41
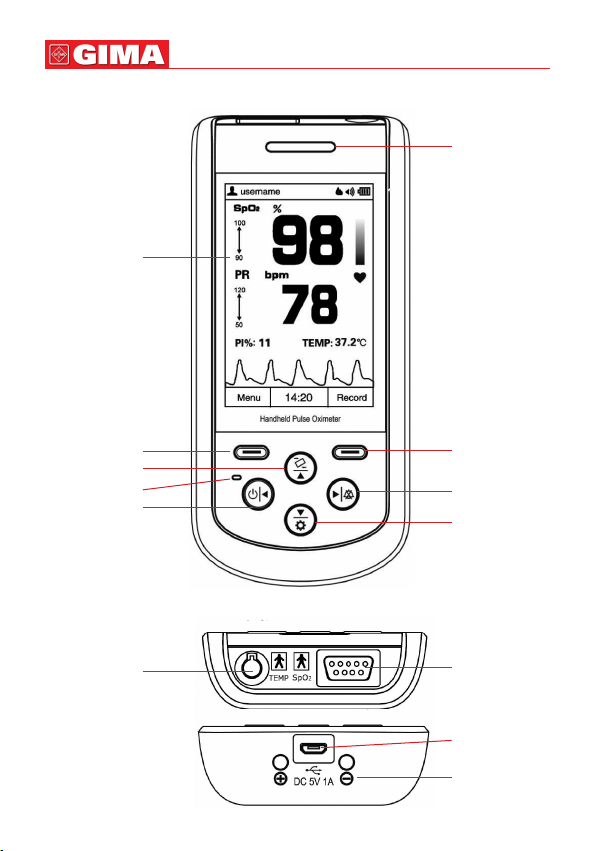
1. Display screen: Display measurement result, trends and menus.
2. (Power/Left): Power on/off the device by longtime pressing; On menu
or sub-menu screen, short time press it to move the cursor left or adjust the
parameter values.
3. (Right/Mute): On data recall screen, longtime press this key, then the
delete dialog pops up; On measuring screen, short time press it to disable or
enable the sound. On menu or sub-menu screen, short time press it to move
the cursor right or adjust the parameter values.
4. (Rotate-lock/Up): On measuring screen, longtime pressing to enable
or disable the automatic screen orientation (on horizontal or vertical direction);
On menu or sub-menu screen, short time press it to move the cursor upwards
or adjust the parameter value.
5. (Setting/Down): On measuring screen, longtime pressing to enter into
setting screen; On menu or sub-menu screen, short time press it to move the
cursor downwards or adjust the parameter value.
6. (Menu/Confirm): Short time press it to enter into menu screen,
or to conrm the selection.
7. (Record/Back): Short time press it to enter into SpO2record list scre-
en, or to back to the previous level of menu.
8. (Alert indicator): If the probe is not well placed or discon-
nected, or the measured value exceeds the preset alert limit value, then the
alert indicator will ash with orange color.
9. (Power saving mode indicator): If the device is set as power saving
mode, then the indicator lights up. And on measuring screen, the indicator
ashes with the pulse beep.
10. Icon: “
SpO2
” ( ): SpO2Probe Connector.
11. Icon: “TEMP” ( ): Temperature Probe Connector.
12.( ): USB connector. Used for data uploading or charging
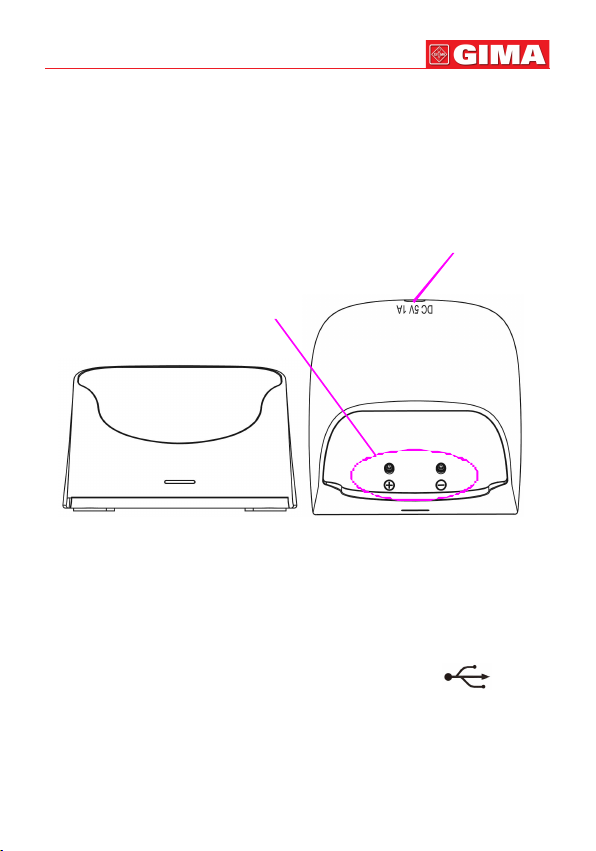
13.( ): DC power input contact shoes with polarity indication.
Used for connecting external DC power input for charging the built-in rechar-
geable battery via the base
ENGLISH