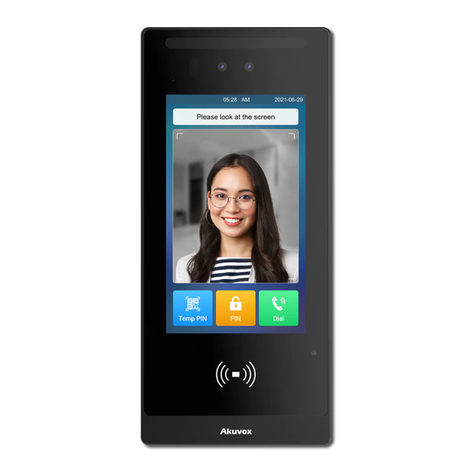
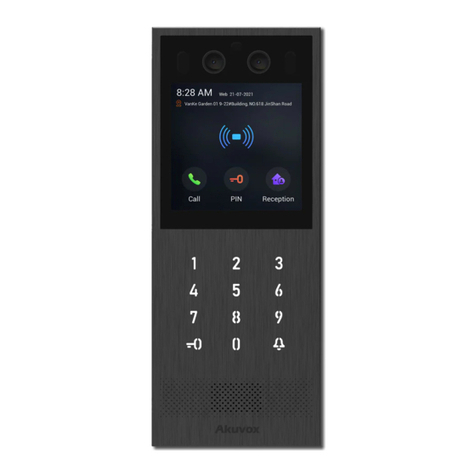
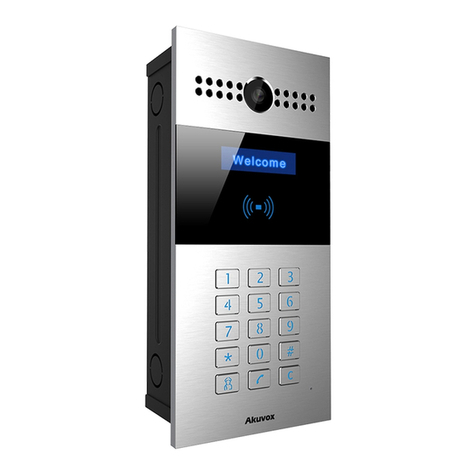
Akuvox E18C Service manual

Version: 1.0 | Date: Oct.2021

About This Manual
Thank you for choosing Akuvox E18C door phone. This manual is intended
for the administrators who need to properly configure the door phone. This
manual applies to 18.30.0.54 version, and it provides all the configurations
for the functions and features of E18C door phones. Please visit Akuvox
forum or consult technical support for any new information or the latest
firmwares.

Introduction of Icons and Symbols
Warning:
Always abide by this information in order to prevent the persons
from injury.
Caution:
Always abide by this information in order to prevent the damages to
the device.
Note:
Informative information and advice from the efficient use of the
device.
Tip:
Useful information for the quick and efficient use of the device.

Table of Contents
1. Product Overview....................................................................................................1
2. Change Log..............................................................................................................2
3. Model Specification............................................................................................... 3
4. Introduction to Configuration Menu....................................................................5
5. Access the Device...................................................................................................7
5.1. Access the Device Setting on the device.................................................7
5.2. Access the Device Setting on the Web Interface....................................8
6. Time and Language Setting................................................................................10
6.1. Language Setting...................................................................................... 10
6.1.1. Language Setting on the Device..................................................10
6.1.2. Language Setting on the Device Web Interface........................11
6.2. Time Setting............................................................................................... 11
6.2.1. Configure Time Setting on the Device........................................ 11
6.2.2. Time Setting on the Device Web Interface.................................13
6.3. LED Setting.........................................................................................14
6.3.1. Configure Card Reader LED Setting............................................ 14
6.3.2. Configure LED White Light Setting..............................................15
6.4. LCD Screen Brightness Setting............................................................... 16
6.4.1. LCD Screen Brightness Setting on the Device.......................... 16
6.4.2. LCD Screen Brightness Setting on the Web Interface..............16
6.5. Screen Display configuration.................................................................. 17
6.5.1. Configure Screensaver..................................................................17
6.5.2. Configure Screensaver on the Device.................................17
6.5.3. Configure Screensaver on the Web Interface.................... 18
6.5.4. Customize Screensaver on the Web Interface.......................... 19
6.5.5. Home Screen Configuration......................................................... 20
6.6. Volume & Tone Configuration................................................................. 21
6.6.1. Volume Configuration................................................................... 21
6.6.1.1. Configure Volume on the Device......................................21
6.6.1.2. Configure Volume on the Web Interface......................... 22
6.6.2. Upload Open Door Tone................................................................23
6.6.3. Configure Door Open Prompt Text.............................................. 23
6.6.4. Configure Hang-up Tone.............................................................. 24
7. Network Setting.................................................................................................... 25
7.1. Device Network Connection Setting.......................................................25
7.2. LTE Wireless Connection Setting............................................................ 26
7.3. Device Local RTP configuration..............................................................27
7.4. Device Deployment in Network............................................................... 28
7.5. NAT Setting.................................................................................................29

8. Intercom Call Configuration............................................................................... 31
8.1. IP call & IP Call Configuration................................................................. 31
8.1.1. Make IP/SIP calls...........................................................................31
8.1.2. IP Call Configuration......................................................................32
8.2. SIP Call &SIP Call Configuration............................................................. 32
8.2.1. SIP Account Registration..............................................................33
8.2.1.1. Configure SIP Account on the Device..............................33
8.2.1.2. Configure SIP Account on the Web Interface.................34
8.2.2. SIP Server Configuration.............................................................. 35
8.2.3. Configure SIP Ports for SIP Calls................................................ 36
8.2.4. Configure Outbound Proxy Server...............................................36
8.2.5. Configure Data Transmission Type.............................................37
8.3. Dial Options Configuration...................................................................... 38
8.3.1. Quick Dial by Number Replacement........................................... 38
8.3.2. Quick Dial By Number Replacement on the Device..................38
8.3.2.1. Quick Dial by Number Replacement on the Device.......39
8.4. Call Auto-answer Configuration............................................................. 40
8.5. Call Settings............................................................................................... 41
8.5.1. Maximum Call Duration Setting...................................................41
8.5.2. Maximum Dial Duration Setting.................................................. 42
8.5.3. Audio& Video Codec Configuration for SIP Calls......................43
8.5.3.1. Configure Audio Codec...................................................... 43
8.5.3.2. Configure Video Codec...................................................... 44
8.6. Configure DTMF Data Transmission......................................................45
9. Phone Book Configuration..................................................................................47
9.1. Phone Book Configuration on the Device..............................................47
9.2. Phone Book Configuration on the Web Interface.................................48
9.2.1. Manage Contact Groups on the Web Interface.........................48
9.2.2. Contact List Configuration on the Web Interface..................... 48
9.2.2.1. Contact List Display Setting............................................. 48
10. Relay Switch Setting.......................................................................................... 50
10.1. Relay Switch Setting...............................................................................50
10.2. DTMF Code Configuration..................................................................... 51
10.3. Web Relay Setting................................................................................... 52
10.3.1. Configure Web Relay on the Web Interface............................. 52
10.3.2. Configure Web Relay on the Device.......................................... 54
10.4. Relay Schedule........................................................................................ 54
11. Door Access Schedule Management.............................................................. 56
11.1. Configure Door Access Schedule......................................................... 56
11.1.1. Create Door Access Schedule on the Web Interface............. 56
11.1.2. Create Door Access Schedule on the Device.......................... 58
11.1.3. Import and Export Door Access Schedule...............................59
11.1.4. Edit the Door Access Schedule..................................................60
11.1.4.1. Edit the Door Access Schedule on the Web Interface 60

11.1.4.2. Edit the Door Access Schedule on the Device............. 60
12. Door Unlock Configuration............................................................................... 62
12.1. Configure PIN Code for Door Unlock................................................... 62
12.1.1. Configure Public PIN code......................................................... 62
12.1.2. Configure Private PIN Code on the Device.............................. 63
12.1.3. Configure Private PIN Code on the Web Interface..................64
12.1.4. Configure Private PIN Access Mode.........................................66
12.2. Configure RF Card for Door Unlock...................................................... 66
12.2.1. Configure RF Card on the Web Interface..................................66
12.2.1.1. Configure RF Card Code Format............................................ 67
12.2.2. Configure Facial Recognition for Door Unlock........................68
12.2.2.1. Configure Facial Recognition on the Device................ 68
12.2.2.2. Configure Facial Recognition on Web Interface.......... 69
12.3. Configure Door Access Using Configured Files................................. 69
12.4. Edit the User(s)-specific door access data........................................ 70
12.4.1. Unlock by QR Code.............................................................................. 71
12.4.2. Unlock by Bluetooth............................................................................ 71
12.4.3. Unlock by NFC.............................................................................. 72
12.4.4. Unlock by HTTP Command on Web Browser..................................72
12.4.5. Unlock by Exit Button by the Door.................................................... 73
12.4.6. Unlock by Reception Tab....................................................................74
12.4.7. Body Temperature Measurement for Door Access........................75
12.4.7.1. Body Temperature Measurement Configuration.................75
13. Security................................................................................................................78
13.1. Tamper Alarm Setting.............................................................................78
13.2. Voice Encryption..................................................................................... 79
13.3. Motion Detection.....................................................................................79
13.3.1. Configure Motion Detection on the Web Interface................. 79
13.3.2. Configure Motion Detection on the Device..............................81
13.4. Security Notification Setting................................................................. 81
13.4.1. Email Notification Setting...........................................................81
13.4.2. FTP Notification setting..............................................................83
13.4.3. TFTP Notification Setting...........................................................83
13.4.4. SIP Call Notification.................................................................... 84
13.5. Web Interface Automatic Log-out........................................................84
14. Monitor and Image.............................................................................................86
14.1. Mjpeg Image Capturing..........................................................................86
14.2. Live Stream.............................................................................................. 87
14.3. RTSP Stream Monitoring....................................................................... 89
14.3.1. RTSP Basic Setting......................................................................89
14.3.2. RTSP Stream Setting...................................................................90
14.4. ONVIF........................................................................................................ 92
15. Logs......................................................................................................................94
15.1. Call Logs................................................................................................... 94

15.2. Door Logs................................................................................................. 94
15.3. Temperature Log..................................................................................... 96
15.4. Export Logs.............................................................................................. 96
16. Debug................................................................................................................... 98
16.1. System Log for Debugging....................................................................98
16.2. PCAP for Debugging...............................................................................99
16.3. User Agent................................................................................................99
17. Firmware Upgrade........................................................................................... 101
18. Backup...............................................................................................................103
19. Auto-provisioning............................................................................................ 105
19.1. Configuration Files for Auto-provisioning........................................ 105
19.2. AutoP Schedule.....................................................................................106
19.3. PNP Configuration................................................................................106
19.4. DHCP Provisioning Configuration......................................................107
19.5. Static Provisioning Configuration...................................................... 108
20. Integration with Third Party Device.............................................................. 111
20.1. Integration via Wiegand.......................................................................111
20.2. Integration via RS485...........................................................................112
20.3. OSDP Setting......................................................................................... 113
20.4. Integration via HTTP API..................................................................... 113
20.5. Power Output Control...........................................................................116
21. Password Modification................................................................................... 117
22. System Reboot&Reset.................................................................................... 118
22.1. Reboot.................................................................................................... 118
22.2. Reset....................................................................................................... 119
23. Abbreviations....................................................................................................121
24. FAQ.....................................................................................................................123
25. Contact Us........................................................................................................ 126

E18C Door Phone Administrator Guide
AKUVOX SMART INTERCOM www.akuvox.com
1
1.Product Overview
Akuvox E18C is an Liunx-based with a touch screen. It incorporates audio
and video communications, access control, and video surveillance. Its
finely-tuned SmartPlus and AI-based communication technology allow
featured customization to better suit your operation habit. E18C multiple
ports, such as RS485 and Wiegand ports, can be used to easily integrate
external digital systems, such as elevator controller and fire alarm detector,
helping to create a holistic control of building entrance and its surroundings
and giving you a great sense of security via a variety of access such as card
access, NFC, Bluetooth, QR code and newly added door access in an
accompaniment with body temperature measurement. E18C door phone
applies to residential buildings, office buildings,and their complex.

E18C Door Phone Administrator Guide
AKUVOX SMART INTERCOM www.akuvox.com
2
2.Change Log
The change log will be updated here along with the changes in new software
version.

E18C Door Phone Administrator Guide
AKUVOX SMART INTERCOM www.akuvox.com
3
3.Model Specification
Model
&
Feature
E18C
Display
7” IPS
Touch Screen
√
Button
X
Housing Material
Plastic
Relay Out
2
Relay In
3
RS485
√
PoE
√
Resolution
1024x600
Brightness
500cd/m2
RAM
1GB
ROM
8GB
Card Reader
13.56MHz
Wi-Fi
X
Bluetooth
√
IP Rating
IP65
Temperature
Detection
Optional
Face recognition
√
LTE
X
USB
X
External SD Card
X

E18C Door Phone Administrator Guide
AKUVOX SMART INTERCOM www.akuvox.com
4
Wall
Mounting
√
Flush
Mounting
√
Desk
Mounting
X
POE Stand by
Power
6.0W
POE Full Load
Consumption
11W
Power
Adapter
Standby
Power
5.8W
Power
Adapter Full
Load
Consumption
10.35W
Color Option
Black

E18C Door Phone Administrator Guide
AKUVOX SMART INTERCOM www.akuvox.com
5
4.Introduction to Configuration Menu
Status: this sections gives you basic information such as product
information, Network Information, and account information etc.
Account: this section concerns SIP account, SIP server, proxy server,
transport protocol type, outbound proximity server.
Network: this section mainly deals with DHCP&Static IP setting, and
device deployment etc.
Intercom: this section covers Intercom call setting, call log etc.
Surveillance: this section includes audio&video related settings such as
Live stream, RTSP, ONVIF, MJPEG.
Access Control: this section includes input type setting, relay setting,
door access control in terms private PIN code, Facial recognition, RF card,
and BLE setting as well log related configurations such as door log and
temperature log.
Device: this section concerns LED light setting, ODSP Setting, screen
saver setting, sound&volume setting and third-party integration in terms
of integration via Wiegand, RS485.
Setting: this second deals with time &language setting, security
notification settings and door prompt text setting.
Upgrade: this section covers Firmware upgrade, device reset&reboot,
configuration file auto-provisioning, PCAP.
Security: this section is for Password modification, tamper alarm, and
web interface automatic-logout.

E18C Door Phone Administrator Guide
AKUVOX SMART INTERCOM www.akuvox.com
6
Mode selection :
1. Discovery mode: It is a plug and play configuration mode. Akuvox
devices will configure themselves automatically when users power on
the devices and connect them to network. It is super time-saving mode
and it will greatly bring users convenience by reducing manual
operations. This mode requires no prior configurations previously by the
administrator.
2. SmartPlus mode: Akuvox SmartPlus is an all-in-one management
system. Akuvox SmartPlus is the mobile service that allows audio, video,
remote access control between smart phones and Akuvox intercoms. All
configurations in the device will be issued automatically from cloud. If
users decide to use Akuvox Smartplus please contact Akuvox technical
support, and they will help you configure the related settings before
using.
3. SDMC mode: SDMC (SIP Device Management Controller) is a simple and
comprehensive software for building management. It provides a
topography for a community while offering you a graphical configuration
interface for the door access, intercom, monitoring, alarm etc.,. It is a
convenient tool for property manager to manage , operate and maintain
the community.
Tool selection
Akuvox has many configuration tools for you to set up devices more
conveniently. Here we list some common tools, please contact your
administrator to get the tool if you need them.
1. SDMC: SDMC is suitable for the management of Akuvox devices large
communities, including access control, resident information, remote
device control etc.,.
2. Akuvox Upgrade tool: Upgrade Akuvox devices in batch on a LAN (Local
Area Network).
3. Akuvox PC Manager: Distribute all configuration items in batch on a LAN.
4. IP scanner: it is used to search Akuvox device IP addresses on a LAN.
5. FacePro: Manage face data in batch for the door phone on a LAN.

E18C Door Phone Administrator Guide
AKUVOX SMART INTERCOM www.akuvox.com
7
5.Access the Device
E18 series door phoneinal system setting can be either accessed on the
device directly or on the device web interface.
5.1. Access the Device Setting on the device
If you want to access the device setting to configure and adjust the
parameters, you can do it directly on the device. You can Long press any
where on the initial screen for approximately five seconds, Enter the default
PIN code “admin”, then press Confirm tab.

E18C Door Phone Administrator Guide
AKUVOX SMART INTERCOM www.akuvox.com
8
5.2. Access the Device Setting on the Web
Interface
You can also enter the device IP address on the web browser, an enter the
username and password to log in the device web interface where you can
configure and adjust parameter etc.
Tip:
You can also obtain the device IP address using the Akuvox IP
scanner to log in the device web interface. Please refer to the URL
below for the IP scanner application:
https://knowledge.akuvox.com/docs/how-to-obtain-ip-address-via
-ip-scanner?highlight=ip%20scanner

E18C Door Phone Administrator Guide
AKUVOX SMART INTERCOM www.akuvox.com
9
Note:
Google Chrome browser is strongly recommended.
The Initial user name and password are “admin” and please be
case-sensitive to the user names and passwords entered.

E18C Door Phone Administrator Guide
AKUVOX SMART INTERCOM www.akuvox.com
10
6.Time and Language Setting
6.1. Language Setting
When you first set up the device, you might need to set the language to your
needs, or you can do it later if needed. And the language can either be set up
directly on the device or on the device web interface according to your
preference.
6.1.1. Language Setting on the Device
Device Language can be configured on the device and on the device web
interface that allows you to select or change the language for screen display
to your preference. Path : Display&Sounds > Language.

E18C Door Phone Administrator Guide
AKUVOX SMART INTERCOM www.akuvox.com
11
6.1.2. Language Setting on the Device Web Interface.
To configure the language on the web interface. Path:Setting >Time/Lang >
LCD Language.
Parameter Set-up:
Type: choose a suitable web language. Normally, English is the default
web and LCD language.
6.2. Time Setting
Time setting can be set up on the device and on the device web interface in
terms of time zone, date and time format etc.
6.2.1.Configure Time Setting on the Device
Time setting on the web interface allows you to set up time and date
manually while allowing you to use NTP server address that you obtained to
automatically synchronize your time and date. And when your time zone is
selected, the device will automatically notify the NTP server of its time zone
selected so that the NTP server can synchronize the selected time zone
setting to your device. Path:Display&Sounds > Language.
、

E18C Door Phone Administrator Guide
AKUVOX SMART INTERCOM www.akuvox.com
12
Parameter Set-up:
Automatic Date&Time: Automatic Date&Time is toggled on by default,
which allows the date& time to be automatically set up and synchronized
with the default time zone and the NTP server (Network Time Protocol).
You can also set it up manually by toggling off the switch first then enter
the time and date you want before pressing the Save tab for the
validation.
Date: click on Date to set the date.
Time: click on Time to set the time.
Time Zone: select the specific time zone depending on where the device
is used and then press Confirm tab for the confirmation. The default time
zone is GMT GMT+0.00.
Date Format: select the date format as you like among three format
options: “M-D-Y”; “D-M-Y”; “Y-M-D” and then press the Confirm tab for
the confirmation.
Time Format: you can either select 12 hour or 24-hour time format as
you like, and then press the Confirm tab for the confirmation.
Table of contents
Other Akuvox Intercom System manuals

Akuvox
Akuvox R27 series User manual

Akuvox
Akuvox C312 Series User manual

Akuvox
Akuvox C315W User manual

Akuvox
Akuvox A01X User manual

Akuvox
Akuvox R29C Assembly instructions

Akuvox
Akuvox Smart Intercom R29 Series Manual

Akuvox
Akuvox R26B Manual

Akuvox
Akuvox R20B Series Manual

Akuvox
Akuvox X933 Series Service manual

Akuvox
Akuvox C313 Series User manual

Akuvox
Akuvox R28 Series User manual

Akuvox
Akuvox R20 Series Manual

Akuvox
Akuvox C315X User manual

Akuvox
Akuvox X915 Series Service manual

Akuvox
Akuvox IT82 Series Manual

Akuvox
Akuvox R29 Series Service manual

Akuvox
Akuvox E12 User manual

Akuvox
Akuvox C313 Series Service manual

Akuvox
Akuvox X915 Series User manual

Akuvox
Akuvox SDP-R29 User manual