Goobay 55495 User manual

R EV2 018 -10 -17
V1.0
Goobay®
by Wentronic GmbH | Pillmannstraße 12
38112 Braunschweig | Germany
Änderungen vorbehalten. | Subject to change without notice | S ou s ré se r ve de m o di c at i on s
LED Schreibtischleuchte Fan + Pen Box
LED desk lamp Fan + Pen Box
Lampe de bureau LED Fan + Pen Box
Betriebsanleitung
User manual
Mode d‘emploi
Art. 55495
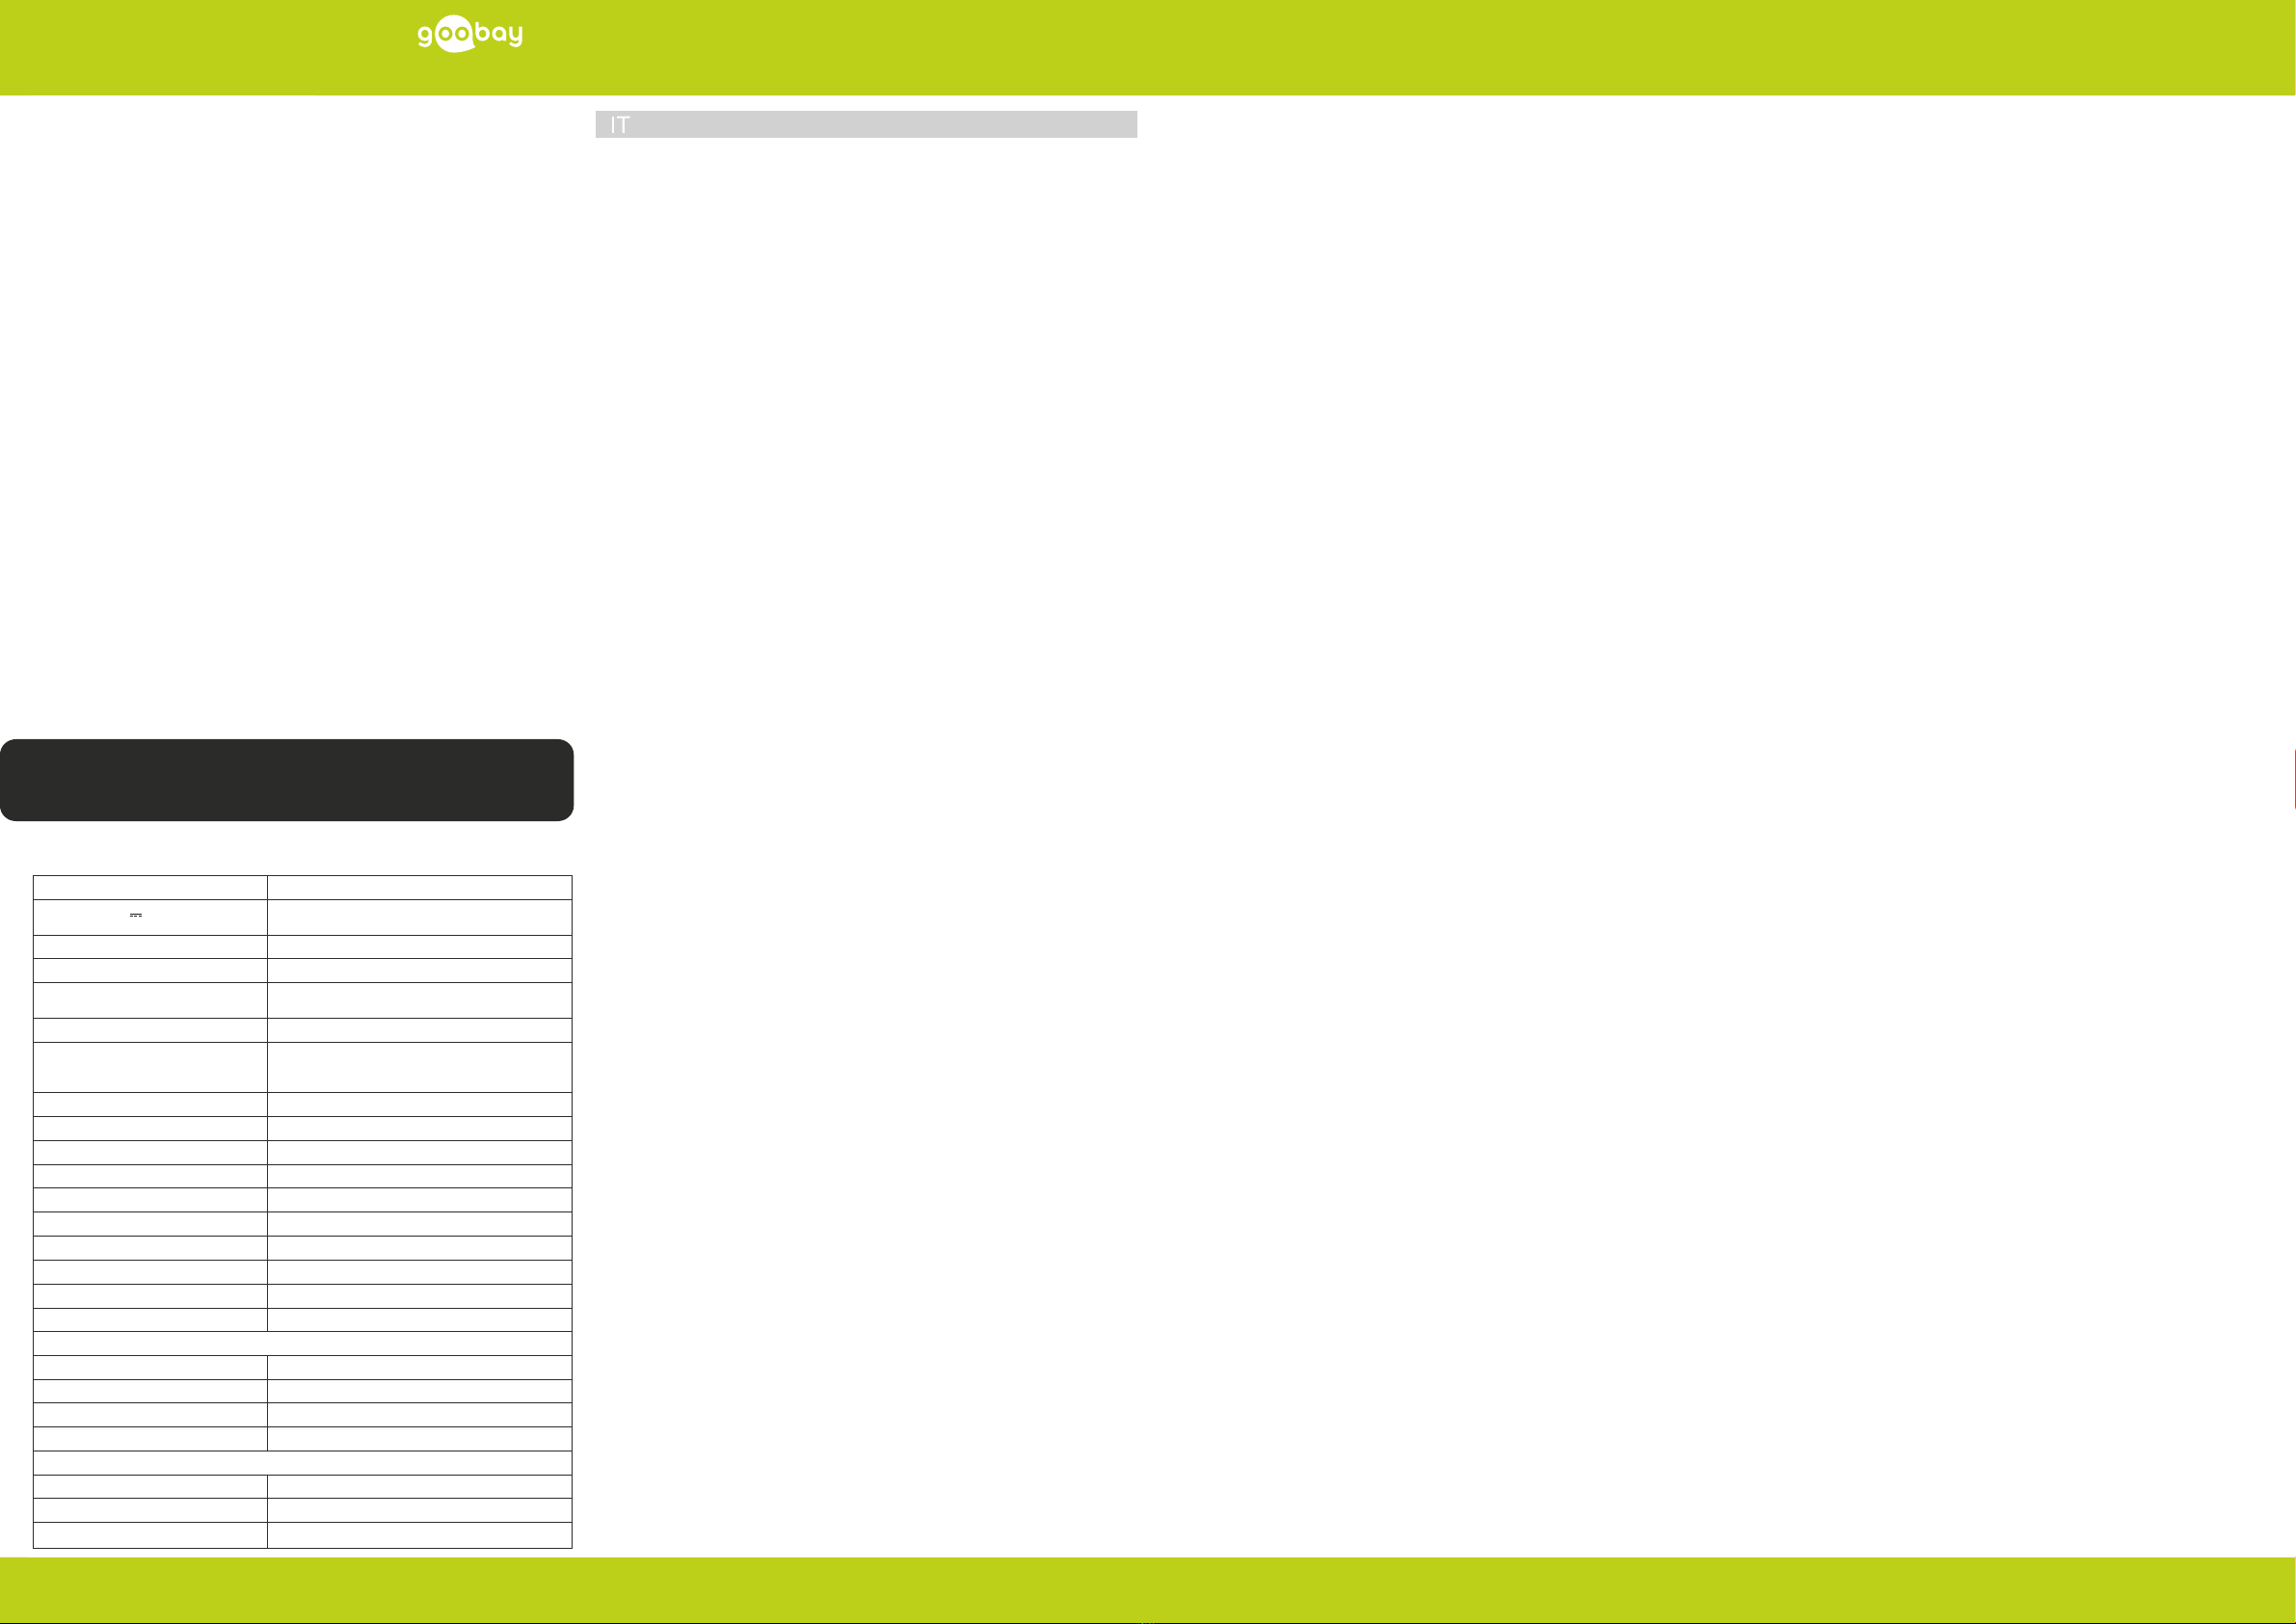
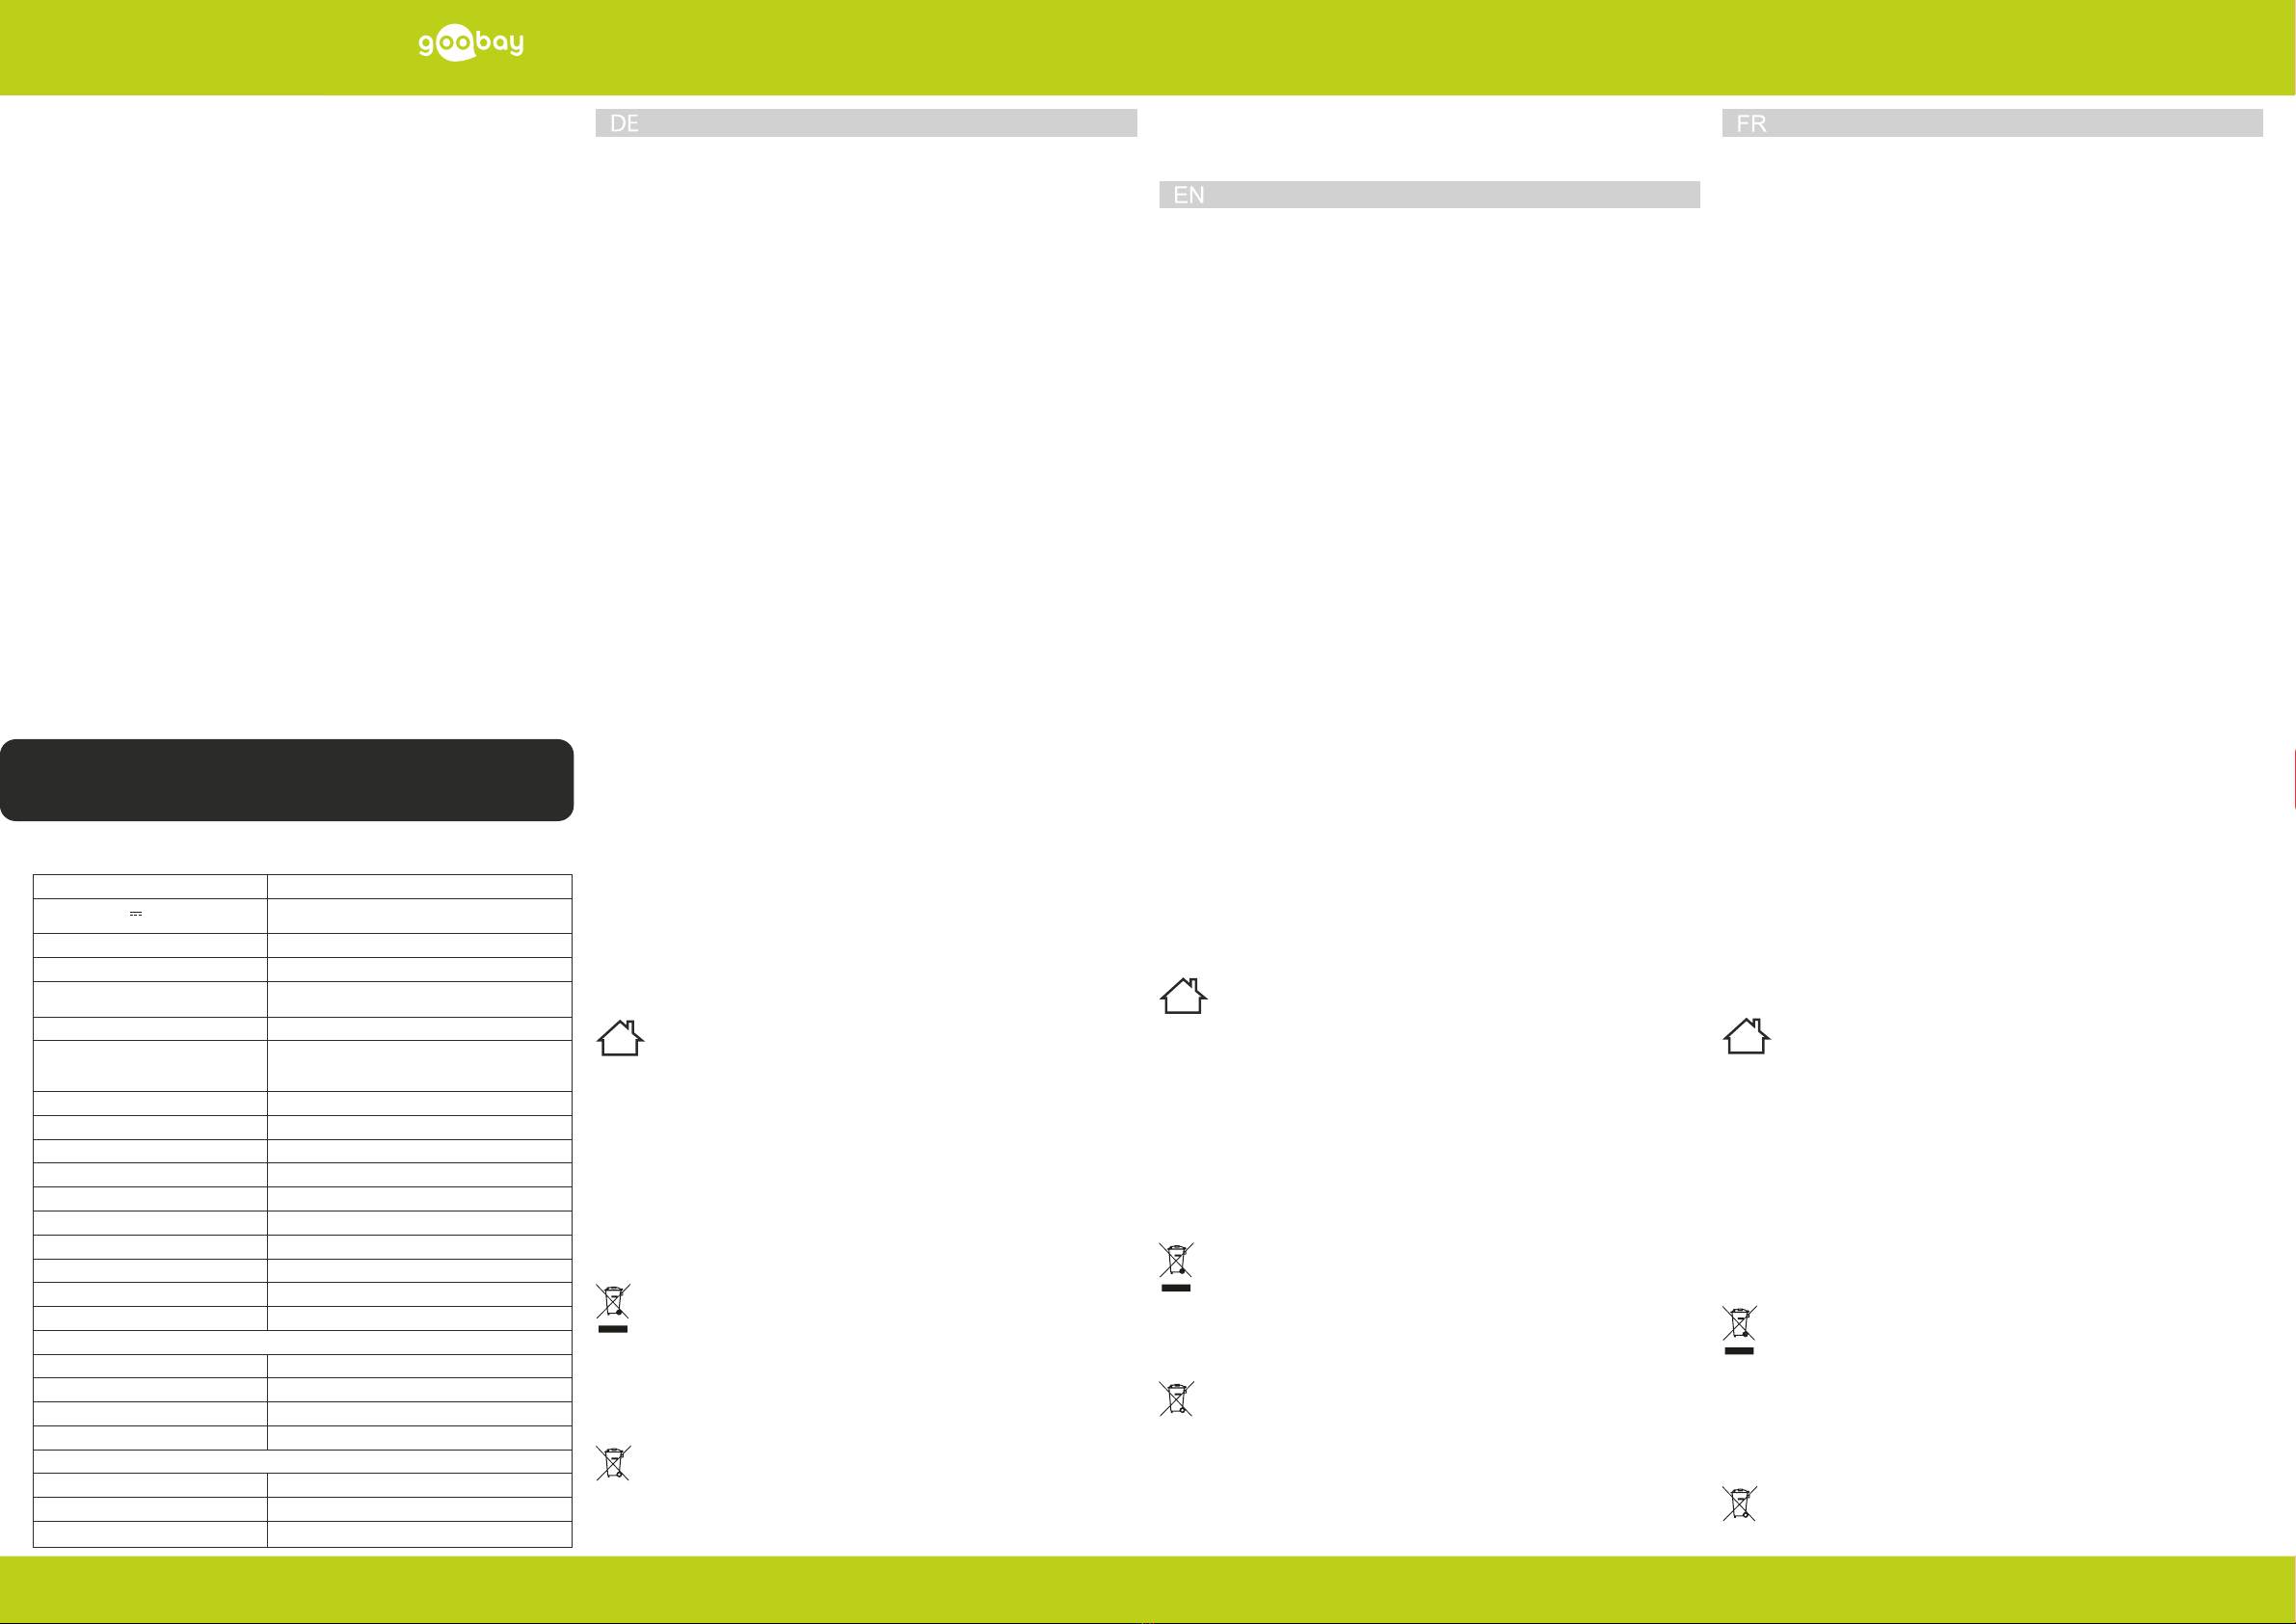
Technische Daten / Specications / Spécications / Speciche
Article number 55495
Rated voltage (V )
Rated current (A)
5
1
Light sources SMD 2835 LEDs
Number of LEDs (pcs.) 20
Power (W)
Corresponds to light bulb ( W )
3
24
Ene rg y ef c ie nc y cl as s A+
Light colour
Rat ed l umi no us ux ( lm)
Colour temperature (K)
neutral white
220
3750 - 4250
Co lo ur r en de ri ng i nd ex (R a) > 80
Beam angle (°) 120
Nominal life time (h) 30000
Nu mb er of s wi tc hi ng c ycl es (x) 100000
Protection class / Protection level III / IP20
Dimmable
Housing material ABS, PS
Housing colour white
Dimensions (mm) 108 x 10 8 x 4 0 0
Net weight (g) 393
Rechargeable battery (permanently installed)
Type 18650 | Li-ion | 3.7 V | 1200 mA | 4.44 Wh
Nominal Charge / Discharge current (mA) 600
Charging time (h) ~3-4
Quantitiy (pcs.) 1x
Micro USB charging cable
Connections USB 2.0 male (type A), DC jack plug
Length (m) ~ 1.0
Weight (g) 19.5
1 Sicherheitshinweise
1.1 Allgemein
• Betriebsanleitung vollständig und sorgfältig vor Gebrauch lesen.
Die Betriebsanleitung ist Bestandteil des Produktes und enthält wichtige
Hinweise zum korrekten Gebrauch.
• Betriebsanleitung aufbewahren.
Die Betriebsanleitung muss bei Unsicherheiten und Weitergabe des Produktes ver-
fügbar sein.
• Vergleichen Sie die technischen Daten von Produkt, Stromnetz und Peripherie-
geräten. Diese müssen identisch sein.
Stromschlaggefahr
• Gehäuse nicht öffnen.
• Pro du kt u nd Z ube hö r ni ch t mo di zi er en.
• Anschlüsse und Schaltkreise nicht kurzschließen.
Zielgruppeninformationen
Nicht für Kinder und Personen mit physisch und/oder psychisch eingeschränkten
Fähigkeiten geeignet.
• Verpackung, Kleinteile und Dämmmaterial gegen unbeabsichtigte Benutzung
sichern.
• Blicken Sie niemals direkt in die Lichtquelle.
• Richten Sie niemals den Lichtstrahl in die Augen anderer Personen oder von
Tieren.
Die Augen können dadurch geschädigt werden.
• Lange Haare, Gliedmaßen und Gegenstände von rotierenden Teilen fernhalten.
Rotierende Teile können Haare und Gegenstände einziehen und Gliedmaßen ver-
letzen.
Betriebs- und Lagerbedingungen
• Produkt, Produktteile und Zubehör sicher platzieren, installieren und transpor-
tieren.
• Produkt, Produktteile und Zubehör nur in einwandfreiem Zustand benutzen.
• Ex t re me B el ast ung en w ie H it z e und K äl te, N äs se un d di rek t e So nne ne in -
strahlung, Mikrowellen sowie Vibrationen und mechanischen Druck vermeiden.
• Genügend Platz um das Produkt herum halten, um eine gute Belüftung und
Mobilität zu gewährleisten.
• Bei Fragen, Defekten, mechanischen Beschädigungen, Störungen und
anderen nicht durch die Begleitdokumentation behebbaren Problemen, an
Händler oder Hersteller wenden.
1.2 Batteriegefahren
Der Akku ist nicht tauschbar!
• Bei nicht bestimmungsgemäßem Gebrauch können Akkus beschädigt werden
und auslaufen.
• Deformieren, verbrennen und zerlegen Sie den Akku nicht.
• Ausgelaufene, deformier te oder korrodier te Zellen im Produkt belassen und
mittels geeigneter Schutzvorrichtungen entsorgen.
• Schließen Sie den Akku nicht kurz.
Es besteht die Gefahr von Explosion, Feuer-, Hitze-, Rauch- und/oder Gasentwick-
lung.
• Setzen Sie den Akku weder Hitze, in Form von beispielsweise Sonneneinstrah-
lung oder Heizungswärme, noch Feuer aus.
Extreme Hitzeeinwirkung kann zu einer Explosion und/oder zum Austreten von
ätzenden Flüssigkeiten führen. Durch mechanische Beschädigungen können gas-
förmige Stoffe austreten, welche stark reizend, brennbar oder giftig sein können.
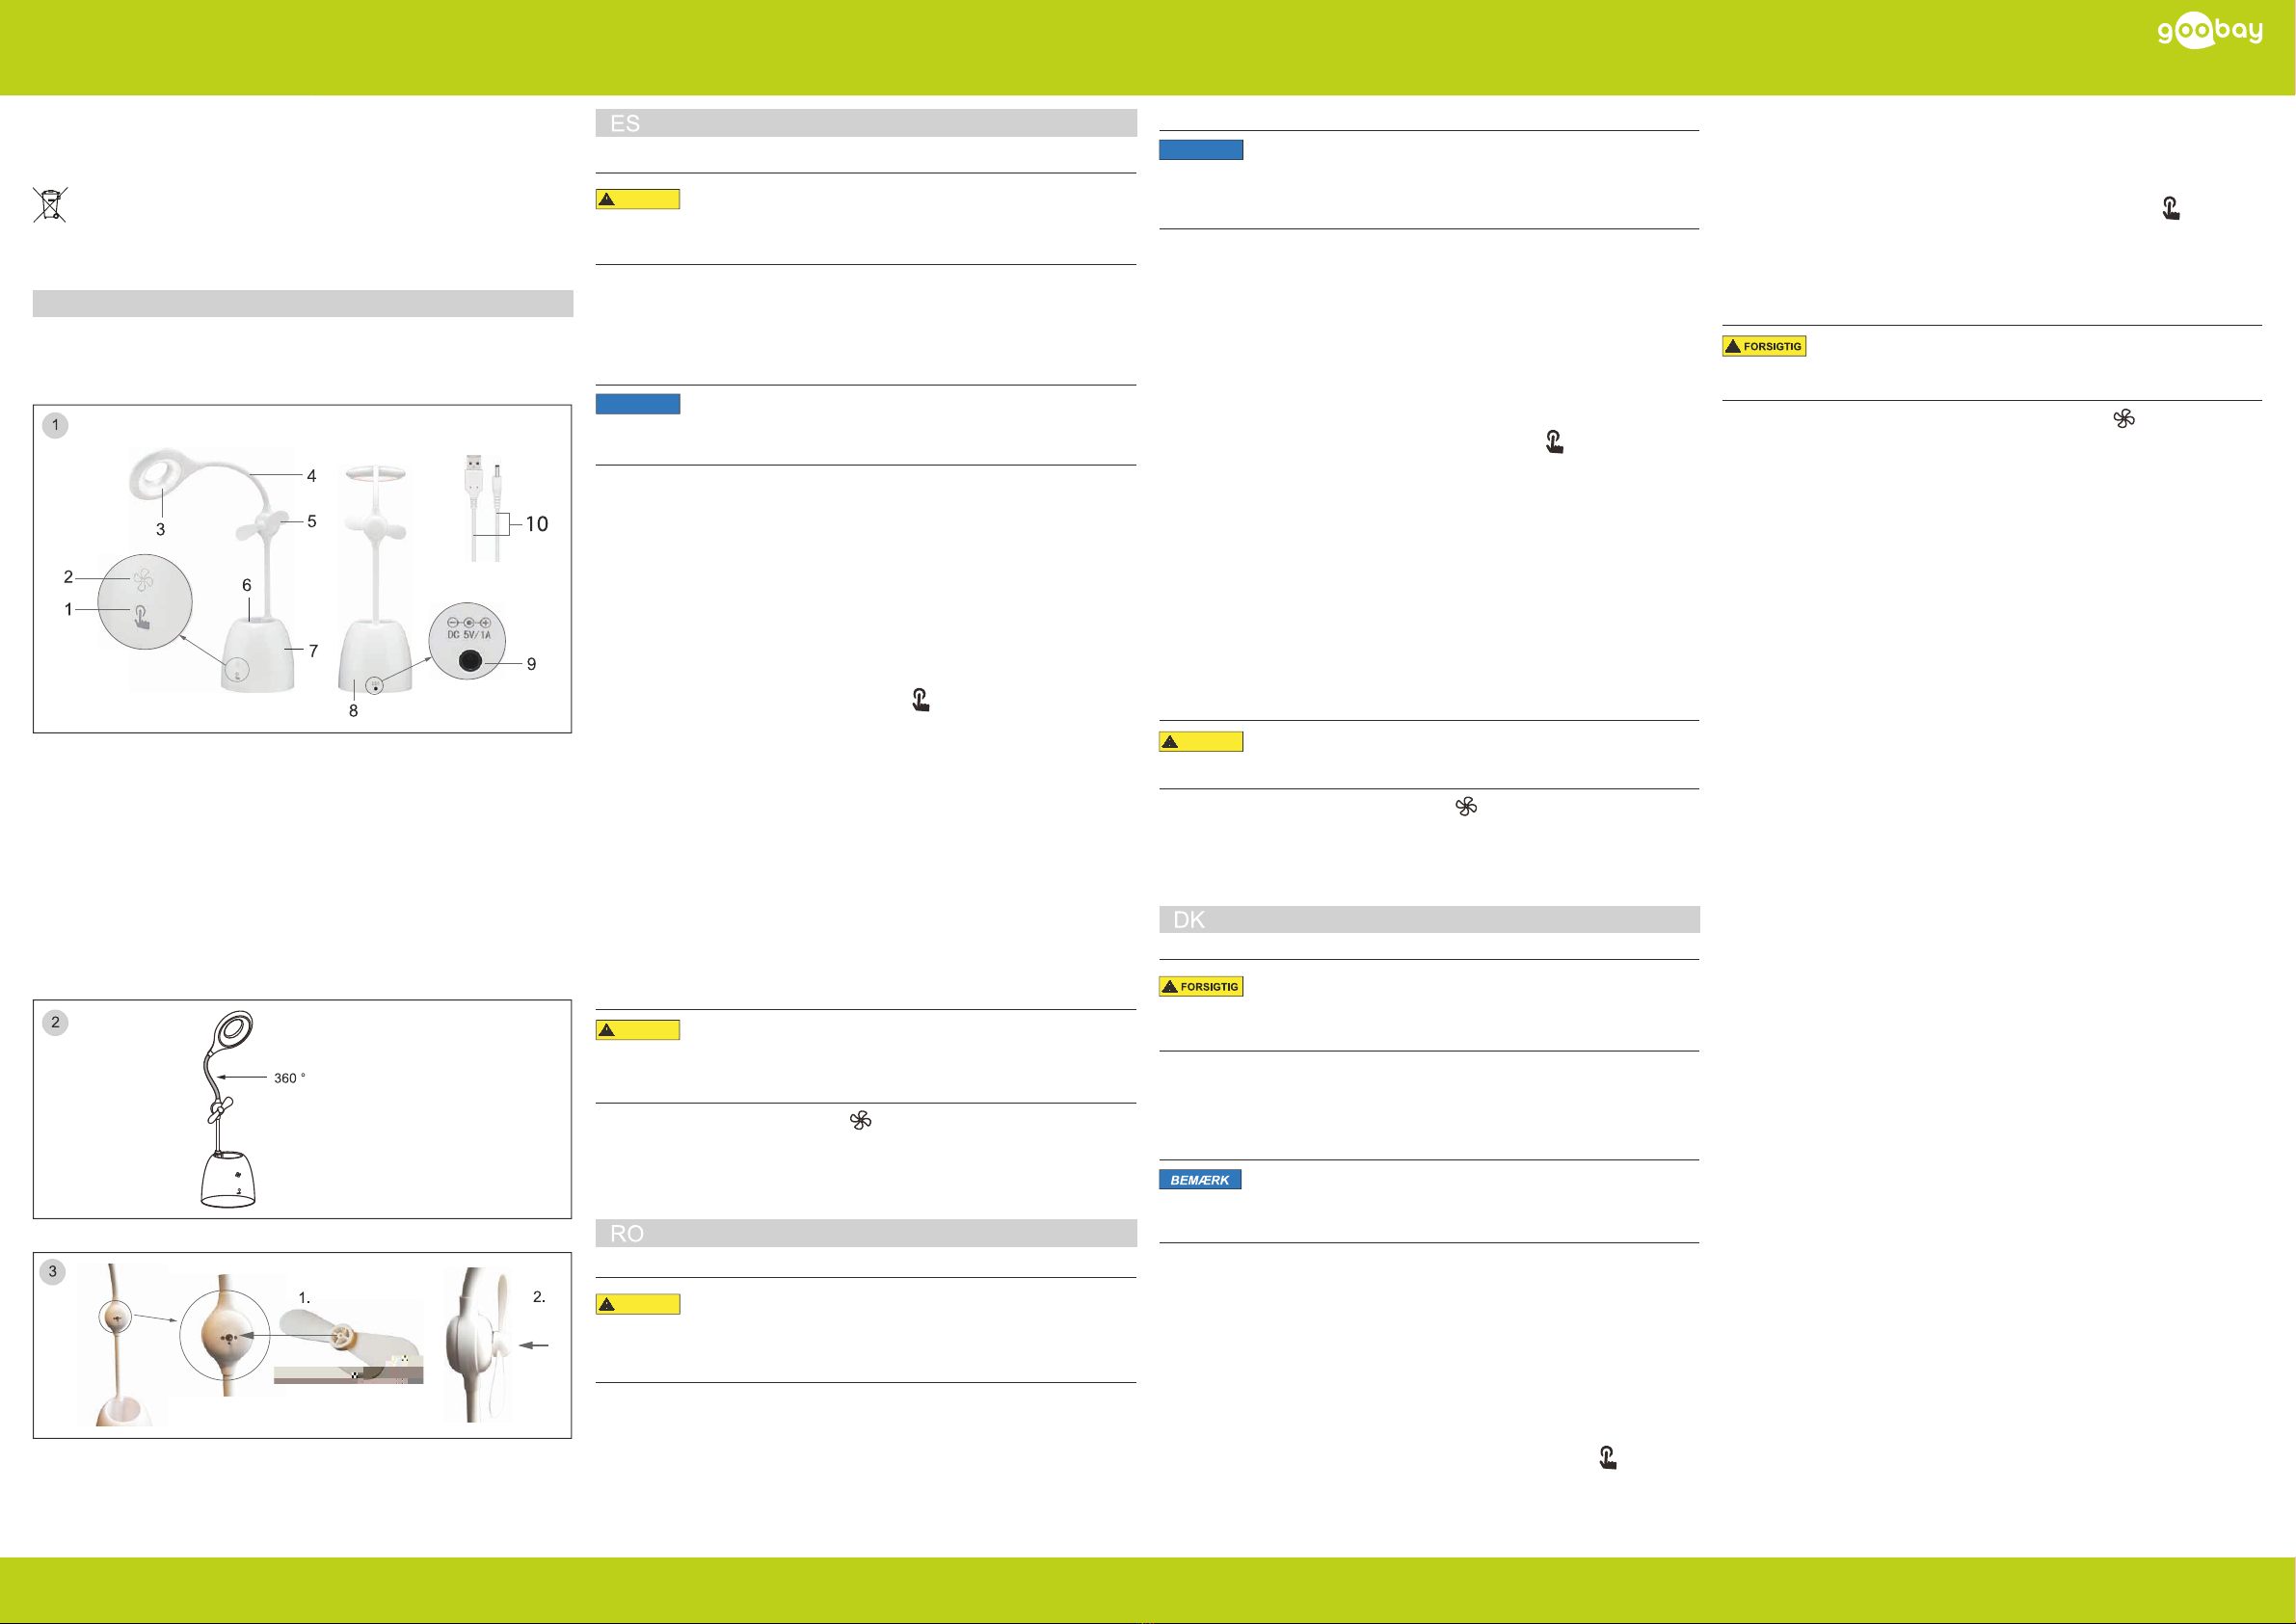
2 Beschreibung und Funktion
Akkubetriebene Innenbeleuchtung für Arbeitszimmer, Schlafzimmer oder Büro
mit Vent il ato r und S ti f t box .
• stufenloser Dimmer mit Touchfeld-Bedienung am Leuchtenfuß
• ex ibl er L euc ht ena r m ist 3 6 0 ° ver ste ll bar
3 Lieferumfang
LED S ch re ibt is ch le uc hte Fan + Pe n Box , Venti lato r pr op el ler, USB - La de kab el ,
Betriebsanleitung.
4 Bestimmungsgemäßer Gebrauch
Eine andere als in Kapitel „Beschreibung und Funktion“ bzw. in den
"Sicherheitshinweisen" beschriebene Verwendung ist nicht gestattet.
Dieses Produkt darf nur in trockenen Innenräumen benutzt werden.
Das Nichtbeachten und Nichteinhalten dieser Bestimmungen und der Sicher-
heitshinweise kann zu schweren Unfällen, Personen- und Sachschäden führen.
5 Wartung, Pege, Lagerung und Transport
• Wartungs- und Reparaturarbeiten nur von ausgebildetem Elektro-Fachperso-
nal ausführen lassen.
• Nur ein trockenes und weiches Tuch zum Reinigen verwenden.
• Keine Reinigungsmittel und Chemikalien verwenden.
• Be i län ge re m Nic ht ge br auc h de n A kku a ll e 3 Mo na te au a den u m di e Ka pa zi -
tät zu erhalten.
• Produkt bei längerem Nichtgebrauch für Kinder unzugänglich und in trockener
und staubgeschützter Umgebung lagern.
• Originalverpackung für den Transport aufheben und verwenden.
6 Entsorgungshinweise
6.1 Produkt
Elektrische und elektronische Geräte dür fen nach der europäischen WEEE Richtlinie
nicht mit dem Hausmüll entsorgt werden. Deren Bestandteile müssen getrennt der
Wieder verwertung oder Entsorgung zugeführt werden, weil giftige und gefährliche
Bestandteile bei unsachgemäßer Entsorgung die Gesundheit und Umwelt nachhaltig
schädigen können. Sie sind als Verbraucher nach dem Elektrogesetz (ElektroG) ver-
p ic hte t, e le kt r is ch e un d el ek t ro ni sc he G er äte a m End e ih re r Leb en sd au er an d en
Hersteller, die Verkaufsstelle oder an dafür eingerichtete, öffentliche Sammelstellen
kostenlos zurückzugeben. Einzelheiten dazu regelt das jeweilige Landesrecht.
Das Symbol auf dem Produkt, der Betriebsanleitung und/oder der Verpackung weist
auf diese Bestimmungen hin. Mit dieser Art der Stofftrennung, Verwertung und Ent-
sorgung von Altgeräten leisten Sie einen wichtigen Beitrag zum Schutz unserer
Umwelt. WEEE Nr.: 82898622
6.2 Batterien / Akkumulatoren
Batterien und Akkumulatoren dürfen nicht mit dem Hausmüll entsorgt werden.
Deren Bestandteile müssen getrennt der Wieder ver wer tung oder Entsorgung zu-
geführt werden, weil giftige und gefährliche Bestandteile bei unsachgemäßer Ent-
sorgung die Umwelt nachhaltig schädigen können.
Si e sin d al s Verb r auc he r ver p i ch tet , di es e am En de i hre r Le be ns dau er a n de n
Hersteller, die Verkaufsstelle oder an dafür eingerichtete, öffentliche Sammelstellen
kostenlos zurückzugeben.
Einzelheiten dazu regelt das jeweilige Landesrecht. Das Symbol auf dem Produkt,
der Betriebsanleitung und/oder der Verpackung weist auf diese Bestimmungen hin.
Mit dieser Art der Stoff trennung, Verwertung und Entsorgung von Altbatterien und
-akkumulatoren leisten Sie einen wichtigen Beitrag zum Schut z unserer Umwelt.
D-34000-1998-0099
1 Safety Instructions
1.1 General
• Read the user manual completely and carefully before use.
The user manual is part of the product and contains important information for
correct use.
• Keep this user manual.
The user manual must be available for uncertainties and passing the product.
• Co mp are t he s pe ci ca ti on s of pr od uc t, p owe r su ppl y an d pe ri ph er als .
These must be identical.
Risk of electric shock
• Do not open the housing.
• Do not modify product and accessories.
• Do not short- circuit connectors and circuits.
Target group information
Not recommended for children and people with physical and / or mentally limited
capabilities.
• Secure packaging, small parts and insulation against accidental use.
• Never look directly into the light source.
• Do not aim the beam of the light into the eyes of other persons or animals.
The eyes can be damaged!
• Keep long hair, limbs and objects away from rotating parts.
Rotating parts can pull in hair and objects and hurt limbs.
Operation and storage conditions
• Place, install and transport product, product parts and accessories in a safe
way.
• Use product, product parts and accessories only in perfect condition.
• Avoid stresses such as heat and cold, moisture and direct sunlight, vibration
and mechanical pressure.
• Keep enough space around the product and to the whole system to ensure
proper ventilation and mobility.
• In case of questions, defects, mechanical damage, trouble and other problems,
non-recoverable by the documentation, contact your dealer or producer.
1.2 Battery hazards
The recharbeable batteriy is not replaceable!
• Batteries may be damaged and leak if not used for the intended purpose.
• Do not deform, burn or disassemble the batter y (rechargeable).
• Leave leaked, deformed or corroded batteries inside the product and dispose it
by appropriate protectives.
• Do not short-circuit the battery (rechargeable).
Thereisadangerof:Explosion,re,heat,smokeand/orgas.
• Do n ot exp os e th e bat t er y t o he at, s uc h as su nli gh t or h eat f ro m he ati ng , or re.
Extreme heat can lead to explosion and/or leakage of corrosive liquid.
Mechanical damage can cause gaseous substances to escape, which can be
highlyirritating,ammableortoxic.
2 Description and Function
Bat te r y - o per ate d in ter i or li gh tin g fo r stu dy, bedr o om o r of c e with fan a nd p en b ox.
• continuous dimmer with touch pad at the base of the lamp
• ex ibl e la mp ar m c a n be t ilt ed 3 6 0°
3 Scope of Delivery
LED d esk l am p Fen + Pe n Box, U S B ch ar gin g c abl e, fa n pr op el le r, op er at ing i n -
structions.
4 Intended Use
We do not permit using the device in other ways like described in chapter
„Description and Function“ or „Safety Instructions“.
Use the product only in dr y interior rooms. Not attending to these regulations
and safety instructions might cause fatal accidents, injuries, and damages to
persons and property.
5 Maintenance, Care, Storage and Transport
• Maintenance and repair work must be carried out only by trained electrical
specialists.
• Only use a dry and soft cloth for cleaning.
• Do not use detergents or chemicals.
• When not using for longer time, charge ever y 3 months to keep the capacity.
• Store the product out the reach of children and in a dry and dust-protected
ambience when not in use.
• Keep and use the original packaging for transport.
Pressure points may remain visible when the product is disassembled.
6 Disposal Instructions
6.1 Product
According to the European WEEE directive, electrical and electronic equipment must
not be disposed with consumers waste. Its components must be recycled or disposed
apart from each other. Other wise contaminative and hazardous substances can
pollute our environment. As a consumer, you are committed by law to dispose
electrical and electronic devices to the producer, the dealer, or public collecting points
at the end of the devices lifetime for free. Par ticulars are regulated in national right.
The symbol on the product, in the user`s manual, and/or at the packaging alludes to
these terms. With this kind of waste separation, application, and waste disposal of
used devices you achieve an important share to environmental protection.
WEEE No: 82898622
6.2 (Rechargeable) batteries
(Rechargeable) batteries must not be disposed of with household waste. Their com-
po ne nts h ave to b e su pp lie d se pa ra tel y to t he re cy cl in g or di sp os al , be c aus e tox ic
and dangerous ingredients can harm the environment if not disposed of sustainably.
As a consumer, you are obliged to return them at the end of their service lives to the
manufacturer, the sales outlet or established for this purpose, public collection points
for free. Details regulates the respective countr y's law. The symbol on the product,
the instruction manual and/or the packaging draws attention to those provisions.
With this kind of material separation, recovery and disposal of waste (rechargeable)
batteries you make an important contribution to protecting our environment.
D-34000-1998-0099
1 Consignes de sécurité
1.1 En général
• Lisez le mode d‘emploi attentivement et complètement avant de l‘utiliser.
Le mode d‘emploi fait partie intégrante du produit et comprend d‘importantes
informations pour une bonne installation et une bonne utilisation.
• Conservez soigneusement ce mode d‘emploi.
Le mode d‘emploi doit être disponible à des incertitudes et transfert du produit.
• Comparez les caractéristiques techniques du produit, du réseau électrique et
des appareils périphériques. Ces données doivent être identiques.
Risque de choc électrique
• Ne pas ouvrir le boîtier.
• Ne m od i ez p as pr od uit e t le s ac ce s so ire s.
• Pas c ou r t- cir cu ite r de s c onn exi on s et c irc ui ts .
Informations sur le groupe cible
Non recommandé pour les enfants et les personnes dont les capacités physiques et
/ ou mentaux limités..
• Sécuriser l‘emballage, petites pièces et l‘isolation contre l‘utilisation accidentelle.
• Ne regardez jamais directement la source lumineuse.
• Ne di r ig ez ja mai s le f ais c eau lu mi neu x da ns le s yeu x d’une au tr e pe rs on ne ou
d’un animal.
Cel a pou r ra it en do mm age r le ur s yeu x !
• Te ni r le s ch eveu x lo ng s, le s pa r t ie s du c or ps e t le s obj et s à l’éc ar t d es p iè ce s
rotatives.
Les pièces rotatives peuvent blesser des parties du corps et happer les cheveux et
objets.
Exploitation et les conditions de stockage
• Placer, installer et transporter le produit, pièces et accessoires des produits
d‘une manière secure.
• Utilisez le produit, pièces et accessoires des produits uniquement en par fait état.
• Évite r de s c on dit io ns ex t rê me s, te lle s qu e la c ha leu r ex tr êm e et fr oi d, l ‘hu mi -
dité et de la lumière directe du soleil, ainsi que microondes, des vibrations et
de la pression mécanique.
• La is sez s uf sa mm ent d e pl ac e lib re a uto ur du p ro dui t a n de g ar ant ir un e
aér at io n ef c ac e et un e bo nn e mo bil ité .
• En cas de questions, les défauts, les dommages mécaniques, des ingérences
et d‘autres problèmes, non récupérables par la documentation, contactez votre
revendeur ou le producteur.
1.2 Risques de batterie
La batterie ne peut pas être remplacée !
• En c as d’ut il is ati on n on c o nfo r me, l es p il es p euve nt êt re e nd omm ag ée s et
couler.
• Ne déformez, ne brûlez ou ne démontez pas la pile.
• Do nne r de s bat t er ie s qu i ont c o ulé, d éfo r mé s ou c o rr od és à l 'i nté r ieu r du p ro
duit et de disposer par protecteurs appropriés.
• Ne provoquez aucun court- circuit avec la pile.
Il existe un risque d’explosion, d’incendie, de dégagement de chaleur, de fumée ou
de gaz.
• N’expo se z la pi le à a uc une s ou rc e de c ha le ur (sol ei l ou c ha leu r du c hau f f ag e,
par exe mpl e) ni au feu.
La chaleur extrême peut provoquer une explosion et/ou l’écoulement de liquides
corrosifs. Les dommages mécaniques peuvent entraîner l’émission de substances
gazeusessusceptiblesd’êtretrèsirritantes,inammablesoutoxiques.
2 Description et fonction
Éclairage intérieur fonctionnant sur batterie pour le bureau ou la chambre, avec
vent il ateu r et p ot à cr ayo ns.
• variateur continu avec commande tactile au pied de la lampe
• bra s de l amp e exib le, r ég la ble à 3 6 0 °
3 Contenu de la livraison
La mp e de bu re au LED Fa n + Pen B ox, hé li c e du ven ti late ur, câb le d e ch ar gem en t US B,
mode d‘emploi.
4 Utilisation prévue
No us n’autor i so ns pa s l’ut il is ati on d u dis po si ti f d’un e faç o n dif fér ent e de
celle décrite au chapitre Description et Fonctions et „Consignes de sécurité“.
Utilisez le produit uniquement dans des espaces intérieurs secs. Ne pas re-
specter ces instructions de sécurité et points de règlement est susceptible de
prov oqu er d es a cc i den ts m or tels , bl es sur es e t do mma ge s à la p er so nn e et à
ses biens
5 Maintenance, Entretien, Stockage et Transport
• La maintenance et les réparations moût être effectuées que par des spécialis-
tes formés électriques.
• Uti li sez u ni que me nt un c hi f fo n do ux e t sec p ou r le n et toya ge.
• Ne pas utiliser de détergents et de produits chimiques.
• Lorsque vous utilisez pas pour plus de temps, recharger tous les 3 mois pour
maintenir la capacité.
• Conser ver le produit hors de la portée des enfants et dans une ambiance
sèche et protégé de la poussière lorsqu‘il ne est pas en cours d‘utilisation.
• Conserver et utiliser l‘emballage d‘origine pour le transport.
Il est possible que les points de pression restent visibles une fois le produit démonté.
6 Instructions pour l’élimination
6.1 Produit
Selon la directive européenne DEEE, la mise au rebut des appareils électriques
et électroniques avec les déchets domestiques est strictement interdite. Leurs com-
po sa nts d oi ven t êtr e re cyc l és é li min és d e fa ço n sé pa ré e.
Les c o mp os ant s tox iq ue s et da ng er eu x peu ven t c aus er d es d omm ag es d ur ab le s à la
san té et à l ‘env ir on ne me nt s‘i ls n e so nt pa s él im iné s c or r ec te me nt.
Vous, e n ta nt qu e c on so mm ate ur, êtes c om mi s pa r la l oi à la m is e au r ebu t de s ap pa -
reils électriques et électroniques auprès du fabricant, du distributeur, ou des points
pub li c s de c ol le c te à la n de l a dur ée d e vi e de s di sp os it if s, et c e d e faç o n gr at uit e.
Les détails sont réglementés dans le droit national. Le symbole sur le produit, dans le
man ue l d‘ ut ili sa ti on , ou su r l‘e mb all ag e fa it r éfé re nc e à c es te r me s. Ave c ce g en re d e
séparation des déchets, d‘application et d‘élimination des déchets d‘appareils usagés,
vous réalisez une par t impor tante de la protection de l‘environnement.
No DEEE : 82898622.
6.2 Batteries (rechargeables)
Batteries (rechargeables) ne doivent pas être jetés avec les ordures ménagères.
Leurs composants doivent être fournis séparément au recyclage ou d'élimination,
parc e qu e le s in gré di en ts tox i que s et d ang er eu se s pe uve nt nu ir e à l'e nvi ro nn em ent
si ne s on t pas é li mi né s de f aç on d ur abl e.

Goobay®
by Wentronic GmbH | Pillmannstraße 12
38112 Braunschweig | Germany
R EV2 018 -10 -17
V1.0
Änderungen vorbehalten. | Subject to change without notice | S ou s ré se r ve de m o di c at i on s
Betriebsanleitung | User manual | Mode d‘emploi
LED Schreibtischleuchte Fan + Pen Box | LED desk lamp Fan + Pen Box | Lampe de bureau LED Fan + Pen Box 55495
En ta nt qu e c on so mm ate ur, vous êt es o bli g é de le s re tou r ne r à la n de le ur s er vic e
vit a u fa br ic a nt , le p oin t de ve nte o u ét ab lis à c et e f fe t, d es p oi nts d e c ol le ct e pub li c s
gratuitement. Détails réglemente la loi du pays respectif. Le symbole sur le produit,
le manuel d'instruction et / ou l'emballage attire l'attention sur ces dispositions.
Avec ce type de matériel de séparation, la récupération et l'élimination des déchets
de pi le s (rec h arg ea bl es), vou s ap po r te z une c o nt ri bu ti on i mp or tan te à la p ro tec t io n
de notre environnement. D-34000-1998-0099
7 Bedienelemente und Teile | Operating Elements and
parts | Eléments de commande et pièces
1 EIN/AUS/DIMMER-Touchfeld 2 Ventilator-EIN/AUS-Touchfeld
3 LED -Modul 4 Leuchtenarm
5 Ventilatorpropeller 6 Stiftbox
7 Leuchtenfuß 8 Ladestatusanzeige
9 DC-Klinkenbuchse 10 USB-Ladekabel
1 ON/OFF/DIMMER Touchpad 2 Ventilator ON/OFF Touchpad
3 LED module 4 Lamp arm
5 Fan propeller 6 Pen box
7 Lamp base 8 Charging status indicator
9 DC jack female 10 USB charging cable
1 Commande tactile MARCHE/ARRÊT/VARIATEUR
2 Commande tactile MARCHE/ARRÊT du ventilateur
3 Module LED 4 Bras de lampe
5 Hélice du ventilateur 6 Pot à c ray ons
7 Pied de la lampe 8 Té mo in d e l’état d e ch ar ge
9 Prise jack CC 10 Câb le d e ch ar ge U SB
8 Aufstellen
Absturzgefahr
• Nur auf ebene und rutschfeste Unterlage platzieren.
• Installieren Sie das Produkt so, dass keine Personen oder Sachen z.B. durch
Herabstürzen, Stolpern o. ä. verletzt oder beschädigt werden können.
1. Kontrollieren Sie den Lieferumfang auf Vollständigkeit und Unversehrtheit.
2. Stellen Sie die LED Schreibtischleuchte auf Ihren Tisch.
3. Richten Sie den Leuchtenarm (4) aus.
Der Leuchtenarm ist um 360° verstellbar. Siehe Abb. 2.
4. Setzten Sie den Ventilatorpropeller (5) auf die Motorwelle und drücken Sie ihn
fest an. Siehe Abb. 3.
9 Erstinbetriebnahme / Laden
Materialschaden durch falsche Spannungsversorgung.
• Technische Daten von Produkt, Stromnetz und Peripheriegeräten vergleichen.
Diese müssen identisch sein.
• Verwenden Sie nur das mitgelieferte USB-Ladekabel.
Vor der Erstinbetriebnahme muss der Akku vollständig geladen sein.
1. Verbinden Sie die DC-Klinkenbuchse (9) der LED Schreibtischleuchte über das
mitgelieferte USB-Ladekabel (10) mit einer USB-Spannungsquelle.
Diese kann entweder ein 230 V USB-Ladeadapter oder die USB-Buchse eines PCs
sein. Die Ladestatusanzeige (8) leuchtet rot. Die LED Schreibtischleuchte ist voll-
ständig geladen, wenn die Ladestatusanzeige nicht mehr leuchtet.
2. Trenne n Si e nac h e r fo lg ter A u ad ung d as U SB - La de kab el w ie de r von d er
LED Schreibtischleuchte und von der USB-Spannungsquelle.
Die Leuchte sollte spätestens dann wieder aufgeladen werden, wenn Sie beginnt
schwächer zu leuchten oder sich nicht mehr einschalten lässt.
10 Ein-/Aus-Schalten und Helligkeit einstellen
10.1 Einschalten
1. Halten Sie die LED Schreibtischleuchte mit einer Hand am Leuchtenfuß
(7) fest.
2. Tippen Sie das EIN/AUS/DIMMER-Touchfeld " " (1) 1x kur z un d kr äf t ig
an. Das Licht schaltet sich ein.
10.2 Helligkeit einstellen
1. Halten Sie die LED Schreibtischleuchte mit einer Hand am Leuchtenfuß
(7) fest.
2. T ipp en S ie d as EI N /AUS/ D IM M ER -Tou ch fel d 1x krä f ti g an u nd ha lte n es
solange gedrückt, bis die gewünschte Helligkeitsstufe erreicht ist.
Die Helligkeit wird zunächst stufenlos reduziert. Wiederholt man den Vorgang,
dann wird die Helligkeit wieder erhöht.
10.3 Ausschalten
1. Halten Sie die LED Schreibtischleuchte wieder mit einer Hand am Leuch-
tenfuß (7) fest.
2. T ipp en S ie d as EI N /AUS/ D IM M ER-Touc hfe ld (1) 1x kur z und k rä f ti g an .
Das Licht schaltet sich aus.
10.4 Memory-Funktion
Die zuletzt eingestellte Helligkeitsstufe wird gespeichert. Nach Aus- und
erneutem Wiedereinschalten der LED Schreibtischleuchte leuchtet diese in
der zuletzt eingestellten Helligkeitsstufe.
11 Ventilator Ein-/Aus-Schalten
Einzugsgefahr
Rotierende Teile können Haare und Gegenstände einziehen und Gliedmaßen ver-
letzen.
• Lange Haare, Gliedmaßen und Gegenstände von rotierenden Teilen fernhalten.
1. Tippen Sie das EIN/AUS -Touchfeld " " (2) 1x kur z u nd k räf tig a n.
Der Ventilator ist eingeschaltet.
2. Tip pe n Si e da s EIN /AUS -Touc hf el d no ch ma ls 1x kur z un d kr äf t i g an.
Der Ventilator ist ausgeschaltet.
12 Leuchtmittel tauschen
Die Leuchtmittel sind nicht tauschbar!
8 Placement
Risk of falling
• Only place on a solid and non-slipping sur face.
• Install the system and devices attached to it in a way that persons cannot be
inj ure d, o r obj ec t s not b e da mag ed f or ex amp le by d ro ppi ng o r stu mb lin g.
1. Check the scope of delivery for completeness and integrity.
2. Place the LED desk lamp on your table.
3. Align the lamp arm (4).
The lamp arm is 360° adjustable. See Fig. 2.
4. P lac e t he f an pr op el le r (5) on t he mo to r sha f t an d pr es s it rm ly d own a s sh own
in Fig. 3.
9 Initial commissioning / charging
Material damage due to incorrect power supply.
• Co mp are t he s pe ci ca ti on s of pr od uc t, p owe r su ppl y an d pe ri ph er als .
These must be identical.
• Only use the supplied USB charging cable.
The battery must be fully charged before initial operation.
1. Connect the DC jack female (9) of the LED desk lamp to an USB power source
using the supplied USB charging cable (10).
This can be either a 230 V USB charging adapter or the USB socket of a PC.
The charging status indicator (8) lights red. The LED desk lamp is fully charged
when the charging status indicator is no longer lit.
2. After charging, disconnect the USB charging cable from the LED desk lamp
and the USB power source.
The lamp should be recharged at the latest when the luminosity decreases or it
cannot be switched on again.
10 Switching on/off and adjusting brightness
10.1 Switching on
1. Hold the LED desk lamp with one hand on the lamp base (7).
2. Tap the ON/OFF/DIMMER touchpad " " (1) 1x br ie y a nd s tr ong ly.
The light is switched on.
10.2 Adjusting brightness
1. Hold the LED desk lamp with one hand on the lamp base.
2. Touch the ON/OFF/DIMMER touch panel strongly and hold until the desired
brightness level is reached.
Thebrightnessisrstreducedsteplessly.Iftheprocessisrepeated,thebrightness
is increased again.
10.3 Switching off
1. Hold the LED desk lamp with one hand on the lamp base again.
2. Tap the ON/OFF/DIMMER touchpad 1x bri e y an d str on gl y.
The light is switched off.
10.4 Memory function
The last brightness level set will be saved. After switching the LED desk lamp
off and on again, it lights up in the last set brightness level.
11 Switching fan on/off
Risk of entry
Rotating parts can pull in hair and objects.
• Keep long hair and objects away from rotating parts.
1. Touch the ON/OFF touchpad " " (2) 1x br ie y a nd s tr ong ly.
The fan is switched on.
2. Touch the ON/OFF touchpad again 1x br ie y and s tr on gly.
The fan is switched off.
12 Replacing light sources
The light sources are not exchangeable!
8 Installation
Risque de chute
• Placez uniquement sur un support plat et antidérapant.
• Ins ta ll ez le p ro dui t de s or te à ce q u’aucu ne p er so nne o u au cu n obj et n e pui ss e
être blessé/endommagé en chutant, trébuchant, etc.
1. Vér i ez l e C ont enu d e li vr ais on p ou r l'ex hau st iv ité et l 'i nté gr it é.
2. Po se z la l amp e de b ure au à LE D sur l a t abl e.
3. Orientez le bras de la lampe (4).
Le bras de la lampe est orientable à 360°. Voir l’illustr. 2.
4 Pla ce z l’h éli c e du ven ti late ur (5) su r l’ar bre d u mo teu r et enf on c ez- la fe r me -
men t. Voir l ’il lus tr. 3.
9 Mise en service initiale/chargement
Dégâts matériels en cas d’alimentation électrique inadéquate.
• Comparez les caractéristiques techniques du produit, du réseau électrique et
des appareils périphériques. Ces données doivent être identiques.
• Uti li sez u ni que me nt le c â bl e de c har ge U S B fou rn i.
La batterie doit être entièrement chargée avant la mise en service initiale.
1. Rac c or de z la pr i se j ac k CC (9) de la l am pe de b ur eau à L ED à un e so urc e d e
ten si on US B à l ’aide du c â bl e de c har ge U S B (10) four n i.
Il peut s’agir d’un adaptateur de charge USB 230 V ou de la prise USB d’un PC.
Le témoin de l’état de charge (14) s’allume en rouge. La lampe de bureau à LED est
entièrement chargée lorsque le témoin de l’état de charge est éteint.
2. A pr ès l e ch ar ge men t, d éb ran ch ez l e c âbl e de c ha rg e US B de l a lam pe d e
bur eau à LED e t de la s ou rc e de t ens io n US B.
La lampe doit être rechargée au plus tard lorsqu’elle commence à briller plus faible-
ment ou qu’elle ne s’allume plus.
10 Mise en marche/à l’arrêt et réglage de la luminosité
10.1 Mise en marche
1. Tene z la la mp e de bu re au à LE D au ni veau d u pi ed d e la la mp e (7 ) avec
une main
2. Appuyez une fois brièvement et for tement sur la commande tactile
MARCHE/ARRÊT/VARIATEUR « » (1).
La lumière s’allume.
10.2 Paramétrage de la luminosité
1. Tene z la la mp e de bu re au à LE D au ni veau d u pi ed d e la la mp e (7 ) avec une
main.
2. Appuyez une fois fortement sur la commande tactile MARCHE/ARRÊT/
VARI ATEU R et m ain ten ez la c o mm and e en fon c ée ju sq u’à atte in dre l e
niveau de luminosité souhaité.
La luminosité est d’abord réduite par paliers. Si l’on répète l’opération, la lumi-
nosité est à nouveau augmentée.
10.3 Mise hors tension
1. Tene z à nou vea u la la mp e de bu re au à LE D au ni veau d u pi ed d e la la mpe (7)
avec une main.
2. Appuyez une fois brièvement et for tement sur la commande tactile
MARCHE/ARRÊT/VARIATEUR (1).
La lumière s’éteint.
10.4 Fonction de mémoire
Le niveau de luminosité paramétré en dernier est enregistré. Après avoir été
éteinte et rallumée, la lampe de bureau à LED éclaire avec la luminosité para-
métrée lors de la dernière utilisation.
11 Mise en marche/à l’arrêt du ventilateur
Peligro de arrastre
Les pièces rotatives peuvent blesser des parties du corps et happer les cheveux et
objets.
• Tenir le s ch eveu x lo ng s, le s pa r t ie s du c or p s et le s ob jet s à l’éc ar t d es p iè c es
rotatives.
1. Appuyez une fois brièvement et for tement sur la commande tactile MARCHE/
ARRÊT «
» (2).
Le ventilateur est en marche.
2. Appuyez de nouveau une fois brièvement et fortement sur la commande tactile
MARCHE/ARRÊT.
Le ventilateur est arrêté.
12 Remplacement des ampoules
Les ampoules ne sont pas remplaçables !

R EV2 018 -10 -17
V1.0
Goobay®
by Wentronic GmbH | Pillmannstraße 12
38112 Braunschweig | Germany
Co n r is er v a di mo di ch e | W ijz ig in ge n vo or be ho ud en . | Z za st r ze żen ie m zm ia n.
Lampada da tavolo a LED ventilatore + astuccio per penna
Ledbureaulamp Fan + Pen Box
Lampa biurkowa LED z wentylatorem + pojemnik na długopisy
Istruzioni per l‘uso
Gebruiksaanwijzing
Instrukcja obsługi
Art. 55495
Speciche / Technische gegevens / Dane techniczne
Article number 55495
Rated voltage (V )
Rated current (A)
5
1
Light sources SMD 2835 LEDs
Number of LEDs (pcs.) 20
Power (W)
Corresponds to light bulb ( W )
3
24
Ene rg y ef c ie nc y cl as s A+
Light colour
Rat ed l umi no us ux ( lm)
Colour temperature (K)
neutral white
220
3750 - 4250
Co lo ur r en de ri ng i nd ex (R a) > 80
Beam angle (°) 120
Nominal life time (h) 30000
Nu mb er of s wi tc hi ng c ycl es (x) 100000
Protection class / Protection level III / IP20
Dimmable
Housing material ABS, PS
Housing colour white
Dimensions (mm) 108 x 10 8 x 4 0 0
Net weight (g) 393
Rechargeable battery (permanently installed)
Type 18650 | Li-ion | 3.7 V | 1200 mA | 4.44 Wh
Nominal Charge / Discharge current (mA) 600
Charging time (h) ~3-4
Quantitiy (pcs.) 1x
Micro USB charging cable
Connections USB 2.0 male (type A), DC jack plug
Length (m) ~ 1.0
Weight (g) 19.5
1 Istruzioni per la sicurezza
1.1 Generalmente
• Leggere attentamente e completamente le istruzioni prima dell‘uso.
Le instruzioni per l‘uso è parte integrante del prodotto e contiene importanti infor-
mazioni per un uso corretto.
• Conser vare questo istruzioni per l‘uso.
Le istruzioni per l‘uso essere disponibile per le incertezze e trasferimento del pro-
dotto.
• Co nf ro nto l e spe c i c he de l pr od ot to, a lim en ta zi on e e pe ri fe ri c he.
Deve essere lo stesso.
Pericolo di scossa elettrica
• Non aprire la custodia.
• No n mo di c a re pr o dot t i e ac c es so ri .
• Non cor to do collegamenti e circuiti.
Informazioni sul gruppo di destinazione
Nonraccomandatoperibambinielepersoneconcapacitàsichee/omental-
mente limitato.
• Imballaggio sicuro, piccole parti e l‘isolamento contro l‘uso accidentale.
• Non guardare mai direttamente vero la sorgente luminosa.
• Non puntare mai il raggio di luce verso gli occhi di altre persone o di animali.
Gli occhi possono danneggiarsi!
• Tenere capelli lunghi, arti e oggetti lontano da parti rotanti.
Le parti rotanti possono inviluppare capelli, catturare oggetti e lesionare gli arti.
Condizioni di funzionamento e di stoccaggio
• Luogo, installare e traspor tare prodotti, parti e accessori prodotti in modo
sicuro.
• Utilizzare il prodotto, le par ti del prodotto e gli accessori solo in perfette condi-
zioni.
• Evit ar e c ond izi o ni es tr em e, c alo re e st re mo e is pe zi ona ta l a fr ed dez z a, u mi dit à
e luce diretta del sole, così come forni a microonde, vibrazioni e pressione
meccanica.
• Ma nten er o spaz io suf c ien te into ro al p ro do t to, pe garant ar na on a

Goobay®
by Wentronic GmbH | Pillmannstraße 12
38112 Braunschweig | Germany
R EV2 018 -10 -17
V1.0
Co n r is er v a di mo di ch e. | W ij zi gin ge n vo or b eh ou de n. | Z z ast r ze że ni em z mia n.
Istruzioni per l'uso | Gebruiksaanwijzing | Instrukcja obsługi
Lampada da tavolo a LED ventilatore + astuccio per penna | Ledbureaulamp Fan + Pen Box | Lampa biurkowa LED z wentylatorem + pojemnik na długopisy 55495
Szc ze gó ł y są re gu lo wan e pr z epi sa mi k ra jo w ym i. O be c no ść t eg o sym bo lu n a pr od uk-
ci e, w po dr ę cz ni ku u ży tkow nik a, a lb o na op ako wan iu i mpl ik uj e te ok re ś le ni a.
Poprzez stosowanie tego rodzaju separacji odpadów, stosowania i usuwania odpa-
dów, ja ki mi s ą zu ż y te ur z ą dze ni a, u ż y tkow ni cy m aj ą swó j ud zi ał w o c hr oni e
śr od ow isk a na tur al ne go. WE EE Nr.: 828 9 8 62 2
6.2 Baterii i akumulatorów
Bat er ii i a kum ul ato ró w ni e wol no w y r zu c ać r az em z o dpa da mi d om ow y mi.
Ic h el em ent y s kł a dow e mus z ą być os ob no p r ze ka zy wane d o re cy kl in gu lu b ut yl iz ac ji ,
po ni ewa ż n ie pr awi d ł owo u t yl izo wan e sub st an cj e tr u ją c e lub n ie be zp ie cz ne m og ą
tr wale z a szko dz ić ś ro d owi sk u.
Kon sum en ci s ą zo bo wi ą za ni d o ni eo dp ł at ne go z w ro tu w sp om nia nyc h el em ent ów po
za koń c zen iu i ch e ksp lo at ac ji d o pr od uc en ta , pun k tu s pr ze da ż y l ub sp ec ja lnyc h,
pub li cz nyc h pun k tów o db io r u. Szc ze g ó ło we in fo r mac je n a te n tem at s ą za war te
w przepisach poszczególnych krajów. O wymaganiach tych informuje symbol
umi es zc zo ny na p ro dukc i e, w in str u kcj i ob sł u gi l ub na o pa kowa ni u. Tak a se gre g acj a
sur owc ów o r az r ec yk li ng i ut y li za cj a zu ży tyc h ba ter i i i aku mu lat or ów st an ow ią w aż ny
wk ł ad w o ch ro nę ś r od owi sk a. D - 3 4 0 0 0 -199 8 - 00 9 9
7 Elementi di comando e parti di prodotto |
Bedieningselementen en onderdelen |
Elementy obsługowe i części
1 Pannello touch ON/OFF/DIMMER 2 Pulsante touch ON/OFF ventilatore
3 Modulo LED 4 Braccio della lampada
5 Elica del ventilatore 6 Por tapenne
7 Base della lampada 8 Indicatore dello stato di ricarica
9 Presa jack CC 10 Cavo di ricarica USB
1 AAN/UIT/DIMMER-touchveld 2 Ventilator-AAN/UIT-touchveld
3 Led-module 4Lamparm
5 Ventilatorpropeller 6 Pennenbox
7 Lampvoet 8 Laadindicator
9 DC-stekkeraansluiting 10 USB-laadkabel
1 Pane l do t ykow y w ł ą cz an ia / w y ł ą cz an ia /ś c ie mni ac za
2 Pane l do t ykow y w ł ą cz an ia / w y ł ą cz an ia we nt yl ato ra
3 M o du ł LED 4 Ram ię l am py
5 Śmi g ł o went y la tor a 6 Pojemnik na przybory do pisania
7 Podstawa lampy 8 Wskaźnik statusu na ładowania
9 Gn ia zdo D C 10 Ka be l do ł ad owa ni a US B
8 Montaggio
Pericolo di caduta
• Pos izi on ar e il pr od ot to s ol am ente s u un a sup er c ie p ia na e ant is c ivo lo.
• Montare il prodotto accertandosi che non arrechi danni a cose o lesioni
a persone, ad es. evitando i rischi connessi a caduta, inciampo e simili.
1. C o ntr ol lar e fo r nit ur a sia c o mp let a e ga ra nti re l 'i nte gr it à.
2. Posizionare la lampada da tavolo a LED sul tavolo.
3. Orientare il braccio della lampada (4).
Ilbracciodellalampadaèregolabilea360°.Vedereg.2.
4. Pos izi on ar e l’eli ca d el ve nti la tor e (5) sul l’alb ero m oto re e s sar l a sa lda me nte i n
po siz io ne. Vede re g. 3 .
9 Prima messa in funzione / Carica
L’errata alimentazione può portare al danneggiamento del
materiale
• Co nf ro nto l e spe c i c he de l pr od ot to, a lim en ta zi on e e pe ri fe ri c he. Deve essere
lo stesso.
• Utilizzare solo il cavo di ricarica USB in dotazione.
Prima di mettere in funzione il dispositivo per la prima volta, accertarsi che la batte-
ria sia completamente carica.
1. Collegare la spina jack CC (9) della lampada da tavolo a LED a una por ta USB
tramite il cavo di ricarica USB in dotazione (10).
L’indicatore dello stato di ricarica (14) si illumina di rosso. La lampada da tavolo a
LED è completamente carica quando l’indicatore dello stato di ricarica non è più
acceso.
2. Terminata la carica, scollegare il cavo di ricarica USB dalla lampada da tavolo
a LED e dalla porta USB.
La lampada deve essere ricaricata quando inizia a illuminare in modo più debole o
quando non si accende più.
10 Accensione/spegnimento e regolazione della
luminosità
10.1 Accensione
1. Con una mano, teþÿ0•@ Ð0` % À@`•`€•@€ 0dnz

R EV2 018 -10 -17
V1.0
Goobay®
by Wentronic GmbH | Pillmannstraße 12
38112 Braunschweig | Germany
Res er vado e l de re c ho a r eal iz ar m o di c ac i on es . | Ne r eze r v ăm d re ptu l la m od i c ă ri . | De r ta ge s fo r be ho ld f or æ nd ri ng er.
Lámpara LED de escritorio con ventilador y bote de lápices
Lampă pentru birou cu LED și ventilator + suport pentru creioane
LED-skrivebordslampe, blæser + kuglepensholder
Instrucciones de uso
Instrucțiuni de utilizare
Brugervejledning
Art. 55495
Datos técnicos / Date tehnice / Tekniske data
Article number 55495
Rated voltage (V )
Rated current (A)
5
1
Light sources SMD 2835 LEDs
Number of LEDs (pcs.) 20
Power (W)
Corresponds to light bulb ( W )
3
24
Ene rg y ef c ie nc y cl as s A+
Light colour
Rat ed l umi no us ux ( lm)
Colour temperature (K)
neutral white
220
3750 - 4250
Co lo ur r en de ri ng i nd ex (R a) > 80
Beam angle (°) 120
Nominal life time (h) 30000
Nu mb er of s wi tc hi ng c ycl es (x) 100000
Protection class / Protection level III / IP20
Dimmable
Housing material ABS, PS
Housing colour white
Dimensions (mm) 108 x 10 8 x 4 0 0
Net weight (g) 393
Rechargeable battery (permanently installed)
Type 18650 | Li-ion | 3.7 V | 1200 mA | 4.44 Wh
Nominal Charge / Discharge current (mA) 600
Charging time (h) ~3-4
Quantitiy (pcs.) 1x
Micro USB charging cable
Connections USB 2.0 male (type A), DC jack plug
Length (m) ~ 1.0
Weight (g) 19.5
1 Instrucciones de seguridad
1.1 General
• Lea las instrucciones de operación completa y cuidadosamente antes de usar.
Lasinstruccionesdeoperaciónsonpartedelproductoycontieneninformación
importante para el uso correcto.
• Guarde las instrucciones de operación.
Lasinstruccionesdeoperacióndebenestardisponiblesencasodeincertidumbre
ytransmisióndelproducto.
• Comparar los datos técnicos del producto con los de la red eléctrica y los
dispositivos periféricos. Estos deben ser idénticos.
Peligro de descarga eléctrica
• No abra la carcasa.
• No m od i qu e el p ro duc to y l os a cc e so ri o s.
• No c o r to ci rc ui te la s co nex io ne s y lo s ci rc ui tos .
Información sobre destinatarios
No adecuado para niños ni personas cuyas capacidades físicas y/o psíquicas
estén limitadas.
• Proteja el embalaje, las piezas pequeñas y el material aislante contra un uso
accidental.
• No mire nunca directamente la luz.
• No apunte nunca a los ojos de personas o animales con el haz de luz.
Hacerlo podría causar lesiones oculares.
• Ma nten ga c ua lq uie r ob jet o, el c ab el lo l ar go y la s ex tr emi da de s lej os d e la s
piezas rotativas.
Las piezas rotativas pueden atrapar y tirar del cabello y de los objetos y causar
lesiones en las extremidades.
Condiciones de funcionamiento y almacenamiento
• Coloque, instale y transporte de forma segura el producto, sus piezas y sus
accesorios.
• Utilice el producto, las piezas del producto y los accesorios solo si están en
perfecto estado.
• Evite ex po ne r el di sp os it ivo a c ar ga s ext re ma s, c om o ca lo r y fr ío, hum ed ad y la
rad iac i ón di re ct a d el so l, a sí co mo a v ib ra ci on es y p re si ón me c án ic a.
• Ma nten ga s u c ien te es pac i o alr ed ed or d el p ro duc to p ar a gar an tiz ar s u bu ena
ventilación y movilidad.
• En c aso d e def ec to s, da ño s me c áni c os, ave ría s y ot ro s pro bl em as qu e no s e
puedan resolver con la documentación incluida, póngase en contacto con el
vendedor o el fabricante.
1.2 Peligros de la batería
La batería no se puede cambiar.
• U n u s o n o c o n f o r m e a l o p r e v i s t o pu e d e da ñ a r l a s b a t e r í a s y p r ov o c a r d e r r a m e s .
• No d efo r me, qu em e ni d esm on te la b ate ría.
• De je la s c élu las q ue p re se nten d er r ame s, e sté n def or m ada s o co r roíd as e n el
pro du ct o y eli míne la s ut ili za nd o lo s me dio s de p rot ec c ió n ade c uad os .
• No c o r to ci rc ui te la b ate ría.
Existepeligrode:explosión,fuego,calentamiento,formacióndegasesodehumo.
• No ex po ng a la ba ter ía a fu ent es d e ca lo r, com o poí u deée

Goobay®
by Wentronic GmbH | Pillmannstraße 12
38112 Braunschweig | Germany
R EV2 018 -10 -17
V1.0
Res er vado e l de re c ho a r eal iz ar m o di c ac i on es . | Ne r eze r v ăm d re ptu l la m od i c ă ri . | De r ta ge s fo r be ho ld f or æ nd ri ng er.
Instrucciones de uso | Instrucțiuni de utilizare | Brugervejledning
Lámpara LED de escritorio con ventilador y bote de lápices | Lampă pentru birou cu LED și ventilator + suport pentru creioane |
LED-skrivebordslampe, blæser + kuglepensholder 55495
Detaljerne reguleres i de nationale lovgivning. Symbolet på dette produkt, i bruger
manualen, eller på indpakningen opfylder disse regler. Med denne form for af falds-
sortering, anvendelse, og affaldsgenbrug opnår du en vigtig del i at bevare miljøet.
WEEE No: 82898622
6.2 Batterierne
Batterierne må ikke bortskaffes sammen med husholdningsaffald. Deres komponen-
ter skal genbruges eller bortskaffes hver for sig. Ellers kan forurenende og skadelige
stoffer forurene vores miljø. Som forbruger er du forpligtet til efter gældende lov at
returnere elektrisk og elektronisk af fald til producenten, forhandleren, eller til en
offentlig opsamlingssted ved afslutning af produktets levetid. Detaljerne reguleres i
de nationale lovgivning. Symbolet på dette produkt, i bruger manualen, eller på
indpakningen opfylder disse regler. Med denne form for affaldssortering, anvendelse,
og af faldsgenbrug opnår du en vigtig del i at bevare miljøet. D-34000-1998- 0099
7 Elementos de manejo y piezas del producto |
Elemente de operare și piese ale produsului |
Betjeningselementer og produktdele
1 Mando táctil ON/OFF/DIMMER 2 Mando táctil ON/OFF del ventilador
3 Módulo LED 4 Brazo de lámpara
5 Hélice del ventilador 6 Bote de lápices
7 Base de la lámpara 8 Indicador de estado de carga
9 Conector hembra CC 10 Cable de carga USB
1 Câm p t act il PORNIRE/OPRIRE/REGULATOR INTENSITATE LUMINOASĂ
2 Câm p t act il P O RN IT/O PRI T vent il ato r
3 Modul LED 4 Bra ț lam pă
5 Elicea ventilatorului 6 Suport pentru creioane
7 Pic io r ul l ăm pi i 8 Aș a j st are în c ăr c are
9 Mu fă d e ali me nt are c .c. t ip j ac k 10 Ca blu d e înc ă rc a re US B
1 TÆND/SLUK/DÆMP-touchpanel 2 Ventilator-TÆND/SLUK-touchpanel
3 LED-modul 4 Lampearm
5 Ventilatorpropel 6 Blyantsholder
7 Lampefod 8 Opladningsstatusindikator
9 DC phono -hunstik 10 USB -ladekabel
8 Montaje
CUIDADO
Peligro de caída
• Colocar únicamente sobre una base plana y antideslizante.
• Instale el producto de manera que no cause lesiones ni daños a personas
o cosas, por ejemplo, al caerse o tropezar.
1. C o mpr u eb e que e l vol um en d e sum ini st ro e sté c o mpl eto e ín teg ro.
2. Coloque la lámpara LED de escritorio en la mesa.
3. Ajuste el brazo de la lámpara (4).
Elbrazodelalámparasepuedeajustarenunángulode360°.Consultelag.2.
4. Coloque la hélice del ventilador (5) en el eje del motor y presiónela. Consulte la
g. 3 .
9 Primera puesta en funcionamiento/carga
ATENCIÓN
Una tensión eléctrica incorrecta puede provocar daños materiales.
• Comparar los datos técnicos del producto con los de la red eléctrica y los
dispositivos periféricos. Estos deben ser idénticos.
• Utilice únicamente el cable de carga USB suministrado.
Antes de poner en funcionamiento la lámpara por primera vez, la batería debe estar
completamente cargada.
1. Conecte el conector hembra CC (9) de la lámpara LED de escritorio con una
fuente de alimentación USB a través del cable de carga USB suministrado (10).
Esta puede ser un adaptador de carga USB de 230 V o la toma USB de un orden
ador. El indicador del estado de carga (14) se ilumina en color rojo. La lámpara LED
de escritorio está completamente cargada cuando el indicador se apaga.
2. Una vez completada la carga, desenchufe el cable de carga USB de la lámpara
y de la fuente de alimentación USB.
La lámpara deberá cargarse de nuevo cuando la luz comience a ser más débil o ya
no se pueda encender.
10 Encendido/apagado y ajuste de la luminosidad
10.1 Encendido
1. Sujete la lámpara LED de escritorio con una mano en la base de dicha
lámpara (7).
2. Toque el mando táctil ON/OFF/DIMMER " " (1) una sola vez, brevemente y
con fuerza. La luz se encenderá.
10.2 Ajustar la luminosidad
1. Sujete la lámpara LED de escritorio con una mano en la base de dicha
lámpara (7).
2. Toque el mando táctil ON/OFF/DIMMER una sola vez, con fuerza, y manténga-
lo pulsado hasta alcanzar el nivel de luminosidad deseado.
La luminosidad se reducirá de forma continua. Si desea volver a aumentarla, repita
este proceso.
10.3 Apagado
1. Sujete de nuevo la lámpara LED de escritorio con una mano en la base de
dicha lámpara (7).
2. Toque el mando táctil ON/OFF/DIMMER (1) una sola vez, brevemente y con
fuerza.
La luz se apagará.
10.4 Función de memoria
Elúltimoajustedeluminosidadconguradoseguarda.Estosignicaque,al
apagar y volver a encender la lámpara LED de escritorio, se encenderá con la mis-
ma luminosidad de la última vez.
11 Encendido/apagado del ventilador
CUIDADO
Peligro de arrastre
Las piezas rotativas pueden atrapar y tirar del cabello y de los objetos y causar
lesiones en las extremidades.
• M an ten ga c ua lqu ie r ob jeto, e l c ab el lo la rg o y la s ext re mi da des l ej os d e las
piezas rotativas
1. Toque el mando táctil ON/OFF " " (2) una vez, brevemente y con fuerza.
El ventilador se encenderá.
2. Toque el mando táctil ON/OFF de nuevo una vez, brevemente y con fuerza.
El ventilador se apagará.
12 Cambiar la bombilla
Las bombillas no se pueden cambiar.
8 Amplasare
PRECAUȚIE
Pericol de cădere
• Pozi ț io naț i di sp ozi ti vu l do ar pe o s up raf aț ă p la nă ș i ant id er apa nt ă.
• Ins ta la ți p ro dus ul în a șa f el în c ât să u r ă nit e pe rs oa ne s au s ă se pr od uc ă
daun e ma ter ia le, d e exem plu a so c iate c u c ă de rea , împ ie dic a rea s au a lte le
asemenea.
1. C o ntr ol aț i da c ă vol umu l liv ra t est e c omp le t și i nta ct .
2. A ș ez aț i la mpa d e bi ro u cu l ed ur i pe m as a dvs .
3. O r ie nt aț i br aț ul l ăm pi i (4).
Brațullămpiiestereglabil360°.Consultațig.2.
4. M o nta ț i eli c ea ve nti lat or ul ui (5) pe a r bo re le m oto ru lui ș i ap ăs aț i b ine.
Co nsu lt aț i g. 3.
9 Prima punere în funcțiune / Încărcare
ATENȚIE
Daune materiale provocate de tensiunea de alimentare greșită.
• Co mp ara ț i date le t ehn ic e al e pr od usu lu i, re țe le i de en er gi e el ec tr i c ă, di sp ozi ti
velor periferice.
Acesteatrebuiesăeidentice.
• Folo si ț i do ar c ab lul d e înc ă rc a re US B f ur ni zat .
Înaintedeprimapunereînfuncțiune,acumulatorultrebuiesăeîncărcatcomplet.
1. C o nec t aț i mu fa d e ali me nt are c .c. d e ti p ja ck (9) a lă mp ii de b ir ou c u le du ri p r in
inte r me diu l ca bl ulu i de în c ăr ca re U SB l iv rat (10) la o surs ă de a li men ta re U SB .
AceastapoateunadaptordeîncărcareUSBde230VsauportulUSBalunuical-
culator.Așajulstăriideîncărcare(14)seaprindeșiareculoareroșie.Lampade
birouculeduriesteîncărcatăcomplet,dacăașajulstăriideîncărcaresestinge.
2. D up ă înc ă rc a re, d ec upl aț i di n no u ca bl ul de î nc ă rc ar e US B de la mp a de b iro u
cu l edu r i și d e sur sa d e te nsi une U S B.
Lampatrebuiereîncărcatăceltârziucândîncepesăluminezemaipuținsaunuse
mai poate porni.
10 Pornire/oprire și reglarea luminozității
10.1 Aprindere
1. Țin eț i b ine l amp a de b ir ou c u le dur i c u o mâ nă d e pic i or ul l ăm pi i (7 ).
2. At in ge ți c â mpu l t act il P O RN IT/O PRI T/IN TE NS ITATE " " (1) o dat ă , scu r t ș i
puternic.
Lumina se aprinde.
10.2 Reglarea luminozității
1. Țin eț i bi ne l amp a de b ir ou c u le dur i c u o mâ nă d e pic i or ul l ăm pi i (7 ).
2. A ti ng eț i c âmp ul t ac ti l PO R NI T/OPR IT/IN T ENS ITAT E o dat ă, p ute r nic , ș i ți ne ți
apă sa t pâ nă c ân d at ing eț i t rea pt a de lu mi noz it ate d or it ă.
Luminozitateamaiîntâisereduce,liniar.Dacărepetațiprocesul,luminozitatea
creștedinnou.
10.3 Stingere
1. Țin eț i di n no u bin e la mpa d e bi ro u cu l ed ur i cu o m ân ă de p ic io r ul l ămp ii ( 7).
2. A ti ng eț i c âmp ul tact il POR NI T/OPR IT/I NT ENS ITAT E (1) o da tă , sc ur t ș i puter ni c.
Lumina se stinge.
10.4 Funcția de memorie
Treaptadeluminozitatereglatăultimadatăestesalvată.Dupăstingereașireaprin-
derealămpiidebirouculeduri,aceastaseaprindepeultimatreaptadeluminozitate
reglată.
11 Pornirea/oprirea ventilatorului
PRECAUȚIE Pericol de tragere
Pieselerotativepotprindepărulșiobiecteleșipotrănimembrele.
• Ț in eț i pă r ul l ung , mem br el e și o bi ec te le de pa r te d e pi es el e rot at ive.
1. A ti ng eț i c âmp ul t ac ti l PO R NI T/OPR IT " " (2) o dată , sc ur t ș i pu ter n ic .
Ventilatorulpornește.
2. Ati ng eț i c âm pul t ac ti l PO R NI T/OPR IT în c ă o dat ă, s cu r t ș i pu ter ni c.
Ventilatorulseoprește.
12 Înlocuirea becurilor
Becurilenupotînlocuite!
8 Opstilling
Nedstyrtningsfare
• Må kun placeres på et plant og skrid underlag.
• Installer produktet, så hverken personer kan komme til skade eller genstande
blive beskadiget, f.eks. ved at snuble eller ved at falde på gulvet.
1. Kontrollér, at du har modtaget alle dele, og at de er intakte.
2. Stil LED-skrivebordslampen på bordet.
3. Ret lampearmen (4) ud.
Lampearmenkanjusteres360°.Seg.2.
4. S æt ve nti lat or pr op el le n (5) på mo tor aks le n, o g tr yk de n på. S e g . 3.
9 Første ibrugtagning/opladning
Tingsskader som følge af forkert spændingsforsyning.
• Sammenlign de tekniske data for produktet, lysnettet og ydre enheder.
De tekniske data skal være identiske.
• Brug kun det medfølgende USB-ladekabel.
Inden den første ibrugtagning skal batteriet være helt opladet.
1. Forbind DC phono-hunstikket (9) på LED-skrivebordslampen med en
USB-spændingskilde ved hjælp af det medfølgende USB-ladekabel (10).
Dette kan enten være en 230 V USB-opladningsadapter eller et USB-hunstik på en
pc. Opladningsstatusindikatoren (14) lyser rødt. LED-skrivebordslampen er helt
opladet, når opladningsstatusindikatoren ikke lyser længere.
2. Når opladningen er gennemført, skal du koble USB-ladekablet fra LED -skrive-
bordslampen og fra USB-spændingskilden.
Lampen skal senest oplades igen, når den begynder at lyse svagere eller ikke
længere kan tændes.
10 Tænd/sluk og indstilling af lysstyrken
10.1 Tænd
1. Hold LED-skrivebordslampen fast med én hånd på lampefoden (7).
2. Tr y k kor t og kr af t ig t 1x på TÆN D/S LU K / DÆM P- to uc hp ane let " " (1) .
Lampen tændes.
10.2 Indstilling af lysstyrken
1. Hold LED-skrivebordslampen fast med én hånd på lampefoden (7).
2. Tr y k ko r t og kr a f ti g t 1x på TÆN D/ S L U K / DÆ M P - t ou c h p a n e le t , og ho l d d et ne d e ,
indtil det ønskede lysstyrkeniveau er nået.
Lysstyrken reduceres først trinløst. Hvis du gentager fremgangsmåden, øges
lysstyrken igen.
10.3 Sluk
1. Hold LED-skrivebordslampen fast med én hånd på lampefoden (7).
2. Try k kor t o g k raf tig t 1x på TÆ N D/S LU K / DÆM P- to uc hpa ne let " " (1).
Lampen tændes.
10.4 Memory-funktion
Det senest indstillede lysstyrkeniveau gemmes. Efter at LED-skrivebordslampen
er blevet slukket og derefter tændt igen, lyser den med det senest indstillede lyss-
tyrkeniveau.
11 Tænd/sluk ventilatoren
Indtrækningsfare
Roterende dele kan trække hår og genstande ind og forårsage kvæstelser.
• Hold langt hår, legemsdele og genstande væk fra roterende dele.
1. Try k kor t o g kr af tig t 1x på TÆ ND /S LUK- to uc hp ane le t " " (2).
Ventilatoren er tændt.
2. Tryk igen kort og kraftigt 1x på TÆND/SLUK-touchpanelet.
Ventilatoren er slukket.
12 Udskiftning af pærerne
Pærerne kan ikke udskiftes!
Table of contents
Other Goobay Fan manuals

Goobay
Goobay 45283 User manual

Goobay
Goobay 52718 User manual

Goobay
Goobay 39513 User manual

Goobay
Goobay 39510 User manual

Goobay
Goobay 59509 User manual

Goobay
Goobay 39510 User manual

Goobay
Goobay 62061 User manual

Goobay
Goobay 59515 User manual

Goobay
Goobay 55524 User manual

Goobay
Goobay 49645 User manual
Popular Fan manuals by other brands

Hunter
Hunter Kingsbridge Owner's guide and installation manual

Envirco
Envirco MAC 10 LEAC2 Installation, operation & maintenance manual

WT Knowles & Sons
WT Knowles & Sons KYK185 Fitting instructions

Johnson
Johnson Medina Instructions for use

Fanimation
Fanimation Inlet FPS7880SN owner's manual

Munters
Munters EM52 Manual for use and maintenance