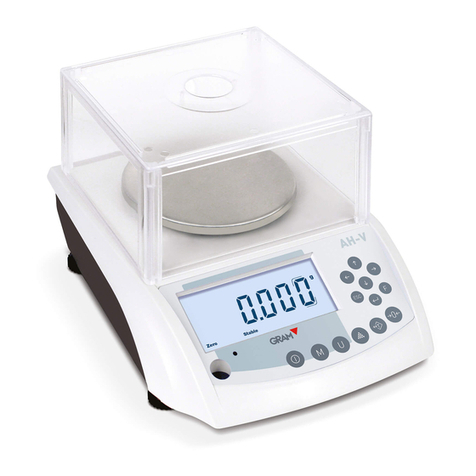
Gram AH series User manual

SERIES / SERIE / SÉRIE
AH
OPERATION MANUAL
MANUAL DE UTILIZACION
MANUEL D´UTILISATION

2
INDEX English
Requirements for an optimal installation 8
Unpacking 8
Installation 10
Description of display 11
Keyboard description 12
Weight unit selection 13
Reset to zero 13
TARE 13
Overload message 13
Pieces counting function 14
Percentages function (%) 14
Parameters setting 15
Calibration 16
Fast calibration 16
Main weight unit selection 16
Second unit weight selection 16
Autopower off configuration 17
Data transmission configuration 17
Baud rate configuration 18
Filter selection 18
Zero correction configuration 18
Auto - zero selection 19
Auto - sample selection in pieces counting 19
Backlight configuration 20
Error messages 20
Output RS-232C 21
Cable to connect the pc to the balance 21
Data format 22

3
Conversion table of weight units 23
Capacities table 23
Technical characteristics 24
Guarantee 25

4
ÍNDICE Español
Requisitos para una óptima instalación 26
Desembalaje 26
Puesta en marcha 28
Descripción del display 29
Descripción del teclado 30
Selección de las unidades de pesada 31
Puesta a cero 31
Tara 31
Alarma de sobrecarga 31
Función de cuentapiezas 32
Función de porcentajes (%) 32
Parámetros para la configuración 33
Calibración 34
Calibración rápida 34
Selección de la unidad principal de pesada 34
Selección de una segunda unidad de pesada 35
Selección de la autodesconexión 35
Selección del método de transmisión de datos 35
Selección del baud rate para el puerto RS-232 36
Selección del filtro de estabilidad 36
Selección del retorno a cero 36
Selección del auto-cero 37
Selección del automuestreo en la función cuentapiezas 38
Selección de la iluminación del display 38
Mensajes de error 39
Salida de datos RS-232 39
Cable conexión de PC a Balanza 39
Formato de data 40

5
Tabla de conversión de las unidades de pesada 41
Tabla de capacidades 41
Características técnicas 42
Garantía 43

6
SOMMAIRE Français
Recommandations pour une optimisation maximale 44
Déballage 44
Mise en marche 46
Description de l’écran 47
Description du clavier 48
Selection des unités de pesée 49
Retour a zero 49
Tare 49
Alarme de surcharge 49
Fonction de compte-pieces 50
Fonction de pourcentages (%) 50
Parametres pour la configuration 51
Calibrage 52
Calibrage rapide 52
Sélection de l’unité principale 53
Sélection d’autres unités de pesée 53
Déconnection automatique 53
Sélection de la transmission de données 54
Sélection de la vitesse de transmission de données 54
Sélection du filtre de stabilité 55
Sélection du retour à zéro 55
Sélection du zéro automatique 56
Echantillonnage automatique en fonction compte-pieces 56
Sélection de l’eclairage automatique de l’écran 57
Sortie de données RS-232 58
Cable de connexion de PC à Balance 58
Format data 58
Exemple de transmission 59

7
Changement d’unités de pesée 60
Tableau de capacités 60
Caracteristiques techniques 60
Garantie 61

8
ENGLISH
REQUIREMENTS FOR AN OPTIMAL INSTALLATION
To obtain the maximum performance and the best results, we recommend
installing the balance according to the following requirements:
• Install it on a firm and stable surface.
• Place it on a stable base free of vibrations.
• Don´t expose it to direct sunlight.
• Don´t submit it to atmospheres with corrosive gases.
• Keep it in an environment free of dust and dirt.
• Work at temperatures between 15º and 30º C.
• Use the balance in environments with humidity lower than 95% HR.
• Keep the balance away from equipment that produces magnetic or
acoustic interferences.
• Calibrate it in its definitive place of use and check it regularly with a
calibration weight (optional), if necessary, recalibrate it.
UNPACKING
Unpack the balance carefully. Inside the carton you will find the following
components:
• This operation manual (please, read it before using the balance).
• A balance Series AH.

9
• A stainless steel pan.
• An AC/Adaptor of 12 V / 800 mA; don´t use any other adaptor, it could
damage the balance.
• A CD-ROM with USB adaptor.
• A USB cable.
• Five pieces of windshield.
VERY IMPORTANT: Keep the original package. It could be useful in the future
in transportin the balance.

10
INSTALLATION
1. Remove the package from the carton.
2. Remove the pan from the cardboard.
3. Remove the AC/Adaptor (it is inside a white box).
4. Take out the balance from its protection and place it on its definitive place
of use, which should be a flat, non-metallic, most stable and rigid surface.
5. Put the stainless steel pan on the pan support.
6. Level the balance by turning the four adjustable feet until the bubble
level located on left frontal side remains in the centre of the circle.
7. Connect the AC/Adaptor to the balance´s connector and then to an outlet
of 220/240 V. 50 Hz.
8. Calibrate the balance with a proper calibration weight. This action is very
important in order to obtain accurate weighing results.
9. For maximum accuracy, it is necessary to keep the balance connected
for about 60 minutes before using it. However, the balance can also be
used immediately with good results.

11
DESCRIPTION OF DISPLAY
1. Zero: It lights when the display is at zero.
2. Tare: It lights when a container or product have been tared.
3. Stable: It appears when balance is stable.
4. Modo: It lights when the “mode” key is pressed.
5. Setup: It lights when the “Setup” key is pressed.
6. Cal: It appears when the balance is in calibration mode.
7. :Battery indicator.
8. Use to change: Used to navigate through the menu.
9. Press enter: The display shows it when it is needed to confirm the function.
10. Press Esc: The display shows it when you can return to previous menu or exit.
11. Weight units symbols:
ct: Quilate
lb: Pound
oz: Ounce
GN: Grain
ozt: Troy ounce
dwt: Pennyweight
t1.T: Tael
pcs: Pieces counting
%: Percentages
Kg: Kilogram
g: Gram

12
KEYBOARD DESCRIPTION
To turn on or to turn off the scale.
To select between weight, pieces-counting or percentage modes.
To select the weight unit. There are 8 weight units available.
To enter the sample in pieces-counting function.
To tare a container or product and then obtain the net weight.
To reset the display to zero.
To confirm data or to print.
To select various menus.
To return to previous menu or to exit.
To move to the right.
To move to the left.
To move up.
To move down.
F

13
WEIGHT UNIT SELECTION
Press the key to select the weight units, the display will view the options.
There are 8 weight units available.
RESET TO ZERO
If the zero value varies during the weighing, press the key, the display
will show zero again.
TARE
This function allows calculating the net weight of a product.
With display showing “zero”, place a container on the pan, then press the
key, the balance will subtract the container´s weight, put the product
into the container and then read the product´s weight on the display (net
weight).
To return to normal weighing model, remove the container and press the
key.
OVERLOAD MESSAGE
If an object is placed on the pan and its weight exceeds the maximal capacity
of the balance, the display will show the message “-----OL-----”, at the same
time, the balance will beep. Remove the object; otherwise it may damage the
mechanism of the balance.

14
PIECES COUNTING FUNCTION
The pieces counting function is used to count the number of pieces deposited
on the pan.
1. Place a container on the pan and press the key.
2. Insert a certain number of pieces (10, 20, 50 or 100) into the container.
This number of pieces is the initial sample, the higher number grants
more accuracy in final counting.
3. Press the key, select the desired sample number using the , ,
, or keys. To confirm the selected value, press the key.
4. The balance will accept the sample and after a few minutes will indicate
the pieces counting mode.
5. The display will show the number of pieces placed on the pan, add the
rest of pieces to obtain the total of pieces.
6. To count other pieces of a different weight unit, repeat the procedure.
7. To return to normal weighing mode, press the key until the sign
grams “g” appears on the right side.
PERCENTAGES FUNCTION (%)
1. Once selected the percentage mode by pressing the key, use the
keys or , to choose between 100.0% or 100.00%.
2. Place the product, considered as 100%, on the pan and press the
key. The symbol “Modo” will flash for a few seconds and then the balance
will beep indicating the procedure is finished.

15
From this moment, the balance is ready to use the percentage function. When
the sample value is less than 0.2d, the display shows “---or---%”. It means
that the sample is too small, therefore, will need to add bigger samples.
Note: To exit from pieces-counting or percentages function, press the
key to return to normal weighing mode.
To return to pieces-counting or percentages function, press the key. The
balance will automatically memorize the previous data, so you can continue
using both functions.
The data memory will be deleted automatically when you switch from one
mode to the other.
PARAMETERS SETTING
Press the Fkey to enter to parameters setting menu. Once it’s pressed, the
display will show the message “CAL”.
Use the and keys to choose the function.
The functions are:

16
CALIBRATION
When the display shows “CAL”, press the key to access to Auto-Calibration
mode.
Use the keys - and , - to enter the calibration weight value,
then press the key to confirm.
Place the calibration weight on the pan, when the balance is stable, it will
return to initial mode of weighing. The calibration has been finished.
FAST CALIBRATION
Keep pressed the key for 3 seconds. The display will show “the weight
calibration value”. Put on the pan a calibration weight which corresponds to
the value indicated by the balance. When the symbol “CAL” disappears, the
calibration will be finished.
MAIN WEIGHT UNIT SELECTION
Press the keys or - to select the weight unit, then press the
key to confirm.
To return to previous menu or to exit, press the key.
(Default value: “g”)
SECOND UNIT WEIGHT SELECTION
(total: 8 weight units available)
Press the keys or - to select the weight units and press

17
to choose “ON” or “OFF”, then press to confirm.
To return to previous menu or to exit, press the key.
AUTOPOWER OFF CONFIGURATION
Press the key until the screen shows the message “A.OFF”, then press .
Use the and keys to select the auto power time, example: no, 2, 5, or
8 minutes. To confirm the desired value, press .
To return to previous menu or to exit, press the key.
(Default value: “no”)
DATA TRANSMISSION CONFIGURATION
Press the key until the screen shows the message “Trn”, then press key.
Press and to select a “stable transmission”. Press the key to
confirm and the key to return to previous menu or to exit.
(Default value: “CLOSE”)
CLOSE
stb - stable transmission
tb - transmission by pressing the Enter key.
ser - series transmission .
disp - transmission to an auxiliary display (optional)

18
BAUD RATE CONFIGURATION
Press the key until the screen shows the message “rate”, then press
the key.
Use the keys and to select the baud rate (1200, 2400, 4800 and 9600)
and press to confirm.
Press the key to return to previous menu or to exit.
(Default value: 2400)
FILTER SELECTION
Press the key until the screen shows the message “FI 105“, then press
the key.
Use the keys and to select the range of stability (from 1 to 15), then
press to confirm.
Press the key to return to previous menu or to exit.
ZERO CORRECTION CONFIGURATION
Press the until the screen shows the message “ZEro1”, then press the
key.
Use the key and to select the zero range (from 0 to 3 divisions). To
confirm, press the key.
Press the key to return to previous menu or to exit.
ZEro1. correction of one division.

19
ZEro2. correction of two divisions.
ZEro3. correction of three divisions.
ZEro0. without correction.
AUTO - ZERO SELECTION
Press the key until the screen shows the message “trAC1”, then press
the key.
Use the and keys to select the auto-zero tracking.
Press the key to confirm.
Press the key to return to previous menu or to exit.
(Default value: “2”)
trAC0. it corrects deviations less than 1/3 of division.
trAC1. it corrects deviations less than 2/3 of division.
trAC2. it corrects deviations less than 1 division.
trAC3. it corrects deviations less than 4/3 of division.
trAC4. it corrects deviations less than 5/3 of division.
trAC5. it corrects deviations less than 2 divisions.
AUTO - SAMPLE SELECTION IN PIECES COUNTING
When the balance is in pieces-counting mode, this function allows making
an automatic small sampling when the quantity of pieces loaded on the pan
are inferior or equal to the initial quantity.
Press the key until the screen shows the message “A.C Y”, then press
the key.

20
Use the and keys to select the desired mode (Yes - “Y” or Not - “N”).
Press the key to confirm.
Press the key to return to previous menu or to exit.
(Default value: “YES”)
A.C Y. automatic auto-sample
A.C N. auto-sample disabled.
BACKLIGHT CONFIGURATION
Press the key until the screen shows the message “b1.1”, then press
the key.
Use the and keys to select the backlight mode, there are three
options: 1, 2 and 3). Press the key to confirm.
Press the key to return to previous menu or to exit.
(Default value: bl.1)
bl.1. Automatic backlight
bl.2. Backlight always on
bl.3. Backlight off
ERROR MESSAGES
The error messages are: “E1 . E2 . E5 . 0L”.
These messages can appear if the platter is not installed properly or when
the environment is not adequate. Please, contact with your distributor.
Table of contents
Languages:
Other Gram Scale manuals

Gram
Gram FD 410 SERIES User manual

Gram
Gram FC Series User manual

Gram
Gram S4 Series User manual

Gram
Gram QUBIC ONE User manual

Gram
Gram K3 SERIES User manual

Gram
Gram Xtrem F User manual

Gram
Gram RZ Series User manual

Gram
Gram AM-3000 Installation manual

Gram
Gram AC 500 Series Installation manual

Gram
Gram C9 Series User manual