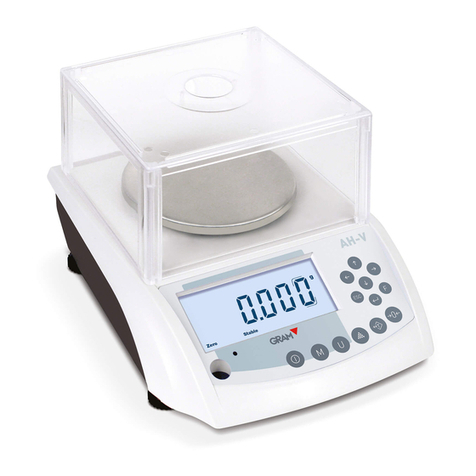
Gram FD 410 SERIES User manual

SERIES / SERIE
FD
410
OPERATION MANUAL
MANUAL DE UTILIZACION

2
INDEX English
Safety information 6
Installation 6
Preparatory before using 7
Storage 7
Unfolding the package 7
Packing list 8
Installation of the balance 9
Usage Conditions 9
Installation sequence 9
Install the balance with density measurement device 10
Connect the Power Adaptor 10
Install the External Facilities 10
Preheat Time 11
Adjust the Level Gauge 11
Display description 11
Keys description 12
Calibration 13
Basic weighing (Tare function) 13
Solid / liquid density measurement 14
Test solid material density 14
Test liquid material density 16
User setups 17
Print setup 17
Set baud rate and calibration mode 18
Restoring factory setup 19
Backlight setup 19
Temperature setup 20
State of goal object setup 20

3
Media parameters setup 21
Additional functions 21
Communication with a computer 22
RS-232 Interface hardware 24
Routine maintenance and troubleshooting 25
Troubleshooting 25
Clearance 25
Clearing the stainless steel surface 25
Safety check 26
Troubleshooting 26
Technical conditions 28
Technical parameters 28
Guarantee 29

4
ÍNDICE Español
Información de seguridad 30
Instalación 30
Antes de utilizar la balanza 31
Entorno de la balanza 31
Embalaje 31
Lista de material 32
Instalación de la balanza 33
Condiciones de uso 33
Montaje de balanza con vitrina 33
Instalación del kit de densidad 33
Conectar el adaptor 34
Instalación de equipos externos 34
Tiempo de Precalentamiento 34
Nivelar la balanza 34
Descripción del display 35
Descripción de las teclas 36
Calibración 36
Pesaje básico 37
Medición de la densidad de líquidos y sólidos 37
Densidad de material sólido 37
Densidad de líquido 39
Configuración de parámetros 41
Configuración de la impresión 41
Configuración de la velocidad de transmisión y modo de calibración 43
Restablecer las configuraciones de fábrica 43
Configuración de la iluminación del display 44
Configuración de la temperatura 44
Predeterminar el tipo de muestra (sólido o líquido) 45

5
Configuración de los parámetros de la media 45
Funciones opcionales 46
Comunicación a un ordenador 47
Interface RS-232 48
Rutina de mantenimiento y solución de problemas 49
Solución de averías 49
Limpieza 49
Limpieza de la superfiie de acero inoxidable 49
Revisión de seguridad 50
Solución de problemas 50
Condiciones técnicas 51
Parámetros técnicos 52
Garantía 53

6
ENGLISH
SAFETY INFORMATION
• To avoid unnecessary damage to the balance, please pay attention to the
following tips.
• Please do not use this balance in dangerous area.
• Only the trained technicians could operate this balance.
• Please turn off the power of the balance before connect it or disconnect
it with other facilities.
• If the environment requires a higher safety standard, please follow the
relevant installation instructions.
• Excessive electromagnetic interference will make the displayed value
in this balance change. Once the interference is dismissed, the balance
could operate in normal way.
• Please avoid any liquid on the surface of the balance. A piece of lightly
damp cloth is allowed to wipe the balance.
INSTALLATION
• Please make sure the local voltage is in line with the rated voltage on the
name board.
• Please pay special attention when use RS-232 as the pins location might
be incompatible with our facilities. Please check the pins locations before
the connection and turn off the connection of different configuration.
• If the facility or the power cord has apparent damage, please turn off

7
the power, put it or them in a safe place and do not use it or them before
they are fixed.
• This balance could only be connected to our accessories or optional
fittings. We are not responsible for any modification the operator makes
to our balance, including using the facilities and cable which are not
supplied by us. However, we are always ready to offer the operation
norms information.
• Please do not open the balance. If the guarantee lable is damaged, our
quality guarantee will automatically cease being effective.
• If the balance does not work well, please contact your local distributor or
our customer service center.
PREPARATORY BEFORE USING
Storage
This balance requires an environment which is free from excessive high or
low temperature, corrosive, vibration, air current and collision.
Unfolding the package
• Unfold the package and check if there is any outer damage of the balance.
• If there is outer damage, please refer to section routain maintenance
and troubleshooting.
• Please keep all the package for possible transportation in the future.
When pack the balance, please remove all the cables to avoid unnecessary
damage.
8
Packing list
• The balance
• Weighing pan
• Pan support
• Glass windshield
• Density accesories
• Power adapter
• User manual
wind shield
RS232 ports erial no. power port
the balance
Plan view
Back viewTop view
adjustable feet
pan support
display
level gauge
panel
screw hole for
wind shield
weighing
pan

9
INSTALLATION OF THE BALANCE
Put it in a proper place, please avoid the following situations:
• Much heat and direct sunlight.
• Air currents and vibrations.
• Excessive moisture.
Usage Conditions
Please do not lay the balance in a quite damp palce for a long time. If the
balance is transferred from a lower temperature environment to a higher
temperature environment, please lay it there with power off foraround 2 hours.
Installation sequence
• Assemble the parts in the
indicated order.
4
3
2
1

10
Install the balance with density measurement device
1. Bracket
2. Beaker holder
3. Beaker
4. Convex holder (concave holder)
1. Put the bracket on the balance and adjust it to the right angle.
2. Put the beaker support and beaker onto the bracket in proper sequence.
3. Fill the beaker 5mm from the rim of it.
4. Test the temperature of liquid with thermometer.
5. Choose the right holder and hang it on the holder.
Connect the Power Adaptor
Only the power adaptor offered by us is allowed.
• Connect the power adaptor to the balance
• Connect the power adaptor to the power socket
Install the External Facilities
Make sure to turn off the balance before connect it or disconnect it with
external facilities (such as printer or computer)
1
2
3
4
5
1
2

11
Preheat Time
To assure the measure accuracy, the balance must be preheated for 30
minutes before normal operation.
Adjust the Level Gauge
Purpose:
• Adjust the level gauge of the balance, the level
gauge needs to be adjusted once its place is
changed. The two front bottom bolts are used
to adjust the level gauge.
• Spin the two bolts as shown in the figure until
the bubble in the level gauge is in the center
of the circle.
• Normally, it needs to be adjusted repeatedly.
DISPLAY DESCRIPTION
L
R
R
R
L
L

12
1. Weighing Units
2. Level Gauge
3. Weighing Mode Signs: Density: Density Measurement Mode
Net: Tare Weight / Gross Weight / Net Weight
4. Capacity / Readability
5. OK indicator: stable display
Display Information:
OK - Reading shown is stable.
g - Reading shown is given in grams.
g/cm3- Reading shown is given in density units.
------- The balance is developing a stable reading
UNABLE – Error operation.
HHHHH – The weight on the pan exceeds the max. capacity of the balance.
LLLLLL – The pan is not properly seated or has been removed.
KEYS DESCRIPTION
Menu key
Calibration / Adjustment key
Print / Output key
Function / Confirmation key

13
Tare key
Power switch
CALIBRATION
Procedure
1. Adjust the level gauge and preheat it for 30 minutes.
2. Press key.
3. Press key, the balance will read its full range (e.g.200), press
key repeateadly, it reads the calibration point within the range (e.g.200,
100, ...).
4. Choose one calibration point and place the right weight on the pan. Press
key, the balance starts calibration, “ACAL” displayed.
5. When the external calibration is 200.000g finished, the balance reads the
value of the weight on the pan (e.g.200).
BASIC WEIGHING (Tare function)
Procedure
1. Press the key , the balance will automatically proceed system
initialization and deduct the tare weight.
2. Place the container on the weighing pan.
3. Press the key.

14
4. Place the simple object in the container.
5. Print the weight value pressing the key.
SOLID / LIQUID DENSITY MEASUREMENT
Applied formula:
Sample density = Weight in the air / (Weight in the air – Weight in the liquid)
* Liquid density
Test solid material density
Because the buoyancy of the liquid density depends on the temperature,
temperature varies 1ºC, the density of distilled water will change 0.02%.
In order to modify the effect of temperature on density, please set the
temperature refer to function setting section:
Step Procedure (Example) Key / Instruction Display
1 Preheat the balance for 30 min
2 Tare the balance 0.000g
3 Set sample state (solid)
CEnTIg
ShaPE
SOLID
0.000g

15
4 Set liquid’s temperature
(press key to
increase,press
key to reduce)
CEnTIg
20
number flickers
0.000g
5Set media parameter
(distilled water)
CEnTIg
SHAPE
COEFF
1
0.000g
6Put the measured sample onto
the upper plate 7.788g
7 Save sample’s weight in the air 7.788g
8 Take off the sample 0.000g
9Test sample’s weight in the
liquid 6.889g
10
Save sample’s weight in the
liquid and display the counted
value
1.221g/cm³
11 Sign out density measurement 0.000g
If necessary for repeating, please start the procedure from step 5.

16
Test liquid material density
Step Procedure (Example) Key / Instruction Display
1 Preheat the balance for 30 min
2 Tare the balance 0.000g
3 Set sample state (liquid)
CEnTIg
ShaPE
SOLID
LIQUID
0.000g
4
Set weight’s density, assume
the weight’s density is 2.24g/
cm³ (if the weight’s density is
unknown, refer to A. to test the
weight’s density) (two times)
(repeat)
CEnTIg
SHAPE
COEFF
1
SET DP.
SET .DP
1.00
2.24
2.24 flickers
0.000g
5Put the weight on the upper
plate 7.788g
6Save the weight’s weight in the
air 7.788g

17
7 Take off the weight 0.000g
8Test the weight’s weight in the
liquid 6.889g
9
Save the weight’s weight in the
liquid and display the counted
value
0.98g/cm³
10 Take off the weight and back to
weighing state
If necessary for repeating, please start the procedure from step 4.
USER SETUPS
The balance could be set up to meet individual requirement.
1. Press the key to enter setup program.
2. Press the key to choose the parameter to be set up and then press
the key to confirm.
3. Anytime to exit the setup program, press the key, it reads “ESC”,
then press the to confirm.
PRINT SETUP
There are three types of printing mode for electronic balance:
Stable Output (STABLE): output after reading value is stable.
Instant Output (INSTANT): instant output after press key.
Interval Output (INTERVAL): interval output with preset time.

18
Users can set up Line Feed for label printing.
※ Printing mode and line feed numbers set apart, after setting up printing
mode, line feed numbers can be set.
Please set up printing mode according to below steps:
1. Press the key, the display will show “PrInT”.
2. Press key to enter into menu, “STAbLE” displayed, default is to
stabilize the output.
3. Press key to choose printing mode you would like, press key
for confirmation.
4. After enter into menu, press key to choose Line Feed “InTEr”,
press key for confirmation, balance displays “0 SEC”, press
key repeatedly to check the preset time interval, then press key for
confirmation. If to choose “0 SEC”, it means Continuous Output.
5. Press key to back to normal weighing mode.
6. Enter into Print Setup Menu, press key repeatedly, choose Line
Feed to set up “LinEFd”.
7. Press key repeatedly to check the preset line feed numbers (1-18).
After choosing proper line feed numbers, press key for choice, back
to normal weighing mode.
SET BAUD RATE AND CALIBRATION MODE
1. Press key for entering into Menu Setup Mode.
2. Press key repeatedly till “bAud” displayed.

19
3. Press key to enter into Baud Rate Setup Menu, “300” displayed.
4. Press key repeatedly till the baud rate you want displays, then press
key for confirmation, after “PArITy” displays, set up Parity Check.
5. Press key for choosing Parity Check, balance first displays “nOnE”
(no check).
6. Press key for checking choice, “Odd” means odd number check,
“EvEn” means even number check.
7. Press key for confirming proper checking type, then back to normal
weighing mode.
RESTORING FACTORY SETUP
1. Press key for entering into menu of the balance, “PrInt” displays.
2. Press key repeatedly till “InITIA” displays.
3. Press key for confirmation, after the balance displays “BUSY”, back
to normal weighing mode, Restoring Factory Setup is over.
BACKLIGHT SETUP
1. Press key for entering into menu of the balance, “PrInt” displays.
2. Press key repeatedly till “bLgHT” displays, press key for
confirmation, balance displays “1 nIn”.
3. Press key repeatedly to choose backlight time (1, 2, 3, 5, 10, 15, 30,
60 are options, means backlight turns off time range is 1-60 minutes).

20
4. Press key for confirmation, balance can be back to normal weighting
mode.
TEMPERATURE SETUP
1. Press key, “CEnTIg” displays.
2. Press key, default “20” temperature value displays (or the
temperature value set last time displays). If the referential liquid’s
measured temperature is lower than the displayed temperature, press
key to reduce till the reading is same as the referential liquid’s
measured temperature. If the referential liquid’s measured temperature
is higher than the displayed temperature, press key to increase till
the reading is same as the referential liquid’s measured temperature.
3. After setting up temperature, press key, value flickers, press
key for confirmation, Temperature Setup is over.
STATE OF GOAL OBJECT SETUP
Before density measurement, please set up the State of Goal Object, steps
are as follows:
1. Press key, “CEnTIg” displays;
2. Press key, “SHAPE” displays;
3. Press key, “SOLID” displays;
Remarks:
If measuring solid’s density, press key for confirmation after step
(3), State of Goal Object Setup is over; If measuring liquid’s density,
Table of contents
Languages:
Other Gram Scale manuals

Gram
Gram AHV Series User manual

Gram
Gram WHITE MEL SERIES User manual

Gram
Gram GX Series User manual

Gram
Gram CM-3 User manual

Gram
Gram C3 Series User manual

Gram
Gram SBZ-600 User manual

Gram
Gram ACUREX TXM User manual

Gram
Gram FC Series User manual

Gram
Gram D3 Series User manual

Gram
Gram C9 Series User manual