manuals.online logo
Brands
  1. Home
  2. •
  3. Brands
  4. •
  5. GRAPHTEC
  6. •
  7. Plotter
  8. •
  9. GRAPHTEC CE7000-130AP User guide

GRAPHTEC CE7000-130AP User guide

CE7000-130AP SETUP MANUAL
This manual provides the setup procedure.
For details on each function, refer to the instruction manual
(PDF) in the supplied CD.
Checking the Accessories
Please check that all the accessories are complete.
If you find any accessories missing, please contact the
distributor where you purchased or our customer center
immediately.
Accessories
* In addition, various information may be attached.
* Accessories may vary depending on the sales area.
* For details, please contact the distributor where you
purchased.
Dedicated accessories
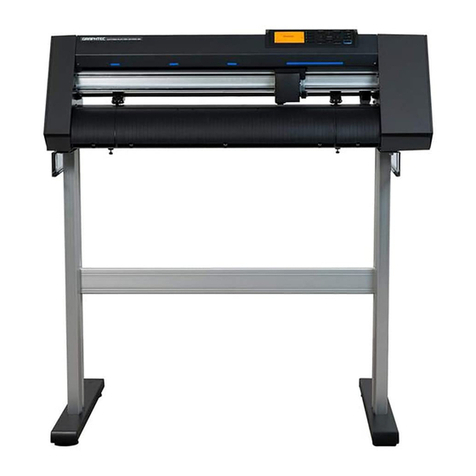
A stand (with a basket) is supplied.
Installing driver/software
The latest driver / software version and installation
instructions are available at:
http://www.graphteccorp.com/support/index.html
Please download it if necessary.
•Windows driver (Do not connect the computer to the cutting
plotter before installing.)
CD
(Various software/User's Manual (pdf))
1 pc.
SETUP MANUAL, TO ENSURE SAFE
AND CORRECT USE,
Cutter Blade Manual 1 of each
Cutter plunger (PHP33-CB09N-HS) 1 pc. Cutter blades (CB09UB (1P)) 1 pc.
Oil-based ballpoint pen plunger
(PHP34-BALL) 1 set
Cutter blade adjustment magnifier
(PM-CT-001) 1 pc.
Oil-based ballpoint pen
(KB700-BK-1P) 1 pc.
Power cable 1 pc. USB cable 1 pc.
Connecting to the Power
Make sure that the power switch is off ( side), and make a
connection between the power connector of the cutting
plotter and the AC outlet of specified voltage using the
supplied power cable.
Initial setup screen
The initial setup screen is displayed only when the power is
first turned on. Then select "DISPLAY LANGUAGE" and
"LENGTH UNIT". When the power switch is turned on
(I side), a message is displayed after displaying the version.
Select a language (English) and press the [ENTER] key.
Select the length unit and press the [ENTER] key.
It will return to default screen.
Aligning the push roller
Lower the media set lever to raise the push rollers. Adjust the
left and right push roller positions according to the width of
the media. Use the roller position guide to place the push
rollers on both ends of the media and the right push roller on
the rightmost wide grit roller.
Place all push rollers on the grit roller.
Push roller’s hold-down force
In models with a push roller’s hold-down force switching
mechanism, make the left and right push roller’s hold-down
force equal. For details on the each push roller’s force
setting, refer to the instruction manual.
Connection to computer
Make a connection between the cutting plotter and the
computer using your interface cable. The available interface
is USB/Network/RS-232C (It depends on the sales area.).
* Please install driver before connecting.
Preparation of cutter plunger
Set the cutter blade in the cutter plunger and then use it with
the cutter plotter. Set the cutter blade in the cutter plunger
according to the instruction manual supplied with the cutter
plunger.
Adjusting the blade length
Refer to the instruction manual supplied with the cutter
plunger and adjust the blade length according to the media.
The blade will gradually extend to suit the thickness of the
media being cut; the optimal length is slightly greater than
the thickness of the media. A test cut will then be performed,
and the blade length adjusted if there is any media left uncut.
When using the thin media such as a film, adjust the blade
length using the supplied loupe. (Refer to User’s Manual.)
Media
Optimal blade length
Media thickness
Attaching a Tool
Loosen the screw of the tool holder and push the tool
(plunger) completely until it touches the top surface of tool
holder while pushing up the tool holder up. Make sure that
the bracket (gray) is engaged on the tool's flange, and then
tighten the screw.
This tool holder
is not set backward.
Seen from above
Tool holder
(Forward)
FlangeBracket to hold tool
Grit roller
Push roller
position guide
Push roller
Push rollers
Media
Grit roller
Media sensor
Hold-down force Low Hold-down force Medium Hold-down force Strong
<Connection via USB interface>
<Connection via network (LAN) interface>
<Connection via RS-232C interface>
RS-232C cable (commercially available product)
(9-pin female - 9-pin female straight connected cable)
USB cable (Accessories)
Network (LAN) cable
(Commercially available product)
Media set lever
Tool holderFlangeBracket to hold tool
Media set selection
Load the media, raise the media set lever, and lower the
push roller. Select the media type according to the set media
type.
ROLL-1 FRONT EDGE:
The media is cut from the front edge. The media width and
front edge are detected.
ROLL-2 CURRENT POSITION:
The media is cut from the set position. Only the media
width is detected.
SHEET:
The sheet media is cut. The media width, front edge and
back edge of sheet media are detected.
CONTINUE:
This is displayed when the media set lever is raised and
lowered again after loading the media once. The previous
plotting/cutting range and tool position are maintained.
After the media is detected, the Ready screen is displayed.
1
2
3
4
Cutting condition setting
Press the "COND/TEST" key and set the cutting conditions.
TOOL, OFFSET, SPEED, FORCE and ACCELERATION are
included in the setting items. For details on each setting item,
refer to the USER’S MANUAL.
Check the result of the test cut and adjust the SPEED,
FORCE and ACCELERATION to the optimum value. When a
general cutting media is used, set to a value that will cause a
thin scratch on the backing sheet.
Cutting test
Press the [ ] key on the CONDITION setting screen to start
a test cut.
How to check offset
Check if the offset value is set correctly by following.
X
Y
Not enough adjustment.
Increase the offset value.
Optimal offset value.
Too much adjustment.
Decrease the offset value.
Check the UP length
when cutting.
When the UP length is
not enough, those that
are cut during cutting,
may come off.
UP length

Other manuals for CE7000-130AP

1

Other GRAPHTEC Plotter manuals

GRAPHTEC CE5000 SERIES User manual

GRAPHTEC

GRAPHTEC CE5000 SERIES User manual

GRAPHTEC Craft ROBO CC100 User manual

GRAPHTEC

GRAPHTEC Craft ROBO CC100 User manual

GRAPHTEC FC9000-75 User manual

GRAPHTEC

GRAPHTEC FC9000-75 User manual

GRAPHTEC FCX4000 SERIES User guide

GRAPHTEC

GRAPHTEC FCX4000 SERIES User guide

GRAPHTEC FC8600-60 User manual

GRAPHTEC

GRAPHTEC FC8600-60 User manual

GRAPHTEC FC4500 User manual

GRAPHTEC

GRAPHTEC FC4500 User manual

GRAPHTEC CE6000 SERIES User guide

GRAPHTEC

GRAPHTEC CE6000 SERIES User guide

GRAPHTEC CE7000-130AP User manual

GRAPHTEC

GRAPHTEC CE7000-130AP User manual

GRAPHTEC FC7000-75 User manual

GRAPHTEC

GRAPHTEC FC7000-75 User manual

GRAPHTEC CE5000-120AP User manual

GRAPHTEC

GRAPHTEC CE5000-120AP User manual

GRAPHTEC FC3100-120 User manual

GRAPHTEC

GRAPHTEC FC3100-120 User manual

GRAPHTEC FC7000 Series User manual

GRAPHTEC

GRAPHTEC FC7000 Series User manual

GRAPHTEC CE7000-40 User manual

GRAPHTEC

GRAPHTEC CE7000-40 User manual

GRAPHTEC FC8000 Series User manual

GRAPHTEC

GRAPHTEC FC8000 Series User manual

GRAPHTEC FC8600 SERIES User guide

GRAPHTEC

GRAPHTEC FC8600 SERIES User guide

GRAPHTEC FC2250 Series User manual

GRAPHTEC

GRAPHTEC FC2250 Series User manual

GRAPHTEC FC4100 series User manual

GRAPHTEC

GRAPHTEC FC4100 series User manual

GRAPHTEC Craft ROBO CC200 User guide

GRAPHTEC

GRAPHTEC Craft ROBO CC200 User guide

GRAPHTEC CE2000-60 User manual

GRAPHTEC

GRAPHTEC CE2000-60 User manual

GRAPHTEC OPS675 User manual

GRAPHTEC

GRAPHTEC OPS675 User manual

GRAPHTEC MP303-04 User manual

GRAPHTEC

GRAPHTEC MP303-04 User manual

GRAPHTEC FC9000 Series User manual

GRAPHTEC

GRAPHTEC FC9000 Series User manual

GRAPHTEC FC4200-50 User manual

GRAPHTEC

GRAPHTEC FC4200-50 User manual

GRAPHTEC FCX4000 SERIES User manual

GRAPHTEC

GRAPHTEC FCX4000 SERIES User manual

Popular Plotter manuals by other brands

Ioline Signature 5000 Technical bulletin

Ioline

Ioline Signature 5000 Technical bulletin

MIMAKI DS-1600 Operation manual

MIMAKI

MIMAKI DS-1600 Operation manual

Jeppesen fishsafe Operation manual

Jeppesen

Jeppesen fishsafe Operation manual

SONOPLOT MICROPLOTTER II manual

SONOPLOT

SONOPLOT MICROPLOTTER II manual

Roland Camm-1 CX-24/12 user manual

Roland

Roland Camm-1 CX-24/12 user manual

MIMAKI CG-60EX Operation manual

MIMAKI

MIMAKI CG-60EX Operation manual

MUTOH ValueCut II VC2-600 user manual

MUTOH

MUTOH ValueCut II VC2-600 user manual

MIMAKI JFX 200-2513 Cleaning procedure

MIMAKI

MIMAKI JFX 200-2513 Cleaning procedure

VDO MAP 11csE Plus GPS user manual

VDO

VDO MAP 11csE Plus GPS user manual

MUTOH RJ-901M Maintenance manual

MUTOH

MUTOH RJ-901M Maintenance manual

Redsail Cutting Plotter user manual

Redsail

Redsail Cutting Plotter user manual

MIMAKI CF2 Series Operation manual

MIMAKI

MIMAKI CF2 Series Operation manual

MIMAKI cg-100AP instruction manual

MIMAKI

MIMAKI cg-100AP instruction manual

MIMAKI CF3-1631 Operation manual

MIMAKI

MIMAKI CF3-1631 Operation manual

Furuno GP-280 Operator's manual

Furuno

Furuno GP-280 Operator's manual

Skycut C Series manual

Skycut

Skycut C Series manual

Murrplastik MVPS G3 G Installation, Adjustment, Operation

Murrplastik

Murrplastik MVPS G3 G Installation, Adjustment, Operation

MUTOH IP-500 Series user manual

MUTOH

MUTOH IP-500 Series user manual

manuals.online logo
manuals.online logoBrands
  • About & Mission
  • Contact us
  • Privacy Policy
  • Terms and Conditions

Copyright 2025 Manuals.Online. All Rights Reserved.