3
®
GB
E
F
D
I
NL
P
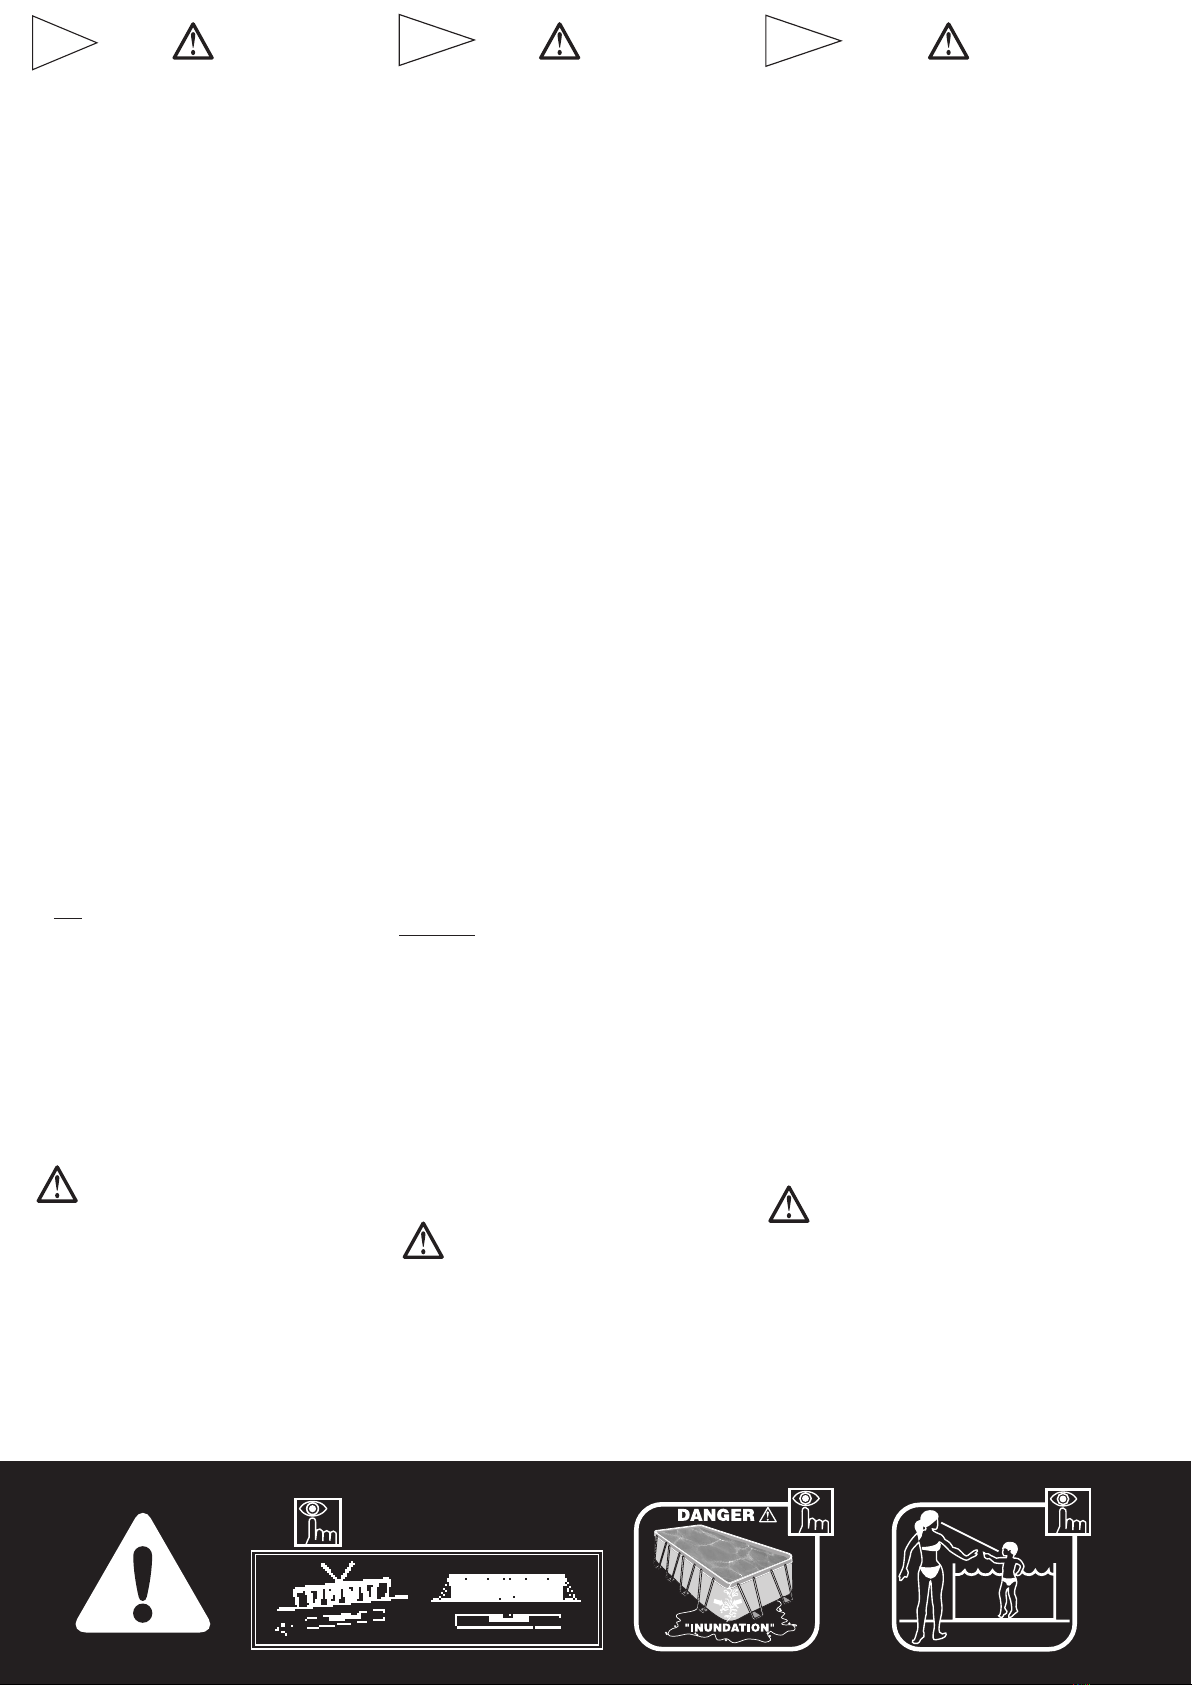
CAUTION: REMOVE LADDER FROM POOL AFTER USE.
ATENCION: QUITE LA ESCALERA DE LAPISCINA DESPUES DEL USO.
ATTENTION:RETIRER L’ÉCHELLE DE LA PISCINE APRÈS UTILISATION.
ACHTUNG: ENTFERNEN SIE DIE POOLLEITER NACHDEM GEBRAUCH.
ATTENZIONE:TOGLIERE LASCALA DELLA PISCINA DOPO L’USO.
OPGELET:VERWIJDER, NA GEBRUIK, DE TRAP VAN HET ZWEMBAD.
ATEN ÇÃO: T IRE A ESCADA DA PISCINA DEPOIS DA UTILIZAÇÃO.
GB
E
F
D
I
NL
P
CAUTION: RISK OF FLOODING IN EVENT OF BREAKAGE.
ATENCION: RIESGO DE INUNDACION EN CASO DE ROTURA.
ATTENTION:RISQUE D’INONDATION EN CAS DE CASSURE.
ACHTUNG: BEI BRUCH BESTEHT ÜBERSCHWEMMUNGSGEFAHR.
ATTENZIONE:RISCHIO DI INONDAZIONE IN CASO DI ROTTURA.
OPGELET:IN GEVAL VAN BREUK: RISICO VOOR OVERSTROMING.
ATENÇÃO: RISCO DE INUNDAÇÃO EM CASO DE ROTURA.
GB
E
F
D
I
NL
P
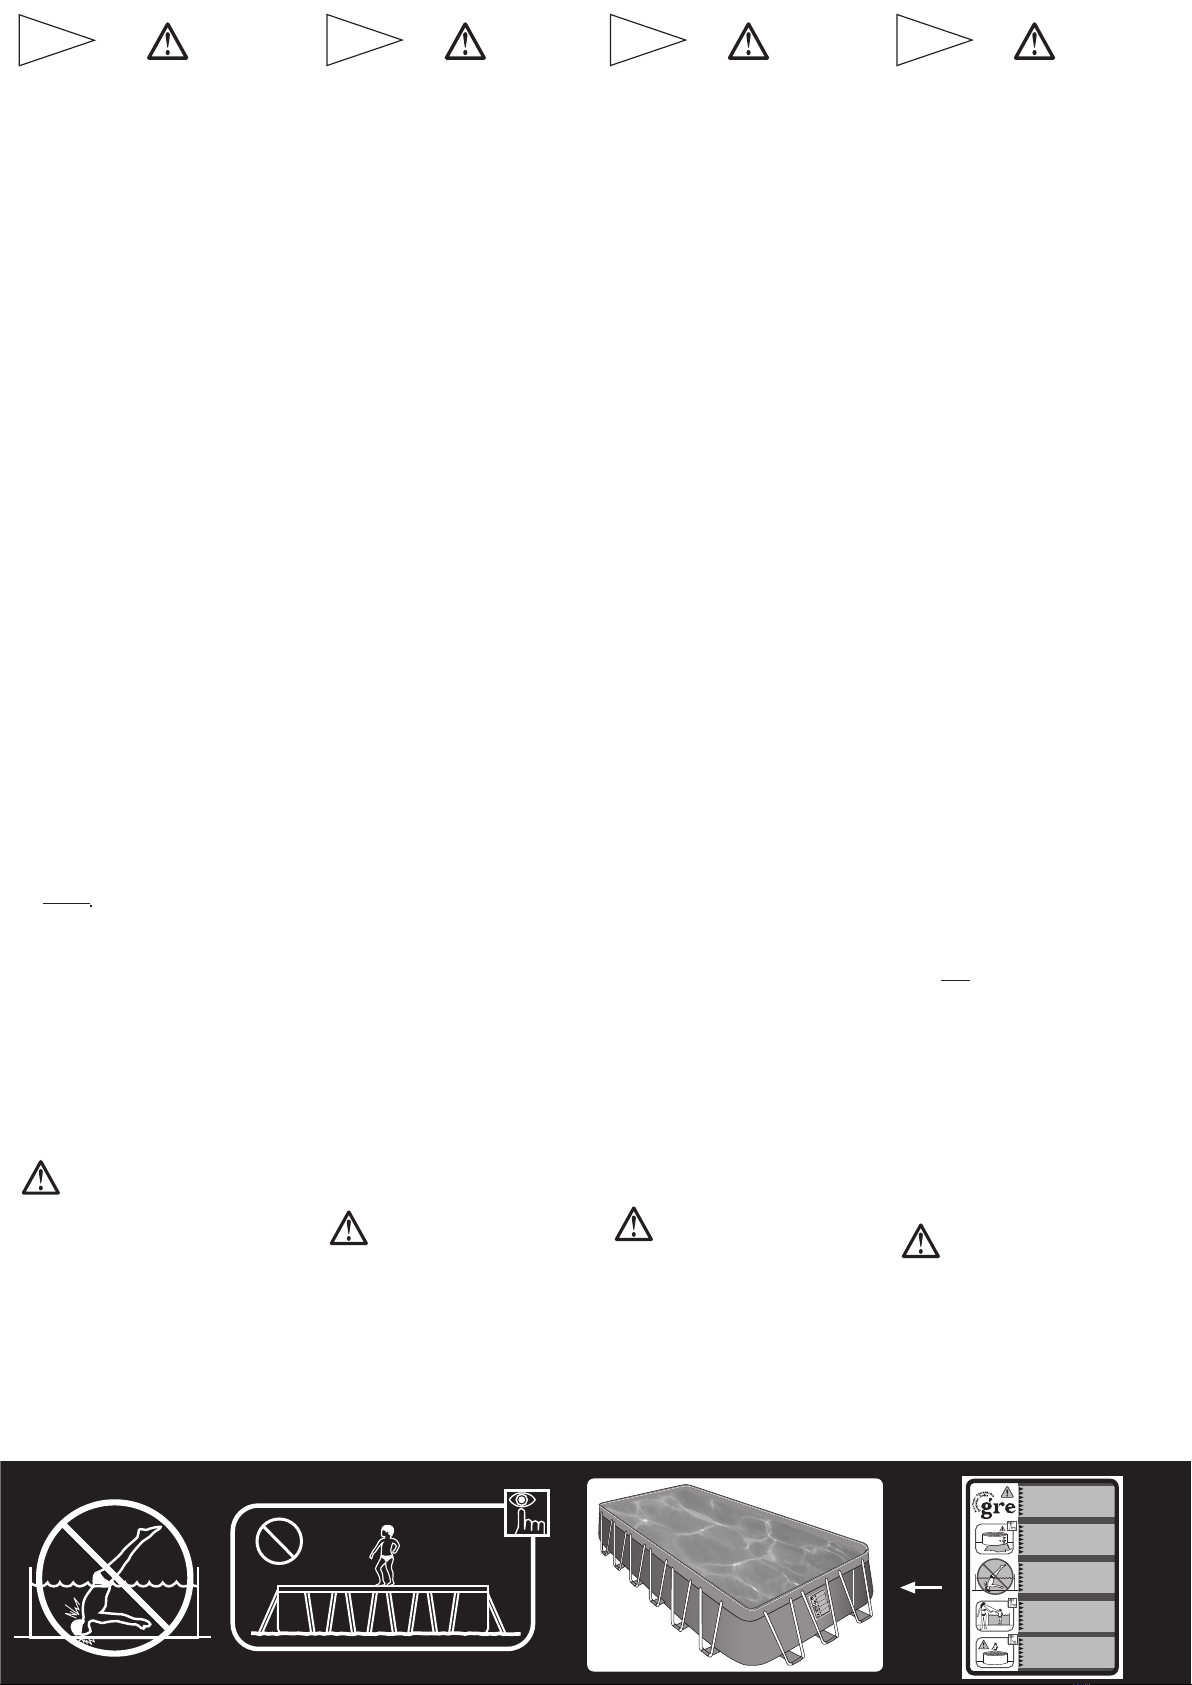
CAUTION: DO NOT DIVE IN HEAD FIRST.
ATEN CION : NO SE LANCE DE CABEZAA LA PISCINA.
ACHTUNG: KEINE KOPFSPRÜNGE MACHEN.
ATTENZIONE:NON TUFFARSI DI TESTA.
OPGELET:NIET DUIKEN.
ATEN ÇÃO: NÃO SE TIRE DE CABEÇA.
ATTENTION:NE PLONGEZ PAS LA TÊTE LA PREMIÈRE.
GB
E
F
D
I
NL
P
CAUTION: “ UNSUPERVISED, YOUR CHILD IS IN DANGER ”.
ATENCION: “ SIN VIGILANCIA, SU NIÑO ESTÁ EN PELIGRO ”.
ATTENTION:“SANS SURVEILLANCE LES ENFANTS SONT EN DANGER”.
ACHTUN G: “OHNE AUFSICHT BEFINDET SICH IHR KIND IN GEFAHR”.
ATTENZIONE:“NON VIGILATA, PERICOLO PER I BAMBINI ”.
OPGELET:“ ZONDER TOEZICHT LOOPT UW KIND GEVAAR ”.
ATENÇÃO: “ SEM VIGILÂNCIA AS CRIANÇAS ESTÃO EM PERIGO ”.
GB
E
F
D
I
NL
P
CAUTION: DO NOT WALKALONG THE EDGE OF THE SWIMMING-POOL.
ATENCION: NO ANDAR SOBRE EL BORDE DE LA PISCINA.
ATTENTION:NE PAS MARCHER SUR LES BORDS DE LA PISCINE.
ACHTUNG: POOLRAND NICHT BETRETEN ODER BEGEHEN.
ATTENZIONE:NON CAMMINARE SUL BORDO DELLA PISCINA.
OPGELET:NIET OVER DE RAND VAN HET ZWEMBAD LOPEN.
ATENÇÃO: NÃO ANDAR NAS BORDAS DA PISCINA.
"INUNDATION"
DANGER
WARNING IMPORTANTE IMPORTANT ACHTUNG ATTENZIONE OPGELET ATENÇAO
WARNING IMPORTANTE IMPORTANT ACHTUNG ATTENZIONE OPGELET ATENÇAO
WARNING IMPORTANTE IMPORTANT ACHTUNG ATTENZIONE OPGELET ATENÇAO
WARNING IMPORTANTE IMPORTANT ACHTUNG ATTENZIONE OPGELET AT ENÇAO
BESONDERS FÜR KINDER UNTER 5 JAHREN.
UNFÄLLE PASSIEREN NICHT IMMER NUR DEN ANDEREN!
BEUGEN SIE POTENTIELLEN UNFÄLLEN VOR!
“DIE NICHTBEACHTUNG DER EMPFOHLENEN
WARTUNGSARBEITEN KANN ZU SCHWEREN
GESUNDHEITSSCHÄDEN, BESONDERS FÜR KINDER,
FÜHREN.”
SICHERHEITSHINWEIS
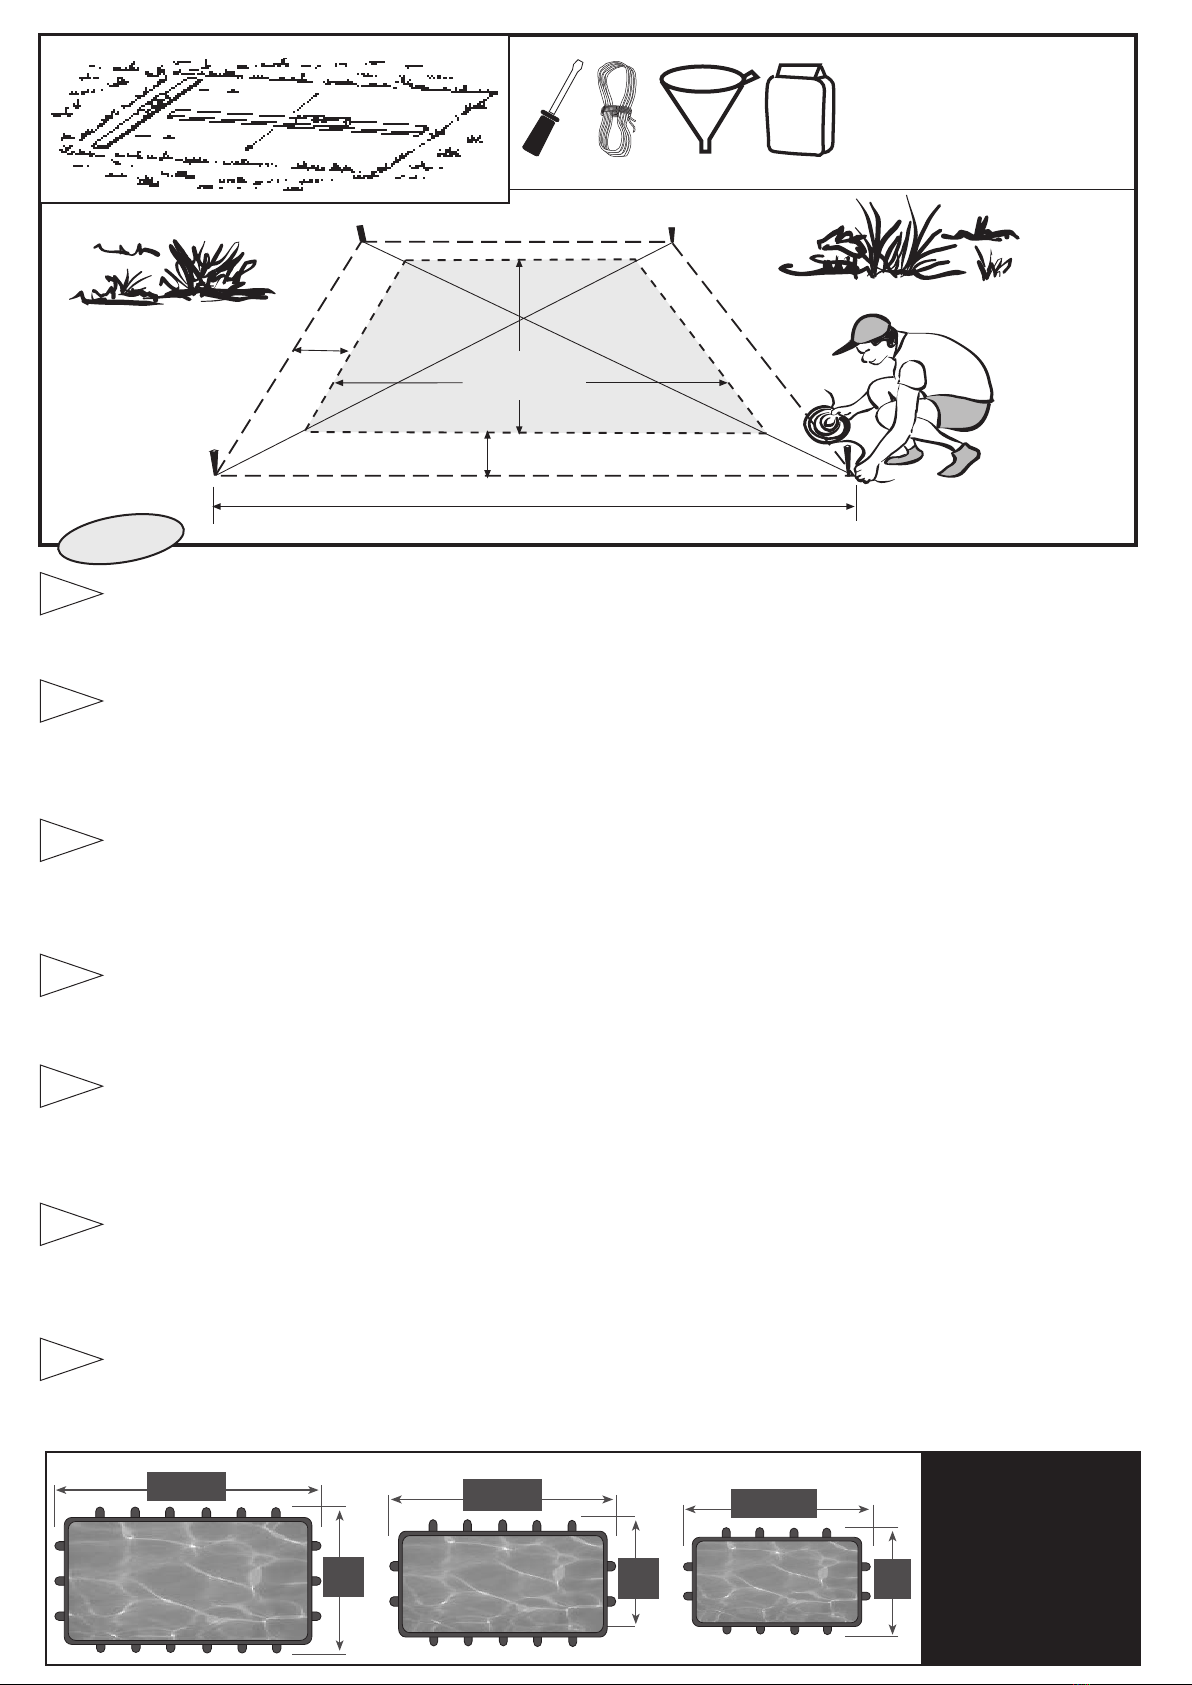
• Vor der Montage bitte die Sicherheitshinweise beachten.
• Aus Sicherheitsgründen dürfen Schwimmbecken nicht auf Terrassen
und Balkone aufgestellt werden.
• Wichtig: Wählen Sie bitte deshalb den Standort für Ihr
Schwimmbecken derart aus, daß das bei einem Unfall oder
Beckenbruch auslaufende Wasser ungehindert abfliessen kann,
um Schäden für Menschen, Tiere, Gebäude oder Grundstücke zu
vermeiden.
• Hinweis: Dieses Becken wurde für Kinder konzepiert. Um Schäden
an Personen und an dem Becken zu verhindern, sollte man sich
nicht auf dem Beckenrand stellen.
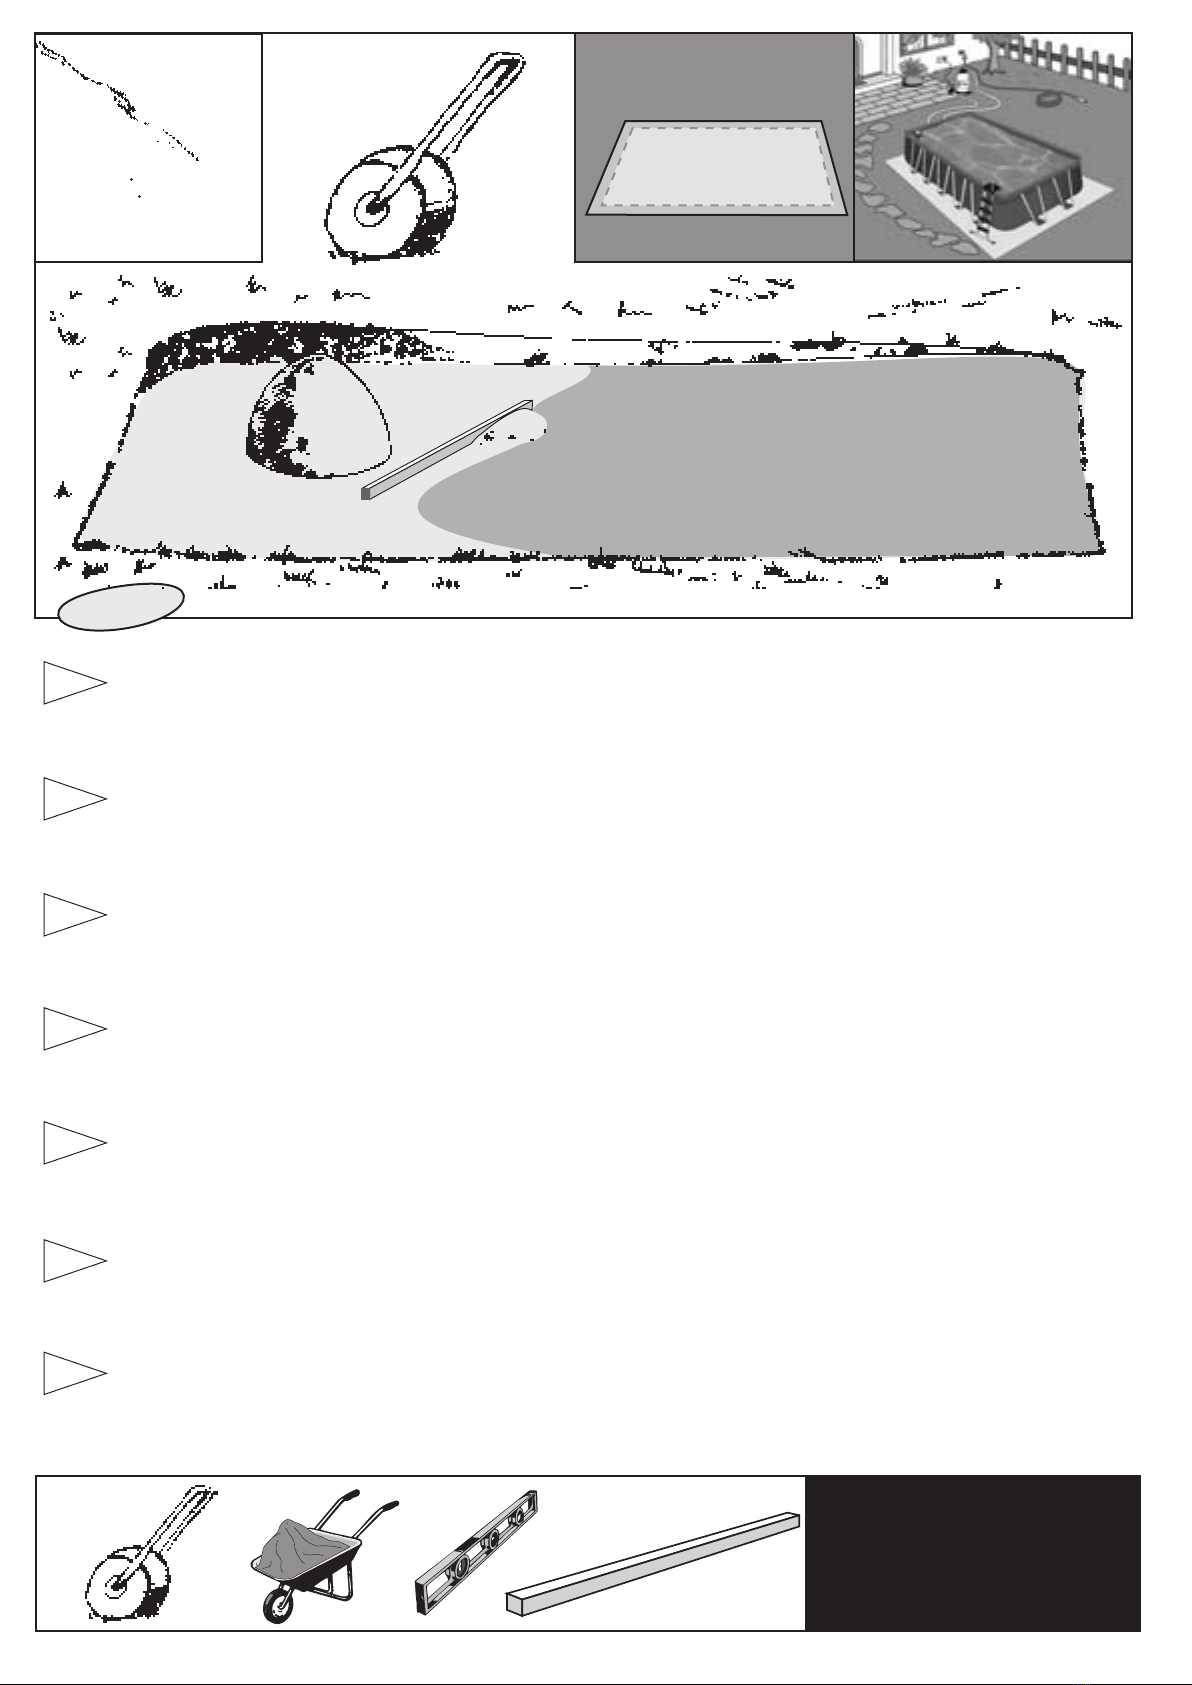
• Das Becken muß auf einer ebenen Fläche aufgestellt werden, da
sonst die Folie unter zu großem Druck steht und dadurch brechen
könnte.
• Kopfsprünge in das Becken und Springen vom Beckenrand sind
untersagt.
• Nachts oder bei unzureichender Beleuchtung darf nicht gebadet
werden.
• Unter Einfluß von alkoholischen Getränken, Arzneimitteln, Drogen
und Ähnliches darf nicht gebadet werden.
• Kämpfe und gewalttätige Spiele sind im Becken untersagt.
•Niemals zwischen der Poolwand und der Leiter schwimmen (es
besteht die Gefahr, eingeklemmt zu werden).
•Tiere (Hund, Katze usw. ) dürfen nicht im Pool baden.
• Manipulieren Sie die Reinigungsanlage niemals, wenn Sie am
Körper oder der Boden feucht sind (tödlicher elektrischer Schlag).
• Nicht ins Pool springen oder den oberen Rand begehen.
WICHTIGER HINWEIS
Überwachen und bei Bedarf handeln:
- Beaufsichtigen Sie Kinder aus nächster Nähe und halten Sie sie
jederzeit im Auge. Wählen Sie einen Verantwortlichen für die
Sicherheit und haben Sie besonders Acht, wenn viele Badegäste
im Pool sind.
- Halten Sie für Nichtschwimmer Schwimmringe bereit.
- Sorgen Sie dafür, dass Ihre Kinder so früh wie möglich schwimmen
lernen.
- Vor dem Eintauchen ins Wasser Nacken, Arme und Beine nass
machen.
- Lassen Sie sich in Erster Hilfe unterweisen, um Kinder sofort
versorgen zu können.
- Verbieten Sie Spritzen und Springen im Gegenwart von Kindern
sowie Laufen und ungebärdiges Spielen um den Pool herum.
- Lassen Sie keine Kinder ohne Schwimmweste oder Armbinden
ins Pool, die Nichtschwimmer oder nicht in Begleitung eines
Erwachsenen sind.
- Hinterlassen Sie kein Spielzeug im oder am unbewachten Pool.
- Halten Sie das Wasser immer peinlich sauber und desinfiziert.
- Produkte zur Wasserbehandlung sind außer Reichweite von
Kindern aufzubewahren.
Vorbeugen:
- Einige Vorrichtungen können zur Sicherheit beitragen, ersetzen
aber keinesfalls die Aufsicht eines Erwachsenen.
- Umzäunung oder Umfassung, die geschlossen gehalten werden
kann.
- Korrekt angebrachte hand- oder automatisch betätigte
Schutzabdeckung.
- Elektronische Kennung (Alarm), wenn etwas oder jemand in den
Pool fällt.
- Griffbereites Telefon in der Nähe des Pools (Handy oder normales
Telefon).
- Griffbereiter Rettungsring oder Stange in der Nähe des Pools.
Bei Unfällen:
- Holen Sie das Kind auf dem schnellsten Weg aus dem Wasser.
- Bemühen Sie sich sofort um Hilfe und folgen Sie den Anweisungen,
die Sie erhalten.
- Ersetzen Sie nasse Kleidung durch trockene.(Bedecken Sie den
Verunglückten mit einer Decke).
- Bringen Sie in unmittelbarer Nähe des Pools eineTafel mit allen
Notrufnummern an: Feuerwehr, Rotes Kreuz, Arzt, Notarzt usw.)
und lernen Sie diese Nummern auswendig.
WICHTIGER HINWEIS: Für alle Filtrierungen gilt die
Installatiosnorm NF C15-100. Danach dürfen frei
zugängliche elektrische Geräte, die in einer En-
tfernung von weniger als 3,50 m vom Pool liegen, nur mit
sehr niedriger Spannung 12 V eingespeist werden.
220 V-Gerate müssen mindestens 3,50 m von Schwimmba-
drand entfernt liegen.
Verwenden Sie Stecker mit30 mA-Differentialunterbrecher.
Bewahren Sie bitte diese wichtigen Hinweise zur späteren
Einsichtsnahme auf.
BEI PROBLEMEN KÖNNEN SIE SICH MIT
UNS UNTER DER FOLGENDEN DEUTSCHEN
TELEFONNUMMER INVERBINDUNG SETZEN:
Deutchland: Tel.: 49 (0) 180 333 0 123 HOT LINE (9 cent/min)
Fax: 49 (0) 7024 92066 69
Österreich: Tel.: 49 (0) 180 333 0 123
Fax: 49 (0) 7024 92066 69
Schweiz, freie nummer: 0 800/563 820
e-mail: info@waterman-pool.com web: www.gre.es
LA SICUREZZA DEI BAMBINI DIPENDE DA VOI.
IL RISCHIO È MASSIMO QUANDO
SONO MINORI DI 5 ANNI.
UN INCIDENTE NON CAPITA SOLO AGLI ALTRI!
PREVENITE I POSSIBILI INCIDENTI!
ATTENZIONE:“LA NON OSSERVANZA DELLE IS-
TRUZIONI
DI MANUTENZIONE PUÒ PROVOCARE GRAVI RISCHI
PER LA SALUTE, IN PARTICO-LARE PER I BAMBINI.”
PRECRIZIONI DI SICUREZZA
• Prima di procedere al montaggio leggere attentamente
le seguenti istruzioni.
• Per sicurezza, non installare mai la piscina su balconi nè
terrazze.
• Importante: Collocare la piscina nelle vicinanze di un punto
di scarico, onde evitare eventuali allagamenti in caso di rottura.
Pensate alla vostra piscina come ad una grossa diga. Se la
piscina non è ben livellata, la pressione potrebbe provocare
la rottura della parete con fuoriuscita di tutta l’acqua in essa
contenuta.Tale volume d’acqua potrebbe causare gravi danni
al suolo e pure alle persone che si trovano nei pressi della
piscina.
• Questa piscina è stata progettata per i bambini.
• Non tuffarsi mai a capofitto nella piscina.
• Non utilizzare la piscina di notte oppure in mancanza di
visibilità.
• Non utilizzare mai la piscina sotto gli effetti di bevande
alcoliche, medicinali, oppure droghe.
• Non permettere eventuali liti nè la pratica di giochi bruschi
in piscina.
• Non nuotare mai fra la parete della piscina e la scaletta
(rischio di restare intrappolati).
• Non fare mai entrare un animale (cane, gatto, ecc…) nella
piscina.
• Non manipolare mai il depuratore con il corpo bagnato o su
un pavimento umido (pericolo di elettrocuzione).
• Non sedersi, non stendersi né camminare
lungo il bordo della piscina.
NORMATIVA DI SICUREZZA
Vigilare ed agire:
- Vigilare i bambini da vicino e costantemente. Scegliere un
responsabile per la sicurezza ed aumentare la vigilanza
quando vi sono molti bagnanti in piscina.
- Prevedere un attrezzatura salvagente per coloro che non
sanno nuotare.
- Insegnare ai propri bimbi a nuotare prima possibile.
- Bagnarsi la nuca, le braccia e le gambe prima di tuffarsi in
acqua.
- Imparare le nozioni di pronto soccorso per aiutare
urgentemente i bambini.
- Vietare i tuffi e i salti in presenza dei bambini, così come le
corse e i giochi bruschi intorno alla piscina.
- Non permettere l'accesso in piscina senza salvagente o
bracciali ai bambini che non sanno nuotare e che non sono
accompagnati da un adulto in acqua.
- Non lasciare giocattoli intorno o dentro la piscina se essa
non è vigilata.
- Tenere sempre l'acqua pulita e disinfettata.
- Conservare i prodotti di trattamento dell'acqua fuori dalla
portata dei bambini.
Prevedere:
- Alcune attrezzature che possono contribuire alla sicurezza,
ma senza sostituirle in nessun caso alla vigilanza di un adulto.
- Recinto o recinzione di protezione il cui accesso si possa
tenere chiuso.
- Copertura di protezione manuale o automatica correttamente
montata e fissata.
- Rilevatore elettronico di caduta in piscina (allarme).
- Telefono accessibile nelle vicinanze della piscina (portatile
o no).
- Galleggiante e pertica nelle vicinanze della piscina.
In caso di incidente:
- Togliere il bambino dall'acqua il più presto possibile.
- Chiedere aiuto tempestivamente e seguire i consigli
eventualmente comunicati.
- Cambiare i vestiti bagnati con dei vestiti asciutti (coprire
l'infortunato con una coperta).
- Memorizzare ed appendere un cartello nelle vicinanze della
piscina con i telefoni del Pronto Soccorso, Pompieri, Croce
Rossa, Emergenza, ecc.
ATTENZIONE: Tutti i filtraggi seguono la norma
di installazione NF C15-100, in base a la quale
ogni apparecchio elettrico, situato ameno di
3,50 m dalla piscina vera e propria, e con libero accesso,
deve essere alimentato a tensione molto bassa: 12 V.
Ogni apparecchio alimentato a 220V, deve essere situato
ad almeno 3,50 m dal bordo della piscina.
Utilizare una presa dotata di disgiuntore differenziale da
30 mA.
Conservare queste istruzioni per future consultazioni
PER OGNI VOSTRA EVENTUALE OCCORRENZA,...
INTERPELLA-TECI!
PER INFORMAZIONITELEFONO:
Italia: Tel.: 800 781 592 Fax.: (33) 4 92 28 03 33
Suizzera, numero verde: 0 800/563 820
DE VEILIGHEID VOOR UW KINDEREN
HANGT VAN UZELF AF!
HET HOOGSTE RISICO LOPEN DE KINDEREN VAN
BENEDEN DE 5 JAAR.
EEN ONGELUK KAN NIET ALLEEN ANDEREN
OVERKOMEN!
VOORKOM MOGELIJKE ONGELUKKEN!
OPGELET:“HET FEIT NIET DE
ONDERHOUDSPLICHTENTE
RESPECTEREN KAN ERNSTIGE RISICO´S
VOOR DE GEZONDHEID OPLEVEREN, IN HET BIJZONDER
VOOR KINDEREN.”
PRAKTISCHEWENKENVOOR DEVEILIGHEID
• Lees eerst aandachtig de volgende instructies door,
voordat U met de montage begint.
• Installeer het zwembad voor de veiligheid niet op balkons
of terrassen.
• Belangrijk: Plaats het zwembad op een plek dichtbij een
afwateringspunt, zodat er zich bij geval van breuk geen
overstromingen kunnen voordoen. Denk aan Uw zwembad
alsof het een grote vijver is. Als het zwembad gedenivelleerd
ligt, kan de druk een breuk in de wand veroorzaken, zodat al
het water weg zal lopen.Deze enorme hoeveelheid aan water
kan belangrijke schade teweegbrengen aan het terrein en
zelfs letsel aan de personen, die zich in de omgeving van het
zwembad bevinden.
• Dit zwembad is ontworpen voor kinderen.
• Nooit in het zwembad duiken.
• Geen gebruik maken van het zwembad bij nacht of bij gebrek
aan zicht.
• Geen gebruik maken van het zwembad als men onder
invloed is van alcoholische dranken, medicijnen of drugs.
• Geen ruzies of bruuske spelletjes veroorloven in het zwembad.
• Nooit zwemmen tussen de wand van het zwembad en de
trap.(Risico in de knel te komen).
• Nooit een dier (hond, kat, enz.) in het zwembad laten
zwemmen.
• Nooit aan de zuiveringsinstallatie werken als uw lichaam of
de grond nat is (elektrokutie).
•Niet gaan zitten, niet duiken ranaf de bovenrand van het
zwembad en daar tevens niet overheen lopen.
NORMATIEF VOOR DEVEILIGHEID
Opletten en handelen:
- Houd de kinderen van dichtbij en constant in de gaten.Zoek
een verantwoordelijk persoon voor de veiligheid en verscherp
het toezicht wanneer er zich vele baders in het zwembad
bevinden.
- Beschik over een uitrusting van zwembanden en zwemvesten
voor hen die niet kunnen zwemmen.
- Leer uw kinderen zo spoedig mogelijk zwemmen.
- Maak nek, armen en benen nat voor het water in te gaan.
- Wees op de hoogte van EHBO om urgent kinderen bij te
staan.
-Verbied duiken en springen in de aanwezigheid van kinderen,
evenals rennen en wilde spelletjes rondom het zwembad.
- Sta - zonder zwemvest of armbandjes - de toegang tot het
zwembad niet toe aan kinderen die niet kunnen zwemmen
en die in het water niet vergezeld zijn door een volwassene.
- Laat geen speelgoed achter rondom en binnenin het zwembad
zonder dat daarop gelet wordt.
- Houd het water voortdurend schoon en gedesin-fecteerd.
- Bewaar de producten voor de behandeling van het water
buiten het bereik van de kinderen.
Preventie:
- Sommige uitrustingen kunnen aan de veiligheid bijdragen,
alhoewel zij in geen enkel geval de waakzaamheid van een
volwassene kunnen vervangen.
- Een omheining of een beveiligingsafrastering waarvan de
toegang gesloten kan blijven.
- Protectiedek met automatische of handbediening, op de
juiste manier geplaatst en vastgezet.
- Een electronische detector voor een val in het zwembad
(alarm).
- Een toegankelijke telefoon dichtbij het zwembad (draagbaar
of niet ).
- Vlotter en polstok dichtbij het zwembad.
In geval van ongeluk:
- Het kind zo snel mogelijk uit het water halen.
- Onmiddellijk hulp inroepen en de raadgevingen van de
informatie opvolgen.
- De natte kleding verwisselen voor droge kleren (de
verongelukte met een deken bedekken ).
- De telefoonnummers memoriseren en een bord dichtbij het
zwembad plaatsen met de nummers van EHBO, Rode Kruis,
Arts, Urgente Dienst, enz.
BELANGRIJK: Alle filtraties volgen de installa-
tienorm NF C15-100, waaardoor wordt bepaald
dat ieder elektrisch apparaat, dat op z'n minst
op een afstand van 3,50 meter van het zwembad verwijderd
en gemakkelijk moet zijn, met een zeer lage spanning
gevoed moet worden: 12V.
Alle apparaten die gevoed worden met 220V, dienen zich
op z'n minst op een afstand van 3,50 meter van de rand
het zwembad te bevinden.
Een stopcontact gebruiken met een differentiële stro-
omonderbreker van 30 mA.
Bewaar deze instructies voor toekomstige raadplegingen.
MOCHT U EEN PROBLEEM HEBBEN, ...¡RAADPLEEG ONS!
TELEFOONNUMMERVOOR ADVIES:
Nederlands: Tel.: 0800 022 33 04 Fax.: (33) 4 92 28 03 33
Belgïe: Tel.: 0800 10 211
¡A SEGURANÇA DOS SEUS FILHOS DEPENDE DE SI!
O RISCO É MÁXIMO QUANDO SÃO MENORES DE 5 ANOS.
¡OS ACIDENTES NÃO PASSAM SÓ AOS OUTROS!
¡EVITE OS POSSÍVEIS ACIDENTES!
ATENÇÃO: “NÃO RESPEITAR AS INSTRUÇÕES DE
MANUTENÇÃO PODE POR GRAVEMENTE
EM PERIGO A SAÚDE,
ESPECIALMENTE A DAS CRIANÇAS.”
CONSELHOS DE SEGURANÇA
• Antes da montagem, ler com atenção as instruções
dadas a seguir.
• Por razões de segurança, nunca instalar a piscina numa
varanda ou num terraço.
• Importante: Colocar a piscina num lugar próximo a um
desaguadoiro, para evitar inundações se a piscina se partir.A
piscina é como uma pequena barragem;se estiver desnivelada,
a pressão pode partir a parede e nesse caso toda a agua
poderia sair.Um volume de agua tão importante pode provocar
danos importantes no terreno e também às pessoas que se
encontrarem ao pé da piscina.
• Esta piscina foi concebida para as crianças.
• Nunca tirar-se de cabeça para a piscina.
• Não utilizar a piscina de noite ou quando houver pouca
visibilidade.
• Não utilizar a piscina debaixo do efeito de bebidas alcoólicas,
medicamentos ou drogas.
• Não permitir brigas ou jogos violentos na piscina.
• Não nadar nunca entre a parede da piscina e a escada
(risco de ficar entalado).
• Não deixar nunca um animal (cão, gato, ou outro) tomar
banho na piscina.
• Nunca manipule o depurador se estiver com o corpo molhado
ou se ou chão estiver molhado (risco de electrocussão).
• Não sentar-se, não deve atirar-se nem andar na borda
superior da piscina.
NORMATIVA DE SEGURANÇA
Vigiar e actuar:
- Vigie as crianças de perto e constantemente. Ponha uma
pessoa responsável da segurança e aumente a vigilância
quando há muitas pessoas na piscina.
- Ponha um equipamento de flutuação para os que não sabem
nadar.
- Ensine a nadar aos pequenos o mais cedo possível.
- Molhe a nuca, os braços e as pernas antes de entrar na
água.
- Aprenda primeiros auxílios para atender urgentemente as
crianças.
- Proíba o mergulho e os saltos em presença das crianças,
assim como correr e os jogos bruscos ao pé da piscina.
- Proíba o acesso à piscina sem colete ou braceletes às
crianças que não sabem nadar e que não estão acompanhadas
por um adulto na água.
- Não deixe brinquedos à volta nem dentro da piscina se
estiver sem vigilância.
- Mantenha permanentemente a água limpa e desinfectada.
- Guarde os produtos de tratamento da água fora do alcance
das crianças.
Prever:
- Equipamentos que possam contribuir à segurança, sem os
substituir nunca pela vigilância de um adulto.
- Uma vala de protecção cujo acesso possa estar fechado.
- Coberta de protecção manual ou automática correctamente
colocada e fixada.
- Detector electrónico de queda na piscina (alarme).
- Telefone acessível ao pé da piscina (portátil ou fixo).
- Bóia e vara ao pé da piscina.
Em caso de acidente:
- Tirar a criança da água o mais rapidamente possível.
- Pedir imediatamente socorro e seguir os conselhos que lhe
forem comunicados.
-Tirar a roupa molhada e vestir roupa seca (cobrir o acidentado
com uma manta).
- Memorizar e afixar um cartaz ao pé da piscina com os
telefones de primeiros auxílios: Bombeiros, Cruz Vermelha,
Médico, Urgências, etc.
ATENÇAO: Todas as filtraçoes seguem a norma
de instalaçao NF C15-100, que estipula que
qualquer aparelho eléctrico, situado a menos
de 3,50 m da piscina, e livremente acessível, deverá ser
alimentado a uma tensão muito baixa: 12V.
Qualquer aparelho eléctrico alimentado com 220V, deve
estra situado pelo menos a 3,50 m do borde da piscina.
Utilizar uma tomada equipado com um disjuntor diferencial
de 30 mA.
Guardar estas instruçoes para futuras consultas
EM CASO DE PROBLEMA, ..¡CONSULTAR-NOS!
TELEFONO CONSULTA:
Tel.: (34) 946 741 844
Fax: (34) 946 741 708 e-mail: gre@gre.es web: www.gre.es
DINL P