9
SLO
Vgradnja
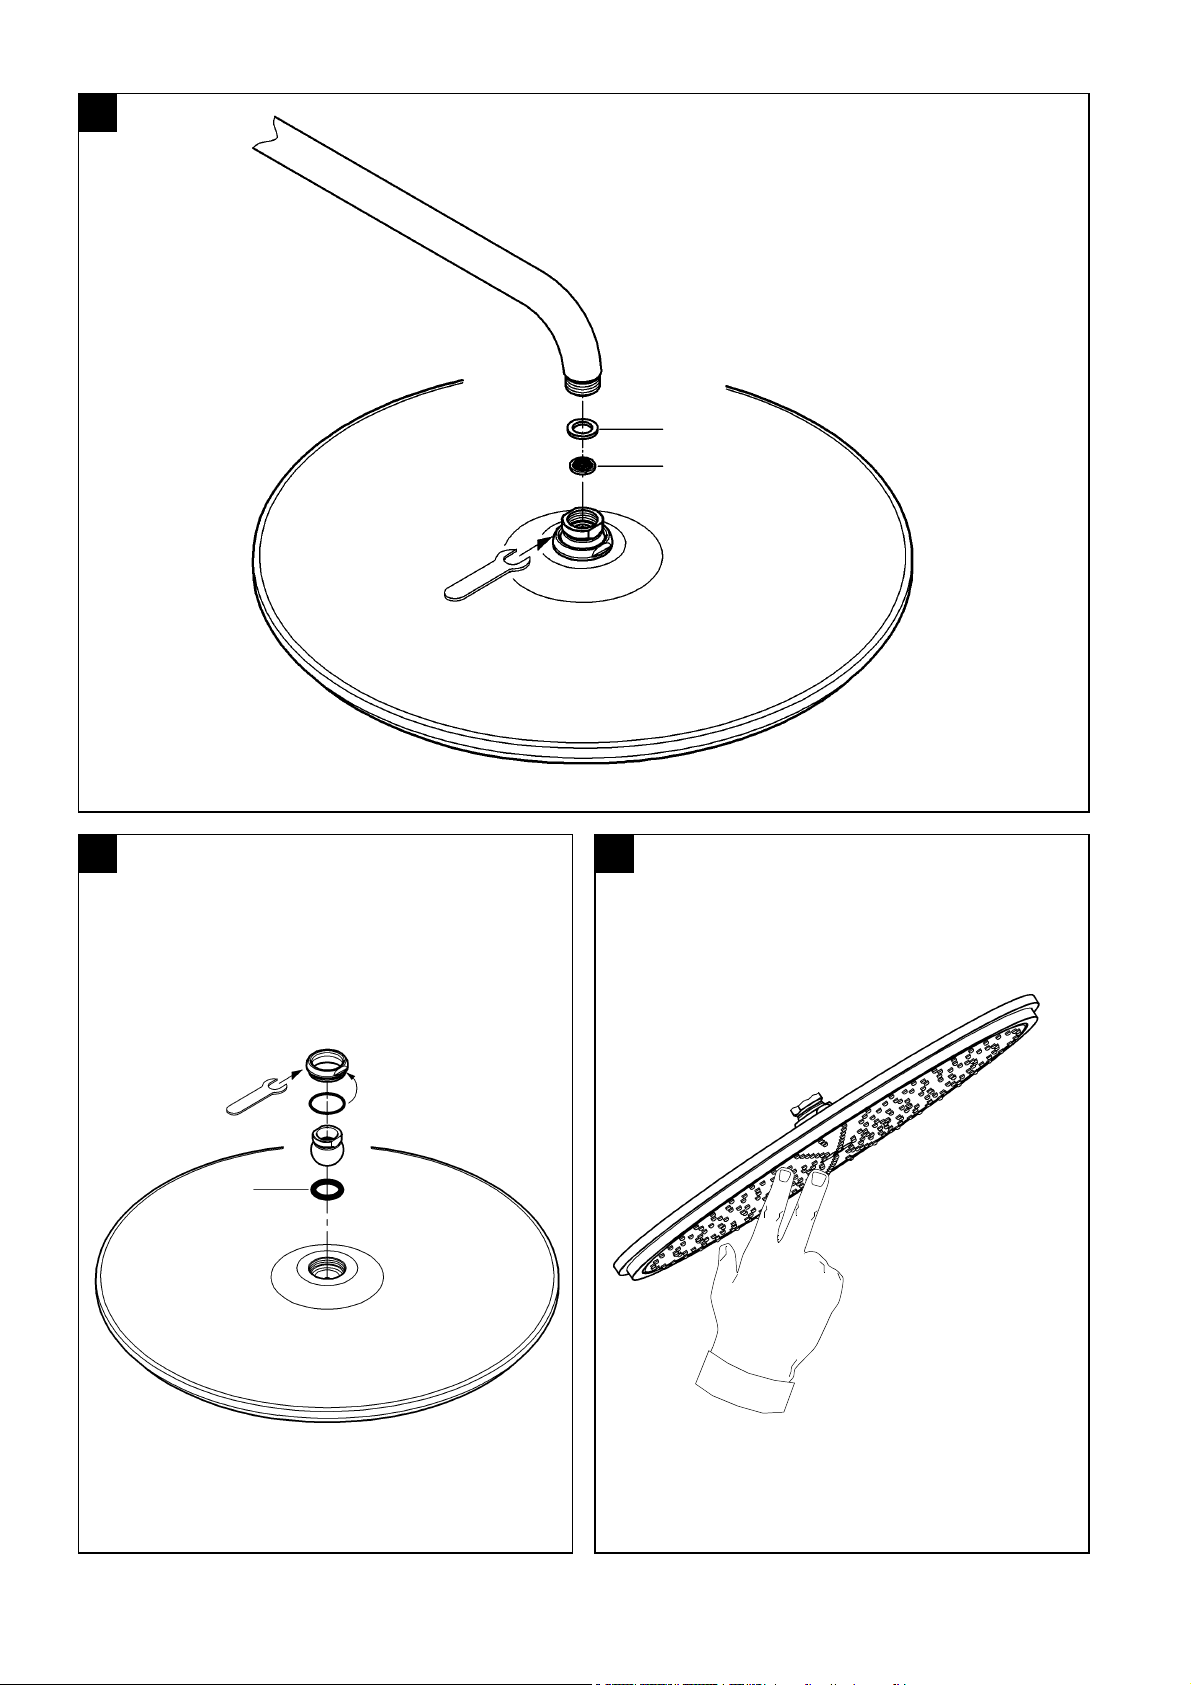
Vgradnja in priključitev, glej stran 2, slika [1].
Glejte risbo v merilu na strani 1.
Opozorilo:
Ti razpršilci za prho se naj uporabljajo samo v kombinaciji z
modeli 28 497, 28 724 ali 28 982!
Pri montaži na suhomontažne stene, (gips in podobno), je
potrebno uporabiti ustrezne montažne elemente, ki
zagotavljajo potrebno trdnost stene.
Vzdrževanje
Tesnila (A) in filter (B), gl. stran 2, sl. [1].
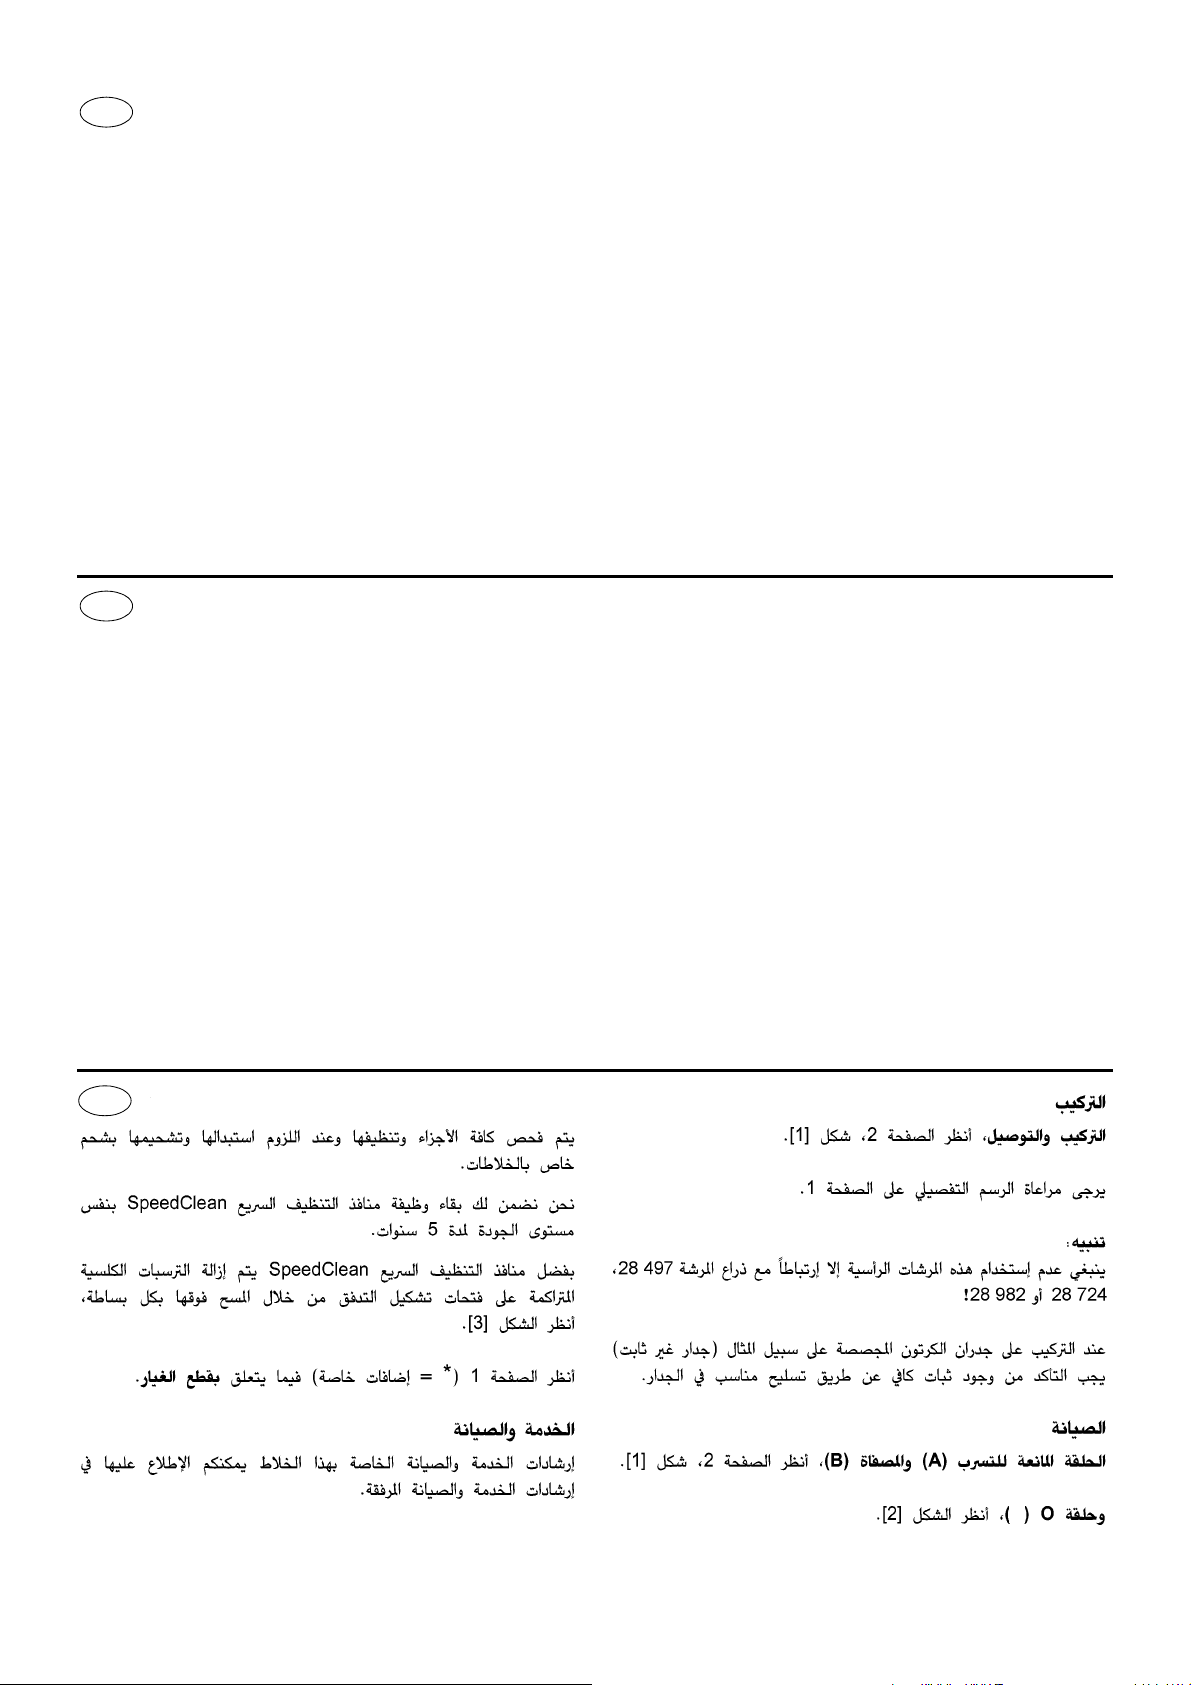
Tesnilni obroček (C), gl. sliko [2].
Vse dele preglejte, očistite, po potrebi zamenjajte in namastite
s posebno mastjo za armature.
5-letna garancija za nespremenjeno delovanje šob
SpeedClean.
S šobami "SpeedClean" odstranite nabrani vodni kamen na
usmerjevalniku curka preprosto tako, s prstom potegnete
čeznje, gl. sliko [3].
Za nadomestne dele glej stran 1 (* = posebna oprema).
Vzdrževanje
Navodila za vzdrževanje priložena.
HR
Ugradnja
Ugradnja i priključivanje, pogledajte stranicu 2, sl. [1].
Držite se mjerne skice na stranici 1.
Uputa:
Ove tuševe iznad glave trebalo bi koristiti samo u spoju sa
rukom tuša 28 497, 28 724 i 28 982!
Pri postavljanju npr. na zid iz od gips-kartona (brz čvrstog
zida) mora se osigurati dostatna dovoljna čvrstoća
postavljanjem odgovarajučeg odgovarajućeg ojačanja u zidu.
Održavanje
Brtviloa (A) i sito (B), pogledajte stranicu 2, sl. [1].
O prsten (C), pogledajte sl. [2].
Sve dijelove provjerite, očistite, te po potrebi zamijenite i
podmažite specijalnom mašću za armature.
Petogodišnje jamstvo na za nepromijenjenu
funkcijubesprijekorno funkcioniranje SpeedClean-sapnica.
Pomoću SpeedClean-sapnice mogu se odstraniti talozi
vapnenca na oblikovniku mlaza, tako da se jednostavno
prebrišu, pogledaj sl. [3].
Rezervni dijelovi, vidi preklopljenu stranicu 1 ( * = specijalni
pribor)
Održavanje
Napomene koje se odnose na održavanje ove armature
BG
Монтаж
Монтаж исвързване, виж страница 2, фиг. [1].
Обърнете внимание на чертежа сразмерите на стр. 1.
Указание:
Тези душове за глава трябва да се използват само в
комбинация със съединително коляно Кат.№28 497,
28 724 или 28 982!
При монтаж напр. върху стени от гипскартон (не твърди
стени) трябва да се осигури достатъчна здравина чрез
съответно подсилване на стената.
Техническо обслужване
Уплътнител (А) ицедка (В), виж страница 2, фиг. [1].
Уплътнителен пръстен (C), виж фиг. [2].
Проверете всички части, почистете ги, ако енеобходимо,
подменете ги иги смажете със специална грес за
арматура.
5 години гаранция за функционирането на дюзите -
SpeedClean.
Чрез дюзите SpeedClean отлагания от варовик по
струйника на душовете, се отстраняват лесно чрез
избърсване сръка, виж фиг. [3].
Резервни части,виж страница I ( * = Специални части).
Поддръжка
Указания за поддръжка на тази арматура можете да
намерите вприложените инструкции за поддръжка.