GYS Tool it PBT 824 User manual

V4_16/06/2021 Find more languages of user manuals on our website
FR 2-7
EN 8-13
RU 26-31
ES 20-25
DE 14-19
NL 32-37
IT 38-43
TESTEUR DE BATTERIE PBT 824
BATTERY TESTER PBT 824
PROBADOR DE BATERÍA PBT 824
ТЕСТЕР БАТАРЕЙ PBT 824
BATTERIETESTER PBT 824
ACCU-TESTER PBT 824
TESTER DI BATTERIA PBT 824
www.gys.fr

INSTRUCTIONS DE SÉCURITÉ
Ce manuel d’utilisation comprend des indications sur le
fonctionnement de l’appareil et les précautions à suivre pour
la sécurité de l’utilisateur. Merci de le lire attentivement avant
la première utilisation et de le conserver soigneusement pour
toute relecture future.
Risque d’explosion et d’incendie!
Une batterie en charge peut émettre des gaz explosifs.
Le testeur de batterie doit être connecté uniquement aux batteries
ayant une tension nominale de sortie de 6 V,12 V et 24 V .
ATTENTION : Une inversion de polarité entraînera la fusion
du fusible et pourrait causer des dommages permanents. Les
dommages dus à l’inversion de polarité ne sont pas couverts
par notre garantie.
ATTENTION : si la batterie de la voiture est déconnectée, il est
possible que certains systèmes de gestion soient désactivés.
Consultez le manuel de votre véhicule pour plus d’informations
sur l’installation.
N’utilisez pas le testeur de batterie si le cordon ou les cosses
sont endommagés.
N’utilisez pas le testeur de batterie s’il a reçu un choc violent ou
a été endommagé de quelque manière que ce soit.
Ne pas démonter l’appareil. Un réassemblage incorrect peut
entraîner un risque de choc électrique ou d’incendie.
Risque de projection d’acide !
• Porter des verres de sécurité et des vêtements appropriés.
• En cas de contact avec les yeux ou la peau, rincer
immédiatement à l’eau et consulter un médecin sans tarder.
• Éviter les ammes et les étincelles. Ne pas fumer.
• Protéger les surfaces de contacts électriques de la batterie à
l’encontre des courts-circuits.
• Matériel conforme aux directives européennes. La
déclaration UE de conformité est disponible sur notre site.
• Marque de conformité EAC (Communauté économique
Eurasienne)
• Matériel conforme aux exigences britanniques. La
déclaration de conformité britannique est disponible sur
notre site (voir à la page de couverture).
• Appareil conforme aux normes Marocaines.
• La déclaration Cم(CMIM) de conformité est disponible sur
notre site internet.
2
PBT 824 FR
Notice originale

• Ce matériel fait l’objet d’une collecte sélective selon la directive
européenne 2012/19/UE. Ne pas jeter dans une poubelle do-
mestique !
• Produit recyclable qui relève d’une consigne de tri.
FONCTIONNEMENT ET UTILISATION
Remarque : Chaque fois que le testeur est connecté à une batterie, il eectuera une vérication rapide du câble pour
assurer une connexion correcte. Si la connexion est bonne, le testeur passera à l’écran d’accueil. Si la connexion est
mauvaise, l’écran achera « VERIFIER PINCES ». Dans ce cas, vérier les connexions des câbles. Les pinces
devront peut-être être reconnectées à la batterie ou le câble devra peut-être être remplacé si ses extrémités sont
endommagées.
1- S’assurer que l’endroit est bien ventilé avant d’eectuer un test.
2- Testeur de batterie (12V et/ou pack de 24V) et des systèmes de charge pour batteries 12 & 24V
3- Avant d’eectuer un test sur la batterie, s’assurer que le contact est coupé, que les accessoires ne fonctionnent
pas. Fermer toutes les portes et le core.
4- Température de fonctionnement conseillée : De 0°C (32°F) à 50°C (122°F)
5- S’assurer que les bornes de la batterie soient propres. Si nécessaire, les nettoyer à l’aide d’une brosse métallique.
Toute présence d’oxydation entre les pinces du testeur et les cosses de la batterie ou entre les cosses de la batterie
et les plots de cette dernière diminue l’ecacité du testeur.
6- S’assurer de la présence de 6 piles de type AA dans le compartiment des piles.
7- Brancher la pince négative (noire) à la borne négative de la batterie. Brancher la pince positive (rouge) sur la
borne positive de la batterie.
MENU PRINCIPAL
Une fois les pinces branchées, le testeur ache automatiquement le menu principal. Utiliser les èches pour faire
déler les fonctionnalités du menu principal.
Fonctionnalités Ecran d’achage Action
Test de batterie 1/9
TEST DE
BATTERIE
XX.XX V
Appuyer sur «ENTRÉE» pour faire un
test de batterie
Test du système
2/9
TEST DU
SYSTÈME
XX.XX V
Appuyer sur «ENTRÉE» pour
faire un test du système
Essai en véhicule
3/9
ESSAI EN
VÉHICULE
XX.XX V
Appuyer sur «ENTRÉE» pour faire un
test en véhicule
Imprimer le dernier résultat
4/9
IMPRIMER
LE DERNIER
RÉSULTAT
Appuyer sur «ENTRÉE» pour
imprimer le dernier résultat
Sélection de la langue
5/9
SÉLECTION DE
LA LANGUE
Appuyer sur «ENTRÉE» pour changer
de langue
Compteur de test
6/9
COMPTEUR
DE TEST
Appuyer sur «ENTRÉE» pour voir
combien de fois le test batterie/
système/véhicule a été réalisé
Changement date/heure
7/9
2018/02/05 13:25:00
Appuyer sur «ENTRÉE» pour régler la
date et l’heure. Puis appuyer sur
pour régler «Année». Appuyer
sur «ENTRÉE» pour terminer l’année.
Suivre l’étape précédente pour
terminer mois/jour/heure et minute. 3
PBT 824 FR
Notice originale

Luminosité
8/9
LUMINOSITÉ Appuyer sur «ENTRÉE» pour
régler la luminosité de l’écran.
Personnaliser
9/9
PERSONNALISER
Appuyer sur «ENTRÉE» pour
modier les informations per-
sonnalisées.
TESTER LA BATTERIE
1. Sélectionner «test de la batterie» dans le menu principal et appuyer sur «ENTRÉE»
2. Appuyer sur pour sélectionner « RÉGULIER / STANDARD » ou « START / STOP »
3. Appuyer sur la touche pour sélectionner le type de batterie. Appuyer sur «ENTRÉE» pour conrmer.
5. Appuyer sur la touche pour sélectionner la norme (EN, CCA, BCI, CA, MCA, JIS, DIN, CEI, SAE, GB)
6. Appuyer sur la touche pour entrer le courant de démarrage de la batterie (exprimée en Ampère)
7. Conrmer la température ambiante supérieure à 0° (32°F) en appuyant sur «ENTRÉE».
8. Suivre les instructions du testeur.
A chacune des étapes, il est possible de revenir au menu principal ou à l’étape précédente, en ap-
puyant sur «ENTRÉE» pendant 2 secondes.
• Résultat du test de la batterie
L’écran du résultat devient vert, orange ou rouge en fonction du résultat trouvé. Vert indiquant un résultat posi-
tif, orange bon mais à surveiller, rouge à remplacer.
Cas Résultats trouvés Analyse
Batterie en bon état
VOL : xx.xx V
CCA : xxxx CCA/SAE
IR : xx.xx mΩ La batterie est opérationnelle.
BATTERIE OK
Bon état, à recharger
VOL : xx.xx V
CCA : xxxx CCA/SAE
IR : xx.xx mΩ Batterie en bon état mais au courant faible.
A recharger avant toute utilisation.
OK A RECHARGER
Mise en garde
VOL : xx.xx V
CCA : xxxx CCA/SAE
IR : xx.xx mΩ
La batterie doit être entrenue. Elle aaiblit
progressivement la capacité de démarrage du
moteur. Il peut également y avoir une mauvaise
connexion entre le véhicule et la batterie.
Surveiller la batterie pour un possible
remplacement.
MISE EN GARDE
Charger et tester
VOL : xx.xx V
CCA : xxxx CCA/SAE
IR : xx.xx mΩ
La batterie est déchargée et ne peut pas être
testée. Recharger la batterie pour eectuer un
nouveau test.
CHARGER & TESTER
A remplacer
VOL : xx.xx V
CCA : xxxx CCA/SAE
IR : xx.xx mΩ La batterie se décharge rapidement et n’est plus
fonctionnelle. Remplacer la batterie.
A REMPLACER
Cellules défectueuses à remplacer
VOL : xx.xx V
CCA : xxxx CCA/SAE
IR : xx.xx mΩ
CEL DEF. A REMPL
Au moins une des cellules de la batterie est
court-circuitée. Remplacer la batterie.
Erreur charge
VOL : xx.xx V
CCA : xxxx CCA/SAE
IR : xx.xx mΩ
ERREUR CHARGE
La batterie dépasse 2 000 CCA ou 200 Ah, ou les
pinces ne sont pas connectées convenablement.
Charger complètement la batterie et retester
après avoir écarté les deux autres causes. Si
l’achage reste identique, la batterie doit être
remplacée.
• Achage de l’état de charge et l’état de santé de la batterie
4
PBT 824 FR
Notice originale

1. Appuyer sur les touches directionnelles pour voir le SOC (état de charge) et le SOH (état de santé) de la batterie.
2. Appuyer sur « ENTRÉE », le code du test apparaît.
Qu’est ce que le « code test» ?
Il permet de récuperer les données du test sous forme de tableau informatique :
A. Insérer le CD fourni dans le lecteur de l’ordinateur.
B. Ouvrir le tableau.
C. Scanner le code barre du ticket (imprimé auparavant) à l’aide d’un lecteur de codes barres, ou entrer le code
dans la première cellule du tableau.
D. Les résultats du test s’achent.
3. Sélectionner OUI ou NON à l’aide des èches pour imprimer le résultat puis appuyer sur «ENTRÉE».
4. Appuyer sur «ENTRÉE» pour revenir au menu principal.
• Test de batterie 24 V
Pour tester une batterie 24 V composée de 2 batteries 12 V câblées en série, le testeur procède à deux analyses dis-
tinctes sur chacune des batteries.
1. Sélectionner «TEST DE BATTERIE» dans le menu principal et choisir « PACK DE BAT. 24 V ».
2. Connecter les pinces négatives et positives aux extrémités du pack batteries 24V. Appuyer sur OK pour lancer le
test.
3. L’écran ache «CONNECTER BATTERIE 1».
4. Brancher les pinces sur la première batterie 12V.
5. Appuyer sur pour sélectionner « RÉGULIER / STANDARD » ou « START / STOP »
6. Appuyer sur la touche pour sélectionner le type de batterie. Appuyer sur «ENTRÉE» pour conrmer.
7. Appuyer sur la touche pour sélectionner la norme (EN, CCA, BCI, CA, MCA, JIS, DIN, CEI, SAE, GB)
8. Appuyer sur la touche pour entrer la capacité de la batterie (exprimée en Ampère-heure «Ah»)
9. Conrmer la température ambiante supérieure à 0° (32°F) en appuyant sur «ENTRÉE».
10. Suivre la même procédure pour la batterie n°2. Puis imprimer le ticket avec les deux résultats.
TEST DU SYSTÈME DE CHARGE DE L’ALTERNATEUR
1. Sélectionner «test du système» dans le menu principal.
2. S’assurer que tous les consommateurs soient éteints, tels que les phares, les lumières, l’air conditionné, la radio
etc. avant de démarrer le moteur.
3. Lorsque le moteur est en marche, l’un des 3 résultats suivants s’ache :
Résultats achés Analyse
Tension de démarrage normale La tension est normale. Appuyer sur «ENTRÉE» pour eectuer un test
de circuit de charge
Tension de démarrage basse La tension est sous la limite. Faire une mise au point du démarreur
selon les procédures recommandées par le fabricant.
Tension de démarrage non-détecté La tension de démarrage n’est pas détectée. Eectuer de nouveau le
démarrage du moteur.
4. Appuyer sur «ENTRÉE» pour commencer le test du système de charge.
• Résultat du test de la tension de démarrage
Cas Résultats achés Analyse
Haute tension de démarrage lorsque
le test est eectué avec le moteur au
ralenti
ALT. IDLE VOLTS
xx.xx V HAUTE Vérier que les connexions soient bonnes. Si tout
est bien connecté, remplacer le régulateur.
Tension de démarrage normale lorsque
le test est eectué avec le moteur au
ralenti
ALT. IDLE VOLTS
xx.xx V NORMAL Aucun problème détecté. Fonctionnement normal
de l’alternateur.
5
PBT 824 FR
Notice originale

6
PBT 824 FR
Notice originale
Tension basse de démarrage lorsque
le test est eectué avec le moteur au
ralenti
ALT. IDLE VOLTS
xx.xx V FAIBLE
L’alternateur ne procure pas susamment de cou-
rant à la batterie. Vérier les courroies, et s’as-
surer que l’alternateur tourne lorsque le moteur
est en marche. Si les courroies glissent ou sont
brisées, les remplacer et faire le test à nouveau.
Vérier la connexion entre l’alternateur et la bat-
terie. Si la connexion est mauvaise, nettoyer ou
remplacer le câble et faire le test à nouveau. Si les
courroies et la connexion sont en bonne condition,
remplacer l’alternateur.
5. Le testeur demandera «ALLUMEZ CONSOM ET PRESSEZ ENTER». Allumer le chauage au maximum (chaleur),
les phares de route et les feux arrières. Ne pas allumer de charges cycliques telles que la climatisation ou les
essuie-glaces.
6. Lorsque le test est eectué, faire tourner le moteur à 2500 tr/min pendant 15 secondes.
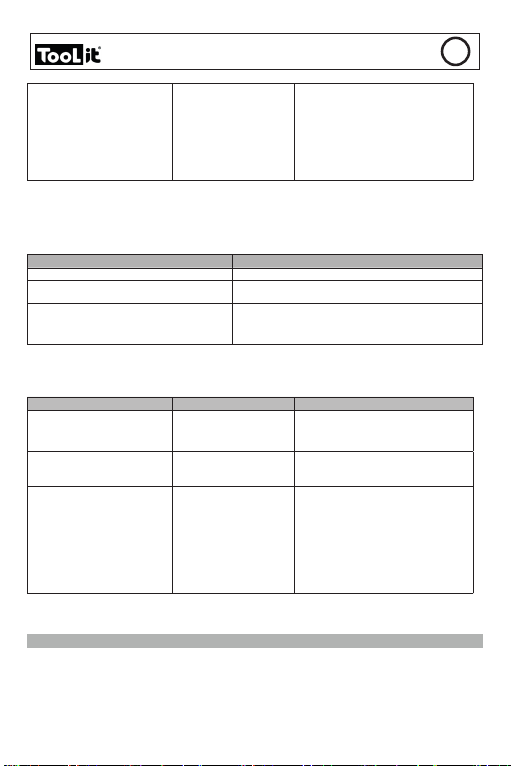
7. Appuyer sur «ENTRÉE» , l’ondulation du système de charge apparait. L’un des trois résultats de test s’ache :
Résultats achés Analyse
Ondulation détectée normale Les diodes fonctionnent bien dans l’alternateur/démarreur
Aucune ondulation détectée Aucune ondulation détectée. Disfonctionnement de l’alternateur. Le
remplacer.
Intensité d’ondulation haute
Une ou plusieurs diodes ne fonctionnent pas ou sont endommagées.
S’assurer que le support de l’alternateur est bien placé et que les
courroies fonctionnent correctement. Si c’est le cas, remplacer
l’alternateur
8. Appuyer sur «ENTRÉE», pour continuer le test de système de charge avec les consommateurs en marche
(phares, chauage ...).
• Résultat du test de système de charge avec consommateurs en marche
Cas Résultats achés Analyse
Haute tension de démarrage lorsque le
test est eectué avec les
consommateurs en marche
ALT. CHARGE
DES VOLTS
xx.xx V HAUT
La tension de sortie de l’alternateur est anor-
malement élevée. Vérier qu’il n’y a pas de
problèmes de connexions. Si non, remplacer
l’alternateur.
Tension de démarrage normale lorsque
le test est eectué avec les
consommateurs en marche
ALT. CHARGE
DES VOLTS
xx.xx V NORMAL
La sortie de tension de l’alternateur est
normale. Aucun problème n’est détecté.
Tension basse de démarrage lorsque
le test est eectué avec les
consommateurs en marche
ALT. CHARGE
DES VOLTS
xx.xx V BAS
L’alternateur ne procure pas susamment de
courant pour la charge du système électrique
et la batterie. Vérier les courroies, et s’assurer
que l’alternateur tourne lorsque le moteur est en
marche. Si les courroies glissent ou sont brisées,
remplacer les courroies et faire le test à nouveau.
Vérier la connexion entre l’alternateur et la
batterie. Si la connexion est mauvaise, nettoyer
ou remplacer le câble et faire le test à nouveau.
Si les courroies et la connexion sont en bon état,
remplacer l’alternateur.
9. Appuyer sur «ENTRÉE», lorsque le test du système est terminé. Eteindre tous les consommateurs (chauage, phares
...) Appuyer sur « ENTREE » pour lire et/ou imprimer les résultats.
TEST EN VEHICULE
Ceci est une combinaison du test de la batterie et du test du système. En choisissant «test en vehicule» le testeur fait
automatiquement l’ensemble des tests. Les résultats des tests sont achés sur un seul et même ticket. Se référer aux
procédures de test ci-dessus ou suivre les instructions sur l’écran du testeur.

7
PBT 824 FR
Notice originale
REMPLACEMENT DU PAPIER
A. Ouvrir le couvercle transparent.
B. Placer un nouveau rouleau de papier dans le compartiment.
C. Placer une petite longueur de papier du compartiment et appuyer sur le couvercle transparent pour fermer.
MAINTENANCE
Cas Remèdes
Ecran non allumé Vérier que l’appareil est bien connecté à la batterie
La tension de la batterie n’est pas assez importante pour réaliser le test (<1.0V).
Charger complètement la batterie et réessayer.
Défaut d’impression Bourrage papier : le papier n’est pas correctement inséré.
Papier épuisé : Insérer du papier.
Batterie interne insusante Remplacer la pile du testeur.
CONDITION DE GARANTIE
La garantie couvre tous défauts ou vices de fabrication pendant 2 ans, à compter de la date d’achat (pièces et main
d’oeuvre).
La garantie ne couvre pas :
• Toutes autres avaries dues au transport.
• L’usure normale des pièces (Ex. : câbles, pinces, etc.).
• Les incidents dus à un mauvais usage (erreur d’alimentation, chute, démontage).
• Les pannes liées à l’environnement (pollution, rouille, poussière).
En cas de panne, retourner l’appareil à votre distributeur, en y joignant :
- un justicatif d’achat daté (ticket de sortie de caisse, facture…)
- une note explicative de la panne.

SAFETY INSTRUCTIONS
This manual includes guidelines on the operation of your device
and the precautions to follow for your own safety. Ensure it
is read carefully before rst use and keep it handy for future
reference.
Risk of explosion and re!
A battery being charged can emit explosive gas.
The battery tester should only be connected to batteries with a
rated output voltage of 6 V, 12 V and 24 V .
CAUTION: Reverse polarity will cause the fuse to blow and
could cause permanent damage. Damage due to reverse
polarity is not covered by our warranty.
CAUTION: If the car’s battery is disconnected, some
management systems may be disabled.
Consult your vehicle manual for more information on installation.
Do not use the battery tester if the cord or terminals are damaged.
Do not use the battery tester if it has received a severe shock or
has been damaged in any way.
Do not disassemble the device. Incorrect reassembly may result
in a risk of electric shock or re.
Acid projection hazard!
• Wear appropriate safety glasses and clothing.
• If your eyes or skin come into contact with battery acid, rinse
the affected part of the body with plenty of water and seek
immediate medical assistance.
• Avoid ames and sparks. Do not smoke.
• Protect the electrical contacts of the battery against short-
circuiting.
• The device complies with European Directive.
• The certicate of compliance is available on our website.
• EAC conformity mark (Eurasian Economic Commission)
• Material conforms to UK requirements. The UK Declaration of
Conformity is available on our website (see cover page).
• Device compliant with Moroccan standards.
• The Cم (CMIM) declaration of conformity is available on our
website.
• This product should be disposed of at an appropriate recycling
facility. Do not dispose of in domestic waste.
• Recyclable product that falls within waste sorting recommen-
dations
8
PBT 824 EN
Translation of the original instructions

OPERATION AND USE
Note: Whenever the tester is connected to a battery, it will perform a quick check of the cable to ensure proper
connection. If the connection is good, the tester will go to the home screen. If the connection is bad, the display
will show «CHECK CLAMPS». In this case, check the cable connections. The clamps may need to be reconnected
to the battery or the cable may need to be replaced if its ends are damaged.
1- Ensure that the area is well ventilated before performing a test.
2- Tester for 12 V batteries and systems for 12 & 24 V charging (Only 12 volt for START & STOP batteries)
3- Before running a test on the battery, make sure the ignition is o, the accessories are also o. Close all the
doors and the boot.
4- Recommended operating temperature: From 0°C (32°F) to 50°C (122°F)
5- Make sure the battery terminals are clean. If necessary, clean them using a wire brush.
Any presence of oxidation between the tester terminals and the battery connectors or between the battery
connectors and the battery terminals reduces the eectiveness of the tester.
6- Ensure that there is a 6 batteries type AA in the battery compartment.
7- Connect the negative (black) terminal to the negative terminal of the battery. Connect the positive plug (red)
to the positive terminal of the battery.
MAIN MENU
Once the clamps are connected, the tester automatically displays the main menu. Use the arrows to scroll
through the main menu features.
Features Display screen Action
Battery test BATTERY
TEST
XX.XX V Press "ENTER" to do a battery test
System test
SYSTEM
TEST
XX.XX V
Press "ENTER" to test the system
Vehicle test
VEHICLE
TEST
XX.XX V
Press "ENTER" to do a vehicle test
Print the last result
PRINT
THE LAST
RESULT
Press "ENTER" to print the last result
Selection of the language LANGUAGE
SELECTION
Press "ENTER" to change the lan-
guage
Test count TEST
COUNT
Press "ENTER" to see how many
times the battery /
system / vehicle test has been perfor-
med"
Date / time change 2018/02/05 13:25:00
Press "ENTER" to set the date and
time. Then press to set "Year".
Press "ENTER" to end the year.
Follow the previous step to complete
month / day / hour and minute.
Brightness
BRIGHTNESS Press "ENTER" to adjust the bri-
ghtness of the screen.
9
PBT 824 EN
Translation of the original instructions

Customise
CUSTOMISE Press ""ENTER"" to edit the custom
information.
BATTERY TEST
1. Select «Battery Test» from the main menu and press «ENTER»
2. Press to select «REGULAR / STANDARD» or «START / STOP»
3. Press button to select the battery type. Press «ENTER» to conrm.
5. Press the key to select the standard (EN, CCA, BCI, CA, MCA, JIS, DIN, IEC, SAE, GB)
6. Press the button to enter the battery capacity (shown in Ah-hour amp)
7. Conrm the ambient temperature above 0 ° (32 ° F) by pressing «ENTER».
8. Follow the instructions of the tester.
At every steps, it is possible to return to the main menu by pressing «ENTER» for 2 seconds.
• Battery test result
The result screen turns green, orange or red depending on the result found. Green indicating a positive result,
orange good but to be watched, red to be replaced.
Result Results found Analysis
Battery in good condition
VOL : xx.xx V
CCA : xxxx CCA/SAE
IR : xx.xx mΩ The battery is operational.
BATTERY OK
Good condition, to be recharged
VOL : xx.xx V
CCA : xxxx CCA/SAE
IR : xx.xx mΩ Battery in good condition but low current.
To recharge before any use.
OK TO RECHARGE
Warning
VOL : xx.xx V
CCA : xxxx CCA/SAE
IR : xx.xx mΩ
The battery must be maintained. It gradually
weakens the starting capacity of the engine.
There may also be a bad connection between the
vehicle and the battery. Monitor the battery for a
possible replacement.
WARNING
Charge & test
VOL : xx.xx V
CCA : xxxx CCA/SAE
IR : xx.xx mΩ The battery discharges quickly and is no longer
functional. Replace the battery.
CHARGE & TEST
To replace
VOL : xx.xx V
CCA : xxxx CCA/SAE
IR : xx.xx mΩ The battery discharges quickly and is no longer
functional. Replace the battery.
TO REPLACE
Defective cells to replace
VOL : xx.xx V
CCA : xxxx CCA/SAE
IR : xx.xx mΩ
CEL DEF. TO REPLA
At least one of the cells in the battery is in
short-circuit. Replace the battery.
Charge error
VOL : xx.xx V
CCA : xxxx CCA/SAE
IR : xx.xx mΩ
ERROR CHARGE
The battery exceeds 2,000 CCA or 200 Ah, or the
clamps are not connected properly. Fully charge
the battery and retest after discarding the other
two causes. If the display remains the same, the
battery must be replaced.
• Display of the state of charge and the state of health of the battery
1. Press the directional buttons to view the SOC (charge status) and SOH (health status) of the battery.
2. Select YES or NO using the arrow keys to print the result and press «ENTER».
3. Press «ENTER» to return to the main menu.
10
PBT 824 EN
Translation of the original instructions

What is «test code»?
It allows you to retrieve the test data in the form of a computer table:
A. Insert the supplied CD into the computer’s drive.
B. Open the table.
C. Scan the barcode of the ticket (previously printed) using a barcode reader, or enter the code
in the rst cell of the table.
D. The test results are displayed.
3. Select YES or NO with the arrows to print the result and press «ENTER».
4. Press «ENTER» to return to the main menu.
• 24 V battery test
To test a 24 V battery composed of 2 12 V batteries wired in series, the tester performs two separate tests on each of
the batteries.
1. Select «BATTERY TEST» from the main menu and select «BATTERY PACK. 24 V ».
2. Connect the negative and positive clamps to the ends of the 24V battery pack. Press OK to start the test.
3. The display shows «CONNECT BATTERY 1».
4. Connect the clamps to the rst 12V battery.
5. Press to select «REGULAR / STANDARD» or «START / STOP».
6. Press the button to select the battery type. Press «ENTER» to conrm.
7. Press to select the standard (EN, CCA, BCI, CA, MCA, JIS, DIN, IEC, SAE, GB)
8. Press to enter the battery capacity (expressed in Ampere-hours «Ah»)
9. Conrm the ambient temperature above 0° (32°F) by pressing «ENTER».
10. Follow the same procedure for battery n°2. Then print the ticket with both results.
TEST OF THE ALTERNATOR CHARGING SYSTEM
1. Select «system test» in the main menu.
2. Ensure that all consumers are o, such as headlights, lights, air conditioning, radio etc. before starting the engine.
3. When the engine is running, one of the following 3 results is displayed :
Results displayed Analysis
Starting normal volts The voltage is normal. Press "ENTER" to perform load circuit test
Low starting voltage The voltage is below the limit. Tune the starter in line with the proce-
dure supplied by the manufacturer.
No starting voltage detected The starting voltage is not detected. Start the engine again.
4. Press «ENTER» to begin the charging system test.
• Result of the start voltage test
Examples Results displayed Analysis
High starting voltage when the test is
performed with the engine at idle ALT. IDLE VOLTS
xx.xx V HIGH Check that the connections are good. If every-
thing is properly connected, replace the regulator.
Normal starting voltage when the test
is performed with the engine at idle ALT. IDLE VOLTS
xx.xx V NORMAL No problem detected. Normal operation of the
alternator.
Low starting voltage when the test is
performed with the engine at idle ALT. IDLE VOLTS
xx.xx V LOW
The alternator does not provide enough power
to the battery. Check the belts, and ensure that
the alternator is running when the engine is
on. If the belts slip or are broken, replace them
and re-test. Check the connection between the
alternator and the battery. If the connection is
bad, clean or replace the cable and re-test. If
the alternator belts and connection are in good
condition, replace the alternator.
11
PBT 824 EN
Translation of the original instructions

12
PBT 824 EN
Translation of the original instructions
5. The tester will prompt to «TURN ON CONSUMERS AND PRESS ENTER». Turn on the heater to maximum (heat),
full beam lights and rear headlights. Do not switch on cyclic loads such as air conditioning or windscreen wipers.
6. When the test is done, run the engine at 2500 rpm for 15 seconds.
7. Press «ENTER», the undulation of the charging system is visible. One of the three test results is displayed:
Results displayed Analysis
Normal undulation detected The diodes are working in the alternator/starter
No undulation detected No undulation detected Alternator malfunction. Replace it.
High undulation intensity One or more diodes are not working or are damaged. Make sure that
the alternator support is properly positioned and that the timing belts
are working properly. If so, replace the alternator.
8. Press «ENTER» to continue the charging system test with the consumers running (lights, heating ...).
• Charging system test result with consumers running
Cas Résultats achés Analyse
Haute tension de démarrage
lorsque le test est eectué avec les
consommateurs en marche
ALT. CHARGE
DES VOLTS
xx.xx V HAUT
La tension de sortie de l’alternateur est anormale-
ment élevée. Vérier qu’il n’y a pas de problèmes
de connexions. Si non, remplacer l’alternateur.
Tension de démarrage normale
lorsque le test est eectué avec les
consommateurs en marche
ALT. CHARGE
DES VOLTS
xx.xx V NORMAL
La sortie de tension de l’alternateur est
normale. Aucun problème n’est détecté.
Tension basse de démarrage
lorsque
le test est eectué avec les
consommateurs en marche
ALT. CHARGE
DES VOLTS
xx.xx V BAS
L’alternateur ne procure pas susamment de
courant pour la charge du système électrique
et la batterie. Vérier les courroies, et s’assurer
que l’alternateur tourne lorsque le moteur est en
marche. Si les courroies glissent ou sont brisées,
remplacer les courroies et faire le test à nouveau.
Vérier la connexion entre l’alternateur et la
batterie. Si la connexion est mauvaise, nettoyer
ou remplacer le câble et faire le test à nouveau.
Si les courroies et la connexion sont en bon état,
remplacer l’alternateur.
9. Press «ENTER» when the system test is completed. Switch o all consumers (heating, headlights...) Press
«ENTER» to read the test results.
VEHICLE TEST
This is a combination of battery test and system test. By choosing «vehicle test» the tester automatically
carries out all the tests. The test results are displayed on a single ticket. Refer to the test procedures above or
follow the instructions on the screen.
PAPER REPLACEMENT
A. Open the transparent cover.
B. Place a new roll of paper in the compartment.
C. Place a small length of paper from the compartment and push the transparent cover to close.
MAINTENANCE
Examples Analysis
Display switched o Check that the device is properly connected. The battery voltage is not high enough
to perform the test (<1.0 V).
Fully recharge the battery and try again.
Printing fault Paper jam: the paper is not inserted correctly.
Out of print paper: Insert paper.
Insucient internal battery Replace the batteries in the tester.

13
PBT 824 EN
Translation of the original instructions
WARRANTY
The warranty covers faulty workmanship for 2 years from the date of purchase (parts and labour).
The warranty does not cover:
• Transit damage.
• Normal wear of parts (eg. : cables, clamps, etc..).
• Damages due to misuse (power supply error, dropping of equipment, disassembling).
• Environment related failures (pollution, rust, dust).
In case of failure, return the unit to your distributor together with:
- The proof of purchase (receipt etc ...)
- A description of the fault reported

SICHERHEITSANWEISUNGEN
DieseBetriebsanleitungenthältSicherheits-undBetriebshinweise.
Bitte lesen Sie diese Anleitung aufmerksam durch, bevor Sie
das Gerät zum ersten Mal benutzen und bewahren Sie diese
sorgfältig auf.
Explosions- und Brandgefahr!
Beim Auaden einer Batterie können explosive Gase freigesetzt
werden.
Der Batterietester sollte nur an Batterien mit einer Ausgangs-
nennspannung von 12 V und 24 V angeschlossen werden.
ACHTUNG: eineVerpolungführt zumSchmelzender Sicherung
und kann dauerhafte Beschädigungen verursachen. Die von
einer Verpolung verursachten Schäden werden nicht durch die
Garantie abgedeckt.
ACHTUNG: Wenn die Batterie nicht angeschlossen ist, sind
möglicherweise einige Steuerungssysteme inaktiv.
Für weitere Information zur Einrichtung lesen Sie bitte die
Bedienungsanleitung Ihres Fahrzeugs.
Benutzen Sie das Gerät nicht, wenn die Kabel oder Anschlüsse
beschädigt sind.
Benutzen Sie das Gerät nicht, wenn es einen heftigen Stoß
erlitten hat oder auf andere Art beschädigt wurde.
Nehmen Sie dasGerätnicht auseinander. Eine falscher Zusammenbau
kann zu einem elektrischen Schlag oder Brand führen.
Gefahr von Säurespritzern !
• Tragen Sie Schutzbrille und geeignete Kleidungen.
• Bei Kontakt der Batteriesäure mit den Augen oder der Haut
sof or t gründlich mit Wasser na chspülen und Arz t konsultieren.
• Vermeiden Sie Funken und Flammen. Rauchen Sie nicht!
• Schützen Sie die elektrischen Kontaktächen der Batterie
gegen Kurzschlüsse.
• Das Gerät entspricht den europäischen Richtlinien und
Normen. Die Konformitätserklärung ist auf unserer
Internetseite verfügbar.
• EAC-Konformitätszeichen (Eurasische Wirtschaftsgemeinschaft)
• Das Material entspricht den britischen Anforderungen.
• Die UK-Konformitätserklärung ist auf unserer Website
verfügbar (siehe Titelseite).
• Das Gerät entspricht den marokkanischen Normen.
• Die Cم (CMIM)-Konformitätserklärung ist auf unserer
Website verfügbar.
14
PBT 824 DE
Übersetzung der Originalbetriebsanleitung

• Dieses Gerät entspricht der 2012/19/EU-Richtlinie über Elek-
tronik- und Elektro-Altgeräte (Altgeräteverordnung) und darf
daher nicht im Hausmüll entsorgt werden. Entsorgen Sie das
Gerät über Ihre kommunale Sammelstelle für Elektro-Altgeräte!
• Recyclingprodukt, das nicht über den Hausmüll entsorgt wer-
den darf.
BETRIEB UND NUTZUNG
Hinweis: Immer wenn der Tester an einer Batterie angeschlossen wird, überprüft er die Messleitung auf korrekten
Anschluss. Bei korrektem Anschlusst, zeigt der Tester die Startseite an. Bei falschem Anschluss, zeigt der Tester
«PRÜFPLATZEN» an. In diesem Fall den Anschluss überprüfen. Die Klemmen an der Batterie neu anschliessen
oder bei beschädigter Messleitung diese ersetzen.
1- Führen Sie die Test nur in gut gelüfteten Räumen durch.
2- Batterietester für 12 VBatterien und 12 & 24V Lichtmaschinen
3- Vor dem Test vergewissern, dass die Zündung ausgeschaltet ist. Alle Türen und den Koerraum schließen.
4- Betriebstemperatur : von 0°C (32°F) bis 50°C (122°F)
5- Sicherstellen, das die Pole der Batterie sauber sind. Wenn erforderlich, mit einer Metallbürste putzen.
Rost oder Schmutz zwischen den Klemmen des Testers und den Batterieanschlüssen oder zwischen den
Batterieanschlüssen und deren Polen beeinussen das Testergebnis.
6- Legen Sie eine 6 Batterien AA in das Batteriefach ein.
7- Die Minuspolklemme (schwarz) am Minuspol der Batterie anschließen. Die Pluspolklemme am Pluspol der
Batterie anschließen.
HAUPTMENÜ
Wenn die Klemmen angeschlossen sind, zeigt der Tester automatisch das Hauptmenü . Die Pfeiltaste benutzen,
um die Funktionen im Hauptmenü durchzublättern.
Funktionen LCD Display Aktion
Batterietest TEST
BATTERIE
XX.XX V
"ENTER" drücken um einen Batterie-
test
durchzuführen
Systemtest
TEST
SYSTEM
XX.XX V
"ENTER" drücken um einen Licht-
maschinentest
durchzuführen
Test im Fahrzeug
TEST IN
FAHRZEUG
XX.XX V
"ENTER" drücken um einen Test inm-
Fahrzeug durchzuführen
Letztes Ergebnis drucken
LETZTES
ERGEBNIS
DRUCKEN
"ENTER" drücken um das letzte Erge-
bnis zu drucken
Auswahl der Sprache AUSWAHL
SPRACHE
"ENTER" drücken um die Sprache
zu ändern"
Testzähler TESTZÄHLER
"ENTER" drücken, um zu sehen, wie
oft Batterie-/Lichtmaschinen/Im-
Fahrzeug-Tests durchgeführt worden
sind.
Einstellung Datum/Uhrzeit 2018/02/05 13:25:00
"ENTER" drücken, um Datum und
Uhrzeit einzustellen. Dann auf
drückenum das Jahr einzustellen.
""ENTER"" drücken um das Jahr
festzulegen. Vorgang wiederholen, um
Monat, Tag, Uhr und Minute festzule-
gen.
Helligkeit HELLIGKEIT "ENTER"" drücken, um die Helligkeit
einzustellen.
Personalisieren PERSONALISIEREN "ENTER" drücken, um die personali-
sierten. Informationen zu ändern. 15
PBT 824 DE
Übersetzung der Originalbetriebsanleitung

BATTERIE TESTEN
1. Im Hauptmenü «Test der Batterie» auswählen und «ENTER» drücken.
2. Auf drücken, um «NORMAL/STANDARD» oder «START / STOP» auszuwählen.
3. Auf die Taste um den Batterietyp auszuwählen. «ENTER» drücken, um zu bestätigen.
5. Auf die Taste drücken, um die Norm auszuwählen (EN, CCA, BCI, CA, MCA, JIS, DIN, CEI, SAE, GB)
6. Auf die Taste um die Batteriekapazität (in Ampere-Stunde «Ah») auszuwählen.
7. Drücken Sie auf «ENTER» um die korrekte Umgebungstemperatur (über 0°C / 32 °F) zu bestätigen.
8. Den Anweisungen am Tester folgen.
Durch Drücken der «ENTER»-Taste für mehr als zwei Sekunden gelangt man zurück ins Hauptmenü.
• Ergebnis des Batterietests
Der Ergebnisbildschirm wird je nach gefundenem Ergebnis grün, orange oder rot. Grün zeigt ein positives Erge-
bnis an, orange gut aber zu beobachten, rot zu ersetzen.
Cas Résultats trouvés Analyse
Batterie im guten Zustand
VOL : xx.xx V
CCA : xxxx CCA/SAE
IR : xx.xx mΩ
BATTERIE OK
Die Batterie ist betriebsbereit.
Guter Zustand, auaden
VOL : xx.xx V
CCA : xxxx CCA/SAE
IR : xx.xx mΩ
OK AUFZULADEN
Batterie in gutem Zustand aber mit geringer Span-
nung.Vor Gebrauch auaden.
Warnung
VOL : xx.xx V
CCA : xxxx CCA/SAE
IR : xx.xx mΩ
WARNUNG
Die Batterie muss aufgeladen werden. Die Startleis-
tung des Motors wird schwächer. Möglicherweise
besteht auch eine schlechte Verbindung zwischen
dem Fahrzeug und der Batterie. Batterie prüfen und
gegebenenfalls ersetzen.
Laden und testen
VOL : xx.xx V
CCA : xxxx CCA/SAE
IR : xx.xx mΩ
LADEN & TESTEN"
Die Batterie ist entladen und kann nicht getestet
werden. Die Batterie auaden, um einen Test erneut
durchzuführen.
Batterie ersetzen.
VOL : xx.xx V
CCA : xxxx CCA/SAE
IR : xx.xx mΩ
BATTERIE ERSETZEN
Die Batterie entlädt sich und funktioniert nicht mehr.
Batterie ersetzen
Bei defekten Zellen muss die
Batterie ersetzt werden.
VOL : xx.xx V
CCA : xxxx CCA/SAE
IR : xx.xx mΩ
ZELLE DEFEKT ERSETZEN
Mindestens eine Batteriezelle ist im Kurzschluss.
Batterie ersetzen
Fehler Auadung
VOL : xx.xx V
CCA : xxxx CCA/SAE
IR : xx.xx mΩ
FEHLER AUFLADUNG
Die Batterie ist über 2 000CCA oder 200Ah oder
die Klemmen sind nicht richtig angeschlossen. Die
Batterie auaden und nach Überprüfung der ande-
ren möglichen Ursachen erneut testen. Bleibt die
Anzeige gleich, muss die Batterie ersetzt werden.
• Anzeige des Lade- und Batteriezustands
1. Die Pfeiltasten drücken, um den SOC (Ladezustand) und den SOH (Batteriezustand) zu lesen.
2. JA oder NEIN mit den Pfeiltasten auswählen, um das Ergebnis auszudrücken, und «ENTER» drücken.
3. «ENTER» drücken, um zurück ins Hauptmenü zu gelangen.
Was ist «Testcode»?
Es ermöglicht Ihnen, die Testdaten in Form einer Computertabelle abzurufen:
A. Legen Sie die mitgelieferte CD in das Laufwerk des Computers ein.
B. Önen Sie die Tabelle.
C. Scannen Sie den Barcode des (zuvor gedruckten) Tickets mit einem Barcodeleser oder geben Sie den Code
ein.
in der ersten Zelle der Tabelle.
D. Die Testergebnisse werden angezeigt.
3. Wählen Sie JA oder NEIN mit den Pfeilen, um das Ergebnis zu drucken, und drücken Sie «ENTER».
4. Drücken Sie «ENTER», um zum Hauptmenü zurückzukehren.
16
PBT 824 DE
Übersetzung der Originalbetriebsanleitung

• 24 V Batterietest
Um eine 24-V-Batterie aus 2 in Reihe geschalteten 12-V-Batterien zu testen, führt der Tester zwei separate
Tests an jeder der Batterien durch.
1. Wählen Sie «BATTERIE-TEST» aus dem Hauptmenü und wählen Sie «BATTERIE-PACK». 24 V ».
2. Schließen Sie die negativen und positiven Klemmen an die Enden des 24V-Batteriepacks an. Drücken Sie OK,
um den Test zu starten.
3. Auf der Anzeige erscheint «CONNECT BATTERY 1».
4. Schließen Sie die Klemmen an die erste 12V-Batterie an.
5. Drücken Sie diese Taste um «REGELMÄßIG / STANDARD» oder «START / STOP» auszuwählen.
6. Drücken Sie die Taste um den Batterietyp auszuwählen. Zur Bestätigung «ENTER» drücken.
7. Drücken Sie die Taste um die Norm auszuwählen (EN, CCA, BCI, CA, MCA, JIS, DIN, IEC, SAE, GB).
8. Drücken Sie die Taste um die Batteriekapazität einzugeben (ausgedrückt in Amperestunden «Ah»).
9. Bestätigen Sie die Umgebungstemperatur über 0° (32°F) durch Drücken von «ENTER».
10. Befolgen Sie die gleiche Vorgehensweise für Batterie Nr. 2. Drucken Sie dann das Ticket mit beiden Ergeb-
nissen aus.
TEST DER LICHTMASCHINE
1. «Systemtest» im Hauptmenü auswählen.
2. Alle Verbraucher im Fahrzeug müssen ausgeschaltet sein (Leuchte, Klimaanlage, Radio usw.),
bevor Sie den Motor starten.
3. Wenn der Motor läuft, wird eines der folgenden Ergebnisse angezeigt :
Angezeigte Ergebnisse: Analyse
Spannung beim Starten normal Die Spannung ist normal. "ENTER" drücken, um einen Ladekreistest
durchzuführen.
Niedrige Startspannung Die Spannung ist zu niedrig. Den Anlasser gemäß den Empfehlungen
des Fahrzeugsherstellers überprüfen
Keine Spannung beim Starten erkannt. Es wird keine Startspannung gemessen. Den Motor erneut starten.
4. «ENTER» drücken, um einen Ladetest durchzuführen.
• Ergebnis des Startspannungstests
Fall Angezeigte Ergebnisse: Analyse
Hohe Startspannung, wenn der
Test mit leerlaufendem Motor
durchgeführt wird.
ALT. IDLE VOLTS
xx.xx V HOCH Prüfen, ob die Verbindungen korrekt sind. Wenn alles
richtig angeschlossen ist, dann den Regler ersetzen.
Normale Startspannung wenn
der Test mit leerlaufendem Motor
durchgeführt wird.
ALT. IDLE VOLTS
xx.xx V NORMAL Kein Problem festgestellt. Normalbetrieb der Licht-
maschine.
Niedrige Startspannung wenn
der Test mit leerlaufendem Motor
durchgeführt wird.
ALT. IDLE VOLTS
xx.xx V NIEDRIG
Die Lichtmaschine liefert nicht genug Strom an die Batte-
rie. Keilriemen prüfen und sicherstellen, das die Licht-
maschine funktioniert, wenn der Motor in Betrieb ist.
Rutschen die Keilriemen oder sind sie beschädigt, dann
diese ersetzen und den Test erneut durchführen. Verbin-
dung zwischen Lichtmaschine und Batterie prüfen. Bei
schlechter Verbindung das Kabel reinigen oder ersetzen
und den Test erneut durchführen. Sind die Keilriemen in
gutem Zustand, dann die Lichtmaschine ersetzen.
5. Am Tester wird Folgendes angezeigt: «ZUBEHÖR EINSCHALTEN UND ENTER DRUCKEN». Die Heizung auf
maximale Leistung einstellen, sowie alle Lichter einschalten. Keine zyklische Lasten wie Klimaanlage oder Schei-
benwischer
einschaltenn.
6. Nach durchlaufenem Test , erhöhen Sie die Drehzahlen des Motors für 15 Sekunden auf 2500U/min.
7. Drücken Sie ENTER. Die Welligkeit des Ladestromkreises erscheint. Ein der folgenden Ergebnisse wird an-
gezeigt.
17
PBT 824 DE
Übersetzung der Originalbetriebsanleitung

18
PBT 824 DE
Übersetzung der Originalbetriebsanleitung
Angezeigte Ergebnisse: Analyse
Normale Welligkeit erkannt. Die Dioden in der Lichtmaschine/im Anlasser arbeiten korrekt.
Keine Welligkeit erkannt. Keine Welligkeit erkannt. Funktionsstörung der Lichtmaschine. Ersetzen.
Hohe Welligkeit.
Eine oder mehrere Dioden funktionieren nicht oder sind beschädigt. Si-
cherstellen, dass die Halterung der Lichtmaschine richtig eingesetzt ist und
dass die Riemen richtig funktionieren. Wenn es der Fall ist, dann die Licht-
maschine ersetzen.
8. «ENTER» drücken, um den Test mit in Betrieb stehendem Zubehör durchzuführen (Leuchte, Heizung...).
• Ergebnis des Ladestromkreistests mit in Betrieb stehendem Zubehör.
Fall Angezeigte Ergebnisse: Analyse
Hohe Startspannung beim Test mit in
Betrieb stehendem Zubehör.
ALT. BELASTUNG
DER VOLTS
xx.xx V HOCH
Die Ausgangsspannung der Lichtmaschine ist zu
hoch. Prüfen, ob es einen Verbindungsfehler gibt.
Sonst die Lichtmaschine ersetzen.
Normale Startspannung beim Test mit
in Betrieb stehendem Zubehör.
ALT. BELASTUNG
DER VOLTS
xx.xx V NORMAL
Die Ausgangsspannung der Lichtmaschine ist
normal. Kein Problem wurde erkannt.
Niedrige Startspannung beim Test mit
in Betrieb stehendem Zubehör.
ALT. BELASTUNG
DER VOLTS
xx.xx V NIEDRIG
Die Lichtmaschine liefert nicht genug Strom zur
Auadung der Batterie und der elektrische Anlage.
Keilriemen prüfen und sicherstellen, das die Licht-
maschine funktioniert, wenn der Motor in Betrieb
ist. Rutschen die Riemen, oder sind sie beschädigt,
dann diese ersetzen und den Test erneut durchfüh-
ren.
Anschluss zwischen Lichtmaschine und Batterie
prüfen. Bei schlechter Verbindung das Kabel reini-
gen oder ersetzen und den Test erneut durchführen.
Sind die Riemen in gutem Zustand, dann die Licht-
maschine ersetzen."
9. «ENTER» drücken, wenn der Systemtest beendet ist. Alle Zubehörteile (Heizung, Leuchte...) ausschalten.
«ENTER» drücken, um alle Testergebnisse anzuzeigen.
TEST IM FAHRZEUG
Dies ist eine Kombination aus Batterie- und Systemtest. Bei Auswahl von «Test im Fahrzeug» führt das Gerät alle Tests
durch. Die Testergebnisse werden auf einem einzigen Beleg ausgedruckt. Den oberen Testprozeduren oder den am
Tester angezeigten Anweisungen folgen.
PAPIER NACHFÜLLEN
A. Transparenten Deckel önen.
B. Legen Sie eine neue Papierrolle ein.
C. Papier ein wenig aus dem Papierfach herausziehen und auf den transparenten Deckel drücken, um ihn zu
schließen.
WARTUNG
Fall Analyse
Bildschirm aus Prüfen, ob das Gerät richtig an der Batterie angeschlossen ist. Die Batteriespannung
ist zu niedrig, um einen Test durchzuführen (<1,0V).
Die Batterie auaden und erneut versuchen.
Druckfehler Papierstau: das Papier wurde nicht richtig eingesetzt.
Kein Papier mehr: Papier nachfüllen.
Interne Batterie ersetzen Batterie des Testers ersetzen.

19
PBT 824 DE
Übersetzung der Originalbetriebsanleitung
HERSTELLERGARANTIE
Die Garantieleistung des Herstellers erfolgt ausschließlich bei Fabrikations- oder Materialfehlern, die binnen 24 Monate
nach Kauf angezeigt werden (nachweis Kaufbeleg). Nach Anerkenntnis des Garantieanspruchs durch den Hersteller
bzw. seines Beauftragten erfolgen eine für den Käufer kostenlose Reparatur und ein kostenloser Ersatz von Ersa-
tzteilen. Die Garantiezeitraum bleibt aufgrund erfolgter Garantieleistungen unverändert.
Ausschluss:
Die Garantieleistung erfolgt nicht bei Defekten, die durch unsachgemäßen Gebruach, Sturz oder harte Stöße sowie
durch nicht autorisierte Reparaturen oder durch Transportschäden, die infolge des Einsendens zur Reparatur, hervor-
gerufen worden sind. Keine Garantie wird für Verschleißteile (z. B. Kabel, Klemmen, Vorsatzscheiben usw.) sowie bei
Gebruachsspuren übernommen.
Das betreende Gerät bitte immer mit Kaufbeleg und kurzer Fehlerbeschreibung ausschließlich über den Fachhandel
einschicken. Die Reparatur erfolgt erst nach Erhalt einer schriftlichen Akzeptanz (unterschrift) des zuvor Kostenvo-
ranschlags durch den Besteller. Im Fall einer Garantieleistung trägt der Hersteller ausschließlich die Kosten für den
Rückversand an den Fachhändler.

INSTRUCCIONES DE SEGURIDAD
Estemanualdeusoincluyeindicacionessobreelfuncionamiento
de su aparato y las precauciones a seguir para su seguridad.
Léalo atentamente antes del primer uso y consérvelo con
cuidado para cualquier relectura en el futuro.
Riesgo de explosión y de incendio !
Una batería en carga puede emitir gases explosivos.
El probador de batería debe conectarse únicamente a as
baterías con una tensión nominal de salida de 6V, 12V y 24V.
CUIDADO : una inversión de polaridad puede conllevar
la fusión del fusible y podría causar daños permanentes.
Los daños debidos a la inversión de polaridad no están
cubiertos por la garantía.
ATENCIÓN: si la batería del vehículo está desconectada,
es posible que algunos sistemas de gestión estén
desactivados.
Consulte el manual de su vehículo para más información
sobre la instalación.
No utilice el probador de batería si el cordón o los
terminales están dañados.
No utilice el probador de batería si el producto a recibido
un golpe brusco o ha sido dañado de cualquier manera.
No desmonte el aparato. Un re-ensamblado incorrecto puede
conllevar un riesgo de descarga eléctrico o de incendio.
Riesgo de proyección de ácido !
• Lleve gafas de seguridad y prendas apropiadas.
• En caso de contacto con los ojos o la piel, aclare
inmediatamente con agua abundantemente y consulte con
un médico sin demora.
• Evite las llamas y las chispas. No fume.
• Proteja las supercies de contactos eléctricos de la
batería contra cortocircuitos.
• Material conforme a las Directivas europeas. La declaración
de conformidad UE está disponible en nuestra página web.
• Marca de conformidad EAC (Comunidad económica
euroasiática).
• Material conforme a las exigencias británicas.
• La declaración de conformidad británica esta disponible
en nuestra web (dirección en la portada).
• El dispositivo se ajusta a las normas marroquíes.
• La declaración de conformidad Cم(CMIM) está
disponible en nuestro sitio web.
20
PBT 824 ES
Traducción de las instrucciones originales
This manual suits for next models
1
Table of contents
Languages:
Other GYS Test Equipment manuals

GYS
GYS Tool it DBT 400 User manual

GYS
GYS Tool it NBT 100 User manual

GYS
GYS Toolit NBT 100 User manual

GYS
GYS Toolit DBT 350 User manual

GYS
GYS BT 551 User manual

GYS
GYS Tool It DBT 500 User manual

GYS
GYS Tool it TBP 500 User manual

GYS
GYS BTW 300 User manual

GYS
GYS Tool it NBT 200 User manual

GYS
GYS Tool it NBT 100 User manual