Hama Cube 00186304 User manual

Mobile Speaker
RadioControlledAlarm Clock
Cube
Funkwecker
PL
NL
H
RO
SK
I
ALARM
SNOOZE /LIGHT
MODE +/RCC
-/°C/°F
14:06
DIE
21.5 C
1
1-
DATE
DAY TEMP
MONTH
E
Instrukcja obsługi
Használati útmutató
Manual de utilizare
Návod kpoužití
Návod na použitie
Manual de instruções
Bruksanvisning
Руководство по эксплуатации
Работна инструкция
Οδηγίες χρήσης
Käyttöohje
F
D
GB Operating Instructions
Bedienungsanleitung
Mode d‘emploi
Instrucciones de uso
Gebruiksaanwijzing
Istruzioni per l‘uso
CZ
P
S
BG
RUS
GR
FIN
00186304
00186305

2
Technical data/Technische Daten
Power supply /Stromversorgung/Alimentation
électrique /Alimentación de corriente/ Питание
/Alimentazione elettrica/Stroomvoorziening /
Ηλεκτρική τροφοδοσία /Zasilanie elektryczne /
Tápellátás /Napájení/Napájanie /Alimentação
elétrica /Alimentarecucurent /Strömförsörjning/
Virransyöttö / Електрозахранване
2xAAA batteries
Battery /Batterie/ pile /pila /
батарея /batteria /batterijen /
μπαταρίες/bateria /elem /baterie/
batéria /pilha/baterie/batteri /
paristo / батерия
Frequenz/Frequenz /fréquences/frecuencia
/частот /frequenza /Frequentie /συχνοτήτων/
Częstotliwość/frekvencia /Frekvence /Frekvencia
/frequências /frecvențe/frekvensband /
Radiotaajuudet / Радиочестотни
77.5 kHz
Temperaturemeasuring range/ Messbereich
Temperatur/ Plage de mesuredelatempérature/
Rango de medición de temperatura/ Диапазон
измерения температуры/Campo di misurazione
temperatura/ Meetbereik temperatuur/ Εύρος
μέτρησης θερμοκρασίας/Zakres pomiaru
temperatur/ Hőmérséklet mérési tartomány/
Rozsah měření teploty/ Rozsah merania teploty/
Amplitude de medição da temperatura/ Domeniu
măsuraretemperatură/Mätområde temperatur/
Lämpötilan mittausalue/ Диапазон на измерване
на температурата
0°C –+50°C
32°F –122°F

14-
MON
21.4 C
11
AM
DST
DATE
DAY TEMP
MONTH
12:26
1
2
34
5
7
6
ALARM MODE
SNOOZE/LIGHT
+/RCC -/°C/°F
8
910
11
12
13
AAA
AAA
3

4
GImportant information -Quick guide
!•This quick-reference guide contains the most importantbasicinformation,such
as safety instructions and the steps necessary to operate the product.
•Tohelp protect the environment and conserve valuable rawmaterials, Hama does not
issue aprinted manual andinstead makes this available exclusively as aPDF download.
•The fulltext of the manual is available at the following internet address:
www.hama.com -> 00186304, 00186305 -> Downloads
•Save the manual on your computer for reference and print it out if possible.
DWichtiger Hinweis -Kurzanleitung
!
•Dies ist eine Kurzanleitung, die Sie mit den wichtigstenBasis-Informationen
wieSicherheitshinweisen und der
Inbetriebnahme Ihres Produktes versorgt.
•Aus Gründen des Umweltschutzes und der Einsparung wertvoller Rohstoffe verzichtet die Firma
Hama auf eine gedruckte Langanleitung und bietet diese ausschließlich als PDF-Download an.
•Die vollständige Langanleitung ist unter der folgenden Internetadresse verfügbar:
www.hama.com -> 00186304, 00186305 -> Downloads
•Speichern Sie die Langanleitung zum Nachschlagen auf Ihrem Computer und drucken Sie
diese nach Möglichkeit aus.
FRemarque importante -Guiderapide
!
•Ceci est un guide rapide qui vous fournit les informationsdebase les plus
importantes relatives aux consignes
de sécurité et àlamise en service devotreproduit.
•Pour des raisons de protectiondel’environnement et de préservation de précieuses matières
premières, la société Hama renonce àl’impression d’un mode d’emploi complet et met celui-ci
àdisposition exclusivement sous forme de chier PDF.
•Lemode d’emploi complet est disponible àl’adresse Internet suivante :
www.hama.com -> 00186304, 00186305 -> Downloads
•Sauvegardez ce mode d’emploi complet pour le consulter sur votreordinateur et
imprimez-le si nécessaire.

5
ENota importante sobrelaguía de inicio rápido
!•Este documento es una guía de iniciorápido que recoge la informaciónbásicamás
importante, como indicaciones de seguridad ocómo poner en funcionamiento el producto.
•Por motivos de protección medioambiental ycon el ndeahorrar materias primas
valiosas, la empresa Hama prescinde de un manual de instrucciones impreso,ofreciéndolo
exclusivamenteenformato PDF descargable.
•Elmanual de instrucciones íntegroestá disponible en la siguiente direccióndeInternet:
www.hama.com->00186304, 00186305 -> Downloads
•Guarde el manual de instrucciones en su ordenador paraconsultarlo cuando sea necesario
eimprímalo si es posible.
NBelangrijke aanwijzing-beknopte handleiding
!•Dit is een beknopte handleiding met belangrijke basisinformatie, zoals
veiligheidsinstructies en informatie over het in gebruik nemen van uw product.
•Omwille van milieubescherming en het besparen van waardevolle grondstoffen ziet Hama af
van gedrukte lange gebruikershandleidingen en biedt deze uitsluitend als PDF-download aan.
•Devolledige lange gebruikershandleiding is op het volgende internetadres
beschikbaar: www.hama.com -> 00186304, 00186305 -> Downloads
•Bewaar deze lange handleiding ter referentie op uw computer en druk deze zo mogelkaf.
INota importante -Guida rapida
!•Lapresente guida rapida fornisce le informazioni di base piùimportanti, quali
istruzioni di sicurezza emessa in funzione del prodotto.
•Per motivi di tutela dell’ambiente edirisparmio di preziose materie prime, la ditta Hama non
fornisce la versione estesa del manuale di istruzioni in formato cartaceo, bensì soltanto in PDF.
•Laversione estesa del manuale di istruzioni èdisponibile al seguente indirizzo
Internet: www.hama.com -> 00186304, 00186305 -> Downloads
•Salvarelaversione estesa del presente manuale di istruzioni per poterla consultare sul proprio
computer estampare, se necessario.

6
PWażna wskazówka —skrócona instrukcja obsługi
!
•Jest to skrócona instrukcja obsługi, która dostarcza najważniejszychpodstawowych
informacji, takich jak wskazówki dotyczące bezpieczeństwa iuruchamiania produktu.
•Zewzględu na ochronęśrodowiskaioszczędność cennych surowców, rma Hama rezygnujez
drukowanej wersji instrukcji obsługi iprzedkłada jąwyłącznie wformie plikuPDF do pobrania.
•Pełny tekst instrukcji obsługi jest dostępny pod następującym adresem internetowym:
www.hama.com -> 00186304, 00186305 -> Downloads
•Należyzachowaćniniejsząinstrukcjęobsługi wcelach informacyjnychnaswoim komputerze
iwydrukowaćją,jeśli to możliwe.
HFontos megjegyzés –Rövid útmutató
!•Ezarövid útmutató az olyan legfontosabb, alapvetőinformációkat tartalmazza,
mint abiztonsági utasítások és atermék üzembe helyezése.
•AHama cég akörnyezetvédelem és az értékes nyersanyagokkal való takarékoskodás
jegyében lemond ahosszú útmutató nyomtatott, papír alapú változatáról, és azt kizárólag
letölthetőPDF-fájlként teszi közzé.
•Ateljes, hosszú útmutató az alábbi internetes címen érthetőel:
www.hama.com -> 00186304, 00186305 -> Downloads
•Ahosszú használati útmutatót mentse le aszámítógépére, hogybármikorbeletekinthessen, és
lehetőség szerint ki is nyomtathatja.
MIndicație importantă–Instrucțiuni rezumate
!•Acestea sunt niște instrucțiuni rezumate, care văoferăcele mai importante
informații de bază,precum indicațiile de securitate șipunerea în funcțiune aprodusului dvs.
•Din motive de protecție amediului șideeconomie amateriilor primevaloroase, rmaHama
renunță la instrucțiunile de utilizaretipărite șivileoferăexclusiv sub forma unei descărcări PDF.
•Textul integral al manualului de utilizarecomplet este disponibil la următoarea adresă
internet: www.hama.com -> 00186304, 00186305->Downloads
•Salvațimanualul de utilizarecomplet pe calculatorul dvs., pentru oconsultareulterioarăși
imprimați-l în funcție de nevoie.
7
CDůležité upozornění –stručný návod
!•Toto je stručný návod, který vám poskytne nejdůležitější základní informace
týkající se bezpečnostních pokynůauvedení vašeho výrobku doprovozu.
•Zdůvodůochrany životního prostředíaúspory cenných surovin společnost Hama upouští od
tištěného dlouhého návodu kobsluze aposkytuje ho výlučnějako soubor ve formátu PDF.
•Úplný dlouhý návod je kdispozici na následující internetové adrese:
www.hama.com -> 00186304, 00186305 -> Downloads
•Tento dlouhý návod si provyhledávání uložte ve svém počítačiapodle možnosti si ho
vytiskněte.
QDôležité upozornenie –stručný návod
!•Toto je stručný návod, ktorývám poskytne najdôležitejšiezákladné informácie,
ako sú bezpečnostné pokyny auvedenie vášho výrobkudoprevádzky.
•Zdôvodov ochrany životného prostredia aúspory cenných surovín upúšťaspoločnosť
Hama od tlačenia dlhého návodu aponúka ho výhradne ako download PDF.
•Úplný dlhý návod je kdispozícii na tejto internetovej adrese:
www.hama.com -> 00186304, 00186305 -> Downloads
•Uložte si vo svojom počítačitento dlhý návod na opakované otváranie apodľamožnosti
si ho vytlačte.

8
OInformação importante -Guia rápido
!•Este manual éumguia rápido, que lhe dá as informações básicas mais
importantes, como, por exemplo, indicações de segurança einstruções para colocar oseu
produto em funcionamento.
•Amdepreservar oambiente edepoupar matérias primas valiosas, aHama optou por
não imprimir aversão longa do manualdeinstruções, disponibilizando-aexclusivamente
como um PDF paradescarregar.
•Poderá encontrar aversão longa do manual de instruções em:
www.hama.com -> 00186304, 00186305 -> Downloads
•Guarde aversão longa do manualdeinstruções no seu computador para opoder consultar,
e,senecessário, paraoimprimir.
SViktig information -snabbinstruktion
!•Detta är en snabbinstruktion som innehåller den viktigaste informationen som
säkerhetsanvisningar ochhur du kommer igång med dinprodukt.
•Av miljöskäl och för att spara på värdefullråvaraavstår Hama från en tryckt, komplett
bruksanvisning. Den nns endast att ladda ned som PDF.
•Den fullständiga bruksanvisningen nns på följande webbadress:
www.hama.com -> 00186304, 00186305 -> Downloads
•Sparaden fullständiga bruksanvisningen idin dator så att dukan titta iden, och skriv ut
den om du behöver det.

9
RВажное указание —краткое руководство
!•Это краткое руководство содержит основную информацию:указания по
технике безопасностиивводу изделия вэксплуатацию.
•Сцелью охраны окружающейсреды иэкономии ценного сырья Hama
отказывается от подробного руководства по эксплуатации впечатном виде и
предлагает его исключительно для загрузки вформате PDF.
•Сполным текстом подробного руководства по эксплуатации можно
ознакомиться здесь:www.hama.com -> 00186304, 00186305 -> Downloads
•Сохраните данное руководство по эксплуатации дляпросмотра на вашем компьютере
иповозможности распечатайте его.
BВажно указание –Кратко упътване:
!•Това екратко упътване,което Ви снабдява снай-важнатабазова информация,
като указания за безопасност ипускането вексплоатация на Вашия продукт.
•От съображения за опазване на околната среда испестяване на ценни суровини
фирма Hama не използва отпечатано дълго ръководство игопредлага само за
изтегляне в PDF формат.
•Цялото дълго упътване еналично на следния интернет адрес:
www.hama.com -> 00186304, 00186305 -> Downloads
•Запамететедългото упътване на Вашия компютързасправки уповъзможност го
разпечатайте.

10
JΣημαντική υπόδειξη –Συνοπτικόεγχειρίδιο
!•Αυτό είναι ένα συνοπτικό εγχειρίδιο το οποίο περιλαμβάνει τις σημαντικότερες
βασικές πληροφορίες,όπως προειδοποιήσεις ασφαλείας και οδηγίες για τη θέσητου
προϊόντος σε λειτουργία.
•Για λόγους προστασίας του περιβάλλοντος και εξοικονόμησης σημαντικώνπρώτων υλών,η
εταιρεία Hama δεν εκδίδει τυπωμένα λεπτομερή εγχειρίδια οδηγιών.Τα εγχειρίδια οδηγιών
διατίθενται αποκλειστικά ως αρχεία PDF.
•Το λεπτομερές εγχειρίδιο οδηγιών είναι διαθέσιμο στην εξής ηλεκτρονικήιστοσελίδα:
www.hama.com->00186304, 00186305 -> Downloads
•Αποθηκεύστε το λεπτομερές εγχειρίδιο οδηγιών στον υπολογιστή σας και,αν χρειάζεται,
τυπώστε το.
LTärkeä huomautuspikaohjeesta
!•Tämä on pikaohje, joka sisältäätärkeimmät perustiedot tuotteesta, kuten
turvallisuusohjeet ja tuotteen käyttöönotto-ohjeet.
•Koska Hama on luopunut painetusta käyttöohjeesta ympäristönsuojelullisista ja
arvokkaiden raaka-aineiden säästämistä koskevista syistä johtuen, pitkä ohje on
saatavissa ainoastaan ladattavana PDF-tiedostona.
•Täysimittainen käyttöohje on saatavilla seuraavasta internetosoitteesta:
www.hama.com -> 00186304, 00186305 -> Downloads
•Tallenna pitkä ohje tietokoneellesi myöhempäätarvettavarten ja tulosta se tarvittaessa.

11
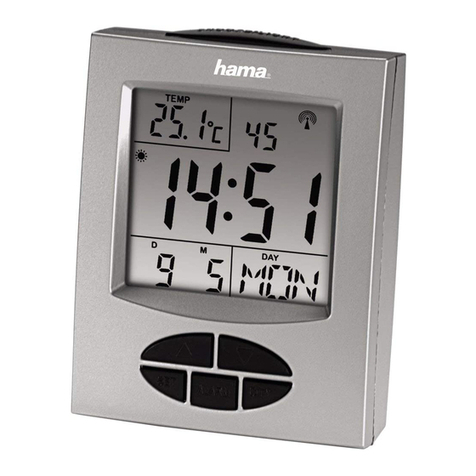
1. Controls and display
1. Time
2. Date
3. Day
4. Temperature
5. DCF radio signal
6. DST–summer time
7. Alarm symbol
8. ALARM button
=sets the alarm/activates and
deactivates the alarm clock
9. MODE button
=settings/conrms the setting
10. +/RCC button
=activates anddeactivates manual
radio signal reception/switches
between 12 and24-hour format/
increases thecurrentsetting
11. -/°C/°F button
=decreases thecurrentsetting/
switches between °C and°F
12. SNOOZE/LIGHT button
=activates thebacklight/interrupts the
alarm for approximately 10 minutes
13. Battery compartment
GOperating instruction
2. Package Contents
•Cube radio-controlled
alarm clock •2xAAA batteries •These operatinginstructions
3. Safety Notes
•Do notuse the product in areas where the use of electronic devices is not permitted.
•Only connect the product to asocket that has been approved forthe device. The
socket must be installed close to the productand easily accessible.
•Donot attempt to service or repair the product yourself.Leave any and allservice work
to qualied experts.
•Donot modify the product in any way.Doing so voids the warranty.
•The product is intended for private, non-commercial use only.
•Use the product for its intended purpose only.
•Protectthe product from dirt, moistureand overheating, andonly useitinadry
environment.

12
•Donot use the product in the immediate vicinity of heaters or other heat sources or in
direct sunlight.
•Donot drop the product and do not expose it to any major shocks.
•Keep the packaging material out of the reach of children due to the risk of suffocation.
•Donot operate the product outside thepower limits giveninthe specications.
•Donot open the deviceorcontinue to operate itifitbecomes damaged.
•Keep this product, as allelectrical products, out of the reach of children!
•Use the item only in moderate climaticconditions.
Warning –Batteries
•When inserting batteries, note the correct polarity (+ and-markings) and insert the
batteries accordingly.Failuretodosocouldresultinthe batteries leakingorexploding.
•Only use batteries that match the specied type. Keep the instructions for the correct
choice of batteries included with the operating instructions of devices safe for future
reference.
•Beforeyou insert the batteries, clean the battery contacts and the polarity contacts.
•Donot allow children to change batteries without supervision.
•Replace allthe batteries in aset at the same time.
•Do not mix old and new batteries, or batteries of different types or from different
manufacturers.
•Remove the batteries from products that arenot being used for an extended period
(unless these arebeing kept ready for an emergency).
•Donot short-circuit batteries.
•Donot charge batteries.
•Donot burn batteries or heat them up.
•Never open, damage or swallow batteries or allow them to enter theenvironment.
Theycan contain toxic,environmentally harmful heavy metals.

13
Warning –Batteries
•Remove spent batteries from the product and dispose of them without delay.
•Avoid storing, charging and using in extreme temperatures and at
extremely low atmospheric pressures (such as at high altitudes).
•Ensurethat batteries with damaged housings do not come into contact
with water.
•Keep batteries out of the reach of children.
4. Operation
4.1 Automatic date/time setting using the DCF signal
•Once you have inserted the battery,the display is switched on, an acoustic signal
sounds and the alarm clock automaticallystarts searching for aDCF signal. During
the search, the radio symbol ashes.
•
Once radiosignalreceiving is successful,the displayshows thesymbol
“radio tower“ continuously.no ashing. This process can take up to 7minutes.
•When the wireless signal is received, the date and time areautomatically set.
N
ote –Time settings
•If,during initial setup of the device, no DCF radio signal is received within the rst few
minutes, the search is aborted. The radio icon (5) will go out.
•If thereare reception problems, we recommend leaving theclocktosit overnight, since
interference is generally less at night.
•In the meantime, you can start amanual search for the DCF radio signal at another
location or you can manually set the time and date.
Backlight
•Press the SNOOZE/LIGHT button (12)tolight up thedisplay for approximately
5seconds.

14
4.2 Alarm clock
Setting the alarm time
•Press the ALARM button (8) to go to alarm mode.
•Press and hold the ALARM button (8) to set the alarm time for the alarm displayed. The
hours display begins to ash.
•Press the +/RCC button (10)orthe -/°C/°F button (11) to selectthe hour for the alarm
time, and conrm your selection by pressing the ALARM button (8). The minutes display
begins to ash.
•Repeat the process to set the minutes for the alarm time.
•Press the ALARM button (8) repeatedly to go backtothe time display.
•Ifyou do not make an entry for 20 seconds,the deviceautomatically exits the settings
mode and the settings you made aresaved.
Activating/deactivating the alarm clock
•Press the ALARM button (8) repeatedly to activate/deactivate thealarm time.
•Ifthe alarm is activated, the corresponding symbol is displayed.
Stopping the alarm clock/snooze function
•Ifthe alarm is triggered, an alarm signal will sound for 2minutes. Thefrequencyofthe
alarm signal increases the longer the alarm continues.
•Press the ALARM button (8) to stop the alarm.
N
ote –Snooze function
•While the alarm signal is sounding, press the SNOOZE/LIGHT button (12) to activate
the snooze function.
begins to ash on the display.The alarm signal will be stopped for 10minutes,
after which it willsound again.

15
5. Care and Maintenance
•Only clean this product with aslightly damp, lint-free cloth and do not use aggressive
cleaning agents.
•Make surethat water does not get into the product.
6. Warranty Disclaimer
Hama GmbH &CoKGassumes no liability and provides no warrantyfor damage resulting
from improper installation/mounting, improper use of the product or from failuretoobserve
the operating instructions and/or safety notes.
7. Declaration of Conformity
Hereby,Hama GmbH &CoKGdeclares that the radio equipment type
[00186304, 00186305]isincompliance with Directive 2014/53/EU.The full
textofthe EU declaration of conformity is available at the followinginternet
address: www.hama.com-> 00186304, 00186305 -> Downloads.

16
DBedienungsanleitung
1. Bedienungselementeund Anzeigen
1. Uhrzeit
2. Datum
3. Tag
4. Temperatur
5. DCF-Funksignal
6. DST–Sommerzeit
7. Alarmsymbol
8. ALARM-Taste
=Einstellung Wecker /Aktivierung/
Deaktivierung Wecker
9. MODE-Taste
=Einstellungen/Bestätigung des
Einstellungswerts
10. +/RCC-Taste
=Aktivierung/Deaktivierungmanueller
Funksignal-Empfang/Wechsel
12-/24-Stundenformat /Erhöhungdes
aktuellen Einstellungswerts
11. -/°C/°F-Taste
=Verminderungdes aktuellen
Einstellungswerts/Wechsel zwischen
°C und °F
12. SNOOZE/LIGHT-Taste
=AktivierungHintergrundbeleuchtung/
Unterbrechungdes Wecksignals für ca.
10 Minuten
13. Batteriefach
2. Packungsinhalt
•Funkwecker Cube •2AAABatterien •diese Bedienungsanleitung
3. Sicherheitshinweise
•Benutzen Sie das Produkt nicht in Bereichen, in denen elektronische Produkte nicht
erlaubt sind.
•Positionieren Sie das Produkt nicht in der Nähe von Störfeldern,Metallrahmen, Computern
und Fernsehern etc. Elektronische Geräte sowie Fensterrahmen beeinträchtigen die
Funktion des Produktes negativ.
•Versuchen Sie nicht, das Produkt selbst zu warten oder zu reparieren. Überlassen Sie
jegliche Wartungsarbeit dem zuständigen Fachpersonal.
•Nehmen Sie keine Veränderungen am Produkt vor.Dadurch verlieren sie jegliche
Gewährleistungsansprüche.
•Das Produkt ist für den privaten, nicht-gewerblichen Haushaltsgebrauchvorgesehen.

17
•Verwenden Sie das Produkt ausschließlich für den dazu vorgesehenen Zweck.
•Schützen Sie das Produkt vor Schmutz,Feuchtigkeitund Überhitzung und verwenden Sie
es nur in trockenen Umgebungen.
•Betreiben Sie das Produkt nicht in unmittelbarer Nähe der Heizung, anderer Hitzequellen
oder in direkter Sonneneinstrahlung.
•Lassen Sie das Produkt nicht fallen und setzen Sie es keinen heftigen Erschütterungen aus.
•Entsorgen Sie das Verpackungsmaterial sofort gemäß denörtlichgültigen
Entsorgungsvorschriften.
•Betreiben Sie das Produkt nicht außerhalbseiner in den technischen Daten angegebenen
Leistungsgrenzen.
•Öffnen Sie das Produkt nicht und betreiben Sie es bei Beschädigungen nicht weiter.
•Dieses Produkt gehört, wie alle elektrischen Produkte, nicht in Kinderhände!
Warnung –Batterien
•Beachten Sie unbedingt die korrekte Polarität (Beschriftung +und -) der Batterien
und legen Sie diese entsprechend ein. BeiNichtbeachtung bestehtdie Gefahrdes
Auslaufens oder einer Explosion der Batterien.
•Verwenden Sie ausschließlich Batterien, die dem angegebenen Typentsprechen. Heben
Sie Hinweise für die richtige Batteriewahl, die in der Bedienungsanleitungvon Geräten
stehen, zum späteren Nachschlagen auf.
•Reinigen Sie vor dem Einlegen der Batterien die Batteriekontakte und die
Gegenkontakte.
•Gestatten Sie Kindern nicht ohne Aufsicht das Wechseln von Batterien.
•Wechseln Sie alle Batterien eines Satzes gleichzeitig.
•Mischen Sie alte und neue Batterien nicht, sowieBatterien unterschiedlichen Typs
oderHerstellers.
•Entfernen Sie Batterien aus Produkten, die längereZeit nichtbenutzt werden (außer
diese werden für einen Notfall bereit gehalten).

18
Warnung –Batterien
•Schließen Sie die Batterien nichtkurz.
•Laden Sie Batterien nicht.
•Werfen Sie Batterien nichtins Feuer und erwärmen Sie sie nicht.
•Batterien nie öffnen, beschädigen,verschlucken oder in die Umwelt gelangen lassen. Sie
können giftige und umweltschädliche Schwermetalle enthalten.
•Entfernen und entsorgen Sie verbrauchte Batterien unverzüglich aus demProdukt.
•Vermeiden Sie Lagerung, Laden und Benutzung bei extremen
Temperaturen und extrem niedrigem Luftdruck (wie z.B. in großen Höhen).
•Achten Sie darauf,dass Batterien mit beschädigtem Gehäuse nicht mit
Wasser in Berührung kommen.
•Bewahren Sie Batterien außerhalbder Reichweite von Kindern auf.
4. Betrieb
4.1. Automatische Einstellung Datum/Uhrzeit nach DCF-Signal
•Nach dem Einlegen der Batterie wird das Display eingeschaltet, es ertönt ein akustisches
Signal und der Wecker beginnt automatisch dieSuche nach einem DCF-Signal. Während
des Suchvorgangs blinkt das Funksymbol auf.
•Nach erfolgreichem Signalempfang wird das „Funkturm“-Symbol dauerhaft eingeblendet
und hört auf zu blinken. Dieser Vorgang kannbis zu 7Minuten dauern.
•Bei Empfang des Funksignalswerden Datum und Uhrzeit automatischeingestellt.

19
H
inweis –Uhrzeiteneinstellung
•Wirdinnerhalbder ersten Minuten während derErsteinrichtungkein DCF-Funksignal
empfangen, wirddie Suche beendet. Das Funksymbol (5) erlischt.
•Bei Empfangsstörungen wird empfohlen, die Uhr über Nacht stehen zu lassen,dahier
die Störsignale in der Regel geringer sind.
•Sie können währenddessen eine manuelle Suche nach dem DCF-Funksignal an einem
anderen Aufstellungsort starten oder die manuelle Einstellung von Uhrzeit undDatum
vornehmen.
Hintergrundbeleuchtung
•Drücken Sie die SNOOZE/LIGHT-Taste (12), wirddas Display für ca. 5Sekunden
beleuchtet.
4.2 Wecker
Einstellung Weckzeit
•Drücken Sie die ALARM-Taste (8), um in den Alarmmodus zu gelangen.
•Drücken und Halten Sie die ALARM-Taste (8), um dieWeckzeit des angezeigten Alarms
einzustellen. Die Stundenanzeige beginnt zu blinken.
•Drücken Sie die +/RCC-Taste (10) oder die -/°C/°F-Taste(11), um die Stunden der
Weckzeit auszuwählen und bestätigen Sie die Auswahl durch Drücken der ALARM-Taste
(8). Die Minutenanzeige beginnt zu blinken.
•Wiederholen Sie diesen Vorgang für die Minuten der Weckzeit.
•Drücken Sie wiederholt die ALARM-Taste (8), um zurück zur Anzeige der Uhrzeit zu
gelangen.
•Erfolgt 20 Sekunden keine Eingabe, wird der Einstellungsmodus automatisch verlassen
und die vorgenommenen Einstellungen gespeichert.

20
Aktivierung/Deaktivierung Wecker
•Drücken Sie wiederholt die Alarm-Taste (8), um die Weckzeit zu aktivieren/deaktivieren.
•Bei aktiver Weckzeit wirddas entsprechende Symbol angezeigt.
Weckerbeenden/Schlummerfunktion
•Wirdder Wecker entsprechendausgelöst, ertönt ein 2-minütiges Wecksignal. Die Häugkeit
desertönenden Signalssteigtmit zunehmender Dauer desAlarms.
•Drücken Sie die ALARM-Taste (8), um den Alarm zu beenden.
H
inweis –Schlummerfunktion
•Drücken Sie während des Wecksignals die SNOOZE/LIGHT-Taste (12),umdie
Schlummerfunktion zu aktivieren.Auf dem Display beginnt zu blinken. Das
Wecksignal wirdfür 10 Minuten unterbrochen und dann erneut ausgelöst.
5. Wartung und Pflege
Reinigen Sie dieses Produkt nur mit einemfusselfreien,leichtfeuchten Tuch und verwenden
Siekeine aggressiven Reiniger.AchtenSie darauf,dass keinWasser in das Produkt eindringt.
6. Haftungsausschluss
Die Hama GmbH &CoKGübernimmt keinerlei Haftung oder Gewährleistungfür Schäden,
die aus unsachgemäßer Installation, Montage und unsachgemäßem Gebrauchdes Produktes
oder einer Nichtbeachtung der Bedienungsanleitung und/oder der Sicherheitshinweise
resultieren.
7. Konformitätserklärung
Hiermit erklärt dieHama GmbH &CoKG, dass der Funkanlagentyp [00186304,
00186305] der Richtlinie 2014/53/EU entspricht. Der vollständige Text der
EU-Konformitätserklärung istunter der folgenden Internetadresse verfügbar:
www.hama.com->00186304, 00186305->Downloads
This manual suits for next models
1
Table of contents
Languages:
Other Hama Alarm Clock manuals