8
DBedienungsanleitung
Bedienungselemente und Anzeigen
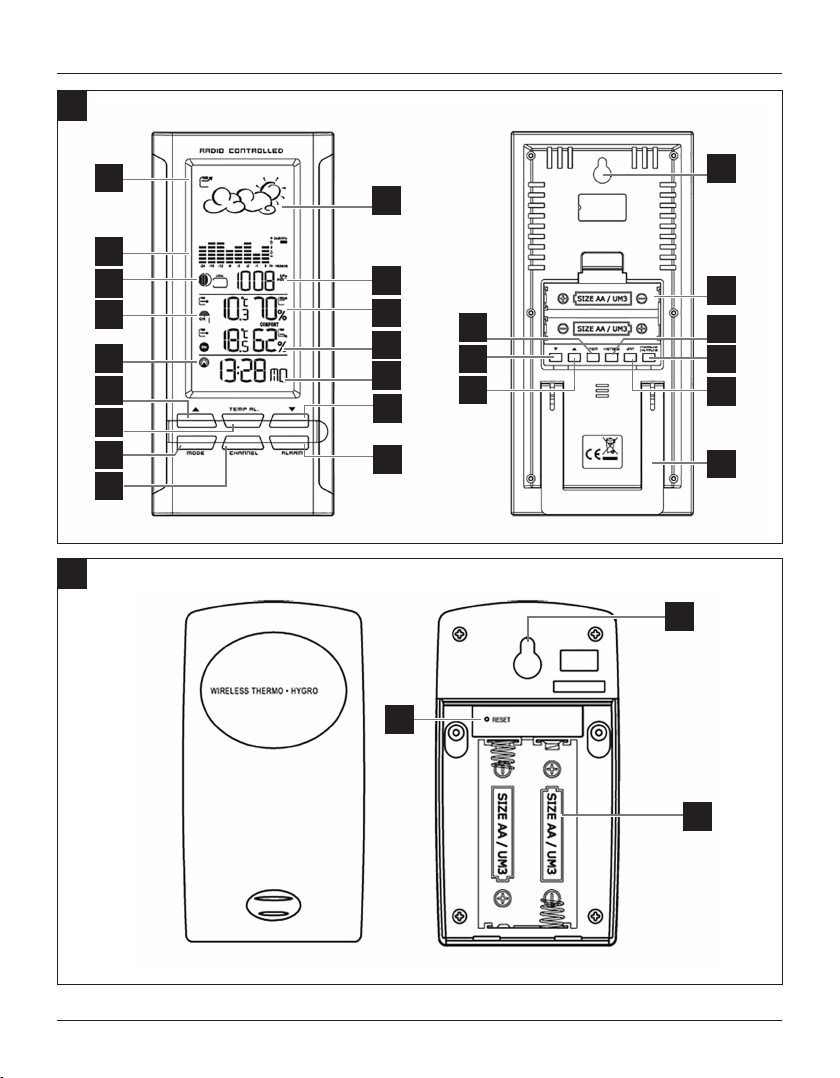
A Basisstation
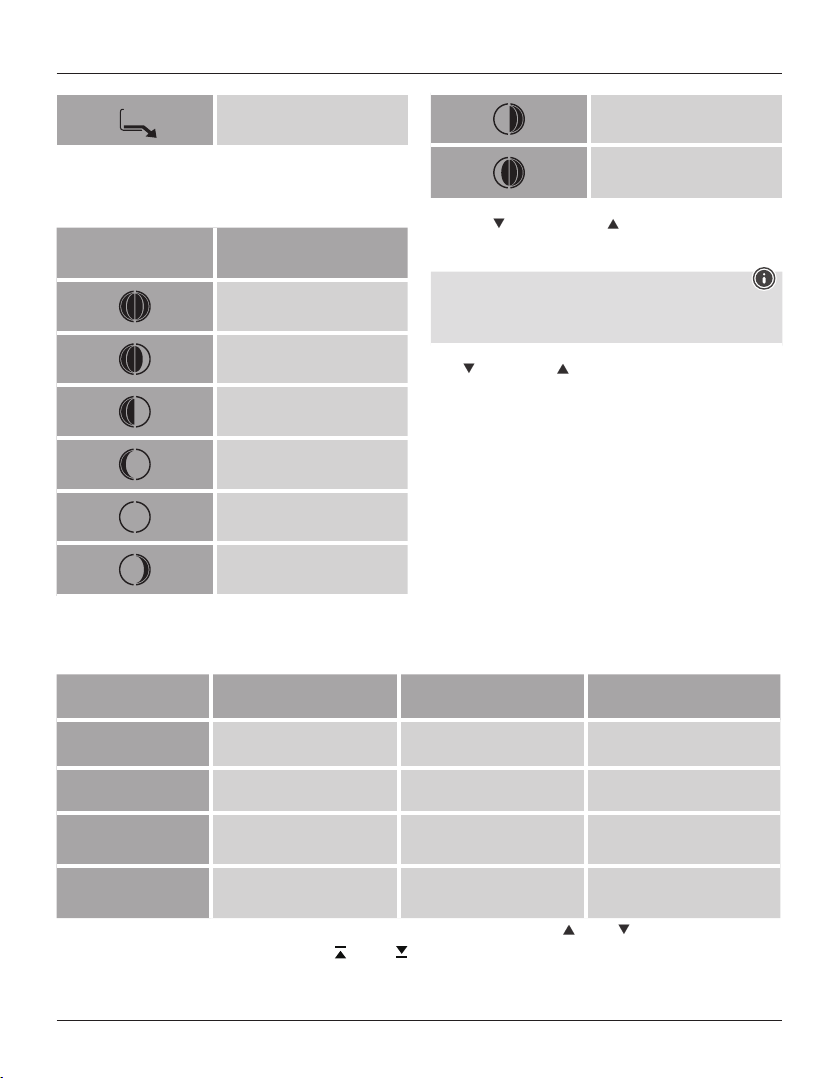
1. Luftdrucktendenz
2. Wettervorhersagesymbol
3. Luftdruckverlauf 24 Stunden
4. Luftdruck
5. Mondphase
6. Funksymbol Messstation
7. Außentemperatur und Luftfeuchtigkeit
8. Raumtemperatur und Luftfeuchtigkeit
9. Funksymbol
10. Uhrzeit
11. - Taste = Erhöhung des aktuellen Einstellungswertes/
Aktivierung/Deaktivierung manueller Funksignal-Empfang
12. TEMP AL. - Taste = Temperaturwarntaste (Festlegung der
Grenzwerte für Höchst- bzw. Tiefsttemperatur
13. - Taste = Verringerung des aktuellen Einstellungswertes/
Manuelle Suche nach Signal von der Messstation
14. MODE - Taste= Einstellungen/ Bestätigung des
Einstellungswertes/Wechsel zwischen Sekunden-, Wochentag-
und Zeitzonenanzeige
15. CHANNEL - Taste = Wechsel zwischen den Messwerten
mehrerer Sensoren
16. ALARM - Taste = Aktuelle Weckzeit/ Weckmodus festlegen
17. Aussparung für Wandmontage
18. Batteriefach
19. - Taste im Batteriefach = Mondphase der letzten Tage/
Einstellung Höhe über NN bzw. den Luftdruck auf NN für die
Barometeranzeige
20. - Taste im Batteriefach = Mondphase der nächsten Tage/
Einstellung Höhe über NN bzw. den Luftdruck auf NN für die
Barometeranzeige
21. MEM - Taste im Batteriefach = Speichertaste zum Aufrufen der
Höchst- bzw. Tiefstwerte für Temperatur und Luftfeuchtigkeit
22. History/Archiv - Taste im Batteriefach = Letzten Stunden
gemessene Luftdruckwerte
23. Unit - Taste (Luftdruck-/Höhe über NN im Batteriefach) =
Wechsel des Anzeigemodus
24. Pressure/Altitude - Taste (Gerätetaste) im Batteriefach =
Einstellung Höhenwert oder die Luftdruckanzeige
25. Standfuß
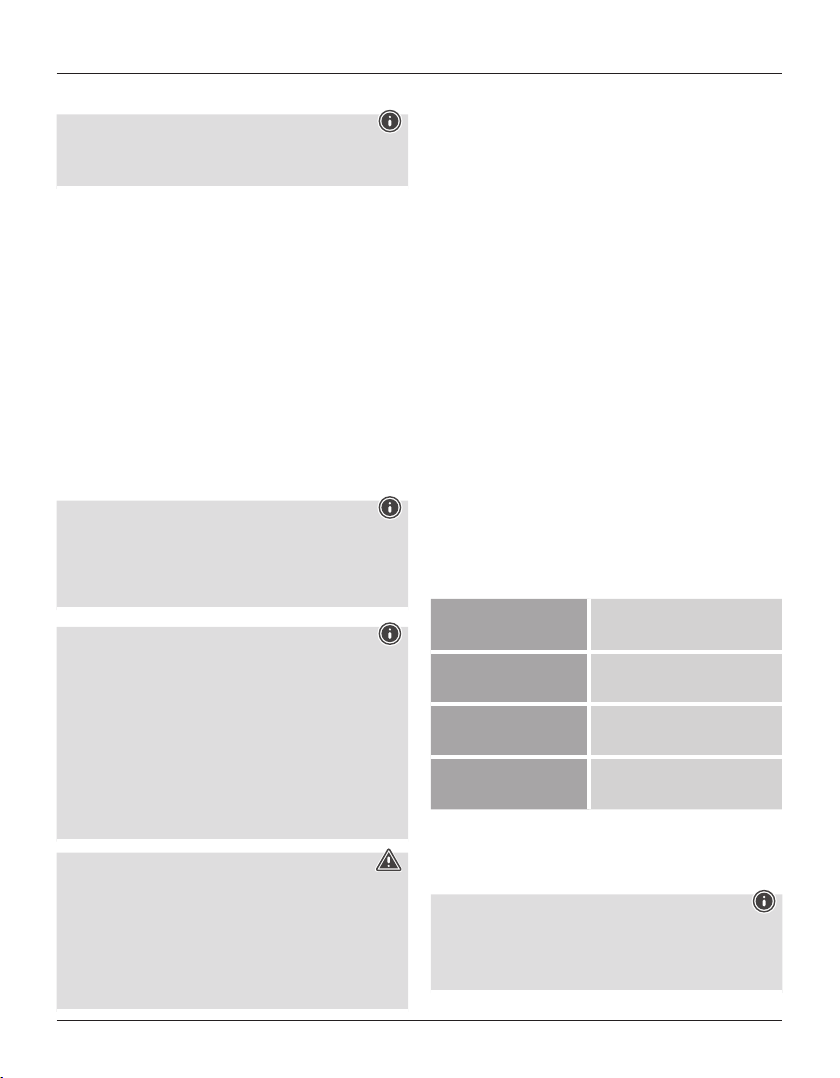
B Messstation
26. Aussparung für Wandmontage
27. Reset - Taste = Zurücksetzung auf Werkseinstellung
28. Batteriefach
1. Erklärung von Warnsymbolen und Hinweisen
Warnung
Wird verwendet, um Sicherheitshinweise zu kennzeichnen oder
um Aufmerksamkeit auf besondere Gefahren und Risiken zu
lenken.
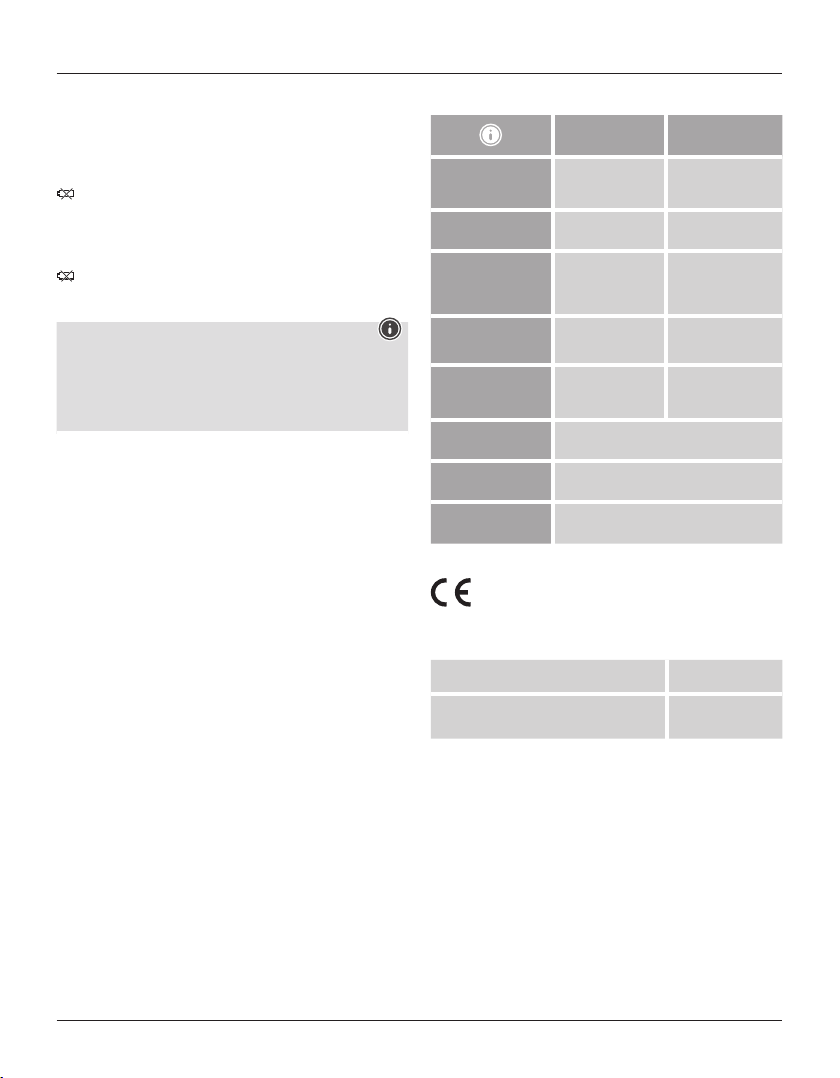
Hinweis
Wird verwendet, um zusätzlich Informationen oder wichtige
Hinweise zu kennzeichnen.
2. Packungsinhalt
•Wetterstation EWS-380
(Basisstation für den Innenbereich / Messstation für den
Außenbereich)
•2 AA Batterien
•diese Bedienungsanleitung
3. Sicherheitshinweise
•Das Produkt ist für den privaten, nicht-gewerblichen
Haushaltsgebrauch vorgesehen.
•Betreiben Sie das Produkt nicht außerhalb seiner in den
technischen Daten angegebene Leistungsgrenzen.
•Schützen Sie das Produkt vor Schmutz, Feuchtigkeit und
Überhitzung und verwenden Sie es nur in trockenen
Umgebungen.
•Betreiben Sie das Produkt nicht unmittelbarer Nähe der Heizung,
anderer Hitzequellen oder in direkter Sonneneinstrahlung.
•Benutzen Sie das Produkt nicht in Bereichen, in denen
elektronische Produkte nicht erlaubt sind.
•Positionieren Sie das Produkt nicht in der Nähe von Störfeldern,
Metallrahmen, Computern und Fernsehern etc. Elektronische
Geräte sowie Fensterrahmen beeinträchtigen die Funktion des
Produktes negativ.
•Lassen Sie das Produkt nicht fallen und setzen Sie es keinen
heftigen Erschütterungen aus.
•Öffnen Sie das Produkt nicht und betreiben Sie es bei
Beschädigung nicht weiter.
•Versuchen Sie nicht, das Produkt selbst zu warten oder zu
reparieren. Überlassen Sie jegliche Wartungsarbeit dem
zuständigen Fachpersonal.
•Nehmen Sie keine Veränderungen am Produkt vor. Dadurch
verlieren Sie jegliche Gewährleistungsansprüche.
•Halten Sie Kinder unbedingt von dem Verpackungsmaterial fern,
es besteht Erstickungsgefahr.
•Entsorgen Sie das Verpackungsmaterial sofort gemäß den örtlich
gültigen Entsorgungsvorschriften.
Warnung - Batterien
•Entfernen und entsorgen Sie verbrauchte Batterien unverzüglich
aus dem Produkt.
•Verwenden Sie ausschließlich Akkus (oder Batterien), die dem
angegebenen Typ entsprechen.
•Mischen Sie alte und neue Batterien nicht, sowie Batterien
unterschiedlichen Typs oder Herstellers.
•Beachten Sie unbedingt die korrekte Polarität (Beschriftung +
und -) der Batterien und legen Sie diese entsprechend ein. Bei
Nichtbeachtung besteht die Gefahr des Auslaufens oder einer
Explosion der Batterien.