Hanhart PROFIL 25 User manual

PROFIL 25
STOPSTAR
Garantie & Bedienungsanleitung
Guarantee & instructions for use
Garantie & mode d‘emploi
Garanzia & istruzioni per l‘uso

DEUTSCH ENGLISH FRANÇAIS ITALIANO
BEDIENUNGSANLEITUNG & GARANTIE
2
INSTRUCTION BOOK & GUARANTEE
8
MODE D‘EMPLOI & GARANTIE
14
ISTRUZIONI PER L'USO E GARANZIA
20

Hanhart-Garantie: 2 (zwei) Jahre
Sollten sich innerhalb dieser Zeit Mängel ergeben, die auf Fabrikations-
fehler oder schlechtes Material zurückzuführen sind, so wird unter Vor-
lage dieses Garantiescheines kostenlose Instandsetzung oder Umtausch
vorgenommen. Fehler infolge falscher Behandlung sowie Schäden,
die durch ausgelaufene Batterien entstanden sind, sowie die Batterien
selbst, fallen nicht unter die Garantie.
Hanhart-guarantee: 2 (two) years
If this stopwatch should become defective within this period, you are
entitled to get it repaired or exchanged free of charge. Defects resulting
from abuse of the stopwatch are not covered by this guarantee: for
instance, if contact springs are corroded by batteries which have leaked.
Batteries are not covered by this guarantee.
Hanhart-garantie: 2 (deux) ans
Si un défaut apparaissait durant cette période, nous échangerions ou
réparerions ce compteur gratuitement. Cette promesse de garantie ne
couvre pas les dégradations causées par un emploi abusif: par exemple,
si les ressorts de contact sont corrodés par des piles ayant coulé. Les
piles ne sont pas couvertes par cette garantie.
Hanhart-garanzia: 2 (due) anni
Se entro tale periodo dovessero verificarsi difetti di tal genere ci
caricheremo dell‘o nere di riparare o sostituire gratuitamente il con-
tasecondi ad eccezione delle spese di tras porto. La presente garanzia
non copre i guasti causati da manomissione o da uso non corretto dello
strumento. La presente garanzia non riguarda lo pile.
Datum / Date / Date / Data:
Verkäufer / Vendor / Vendeur / Venditore:

PROFIL 25 & STOPSTAR
Technische Daten (für beide Uhren)
Temperaturbereich
im Einsatz: -15 °C bis +55 °C
bei Lagerung: -25 °C bis +65 °c
Batterie
Typ: Mignonzelle AA
Kapazität: 3 bis 4 Jahre
Indikator: Wird nach einem RESET die MIN, 10 MIN und STD-Stelle
blinkend dargestellt, verbleibt noch für ca. 3 Wochen
Gangreserve.
Display
Profil: 9 Digits 8/6 mm Ziffernhöhe
Stopstar: 7 Digits 6,5/4 mm Ziffernhöhe
Anzeige: 7 Digits bei Splitfunktion: h, mm, ss, 1/100 Sek.
6 Digits bei Lapfunktion: mm, ss, 1/100 Sek.
2 Digits Eventcounter (nicht bei Stopstar 2)
Gehäuse ABS
Gewicht mit Batterie ca. 90 g
Genauigkeit PROFIL 25: +/- 7 Sek./Monat (bei 20 °C)
STOPSTAR 2: +/- 30 Sek./Monat
Zeitauflösung 1/100 Sek.
Speicher PROFIL 25:
24+1 (die ersten 24 und die letzte Zeitnahme)
STOPSTAR 2:
2 (Dualzeitmessung)
2

Funktionen PROFIL 25:
Addition, Split, Lap, Uhrzeit, Memoryabruf
STOPSTAR 2:
Addition, Split
Tasten PROFIL 25:
4: Start/Stop, Split/Lap, Memory/Display, Mode
STOPSTAR 2:
2: Start/Stop, Split/Reset
Batterie einlegen bzw. wechseln
Gehäuserückwand durch Druck auf
den Steg auf der Gehäuseunterseite
abnehmen (siehe Skizze). Batterie
einsetzen (auf richtige Polung achten).
Deckel wieder einrasten.
Kordel und Schutztasche montieren
Batteriedeckel abnehmen und Kordel von der Gehäuseaußenseite durch
eines der beiden Löcher einführen und durch das andere Loch von der
Gehäuseinnenseite wieder hinausführen. Beide Kordelenden von innen
durch die beiden Löcher der Schutztasche führen und dann verknoten.
SPLIT
5 MEMORIES
START/STOPSPLIT/LAP
DISPLAY
MEMORY
MODE
TIME SET RESET
stop
start
reset
split
1/100
h min sec
PROFIL 25 STOPSTAR 2

Legende zu verschiedenen Fachausdrücken:
SPLIT: ist die fortschreitende Zeit nach jedem Messpunkt.
Die letzte Splitzeit ist gleichzeitig auch die Gesamtzeit.
LAP: sind Differenzzeiten vom vorhergehenden zum
aktuellen Messpunkt, auch Rundenzeiten genannt.
ADD: sind Additionszeiten, abwechselnd Aktiv- und Pausen-
zeiten (Timeout).
MEMORY: sind Zeiten im Speicher.
EVENT: sind Zähler der gemessenen Splitzeiten.
STOPSTAR 2:
Mögliche Funktionen mit Suchindex (a-b)
a) Zeiten messen (Start/Stop und Split)
b) Reset der Stoppuhr
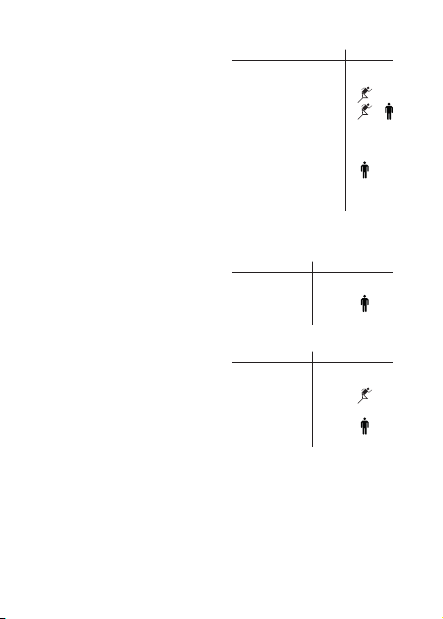
a) Zeiten messen
Start/Stop bzw. Addition
Start: Taste Start/Stop
Stop: Taste Start/Stop
Start: Taste Start/Stop
usw.
Split
Start: Taste Start/Stop
Split: Taste Split/Reset
Split: Taste Split/Reset
Split: Taste Split/Reset
usw.
Display
läuft
steht
läuft
Symbol
Display
läuft
steht
läuft
steht
Symbol
4

Dualmessung (zwei Zeiten schnell nacheinander)
Start: Taste Start/Stop
Messpunkt(e) abwarten...
1. Messpunkt Taste Split
2. Messpunkt Taste Stop
Auslesen Messpunkt 2 mit:
Taste Split
Reset: Taste Split
b) Reset der Uhr
Nur möglich nach einem Stoppvorgang z.B.
Start: Taste Start/Stop
Stop: Taste Start/Stop
Reset: Taste Split/Reset
oder
Start: Taste Start/Stop
Split: Taste Split/Reset
Split: Taste Split/Reset
Stop: Taste Start/Stop
Reset: Taste Split/Reset
PROFIL 25:
Mögliche Funktionen mit Suchindex (a-g)
a) Reset der Uhr e) Sichtbar laufende Anzeige
b) Mode-Funktion f) Event Counter
c) Zeiten messen (Start/Stop) g) Setzen der Uhrzeit
d) Speicherabruf
Display
läuft
steht
0:00:00:00
Symbol
Display
läuft
läuft
steht
Zeit von Messpunkt 1
-> notieren
Zeit von Messpunkt 2
0:00:00:00
Symbol
Display
läuft
steht
läuft
steht
0:00:00:00
Symbol

a) Reset
Gemeinsames Betätigen der Tasten START/STOP und MODE. Alle
Zeiten und der Memoryspeicher werden gelöscht. Die Uhrzeit bleibt
erhalten.
b) MODE (Wechsel der Funktionen)
Das Drücken der MODE-Taste bewirkt ein Funktionswechsel mit der
Bestätigung im Funktionsfenster.
SPLIT -> LAP -> TIME und wieder zurück nach Split.
c) Zeiten messen
- Die MODE-Taste selektiert die Funktionen SPLIT, LAP oder TIME.
- Unabhängig, welchen Mode Sie angewählt haben, ist es während
einer Zeitnahme, ohne Beeinflussung der anderen Funktionen
jederzeit möglich, den Mode zu ändern. Das Funktionssymbol im Dis-
play bestätigt lediglich die im Moment sichtbare Zeitmessart,
während die anderen Funktionen im Hintergrund weiterhin parallel
aktiv sind.
- Mit Hilfe der Taste START/STOP wird die Uhr abwechselnd gestartet
und gestoppt. Die Symbole bestätigen diesen Zustand.
Die SPLIT/LAP-Taste veranlasst die Speicherung der momentanen
SPLIT- und LAP-Zeit. Die Zeitanzeige bleibt scheinbar stehen. Dies
dient zur besseren Erkennung und Ablesung der gemessenen Zeit.
d) Speicherabruf
- Es kann jederzeit während der Zeitmessung mit Hilfe der Taste
MEMORY ein Speicherabruf erfolgen. Die ersten 24 Speicherplätze
sind den ersten 24 Zeiten zugeordnet. Im letzten (25.) Speicherplatz
befindet sich immer die zuletzt gemessene Zeit, sofern mehr als 25
Zeiten gestoppt wurden.
- Ablauf:
Taste MEMORY drücken und festhalten. Die Speicherzeit wird solange
angezeigt, wie die Taste gedrückt ist. Während dieser Phase steht im
Display der Zusatz MEMORY und direkt daneben die Speicher-
6

nummer. Beim zweiten Drücken von MEMORY erfolgt die Ausgabe
der nächsten Speicherzeit usw. Nach einem Auslesen des Speichers
steht das Display prinzipiell auf der zuletzt gemessenen Zeit. Wird die
Anzeige sichtbar laufend gewünscht -> siehe nächster Punkt.
e) Sichtbar laufende Anzeige
Ein kurzes Betätigen der DISPLAY- Taste bringt die Uhr nach einem
Stoppvorgang wieder in einen sichtbar laufenden Zustand.
f) Event Counter (zweistellig in Klammer)
- Zeigt die Anzahl der Betätigungen von Taste SPLIT/RESET (max. 99)
- Beim Speicherabruf wird die entsprechende Speichernummer
angezeigt.
g) Prinzipiell ist das Setzen der Uhrzeit nur nach einem Reset möglich
- Reset der Uhr
- mit der MODE-Taste auf TIME-Funktion gehen
- Taste DISPLAY aktiviert den SET-Vorgang mit dem Symbol SET im
Display.
- Ein weiteres Betätigen von Taste DISPLAY selektiert das zu setzende
Digit, welches blinkend dargestellt wird.
- Taste SPLIT/LAP erhöht das blinkende Digit (0-5 oder 0-9).
- Sekunden können nicht gesetzt werden. Zum Synchronisieren die
Minuten beim Setzen aufrunden und anschließend warten bis die
Vergleichsuhr die vorgegebene Minute erreicht hat.
- Taste MODE verlässt den Set-Zustand, ohne weiterschalten zum
nächsten MODE.
Verbraucher sind gesetzlich verpflichtet Altbatterien zu
einer geeigneten Sammelstelle/ Verkaufsstelle/ Versand-
lager zu bringen.
Die durchgestrichene Mülltonne bedeutet: Batterien
und Akkus dürfen nicht in den Hausmüll. Pb, Cd und Hg
bezeichnen Inhaltsstoffe, die oberhalb der gesetzlichen
Werte liegen.

PROFIL 25 & STOPSTAR
Technical features (for both stopwatches)
Temperature range
During use: -15 °C to +55 °C
During storing: -25 °C to +65 °C
Batteries
Type: Mignon cell AA
Capacity: 3 to 4 years
Indication: If after a RESET, the digits of h,
10min and 1min are flashing, there is still an approx.
3-week reserve.
Display
Profil: 9 digits, height 8/6 mm
Stopstar: 7 digits, height 6.5/4 mm
Indication: 7 digits at Split function: h, mm, ss, 1/100 sec
6 digits at Lap function: mm, ss, 1/100 sec
2 digits event counter (not included in Stopstar 2)
Case ABS
Weight Approx. 90 g with battery
Precision PROFIL 25: +/- 7 sec/month (at 20 °C)
STOPSTAR 2: +/- 30 sec/month
Time unit 1/100 sec
Memories PROFIL 25:
24+1 (24 for first, and 1 for the final time)
STOPSTAR 2:
2 (dual measurement)
8

Functions PROFIL 25:
Addition, Split, Lap, Uhrzeit, Memory recall
STOPSTAR 2:
Addition, Split
Buttons PROFIL 25:
4: Start/Stop, Split/Lap, Memory/Display, Mode
STOPSTAR 2:
2: Start/Stop, Split/Reset
Inserting and changing battery
Remove the battery cover by pressure
on the bar located on the bottom of the
case (see illustration).
Place battery with the correct polarity.
Snap the cover back in place.
Installing lanyard and protection pouch:
Remove the battery cover. Insert the lanyard from the outer side of
the case through one of the two holes and pass through the other
hole from the inner side of the case. Pull the both lanyard ends from
inside through the two holes of the protection pouch and then tie them
together.
SPLIT
5 MEMORIES
START/STOPSPLIT/LAP
DISPLAY
MEMORY
MODE
TIME SET RESET
stop
start
reset
split
1/100
h min sec
PROFIL 25 STOPSTAR 2

Legend of functions:
SPLIT: is the accumulated time after each measuring point.
The last split time is also the total time.
LAP: is the difference between the last time measured and the
current time, also called lap times.
ADD: are the addition times, alternatively active and break
times (timeout).
MEMORY: are the registered times in memory.
EVENT: is the number of the measured split times.
STOPSTAR 2:
Available functions with search index (a-b)
a) Measuring of time periods (Start/Stop und Split)
b) Reset of the stopwatch
a) Measuring times
Start/Stop or Addition
Start: Button Start/Stop
Stop: Button Start/Stop
Start: Button Start/Stop
etc.
Split
Start: Button Start/Stop
Split: Button Split/Reset
Split: Button Split/Reset
Split: Button Split/Reset
etc.
Display
runs
stops
runs
Symbol
Display
runs
stops
runs
stops
Symbol
10

Dual mesuring (two times quickly one after the other)
Start: Button Start/Stop
Wait for measuring point(s)...
1. measuring point button Split
2. measuring point button Stop
Read measuring point 2 with:
Button Split
Reset: Button Split
b) Reset of stopwatch
Only possible alter stop procedure, for example
Start: Button Start/Stop
Stop: Button Start/Stop
Reset: Button Split/Reset
or
Start: Button Start/Stop
Split: Button Split/Reset
Split: Button Split/Reset
Stop: Button Start/Stop
Reset: Button Split/Reset
PROFIL 25:
Available Functions with search index (a-g)
a) Reset of stopwatch e) Visible running time
b) Mode Function f) Event Counter
c) Measuring times (Start/Stop) g) Setting of time
d) Memory recall
Display
runs
stops
0:00:00:00
Symbol
Display
runs
runs
stops
Note time from
measuring point 1
time from measuring
point 2
0:00:00:00
Symbol
Display
runs
stops
runs
stops
0:00:00:00
Symbol

a) Reset
By pressing the START/ STOP and MODE buttons at the same time, all
times and memories are erased. The daytime remains in memory.
b) MODE (changing functions)
By pressing the MODE button, the functions are changed in the
following sequences and can be seen on the display.
SPLIT -> LAP -> TIME and back to Split.
c) Measuring times
- The MODE button selects the functions SPLIT, LAP or TIME.
- Regardless which mode you have selected, it is possible to change
the mode at any time without affecting the other functions. The
function symbol on the display only confirms the time measurement
visible in the moment, while the other functions are still active in the
background.
- The START/STOP button alternately starts and stops the watch. The
symbols confirm this procedure. The SPLIT/LAP button
causes the current SPLIT and LAP time to be memorized. The time
display stops.This serves for better recognition of the measured time.
d) Memory recall
- Memory can be recalled at any time during the time measurement
using the MEMORY button. The first 24 memories are stored for the
first 24 times. The last (25th) memory always contains the last
measured time, if more than 25 times have been stopped.
- Procedure:
Press and hold the MEMORY button. The memory time will be
indicated as long as the key is pressed. During this phase, the display
shows the MEMORY and the memory number. Pressing MEMORY
twice causes the next memory time to be emitted. The display shows
the last measured time. If the measured time should permanently be
displayed, read the next point.
12

e) Visibly running time
By pressing the DISPLAY button briefly the stopwatch returns to a
visible stop procedure.
f) Event Counter (double-digit in brackets)
- Displays the number of times of SPLIT/RESET (max 99)
- During memory recall the corresponding memory number is
displayed
g) Principally, the setting of the time is only possible after a reset
- Reset the stopwatch
- Press MODE button to enter the TIME function
- DISPLAY button is activating the SET operation with symbol SET on
the display
- A further pressing of the DISPLAY button selects the digit to be set,
which appears in a flashing mode.
- The SPLIT/LAP button is advancing the flashing digit (0-5 or 0-9).
- Seconds cannot be set. In order to synchronize, set the minutes by
rounding up and wait until the comparison has reached the specified
minute.
- The MODE button exits the set procedure without forwarding to the
next mode.
Consumers are legally required to dispose of batteries at
suitable collection points, vending points or dispatch bays.
The crossed-out wheeled bin means that batteries must
not be disposed of in the household waste. Pb, Cd and Hg
designate substances that exceed the legal limits.

PROFIL 25 & STOPSTAR
Caractéristiques techniques (pour les deux chronomètres)
Température
en utilisation: -15 °C à +55 °C
hors service: -25 °C à +65 °c
Piles
Type: Mignoncell AA
Durée: De 3 - 4 ans
Indicateur: Si après un RESET les chiffres correspondantes
MIN, 10 MIN et HEURE clignotent, il reste environ 3
semaines de réserve
Affichage
Profil: 9 chiffres, Taille des chiffres 8/6 mm
Stopstar: 7 chiffres, Taille des chiffres 6.5/4 mm
Indication: 7 chiffres en fonction Split: h, mm, ss, 1/100 sec
6 chiffres en fonction Lap: mm, ss, 1/100 sec
2 chiffres compteur du nombre de temps pris (pas avec
Stopstar 2)
Boîtier ABS
Poids environ 90 g avec pile
Précision PROFIL 25: +/- 7 sec/mois (à 20 °C)
STOPSTAR 2: +/- 30 sec/mois
Unités de mesure 1/100 sec
Mémories PROFIL 25:
24+1 (pour les premières 24 et la dernière mesure)
STOPSTAR 2:
2 (double mesure)
14

Fonctions PROFIL 25:
Addition, Split, Lap, l’heure, Rappel de mémoire
STOPSTAR 2:
Addition, Split
Touches PROFIL 25:
4: Start/Stop, Split/Lap, Memory/Display, Mode
STOPSTAR 2:
2: Start/Stop, Split/Reset
Installation et remplacement de la pile
Retirer l‘arrière du boîtier par pression sur
la passerelle située à la base du boiter
(voir croquis). Placer la pile en respectant
la polarité. Remettre le couvercle. Après
remplacement de la pile, l‘heure et la date
doivent être introduites à nouveau.
Montage du cordon et de la housse de protection
Retirer le couvercle de la pile et introduire le cordon du boîtier extérieur
par un des deux trous et le ressortier par l‘autre trou du boîtier intéri-
eur. Diriger les deux extrémités du cordon de l‘intérieur dans les trous
de la housse de protection et les nouer.
SPLIT
5 MEMORIES
START/STOPSPLIT/LAP
DISPLAY
MEMORY
MODE
TIME SET RESET
stop
start
reset
split
1/100
h min sec
PROFIL 25 STOPSTAR 2

Légende à divers termes techniques:
SPLIT: Le temps progressif après chaque point de mesure. Le
dernier temps intermédiaire est aussi le temps total.
LAP: Différence de temps entre le temps précèdent et le
nouveau pris, aussi connu comme le temps au tour.
ADD: Temps d‘addition, alternativement temps active et temps
de pause (timeout).
MEMORY: Temps enregistres dans la mémoire
EVENT: Compteur du nombre de temps Split mesurés.
STOPSTAR 2:
Fonctions possibles avec l‘index de recherche (a-b)
a) Mesure des temps (Start/Stop und Split)
b) Remise le chronomètre à zéro
a) Mesure des temps
Start/Stop ou Addition
Start: Touche Start/Stop
Stop: Touche Start/Stop
Start: Touche Start/Stop
etc.
Split
Start: Touche Start/Stop
Split: Touche Split/Reset
Split: Touche Split/Reset
Split: Touche Split/Reset
etc.
Affichage
tourne
arrête
tourne
Symbole
Affichage
tourne
arrête
tourne
arrête
Symbole
16
Double Mesure (2 temps rapprochés)
Start: Touche Start/Stop
Attendez le(s) point(s) de mesure...
1. point de mesure Touche Split
2. point de mesure Touche Stop
Lâcher point de mesure 2 avec:
Touche Split
Remise à zero: Touche Split
b) Remise à zéro
seulement possible après une procédure de Stop par example
Start: Touche Start/Stop
Stop: Touche Start/Stop
Reset: Touche Split/Reset
ou
Start: Touche Start/Stop
Split: Touche Split/Reset
Split: Touche Split/Reset
Stop: Touche Start/Stop
Remise à zéro : Touche Split/Reset
PROFIL 25:
Fonctions possibles avec l‘index de recherche (a-g)
a) Remise le chronomètre à zéro e) Temps courant visible
b) Fonction de mode f)
Compteur du nombre de temps pris
c) Mesure de temps (Start/Stop) g) Introduction de l’heure
d) Rappel de mémoire
Affichage
tourne
arrête
0:00:00:00
Symbole
Affichage
tourne
tourne
arrête
noter temps de point
de mesure 1
temps de point de
mesure 2
0:00:00:00
Symbole
Affichage
tourne
arrête
tourne
arrête
0:00:00:00
Symbole

a) Remise le chronomètre à zéro
En appuyant sur les touches START/STOP et MODE, les temps et
mémoires sont effaces. L‘heure reste en mémoire.
b) MODE (changement des fonctions)
Par pression sur la touche MODE les fonctions changent et sont
affichés dans la fenêtre des fonctions
SPLIT -> LAP -> TIME et retour à Split.
c) Mesure de temps
- La touche MODE sélectionne les fonctions SPLIT, LAP ou TIME.
- Indépendant quelle mode vous avez choisie, il est possible de
changer le mode en tout temps pendant mesure de temps sans
influencer les autres fonctions. Le symbole de fonction dans
l‘affichage indique seulement le mode de mesure de temps pour le
moment, mais les autres fonctions restent actives dans l’ombre.
- Par pression sur la touche START/STOP le compteur démarre ou stop.
Les symboles indiquent cette action. Au moyen de la touche
SPLIT/LAP les valeurs des temps SPLIT et LAP sont enregistrés et
mémorisés. L‘indication de temps reste figée. Ceci pour faciliter la
lecture du temps mesuré.
d) Rappel de mémoire
- Pendant que le temps défile, il est possible à tout moment pendant
la mesure en pressant le bouton MEMORY. Les premières 24
mesures sont enregistrées. Au-delà de la capacité totale (24), la
25ème mesure correspond au dernier nombre enregistré.
- Procédure:
Appuyez la touche MEMORY et reste pressée. Le temps mémorisé
est affiché ainsi longue que la touche est pressée. Pendant cette
phase MEMORY et le numéro de mémoire sont affichés. Par nouvelle
pression de la touche MEMORY la mémoire suivante est affichée et
ainsi de suite. En lâchant la touche le temps dernièrement mesuré
est principalement affiché. Si vous désirez l‘affichage du temps
courant visible voir le point suivant.
18
This manual suits for next models
2
Table of contents
Languages:
Other Hanhart Watch manuals

Hanhart
Hanhart Delta E 100 User manual

Hanhart
Hanhart Delta E 100 User manual

Hanhart
Hanhart LABOR 2 User manual

Hanhart
Hanhart Pioneer Series User manual

Hanhart
Hanhart CLASSICTIMER User manual

Hanhart
Hanhart Pioneer Series User manual

Hanhart
Hanhart 14035 User manual

Hanhart
Hanhart DELTA E 200 SPECTRON User manual

Hanhart
Hanhart PRIMUS User manual

Hanhart
Hanhart Compact 2 User manual


