2
1. Sprache einstellen
Bei der ersten Inbetriebnahme des Whirlpools
muss zunächst die Benutzersprache einge-
stellt werden. Es stehen die Sprachen deutsch,
englisch, italienisch, spanisch, französisch oder
holländisch zur Verfügung.
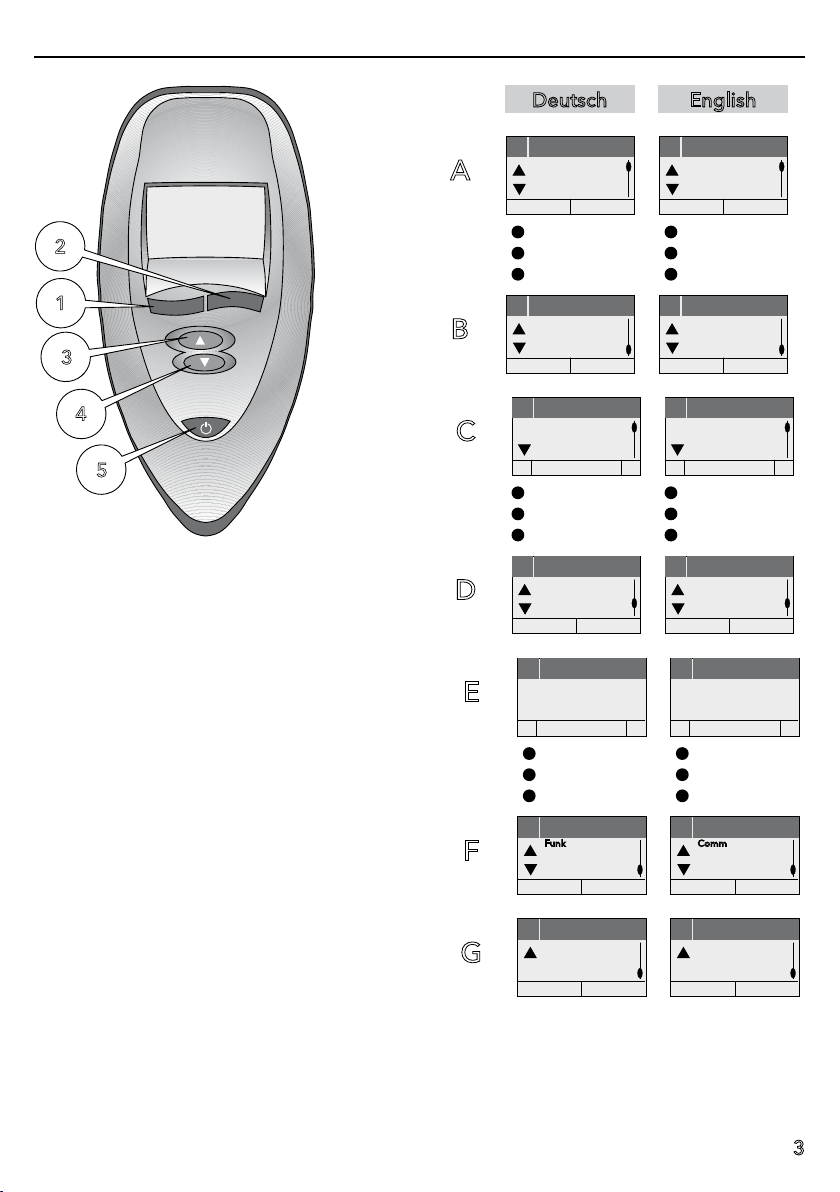
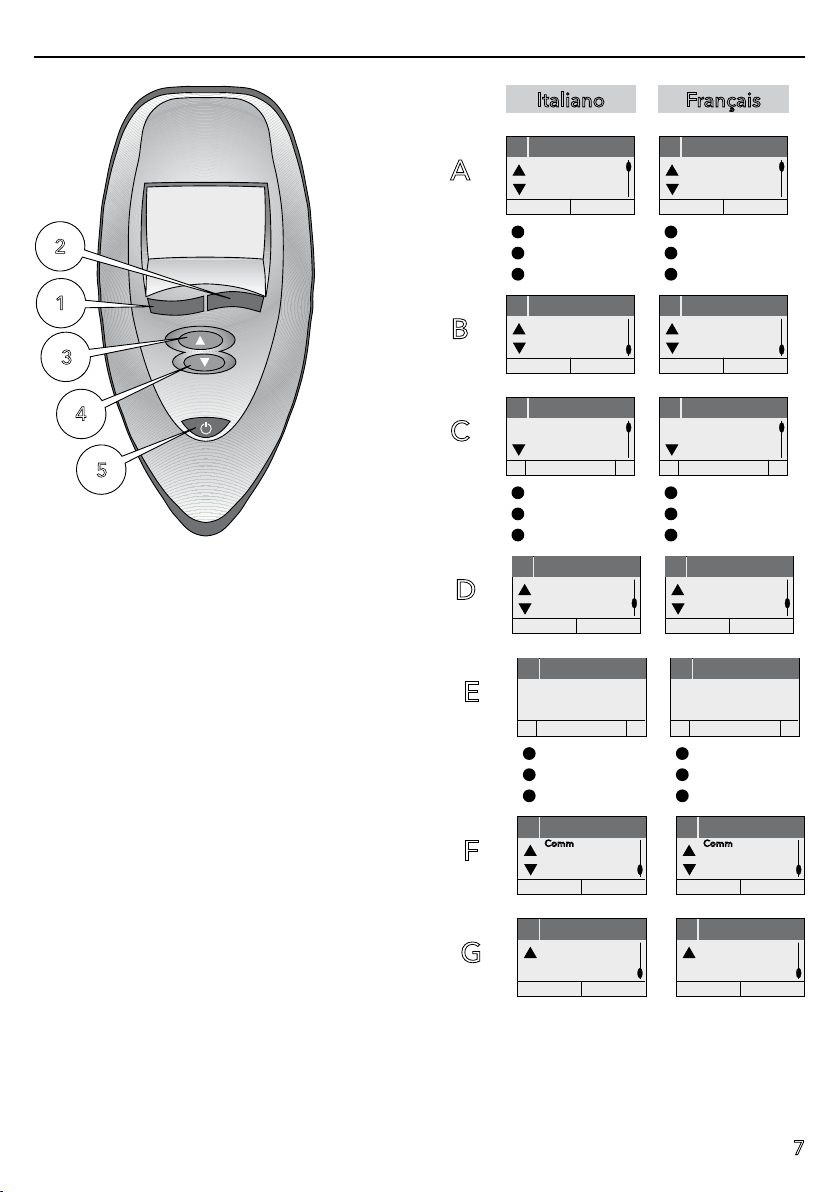
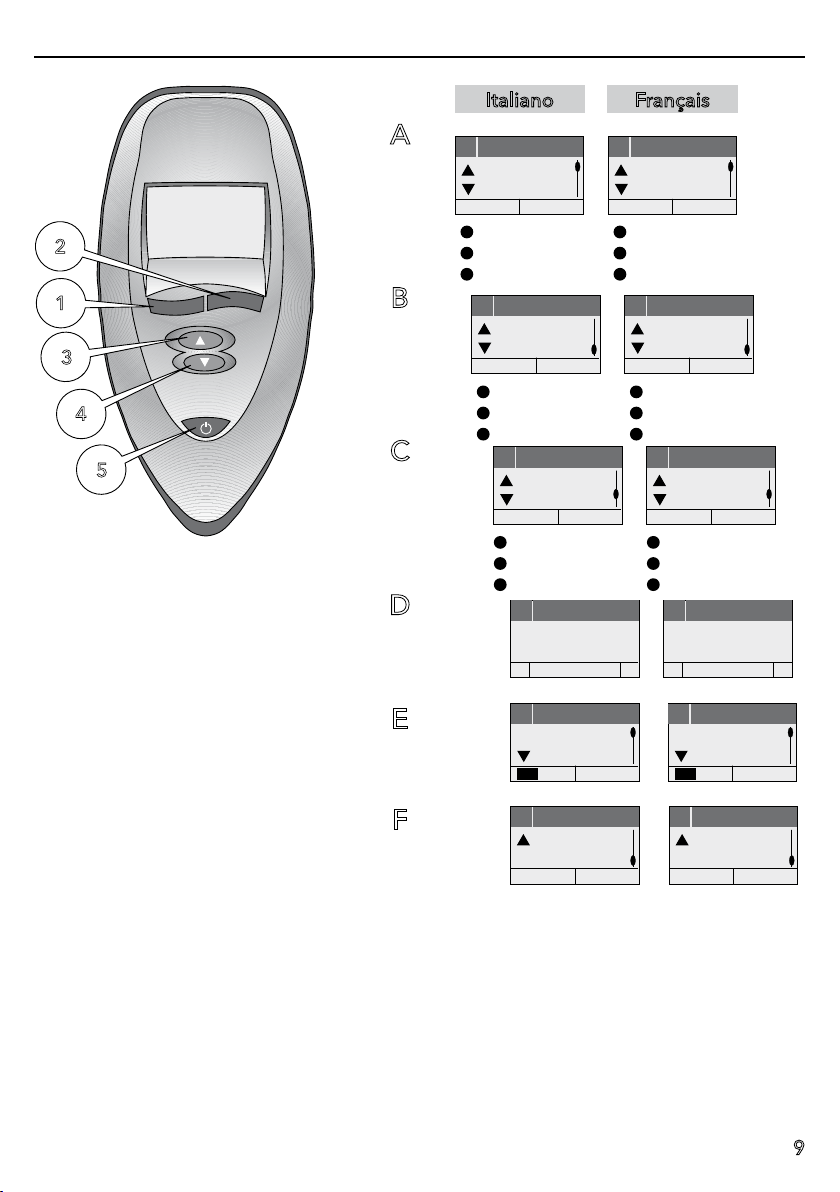
NachdemEinschalten des Poolmastersmit Taste5
erscheint im Display das Menü Programme (A).
DrückenSie1xdieTaste3(A)undanschließend
1 x die Taste 2 (B). Mit den Tasten 1 und 2läßt
sich nun die Sprache auswählen (C).
Durch Betätigen der Taste 4 und anschließen-
dem Ausschalten des Bedienelemtes mit
Taste 5 wird die gewünschte Benutzersprache
abgespeichert.
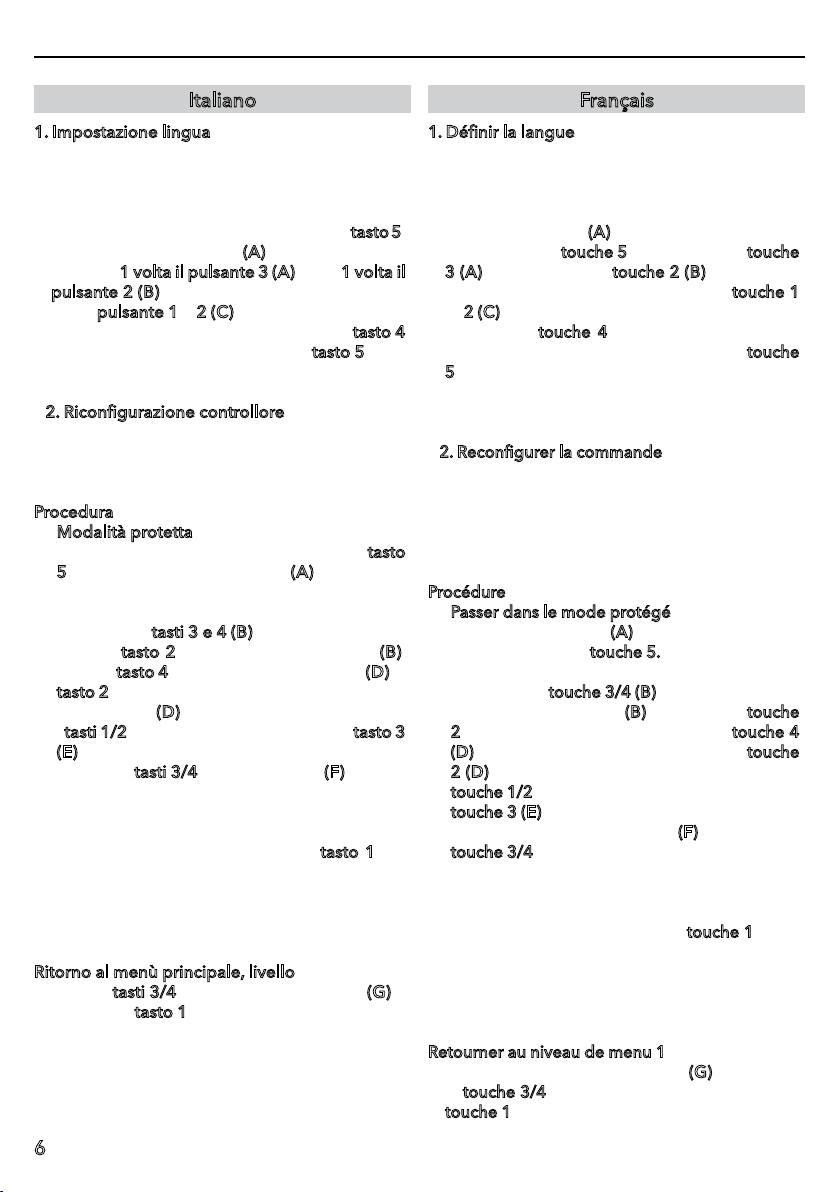
2. Steuerung neu konfigurieren
BeiAustauscheinerderKomponenten,Steuerung
oderPoolmaster,müssendieseneuaufeinander
abgestimmt werden (nur im abgesicherten
Modus möglich).
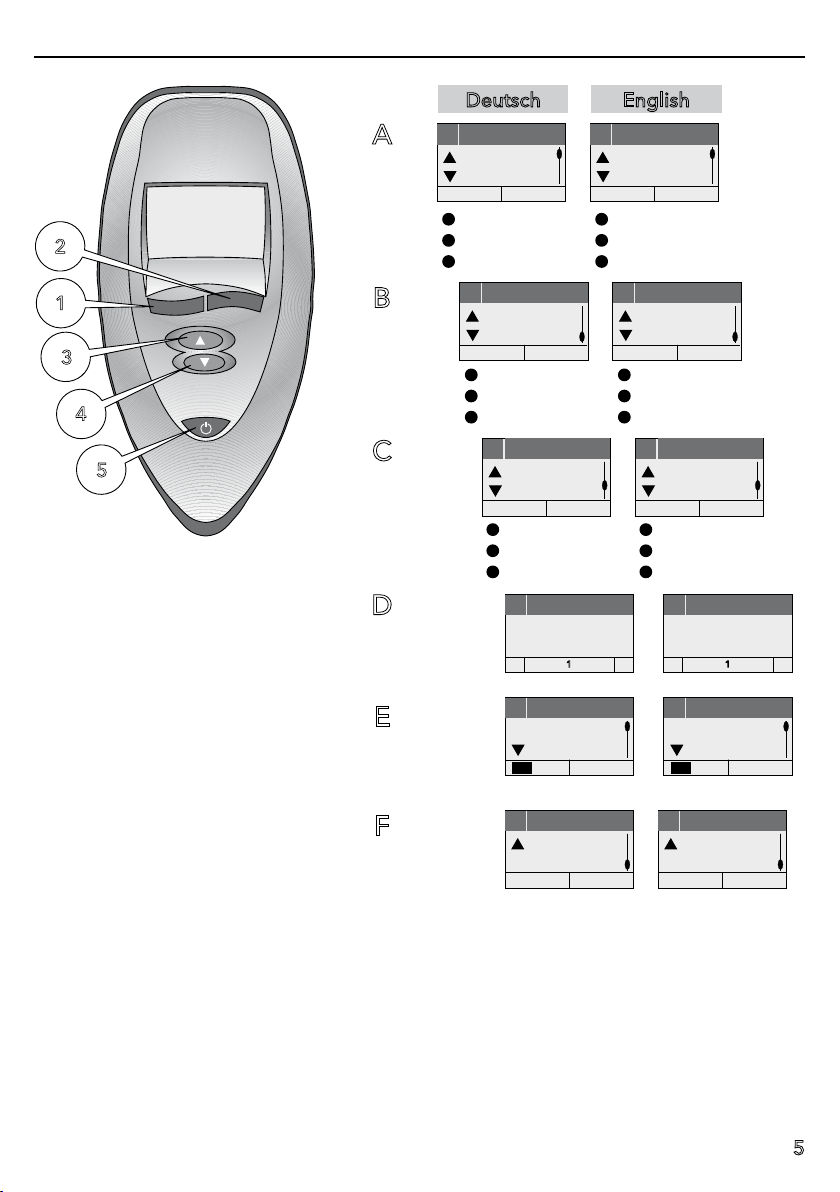
- In den abgesicherten Modus wechseln
Nach dem Einschalten des Poolmasters
mit Taste 5 erscheint im Display das Menü
Programme (A).
‚Einstellung‘ in Menüebelne 1 mit Taste 3/4
aufrufen (B).
Mit Taste 2 ‚Einst.‘ (B) auswählen und mit Taste
4zu ‚System‘ (D) wechseln. ‚Einst.‘ (D) mit Taste
2auswählen und mit Taste1/2 den Pincodeauf
1 setzen, mit Taste 3 den Pincode bestätigen
(E).
- mit Taste 3/4 zu Display-Anzeige (F)
wechseln
- die Versorgungsspannung am Whirlpool für
min. 5 sec. ausschalten
- Versorgungsspannung einschalten
- ‚Init LT‘ mit Taste 1 am Poolmaster bestätigen
- wartenbis die Konfigurationabgeschlossenist
(LTF 0 wechselt nach LTF 1). Dieser Vorgang
kann bis zu einer Minute dauern.
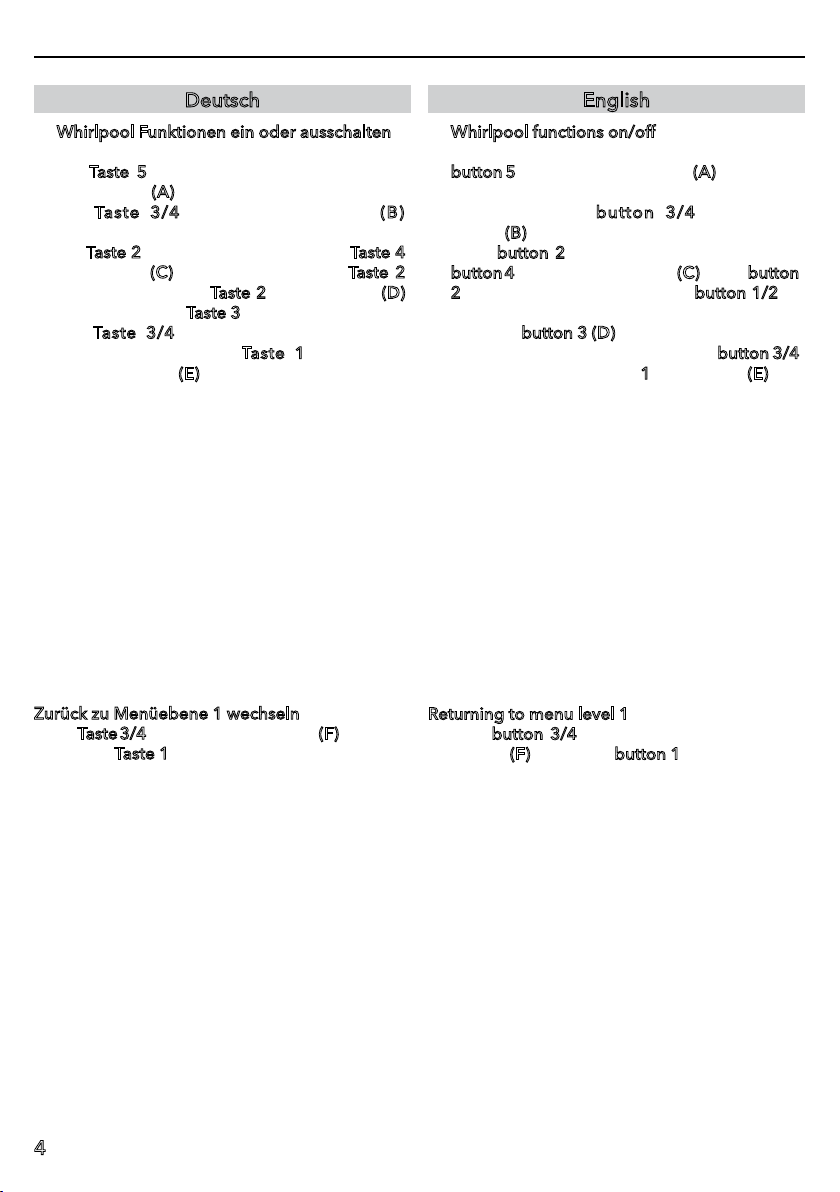
Zurück zu Menüebene 1 wechseln
Mit Taste 3/4 das leere Menüfenster (G) aufrufen
und mit Taste 1 ‚Ende‘ auswählen.
1. Language setting
Duringthe initialstart-upof the whirlpool,the user
language must be first set.
Either German, English, Italien, Spansih, French
or Dutch language can be selected.
Swiching on the control element by pressing but-
ton 5, the Program selection (A) appears in the
display.Press1timebutton3(A)andafter1time
button2(B).The language can be selected now
with buttons 1 and 2 (C).
The desired user language is saved by pressing
button 4 and then switching off the control ele-
ment with button 5.
2. Reconfigure the control
If a control or Poolmaster component is replaced,
they have to be readjusted to each other
(possible only in secured mode).
Procedure
- Changing to the secured mode
Swiching on the control element by pressing
button 5, the Program selection (A) appears in
the display.
Call up ‚Settings’ in menu level 1 by pressing
button 3/4 (B).
Press button 2 to select ‚Settings’ (B) and press
button4tochange to ‚System’(D).Pressbutton
2to select ‚Settings’ (D) and press button 1/2
to set the pin code to 1; confirm the pin code
by pressing button 3 (E).
- Press button 3/4 to change to the display (F)
- Switch off the supply voltage on the whirlpool
for at least 5 seconds
- Switch on the supply voltage
- Confirm ‚Init LT‘ with button 1 on the
Poolmaster
- Wait until the configuration is completed (LTF
0 changes to LTF 1). This process can take up
to one minute.
Returning to menu level 1
Pressbutton3/4tocalluptheemptymenuwindow
(G) and press button 1 to select ‚End’.
Deutsch English