manuals.online logo
Brands
  1. Home
  2. •
  3. Brands
  4. •
  5. Henderson
  6. •
  7. Door Opening System
  8. •
  9. Henderson SIM100 User manual

Henderson SIM100 User manual

SIM100
Fitting Instructions
Kit Short Code
Door Thickness
Range
Max Door Width Min Door Weight Max Door Weight
SIM100 25 - 50mm 1250mm 25kg 120kg
PRODUCT SPECIFICATION
KIT COMPONENTS
TOOLS REQUIRED
Cable (x1)
Cable Collar & Grub Screw(x2)
Cable Securing
Bracket (x2)
Pulley Wheel (x2)
Cable Clamp & Nut (x1)
Spring (x1)
Thimble Insert (x1)
Adjuster Bolt & Nut (x1)
Tape
Measure
7mm
Spanner
8mm
Spanner
Drill and
2mm Drill Bit
1.5 and 5mm
Allen Keys
Philips
Screwdriver
Page 1
Elevated View
(for illustrative purposes Husky components are shown in the below diagram)
Overhead View
(for illustrative purposes Husky components are shown in the below diagram)
SYSTEM OVERVIEW
Left Hand Door
Right Hand Door
Hanger
Cable Bracket
Tension Spring
Hanger
Cable Bracket
Pulley Wheel
Pulley
Wheel
Hanger
Hanger
Track
Cable Bracket
Hanger
Hanger
Hanger
Hanger
Track
Tension
Pulley
Pulley
Left Hand Door
Page 2
a) When installing with Soltaire or Pocket Door Pro
b) When installing with Husky Sliding or Pocket Door
STEP BY STEP INSTRUCTIONS
Important Note: Please install sliding door system in accordance with separate fitting instructions before
moving to the steps below.
STEP 1: Remove cap head screw and replace with set screw and simultaneous wheel.
Track
Track
Right Hand Door
LeftHand Door
Pulley Track Block
Cable Pulley
Cable Pulley
Pulley Track Block
Right Hand Door
Left Hand Door
Clip Stop
Clip Stop
Cable Pulley
Cable Pulley
Page 3
STEP 2: Remove the doors. Fit the left and right hand door brackets to the top of both doors.
STEP 5: Feed the cable through the right hand pulley wheel.
STEP 3: Rehang the doors.
STEP 4: Hook the fixed loop end of the cable to the right hand door bracket.
5mm
5mm
Centre line of doors
Left hand door
Right hand door
Door thickness
Fixed loop
Right hand door
cable securing bracket
Cable
Cable Pulley
Page 4
STEP 8: Whilst holding the cable (with a small amount of tension) thread the cable clamp onto the cable.
Next, form a loop and insert the thimble into the loop. Feed the end of the cable back through the cable
clamp to hold the shape of the loop.
STEP 6: Place the cable collar into the left hand door bracket and thread the cable through the collar.
STEP 7: Feed the cable through the left hand pulley wheel
NOTE: Do not tighten the
grub screws at this stage
Cable Collar
Left hand door
cable securing bracket
Grub
Screws
Cable
Cable Pulley
Cable Clamp
Thimble
insert
Page 5
P C Henderson Ltd, Durham Road, Bowburn, Co. Durham, DH6 5NG, UK 370262
UK Sales Export Sales 01/04/2021
t: +44 (0) 191 377 7345 t: +44 (0) 191 377 7346 Issue 5
e: [email protected]om e: international@pchenderson.com
w: www.pchenderson.com w: export.pchenderson.com
i) Fit the adjuster bolt on to the right hand door bracket complete with the two lock nuts, then hook the
spring on to the adjuster bolt and hook the cable loop on to the other end of the spring.
ii) Pull the excess cable through the cable clamp until the spring starts to pull back, then tighten the cable
clamp nut to secure the cable loop. Cut off any excess cable with the cable cutters.
iii) Adjust the adjuster nut to tension the cable so there is no sag in the cable and lock off the lock nut.
STEP 10: Close the doors and tighten the grub screws in the cable collar to secure the doors in place. Test
the operation of the system to ensure it is working correctly
STEP 9: Attach the cable to the door following the below steps.
Cable Clamp
Spring
Adjuster Bolt
Fixed Loop
Lock Nut
Thimble
Insert
Right Hand Door
Bracket
Adjuster Nut
Cable
Page 6

Other Henderson Door Opening System manuals

Henderson Bifold User manual

Henderson

Henderson Bifold User manual

Henderson SIM100 User manual

Henderson

Henderson SIM100 User manual

Henderson HUSKY 50 User manual

Henderson

Henderson HUSKY 50 User manual

Henderson HUSKY 100 User manual

Henderson

Henderson HUSKY 100 User manual
Henderson MARATHON FDK1 User manual

Henderson

Henderson MARATHON FDK1 User manual

Henderson EVOLVE POCKET DOOR PRO Series User manual
Henderson

Henderson EVOLVE POCKET DOOR PRO Series User manual

Henderson Easyclose User manual

Henderson

Henderson Easyclose User manual
Henderson SIROCCO User manual

Henderson

Henderson SIROCCO User manual
Henderson HUSKY Folding 25 Series User manual

Henderson

Henderson HUSKY Folding 25 Series User manual

Henderson Evolve Glass SIM Kit User manual

Henderson

Henderson Evolve Glass SIM Kit User manual

Henderson ZENITH User manual

Henderson

Henderson ZENITH User manual

Popular Door Opening System manuals by other brands
HomeMatic HmIP-SWDO-2 Mounting instruction and operating manual
HomeMatic

HomeMatic HmIP-SWDO-2 Mounting instruction and operating manual

Dormakaba ITS9613 installation instructions
Dormakaba

Dormakaba ITS9613 installation instructions

Dorma 8900 FH manual

Dorma

Dorma 8900 FH manual

DITEC DAB305 user manual

DITEC

DITEC DAB305 user manual

Assa Abloy Corbin Russwin ED8200A Series installation instructions
Assa Abloy

Assa Abloy Corbin Russwin ED8200A Series installation instructions

Care Call CCD4A-2220-EU quick start guide

Care Call

Care Call CCD4A-2220-EU quick start guide

SEA Saturn 600 Mounting and Connecting Instructions

SEA

SEA Saturn 600 Mounting and Connecting Instructions

Verkada AC62 install guide

Verkada

Verkada AC62 install guide

Lock L5241AL installation instructions

Lock

Lock L5241AL installation instructions

Assa Abloy DC200 installation instructions

Assa Abloy

Assa Abloy DC200 installation instructions

ASTEC b.1000 Assembly instructions

ASTEC

ASTEC b.1000 Assembly instructions

Cal-Royal N900 Series installation instructions

Cal-Royal

Cal-Royal N900 Series installation instructions

Relcross 9130 installation instructions

Relcross

Relcross 9130 installation instructions

eao 57 Series Assembly instruction

eao

eao 57 Series Assembly instruction
Hafele 940.41.043 Installation instructions operating instructions
Hafele

Hafele 940.41.043 Installation instructions operating instructions

Entrematic Ditec KS200VA installation manual
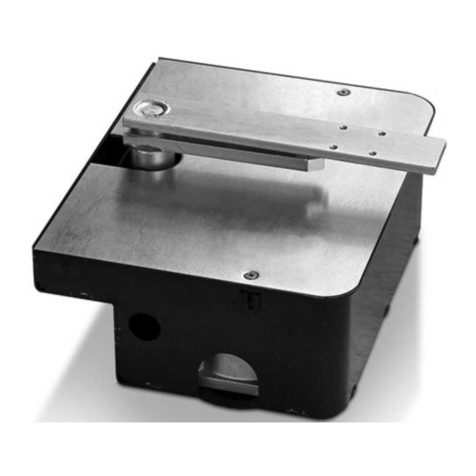
Entrematic

Entrematic Ditec KS200VA installation manual

Entrematic Ditec CUBIC6C installation manual

Entrematic

Entrematic Ditec CUBIC6C installation manual

Keyautomation TURBO 400 Instructions and warnings for installation and use

Keyautomation

Keyautomation TURBO 400 Instructions and warnings for installation and use

manuals.online logo
manuals.online logoBrands
  • About & Mission
  • Contact us
  • Privacy Policy
  • Terms and Conditions

Copyright 2025 Manuals.Online. All Rights Reserved.