manuals.online logo
Brands
  1. Home
  2. •
  3. Brands
  4. •
  5. Herman Miller
  6. •
  7. Indoor Furnishing
  8. •
  9. Herman Miller Electric Sit Stand Desk User manual

Herman Miller Electric Sit Stand Desk User manual

Herman Miller Electric Sit Stand Desks Operating Instructions
1
Control Switch
Notes
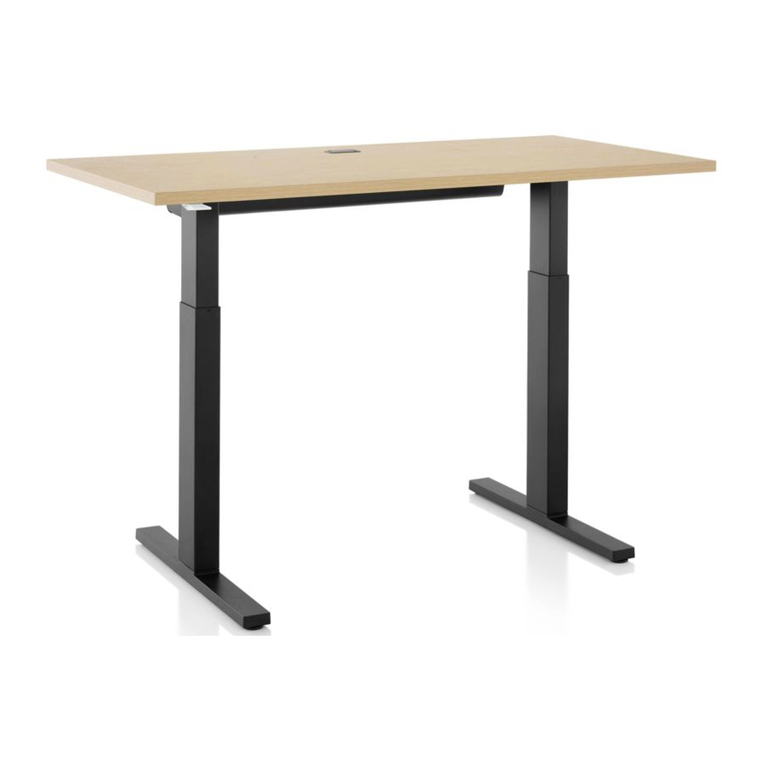
Electrically operated sit stand desks allow for continuous height adjustment
of the worksurface using a 2 stage column from 650-1250mm or a single
stage column from 700-1100mm (Ratio single stage – 700-1200mm)
above floor level at a speed of 38mm per second.
The desk must be connected to a suitable mains (240)voltage supply
using a Herman Miller power entry cord appropriate to the country of use.
Any cables that rise and fall with the worksurface must be of sucient
length to ensure that no strain is placed upon the cables or their connectors
to other apparatus. Similarly the cables must not interfere with the
operation of the desk.
IMPORTANT: PLEASE ENSURE THAT THERE IS NO OBSTRUCTION
TO THE MOVEMENT OF THE MECHANISM OR WORKSURFACE.
SURFACES CLEAR AND EVENLY LOADED.
THE DESK SHOULD BE INSTALLED WITH A MINIMUM SAFETY GAP OF 25MM
BETWEEN EACH OF THE NON-USER EDGES AND ANY ADJACENT HARD
SURFACE I.E.: BUILDING WALLS, STORAGE UNITS, OTHER DESKS ETC.
Note: The 25mm safely gap applies to hard surfaces adjacent to the desk
throughout the full range of movement. Screen brackets are designed
to ensure there is a safety gap.
The electronic mechanism is designed to European safety standards
with a cut out to ensure the motors do not over heat. The desk will move
freely up and down for 2 minutes at which time the operation will cease
and the mechanism will require a full 20 minutes rest time before
continuing. If the mechanism is operated aer only 10 minutes rest
the desk will work for only 1 minute of continuous use and so on.
HermanMiller
Operating Instructions
1.0 Collision Detection System
If the desk has been installed with the optional collision detection system,
then in the event of the worktop or understructure colliding with an object,
the table will reverse its direction of motion and move about 40mm in the
opposite direction. If a control switch with an LED display is being used the
control switch will display the E60 error code.
Remove the obstruction and the desk can be used again.
2.0 Activating the Control Box for the First Time
Once the control box, control switch, motor cables and collision detection
system (if used) have been connected correctly as per the installation
instruction, turn on the power to the control box.
Now the desk is ready to be reset.
Lower the table to its lowest position using the Desk Down Key. Once the
desk has stopped moving, release the key briefly and then hold it again
for 15 seconds or until the desk moves down a further 3-6mm, pauses
and then moves up 3-6mm.
IMPORTANT: The Desk Down Key must be continuously pressed until
the process is complete.
The control switch with an LED display will indicate the need for resetting
with the display ‘--’.
When the reset process is complete, the display will show the desk’s
lowest height, 650 or 700.
Aer 20 seconds the control box will detect the connected amplier
box and sensor, this is signalled by an audible double click.
The collision detection sensor is now ready.
IMPORTANT: Do not press any button on the control switch until this
recognition is complete.
If this happens by accident, this may delay the detection of the sensor,
or may require a complete reset to ensure the sensor is recognised.
Once a control box has detected a connected sensor the rst time
it does not need to re-search for the sensor again, even aer a reset
of the desk or being powered o.
3.0 Manual Reset
Press the Desk Down Key continuously until the desk has reached
the lowest position (programmed desktop position).
Press the Desk Down Key again and keep pressing it. Aer about
15 seconds, the desk will slowly move further down until it reaches
the absolutely lowest position possible.
Release the Desk Down Key. The electric height-adjustable desk
can now be used again normally.
How to use your electric sit stand desk
Memory Position Key 1 Display Desk Up Key
Memory Position Key 2
Desk Down KeyMemory KeyMemory Position Key 3
Memory Position Key 4
PB2255
Herman Miller Electric Sit Stand Desks Operating Instructions
2
6.0 Errors Messages
6.1 Error code: HOT
The SMART control unit is tted with overheating protection.
Overheating has caused it to stop the control unit.
Solution: Wait until the control unit has cooled down and HOT is no longer
displayed. The SMART control unit is then operational again. This could take
several minutes.
6.2 Error codes: E24/25/26/48/49/60
Motor current overload. The control box believes the desk movement is
being obstructed or it has too much weight on the desk. This may also occur
if the actual height of the Worksurface does not correspond to the height
reading on the LED control switch. In this case when the column reaches its
physical limit the control box does not realise this and thinks the desk has
collided with something.
Solution: Remove load, remove obstructions. The desk should now operate.
If not a manual reset may be required, see section 3.0 Manual Reset.
6.3 Error code: E71
This applies to desks with collision detection control boxes. If the control
unit detects a fault on the collision sensor the code E71 appears in the
display of the control switch, and should either the Desk Up or Down Keys
be depressed when this code is displayed, 3 clicks will be heard from the
control unit and the desk will not move.
4.0 Storing Preferred Desk Heights
Step 1
Using the Desk Up/Desk Down Keys adjust the desktop
to the position you want to save.
Step 2
The display will show the desktop height (e.g. 13.4).
Step 3
Press the Memory Key.
Step 4
The display will read S-.
Step 5
Press the required Memory Position Key (e.g. 2).
The display will read S2.
The set desktop position will now be saved to the selected
Memory Position Key. You will hear an audible double click
and aer about 2 seconds the saved desktop position
will be displayed.
This situation also occurs when the collision detection unit has been
disconnected from the control box has been then reconnected.
Solution: Reset the collision detection sensor.
1. Disconnect the collision sensor from the control box.
2. Press the ‘Desk Up Key’ until the desk has reached its highest position.
The up key must be pressed until the desk begins to move with
reduced speed to the highest position and the code E71 disappears.
There, the ‘Desk Up Key’ may need to be released and pressed again.
3. The control unit will click three times, to conrm that the sensor is
disabled.
4. Reconnect the collision sensor to the control box and conduct a
manual reset, see section 3.0 Manual Reset.
6.4 Error codes: E36/37/38/61/70
Column or motor missing or not detected.
Solution: Disconnect the mains supply to the control box and wait at least
5 seconds. Re-connect the missing columns or motor leads to the control
box. Reconnect the mains supply to the control box. Conduct a manual
reset, see section 3.0 Manual Reset.
6.5 Error: Desk does not reach full height
If for any reason the desk does not reach its full height conduct a manual
reset, see section 3.0 Manual Reset.
5.0 Using Stored Height Settings
Step 1
Press and hold the required Memory Position Key (e.g. 2).
The desktop will move until it reaches the saved position.
If you release the key before the saved position is reached,
the desktop will stop and the saved desktop position will
not be reached.
Step 2
When the desktop reaches the saved position you can
now release the key.
The display will read the current (saved) desktop position.

Other Herman Miller Indoor Furnishing manuals

Herman Miller Motia Sit-to-Stand Table Installation instructions

Herman Miller

Herman Miller Motia Sit-to-Stand Table Installation instructions

Herman Miller Tu Installation instructions

Herman Miller

Herman Miller Tu Installation instructions

Herman Miller Nevi Link Guide

Herman Miller

Herman Miller Nevi Link Guide

Herman Miller Aeron User manual

Herman Miller

Herman Miller Aeron User manual

Herman Miller Repeat Single Desk User manual

Herman Miller

Herman Miller Repeat Single Desk User manual

Herman Miller Aeron User manual

Herman Miller

Herman Miller Aeron User manual

Herman Miller Mirra 2 Guide

Herman Miller

Herman Miller Mirra 2 Guide

Herman Miller Noguchi Rudder Coffee Table User manual

Herman Miller

Herman Miller Noguchi Rudder Coffee Table User manual

Herman Miller Caper Installation instructions

Herman Miller

Herman Miller Caper Installation instructions

Herman Miller Prospect Media Space Installation instructions

Herman Miller

Herman Miller Prospect Media Space Installation instructions

Herman Miller New Aeron User manual

Herman Miller

Herman Miller New Aeron User manual

Herman Miller Layout Studio Installation instructions

Herman Miller

Herman Miller Layout Studio Installation instructions

Herman Miller Everywhere Series User manual

Herman Miller

Herman Miller Everywhere Series User manual

Herman Miller Canvas Vista UBI Installation instructions

Herman Miller

Herman Miller Canvas Vista UBI Installation instructions

Herman Miller Nelson X-Leg Table User manual

Herman Miller

Herman Miller Nelson X-Leg Table User manual

Herman Miller Embody User manual

Herman Miller

Herman Miller Embody User manual

Herman Miller Fuld Installation instructions

Herman Miller

Herman Miller Fuld Installation instructions

Herman Miller Equa 2 User manual

Herman Miller

Herman Miller Equa 2 User manual

Herman Miller Aeron Installation instructions

Herman Miller

Herman Miller Aeron Installation instructions

Herman Miller Mirra 2 User manual

Herman Miller

Herman Miller Mirra 2 User manual

Herman Miller Vantum Installation instructions

Herman Miller

Herman Miller Vantum Installation instructions

Herman Miller Exclave Meeting Table Installation instructions

Herman Miller

Herman Miller Exclave Meeting Table Installation instructions

Herman Miller Cosm Installation instructions

Herman Miller

Herman Miller Cosm Installation instructions

Herman Miller Celle User manual

Herman Miller

Herman Miller Celle User manual

Popular Indoor Furnishing manuals by other brands

Regency LWMS3015 Assembly instructions

Regency

Regency LWMS3015 Assembly instructions

Furniture of America CM7751C Assembly instructions

Furniture of America

Furniture of America CM7751C Assembly instructions

Safavieh Furniture Estella CNS5731 manual

Safavieh Furniture

Safavieh Furniture Estella CNS5731 manual

PLACES OF STYLE Ovalfuss Assembly instruction

PLACES OF STYLE

PLACES OF STYLE Ovalfuss Assembly instruction

Trasman 1138 Bo1 Assembly manual

Trasman

Trasman 1138 Bo1 Assembly manual

Costway JV10856 manual

Costway

Costway JV10856 manual

moss DESIGN Caisson Credenza Assembly instructions

moss DESIGN

moss DESIGN Caisson Credenza Assembly instructions

Aquaglide FULL DECK 15.0 owner's manual

Aquaglide

Aquaglide FULL DECK 15.0 owner's manual

AREBOS AR-HE-SW30 user manual

AREBOS

AREBOS AR-HE-SW30 user manual

Till-Hilft Fulda 87005.330 Assembly instructions

Till-Hilft

Till-Hilft Fulda 87005.330 Assembly instructions

Twoey Outside 2010 quick start guide

Twoey Outside

Twoey Outside 2010 quick start guide

Hettich Easys 200 operating instructions

Hettich

Hettich Easys 200 operating instructions

The bedboss RELAX 404 Series owner's manual

The bedboss

The bedboss RELAX 404 Series owner's manual

Oeseder Möbelindustrie Bern 991 720 Assembly instructions

Oeseder Möbelindustrie

Oeseder Möbelindustrie Bern 991 720 Assembly instructions

Costway HW68469 user manual

Costway

Costway HW68469 user manual

Next ALIX A27743 Assembly instructions

Next

Next ALIX A27743 Assembly instructions

BROSA Hans Assembly guide

BROSA

BROSA Hans Assembly guide

Prodigg MINIKA PBA015T-FUR installation manual

Prodigg

Prodigg MINIKA PBA015T-FUR installation manual

manuals.online logo
manuals.online logoBrands
  • About & Mission
  • Contact us
  • Privacy Policy
  • Terms and Conditions

Copyright 2025 Manuals.Online. All Rights Reserved.