manuals.online logo
Brands
  1. Home
  2. •
  3. Brands
  4. •
  5. HIK VISION
  6. •
  7. Security System
  8. •
  9. HIK VISION DS-PWA32-K User manual

HIK VISION DS-PWA32-K User manual

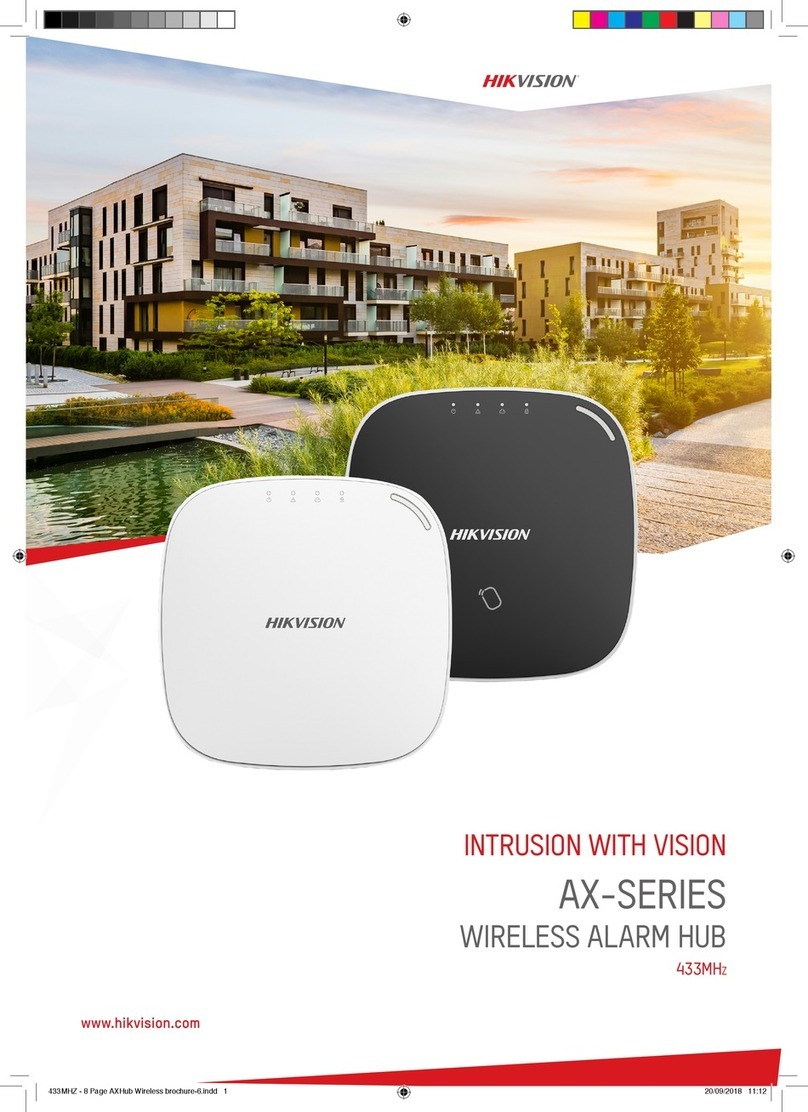
How to Setup the Wireless Alarm Kit
ⅠPreparation
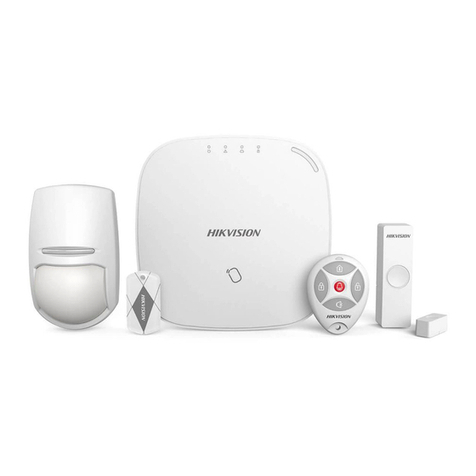
Wireless Alarm Kit:.DS-PWA32-K
(Control Panel×1,PIR Detector×1,Magnetic Contact×1,Keyfob×1)
Note:
This document is for 433Mhz wireless Kit reference only.
ⅡDescription for hardware:
1.
Description of Control panel:
a) For the front panel, there are five lights, and the meanings are showing below:
b) For the rear panel, there are eight ports or buttons, the meanings are showing
below:
①Network Port ②Power Port ③Serial port ④Backup Battery port ⑤AP/Station
Mode switch ⑥SIM model optional ⑦Reset button ⑧Tamper Button
2.
Description of Sensors:
a) PIR sensor: ①Tamper Button ②Battery ③Reset Button
b) Magnetic Contact sensor: ①Tamper & Reset Button ②Battery
3.
Description of Keyfob:
a) Keyfob: ①Home Arm button ②Arm button ③Disarm button ④Clear Button
⑤Emergency button
ⅢConfiguration steps:
Note: For the wireless alarm panel, we can configure through three mainly ways:
Local, Web, Hik-connect, also you can configure the device through the iVMS4200.
A. Local configuration Way:
a) Power the alarm panel and waiting it to run normally;
b) Remove the protection plastic papers to let the battery work;
c) Push the button on the right side on the control panel, then you will enter the
“Add device mode”;
d) Bring the sensors close to the alarm panel and trigger alarms, then the sensor
will be added to the control panel.
Note:
①For the PIR sensor, we need push the button once, and see the red light and blue
light shining in turns. For other sensors, just trigger the alarm.
②This local mode cannot add the Keyfob since the security reason;
③If you add the wrong sensor to alarm panel. You can reset the panel or sensors.
For the alarm panel, you can long press the reset button.
④For the PIR sensor, you can remove the battery, long press the reset button, then
put the battery back. Waiting the sensor until the lights shining normally and loose
the button. Then it will not connect to the panel.
⑤For the Door magnetic contact, you can remove the battery, long press the reset
button, then put the battery back. Waiting the lights goes off and loose the
button. .Then it will not connect to the panel.
B. Web configuration Way:
a) Power the alarm panel and waiting it to run normally;
b) Switch the AP/Station (Mark 3) to AP mode(Mark 2).
c) Then you can search the WIFI on your laptop with the name ‘HAP+ SN code’,
connect this WIFI and type the password with ‘AP+VERTIFICATION CODE’.
So the WIFI name is ‘HAPQ00242384’, and the password for this panel is
‘APJLQTDJ’
d) Search the Alarm Panel on SADP, then active it and set the password or IP.
e) Log in the alarm panel through the IE by the IP;
f) Choose to the Keyfob interface and click Add button.
Note: You can add the keyfob through the WEB, iVMS4200, but cannot be added
on local.
g) After you click add, it will remind you press any key on the keyfob. Then click any
button on the keyfob, it will pop-up the add interface.
You can set the name and the authority for this keyfob.
After you finished all steps, you can see the keyfob on the list.
h) After you have added the keyfob, you can continue to add sensors. Choose to
Zone interface on the Wireless Device. Click the Settings.
Then you will see the settings interface, you can set the Name and Type of the
sensors, Enable the wireless detector, type in the serial No. of the sensors, click OK,
then the sensors will be added to the wireless Panel.
After these steps, you can see the Door Contact on the Zone 2. Its name is
MainDoor and the type is instant zone.
i) After you have added all sensors, you can set the WIFI, which means the alarm
panel will connect to this WIFI and connect to the Internet.
Choose the WIFI Parameters, and click the WIFI on the list, click the connect button,
then type the password.
j) You can also set the IP for the alarm panel on the WLAN page. After all steps,
switch the AP/WIFI mode button to Station. Then the alarm panel will connect to
the WIFI automatically.
Note: All settings should be on the disarm mode.
C. Hik-connect configuration:
a) Power the alarm panel and waiting it to run normally; You can refer to the Way B
Step I to connect the panel to one stable Wi-Fi.
b) Download the Hik-Connect mobile client from Google Play (for Android) or App
store (for iOS) and login the client before operating the Axiom security control
panel.
c) Select adding type, choose the scan QR code mode, then scan the mode, and type
the verification code on the rear panel.
d) Tap a zone in the zone page to enter the zone page.
e) Then you can type the serial number to add the sensor to this zone.
f) Set the following parameters as you desired.
Zone Type: Select a zone type from the zone type list. You can tap ?to view each
zones.
Zone Bypass: Enable the function and the zone will be bypassed. No alarm will be
received while the zone is bypassed.
Link Camera: You can link the zone to cameras. When an alarm is triggered, you can
monitor the zone via the linked cameras.
Stay/Away: Enable the function and the zone will be auto bypassed when the zone is
in stay or away status.
Chime: Enable the function and the zone will be start audible alarm when it is
triggered.
Enable Silent Zone: Enable the function and no siren will be triggered if an event or
alarm occurs.
g) You can also Arm/Disarm the zone. Set the arming/disarming schedule to
arm/disarm a particular zone automatically.
Also Tap a security control panel to enter the control page and tap or to enter the
Setting page.
h) Enable the auto arm/disarm function and set the auto arm time/auto disarm time.
You can also set the late to disarm time, entry delay time, exit delay time, and siren
delay time.
i) You can check the system Status on the Hik-connect APP, also you can receive all
alarms after you arm the zones.
PS: This document just for the simple settings, please check the user manual
for more details.
First Choice for Security Professionals
HIKVISION
Technical Support

Other HIK VISION Security System manuals
HIK VISION Pyronix Enforcer 64 User manual

HIK VISION

HIK VISION Pyronix Enforcer 64 User manual

HIK VISION DS-PEA101 Series User manual

HIK VISION

HIK VISION DS-PEA101 Series User manual

HIK VISION DS-TCG405-E User manual

HIK VISION

HIK VISION DS-TCG405-E User manual

HIK VISION DS-MI9605-GA Series User manual

HIK VISION

HIK VISION DS-MI9605-GA Series User manual

HIK VISION DS-PEA102S User manual

HIK VISION

HIK VISION DS-PEA102S User manual

HIK VISION DS-1901I Administrator Guide

HIK VISION

HIK VISION DS-1901I Administrator Guide

HIK VISION AX PRO User manual

HIK VISION

HIK VISION AX PRO User manual

HIK VISION AX PRO Series Installation guide

HIK VISION

HIK VISION AX PRO Series Installation guide

HIK VISION DS-PEA Series User manual

HIK VISION

HIK VISION DS-PEA Series User manual

HIK VISION AX PRO DS-PWA64-L-WE User manual

HIK VISION

HIK VISION AX PRO DS-PWA64-L-WE User manual

HIK VISION AX Series User manual

HIK VISION

HIK VISION AX Series User manual

HIK VISION DS-PK-LRT User manual

HIK VISION

HIK VISION DS-PK-LRT User manual
HIK VISION Pyronix Enforcer V10 Service manual

HIK VISION

HIK VISION Pyronix Enforcer V10 Service manual

HIK VISION AX PRO User manual

HIK VISION

HIK VISION AX PRO User manual

HIK VISION Castle/Pyronix Euro 280 User manual

HIK VISION

HIK VISION Castle/Pyronix Euro 280 User manual

HIK VISION NB V6 User manual

HIK VISION

HIK VISION NB V6 User manual
HIK VISION AX PRO M2 User manual

HIK VISION

HIK VISION AX PRO M2 User manual

HIK VISION DS-PD1-EB-WS2 User manual

HIK VISION

HIK VISION DS-PD1-EB-WS2 User manual

HIK VISION DS-MI9605-GA Series User manual

HIK VISION

HIK VISION DS-MI9605-GA Series User manual

HIK VISION DS-PEA12-P/ZJ User manual

HIK VISION

HIK VISION DS-PEA12-P/ZJ User manual

HIK VISION DS-19A08-BNG User manual

HIK VISION

HIK VISION DS-19A08-BNG User manual
HIK VISION DS-K1T604M User manual

HIK VISION

HIK VISION DS-K1T604M User manual

HIK VISION DS-19A Series User manual

HIK VISION

HIK VISION DS-19A Series User manual

HIK VISION DS-K2M060 User manual

HIK VISION

HIK VISION DS-K2M060 User manual
Popular Security System manuals by other brands

Esse-ti ST56 GMV quick guide

Esse-ti

Esse-ti ST56 GMV quick guide

Nexa PRO select MTS-163/RF2 manual

Nexa

Nexa PRO select MTS-163/RF2 manual

Eterna NPCH installation instructions

Eterna

Eterna NPCH installation instructions

Night Owl NONB-44500 instruction manual

Night Owl

Night Owl NONB-44500 instruction manual

Siemens milltronics MFA 4P instruction manual

Siemens

Siemens milltronics MFA 4P instruction manual

Kimessa CANline 10 operating instructions

Kimessa

Kimessa CANline 10 operating instructions

Alderon Industries Vizzyalarm VZW-01 Operation, maintenance and installation manual

Alderon Industries

Alderon Industries Vizzyalarm VZW-01 Operation, maintenance and installation manual

Swann alpha Series instruction manual

Swann

Swann alpha Series instruction manual

Venitem Mini Doge F24 user manual

Venitem

Venitem Mini Doge F24 user manual

MOB MO8742 user manual

MOB

MOB MO8742 user manual

Valcom InformaCast VIP-998-IC quick start guide

Valcom

Valcom InformaCast VIP-998-IC quick start guide

Philips VSS2364/C4T user manual

Philips

Philips VSS2364/C4T user manual

Climax Technology PB-15ZBS manual

Climax Technology

Climax Technology PB-15ZBS manual

clare ClareOne CLR-C1-PNL1 quick start guide

clare

clare ClareOne CLR-C1-PNL1 quick start guide

M&S Systems CHIME MC3 installation instructions

M&S Systems

M&S Systems CHIME MC3 installation instructions

Swann One quick start guide

Swann

Swann One quick start guide

Clover WW5000R Setup guide

Clover

Clover WW5000R Setup guide

Smartwares SA68G user manual

Smartwares

Smartwares SA68G user manual

manuals.online logo
manuals.online logoBrands
  • About & Mission
  • Contact us
  • Privacy Policy
  • Terms and Conditions

Copyright 2025 Manuals.Online. All Rights Reserved.