Honeywell IdentIPoint User manual

INSTALLATION INSTRUCTIONS
Put Bar Code Here
95−7767
Honeywell IdentIPoint™ Intelligent
Smartcard System
GENERAL
IdentIPoint™ is an intelligent smart card based access control
system that integrates with Enterprise Buildings Integrator™
(EBI) to provide a secure, scalable and a cost effective
solution for securing defense installations, airports, and
buildings. This document describes how to install and
configure the IdentIPoint system.
Fig. 1. IdentIPoint system architecture

HONEYWELL IDENTIPOINT™ INTELLIGENT SMARTCARD SYSTEM
95-7767 2
NOTE: For detailed connection diagrams see topics
Detailed Wiring Diagrams and Wiring Other
Devices.
NOTE: Any currently available IdentIPoint reader can be
used as an enrollment reader.
OVERVIEW
IdentIPoint is Honeywell's next generation smart card based
access control system in conjunction with Honeywell's award
winning Enterprise Buildings Integrator - EBITM. IdentIPoint
readers come with a powerful built-in controller thus
eliminating the need to install a separate multi-door access
controller. IdentIPoint offers flexible architecture options
including the option of connected and standalone readers.
The readers communicate with EBI over a wired or wireless*
Ethernet network.
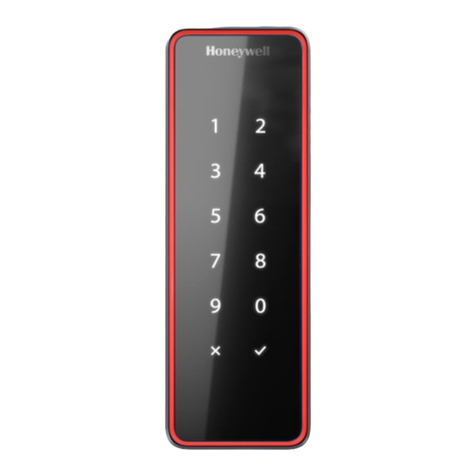
The IdentIPoint hardware family consists of the following
models:
• Indoor / Outdoor basic readers - IP65 (BTBAS)
• Indoor readers with LCD & Keypad (BTSTD)
• Indoor readers with LCD, Keypad and Fingerprint
(BTFPT)2
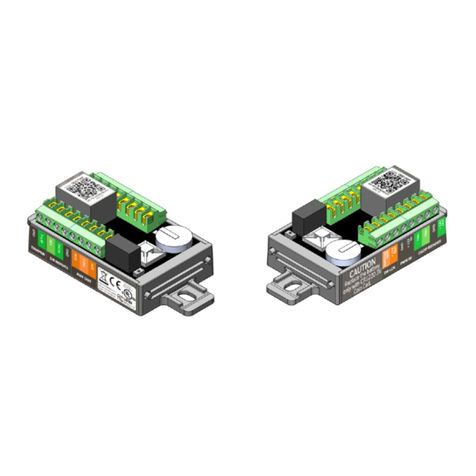
• Remote Input Output Module (IOM) (BTIO)
IdentIPoint readers support the following Contactless Smart
Card Reader technologies:
• MIFARE Classic 1K, 4K
• MIFARE DESFire 4K
• MIFARE DESFire EV1 4K, 8K
IdentIPoint readers also support the following network
technologies:
• Wireless LAN IEEE802.11b/g standard; provides WPA
security for infrastructure mode of operation*.
• High speed 10/100 Mbps Ethernet connection for Wired
LAN via RJ45.
IdentIPoint readers support the following types of peripheral
connections:
• One RS485 serial bus (115200 baud) for IOM
• Bus Termination and BIAS for RS485 on board (jumpers or
dip switch)
• Digital Output 1 (current sinking at 1A, 24VDC max.)
• Supervised Inputs 3; capable of distinguishing 4 states
• Relay Contact 1 (1A-24VDC) - Form C
• Two Tamper Inputs:
— Inner Tamper Switch: Micro-switch (detecting casing
opening)
— Outer Tamper Switch: Optical (detecting unit dis-
mounted from wall)
The readers work with 12V to 24VDC power supply or Power-
over-Ethernet (PoE)* conforming to the IEEE 802.3af
standard. All software and firmware is remotely upgradeable
over the network via EBI.
All the IdentIPoint readers are designed to work with an
optional remote IOM. The IOM is used when the control inputs
and outputs of the door are desired to be on the secure side of
the door - for high security installations. The IOM integrates
seamlessly with the readers via a secure encrypted RS485
bus. Up to four IOMs can be connected via the same bus to a
reader. The IOMs are independently addressable via DIP
switches.
The IOM supports the following types of Inputs and Outputs:
• Relay: 2 - (1A 24VDC) Form C
• Digital Input: 2
• Digital Output: 2 (current sinking; (max 24V 1A)
• Supervised Analog Inputs : 4 ; capable of distinguishing 4
states
• Supervised Analog Output 1 - repeats the last Supervisory
Input, SAI3
The IOM works with a 12V to 24VDC power supply. It is
possible to control one door using two Readers in IN & OUT
mode with the help of an IOM.
* See Table.1.
Models and Part Numbers
The IdentIPoint product-line consists of the following three
reader models and one input/output unit:
1. Basic: Basic Indoor / Outdoor reader with IP65 rating3
(Part no.: BTBAS)
2. Standard: Indoor reader with LCD & Keypad (Part no.:
BTSTD)
3. Fingerprint: Indoor reader with LCD, Keypad and Fin-
gerprint unit (Part no.: BTFPT)2
4. IOM: Remote Input Output Module (Part no.: BTIO)
NOTE:
1. For device ratings, see product datasheet (Docu-
ment no. 74-5086).
2. The BTFPT module is not UL294 listed and shall
not be used for UL applications.
3. IP65 enclosure rating was not evaluated by UL.
BEFORE INSTALLATION
1. Verify the mounting locations with the job drawings.
2. Unpack the IdentIPoint reader, IOM and accessories
and check them. Report any damaged or missing com-
ponents to a Honeywell representative. A claim must be
filed with the commercial carrier responsible.

HONEYWELL IDENTIPOINT™ INTELLIGENT SMARTCARD SYSTEM
395-7767
WARNING
Fire Safety and Liability Notice: Never connect
card readers to any critical entry, exit door, barrier,
elevator or gate without providing an alternative
exit in accordance with all fire and life safety
codes pertinent to the installation. These fire and
safety codes vary from city to city and you must
get approval from local fire officials whenever
using an electronic product to control a door or
other barrier. Use of egress buttons, for example,
may be illegal in some cities.In most applications,
single action exit without prior knowledge of what
to do is a life safety requirement. Always make
certain that any required approvals are obtained in
writing. Verbal approvals are not valid.
IMPORTANT
Table 1.
IDENTIPOINT HARDWARE
Inside the reader box
• Intelligent Reader Unit - 1
• Mounting Plate - 1
• Mounting Hardware - Screws and Wall Anchors - 6 each
• Extra Tamper Resistant Screws - 2
• Tool for Tamper Resistant Screw - 1
• Connector with cable - 2 (9 and 10 pin)
• Resistors - 2K (Color Code: RED-BLACK-RED-GOLD;
0.5W axial type, 5% tolerance) - 3
• Resistors - 1K (Color Code: BROWN-BLACK-RED-GOLD;
0.5W axial type, 5% tolerance) - 3
• Square ferrite clip - 1
• Round ferrite clip - 1
• Quick Installation Guide - 1
Inside the IOM box
• Input / Output Module Unit - 1
• Mounting Hardware - Screws and Wall Anchors - 3 each
• Extra Tamper Resistant Screws - 2
• Tool for Tamper Resistant Screw - 1
• Connectors for termination - 12 x 2 connections; 3 x 3
connections
• Resistors - 2K (Color Code: RED-BLACK-RED-GOLD;
0.5W axial type, 5% tolerance) - 4
• Resistors - 1K (Color Code: BROWN-BLACK-RED-GOLD;
0.5W axial type, 5% tolerance) - 6
• Quick Installation Guide - 1
ASSEMBLY, MOUNTING AND
INSTALLATION
Mounting and Installing the Reader
NOTE:
• The reader can be mounted either on a drywall or on
a concrete wall using conduits and a gang box.
1 For UL294 applications, only UL294 and/or UL1076 listed power supplies should be used for reader and
lock power with required 72 hour battery backup.
2 Use of PoE is not a UL294 listed configuration and should not be used on UL294 applications.
3 Wifi network configuration is not a UL294 listed configuration and should not be used on UL294
applications.
4 As a standalone or disconnected reader is not supervised, this configuration should not be used on
UL294 applications.
5 For UL294 applications using an IOM, note that the IOM needs to be kept on the secure side of the door
i.e. indoors, and within a distance of 7.5 meters from the reader to which it is connected. In case the
distance between the IOM and the reader exceeds 7.5 meters, the use of lightning protection devices on
the RS485 line is mandatory.
6 The class of these products is a UL294 Access Control System, complying with UL294 Attack
Class I.

HONEYWELL IDENTIPOINT™ INTELLIGENT SMARTCARD SYSTEM
95-7767 4
• The drywall and gang boxes shown here are just
representations of the actual hardware. During
installation, please use the hardware as per the
required dimensions and availability.
• To install IdentIPoint devices in place of older devices
that have been removed, you may use the
TRADELINE® 209651A Universal Cover Plate to
cover marks from the older devices and allow
mounting of IdentIPoint devices on vertical or
horizontal outlet boxes. See document no. 69-1093
for more details.
WARNING
Earth ground all enclosures for proper installation.
It is mandatory to connect the "Frame Ground" on
the J10 terminal of the fingerprint reader to an
electronic earth. In case an electronic earth is not
available then "Frame Ground" can be connected
to the Input Power Supply earth or common
ground available nearby.
WARNING
Make all electrical field connections to reader and
IOM(s) before applying DC power to configuration.
Failure to do so and connecting positive terminal
first on IOM before negative can result in failed
operation that would require power recycling. Do
not make power connections with power applied
to wiring/terminal blocks - power down all circuits
before connecting or disconnecting all terminal
blocks on reader or IOM.
Drywall Mounting
1. Fig.2 and Fig.3 show the parts of the IdentIPoint reader.
Use the back-plate of the reader to mark out the posi-
tion of the reader on the drywall. Mark the positions of
the mounting screws and the opening for routing the
cables.
2. Cut the cable opening on the drywall using suitable
tools and punch an adequate number of holes for the
mounting screws. It is advisable to use at least four
screws to mount the reader. Use the wall anchors for
additional holding strength. See Fig.4.
3. Hold the back-plate in position on the drywall. Align the
mounting screws with their holes and fasten the back-
plate securely on the drywall using the screws. See
Fig.4.
4. Route the field wires including the Ethernet cable (if
required) from behind the drywall through the cable
opening and bring them to the front of the mounting sur-
face. See Fig.6. Clip the square* ferrite clip on the
reader's Ethernet pigtail. See Fig.7. Connect the field
wiring to the correct Molex pigtails. See Table.2 for wire
sizes and distances. For reader connection details see
Fig.11 and Table.5 and Table.6. Plug the Molex termi-
nal(s) in ports J9 and J10 at the back of the reader. See
Fig.7. Clip (with two turns wrapped) the round** ferrite
clip on the field Ethernet cable. See Fig.6. Plug the
RJ45 connector of the field Ethernet cable into the
Ethernet port of the reader at the end of the pigtail. See
Fig.7. Drop the excess lengths of Molex and Ethernet
wires behind the drywall. Set the S1 DIP switch if the
reader is to be connected to an IOM via RS485. See
Fig.11, Table.7 and Section RS485 Communication and
Termination Setting of Connector and Switch Descrip-
tions topic for more details.
5. Once all the connections and settings are done, hold
the reader against the back-plate, aligning the mounting
slots at the back of the reader with their corresponding
catches on the back-plate and push it downwards until it
hooks into place firmly. See Fig.8 and Fig.9.
6. Use the Allen wrench to tighten the tamper-resistant
screw at the bottom of the reader into the hole provided
on the back-plate so as to fasten the reader to the back-
plate securely. See Fig.10.
* Required for the unit to limit emissions within FCC part 15
Class B level. Should be clipped on the reader's Ethernet
pigtail and accommodated behind the drywall.
** Required for the unit to limit emissions within FCC part 15
Class B level. Can be clipped either near the reader or at the
far end (near the network switch) of the field Ethernet cable.
Gang Box (concrete wall) Mounting
1. Fig.2 and Fig.3 show the parts of the IdentIPoint reader.
Ensure that the correct sized gang box is securely
embedded in the concrete wall. The holes provided in
the gang box for the screws should align properly with at
least two of the holes provided in the reader back-plate
for the screws.
2. Hold the back-plate in position over the gang box. Align
the mounting screws with their holes and fasten the
back-plate securely on the gang box using the screws.
See Fig.5.
3. Route the field wiring including the Ethernet cable (if
required) from the conduits into the gang box. Clip the
square* ferrite clip on the reader's Ethernet pigtail. See
Fig.7. Connect the field wiring to the correct Molex pig-
tails. See Table.2 for wire sizes and distances. For
reader connection details see Fig.11 and Table.5 and
Table.6. Route the Molex terminal(s) through the cable
opening on the back-plate towards the front of the
mounting surface (see Fig.6) and plug them in ports J9
and J10 at the back of the reader. See Fig.7. Clip (with
two turns wrapped) the round** ferrite clip on the field
Ethernet cable. See Fig.6. Plug the RJ45 connector of
the field Ethernet cable into the Ethernet port of the
reader provided at the end of the pigtail. See Fig.7.
Allow room for the Molex and Ethernet pigtails inside the
gang box. Set the S1 DIP switch if the reader is to be
connected to an IOM via RS485. See Fig.11, Table.7
and Section RS485 Communication and Termination
Setting of Connector and Switch Descriptions topic for
more details.
4. Once all the connections and settings are done, hold
the reader against the back-plate, aligning the mounting
slots at the back of the reader with their corresponding
catches on the back-plate and push it downwards until it
hooks into place firmly. See Fig.8 and Fig.9.
5. Use the Allen wrench to tighten the tamper-resistant
screw at the bottom of the reader into the hole provided
on the back-plate so as to fasten the reader to the back-
plate securely. See Fig.10.
* Required for the unit to limit emissions within FCC part 15
Class B level. Should be clipped on the reader's Ethernet
pigtail and accommodated inside the gang box.
** Required for the unit to limit emissions within FCC part 15
Class B level. Can be clipped either near the reader or at the
far end (near the network switch) of the field Ethernet cable.

HONEYWELL IDENTIPOINT™ INTELLIGENT SMARTCARD SYSTEM
595-7767
Fig. 2. Parts of IdentIPoint reader - Front of reader and Back-plate
BACK-PLATE
CATCHES FOR
HOLDING READER
ON BACK-PLATE (4)
READER
STATUS LED
KEYPAD
READER FRONT
MOUNTING SCREW
HOLES (10)
OPENING FOR
ROUTING CABLES (1)
123
456
789
0#
LCD
HOLE FOR SECURING
READER TO BACK-
PLATE (1) BACK-PLATE
CATCHES FOR
HOLDING READER
ON BACK-PLATE (4)
READER
STATUS LED
KEYPAD
READER FRONT
MOUNTING SCREW
HOLES (10)
OPENING FOR
ROUTING CABLES (1)
123
456
789
0#
LCD
HOLE FOR SECURING
READER TO BACK-
PLATE (1)

HONEYWELL IDENTIPOINT™ INTELLIGENT SMARTCARD SYSTEM
95-7767 6
Fig. 3. Parts of IdentIPoint reader - Back of reader
Fig. 4. Mounting reader back-plate on drywall
READER MOUNTING
SLOTS (4)
STATUS LEDS (3)
DIP SW ITCH S1
READER BACK
10/100
Activity
Power
ETHERNET TERMINAL
(EPOXY POTTED FOR
IP65 COMPLIANCE)
FACTORY RESET
SWITCH
OPTICAL TAMPER
SENSOR
WIRING
TERMINAL
PORTS J9, J10
HOLE FOR TAMPER-
RESISTANT SCREW
CAT5 PIGTAIL
HOLE FOR HOLDING
RUBBER COVER
(SHOWN IN CALLOUT)
RJ45 TERMINAL PLUG
Model: BTSTD
IdentIPoin tStan da rd Indoor
Power 1 0-28 VDC, PoE
M AC ID Eth ern et 00 40 84 0A F 33 E
MAC IDWi-fi 00408-IOAF33F
Manu factured: 2 00 9. 0 7. 13 MA D E INCHINA
1
2
3
4
1
2
3
4
ON POS I T I ONON POS I T I ON
READER MOUNTING
SLOTS (4)
STATUS LEDS (3)
DIP SW ITCH S1
READER BACK
10/100
Activity
Power
ETHERNET TERMINAL
(EPOXY POTTED FOR
IP65 COMPLIANCE)
FACTORY RESET
SWITCH
OPTICAL TAMPER
SENSOR
WIRING
TERMINAL
PORTS J9, J10
HOLE FOR TAMPER-
RESISTANT SCREW
CAT5 PIGTAIL
HOLE FOR HOLDING
RUBBER COVER
(SHOWN IN CALLOUT)
RJ45 TERMINAL PLUG
Model: BTSTD
IdentIPoin tStan da rd Indoor
Power 1 0-28 VDC, PoE
M AC ID Eth ern et 00 40 84 0A F 33 E
MAC IDWi-fi 00408-IOAF33F
Manu factured: 2 00 9. 0 7. 13 MA D E INCHINA
1
2
3
4
1
2
3
41
2
3
4
1
2
3
4
1
2
3
4
ON POS I T I ONON POS I T I ONON POS I T I ONON POS I T I ON
CUT AN OPENING IN THE
DRYWALL FOR ROUTING THE
WIRES THE OPENING MUST
WIRES
.
THE OPENING MUST
HAVE THE SAME DIMENSIONS
AS THAT IN THE BACK-PLATE.
USE THE SCREWS PROVIDED
TO FIX THE BACK-PLATE TO
THE DRYWALL.
THE DRYWALL.
NOTE: USE A MINIMUM OF 4
SCREWS IN THE HOLES
CIRCLED IN RED
ROUTE THE WIRES FROM
BEHIND THE DRYWALL
THROUGH THE CONDUITS
PUNCH AN ADEQUATE NUMBER
OF HOLES IN THE DRYWALL
FOR THE SCREWS

HONEYWELL IDENTIPOINT™ INTELLIGENT SMARTCARD SYSTEM
795-7767
Fig. 5. Mounting reader back-plate on concrete wall using gang box and conduit
Fig. 6. Routing the wires before plugging the connectors into the reader
USE THE SCREWS PROVIDED
TO FIX THE READER BACK-
PLATE TO THE EMBEDDED
GANG BOX EMBEDDED IN WALL
PLATE TO THE EMBEDDED
GANG BOX.
NOTE: USE A MINIMUM OF 2
SCREWS IN THE HOLES
CIRCLED IN RED TO FASTEN
THE BACK-PLATE
CLIP ROUND FERRITE CLIP ON
THE FIELD ETHERNET CABLE
WITH TWO TURNS WRAPPED
ROUTE THE RJ45 CONNECTOR
(IF REQUIRED) AND MOLEX
TERMINALS FROM BEHIND THE
DRYWALL OR THROUGH THE
CONDUITS (IN CASE OF
CONCRETE WALL) AND BRING
THEM TOWARDS THE FRONT
SIDE OF THE MOUNTING
SURFACE THROUGH THE
OPENING ON THE READER’S
BACK-PLATE.
PLUG THE RJ45 CONNECTOR
INTO THE ETHERNET PORT OF
THE READER AT THE END OF
THE PIGTAIL.
PLUG THE MOLEX TERMINALS
INTO THE J9 AND J10 PORTS
OF THE READER

HONEYWELL IDENTIPOINT™ INTELLIGENT SMARTCARD SYSTEM
95-7767 8
NOTE: Round ferrite clip is required for the unit to limit emissions within FCC part 15 Class B level. Can be clipped
either near the reader or at the far end (near the network switch) of the field Ethernet cable.
The connector wire colors shown above are only indicative. Refer to Table.5 and Table.6 for the correct colors.
Fig. 7. Plugging the connectors into the IdentIPoint reader
NOTE: Square ferrite clip is required for the unit to limit emissions within FCC part 15 Class B level. Should be clipped
on the reader's Ethernet pigtail and accommodated behind the drywall or inside the gang box. The connector
wire colors shown above are only indicative. Refer to Table.5 and Table.6 for the correct colors.
BOTH MOLEX TERMINALS
SHOULD FIT FIRMLY INSIDE
THEIR RESPECTIVE PORTS
AT THE BACK OF THE
AT THE BACK OF THE
READER AS SHOWN
HOLD THE 9 AND 10-PIN
MOLEX TERMINALS
PERPENDICULAR TO THE
BACK OF THE READER AND
ALIGN THEM CORRECTLY
WITH PORTS J9 AND J10
PIN 9 PIN 1
PIN 1
PORT
J9
PIN 10
PORT
J10
10/100
A
ctivity
Power
Model:BTSTD
IdentIPoi nt Standard Indo or
Power 10-28 VDC, PoE
MAC IDEthernet 0040840AF33E
MACID Wi-fi 00408-IOAF33F
Manufactured: 2009.07.13 MADE INCHINA
O
N
O
N
O
N
O
N
TO PIN 1 TO PIN 10
ONPOSITI
O
ONPOSITI
O
ONPOSITI
O
ONPOSITI
O
1
2
3
4
1
2
3
41
2
3
4
1
2
3
4
1
2
3
4
PLUG RJ45
CONNECTOR (IF
REQD.) IN THE RJ45
TERMINAL PL
UG
TO PIN 9
9-PIN MOLEX
TERMINAL 10-PIN MOLEX
TERMINAL
TO PIN 1
CLIP SQUARE
FERRITE CLIP TO
THE PIGTAIL
PUSH THE 9 AND 10-PIN MOLEX TERMINALS
FIRMLY INTO THE READER PORTS J9 AND J10
RESPECTIVELY. ENSURE THAT ALL 9 AND 10
PINS GO INSIDE THE HOLES OF THEIR
RESPECTIVE TERMINALS AND THAT THE
SPECIAL PROTRUSIONS ON THE TERMINALS
MATE WITH THE SPECIAL SLOTS PROVIDED
UG
MATE WITH THE SPECIAL SLOTS PROVIDED
ON THE PORTS. THIS ENSURES THAT THE
TERMINALS CANNOT BE PLUGGED INTO
WRONG PORTS.

HONEYWELL IDENTIPOINT™ INTELLIGENT SMARTCARD SYSTEM
995-7767
Fig. 8. Aligning IdentIPoint reader with back-plate before mounting it
ALIGN THE MOUNTING
SLOTS BEHIND THE
READER WITH THEIR
CORRESPONDING
CATCHES ON THE
BACK-PLATE
10/100
Activity
Power
Model: BTSTD
IdentIPointStan da rd Indoor
Power 1 0-28 VDC, Po E
M AC ID Eth ernet 00 40 84 0A F 33 E
MACIDWi-fi 00408-I OA F 3 3 F
Manufactured: 2009.07.13 MA DE INCHINA
ON P OSI T I ONON P OSI T I ONON P OSI T I ONON P OSI T I ON
1
2
3
4
1
2
3
41
2
3
4
1
2
3
4
1
2
3
4

HONEYWELL IDENTIPOINT™ INTELLIGENT SMARTCARD SYSTEM
95-7767 10
Fig. 9. Mounting IdentIPoint reader on the back-plate
READER ASSEMBLY –
SIDE VIEW
ALIGN THE MOUNTING
SLOTS BEHIND THE
READER WITH THEIR
CORRESPONDING
CATCHES ON THE
BACK-PLATE. PUSH
THE READER
DOWNWARDS UNTIL IT
HOOKS INTO PLACE
FIRMLY
READER ASSEMBLY –
FRONT VIEW
123
456
789
0#
READER ASSEMBLY –
SIDE VIEW
ALIGN THE MOUNTING
SLOTS BEHIND THE
READER WITH THEIR
CORRESPONDING
CATCHES ON THE
BACK-PLATE. PUSH
THE READER
DOWNWARDS UNTIL IT
HOOKS INTO PLACE
FIRMLY
READER ASSEMBLY –
FRONT VIEW
123
456
789
0#

HONEYWELL IDENTIPOINT™ INTELLIGENT SMARTCARD SYSTEM
11 95-7767
Fig. 10. Securing the IdentIPoint reader to the back-plate
10/100
Activity
Power
Model: BTSTD
IdentIPointStan da rd Indoor
Power 1 0-2 8 VDC, PoE
M AC ID Eth ernet 00 40 84 0A F 33 E
MAC IDWi-fi 00408-IOAF33F
Manufactured: 2009.07.13 MA D E INCHI NA
ON POSITIONON POSITIONON POSITIONON POSITION
1
2
3
4
1
2
3
41
2
3
4
1
2
3
4
1
2
3
4
USE THE ALLEN
WRENCH TO
SECURE THE
READER TO THE
BACK-PLATE WITH
THE TAMPER-
RESISTANT SCREW
123
456
789
0#

HONEYWELL IDENTIPOINT™ INTELLIGENT SMARTCARD SYSTEM
95-7767 12
Fig. 11. Reader connections
Mounting and Installing the Input/Output
Module
NOTE:
• The IOM can be mounted either on a drywall or on a
concrete wall using conduits and a gang box.
• The drywall and gang boxes shown here are just
representations of the actual hardware. During
installation, please use the hardware as per the
required dimensions and availability.
• To install IdentIPoint devices in place of older devices
that have been removed, you may use the
TRADELINE® 209651A Universal Cover Plate to
cover marks from the older devices and allow
mounting of IdentIPoint devices on vertical or
horizontal outlet boxes. See document no. 69-1093
for more details.
10/100
Ac tiv i ty
Po w e r
Model: BTSTD
IdentIP oi nt S t andard I ndoor
Power 10-28 VDC, PoE
MA C I D E t hernet 0040840A F33E
MA C IDW i-fi 00408-IO A F33F
Manufactured: 2009.07.13 MADE INCHINA
ON POS ITIONON POS ITIONON POS ITIONON POS ITION
1
2
3
4
1
2
3
41
2
3
4
1
2
3
4
1
2
3
4
10/100
Ac tiv i ty
Po w e r
Model: BTSTD
IdentIP oi nt S t andard I ndoor
Power 10-28 VDC, PoE
MA C I D E t hernet 0040840A F33E
MA C IDW i-fi 00408-IO A F33F
Manufactured: 2009.07.13 MADE INCHINA
ON POS ITIONON POS ITIONON POS ITIONON POS ITION
1
2
3
4
1
2
3
41
2
3
4
1
2
3
4
1
2
3
4
Marking Color Descripon
10/100 Green On when network is 100
MBit
Acvity Orange Flashes on network acvity
Power Blue On if power on
Marking Color Descripon
10/100 Green On when network is 100
MBit
Acvity Orange Flashes on network acvity
Power Blue On if power on
J9 PIN PIN J10
SAI-1-GND 91Power-OUT
SAI-1 8 2 Power-GND
SAI-0-GND 7 3 RS485-A
SAI-0 6 4 RS485-B
Relay-NO 5 5 RS485-GND
Relay-NC 4 6 DO
Relay-C 3 7 DOGnd
Power-GND 2 8 SAI-2
Power-IN 19SAI-2-GND
10 Frame-GND
J9 PIN PIN J10
SAI-1-GND 91Power-OUT
SAI-1 8 2 Power-GND
SAI-0-GND 7 3 RS485-A
SAI-0 6 4 RS485-B
Relay-NO 5 5 RS485-GND
Relay-NC 4 6 DO
Relay-C 3 7 DOGnd
Power-GND 2 8 SAI-2
Power-IN 19SAI-2-GND
10 Frame-GND
Posion Effect when“ON”
(Posion Le)
1 RS485-Apull up
2 RS485 terminaon
3 RS485-B pull down
4WifiDisable
Posion Effect when“ON”
(Posion Le)
1 RS485-Apull up
2 RS485 terminaon
3 RS485-B pull down
4WifiDisable
DIP SWITCH S1
CONNECTORS AT THE BACK
LED INDICATORS AT THE BACK
FACTORY
RESET
SWITCH
OPTICAL
ALARM
TAMPER

HONEYWELL IDENTIPOINT™ INTELLIGENT SMARTCARD SYSTEM
13 95-7767
WARNING
Make all electrical field connections to reader and
IOM(s) before applying DC power to configuration.
Failure to do so and connecting positive terminal
first on IOM before negative can result in failed
operation that would require power recycling. Do
not make power connections with power applied
to wiring/terminal blocks - power down all circuits
before connecting or disconnecting all terminal
blocks on reader or IOM.
WARNING
Grounds need to be affixed first before applying
any power to a configuration. The dedicated
ground connector J3 on the IOM (see Fig.18) can
be used for the above purpose.
WARNING
No components should be added to a hot i.e.
powered up configuration.
CAUTION
Electro-static discharge (ESD) can damage CMOS
integrated circuits and modules. To prevent
damage always follow these procedures:
— Use static shield packaging and containers to trans-
port all electronic components, including completed
reader assemblies.
— Handle all ESD sensitive components at an approved
static controlled workstation.
Drywall Mounting
1. The IOM has a clamshell plastic case. The back half of
the case has the electronic circuit board fastened to it
while the front case cover swings open to allow access
to the electronics and wiring. Pull open the front cover.
This reveals the mounting holes and other components
inside the IOM. See Fig.12 and Fig.13.
2. Use the back half to mark out the position of the IOM on
the drywall. Also mark the positions of the mounting
screws and the openings for routing the cables. See
Fig.14.
3. Cut the two cable openings on the drywall using suitable
tools. The openings should be aligned with the knock-
out holes provided on the back half for routing the
cables. Also punch three holes at suitable places in the
drywall for the mounting screws. Use the wall anchors
for additional holding strength. See Fig.14.
4. Ensure that the knock-out holes on the back half have
been opened up. (Knock-out holes are also provided on
both sides of the IOM enclosure in case field conditions
require routing the wires from the sides.) Hold the back
half in position on the drywall. Align the mounting
screws with their holes and fasten the back half securely
on the drywall using the three screws. See Fig.14.
5. Route the field wires from behind the drywall through
the cable opening and bring them inside the IOM via the
knock-out holes. See Table.2 for wire sizes and dis-
tances. Connect the wire terminals to the ends of the
wires and plug the wire terminal(s) in their correct slots
on the PCB. See Fig.16. For IOM connection details see
Fig.18 and Table.8. Drop the excess wire lengths behind
the drywall. Set the S1 DIP switch if the IOM is to be
connected to a reader via RS485. See Fig.18, Table.10
and Section RS485 Communication and Termination
Setting of Connector and Switch Descriptions topic for
more details.
6. Set the IOM address as per Fig.18, Table.11 and Sec-
tion IOM Address Setup of Connector and Switch
Descriptions topic for more details.
7. Once all connections and settings are done, close the
IOM enclosure by pressing the front case cover over the
back half. See Fig.16.
8. Use the Allen wrench to tighten the tamper-resistant
screw at the top of the IOM enclosure. See Fig.17.
Gang Box (concrete wall) Mounting
1. The IOM has a clamshell plastic case. The back half of
the case has the electronic circuit board fastened to it
while the front case cover swings open to allow access
to the electronics and wiring. Pull open the front cover.
This reveals the mounting holes and other components
inside the IOM. See Fig.12 and Fig.13.
2. Ensure that the correct sized gang box is securely
embedded in the concrete wall. One of the holes pro-
vided in the gang box for the screws should align prop-
erly with at least the top hole provided in the IOM's back
half for the screw. For the remaining screws punch addi-
tional holes at the correct places directly in the concrete
wall. Use the wall anchors for additional holding
strength. The gang box itself should be large enough to
cover both the knock-out cable holes at the back of the
IOM. See Fig.15.
3. Route the field wires from the conduits into the gang box
and bring them inside the IOM via the knock-out holes.
See Table.2 for wire sizes and distances. The IOM can
now be mounted on the wall. Hold the back half in posi-
tion over the gang box and wall. Align the three mount-
ing screws with their holes and fasten the back half
securely on the gang box and wall using the screws.
See Fig.15.
4. Connect the wire terminals to the ends of the wires and
plug the wire terminal(s) in their correct slots on the
PCB. See Fig.16. For IOM connection details see Fig.18
and Table.8. Allow room for any excess wire lengths
inside the gang box. Set the S1 DIP switch if the IOM is
to be connected to a reader via RS485. See Fig.18,
Table.10 and Section RS485 Communication and Ter-
mination Setting of Connector and Switch Descriptions
topic for more details.
5. Set the IOM address as per Fig.18, Table.11 and Sec-
tion IOM Address Setup of Connector and Switch
Descriptions topic for more details.
6. Once all connections and settings are done, close the
IOM enclosure by pressing the front case cover over the
back half. See Fig.16.
7. Use the Allen wrench to tighten the tamper-resistant
screw at the top of the IOM enclosure. See Fig.17.
NOTE: The power supply wiring for the BTIO IOM shall
be enclosed by conduit.

HONEYWELL IDENTIPOINT™ INTELLIGENT SMARTCARD SYSTEM
95-7767 14
Fig. 12. Outer structure of IOM - Front and side view
Power
Data
Tamper
POWER,
DATA AND
TAMPER
INDICATION
LEDS
FRONT COVER
OF THE IOM
HINGE AT THE
BOTTOM HOLDING
THE TWO PARTS
TOGETHER
BACK HALF OF
THE IOM
SIDE KNOCK -OUTS
FOR CABLE HOLES
Power
Data
Tamper
POWER,
DATA AND
TAMPER
INDICATION
LEDS
FRONT COVER
OF THE IOM
HINGE AT THE
BOTTOM HOLDING
THE TWO PARTS
TOGETHER
BACK HALF OF
THE IOM
SIDE KNOCK -OUTS
FOR CABLE HOLES

HONEYWELL IDENTIPOINT™ INTELLIGENT SMARTCARD SYSTEM
15 95-7767
Fig. 13. Internal structure and components of IOM
PRINTED CIRCUIT
BOARD
BACK KNOCK-
OUTS FOR CABLE
HOLES (2)
WIRING
TERMINALS–
2 WIRE (13)
WIRING
TERMINALS–
3 WIRE (3)
IOM FRONT COVER-OPEN
HOLE FOR
TAMPER-
RESISTANT
SCREW
IOM BACK HALF-OPEN
HOLE FOR
TAMPER-
RESISTANT
SCREW
LIGHT GUIDES
CABLE
GUIDES (6)
COVER TAMPER
DETECTION
SWITCH
PULL OPEN THE
FRONT COVER OF
THE IOM AND ALLOW
IT TO HANG FROM
THE HINGE
MOUNTING
SCREW HOLES
(3)

HONEYWELL IDENTIPOINT™ INTELLIGENT SMARTCARD SYSTEM
95-7767 16
Fig. 14. Mounting the IOM on a drywall
CUT OPENINGS IN THE
DRYWALL FOR ROUTING THE
WIRES. THE OPENINGS MUST
HAVE THE SAME DIMENSIONS
AS THAT IN THE BACK HALF OF
THE IOM.
PUNCH THREE HOLES IN
THE DRYWALL FOR THE
SCREWS
USE THE SCREWS
PROVIDED TO FIX THE
BACK HALF OF THE IOM
TO THE DRYWALL.
NOTE: USE ALL THREE
HOLES TO FASTEN THE
IOM
IOM

HONEYWELL IDENTIPOINT™ INTELLIGENT SMARTCARD SYSTEM
17 95-7767
Fig. 15. Mounting the IOM on a concrete wall using gang box and conduit
GANG BOX EMBEDDED IN WALL
PUNCH ADDITIONAL HOLES
IN THE WALL FOR THE
OTHER SCREWS
USE THE SCREWS PROVIDED
TO FIX THE BACK HALF OF IOM
TO THE GANG BOX AND THE
WALL.
NOTE: USE ALL 3 SCREWS TO
FASTEN THE IOM

HONEYWELL IDENTIPOINT™ INTELLIGENT SMARTCARD SYSTEM
95-7767 18
Fig. 16. Routing the wires and connecting them to the IOM PCB
ROUTE THE WIRES
THROUGH THE KNOCK -
OUT HOLES AND FIX
THEM TO THE CORRECT
TERMINALS ON THE PCB
USING THE PROVIDED
WIRE TERMINAL BLOCKS
AFTER WIRING AND
OTHER HARDWARE
CONFIGURATIONS ARE
DONE, SHUT THE FRONT
COVER OF THE IOM
ROUTE THE WIRES
THROUGH THE KNOCK -
OUT HOLES AND FIX
THEM TO THE CORRECT
TERMINALS ON THE PCB
USING THE PROVIDED
WIRE TERMINAL BLOCKS
AFTER WIRING AND
OTHER HARDWARE
CONFIGURATIONS ARE
DONE, SHUT THE FRONT
COVER OF THE IOM

HONEYWELL IDENTIPOINT™ INTELLIGENT SMARTCARD SYSTEM
19 95-7767
Fig. 17. Securing the front cover onto the back half of the IOM
Power
Data
Tamper
USE THE ALLEN
WRENCH TO
SECURE THE FRONT
COVER OF THE IOM
TO THE BACK HALF
WITH TAMPER-
RESISTANT SCREW
Power
Data
Tamper
Power
Data
Tamper
USE THE ALLEN
WRENCH TO
SECURE THE FRONT
COVER OF THE IOM
TO THE BACK HALF
WITH TAMPER-
RESISTANT SCREW

HONEYWELL IDENTIPOINT™ INTELLIGENT SMARTCARD SYSTEM
95-7767 20
Fig. 18. IOM connections
DIP switch -S1
Posion Effect when“ON”
(Posion Up)
1 RS485-A pull up
2 RS485 terminaon
3 RS485-B pull down
4Reserved
Posion Effect when“ON”
(Posion Up)
1 RS485-A pull up
2 RS485 terminaon
3 RS485-B pull down
4Reserved
Switch Descripon
S1 RS485 TerminaonControl DIP switch
S2 Inializaon Buon
S3 IOM Address set up DIP switch
S4 Cover tamper detecon switch
Switch Descripon
S1 RS485 TerminaonControl DIP switch
S2 Inializaon Buon
S3 IOM Address set up DIP switch
S4 Cover tamper detecon switch
S2: Inializaon
Buon
DIP switch
S3 -IOM address
Posion Descripon
1 Address value 1
2 Address value 2
3 Address value 4
4 Address value 8
5 Address value 16
6 Address value 32
7 Address value 64
8 For IOM setup, normallyset to OFF
Posion Descripon
1 Address value 1
2 Address value 2
3 Address value 4
4 Address value 8
5 Address value 16
6 Address value 32
7 Address value 64
8 For IOM setup, normallyset to OFF
S4: Cover tamper
detecon switch
Other manuals for IdentIPoint
1
Table of contents
Other Honeywell IP Access Controllers manuals

Honeywell
Honeywell NetAXS-123 Troubleshooting guide

Honeywell
Honeywell IDENT-KEY 3 Instruction manual

Honeywell
Honeywell MPA1 User manual

Honeywell
Honeywell MPA2 User manual

Honeywell
Honeywell VISTA CA-FP-100F User manual

Honeywell
Honeywell NetAXS-123 User manual

Honeywell
Honeywell NetAXS-123 User manual

Honeywell
Honeywell MPA1C1 User manual

Honeywell
Honeywell MPA2C3 User manual

Honeywell
Honeywell ACS-8 User manual