manuals.online logo
Brands
  1. Home
  2. •
  3. Brands
  4. •
  5. Honeywell
  6. •
  7. Safe
  8. •
  9. Honeywell 3035D How to use

Honeywell 3035D How to use

This manual suits for next models

5

Other Honeywell Safe manuals

Honeywell 5005 User manual

Honeywell

Honeywell 5005 User manual

Honeywell 1101 User manual

Honeywell

Honeywell 1101 User manual

Honeywell 6108 User manual

Honeywell

Honeywell 6108 User manual

Honeywell 2111 User manual

Honeywell

Honeywell 2111 User manual

Honeywell 5410 How to use

Honeywell

Honeywell 5410 How to use

Honeywell 2101 User manual

Honeywell

Honeywell 2101 User manual

Honeywell 2512 User manual

Honeywell

Honeywell 2512 User manual

Honeywell 5203 User manual

Honeywell

Honeywell 5203 User manual

Honeywell 5103 User manual

Honeywell

Honeywell 5103 User manual

Honeywell 3511 User manual

Honeywell

Honeywell 3511 User manual

Honeywell Media Protector 2040 User manual

Honeywell

Honeywell Media Protector 2040 User manual

Honeywell 5101 User manual

Honeywell

Honeywell 5101 User manual

Honeywell 2111 User manual

Honeywell

Honeywell 2111 User manual

Honeywell 2605 User manual

Honeywell

Honeywell 2605 User manual

Honeywell 2911 User manual

Honeywell

Honeywell 2911 User manual

Honeywell 1532 User manual

Honeywell

Honeywell 1532 User manual

Honeywell 2050 User manual

Honeywell

Honeywell 2050 User manual

Honeywell 1114 User manual

Honeywell

Honeywell 1114 User manual

Honeywell 2077D - 1.21 Cubic Foot Anti-Theft Safe User manual

Honeywell

Honeywell 2077D - 1.21 Cubic Foot Anti-Theft Safe User manual

Honeywell 2510 User manual

Honeywell

Honeywell 2510 User manual

Honeywell 5002 User manual

Honeywell

Honeywell 5002 User manual

Honeywell 3518 User manual

Honeywell

Honeywell 3518 User manual

Honeywell 2070A - 43 Cubic Foot Expandable Anti-Theft Wall... How to use

Honeywell

Honeywell 2070A - 43 Cubic Foot Expandable Anti-Theft Wall... How to use

Honeywell 1502 User manual

Honeywell

Honeywell 1502 User manual

Popular Safe manuals by other brands

Euromate 406210 Original instructions

Euromate

Euromate 406210 Original instructions

SPORTS AFIELD PRESERVE SA72-60WD instruction manual

SPORTS AFIELD

SPORTS AFIELD PRESERVE SA72-60WD instruction manual

Squire Stronghold Keysafe Fitting instructions

Squire

Squire Stronghold Keysafe Fitting instructions

Phoenix FS0352C Instructions & Guarantee Registration

Phoenix

Phoenix FS0352C Instructions & Guarantee Registration

Hornady SnapSafe Trunk Safe II owner's manual

Hornady

Hornady SnapSafe Trunk Safe II owner's manual

Phoenix KS0030E Series operating instructions

Phoenix

Phoenix KS0030E Series operating instructions

Vaultek 10 Series Quick setup

Vaultek

Vaultek 10 Series Quick setup

Arregui CLASS operating instructions

Arregui

Arregui CLASS operating instructions

Technomax Trony Series Instruction handbook

Technomax

Technomax Trony Series Instruction handbook

SPORTS AFIELD INSTINCT BIOMETRIC Series instruction manual

SPORTS AFIELD

SPORTS AFIELD INSTINCT BIOMETRIC Series instruction manual

SPORTS AFIELD SA-HD5-BIO instruction manual

SPORTS AFIELD

SPORTS AFIELD SA-HD5-BIO instruction manual

Olymp GOsafe 110 operating instructions

Olymp

Olymp GOsafe 110 operating instructions

Phoenix SS0100E Operating Instructions & Guarantee Registration

Phoenix

Phoenix SS0100E Operating Instructions & Guarantee Registration

Ankaro ANK EZ I quick start guide

Ankaro

Ankaro ANK EZ I quick start guide

Beaumont SMART KEYBOX user guide

Beaumont

Beaumont SMART KEYBOX user guide

Phoenix FS1270E Series operating instructions

Phoenix

Phoenix FS1270E Series operating instructions

Shure T-Wall Series Assembly instructions

Shure

Shure T-Wall Series Assembly instructions

Toolland BG80050 user manual

Toolland

Toolland BG80050 user manual

manuals.online logo
manuals.online logoBrands
  • About & Mission
  • Contact us
  • Privacy Policy
  • Terms and Conditions

Copyright 2025 Manuals.Online. All Rights Reserved.

Operation & Installation Guide
MHCB3035D40D50308
www.HoneywellSafes.com
Home and Office Security Safes
Coffres-forts résidentiels et commerciaux
Cajas fuertes de seguridad para la oficina y el hogar
Sicherheitssafes für Heim und Büro
Brandkasten voor thuis en kantoor
US/Canada - Etats-Unis/ Canada - EUA/Canadá - USA/Kanada - V.S./Canada
2835 East Ana Street Rancho Dominguez, CA 90221-5601 USA
US/Canada Toll Free:
Numéro sans frais aux Etats-Unis/ Canada:
EUA/Canadá llamada telefónica gratis:
USA/Kanada gebührenfrei:
V.S./Canada gratis nummer:
800-223-8566
US/Canada - EUA/Canadá - Etats-Unis/ Canada:
310-638-1182
Fax - Facsímile:
310-638-6489
Email - Courriel:
C[email protected]
Europe - Europa
c/o - Atención - p/a:
Freightways Distriservices B.V.
P.O. Box 3077
2220 CB Katwij
The Netherlands
+31 71 4090721
English
Français
Español
Deutsch
Nederlands
Model / Modèle / Modelo / Modell:
3035D / 3035DE / 3035DBJ / 3040D / 3040DE / 3040DBJ
Lireces instructions très attentivement!
¡Sírvase leer estas instrucciones cuidadosamente!
Read These Instructions VeryCarefully!
Bitte lesen Sie diese Anleitung genau durch!
Lees deze instructies zorgvuldig door!
Australia-I’Australie-Austrelien-Australië
c/o - Atención - p/a:
Customer Service Dept.
Master Distributors
11 Howleys Road
Notting Hill VIC 3168
03-9538-9200
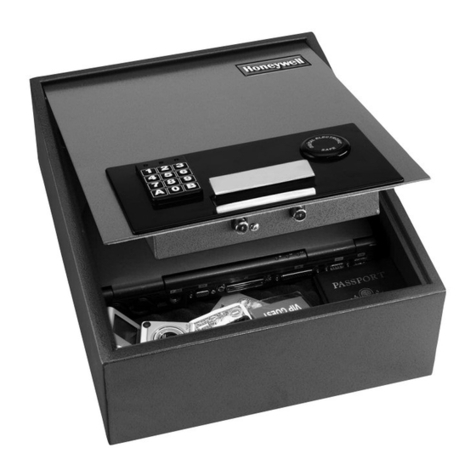
DELUXE
SECURITY BOX
with Digital Electronic Lock
4
2
5
3
*
1
4
2
5
3
*
1
4
2
5
3
*
1
+
+
Fig. 1 Fig. 2
Fig. 4
+
+
Fig. 3
Illustrations
4
2
5
3
*
1
Fig. 5 Fig. 6
1
English Nederlands
Español Deutsch
Français
Reservesleutels bestellen:
Als er een sleutel kwijtraakt of u wilt extra
sleutels voor uw brandkast dan kunt u deze
gemakkelijk aanschaffen bij onze afdeling
Klantenservice.
Betaling en levering:
In de VS zijn reservesleutels verkrijgbaar tegen
betaling en creditcardbestellingen zijn mogelijk
via de telefoon en via onze website. Voor
bestellingen die per post ontvangen worden is
een cheque of postwissel vereist ten gunste
van “SISCO”.
U dient de volgende informatie te verstrekken
voor snelle en nauwkeurige verwerking:
•Naam / Adres / Telefoonnummer
• Modelnummer van de brandkast
• E-mailadres (indien beschikbaar)
• Aantal gewenste sleutels
• Sleutelnummer (staat op het slot)
Voorwaarden kunnen zonder verdere waarschuwing
veranderd worden
4
2
5
3
*
1
2
Important
Welcome to the HONEYWELL Family
of Products
Along with peace of mind, your Honeywell
Digital Security Box will provide many years
of secure storage for your valuables.
For security, you should:
•Immediately set your own personal
combination.
• Store the keys and personal combination
away from the security box.
• Mail the warranty registration card or
register via the internet at
www.HoneywellSafes.com
The pre-set factory code for your safe is:
3*
Overview
10
8
4
1
5
2
6
3
9
1. Locked override key icon
2. Override key lock
3. Rotating knob or latching handle
4. Unlocked knob icon
5. LED Indicator light
6. Security box lid
7. Red code setting button
(see diagram to the right)
8. Unlocked override key icon
9. Locked knob icon
10.Digital keypad buttons
11.Security cable attachment hole plug
English
21
Nederlands
De stalen veiligheidskluis is ontworpen voor
minimale beveiliging tegen diefstal en is
geïsoleerd met een vlamvertragend
materiaal. Raadpleeg uw Security
detailhandel voor brandkasten die een
maximale bescherming bieden tegen vuur
of waterschade, of breng een bezoek aan
de HONEYWELL website:
www.HoneywellSafes.com
Doelmatig gebruik van uw
veiligheidskluis
Beperkte garantie
Sisco garandeert dat zijn stalen kluizen vrij zijn van
defecten in materialen en vakmanschap voor een periode
van 90 dagen na aankoopdatum. Mocht uw stalen kluis in
de eerste 90 dagen niet functioneren wegens een
fabrieksfout, dan zal deze gratis worden gerepareerd of
vervangen. Stuur de defectieve stalen kluis in zijn
oorspronkelijke doos portvrij via een navolgbare methode
samen met een uitleg over het probleem naar het
onderstaande adres. Na onderzoek zal het apparaat
gerepareerd of vervangen worden en gefrankeerd aan u
worden teruggestuurd. Deze garantie is niet geldig als het
apparaat op enigerlei manier verkeerd is gebruikt. Deze
garantie is alleen van toepassing op de oorspronkelijke
koper. De nieuwe verzending zal na 2-4 weken arriveren.
Honeywell doet geen uitlatingen over en geeft geen garanties in verband met
dit product of deze service. Het handelsmerk Honeywell wordt door SISCO
gebruikt onder licentie van Honeywell Intellectual Properties Inc.
Reservesleutels
Klantenservice
Zo neemt u contact met ons op
Telefoon: 1-800-223-8566
Maandag t/m vrijdag, 7.30 uur tot 16.30 uur
Pacific Standard Time
Email: [email protected]
Behalve de vereiste informatie over uw brandkast
dient u het telefoonnummer en de tijd te
vermelden waarop u het beste bereikt kunt
worden tijdens normale klantenservice uren.
U krijgt binnen 24 kantooruren of de volgende
werkdag een antwoord per e-mail of telefoon.
Post:
T.a.v.: Customer Service Dept.
SISCO
2835 E. Ana Street
Rancho Dominguez, CA 90221
Internet: www.HoneywellSafes.com
+
+
7
Your Security Box Includes
• (4) “AA” Batteries
• (1) Foam pad providing added
protection for your valuables
• (2) Override keys
• (1) Key lock cover
• (1) 4 foot steel secure cable
(3040D, 3040DE, 3040DBJ)
• (1) Security cable attachment
hole plug
(3040D, 3040DE, 3040DBJ)
EXTERIOR
SIDE VIEW
11
SISCO
2835 E. Ana Street
Rancho Dominguez, CA 90221
Getting Started
3
STEP 4: Opening your Security
Box using the pre-set factory
code
THE PRE-SET FACTORY CODE IS 3*
Using the keypad, enter the factory pre-set
code. The LED will flash a green light and
stay green for 10 seconds after the
button is pressed. You will hear the
Security Box unlock.
NOTE: You have 10 seconds to open the
Security Box. If the green light goes out,
you will have to re-enter the code.
To open, turn the knob from the locked
position to the unlocked position, one
quarter turn counter-clockwise. To open, lift
from the outer edge of the lid. (fig.2)
If the LED light flashes red after you enter
the code, this means the code was entered
incorrectly and the Security Box will not
open.
NOTE: If an incorrect code is entered 3
times in a row, the Security Box will
automatically shut down for 4 minutes
before it can be opened again using the
correct code. During this delay, the
Override Key can be used to open the
Security Box.
English
NOTE: For your security, immediately
re-program the digital lock to your
Personal Passcode.
Open your Security Box with the Override
Key or with the pre-set factory Passcode.
On the inside of the lid, find and press
the red button located to the side of the
battery compartment (Fig.3). The LED light
above the keypad will flash orange.
Enter your personal Passcode, up to 5
digits, followed by the button and then
repeat a second time. You must enter
the number twice.
For example: 1 2 3 4 5 - 1 2 3 4 5
After the first entry, the LED will flash orange.
After the second entry, the LED will flash
green and then go out.
Your Personal Passcode is now saved.
Write it down and store it in a secure place
away from the Security Box.
Close the lid of your Security Box and
return the knob to the locked position (Fig. 6).
If the override key was used, turn to the
locked position, remove and replace the
lock cover.
NOTE: The factory pre-set code is no longer active and cannot
be used to open the Security Box.
Programming your
Personal Code
STEP 1: Locate Override Keys
Keys and batteries are stored in the packing
material. Remove them before discarding
the box.
STEP 2: Opening your Security
Box using your override key
Remove cover from key lock.
Insert Override Key into key lock and turn
the key counter clockwise one quarter turn
to the unlocked position.
Turn the knob counter-clockwise one
quarter turn to the unlocked position. (fig.1)
To open, lift from the outer edge of the lid.
(fig.2)
STEP 3: Installing Batteries
Locate the battery cover on the back side
of the lid. (fig.4)
Slide the cover off the battery
compartment.
Properly insert batteries, noting correct
direction, replace cover and close the
Security Box lid.
Return the Override Key and the knob to
the locked position.
Zorg dat u de veiligheidskluis niet te ver
vult, zodat de deur volledig dicht kan.
Zorg dat de knop in de onvergrendeld-
stand staat.
Zorg dat het deksel volledig gesloten is
(zie fig. 5)
Draai de knop vanuit de onvergrendeld-
stand een kwartslag met de klok mee naar
de vergrendeld-stand. Uw veiligheidskluis is
nu vergrendeld.
LET OP: Als de noodsleutel in de
onvergrendeld-stand staat kunt u de
veiligheidskluis openen en sluiten door de
knop van de vergrendelde naar de
onvergrendelde stand en weer terug te
draaien zonder uw persoonlijke code in te
voeren. Zorg dat u voor het vergrendelen van
uw veiligheidskluis de noodsleutel naar de
vergrendel-stand hebt gedraaid en hem uit de
buurt van de veiligheidskluis op een veilige
plek hebt opgeborgen.
20
Zo sluit en vergrendelt u
uw veiligheidskluis
Storingzoeken
Geen licht uit het LED: Dit betekent dat de
batterijen op zijn en vervangen moeten
worden. Raadpleeg voor het vervangen van
batterijen Aan de Slag, STAP 2 en 3.
Let op: Het vervangen van batterijen zal
de persoonlijke code niet uitwissen.
Het LED-controlelampje gaat rood
knipperen.
Dit betekent dat uw batterijen bijna leeg zijn.
Raadpleeg voor het vervangen van batterijen
(Aan de slag, Stap 2 en 3)
Waarschuwing: FORCEER DE KNOP NIET
De knop zal breken als deze geforceerd
wordt en uw veiligheidskluis zal beschadigd
worden. Als de knop juist gebruikt wordt zult
u deze gemakkelijk naar de onvergrendelde
stand kunnen draaien.
Als u vragen hebt over het gebruik van de
veiligheidskluis, belt u dan de klantenservice
van SISCO op 1-800-223-8566. Belt u eerst de
klantenservice alvorens u de veiligheidskluis
terug naar de detailhandel brengt.
Nederlands
Veiligheidskabel
Verwijder de plug van het
bevestigingsgat van de
veiligheidskabel.
Wikkel de kabel rond het
gewenste voorwerp en
dan door zichzelf heen.
Druk op de ontspanknop
van de kabel en terwijl u
deze knop ingedrukt
houdt steekt u de
veiligheidskabel in het
gat zoals getoond op het
diagram, waarna u de
knop loslaat.
Modellen 3040D, 3040DE, en 3040DBJ
bevatten een veiligheidskabel.
1
2
3
Aan de slag
19
STAP 4: De veiligheidskluis
openen met de code die vooraf
in de fabriek is ingesteld
DE VOORAF IN DE FABRIEK INGESTELDE CODE IS 3*
Voer met het toetsenpaneel de code in die
vooraf in de fabriek is ingesteld. De LED
knippert groen en blijft nadat er op de
knop is gedrukt 10 seconden lang groen.
U hoort de veiligheidskluis ontgrendelen.
LET OP: U hebt 10 seconden om de
veiligheidskluis te openen. Als het groene
licht uitgaat is het nodig uw code opnieuw in
te voeren.
Om de veiligheidskluis te openen draait u
de knop een kwartslag tegen de klok in,
van de vergrendeld naar de onvergrendeld-
stand. Om het kluisje te openen, tilt u de
buitenste rand van het deksel op. (Afb. 2)
Als de LED rood knippert na het invoeren
van de code betekent dit dat de code
onjuist is ingevoerd en de veiligheidskluis
niet open gaat.
LET OP: Als er drie maal achter elkaar een
onjuiste code wordt ingevoerd, blokkeert de
veiligheidskluis automatisch 4 minuten lang
en kan daarna weer worden geopend met de
juiste code. Tijdens deze vertraging kan de
veiligheidskluis met de noodsleutel worden
geopend.
Nederlands
Zo programmeert u uw
persoonlijke code in
STAP 1: De noodsleutels
zoeken
Sleutels en batterijen worden in het
verpakkingsmateriaal bewaard. Verwijder ze
voordat u de doos weggooit.
STAP 2: De veiligheidskluis met
de noodsleutel openen
Haal het afdekplaatje van het slot.
Steek de noodsleutel in het slot en draai
deze een kwartslag tegen de klok in naar
de onvergrendeld-stand.
Draai de knop een kwartslag tegen de klok
in naar de onvergrendeld-stand. (Afb. 1)
Til de buitenste rand van het deksel op om
het kluisje te openen. (Afb. 2)
STAP 3: Batterijen plaatsen
Zoek het batterijafdekplaatje achter op het
deksel. (Afb. 4)
Schuif het plaatje van de batterijruimte af.
Zet de batterijen er goed in, let op de juiste
richting, en zet het plaatje terug en sluit het
deksel van de veiligheidskluis weer.
Zet de noodsleutel terug in de
vergrendeld-stand.
4
English
Closing and Securing your
Security Box
Be careful not to overfill your Security Box
or obstruct the door from completely
closing.
Make sure knob is in the unlocked position.
Make sure lid is closed completely. (Fig. 5)
Turn the knob from the unlocked position
one quarter turn clockwise to the locked
position. Your Security Box should now be
secured.
NOTE: While the override key is in the
unlocked position you can open and close
the Security Box by turning the knob from
the locked to the unlocked position and
back again without entering your personal
code. To secure your Security Box, make
sure that you have turned the override key
to the locked position and have stored the
key away from the Security Box in a safe
place.
Troubleshooting
No light from LED: This indicates that the
batteries are expired and need to be
replaced. To change the batteries, see
Getting Started STEPS 2 & 3.
NOTE: Replacing batteries does not
erase your personal code.
The LED is blinking a red light:
This means that your batteries are low. To
change your batteries, see Getting Started
STEPS 2 & 3.
Warning: DO NOT FORCE THE KNOB
If forced, the knob will break and your
Security Box will be damaged. When
operated correctly, the knob will function
so that it can be turned easily into the
opened position.
If you have additional questions while
operating your Security Box, please
call SISCO Customer Service at
1-800-223-8566. Please call our Customer
Service line prior to returning your
Security Box to the retailer.
Security Cable
INSIDE
VIEW
Left side
panel
Back panel
EXTERIOR
SIDE VIEW
EXTERIOR
SIDE VIEW
Press Here
Remove the plug from
security cable
attachment hole.
Loop cable around
desired object and then
through itself.
Depress cable release
button and while holding
down, insert security
cable into the hole as
shown in diagram, then
release button.
Models 3040D, 3040DE, and 3040DBJ
include security cable.
1
2
3
LET OP: Herprogrammeer de digitale
vergrendeling meteen met uw persoonlijke
code.
Open de veiligheidskluis met de noodsleutel
of de vooraf in de fabriek ingestelde code.
Aan de binnenkant van het deksel drukt u
op de rode knop die zich aan de zijkant
van het batterijvak bevindt (Afb. 3). Het
LED-lampje boven het toetsenpaneeltje zal
oranje flitsen.
Voer uw persoonlijke veiligheidscode van
maximaal 5 cijfers in, gevolgd door de
toets en daarna herhaalt u dit nummer. U
moet het nummer twee keer invoeren.
Bijvoorbeeld: 1234 - 1234 . Na de
eerste keer dat u het invoert zal het LED
oranje flitsen. Na de tweede keer dat u het
invoert zal het LED groen flitsen en daarna
uitgaan.
Uw persoonlijke veiligheidscode is nu
opgeslagen. Schrijf de code op en bewaar
het op een veilige plek buiten de kluis.
Sluit het deksel van uw kluis en draai de
knop terug naar de gesloten positie
(Afb. 6). Als de noodsleutel werd gebruikt
draait u deze naar de gesloten positie,
verwijder hem en plaats de sleutelklep
weer terug.
LET OP: De code die vooraf in de fabriek is ingesteld is nu niet
meer actief en kan niet worden gebruikt om de veiligheidskluis
te openen.
5
English
4
2
5
3
*
1
18
Belangrijk
Welkom bij de productfamilie van
HONEYWELL
Naast gemoedsrust biedt het HONEYWELL
digitale veiligheidskluisje u jarenlang veilige
opslag voor uw kostbaarheden.
Voor de veiligheid dient u:
Uw persoonlijke combinatie meteen in te
stellen.
De sleutels en persoonlijke combinatie niet
in de buurt van de veiligheidskluis te
bewaren.
De garantieregistratiekaart op te sturen of
de brandkast via het internet laten
registreren bij
www.HoneywellSafes.com
In de fabriek is de combinatie van uw
brandkast van tevoren ingesteld op:
3*
Overzicht
10
8
4
1
5
2
6
3
9
1. Icoon noodsleutel vergrendeld
2. Noodsleutelslot
3. Draaiknop of vergrendelhendel
4. Icoon knop onvergrendeld
5. LED-controlelampje
6. Deksel veiligheidskluis
7. Rode knop voor instellen code
(zie schema rechts)
8. Icoon noodsleutel onvergrendeld
9. Icoon knop vergrendeld
10.Knoppen digitaal toetsenpaneel
11.Plug voor het bevestigingsgat voor
de veiligheidskabel
Nederlands
11
+
+
7
Uw veiligheidskluis bevat
• (4) “AA” batterijen
• (1) Schuimrubber kussen dat extra
bescherming biedt voor uw waardevolle
artikelen
• (2) Noodsleutels
• (1) Deksel voor slot
• (1) Stalen veiligheidskabel van 120 cm
(3040D, 3040DE, 3040DBJ)
• (1) Plug voor het bevestigingsgat voor
de veiligheidskabel
(3040D, 3040DE, 3040DBJ)
Customer Support Appropriate Use of Your
Security Box
Replacement Keys
How to Contact Us
Phone: 1-800-223-8566
Monday through Friday, 7:30 am to 4:30 pm
Pacific Standard Time
Email: [email protected]
In addition to the required information regarding
your Security Box, you must include the best
time and proper telephone number to reach
you during our normal Customer Service hours.
You should receive a reply response via e-mail
or phone within 24 business hours or the
following business day.
Mail:
Attn: Customer Service Dept.
SISCO
2835 E. Ana Street
Rancho Dominguez, CA 90221
Internet: www.HoneywellSafes.com
Ordering Replacement Keys:
If a key becomes misplaced or you would like
additional keys for your Security Box, you may
conveniently purchase them from our Customer
Service Department.
Payment and Delivery:
In the US, replacement keys are available for a
fee and credit card orders are accepted by
telephone and through our website. Checks or
money orders are required for orders received
by mail and should be made payable to
“SISCO”.
You must supply the following information to
assure accurate and prompt processing:
• Name / Address / Telephone
• Security box Model Number
•E-mail address (if available)
• Number of keys requested
• Key number (located on the lock)
Terms subject to change without notice
Limited warranty
Your steel Security Box is designed to provide
minimal security against theft and is insulated
with fire retardant material. For safes that provide
maximum protection from fire or water damage,
see your Security retailer, or visit our
HONEYWELL web site: www.HoneywellSafes.com
SISCO warrants its Steel Boxes to be free of defects in
material and workmanship for a period of 90 days from
the date of purchase. If your Steel Box should fail to work
during the first 90 days due to any factory defects, it will
be repaired or replaced free of charge. Return the
defective Steel Box in its original carton, freight prepaid,
using a traceable method along with an explanation of
the problem to the address listed below. Upon
examination, the unit will either be repaired or replaced
and shipped back to you prepaid. This warranty is void if
the item has been misused in any way. This warranty only
applies to the original purchaser. Please allow 2-4 weeks
for the reshipment to arrive.
Honeywell makes no representations or warranties with respect to this
product or service. The Honeywell Trademark is used under license from
Honeywell Intellectual Properties Inc. by SISCO.
SISCO
2835 E. Ana Street
Rancho Dominguez, CA 90221
Operation & Installation Guide
MHCB3035D40D50308
www.HoneywellSafes.com
Home and Office Security Safes
Coffres-forts résidentiels et commerciaux
Cajas fuertes de seguridad para la oficina y el hogar
Sicherheitssafes für Heim und Büro
Brandkasten voor thuis en kantoor
US/Canada - Etats-Unis/ Canada - EUA/Canadá - USA/Kanada - V.S./Canada
2835 East Ana Street Rancho Dominguez, CA 90221-5601 USA
US/Canada Toll Free:
Numéro sans frais aux Etats-Unis/ Canada:
EUA/Canadá llamada telefónica gratis:
USA/Kanada gebührenfrei:
V.S./Canada gratis nummer:
800-223-8566
US/Canada - EUA/Canadá - Etats-Unis/ Canada:
310-638-1182
Fax - Facsímile:
310-638-6489
Email - Courriel:
CustomerService@HoneywellSafes.com
Europe - Europa
c/o - Atención - p/a:
Freightways Distriservices B.V.
P.O. Box 3077
2220 CB Katwij
The Netherlands
+31 71 4090721
English
Français
Español
Deutsch
Nederlands
Model / Modèle / Modelo / Modell:
3035D / 3035DE / 3035DBJ / 3040D / 3040DE / 3040DBJ
Lireces instructions très attentivement!
¡Sírvase leer estas instrucciones cuidadosamente!
Read These Instructions VeryCarefully!
Bitte lesen Sie diese Anleitung genau durch!
Lees deze instructies zorgvuldig door!
Australia-I’Australie-Austrelien-Australië
c/o - Atención - p/a:
Customer Service Dept.
Master Distributors
11 Howleys Road
Notting Hill VIC 3168
03-9538-9200
DELUXE
SECURITY BOX
with Digital Electronic Lock