CODE: GZ0000010348
October, 2005
© 2005 HORIBA, Ltd. For any question regarding this product, please contact your local agency, or inquire from the HORIBA
website (http://global.horiba.com/contact_e/index.htm).
Instruction Manual for pH Electrodes
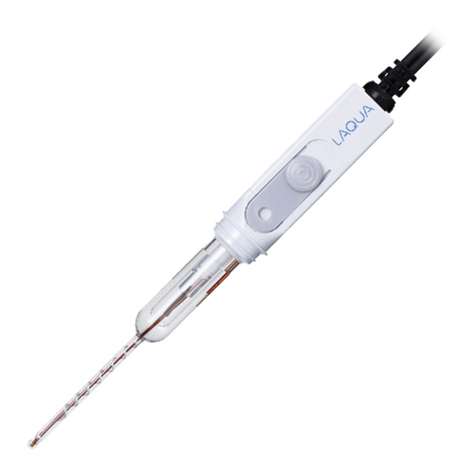
Thank you for purchasing a HORIBA pH electrode. Read this manual carefully, before using the electrode.
Contents: Electrode …1 ・Instruction manual …1
■Specifications and parts description
■Connecting to pH meter
5.Insert the electrode connector into the connector port sleeve on the meter, after aligning with the pin. Do not insert the connector unless it is aligned
properly with the connector port.
6.Press the electrode connector into the connector port on the meter, while turning the connector to the right.
7.Slide the connector cover over the connector. Then, push the cover in straight until it comes in light contact with the meter case. Do not turn the
cover.
8. Insert the temperature connector into the jack on the meter. Insert the connector firmly, until the O-ring on the connector can no longer be seen.
Note
Be sure to install the temperature connector. If not, accurate measurement cannot be performed.
■Preparation
Note
White crystal (KCl) can adhere to the internal solution filler port or protective cap. However, it will not cause any performance problem.
Wash away the white crystal with pure water.
●For first use or after long-term interval
■Measurement (calibration)
■Storage
• Do not dry the responsive glass membrane and liquid junction. If they are dry, replace the internal solution and immerse them in pure water for 12 hours
or longer. After these procedures, perform calibration. If calibration cannot be performed correctly, replace the electrode.
• Avoid storing the electrode in hot and humid locations. Store the electrode indoors, out of direct sunlight.
■Maintenance
Note
Do not use organic solvents (such as acetone or tetrahydrofuran) or strong acid or alkaline cleansing solutions. Using such chemicals may
damage the body of the electrode or cause a decline in performance.
• To maintain electrode performance, replace the internal solution approximately every two or three months. (Refer to " ■Preparation.")
• Dirt on the responsive glass membrane or liquid junction by the test solution may cause a decline in electrode response and sensitivity or measurement
error. If the electrode is very dirty and cannot be washed clean using pure water, perform cleansing.
●Cleansing of electrod
■For accurate measurement
For accurate measurement, refer to items below.
• Stir the sample with stirrer in measurement (calibration).
• Perform temperature compensation manually or automatically. (Refer to the instruction manual of pH meter.)
• Temperature of standard solution and sample should be the same.
• Immerse the responsive glass membrane and liquid junction in the sample completely. Make sure that the surface of the internal solution inside the
electrode is higher than the surface of the sample solution.
• Rinse the electrode with the sample before measurement.
• Perform calibration before measurement. If measurement is performed everyday, perform calibration once or more a day.
■Cautions for use
Caution
Chemical solution
The internal solution in the electrode uses potassium chloride (3.33
mol/L-KCI). If the internal material comes in contact with the hands
or skin, wash immediately with water. If the internal solution comes
in contact with the eyes, flush with a large amount of running water,
then seek medical advice.
Glass fragments
Glass fragments can cause injury.
The outer tube and tip of the electrode are made from glass.
Be careful not to break them.
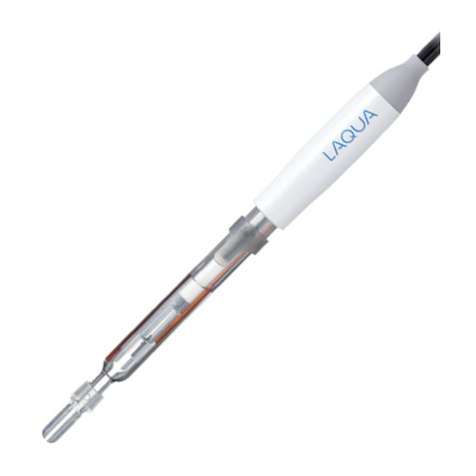
Model/ Part name Specification Specification
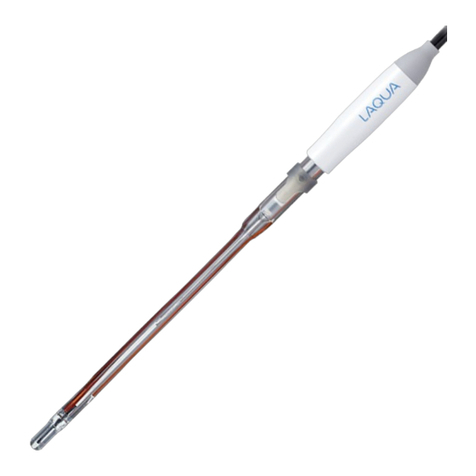
●9678-10D
pH range: pH 0 to 14
Usable temp. range: 0ºC to 100ºC
Storage temp. range: 0ºC to 50ºC
Internal electrode: Silver/ silver chloride
Reference electrode internal solution:
3.33 mol/L-KCl solution (#300)
Liquid junction material: Porous ceramic
Wetted material: Glass, ceramic
Electrode length: 250 mm (including a cap)
Ext. diam. of wetted part: 7 mm
Wetted part height: Approx. 21 mm (from the tip of
electrode)
Lead length: 1 m
1. Loosen the knurled nut, then
remove the protective cap.
2. Remove the existing electrode
internal solution with a dropper.
3. Fill the electrode with new
internal solution
(#300) until the
solution level
gets close to
the filler port.
4. Wash the electrode tip well with
pure water,
then wipe
it dry with
filter
paper.
1. Open the internal solution filler
port. *1
2. If necessary, fill the electrode with
new internal solution until the
solution level gets close to the
filler port.
3. Wash the electrode with pure
water and dry it with filter paper,
prior to every immersion into
standard/sample solution.
4. When there are air bubbles inside
the responsive glass membrane,
stir it lightly to remove bubbles.
Liquid junction
Protective cap
Stem
Cap
Temp. connector
Electrode connector
Connector cover
Lead
Responsive glass
membrane
Internal solution filler port
(Slide cap)
Knurled nut
Protective cap
Knurled nut
②remove
①loosen
5. Immerse the responsive glass
membrane and liquid junction
in the sample completely.
Make sure that the surface of
the internal solution inside the
electrode is higher than the
surface of the sample solution.
6. Stir the electrode
lightly to remove
bubbles.
*1 Be sure to keep the internal solution filler port open
during measurement. If it is clogged with the solution,
accurate measurement cannot be performed. Wipe the
solution with cloth.
*2 For calibration/ measurement on pH meter, refer to the
instruction manual of pH meter.
1. Wash the electrode well with
pure water to
remove sample
completely.
2. Close the slide cap. 3. Wash the inside of the
protective cap with
pure water, then add
enough pure water to
soak the swab.
4. Attach the protective cap and
tighten the knurled nut.
1. Open the slide cap.
2. Immerse the responsive glass membrane and liquid
junction in cleansing agent for approximately one hour
until contamination is removed. The responsive glass
membrane can also be cleaned by wiping it with cotton
gauze containing cleansing agent.
3. Rinse the electrode with pure water completely.
4. Replace the internal solution.
(Refer to " ■Preparation.")
Note
Be sure to perform calibration prior to measurement after
cleansing the electrode.
Type of dirt Cleansing agent
General Diluted neutral cleansing agent
Oil Alcohol, or diluted neutral cleansing agent
Inorganic substance Inorganic substance Electrode cleaner (#220) or
Hydrochloric acid approx. 1 mol/L
Protein Cleansing agent including protein-cutting
enzyme
Liquid junction Electrode cleaner (#220)
• Do not shock the electrode.
• Do not use chapped or cracked electrode. Replace such electrode
with a new one.
• Do not allow the connector to come in contact with water or unclean
hands.
• Always use the #300 internal solution for reference electrode.
• If the responsive glass membrane or liquid junction is very dirty and
cannot be washed clean using pure water, cleanse it depending on dirt
condition. (Refer to " ■Maintenance.")
• Avoid continuous use of this electrode at acidic or alkaline
concentrations above 0.1 mol/L. Using the electrode under these
conditions may harm performance and shorten the life of the
electrode.
• Do not measure the solutions which contain fluoride ion, which may
corrode the glass electrode.
• Do not suddenly immerse the electrode in samples where the
temperature variation is 50ºC or more.
• Brown colored silver chloride can be detected inside the responsive
glass membrane. However, it will not cause any performance problem.
• Do not use the sensor in any place where usable temperature is out of
the specified range.
• White crystal can adhere to the internal solution filler port or protective
cap after storage of the electrode. However, it will not cause any
performance problem.
①attach
②tighten
Protective cap
Knurled nut
