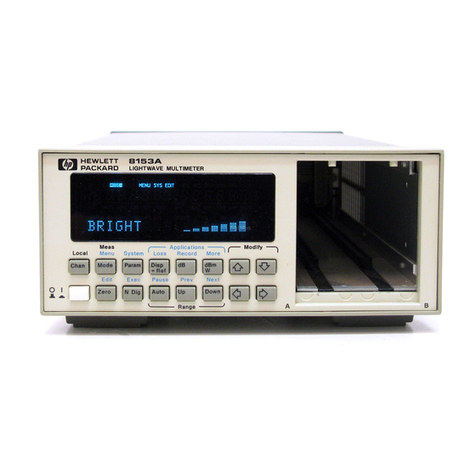
HP 8163A Series User manual

HP 8163A Lightwave
Multimeter &
HP 8164A Lightwave
Measurement System
User’s Guide

Hewlett-Packard GmbH
Herrenberger Str. 130
71034 Böblingen
Germany
Notices
This document contains proprie-
tary information that is protected
by copyright. All rights are
reserved.
No part of this document may be
photocopied, reproduced, or
translated to another language
without the prior written consent
of Hewlett-Packard GmbH.
Copyright 1999 by:
Hewlett-Packard GmbH
Herrenberger Str. 130
71034 Böblingen
Germany
Subject Matter
The information in this docu-
ment is subject to change with-
out notice.
Hewlett-Packard makes no war-
ranty of any kind with regard to
this printed material, including,
but not limited to, the implied
warranties of merchantability
and fitness for a particular pur-
pose.
Hewlett-Packard shall not be lia-
ble for errors contained herein or
for incidental or consequential
damages in connection with the
furnishing, performance, or use
of this material.
Printing History
New editions are complete revi-
sions of the guide reflecting
alterations in the functionality of
the instrument. Updates are
occasionally made to the guide
between editions. The date on
the title page changes when an
updated guide is published. To
find out the current revision of
the guide, or to purchase an
updated guide, contact your
Hewlett-Packard representative.
Control Serial Number: First
Edition applies directly to all
instruments.
Warranty
ThisHewlett-Packard instrument
product is warranted against
defects in material and work-
manship for a period of one year
from date of shipment. During
the warranty period, HP will, at
its option, either repair or replace
products that prove to be defec-
tive.
For warranty service or repair,
this product must be returned to
a service facility designated by
HP. Buyer shall prepay shipping
charges to HP and HP shall pay
shipping charges to return the
product to Buyer. However,
Buyer shall pay all shipping
charges, duties, and taxes for
products returned to HP from
another country.
HP warrants that its software and
firmware designated by HP for
use with an instrument will exe-
cute its programming instruc-
tions when properly installed on
that instrument. HP does not
warrant that the operation of the
instrument, software, or
firmware will be uninterrupted or
error free.
Limitation of
Warranty
The foregoing warranty shall not
apply to defects resulting from
improper or inadequate mainte-
nance by Buyer, Buyer-supplied
software or interfacing, unau-
thorized modification or misuse,
operation outside of the environ-
mental specifications for the
product, or improper site prepa-
ration or maintenance.
No other warranty is expressed
or implied. Hewlett-Packard spe-
cifically disclaims the implied
warranties of Merchantability
and Fitness for a Particular Pur-
pose.
Exclusive Remedies
The remedies provided herein
are Buyer’s sole and exclusive
remedies. Hewlett-Packard shall
not be liable for any direct, indi-
rect, special, incidental, or con-
sequential damages whether
based on contract, tort, or any
other legal theory.
Assistance
Productmaintenance agreements
and other customer assistance
agreements are available for
Hewlett-Packard products. For
any assistance contact your near-
est Hewlett-Packard Sales and
Service Office.
Certification
Hewlett-Packard Company certi-
fies that this product met its pub-
lished specifications at the time
of shipment from the factory.
Hewlett-Packard further certifies
that its calibration measurements
are traceable to the United States
National Institute of Standards
and Technology, NIST (for-
merly the United States National
Bureau of Standards, NBS) to
the extent allowed by the Insti-
tutes’s calibration facility, and to
the calibration facilities of other
International Standards Organi-
zation members.
ISO 9001
Certification
Produced to ISO 9001 interna-
tional quality system standard as
part of our objective of continu-
ally increasing customer satis-
faction through improved
process control.
08164-91011 E0599
First Edition:
E0599: May1999
Firmware Revision:
1.0

HP 8163A Lightwave Multimeter &
HP 8164A Lightwave Measurement System
User’s Guide

4
Safety Summary
Safety Considerations
The following general safety precautions must be observed during
all phases of operation, service, and repair of this instrument.
Failure to comply with these precautions or with specific warnings
elsewhere in this manual violates safety standards of design,
manufacture, and intended use of the instrument. Hewlett-Packard
Company assumes no liability for the customer’s failure to comply
with these requirements.
General This is a Safety Class 1 instrument (provided with
terminal for protective earthing) and has been manufactured and
tested according to international safety standards.
Before operation, you should review the instrument and manual for
safety markings and instructions. You must follow these to ensure
safe operation and to maintain the instrument in safe condition.
Some HP 8164A circuits are powered whenever the instrument is
connected to the AC power source. To disconnect from the line
power, disconnect the power cord either at the rear power inlet or at
the AC line power source (receptacle). One of these must always be
accessible. If the instrument is in a cabinet, it must be disconnected
from the line power by the system’s line power switch.
WARNING Toavoid hazardous electrical shock, do not perform electrical tests
when there are signs of shipping damage to any portion of the outer
enclosure (covers, panels, and so on).
Line Power Requirements
The HP 8163A Lightwave Multimeter can operate from the single-
phase AC power source that supplies between 100 V and 240 V at a
frequency in the range 50 to 60 Hz. The maximum power
consumption is 120 VA with all options installed.

5
Safety Summary
The HP 8164A Lightwave Measurement System can operate from
any single-phase AC power source that supplies between 100 V and
240 V at a frequency in the range from 50 to 60 Hz. The maximum
power consumption is 270 VA with all options installed.
Line Power Cable
In accordance with international safety standards, the instrument
has a three-wire power cable. When connected to an appropriate
AC power receptacle, this cable earths the instrument cabinet. The
type of power cable shipped with each instrument depends on the
country of destination. Please refer to the figure below for the part
numbers of available power cables.
WARNING Toavoid the possibility of injury or death, you must observe the
following precautions before switching on the instrument.
• If this instrument is to be energized via an autotransformer for
voltage reduction, ensure that the Common terminal connects to the
earth pole of the power source.
• Insert the power cable plug only into a socket outlet provided with a
protective earth contact. Do not negate this protective action by the
using an extension cord without a protective conductor.

6
Safety Summary
• Before switching on the instrument, the protective earth terminal of
the instrument must be connected to a protective conductor. You can
do this by using the power cord supplied with the instrument.
• Do not interrupt the protective earth connection intentionally.
The following work must be carried out by a qualified electrician.
All local electrical codes must be strictly observed. If the plug on
the cable does not fit the power outlet, or if the cable is to be
attached to a terminal block, cut the cable at the plug end and rewire
it.
The color coding used in the cable depends on the cable supplied. If
you are connecting a new plug, it should meet the local safety
requirements and include the following features:
• Adequate load-carrying capacity (see table of specifications).
• Ground connection.
• Cable clamp.
Operating Environment
WARNING The HP 8163A Lightwave Multimeter & HP 8164A Lightwave
Measurement System is not designed for outdoor use. To prevent
potential fire or shock hazard, do not expose the instrument to rain or
other excessive moisture.
Input/Output Signals
CAUTION There are two input BNC connectors: the Remote Interlock Connector and
the Trigger Input, see page 152. These are TTL inputs. A maximum of 5 V
can be applied as an external voltage to either of these input connectors.
There is one output BNC connector: the Trigger Output, see page 152. This
is a TTL output. Do not apply an external voltage to this connector.

7
Safety Summary
Additional safety requirements
Operation - Before applying power Comply with the installation
section. Additionally, the following shall be observed:
• Do not remove instrument covers when operating.
• Before the instrument is switched on, all protective earth
terminals, extension cords, auto-transformers and devices
connected to it should be connected to a protective earth via a
ground socket. Any interruption of the protective earth
grounding will cause a potential shock hazard that could result
in serious personal injury.
• Whenever it is likely that the protection has been impaired, the
instrument must be made inoperative and be secured against any
unintended operation.
• There is no user-replaceable fuse in this instrument. The use of
repaired fuses and the short-circuiting of fuseholders must be
avoided.
• Adjustments described in the manual are performed with power
supplied to the instrument while protective covers are removed.
Be aware that energy at many points may, if contacted, result in
personal injury.
• Any adjustments, maintenance, and repair of the opened
instrument under voltage should be avoided as much as possible,
and when unavoidable, should be carried out only by a skilled
person who is aware of the hazard involved. Do not attempt
internal service or adjustment unless another person, capable of
rendering first aid and resuscitation is present. Do not replace
components with power cable connected.
• Do not operate the instrument in the presence of flammable
gases or fumes. Operation of any electrical instrument in such an
environment constitutes a definite safety hazard.
• Do not install substitute parts or perform any unauthorized
modification to the instrument.
• Be aware that capacitors inside the instrument may still be
charged even if the instrument has been disconnected from its
source of supply.

8
Safety Summary
Safety Symbols
The apparatus will be marked with this symbol when it is necessary
for the user to refer to the instruction manual in order to protect the
apparatus against damage.
Caution, risk of electric shock.
Frame or chassis terminal.
Protective conductor terminal.
Hazardous laser radiation.
WARNING TheWARNING sign denotes a hazard. It calls attention to a procedure,
practice or the like, which, if not correctly performed or adhered to,
could result in injury or loss of life. Do not proceed beyond a
WARNING sign until the indicated conditions are fully understood and
met.
CAUTION The CAUTION sign denotes a hazard. It calls attention to an operating
procedure, practice or the like, which, if not correctly performed or adhered
to, could result in damage to or destruction of part or all of the equipment.
Do not proceed beyond a CAUTION sign until the indicated conditions are
fully understood and met.

9
Safety Summary
Initial Safety Information for Tunable Laser Source
Modules
HP 81680A HP 81682A HP 81640A HP 81689A
Laser Type Fabry
Perot-Laser
InGaAsP
Fabry
Perot-Laser
InGaAsP
Fabry
Perot-Laser
InGaAsP
Fabry
Perot-Laser
InGaAsP
Laser Class
According to 21
CFR 1040.10 (USA) IIIb IIIb IIIb IIIb
Permissible Output Power (CW) <20 mW <20 mW <20 mW <20 mW
Beam Diameter 9µm9µm9µm9µm
Numerical Aperture 0.1 0.1 0.1 0.1
Wavelength 1200-1670 nm 1200-1670 nm 1200-1670 nm 1200-1670 nm
Laser Class
According to
IEC 825-1 (Non-USA)
EN 60825-1 Europe
3A 3A 3A 3A
Permissible Output Power (CW) <20 mW <20 mW <20 mW <20 mW
Beam Diameter 9µm9µm9µm9µm
Numerical Aperture 0.1 0.1 0.1 0.1
Wavelength 1400-1670 nm 1400-1670 nm 1400-1670 nm 1400-1670 nm

10
Safety Summary
NOTE
.
USA (All Tunable Laser Source Modules HP 81640A/80A/82A/89A)
These laser safety warning labels are fixed on the outside of the HP 8164A
Lightwave Measurement System before shipment.

11
Safety Summary
A sheet of laser safety warnings is included with the laser module. You
MUST stick the labels in the local language onto the outside of the
instrument, in a position where they are clearly visible to anyone using
the instrument.
You MUST return instruments with malfunctioning laser boxes to
an HP Service Center for repair and calibration.
The laser module has a built in safety circuitry which will disable
the optical output in the case of a fault condition.
Non-USA (All Tunable Laser Source Modules HP 81640A/80A/82A/89A)
These laser safety warning labels are fixed on the outside of the HP 8164A
Lightwave Measurement System before shipment.

12
Safety Summary
WARNING Use of controls or adjustments or performance of procedures other
than those specified for the laser source may result in hazardous
radiation exposure.
WARNING Refer Servicing only to qualified and authorized personnel.
WARNING Donot enable the laser when there is no fiber attached to the optical
output connector.
Tunable Laser Source Modules and Laser Source Modules have optical
output connectors.
The laser is enabled by pressing the gray button beside the optical
output connector on the front panel of the module. The laser is enabled
when the green LED on the front panel of the instrument is lit.
WARNING Under no circumstances look into the end of an optical cable attached
to the optical output when the device is operational.
The laser radiation can seriously damage your eyesight.
WARNING The use of optical instruments with this product will increase eye
hazard.

13
Safety Summary

14
Safety Summary
The Structure of this Manual
This manual is divided into 3 categories:
• Getting Started
This section gives an introduction to the instrument. and aims to
make the instrument familiar to you: Chapters 1 and 2.
• How to Use Modules
This is the information on how to control modules from the front
panel: Chapters 3, 4, and 5.
• Additional Information
This is supporting information of a non-operational nature. this
contains installation information, accessories, specifications,
function tests, and cleaning procedures: Appendixes A to E.
Conventions used in this manual
• Hardkeys are indicated by small capitals, for example, CONFIG,
or CHANNEL.
• Softkeys are indicated by normal text enclosed in square
brackets, for example, [Zoom] or [Cancel].
• Parameters are indicated by small capitals enclosed by square
brackets, for example, [RANGE MODE], or [MINMAX MODE].
• Menu items are indicated by small capitals enclosed in brackets,
for example, <MINMAX>, or <CONTINUOUS>.

15
Table of Contents
Safety Considerations ......................................................... 4
Line Power Requirements 4
Line Power Cable 5
Operating Environment 6
Input/Output Signals 6
Additional safety requirements ........................................... 7
Initial Safety Information for Tunable Laser Source Modules 9
1 Getting Started
1.1 The HP 8163A Lightwave Multimeter ..................27
1.2 The HP 8164A Lightwave Measurement System .28
1.3 A Description of the User Interface .......................30
Password ............................................................................. 31
If You Forget Your Password 31
User Interface Features ....................................................... 32
Introducing Softkeys 32
Introducing Hardkeys 32
Special Module States 32
Slot and Channel Numbers 32
How to Navigate/Modify the Display ................................ 33
Overview Screen 33
How to Use the Cursor Key 34
How to Use the Numerical Keypad 35
How to Use the Modify Knob 35
How to Change Channel 36
How to Access the Details Screen 36
How to Access the Menu 38
How to Change the System Configuration 39

16
Table of Contents
1.4 How to Change the Value of a Parameter ........... 41
How to Select a Parameter ..................................................42
How to Accept the New Value of a Parameter ...................42
How to Make a Big Change to a Continuous Parameter .....42
How to Make a Small Change to a Continuous Parameter 43
How to Change a Discrete Parameter .................................44
How to Set All Parameters to Their Default Values ...........45
If You Make a Mistake ........................................................45
If the Parameter Changes to Different Value ......................45
1.5 A Sample Session .................................................... 46
How to Measure the Power of a Modulated Signal ............46
2 Additional Features
2.1 Using the System Utilities ...................................... 51
How to Set the Backlight & Contrast ..................................52
To Set the Contrast 52
How to Set the HP-IB Address ...........................................53
How to Lock/Unlock the Instrument ...................................54
How to Change the Password ..............................................56
If You Forget Your Password .............................................56
How to Set the Trigger Configuration .................................56
How to Get Information About Modules ............................57
How to Get Information About the Mainframe ..................58
2.2 How to Connect an External Monitor .................. 59

17
Table of Contents
3 Power Measurement
3.1 How to Measure Power ..........................................63
The Power Value ................................................................ 63
How to Set the Number of Digits 63
How to Set the Power Unit ................................................. 64
What are the Power Units ? 64
How to Set the Calibration Offset ...................................... 66
How to Set the Reference Level ......................................... 67
How to Input a Reference Level 67
HowtoSettheReference Valuetothe CurrentPower
Value 68
How to Reference Another Power Measurement
Channel 68
How to Set the Wavelength ................................................ 70
How to Remove Electrical Offsets ..................................... 70
How to Choose the Range Mode ........................................ 73
How to Set the Range ......................................................... 74
Upper Power Limit and Resolution 80
How to Set the Averaging Time ......................................... 80
How to Choose the MinMax Mode .................................... 81
How to Turn Off MinMax Mode ........................................ 84
How to Hold the Screen ...................................................... 85
4 Laser Sources
4.1 How to Use Laser Source Modules ........................89
The Laser Wavelength Value ............................................. 89
Dual-Wavelength Laser Source Modules 90

18
Table of Contents
How to Enable/Disable Laser Output ..................................90
How to Set Attenuation .......................................................91
How to Modulate the Optical Output ..................................92
How to Change Modulation Source 92
How to Modulate the Output Signal 93
5 Tunable Lasers
5.1 What is a Tunable Laser ? .................................... 97
5.2 How to Set the Power ............................................. 97
How to Set the Output Power of a CW Signal ....................98
How to Set Output Power 98
How to Set the Optical Output 98
How to Set the Optical Output 101
How to Enable the Optical Output 101
How to Set Power and Attenuation 102
What is Excessive Power ? ..................................................104
The Analog Output ..............................................................105
How to Set the BNC Output Line Mode as an Analog
Output 106
5.3 How to Set the Wavelength ................................... 106
Wavelength Range ..............................................................106
How to Set the Wavelength Directly ...................................107
How to Set a Relative Wavelength .....................................107
How to Change the Output Wavelength 108
How to Set the Base Wavelength 109
How to Change the Frequency Offset 109
5.4 How to Perform a Wavelength Sweep ................. 109

19
Table of Contents
What is a Wavelength Sweep ? .......................................... 109
How to Set the Wavelength Sweep .................................... 110
The Sweep Parameters 110
How to Set the Repeat Mode 110
How to Set the Maximum Power for the Sweep
Range 111
How to Perform a Sweep .................................................... 111
How to Execute a Stepped Sweep 112
How to Execute a Continuous Sweep 114
How to Perform a Manual Sweep 115
5.5 How to Modulate a Signal ......................................116
How to Use the Internal Modulation .................................. 117
How to Set the Output Power of a Modulated Signal
117
How to Set the Frequency of a Modulated Signal 117
How to Set the Modulation Mode 117
How to Use External Modulation ....................................... 118
External Digital Modulation 118
External Analog Modulation 119
Wavelength Locking 120
External Digital Modulation using Input Trigger
Connector 121
How to Increase Linewidth 122
How to Set the Output Power of a Modulated Signal
123
How to Configure the Modulation Output ......................... 123
How to Set the BNC Output Line Mode as a Modu-
lation Output 123
How to Set the Modulation Output Mode 123
5.6 How to Use Triggers ...............................................124
How to Use Input Triggering .............................................. 124
How to Use Output Triggering ........................................... 125

20
Table of Contents
5.7 How to Use Auxiliary Functions ........................... 127
Automatic Realignment .......................................................127
How to Perform a Wavelength Zero ...................................128
A Installation and Maintenance
A.1 Safety Considerations ........................................... 133
A.2 Initial Inspection ................................................... 133
A.3 AC Line Power Supply Requirements ................ 134
Line Power Cable ................................................................134
Changing the Battery ...........................................................137
Changing the Fuse ...............................................................138
A.4 Operating and Storage Environment .................. 138
Temperature ........................................................................139
Humidity ..............................................................................139
Storage and Shipment ..........................................................139
Instrument Cooling ..............................................................139
Operating Position 140
Storage Position ...................................................................141
Carrying the Instrument ......................................................142
A.5 Using Modules ....................................................... 143
How to Fit and Remove Modules .......................................143
How to Remove a Front-Loadable Module 144
How to Fit a Front-Loadable Module 145
How to Remove a Back-Loadable Module 146
How to Fit a Back-Loadable Module 148
Adding a Connector Interface .............................................149
Protecting Empty Module Slots ..........................................150
Other manuals for 8163A Series
2
This manual suits for next models
1
Table of contents
Other HP Multimeter manuals