Contents
Getting started
System requirements 5
Setting up VIVE Pro 2 for the first time 6
What's the highest resolution on VIVE Pro 2, and how do I enable it? 7
Can I mix versions of base stations, link boxes, or cables? 7
Headset and link box
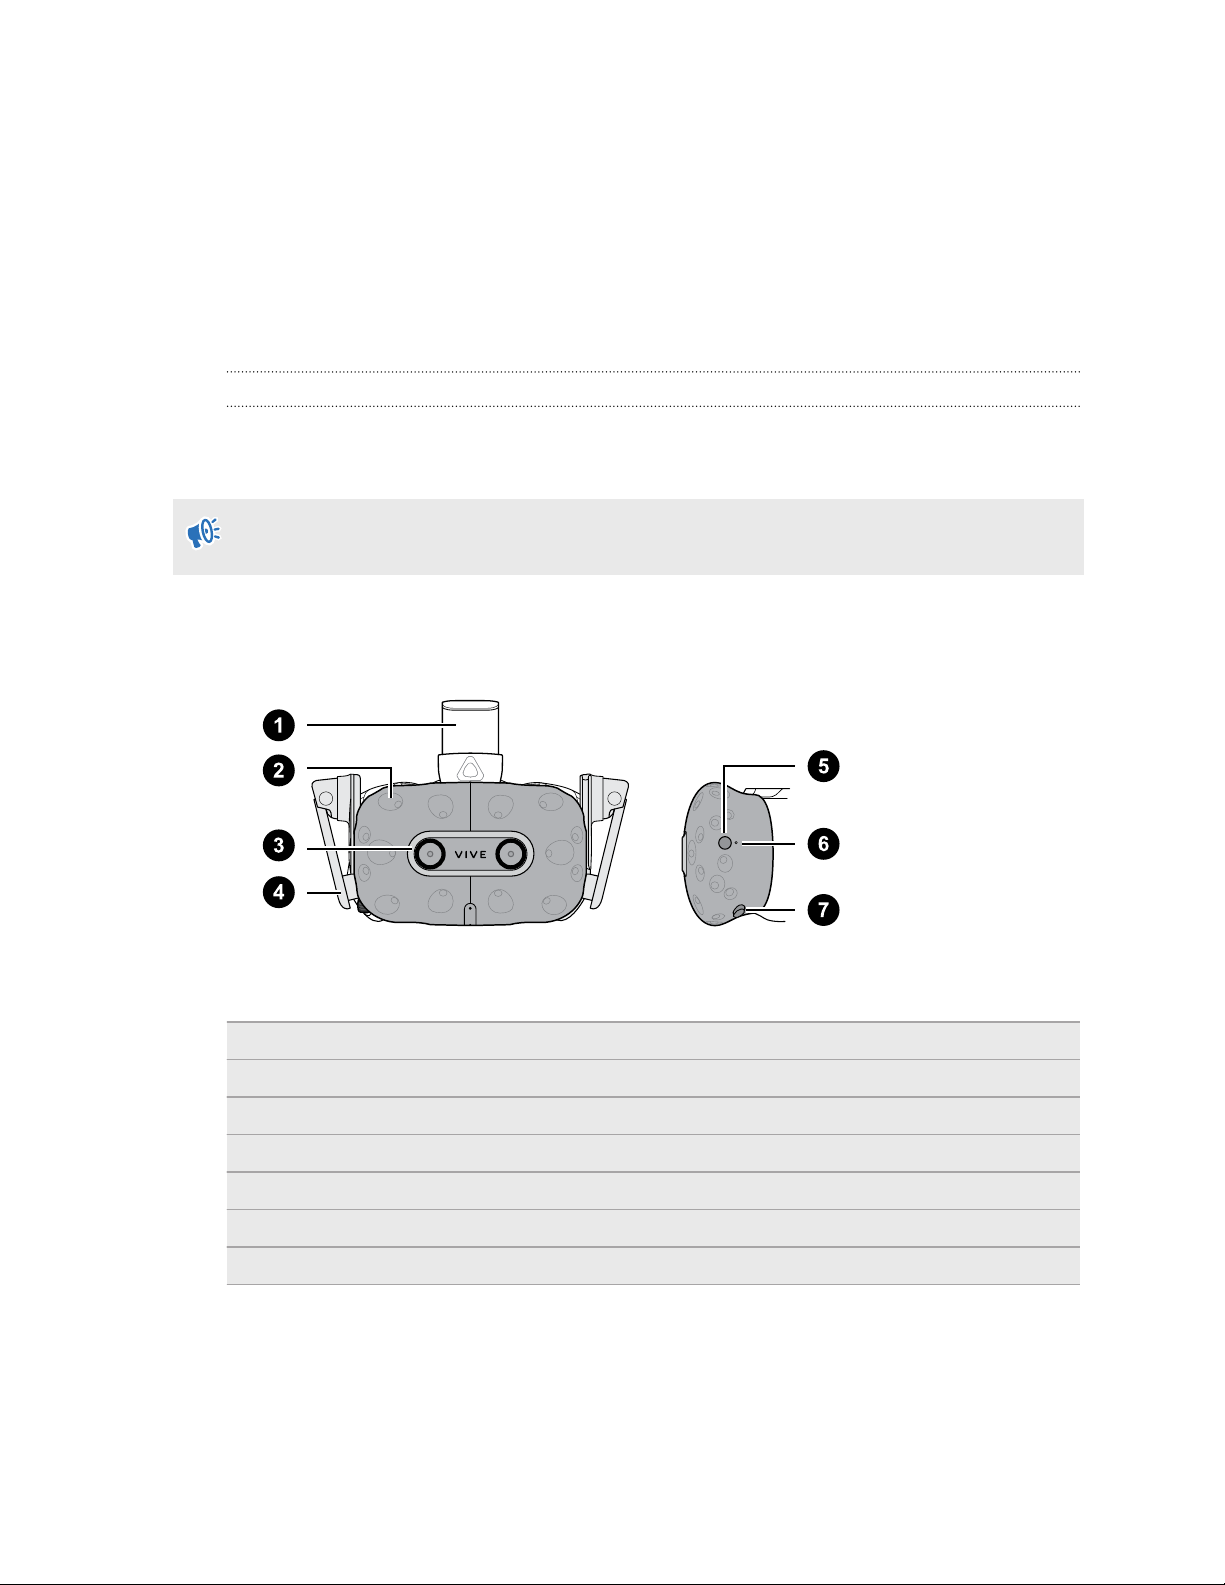
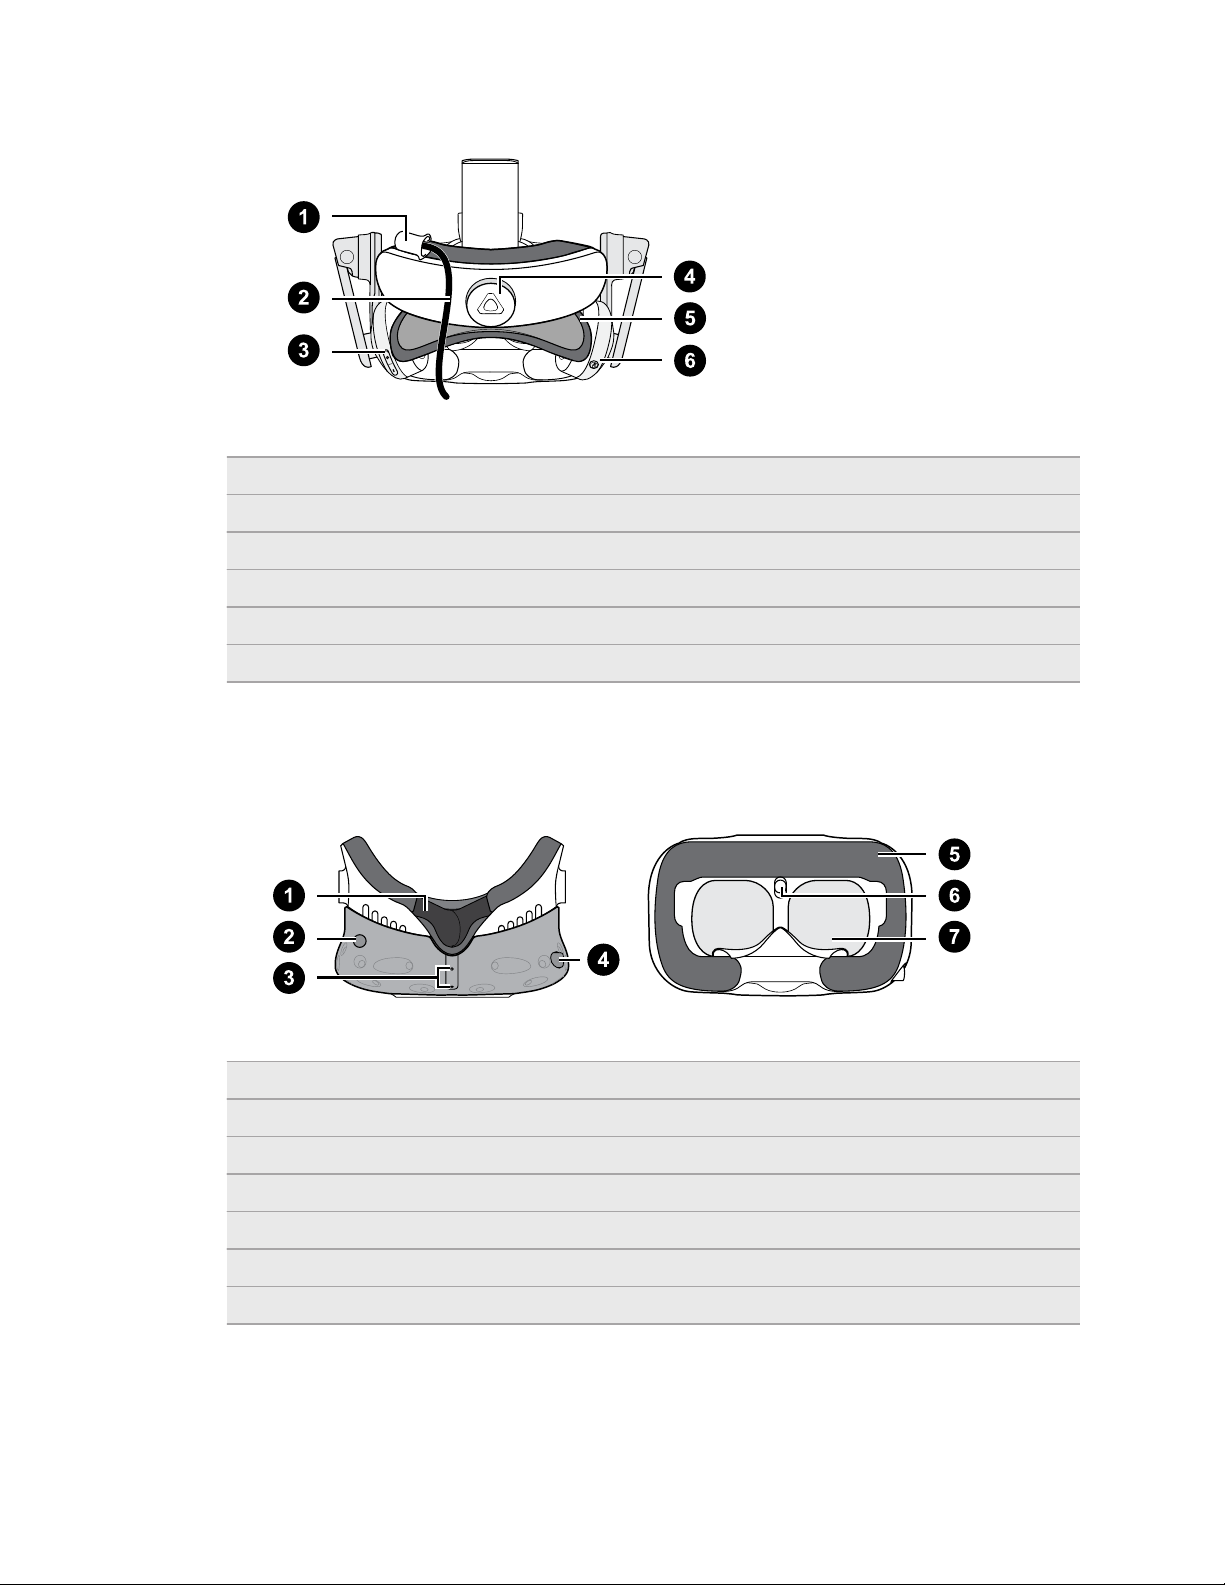
Headset 9
VIVE Link Box (2.0) 26
Product care and repair 29
Common solutions 36
Base stations
Base Station 2.0 42
Base Station 1.0 53
Base Station 1.0 and 2.0 FAQs 58
Controllers
About VIVE Controllers (2018) 60
Charging the controllers 61
Turning the controllers on or off 61
Pairing the controllers with the headset 61
Attaching the lanyards to the controllers 62
Updating controller firmware 63
What does the status light on the controllers mean? 64
What should I do if a controller is not tracked? 64
How do I know which controller is not tracked? 64
What can I do if the controller trackpad is oversensitive? 65
What should I do if my controller won't turn on? 66
The controller automatically turns off. What should I do? 66
How do I recover my controller after an interrupted update? 67
Play area
What is the play area? 68
Choosing the play area 68
Planning your play area 69
Setting up a standing-only play area 70
Setting up a room-scale play area 71
Verifying your setup 72
After setting up, how do I turn the VIVE system on? 72
What is the recommended space for the play area? 73
Can I include space occupied by furniture for the play area? 73
Can seated/standing-only experiences work at room scale? 73
How do I fix download errors during VIVE Setup installation? 73
I can't complete the room setup. What should I do? 73
2 Contents