manuals.online logo
Brands
  1. Home
  2. •
  3. Brands
  4. •
  5. Huawei
  6. •
  7. Batteries Charger
  8. •
  9. Huawei R50040G1 User manual

Huawei R50040G1 User manual

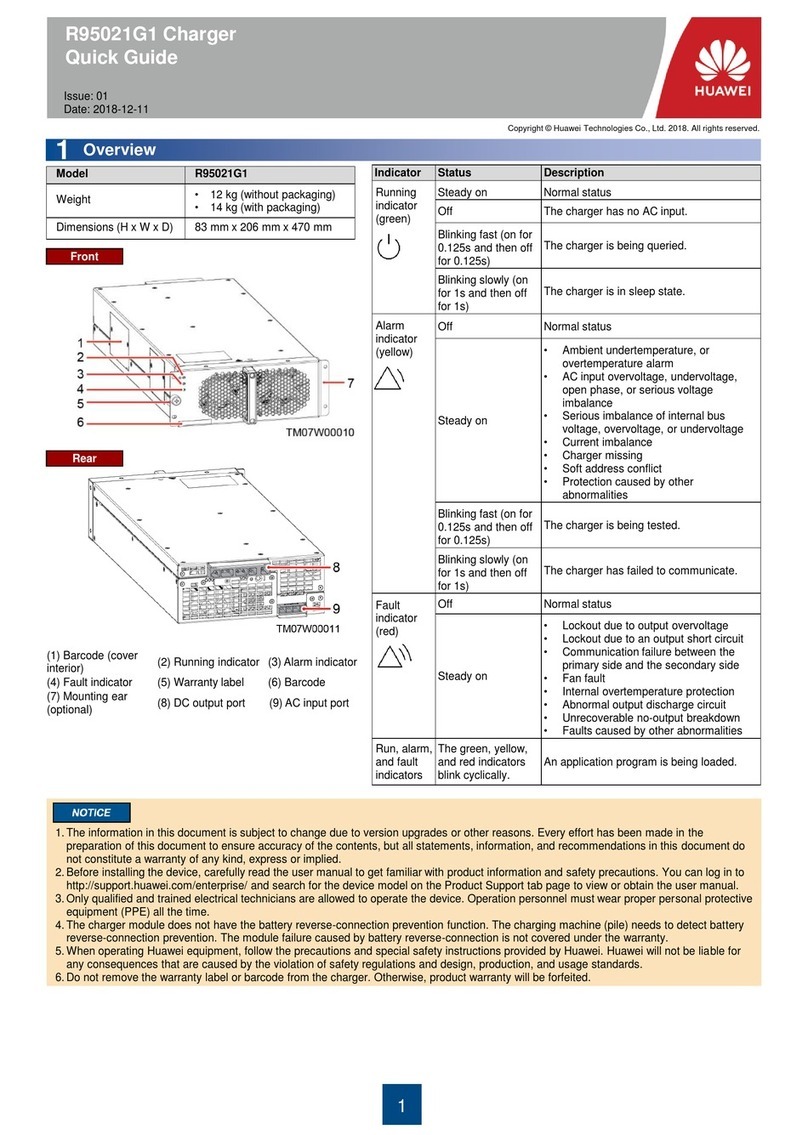
1
Indicator
Status
Description
Running
indicator
(green)
Steady on (normal
status)
The charger has an AC input.
Off
The charger has no AC input.
Blinking at 0.5 Hz
The charger is being queried.
Blinking at 4 Hz
An application is being loaded.
Alarm
indicator
(yellow)
Off (normal status)
The charger has no protection alarms.
Steady on
•
Ambient overtemperature alarm
•
AC input overvoltage, undervoltage
, open phase, or
serious voltage imbalance
•
Slight current imbalance
•
Soft address abnormality alarm
•
Ambient undertemperature alarm
•
Protection caused by other abnormalities
Blinking
The charger has failed to communicate.
Fault
indicator
(red)
Off (normal status)
The charger is fault
-free.
Steady on
•
Lockout due to output overvoltage
•
Serious current imbalance
•
Fan fault
•
Communication failure between the primary side
and the secondary side
•
Unrecoverable no-output breakdown
•
Poor connection
•
Lockout due to an output short circuit
•
Abnormal detection of the hardware address board
•
Abnormal output discharge circuit
•
Faults caused by other abnormalities
Power
indicator
Steady on
Indicates the output power.
•
600 W < output power ≤ 4000 W: One indicator is
on.
•
4000 W < output power ≤ 8000 W: Two indicators
are on.
•
8000 W < output power ≤ 12000 W: Three
indicators are on.
• 12000 W< output power ≤ 16000 W: Four indicators
are on.
•
Output power > 16000 W: Five indicators are on.
Issue: 02
Part Number: 31509297
Date: 2018-06-15
R50040G1 Charger
Quick Guide
1Overview
2Installing the Charger
(1) Power indicators
(2) Running indicator
(3) Alarm indicator
(4) Fault indicator
(5) Warranty label
(6) Barcode
(7) Mounting ear
(optional)
(8) DC output port
(9) AC input port
Model R50040G1
Weight •12 kg (without packaging)
•14 kg (with packaging)
Dimensions (H x W x D) 83 mm x 206 mm x 470 mm
•The charging machine (pile) or station should comply with the environment protection requirements in sections 6.3 and 8.3 of NB/T33001-2010 as well as the
environment resistance and protection level requirements in NB/T33008.1-2013. They should provide the protection rating of at least IP54 outdoors or IP30
indoors when used in common environments.
•Avoid using the product in sea environments or outdoor land environments (with simple shielding measures) near pollution sources. If such an environment is
unavoidable, the charging machine (pile) should provide the protection rating of IP65. Otherwise, the product may become faulty, and the resulting product
malfunction or component damage is beyond the warranty scope. Pollution sources refer to the following areas:
–Areas within 3.7 km away from salt water such as the sea
–Areas within 3 km away from serious pollution sources, such as metallurgic plants, coal mines, and heat and power plants
–Areas within 2 km away from medium pollution sources, such as chemical factories, rubber plants, and electroplating factories
–Areas within 1 km away from light pollution sources, such as food factories, tanneries, and heating boilers
Installation Environment and Hole Size Requirements
2.1
Installing the Charger
2.2
Application scope: charging machine (pile) or station
The charger can be installed horizontally, sidewards, or vertically (with the panel at the bottom). If side or vertical installation is adopted, ensure that mechanical
parts are designed to avoid interference. The installation mode can be selected according to the actual situation. Horizontal installation is recommended and vertical
installation is not recommended.
Front
Rear
•Avoid using the product in an environment with corrosive or insulation-damaging materials.
If such an environment is unavoidable, the charging machine (pile) should provide the
protection rating of IP65. Otherwise, the product may become faulty, and the resulting
product malfunction or component damage is beyond the warranty scope.
•It is recommended that the ventilation area for a single charger be 11500 mm2, and the
minimum ventilation area be 9000 mm2. The ventilation area of the system is calculated
based on the number of chargers. (The data is only the area required for heat dissipation of
the charger but not other devices.)
•It is recommended that the air inlet and outlet of the charger be at least 40 mm away from
the cabinet. The specific distance depends on the air channel of the system.
Mounting Hole Sizes (unit: mm)
Copyright © Huawei Technologies Co., Ltd. 2018. All rights reserved.
1. The information in this document is subject to change due to version upgrades or other reasons. Every effort has been made in the preparation of this document to
ensure accuracy of the contents, but all statements, information, and recommendations in this document do not constitute a warranty of any kind, express or implied.
2. Before installing the device, carefully read the user manual to get familiar with product information and safety precautions. You can log in to
http://support.huawei.com/carrier/ and search for the device model on the Product Support tab page to view or obtain the user manual.
3. Only qualified and trained electrical technicians are allowed to operate the device. Operation personnel must wear proper personal protective equipment (PPE) all
the time.
4. Before installing the device, check that the product and accessories are intact and complete. If any damage is found or any component is missing, contact your
supplier.
5. When operating Huawei equipment, follow the precautions and special safety instructions provided by Huawei. Huawei will not be liable for any consequences that
are caused by the violation of safety regulations and design, production, and usage standards.
6. Do not remove the warranty label or barcode from the charger. Otherwise, product warranty will be forfeited.
NOTICE
2
Preparing Terminals
3.2
Port
Name
Function
Remarks
P1
NC
None
-
P2,
P3
DC+
DC output +
DC output of the
charger
P4,
P5
DC
-
DC output
–
A1
ADDRESS_0
Address line (row address)
Connects to the
address board.
B1
ADDRESS_1
Address line (column
address)
C1
ADDRESS_IO
Address extension
(extended address)
A2
NC
None
-
B2
LINK_CHECK
Charger in
-position
detection
B2 and C2 need to be
short
-circuited.
C2
SEC_GND
Control ground
A3, B3, C3, A4, B4,
C4,
A5
NC
None
-
B5
CANBL
CAN signal line
Cascades to the
monitoring module of
the system.
C5
CANBH
CAN signal line
Output Terminal Appearance Output Terminal Port Definitions
•Used with an address board, Huawei-supplied
•Not used with an address board, user-supplied;
recommended model: AVIC Jonhon CZ36E-20Z
3Electrical Connection
Determine the heat resistance grade of the cable insulation material based on the ambient temperature. It is recommended that the cables resist heat of at
least 105°C.
Port
Recommended Cable Specifications (Choose Any of the Following)
Remarks
DC output power
cable
Cross
-sectional area 6 mm2(H07Z-K, UL3386, or equivalent cables able to work for a long term
at 105
°C)
Two cables are required. If the cable
surface temperature is higher than 90
°C,
use high temperature
-resisting cables.
Cross
-sectional area 10 AWG (UL1015 material 105°C)
Cross
-sectional area 6 mm2(BVR-ZR-105, flame retardant, 105°C, flexible wire)
AC input power cable
Cross
-sectional area 6 mm2(H07Z-K, UL3386, or equivalent cables able to work for a long term
at 105
°C)
If the cable surface temperature is higher
than 90
°C, use high temperature-resisting
cables.
Cross
-sectional area 10 AWG (UL1015 material 105°C)
Cross
-sectional area 6 mm2(BVR-ZR-105, flame retardant, 105°C, flexible wire)
CAN communications
cable
Shielded twisted pair: minimum cross
-sectional area 0.08 mm2, maximum cross-sectional area
1.5 mm
2; wire minimum cross-sectional area 28 AWG, wire maximum cross-sectional area 16
AWG
-
Preparing Cables
3.1
Side Installation
Vertical Installation (Not Recommended)
Horizontal Installation (Recommended)
1. (Optional) Determine whether to install the
mounting ear based on the site
requirement.
2. Slowly push the charger into the slot.
3. Tighten the screws in the middle of the
panel. Then, install and tighten the screws
in the lower and upper parts of the panel
as well as the screws on the mounting ear.
4. After the installation is complete, seal the
cable holes of the cabinet.
Vertical
installation is not
recommended
because doing
so will cause
maintenance
difficulty as you
will be unable to
locally check
whether the
charger is
running (the
indicators are
invisible
because the
panel faces
downwards).
NOTICE
NOTICE
The user needs to supply
a terminal for connecting
to this port. You are
advised to use the
Weidmüller terminal model
BCZ 3.81/02/180 SN GN
BX. Pins B2 and C2 of the DC output terminal must be short-circuited. Otherwise, the
charger cannot be started. The terminal to be used with an address board is
supplied by Huawei, and the pins are short-circuited before delivery. The output
terminal not used with an address board needs to be supplied by the user, and the
user needs to short-circuit the pins.
NOTICE
•DC output +, DC output –, address line, charger in-position
detection, and control ground signals are hazardous voltages
so basic insulation is designed between these signals and the
enclosure.
•The CAN signal line is a safety extra-low voltage (SELV).
Functional insulation is designed between this signal and the
enclosure; enhanced insulation is designed between this
signal and hazardous voltages.
•This document uses a Huawei-supplied address board as an
example. For details about how to use a user-supplied
address board, see the Charger Terminal and Address Board
Quick Guide.
NOTICE
3
Connecting Output Power Cables
3.3
Connecting Output Power Cables (Used with an Address Board)
2. Install CAN communications cables.
Example (Hardware Address: 3)
Input Terminal Appearance
Port
Name
Function
Remarks
1
PE
Ground
Connects to the ground
terminal in the system.
2
L1
AC input
AC input of the charger
3
L2
AC input
4
L3
AC input
1. Install DC output power cables.
User-supplied; recommended model: AVIC Jonhon CZ36E-4Z-04
•The metal terminals are delivered together with the DC output terminal.
•The recommended crimping tool is XCXY-02. The locator model is DWQ-18.
•Recommended heat-shrink tubing diameter: 6 mm; recommended temperature resistance: 125°C;
recommended baking temperature: 110°C
•The metal terminals must be reliably crimped. Minimum pulling-out force: 300 N for the cross-sectional area
10 AWG or 350 N for the cross-sectional area 6 mm2.
NOTE
The DC output terminal can be installed in the following two scenarios. Install it based on the site requirement.
•Used with an address board (DC output terminal and address board supplied by Huawei)
•Not used with an address board (DC output terminal supplied by the user)
A 120-ohm resistor must be connected in parallel between the cables of the first and last chargers. Otherwise, communication may be poor.
The user needs to supply a terminal for connecting to the CAN communications cable port. You are advised to use the Weidmüller terminal model BCZ
3.81/02/180 SN GN BX.
NOTICE
3. Set the address DIP switch.
•The address extension function is disabled: Two address setting switches are used on the address
board to set the address. Up to 36 addresses can be set. Hardware address = (Row address –1) x 6 +
Column address
•The address extension function is enabled: One extension switch and two address setting switches are
used on the address board to set the address. Up to 64 addresses can be set. Hardware address =
Extended address x 36 + (Row address –1) x 6 + Column address
•Switch 7 of S1 indicates the extended address. When switch 7 of S1 is OFF, the extended address is 0.
When switch 7 of S1 is ON, the extended address is 1.
•Switches 1–6 of S1 correspond to row addresses 1–6. Switches 1–6 of S2 correspond to column
addresses 1–6.
•Switch 8 of S1 and switches 7 and 8 of S2 are invalid so they do not need to be operated.
Example: Assume that the address extension function is enabled, switch 7 of S1 is OFF, switch 1 of S1 is
ON, and switch 3 of S2 is ON. Then, hardware address = 0 x 36 + (1 –1) x 6 + 3 = 3.
•The address extension function is disabled by default. To enable the function, send a configuration
command from the monitoring module through the CAN protocol. The configuration can be saved
upon a power failure.
•Module addresses in the same system cannot be duplicate.
•The address extension function is disabled: Ensure that only one switch in S1 or S2 is ON when
setting an address. If multiple switches are ON, an error will occur during hardware address
calculation.
•The address extension function is enabled: Ensure that only one switch in S1 or S2 except switch 7
of S1 is ON when setting an address. If multiple switches are ON, an error will occur during
hardware address calculation.
NOTICE
4
Connecting Output Power Cables (Not Used with an Address Board)
Connecting AC Input Power Cables
3.4
Power-On Check
3.5
After installation and power-on, use a multimeter to check whether the voltage at the cabinet copper bar connected to the output terminal of the charger is within
the normal range (200–500 V DC). Check that the green indicator on the charger is steady on, indicating that the charger is running properly.
4Maintenance
To ensure that the charger can operate properly for a long term, you are advised to perform routine maintenance on it as described in this chapter.
•The product has the maintenance-free class B and the MTTR of at most 1 h. The charger is hot swappable and should be replaced if it is faulty.
•The air filter of the cabinet needs to be cleaned regularly to avoid dust buildup at the air inlet as dust can cause overheating inside the charger.
Indicator
Status
Description
Solution
Alarm
indicator
(yellow)
Steady
on
•
Ambient overtemperature alarm
•
AC input overvoltage,
undervoltage, open phase, or
serious voltage imbalance
•
Slight current imbalance
•
Soft address abnormality alarm
•
Ambient undertemperature
alarm
•
Protection caused by other
abnormalities
Check that the input power
cables and power
distribution circuit breakers
of the charging machine
(pile) or station cabinet are
normal.
If the alarm persists,
contact Huawei customer
service center.
Blinking
The charger has failed to
communicate.
Check that the CAN
communications cable is
correctly connected and the
build
-
out resistor is installed
as required.
If the alarm persists,
contact Huawei customer
service center.
Fault
indicator (red)
Steady
on
•
Lockout due to output
overvoltage
•
Serious current imbalance
•
Fan fault
•Communication failure between
the primary side and the
secondary side
•
Unrecoverable no-output
breakdown
•
Poor connection
•
Lockout due to an output short
circuit
•
Abnormal detection of the
hardware address board
•
Abnormal output discharge
circuit
•
Faults caused by other
abnormalities
Contact Huawei customer
service center.
5Troubleshooting
Scan here for more
documents:
Support
Scan here for Huawei
technical support:
iOS Android
You can also log in to Huawei technical support
website: http://support.huawei.com
•The metal terminals are delivered together with the AC input terminal.
•The recommended crimping tool is XCXY-02. The locator model is DWQ-18.
•Recommended heat-shrink tubing diameter: 6 mm; recommended temperature resistance: 125°C; recommended baking temperature: 110°C
•The metal terminals must be reliably crimped. Minimum pulling-out force: 300 N for the cross-sectional area 10 AWG or 350 N for the cross-sectional area 6 mm2.
NOTE
To install the technical support app, scan the iOS or Android
QR code. To access the technical support website, scan the
Support QR code. After logging in to the technical support app
or website, you can search for the device model to view or
obtain more information.
NOTE
Huawei Technologies Co., Ltd.
Huawei Industrial Base, Bantian, Longgang
Shenzhen 518129 People's Republic of China
www.huawei.com
Email: [email protected]

Other Huawei Batteries Charger manuals

Huawei R100020G1 User manual

Huawei

Huawei R100020G1 User manual

Huawei SuperCharge P0006 User manual

Huawei

Huawei SuperCharge P0006 User manual

Huawei CP61 User manual

Huawei

Huawei CP61 User manual

Huawei R100030G1 User manual

Huawei

Huawei R100030G1 User manual

Huawei FusionCharge AP07N-EU User manual

Huawei

Huawei FusionCharge AP07N-EU User manual

Huawei CP60 User manual

Huawei

Huawei CP60 User manual

Huawei PowerCube 5000 User manual

Huawei

Huawei PowerCube 5000 User manual

Huawei GLL-AL04 User manual

Huawei

Huawei GLL-AL04 User manual

Huawei CP60 User manual

Huawei

Huawei CP60 User manual

Huawei CP60 User manual

Huawei

Huawei CP60 User manual

Huawei PV+ESS+Charger Solution User manual

Huawei

Huawei PV+ESS+Charger Solution User manual

Huawei SCharger-7KS-S0 User manual

Huawei

Huawei SCharger-7KS-S0 User manual

Huawei FusionCharge AC User manual

Huawei

Huawei FusionCharge AC User manual

Huawei R95021G1 User manual

Huawei

Huawei R95021G1 User manual

Popular Batteries Charger manuals by other brands

VOLTCRAFT V-CHARGE 80GPS operating instructions

VOLTCRAFT

VOLTCRAFT V-CHARGE 80GPS operating instructions

Philips SCB1430NB user manual

Philips

Philips SCB1430NB user manual

Fein GAL 1880 CV 9 manual

Fein

Fein GAL 1880 CV 9 manual

RRC RRC-SMB-UBC-DIS manual

RRC

RRC RRC-SMB-UBC-DIS manual

Texas Instruments BQ2463X EVM user guide

Texas Instruments

Texas Instruments BQ2463X EVM user guide

Ecotap DC 60 manual

Ecotap

Ecotap DC 60 manual

Delta-q QuiQ user guide

Delta-q

Delta-q QuiQ user guide

Livoo TEA301 user manual

Livoo

Livoo TEA301 user manual

Tronic TRONIC KH 967 operating manual

Tronic

Tronic TRONIC KH 967 operating manual

Ansult 024831 operating instructions

Ansult

Ansult 024831 operating instructions

Sunforce 60113 manual&nbsp;

Sunforce

Sunforce 60113 manual&nbsp;

Joy S13 user manual

Joy

Joy S13 user manual

NewMar Guided Wave 12-1200IC Installation & operation manual

NewMar

NewMar Guided Wave 12-1200IC Installation & operation manual

everActive NC 1000 user manual

everActive

everActive NC 1000 user manual

MRS MCharger Easy S Installation and operating manual

MRS

MRS MCharger Easy S Installation and operating manual

Ryobi BC-1800 Owner's operating manual

Ryobi

Ryobi BC-1800 Owner's operating manual

SMA SUNNY ISLAND SIC40-MPT Technical description

SMA

SMA SUNNY ISLAND SIC40-MPT Technical description

Charles Solid Power AE Series Specifications

Charles

Charles Solid Power AE Series Specifications

manuals.online logo
manuals.online logoBrands
  • About & Mission
  • Contact us
  • Privacy Policy
  • Terms and Conditions

Copyright 2025 Manuals.Online. All Rights Reserved.