INSTALLATION and MAINTENANCE INSTRUCTIONS
SPRING OPERATED ELECTRIC CABLE REELS
NOTE: These instructions are written for machine pull reels.
☞If installing or servicing hand pull reel, use only those steps marked with hand ☞.
All units are provided with right hand rotation unless otherwise
specified. This means that spool rotates counter-clockwise to
wind cable when viewing reel from slip ring side.
Clock-type springs provide power for cable take-up. Spring
tension must be adjusted at time of installation to insure
that cable will rewind completely at all times.
INSTALLATION
1. If reel is supplying power to a machine, insure that
machinery is at position closest to reel.
☞2. Securely mount reel in desired position using 3/8"(M10)
bolts. If reel is not equipped with a pivoting mounting
base, be sure spool centerline is aligned with cable run.
☞3. Position cable guide (optional). Guide must be oriented
so cable pays off reel in a straight line without bends.
Refer to GENERAL ARRANGEMENT DRAWING
on back page.
☞4. Install cable if not included with reel. Refer to CABLE
INSTALLATION section on back page.
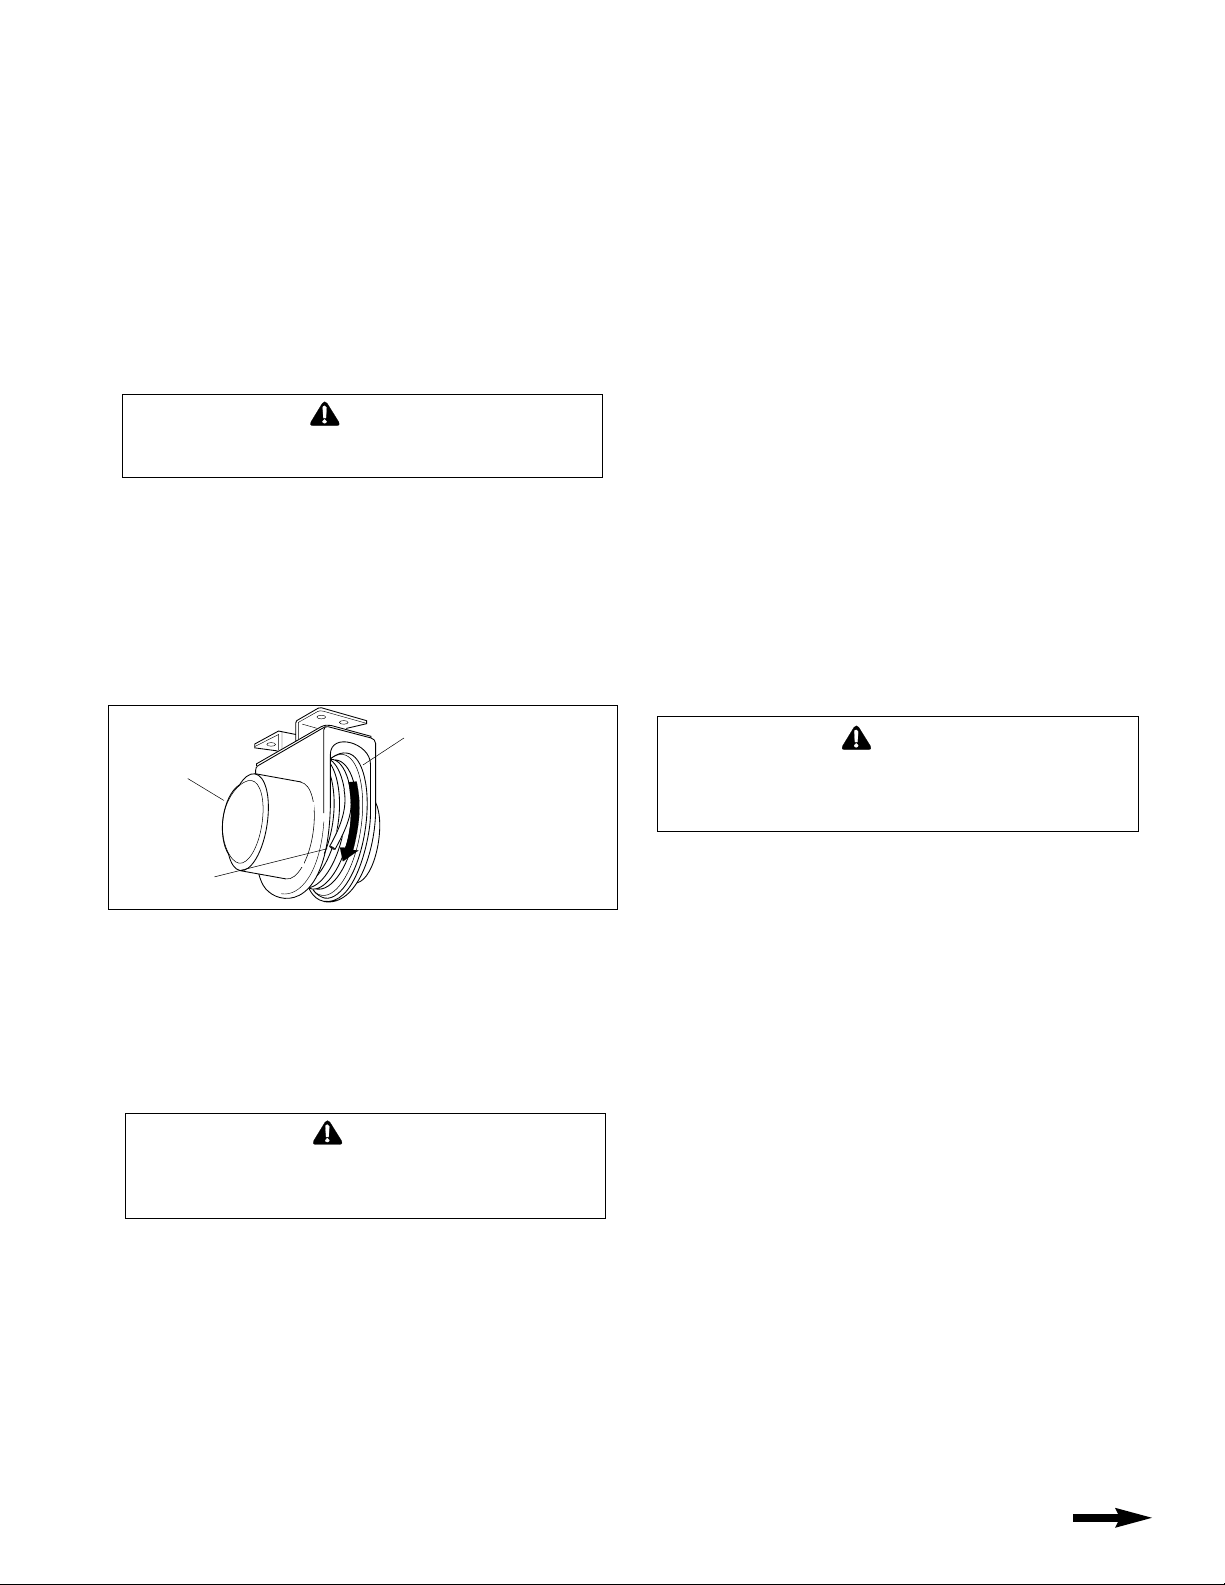
☞5. Adjust spring tension using one of the following methods:
A. If outer end of cable has not been connected, hold
cable end next to the spool and rotate spool in
clockwise direction (when viewed from slip ring side)
until desired tension is achieved. See Figure 1.
B. If outer end of cable has been connected, remove
the four spring housing screws and rotate the
entire spring housing clockwise (when viewed
from spring side).
☞6. Feed cable end out through cable guide (if so equipped)
and pay-out cable to maximum working length. At least
one turn of cable should remain on spool. If spool
locks up prior to reaching required length, either reel
was over-tensioned during step 5 or reel capacity has
been exceeded. Failure to correct this condition will
result in shortened spring life and possible damage to
other reel components.
☞7. Attach and adjust cable stop. Complete cable working
end connections.
8. If machine pull application or if no-lock operation is
desired, disengage ratchet lock. See following section.
☞9. Remove slip ring cover and connect individual supply
conductors to terminal block. Replace cover.
☞10. Turn on power to reel.
RATCHET LOCK
If reel is equipped with ratchet lock, reel is shipped with ratchet
lock “engaged”. If constant spring tension is required, lock
may be disengaged by moving the selector lever, located
beneath the spring assembly, to “OFF”.
MAINTENANCE
Periodically oil the bronze flange-bushing located on the
slip ring side of the reel.
The self-aligning bushing located on the spring side of
the reel is made of a self-lubricating, wear -resistant
material that needs no further lubrication.
Periodically inspect brushes on the slip ring assembly.
Replace if badly worn. Remove the slip ring side frame half to
gain access to brushes.
SPRING REPLACEMENT
The unique SAFETYCHANGE® spring motor consists of a
spring sealed within a housing. A replacement spring is
supplied sealed in its housing and the old unit should be
discarded completely.
☞1. Turn off all electric power.
☞2. Disconnect cable from working end connections.
☞3. Wind cable onto reel to relieve all spring tension.
☞4. Remove four screws holding spring assembly and
gently slide spring assembly off main shaft.
☞5. Slide new spring assembly onto shaft and reassemble
reel by reversing above steps.
☞6. Adjust spring tension. Refer to INSTALLATION, Step 5.
SLIP RING REPLACEMENT
☞1. Turn off all electric power. Disconnect input wiring.
☞2. Engage ratchet lock to prevent spool from rotating.
☞3. Remove reel from mounting base.
☞4. Remove screws holding slip ring side frame half and
remove frame half.
☞5. Disconnect cable leads from slip ring terminals.
☞6. Remove hardware holding slip ring assembly in
position. Pull slip ring assembly off shaft.
☞7. Install new slip ring assembly on shaft and
re-assemble reel by reversing above steps.
If mounting overhead, provide safety chain between reel
base and mounting surface to prevent accidental reel drop.
CAUTION
Following adjustment, be sure all cable can be drawn off
reel without winding the spring tight. Winding spring tight
could damage spring or cable.
CAUTION
Do not attempt to remove spring from its housing. Clock-
type springs can be dangerous to handle. Removal of
spring from housing could result in personal injury.
WARNING
CONTINUED ON BACK PAGE
Figure 1 SPOOL
SLIP RING
SIDE
END OF
CABLE
ADJUST SPRING TENSION
BY HOLDING CABLE END
AGAINST SPOOL AND
ROTATING SPOOL.
DO NOT
OVER-TENSION SPRING.
CABLE REMOVAL
Use the following procedure to remove worn or damaged cable
from reel prior to installation of new cable.
1. Move machine serviced by reel to a position closest to
reel. Spring will still be under pre-tension at this point.
☞2. Turn off all electric power.
☞3. Disconnect cable from machine or other fixtures.
Wind cable onto spool to relieve all spring tension.
NOTE: Once all tension is removed from spring, spool cannot
rotate further. Forcing spool to rotate could damage spring.
☞4. Remove four screws holding spring assembly and
gently slide assembly off main shaft.
☞5. Locking and hoist duty reels only, remove slip ring cover.
☞6. Unwind cable from spool. Remove cable clamp.
☞7. Disconnect cable leads: On locking and hoist duty
reels, disconnect leads from junction block on spool.
On watertight reels, pull cable out of hole in spool,
exposing slip ring leads. Disconnect.
☞8. Install new cable following directions below.
CABLE INSTALLATION
Use the following procedure to replace cable or if reel was
ordered without cable. Refer to CABLE INSTALLATION
REFERENCE DRAWING, below.
☞1. Unspool new cable from shipping spool and lay out
to eliminate twist.
NOTE: This step is not essential, but will aid in winding
operation of the reel and prolong cable life.
☞2. Remove slip ring cover.
☞3. Remove four screws holding spring assembly and
gently slide spring assembly off main shaft.
☞4. Connect cable leads: On locking and hoist duty reels,
feed one end of the cable through opening in spool
and connect cable leads to junction box on spool.
(See drawing below).
On watertight reels, connect cable leads to slip ring
leads (slip ring leads should extend thru hole in
spool). Following connection, tuck leads and cable
end inside spool.
☞5. Secure cable using cable clamp on spool.
☞6. Wind the cable onto the reel spool by hand rotating
spool in counter-clockwise direction (when viewed from
slip ring side).
☞6. Slide spring assembly onto shaft and secure with
four screws.
☞7. Replace slip ring cover, if removed.
☞8. Complete cable installation using steps 5 thru 10 under
INSTALLATION on page one.
SPRING ADJUSTMENT
INCREASE TENSION:
A. If outer end of cable has not been connected, hold
cable end next to spool and rotate in clockwise direction
(when viewed from slip ring side) until desired tension
is achieved. Refer to Page 1, Figure 1.
–OR–
B. If outer cable has been connected, remove the four
spring housing screws and rotate the entire spring
housing clockwise.
DECREASE TENSION:
1. Remove as much spring tension as possible by retracting
cable to cable stop or by moving machinery to position
closest to reel.
2. Remove four spring housing screws and rotate entire spring
housing counterclockwise (when viewed from spring side).
Printed in USA Bulletin No. 602152.c
HUBBELL
®
Workplace Solutions
P.O. Box 26 •600 South Clark St.
Mayville, WI 53050
Phone 920–387–5195
INSTALL CABLE THIS
DIRECTION. CONNECT
TO JUNCTION BLOCK
ON SPOOL
JUNCTION
BLOCK
INSTALL CABLE THIS
DIRECTION. CONNECT TO
SLIP RING LEADS
SLIP
RING
LEADS
SLIP RING
ASSEMBLY
MOUNTING
BASE
SUPPLY CABLE–CONNECT TO
LEADS FROM SLIP RING AT
TERMINAL BLOCK
TERMINAL
BLOCK
SPOOL
SPOOL
SPOOL ROTATION TO
WIND CABLE–
VIEWED FROM SPRING
MOTOR SIDE
SPRING
MOTOR SLIP RING
COVER
SLIP
RING
COVER
LINE
ENTRANCE
(NPT)
SLIP RING
ASSEMBLY
SPRING
MOTOR
PAYOFF
DIRECTION–
OPTIONAL
CABLE GUIDE
LOCATIONS
PAYOFF
DIRECTION–
OPTIONAL
CABLE GUIDE
LOCATIONS
PIVOTING
MOUNTING
BASE
SPOOL ROTATION TO
WIND CABLE–
VIEWED FROM SPRING
MOTOR SIDE
SUPPLY CABLE–CONNECT TO LEADS
FROM SLIP RING AT TERMINAL BLOCK
TERMINAL
BLOCK
CABLE INSTALLATION REFERENCE DRAWINGS
LOCKING & HOIST DUTY REELS WATERTIGHT REELS


