manuals.online logo
Brands
  1. Home
  2. •
  3. Brands
  4. •
  5. Husqvarna
  6. •
  7. Lawn And Garden Equipment
  8. •
  9. Husqvarna Automower 305 User manual

Husqvarna Automower 305 User manual

HUSQVARNA AUTOMOWER®
305/308
www.automower.com
1
234
5
6
7
20 cm
5 cm
30 cm
8
9
10
11
12
13
14
15
16
KURZANLEITUNG
GUIDE RAPIDE
GUIDA RAPIDA
QUICK GUIDE
115 59 36-39
AUTOMOWER®ist eine Marke von Husqvarna AB. Copyright © 2013 HUSQVARNA. Alle Rechte vorbehalten.
AUTOMOWER®est une marque déposée appartenant à Husqvarna AB. Copyright © 2013 HUSQVARNA. Tous droits réservés
AUTOMOWER®è un marchio di proprietà di Husqvarna AB. Copyright © 2013 HUSQVARNA. Tutti i diritti riservati.
AUTOMOWER®is a trademark owned by Husqvarna AB. Copyright © 2013 HUSQVARNA. All rights reserved.
What is what?
1. Main switch
2. STOP button
3. Charging strip
4. LED for function check
of the boundary and
guide wires
5. Cutting height indication
6. Display
7. Keypad
8. Charging station
9. Transformer
10. Low voltage cable
11. Wire for boundary and
guide
12. Couplers
13. Staples
14. Connectors
15. Measurement gauge
16. Screws for securing the
charging station
Descrizione delle parti
1. Interruttore principale
2. Pulsante STOP
3. Striscia di ricarica
4. LED per il controllo del
funzionamento dei cavi
perimetrale e guida
5. Indicazione dell’altezza di
taglio
6. Display
7. Tastiera
8. Stazione di ricarica
9. Trasformatore
10. Cavo a bassa tensione
11. Matassa per cavo
perimetrale e guida
12. Giunti
13. Picchetti
14. Connettori
15. Astina di misurazione
16. Chiodi per fissare la
stazione di ricarica
Quels sont les
composants ?
1. Interrupteur principal
2. Bouton STOP
3. Contacts de charge
4. LED de fonctionnement
du câble périphérique et
du câble guide
5. Indication de la hauteur
de coupe
6. Écran
7. Clavier
8. Station de charge
9. Transformateur
10. Câble basse tension
11. Câble périphérique et
guide
12. Coupleurs
13. Cavaliers
14. Raccords
15. Règle
16. Vis pour fixation de la
station de charge
Was ist was?
1. Hauptschalter
2. STOP-Taste
3. Ladekontakte
4. LED für Funktionsprüfung
des Begrenzungskabels
und Suchkabels
5. Schnitthöhenanzeige
6. Display
7. Tastatur
8. Ladestation
9. Transformator
10. Niederspannungskabel
11. Begrenzungs- und
Suchkabel
12. Verbinder
13. Haken
14. Verbinder
15. Lineal
16. Schrauben zum Befestigen
der Ladestation
QG,1155936-,305-308,2014.indd 1 2013-11-08 17.42
O I
O I
0 cm / 0”
5 cm / 2”
30 cm / 12”
20 cm / 8”
10 cm / 4”
min 2 m / 7 ft
3 m / 10 ft
75 cm / 21/2’
3
4
5
1
2
STARTEN / DÉMARRAGE / AVVIAMENTO / STARTING
STOPPEN / ARRÊT / ARRESTO / STOPPING
QG,1155936-,305-308,2014.indd 2 2013-11-08 17.42
1. AUFSTELLEN UND ANSCHLIESSEN DER LADESTATION
Siehe Kapitel 3.2 und 3.3 im Bedienungshandbuch
1. DieLadestationsollteaufeinerrelativhorizontalenFlächezentralimArbeitsbereichpositioniertwerden,mitvielFrei
äche vor der Ladestation.
2.Das Niederspannungskabel des Transformators an die Ladestation und den Transformator anschließen.
3.Den Transformator an eine 230-V-Steckdose anschließen.
4. DenMähroboterzumAuadendesAkkusindieLadestationstellen,währenddasBegrenzungskabelverlegtwird.Stellen
Sie den Hauptschalter auf Position 1.
2. PLATZIERUNG DES BEGRENZUNGSKABELS UND DES SUCHKABELS
Siehe Kapitel 3.4 im Bedienungshandbuch
1. Legen Sie Begrenzungskabel so, dass es eine Schleife um den Arbeitsbereich bildet.
2.Machen Sie eine Öse an der Stelle, an der das Suchkabel später verbunden wird.
3.Das Suchkabel zu dem Punkt an der Begrenzungsschleife verlegen, an dem diese verbunden werden sollen. Vermeiden
Sie eine Kabelverlegung mit spitzen Winkeln.
3. ANSCHLIESSEN DES BEGRENZUNGSKABELS UND DES SUCHKABELS
Siehe Kapitel 3.5 im Bedienungshandbuch
1. Das Suchkabel durch die Öffnung unten an der Ladestation führen.
2.Die Verbinder öffnen und die Kabelenden in die Einbuchtungen der Verbinders legen.
3.Den Verbinder mit einer Zange zusammendrücken.
4. Überstehendes Begrenzungskabel abschneiden. 1-2 cm oberhalb des jeweiligen Verbinders abschneiden.
5. Drücken Sie die Verbinder auf die Kontaktstifte an der Ladestation, jeweils markiert als AL (links) und AR (rechts). Es ist
wichtig, dass das rechte Kabel an den rechten Kontaktstift und das linke Kabel an den linken Kontaktstift angeschlossen wird.
6.Den Verbinder auf den mit ”Guide” gekennzeichneten Kontaktstift an der Ladestation setzen.
4. ANSCHLIESSEN DES SUCHKABELS AN DAS BEGRENZUNGSKABELS
Siehe Kapitel 3.6 im Bedienungshandbuch
1. Das Begrenzungskabel mit einer Kneifzange in der Mitte der in Punkt 2.2 erstellten Öse abschneiden.
2.Das Suchkabel mit dem Begrenzungskabel mithilfe des zugehörigen Verbinders verbinden. Die Verbinder mit einer Zange
vollständig zusammendrücken.
5. STARTEN UND STOPPEN
Siehe Kapitel 4.3 und 4.4 im Bedienungshandbuch
STARTEN
1. Durch Drücken der STOP-Taste die Abdeckung öffnen.
2.Stellen Sie den Hauptschalter auf Position 1. Bei der ersten Inbetriebnahme, beginnt eine Startsequenz, bei der Sie u. a.
einen vierziffrigen PIN-Code eingeben können.
3. START-Taste drücken und abdeckung schließen.
STOPPEN
STOP-Taste drücken.
6. DEN MÄHROBOTER AN DIE GRÖSSE IHRER RASENFLÄCHE ANPASSEN
Siehe Kapitel 6.3 im Bedienungshandbuch
Die Mähergebnisse hängen von der Mähzeit ab. Passen Sie die Mähzeit mithilfe der Timer-Funktion an Ihren Garten an. Sie
bestimmen, zu welchen Tageszeiten der Mähroboter arbeitet. Der Mähroboter mäht ca. 45 m² pro Stunde und Tag (ca. 30 m²
beim Automower®305). Beispiel: Wenn Ihr Garten 360 m² Rasen umfasst, sollte der Mähroboter durchschnittlich 8 Stunden
pro Tag (12 Stunden beim Automower®305) in Betrieb sein.
7. WARTUNG
Siehe Kapitel 8 im Bedienungshandbuch
1. Der Hauptschalter muss sich während aller Arbeiten am Chassis des Mähroboters, wie Reinigung oder Austauschen der
Klingen,inStellung0benden.TauschenSiedieMesserfüreinstetsoptimalesMähergebnisregelmäßigaus.
2.DenMähroboterniemiteinemHochdruckreinigeroderunterießendemWasserreinigen.KeineLösungsmittelzum
Reinigen benutzen.
3.Alle Verbindungen zur Ladestation (Stromversorgung, Begrenzungs- und Suchkabel) müssen getrennt werden, falls ein
Gewitterrisiko besteht.
4. Laden Se die Batterie am Ende der Saison vor der Wintereinlagerung vollständig auf.
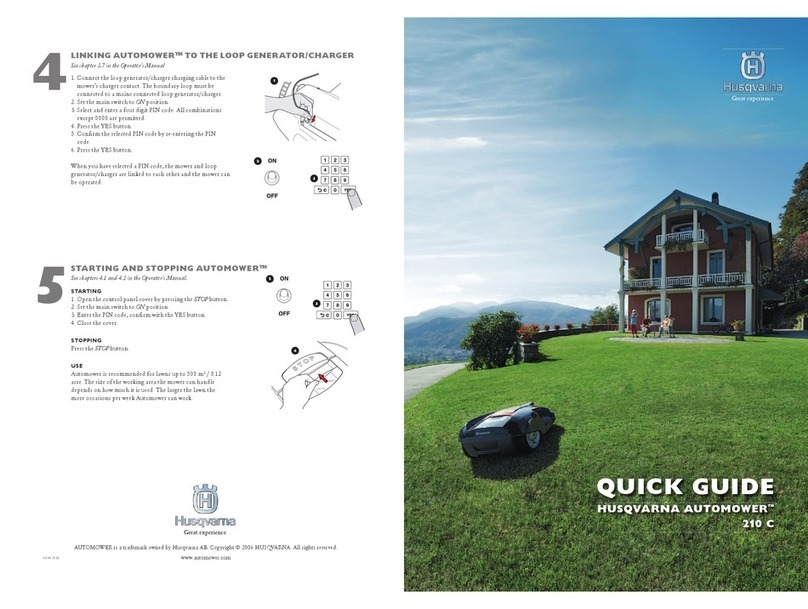
1. PLACEMENT OF AND CONNECTING THE CHARGING STATION
See chapters 3.2 and 3.3 in the Operator’s Manual
1. Place the charging station at a central position in the working area, with a lot of open space in front of the charging station
and on a relatively horizontal surface.
2.Connect the transformer’s low voltage cable to the charging station and the transformer.
3.Connect the transformer to a 230 V wall socket.
4. Place the robotic lawnmower in the charging station to charge the battery while the boundary wire is laid. Set the main
switch to position 1.
2. PLACEMENT OF THE BOUNDARY WIRE AND THE GUIDE WIRE
See chapter 3.4 in the Operator’s Manual
1. Lay the boundary wire so that it forms a loop around the working area.
2.Make an eyelet at the point where the guide wire will later be connected.
3.Run the guide wire to the point on the boundary loop the connection will be made. Avoid laying the wire at tight angles.
3. CONNECTING THE BOUNDARY WIRE AND THE GUIDE WIRE
See chapter 3.5 in the Operator’s Manual
1. Run the guide wire through the slot at the bottom of the charging station.
2.Open the connectors and lay the wire ends in the recesses on each connector.
3.Press the connectors together using a pair of pliers.
4. Cut off any surplus boundary wire. Cut 1 to 2 cm above the connectors.
5.Press the connectors onto the contact pins, marked AL (left) and AR (right), on the charging station. It is important that the
right-hand wire is connected to the right-hand contact pin, and the left-hand wire to the left-hand pin.
6.Fasten the connector to the contact pin marked Guide on the charging station.
4. CONNECTING THE GUIDE WIRE TO THE BOUNDARY WIRE
See chapter 3.6 in the Operator’s Manual
1. Cut the boundary wire with a wire cutters at the centre of the eyelet that was made in step 2.2.
2.Connect the guide wire to the boundary wire using the accompanying couplers. Press the couplers completely together
with a pair of pliers.
5. STARTING AND STOPPING
See chapters 4.3 and 4.4 in the Operator’s Manual
STARTING
1. Open the cover by pressing the STOP button.
2.Set the main switch to position 1.Whenyoudothisforthersttime,astartupsequencestartswhereyouselectafour
digit PIN code among other things.
3.Press the START button and close the cover.
STOPPING
Press the STOP button.
6.
ADJUSTING THE ROBOTIC LAWNMOWER TO SUIT THE SIZE OF YOUR LAWN
See chapter 6.3 in the Operator’s Manual
The mowing results depend on mowing time. Adjust the mowing time to suit your garden using the Timer function. You decide
what times during the day the robotic lawnmower is to work. The robotic lawnmower mows about 45 m² per hour and day
(approx. 30 m² for the Automower®305). For example; if your garden consists of 360 m² of grass, the robotic lawnmower
should work on average 8 hours per day (12 hours for the Automower®305).
7. MAINTENANCE
See chapter 8 in the Operator’s Manual
1. The main switch should be in the 0 position during all work on the robotic lawnmower’s chassis, such as cleaning or
replacing the blades. Replace the blades regularly for the best mowing result.
2.Never use a high-pressure washer or even running water to clean the robotic lawnmower. Never use solvents for cleaning.
3.All connections to the charging station (power supply, boundary and guide wire) must be disconnected if there is a risk of a
thunderstorm.
4. Fully charge the battery at the end of the season before winter storage.
EN DE
QG,1155936-,305-308,2014.indd 3 2013-11-08 17.42
1. POSIZIONAMENTO E COLLEGAMENTO DELLA STAZIONE DI RICARICA
Vedere i capitoli 3.2 e 3.3 del Manuale Operatore
1. Posizionarelastazionediricaricainunaposizionecentralenell’areadilavoro,suunasupercierelativamenteorizzontale
e con molto spazio di fronte alla stazione stessa.
2.Collegare il cavo a bassa tensione del trasformatore alla stazione di ricarica e al trasformatore.
3.Collegare il trasformatore a una presa di rete da 230 V.
4. Collocare il rasaerba robotizzato nella stazione di ricarica per caricare la batteria durante la posa del cavo perimetrale.
Portare l’interruttore principale sulla posizione 1.
2. POSA DEL CAVO PERIMETRALE E DEL CAVO GUIDA
Vedere il capitolo 3.4 del Manuale Operatore
1. Estendere il cavo perimetrale assicurandosi che formi un anello intorno all’area di lavoro.
2.Predisporre un occhiello nel punto in cui il cavo guida verrà collegato più tardi.
3.Condurreilcavoguidanoalpuntodell’anelloperimetraledoveverràeffettuatoilcollegamento.Nellastesuradelcavo
evitare gli angoli stretti.
3. COLLEGAMENTO DEL CAVO PERIMETRALE E DEL CAVO GUIDA
Vedere il capitolo 3.5 del Manuale Operatore
1. Guida attraverso la feritoia situata sul fondo della stazione di ricarica.
2.Aprire il connettore e appoggiare le estremità del cavo negli incavi di ogni connettore.
3.Premere i connettori insieme usando un paio di pinze.
4. Tagliare l’eventuale cavo perimetrale in eccesso. Tagliare a 1 o 2 cm sopra i connettori.
5.Premere i connettori sui pin di contatto della stazione di ricarica contrassegnati con AL (sinistra) e AR (destra)
È importante che il cavo di destra sia collegato al pin di contatto di destra e che il cavo di sinistra sia collegato al pin di
sinistra.
6.Fissare il connettore al pin di contatto marcato Guida presente sulla stazione di carico.
4. COLLEGAMENTO DEL CAVO GUIDA AL CAVO PERIMETRALE
Vedere il capitolo 3.6 del Manuale Operatore
1. Tagliareilcavoperimetralecondeitaglialialcentrodell’occhiellopredispostoalpunto2.2.
2.Collegare il cavo guida al cavo perimetrale usando i giunti in dotazione. Premere i giunti per unirli completamente con
un paio di pinze.
5. AVVIAMENTO E ARRESTO
Vedere i capitoli 4.3 e 4.4 del Manuale Operatore
AVVIAMENTO
1. Aprire il coperchio premendo il pulsante STOP.
2.Posizionare l’interruttore principale su 1. Quando questa operazione viene eseguita per la prima volta, inizia una
sequenza di avviamento dove, tra le altre cose, deve essere selezionato un codice PIN di quattro cifre.
3.Premere il pulsante START e chiudere lo sportello.
ARRESTO
Premere il pulsante STOP.
6. ADEGUARE IL RASAERBA ALLE DIMENSIONI DEL PRATO
Vedere il capitolo 6.3 del Manuale Operatore
I risultati di taglio dipendono dal tempo di rasatura. Adeguare il tempo di taglio al giardino utilizzando la funzione Timer.
È possibile decidere in quali orari della giornata fare funzionare il rasaerba robotizzato. Il rasaerba robotizzato taglia circa
45 m² per ora e giorno (circa 30 m² per Automower®305). Per esempio: se il vostro giardino è coperto da 360 m² di erba, il
rasaerba robotizzato deve funzionare in media 8 ore al giorno (12 ore per Automower®305).
7. MANUTENZIONE
Vedere il capitolo 8 del Manuale Operatore
1. L’interruttore principale deve essere in posizione 0 durante tutti i lavori al sottoscocca del rasaerba, ad esempio pulizia
o sostituzione delle lame. Sostituire regolarmente le lame per ottenere risultati di taglio ottimali.
2.Per la pulizia del rasaerba robotizzato, non utilizzare mai dispositivi di lavaggio ad alta pressione, né acqua corrente.
Non utilizzare mai solventi per la pulizia.
3.Scollegare tutti i collegamenti alla stazione di ricarica (alimentazione, cavo perimetrale e cavo guida) se c’è il rischio di
un temporale.
4. Caricarecompletamentelabatteriaallanedellastagioneprimadelrimessaggioinvernale.
1. INSTALLATION ET BRANCHEMENT DE LA STATION DE CHARGE
Voir chapitres 3.2 et 3.3 du manuel d’utilisation
1. Placez la station de charge à un endroit central de la zone de tonte, avec un grand espace ouvert face à elle, et sur une
surface relativement horizontale.
2. Branchez le câble basse tension du transformateur à la station de charge et au transformateur.
3. Branchez le transformateur à une prise murale de 230 V.
4. Placez le robot de tonte dans la station de charge pour charger la batterie pendant la pose du câble périphérique. Mettez
l’interrupteur principal en position 1.
2. POSE DU CABLE PERIPHERIQUE ET DU CABLE GUIDE
Voir chapitre 3.4 du manuel d’utilisation
1. Disposezlecâblepériphériqueanqu’ilformeuneboucleautourdelazonedetravail.
2. Faites un oeillet au point où le câble guide sera connecté ultérieurement.
3. Faites courir le câble guide jusqu’au point du câble périphérique où se fera la connexion. Évitez de poser le câble dans des
angles serrés.
3. CONNEXION DU CABLE PERIPHERIQUE ET DU CABLE GUIDE
Voir chapitre 3.5 du manuel d’utilisation
1. Faites passer le câble guide dans la rainure en bas de la station de charge.
2. Ouvrez les connecteurs et placez les extrémités du câble dans les rainures de chaque connecteur.
3. Serrez les connecteurs à l’aide d’une pince.
4. Coupez tout excédent de câble périphérique. Coupez 1 à 2 cm au-dessus des connecteurs.
5. Enfoncez le connecteur dans la broche de contact, indiquée par un AL (gauche) et AR (droite) sur la station de charge. Il est
important que le câble de droite soit connecté à la broche de droite et le câble de gauche, à la broche de gauche.
6. Branchez le connecteur à la broche de contact indiquée par Guide sur la station de charge.
4. CONNEXION DU CABLE GUIDE AU CABLE PERIPHERIQUE
Voir chapitre 3.6 du manuel d’utilisation
1. Coupez le câble périphérique à l’aide d’une pince coupante au centre de l’oeillet que vous avez fait à l’étape 2.2.
2. Branchez le câble guide au câble périphérique à l’aide des coupleurs fournis. Pressez complètement les coupleurs à l’aide
d’une pince.
5. DÉMARRAGE ET ARRÊT
Voir chapitres 4.3 et 4.4 du manuel d’utilisation
DÉMARRAGE
1. Ouvrez le capot en appuyant sur le bouton STOP.
2. Mettez l’interrupteur principal en position 1. Quand vous faites ceci pour la première fois, une séquence de démarrage
commence au cours de laquelle vous sélectionnez un code PIN à quatre chiffres, notamment.
3. Appuyez sur le bouton DÉMARRAGE et fermez le carter.
ARRÊT
Appuyez sur le bouton STOP.
6. RÉGLAGE DU ROBOT DE TONTE EN FONCTION DE VOTRE PELOUSE
Voir chapitre 6.3 du manuel d’utilisation
RÉGLAGE DU ROBOT DE TONTE EN FONCTION DE LA TAILLE DE VOTRE PELOUSE
Les résultats de tonte dépendent du temps de tonte. Ajustez le temps de tonte en fonction de votre pelouse à l’aide de la fonction
Minuterie. Vous décidez les heures de la journée et les jours de la semaine pour la tonte de votre pelouse. Le robot de tonte tond
environ 45 m² par heure et par jour (environ 30 m² en ce qui concerne le modèle Automower®305). Si par exemple votre pelouse
s’étend sur 360 m², il convient dès lors de faire fonctionner le robot de tonte 8 heures par jour en moyenne (12 heures pour le
modèle Automower®305).
7. MAINTENANCE
Voir chapitre 8 du manuel d’utilisation
1. L’interrupteur principal doit toujours être en position 0 pendant toutes les tâches sur le châssis du robot de tonte, telles que le
nettoyage ou le remplacement des lames. Remplacez les lames régulièrement pour obtenir des résultats de tonte optimaux.
2. Ne nettoyez jamais le robot de tonte avec un nettoyeur à haute pression ni à l’eau courante. N’utilisez jamais de solvants pour
le nettoyage.
3. Tous les raccordements de la station de charge (alimentation électrique, câble périphérique et câble guide) doivent être
débranchés en cas de risque d’orage.
4. Chargezcomplètementlabatterieàlandelasaisonavantderangerlerobotpourl’hiver.
FR IT
QG,1155936-,305-308,2014.indd 4 2013-11-08 17.42
Other manuals for Automower 305

30

Other Husqvarna Lawn And Garden Equipment manuals

Husqvarna 650CRT User manual

Husqvarna

Husqvarna 650CRT User manual

Husqvarna AUTOMOWER 420 User manual

Husqvarna

Husqvarna AUTOMOWER 420 User manual

Husqvarna DT18 C User manual

Husqvarna

Husqvarna DT18 C User manual

Husqvarna DRT70 User manual

Husqvarna

Husqvarna DRT70 User manual

Husqvarna CRT900LS Use and care manual

Husqvarna

Husqvarna CRT900LS Use and care manual

Husqvarna Z560X User manual

Husqvarna

Husqvarna Z560X User manual

Husqvarna 250PS Instruction manual

Husqvarna

Husqvarna 250PS Instruction manual

Husqvarna RTT900 User manual

Husqvarna

Husqvarna RTT900 User manual

Husqvarna AUTOMOWER 230 ACX User manual

Husqvarna

Husqvarna AUTOMOWER 230 ACX User manual

Husqvarna 968999195 User manual

Husqvarna

Husqvarna 968999195 User manual

Husqvarna CG 200 User manual

Husqvarna

Husqvarna CG 200 User manual

Husqvarna Automower 305 User manual

Husqvarna

Husqvarna Automower 305 User manual

Husqvarna 42" Collection System Product manual

Husqvarna

Husqvarna 42" Collection System Product manual

Husqvarna AUTOMOWER 210 C User manual

Husqvarna

Husqvarna AUTOMOWER 210 C User manual

Husqvarna Automower 305 User manual

Husqvarna

Husqvarna Automower 305 User manual

Husqvarna S500 PRO User manual

Husqvarna

Husqvarna S500 PRO User manual

Husqvarna 143AE15 User manual

Husqvarna

Husqvarna 143AE15 User manual

Husqvarna AUTOMOWER 450X User manual

Husqvarna

Husqvarna AUTOMOWER 450X User manual

Husqvarna Viking CA 150 User manual

Husqvarna

Husqvarna Viking CA 150 User manual

Husqvarna SR600-2 User manual

Husqvarna

Husqvarna SR600-2 User manual

Husqvarna 500RTT User manual

Husqvarna

Husqvarna 500RTT User manual

Husqvarna Gear Drive User manual

Husqvarna

Husqvarna Gear Drive User manual

Husqvarna GTH24K54 User manual

Husqvarna

Husqvarna GTH24K54 User manual

Husqvarna Automower Connect 4G User manual

Husqvarna

Husqvarna Automower Connect 4G User manual

Popular Lawn And Garden Equipment manuals by other brands

Sears 486.244062 owner's manual

Sears

Sears 486.244062 owner's manual

Koolatron Lentek PestContro Deluxe instruction manual

Koolatron

Koolatron Lentek PestContro Deluxe instruction manual

Clas Ohlson 31-1756 quick start guide

Clas Ohlson

Clas Ohlson 31-1756 quick start guide

Trac Vac DS200 instruction manual

Trac Vac

Trac Vac DS200 instruction manual

hillvert HT-BT-16 user manual

hillvert

hillvert HT-BT-16 user manual

Marshall Amplification WK-MW15 quick start guide

Marshall Amplification

Marshall Amplification WK-MW15 quick start guide

Belanger Chameleon Arch Series owner's manual

Belanger

Belanger Chameleon Arch Series owner's manual

Cardigo Mini instruction manual

Cardigo

Cardigo Mini instruction manual

Dewenwils HDWT03A instruction manual

Dewenwils

Dewenwils HDWT03A instruction manual

Daewoo DALPRS18-1 user manual

Daewoo

Daewoo DALPRS18-1 user manual

Bosch MSGP3L user manual

Bosch

Bosch MSGP3L user manual

Cardigo Flying Insect Killer Pro instruction manual

Cardigo

Cardigo Flying Insect Killer Pro instruction manual

HOMEbox XXL quick start guide

HOMEbox

HOMEbox XXL quick start guide

pratic Hi-Pergolas Rialto installation manual

pratic

pratic Hi-Pergolas Rialto installation manual

Vilmorin VILMA manual

Vilmorin

Vilmorin VILMA manual

Conino Lamborgini GBS 6036 LI operating instructions

Conino Lamborgini

Conino Lamborgini GBS 6036 LI operating instructions

Gardena 1242 operating instructions

Gardena

Gardena 1242 operating instructions

Vilmorin Kitchen Gardening VIVIANA manual

Vilmorin

Vilmorin Kitchen Gardening VIVIANA manual

manuals.online logo
manuals.online logoBrands
  • About & Mission
  • Contact us
  • Privacy Policy
  • Terms and Conditions

Copyright 2025 Manuals.Online. All Rights Reserved.