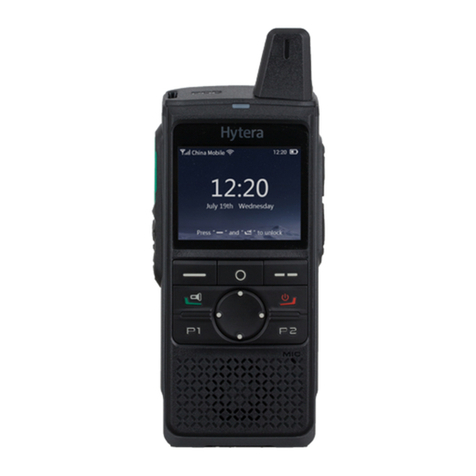
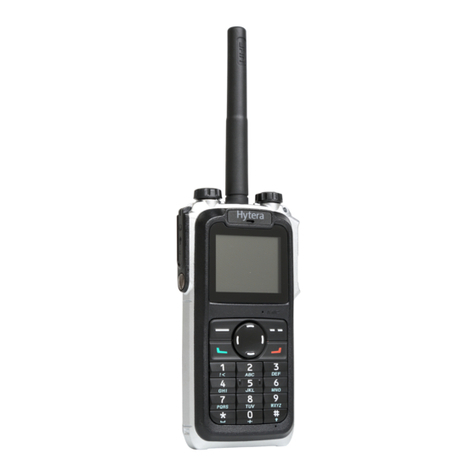
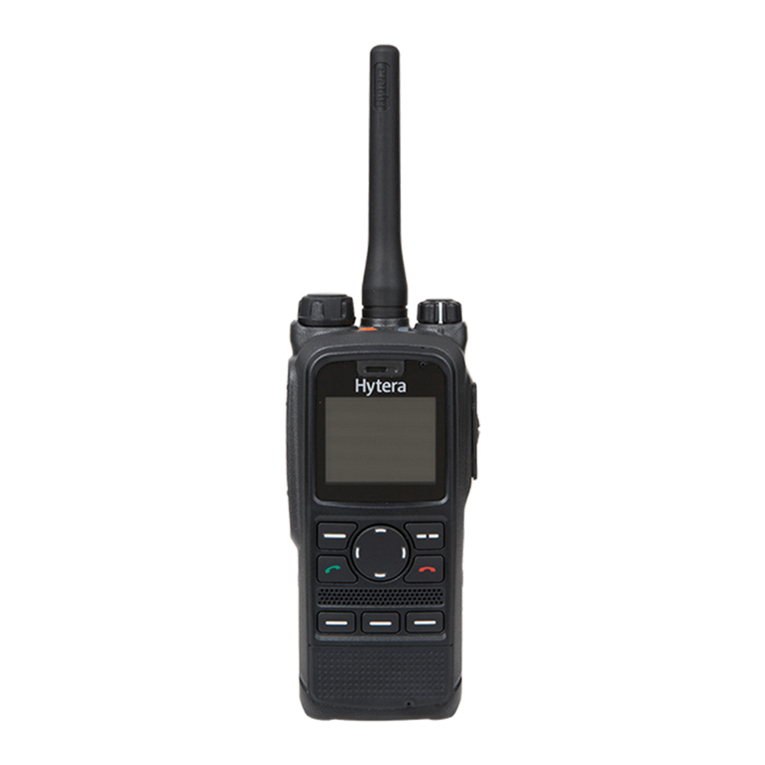
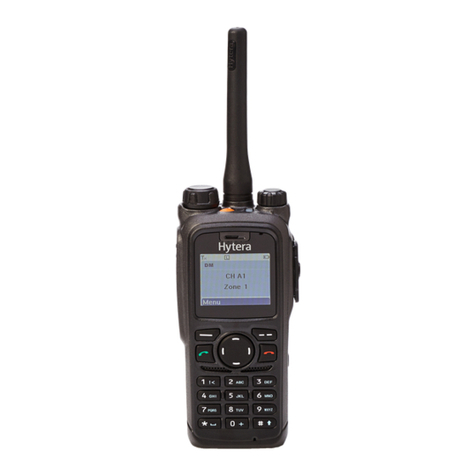
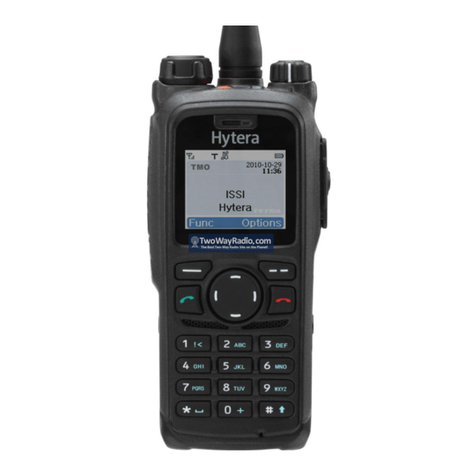
Hytera PT790Ex F5 TETRA User manual

PT790Ex F5 TETRA Intrinsically
Preface
Thanks for your favor in our product. This manual is helpful for you to quickly know how to use the
product. For detailed features and operations, please refer to the TETRA Terminal Series Feature Book
and the Safety Information Booklet along with the product.
This manual is applicable to the following product:
Safe Portable Terminal

Disclaimer
Hytera Communications Corporation Limited (the Company) endeavors to achieve the accuracy and
completeness of this manual, but no warranty of accuracy or reliability is given. All the specifications and
designs are subject to change without notice due to continuous technology development. No part of this
manual may be copied, modified, translated, or distributed in any manner without the express written
permission of us.
We do not guarantee, for any particular purpose, the accuracy, validity, timeliness, legitimacy or
completeness of the Third Party products and contents involved in this manual.
If you have any suggestion or would like to learn more details, please visit our website
at:http://www.hytera.com.
RF Radiation Information
This product must be restricted to operations in an occupational/controlled RF exposure environments.
Users must be fully aware of the hazards of the exposure and able to exercise control over their RF
exposure to qualify for the higher exposure limits.
RF Radiation Profile
Radio Frequency (RF) is a frequency of electromagnetic radiation in the range at which radio signals are
transmitted. RF technology is widely used in communication, medicine, food processing and other fields.
It may generate radiation during use.
RF Radiation Safety
In order to ensure user health, experts from relevant industries including science, engineering, medicine
and health work with international organizations to develop standards for safe exposure to RF radiation.
These standards consist of:
zUnited States Federal Communications Commission, Code of Federal Regulations; 47 CFR part 2
sub-part J;
zAmerican National Standards Institute (ANSI)/Institute of Electrical and Electronic Engineers (IEEE)
C95. 1-1992;
zInstitute of Electrical and Electronic Engineers (IEEE) C95. 1 – 1999;
zInternational Commission on Non-Ionizing Radiation Protection (ICNIRP) 1998;
FCC Regulations
Federal Communication Commission (FCC) requires that all radio communication products should meet

the requirements set forth in the above standards before they can be marketed in the U.S, and the
manufacturer shall post a RF label on the product to inform users of operational instructions, so as to
enhance their occupational health against exposure to RF energy.
EU Regulatory Conformance
As certified by the qualified laboratory, the product is in compliance with the essential requirements and
other relevant provisions of the Directive 1999/5/EC. Please note that the above information is
applicable to EU countries only.
FCC Statement
This equipment has been tested and found to comply with the limits for a Class B digital
device, pursuant to part 15 of FCC Rules. These limits are designed to provide
reasonable protection against harmful interference in a residential installation. This
equipment generates and can radiate radio frequency energy and, if not installed and
used in accordance with the instructions, may cause harmful interference to radio
communications. However, there is no guarantee that interference will not occur in a
particular installation. If this equipment does cause harmful interference to radio or
television reception, which can be determined by turning the equipment off and on, the
user is encouraged to try to correct.
The interference by one or more of the following measures:
● Reorient or relocate the receiving antenna. Increase the separation between the
equipment and receiver.
● Connect the equipment into an outlet on a circuit different from that to which the
receiver is connected.
● Consult the dealer or an experienced radio/TV technician for help
Operation is subject to the following two conditions: 1. This device may not cause harmful
interference, and 2. This device must accept any interference received, including
interference that may cause undesired operation.

Note:” Changes or modifications to this unit not expressly approved by the party
responsible for compliance could void the user’s authority to operate the equipment.”
RF Exposure Compliance and Control Guidelines and
Operating Instructions
To control your exposure and ensure compliance with the occupational/controlled
environment exposure limits always adhere to the following procedures.
Guidelines:
•Do not remove the RF Exposure Label from the device.
• User awareness instructions should accompany device when transferred to other users.
• Do not use this device if the operational requirements described herein are not met.
Operating Instructions:
• Transmit no more than the rated duty factor of 50% of the time. To transmit (talk), push
the Push-To-Talk (PTT) button. To receive calls, release the PTT button. Transmitting
50 % of the time, or less, is important because this radio generates measurable RF
energy exposure only when transmitting (in terms of measuring for standards
compliance).
• Hold the radio in a vertical position in front of face with the microphone (and the other
parts of the radio, including the antenna) at least one inch (2.5 cm) away from the nose.
Keeping the radio at the proper distance is important because RF exposures decrease
with distance from the antenna. Antenna should be kept away from eyes.
• When worn on the body, always place the radio in a Hytera’s approved clip, holder,
holster, case, or body harness for this product. Using approved body-worn accessories is
important because the use of Hytera’s or other manufacturer’s non-approved accessories
may result in exposure levels, which exceed the FCC’s occupational/controlled
environment RF exposure limits.
•If you are not using a body-worn accessory and are not using the radio in the intended
use position in front of the face, then ensure the antenna and the radio are kept at least
• Use only manufacturer’s name approved supplied or replacement antennas, batteries,
and accessories. Use of non-manufacturer-name approved antennas, batteries, and
accessories may exceed the FCC RF exposure guidelines.
2.5 cm (one inch) from the body when transmitting. Keeping the radio at the proper
distance is important because RF exposures decrease with increasing distance from the
antenna.
• Use only manufacturer’s name approved supplied or replacement antennas, batteries,
and accessories. Use of non-manufacturer-name approved antennas, batteries, and
accessories may exceed the FCC RF exposure guidelines.
•For a list of Hytera’s approved accessories (see the user manual), or (visit the following
website which lists approved accessories: http: add website address), or(The
manufacturer should include the appropriate bracketed item{s} in the manual.)
• For a list of Hytera’s approved accessories (see the user manual), or (visit the following
website which lists approved accessories: www.hytera.cn

IC statement
The device has been tested and compliance with SAR limits, users can obtain Canadian
information on RF exposure and compliance
Après examen de ce matériel aux conformité aux limites DAS et/ou aux limites d’intensité
de champ RF, les utilisateurs peuvent sur l’exposition aux radiofréquences et la
conformité and compliance d’acquérir les informations correspondantes
ThisdevicecomplieswithIndustryCanadalicence‐exemptRSSstandard(s).Operationissubject
tothefollowingtwoconditions:(1)thisdevicemaynotcauseinterference,and(2)thisdevice
mustacceptanyinterference,includinginterferencethatmaycauseundesiredoperationofthe
device.
LeprésentappareilestconformeauxCNRd'IndustrieCanadaapplicablesauxappareilsradio
exemptsdelicence.
L'exploitationestautoriséeauxdeuxconditionssuivantes:
(1)l'appareilnedoitpasproduiredebrouillage,et
(2)l'utilisateurdel'appareildoitacceptertoutbrouillageradioélectriquesubi,mêmesile
brouillageestsusceptibled'encompromettrelefonctionnement.
UnderIndustryCanadaregulations,thisradiotransmittermayonlyoperateusinganantennaofa
typeandmaximum(orlesser)gainapprovedforthetransmitterbyIndustryCanada.Toreduce
potentialradiointerferencetootherusers,theantennatypeanditsgainshouldbesochosen
that,theequivalentisotropicallyradiatedpower(e.i.r.p.)isnotmorethanthatnecessaryfor
successfulcommunication.
Conformémentàlaréglementationd'IndustrieCanada,leprésentémetteurradiopeut
fonctionneravecuneantenned'untypeetd'ungainmaximal(ouinférieur)approuvépourl'é
metteurparIndustrieCanada.Danslebutderéduirelesrisquesdebrouillageradioélectriqueà
l'intentiondesautresutilisateurs,ilfautchoisirletyped'antenneetsongaindesortequela
puissanceisotroperayonnéeéquivalente(p.i.r.e.)nedépassepasl'intensiténécessaireàl'é
tablissementd'unecommunicationsatisfaisante.

ICRSSwarning
Theterm“IC:”beforethecertification/registrationnumberonlysignifiesthattheIndustry
Canadatechnicalspecificationsweremet.
Leterme"IC:"devantlenumérodecertification/enregistrementsignifieseulementqueles
spécificationstechniquesd'IndustrieCanadaontétérespectées.
Nominalantennaportimpedance/ImpédancenominaleantennePort50ΩICradiation
exposurestatement
Thisradioisintendedforuseinoccupational/controlledapplicationswhereusershavebeen
madeawareofthepotentialrisksforexposureandcanexercisecontrolovertheirexposure.This
productisnotauthorisedforgeneralpopulation,consumerorsimilaruse.Thistransmittermust
notbeco‐locatedoroperatinginconjunctionwithanyotherantennaortransmitter.
Cetteradioaétécon?uepourunusageprofessionneldansunenvironnementcontr?lé,oùles
utilisateurssontpleinementconscientsdudangerpotentieldel’expositionàlaquelleilssont
oumisetpeuventexerceruncontr?lesurcetteexposition.CedispositifradioN’ESTPASautorisé
pourl’ensembledelapopulation,lesconsommateursengénéral,nipouruneutilisationsimilaire.
Cetémetteurnedoitpasêtreco‐localisésoufonctionnerenconjonctionavecuneautreantenne
ouémetteur.CaringforyourproductYourradiodoesnotrequireregularservicing.Caringfor
yourradioasdescribedinthisguidewillhelpmaintaintheproductingoodoperationalcondition.

Contents
1. Intrinsically Safe Terminal Information ............................................................. ..............................1
Equipment marking...............................................................................................................................5
No Misoperations..................................................................................................................................5
Safety Instructions ................................................................................................................................6
Compliance Standards..........................................................................................................................6
2. Items in the Package..........................................................................................................................9
3. Product Overview.............................................................................................................................10
3.1 Product Controls...........................................................................................................................10
3.2 Programmable Keys .....................................................................................................................11
4. Before Use ........................................................................................................................................12
4.1 Attaching the Antenna...................................................................................................................12
4.2 Installing the SIM Card..................................................................................................................12
4.3 Attaching the Battery.....................................................................................................................13
4.4 Charging the Battery.....................................................................................................................15
5. Status Indication ..............................................................................................................................17
5.1 Status Icon....................................................................................................................................17
5.2 LED Indicator................................................................................................................................18
6. Basic Operations..............................................................................................................................19
6.1 Turning On/Off..............................................................................................................................19
6.2 Switching Operation Mode............................................................................................................19
6.3 Adjusting the Call Volume.............................................................................................................19
6.4 Inputting through Keypad..............................................................................................................19
6.5 Locking/Unlocking the Keypad......................................................................................................19
6.6 PIN Code Security and Changing.................................................................................................20
6.7 Managing the Contacts.................................................................................................................20
7. Call Services.....................................................................................................................................21
7.1 TMO..............................................................................................................................................21
7.2 DMO .............................................................................................................................................23
8. Message............................................................................................................................................25
8.1 Status Message............................................................................................................................25
8.2 User Message...............................................................................................................................25
9. Troubleshooting...............................................................................................................................27
10. Care and Cleaning..........................................................................................................................29
11. Optional Accessories.....................................................................................................................30
12. Appendix.........................................................................................................................................31
12.1 SSI & TSI Dialing Rules..............................................................................................................31

1. Intrinsically Safe Terminal Information
Equipment marking
FM/CAN
zClass I, Zone 0 AEx/Ex ia IIC T4 Ga
zClass I,II, III Div 1, Group A,B,C,D,E, F, G T120°C
z-30℃≤Ta≤60℃
ATEX
zII 1G Ex ia IIC T4
zII 1D Ex ia IIIC T120°C IP6X
zI M1 Ex ia
IECEx
zEx ia IIC T4 Ga
zEx ia IIIC T120°C Da IP6X
zEx ia I Ma
Certificate Number
z
z
No Misoperations
Stop operating this product and leave the explosive atmosphere immediately when the safety or integrity
of the product is endangered, and deliver it to your local dealer for examination.
These items may endanger the product’s safety or integrity:
zThe radio is stored improperly;
zThe radio is faulty;
zThe radio works with overload;
zThe radio’s operational error or threshold value is out of allowed range.
zThe radio is damaged during transportation;
zThe radio’s housing is obviously damaged or cracked;
zThe radio logo or model is hard to be recognized;

Safety Instructions
Caution
To protect you against any property loss, bodily injury or even death, be sure to observe the
following safety instructions:
zUse only the Ex-battery BL1813-Ex or BL2413-Ex specified by the Company. The use of other
batteries may result in Ex-protection (intrinsic safety) failure.
zCharge the battery in a non-hazardous area only with the designated charger.
zDo not remove the battery from the radio in a hazardous area.
zDo not carry any standby battery into a hazardous area.
zUse the accessories specified by the Company only. Do not replace the accessories in a hazardous
area.
zDo not use a damaged antenna. If a damaged antenna comes into contact with your skin, a minor
burn may result.
zDo not expose the radio to direct sunlight for a long time, nor place it close to a heating source.
zHold the radio upright and keep its microphone 2.5 to 5 centimeters away from your mouth during
use.
zIf you wear a radio on your body, ensure its antenna is at least 2.5 centimeters away from your body
during transmission.
zPlease do not use the radio out of the operating temperature range specification of this product.
zDo not attempt to repair and service the radio, batteries and its accessories. Please contact your
dealer for repair and servicing.
zDo not dissemble or redo the radio. Unauthorized modification of the radio may result in termination
of Ex-protection (intrinsic safety) of the radio.
zImproper usage of the product other than it is intended to be used for will impair safety of the product,
yourself and surrounding environment.
Compliance Standards
Standard Issue Date
FM
FM Class 3600 2011

Standard Issue Date
FM Class 3611 2004
FM Class 3810 2005
ANSI/IEC-60529(Ed. 4.0) 2004
ANSI/ISA-60079-0(12.00.01) 2009
ANSI/ISA-60079-11(12.02.01) 2012
ANSI/ISA-60079-31(12.10.03) 2009
ANSI/ISA-61010-1(82.02.01) 2004
CAN
CAN/CSA-C22.2 No.0-M91 2006
CAN/CSA-C22.2 No.142-M1987 2009
CAN/CSA-C22.2 No.213-M1987 2008
CAN/CSA-C22.2 No.60079-0 (Ed. 5.0) 2011
CAN/CSA-C22.2 No.60079-11 (Ed. 5.0) 2011
CAN/CSA-C22.2 No.60079-31 (Ed.1.0) 2012
CAN/CSA-C22.2 No.60529 (Ed. 5.0) 2005
CAN/CSA-C22.2 No.61010-1 (Ed. 2.0) 2009
ATEX
EN 60079-0 (Ed. 5.0) 2009
EN 60079-11 (Ed. 6.0) 2012
EN 60079-31 (Ed. 1.0) 2009
EN 60529+A1 (Ed. 2.0) 1992
IECEx
IEC-60079-0 (Ed. 6.0) 2011

Standard Issue Date
IEC-60079-11 (Ed. 6.0) 2011
IEC-60079-31 (Ed. 1.0) 2008

2. Items in the Package
Please unpack carefully and check if all items listed below are received. If any item is missing or
damaged, please contact your dealer.
Portable Terminal Antenna Belt Clip
Strap Charger Battery
Power Adapter Documentation Kit
Note
The frequency band is marked on the label of the antenna; if not, refer to the band on the terminal for
frequency band information.

3. Product Overview
3.1 Product Controls
No. Part Name No. Part Name
○
1 SK1 (Side Key 1) ○
15 Power On-Off/Volume Control
Knob
○
2 PTT (Push-to-Talk) Key ○
16 Half-duplex Microphone
○
3 SK2 (Side Key 2) ○
17 Accessory Connector Cover
○
4 Emergency Key ○
18 Options/Back Key
27

No. Part Name No. Part Name
○
5 Group Selector Knob ○
19 End Key
○
6 Full-duplex Receiver ○
20 Navigation Key
○
7 LCD Display ○
21 Full-duplex Microphone
○
8 Func/OK Key ○
22 Battery Latch
○
9 Answer/Call Key ○
23 Accessory Connector
○
10 Half-duplex Speaker ○
24 Belt Clip
○
11 Numeric Keypad ○
25 Battery
○
12 Antenna Connector ○
26 Charging Piece
○
13 LED Indicator ○
27 Strap Hole
○
14 Antenna / /
3.2 Programmable Keys
For enhanced convenience, you may request your dealer to program the SK1, SK2, Navigation key,
Answer/Call key, numeric keys 1–9, and as shortcuts to needed menus and functions.
Please refer to the corresponding TETRA Terminal Series Feature Book for more details.

4. Before Use
4.1 Attaching the Antenna
Rotate the antenna clockwise to fasten it.
To remove the antenna, rotate it counter-clockwise.
4.2 Installing the SIM Card
If a SIM card is required to realize the End-to-End Encryption (E2EE) feature which should be purchased
separately, please install the SIM card first.
1. Turn off the terminal, and then slide the battery latch upwards to unlock the battery.
2. Loosen the screws fixing the SIM card cover, open the cover, and then place the card into the slot
properly, as shown in the figure below.
3. Replace the cover and tighten the screw as shown in the figure below.

4.3 Attaching the Battery
1. Align the battery slots with the guide rails on the terminal, and push the battery as ○
2 shows.
12
1
2. Open the battery latch and hold it down until the metal lock goes into the battery housing
completely.
3. Push the battery until it is fully fitted into the slot, and then release the battery latch.
Note:
To remove the battery, please power off the terminal first. Then open the battery latch, and slide the
battery out while holding down the battery latch.
4.3.2 Attaching the Belt Clip
1. Loosen the screws on the back of the terminal.
2. Align the screw holes on the belt clip with those on the terminal's body, and then tighten the screws
as shown below.

4.3.3 Attaching the Accessories
1. Open the accessory connector cover as shown below.
2. Align the accessory (such as an audio accessory, or a programming cable) plug with the accessory
connector.
Caution:
Do not scrape the silicone rubber surrounding the accessory connector screw hole.
Otherwise, the waterproof performance of the terminal will be affected.
3. Secure the accessory plug with screw.

4.4 Charging the Battery
Only use the charger and battery specified by the Company. The charger LED indicator will indicate the
charging process.(See the table below). The figure below shows you how to charge the battery.
1
2
2
3
3
1. Connect the power adapter to AC socket. See arrow ○
1.
2. Plug the power adapter into the rear jack of charger. See arrow ○
2.
3. Place the terminal with the battery attached, or the battery alone, into the charger. See arrow ○
3.
The charger LED indicates you the charging process. When the charger LED glows red, the charging
begins. When charging is complete, the charger LED glows green.
The table below shows you the details.
Note
¾To achieve optimal battery performance, please charge the battery for 5 hours before initial use.
¾Please refer to the Safety Information Booklet for the detailed information on battery use.

LED Indication Charging Status
The LED indicator flashes red
slowly. Standby(no load)
The LED indicator glows red. Charging
The LED indicator glows orange. 90% charged
The LED indicator glows green. Fully charged
The LED indicator flashes red
rapidly. Charging failed

5. Status Indication
5.1 Status Icon
Name Icon Terminal Status
Battery Strength Icon The battery strength is low.
More bars indicate more battery strength.
RSSI Icon (For TMO only) No signal indicates that the terminal is unregistered.
More bars indicate stronger signal.
Message Icon There is(are) unread message(s).
The Inbox is full.
Operation Mode Icon
The terminal is operating in TMO.
The terminal is operating in DMO.
The terminal is operating in fallback mode.
Profile Icon Silent
Normal
Audio Accessory Icon The audio accessory is connected.
GPS Icon
A GPS module is connected and the valid GPS data is
received.
Valid GPS data can be received, and the audio
accessory has been connected.
A GPS module is connected and no valid GPS data is
received.
No valid GPS data can be received and the audio
accessory has been connected.
Call Icon A call is in progress.
Group Selection Icon The terminal is ready for switching the talkgroup.
Table of contents
Other Hytera Touch Terminal manuals

Hytera
Hytera Z1PF5 TETRA User manual

Hytera
Hytera TETRA PT580H F5 User manual

Hytera
Hytera PT580 Plus User manual

Hytera
Hytera PNC370 User manual

Hytera
Hytera PNC370 User manual

Hytera
Hytera Z1p TETRA User manual

Hytera
Hytera TETRA PT580H User manual

Hytera
Hytera PT560H F5 TETRA User manual

Hytera
Hytera TETRA User manual

Hytera
Hytera PNC370 User manual
Popular Touch Terminal manuals by other brands

Control Techniques
Control Techniques DRIVE CENTRE 315C manual

Gemalto
Gemalto CINTERION BGS2T AT Command set

EchoStar
EchoStar inmarsat Hughes 9450 Series installation guide

2M Technology
2M Technology 2MTHFR-2M quick guide

HiStone
HiStone HK578 Series user manual

Nautilus Hyosung
Nautilus Hyosung MX2600SE Quick reference guide