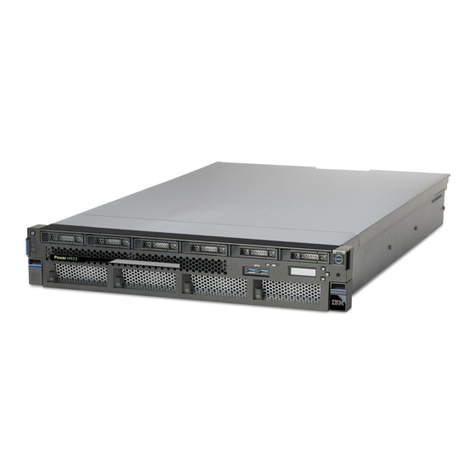
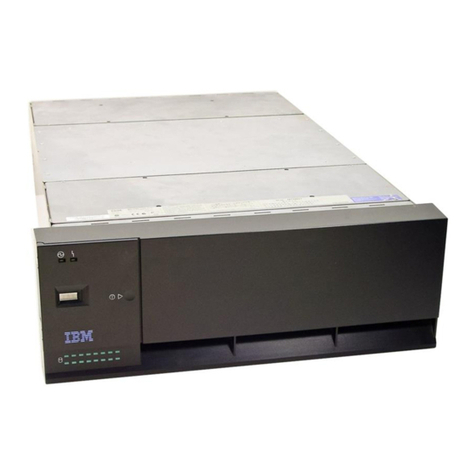
IBM iSeries 5075 User instructions

AS/400e
Setting Up Your 5075 Expansion Unit
Ve r s i o n 4
SA41-5148-00


AS/400e
Setting Up Your 5075 Expansion Unit
Ve r s i o n 4
SA41-5148-00

Note
Before using this information and the product it supports, be sure to read the information in “Safety and Environmental
Notices” on page v and “Notices” on page 31.
First Edition (May 2000)
This edition applies only to reduced instruction set computer (RISC) systems.
© Copyright International Business Machines Corporation 2000. All rights reserved.
US Government Users Restricted Rights – Use, duplication or disclosure restricted by GSA ADP Schedule Contract
with IBM Corp.

Contents
Safety and Environmental Notices . . . v
Danger Notices .............v
Caution Notices .............v
Product Recycling and Disposal.......vi
Battery Return Program .........vi
Environmental Design ..........vi
About Setting Up The 5075 Expansion
Unit (SA41–5148) ..........vii
Who should read this book .........vii
Prerequisite and related information ......vii
How to send us your comments .......vii
Chapter 1. Preparing to set up your 5075
Expansion Unit............1
Hardwarerequirements...........1
Planning your cable layout .........1
Identifying HSL and SPCN Cables ......1
Using a redundant link ..........2
Powering down your system unit .......3
Installing the 7002 cable ..........3
Chapter 2. Installing your 5075 directly
to your system unit..........7
Chapter 3. Connecting your 5075 to
another expansion unit ........9
Connecting your 5075 to the beginning of a loop . . 9
Connecting your 5075 to the middle of a loop . . . 11
Connecting your 5075 to the end of a loop ....12
Chapter 4. Completing your installation 15
Chapter 5. Verifying Your New
Configuration ............17
Appendix A. Removing the covers . . . 19
5075 and system unit back covers .......19
5074 back cover .............19
5079 back cover .............20
Appendix B. Connector Locations . . . 23
270 HSL connector locations .........23
820 HSL connector locations .........24
5075 connector locations ..........24
5074 connector locations ..........25
5079 connector locations ..........26
Appendix C. System unit control panel 27
Appendix D. Cabling rules for systems
with a 503x Migration Unit ......29
Notices ..............31
Electronic Emission Notices .........32
Federal Communications Commission (FCC)
Statement..............32
Trademarks..............33
Readers’ Comments — We’d Like to
Hear from You ...........35
© Copyright IBM Corp. 2000 iii

iv Setting Up Your 5075 Expansion Unit V4R5

Safety and Environmental Notices
Danger Notices
A danger notice calls attention to a situation that is potentially lethal or extremely
hazardous to people.
DANGER
An electrical outlet that is not correctly wired could place hazardous voltage
on metal parts of the system or the products that attach to the system. It is the
customer’s responsibility to ensure that the outlet is correctly wired and
grounded to prevent an electrical shock. (RSFTD201)
DANGER
To prevent a possible electrical shock when installing the system, ensure that
the power cords for all devices are unplugged before installing signal cables.
(RSFTD202)
DANGER
To prevent a possible electrical shock when adding or removing any devices
to or from the system, ensure that the power cords for those devices are
unplugged before the signal cables are connected or disconnected. If possible,
disconnect all power cords from the existing system before you add or
remove a device. (RSFTD203)
DANGER
To prevent a possible electrical shock during an electrical storm, do not
connect or disconnect cables or station protectors for communications lines,
display stations, printers, or telephones. (RSFTD003)
DANGER
To prevent a possible electrical shock from touching two surfaces with
different electrical grounds, use one hand, when possible, to connect or
disconnect signal cables. (RSFTD004)
Caution Notices
A caution notice calls attention to a situation that is potentially hazardous to
people because of some existing condition.
CAUTION:
Telecommunications Statement: This unit contains over-voltage circuits between
the ac power outlet and the unit. These circuits meet the standard limits
described in International Electrical Commission (IEC) 664, installation category
II. It is the customer’s responsibility to ensure that the power outlet meets the
standards of IEC 664, installation category II. (RSFTC214)
© Copyright IBM Corp. 2000 v

Product Recycling and Disposal
Components of the system, such as structural parts and circuit cards, can be
recycled where recycling facilities exist. IBM does not currently collect and recycle
used IBM products from customers in the United States other than those products
that are involved in trade-in programs. Companies are available to disassemble,
reutilize, recycle, or dispose of electronic products. Contact an IBM account
representative for more information.
The system unit contains batteries and circuit boards with lead solder. Before you
dispose of this unit, these batteries and circuit boards must be removed and
discarded according to local regulations or recycled where facilities exist. This book
contains specific information on each battery type where applicable.
Battery Return Program
In the United States, IBM has established a collection process for reuse, recycling,
or proper disposal of used IBM batteries and battery packs. For information on
proper disposal of the batteries in this unit, please contact IBM at 1-800-426-4333.
Please have the IBM part number that is listed on the battery available when you
make your call. For information on battery disposal outside the United States,
contact your local waste disposal facility.
Environmental Design
The environmental efforts that have gone into the design of the system signify
IBM’s commitment to improve the quality of its products and processes. Some of
these accomplishments include the elimination of the use of Class I
ozone-depleting chemicals in the manufacturing process, reductions in
manufacturing wastes, and increased product energy efficiency. For more
information, contact an IBM account representative.
vi Setting Up Your 5075 Expansion Unit V4R5

About Setting Up The 5075 Expansion Unit (SA41–5148)
This book contains information about setting up the 5075 Expansion Unit. You can
install your 5075 Expansion Unit yourself. It will take approximately one to three
hours to install the hardware.
You can choose not to install the expansion unit yourself. You can contact IBM or
an Authorized Dealer to make arrangements for them to install it for a fee.
The following list is an overview for installing the 5075 Expansion Unit:
vPrepare for your 5075 Expansion Unit installation.
vPower down your system unit.
vConnect cables:
–Connect cables to your 5075 Expansion Unit.
–Connect to your AS/400e server 270 or 820, or;
–Connect cables to another expansion unit.
vPower up your 270 or 820 and your 5075 Expansion Unit.
vVerify your new configuration.
Who should read this book
You should be familiar with the AS/400 system, display, and keyboards. You
should also know how to power down the system and perform a system initial
program load. You should also know how to power down system peripherals such
as printers, monitors, and PCs.
Prerequisite and related information
Use the AS/400 Information Center as your starting point for looking up AS/400
technical information. You can access the Information Center from the AS/400e
Information Center CD-ROM (English version: SK3T-2027) or from one of these
Web sites:
http://www.as400.ibm.com/infocenter
http://publib.boulder.ibm.com/pubs/html/as400/infocenter.htm
The AS/400 Information Center contains advisors and important topics such as CL
commands, system application programming interfaces (APIs), logical partitioning,
clustering, Java, TCP/IP, Web serving, and secured networks. It also contains
Internet links to Web sites such as the AS/400 Online Library, AS/400 redbooks,
and the AS/400 Technical Studio.
How to send us your comments
Your feedback is important in helping to provide the most accurate and
high-quality information. If you have any comments about this book or any other
AS/400 documentation, fill out the readers’comment form at the back of this
book.
vIf you prefer to send comments by mail, use the readers’comment form with the
address that is printed on the back. If you are mailing a reader’s comment form
© Copyright IBM Corp. 2000 vii

from a country other than the United States, you can give the form to the local
IBM branch office or IBM representative for postage-paid mailing.
vIf you prefer to send comments by FAX, use either of the following numbers:
–United States and Canada: 1-800-937-3430
–Other countries: 1-507-253-5192
vIf you prefer to send comments electronically, use one of these e-mail addresses:
–Comments on books:
IBMMAIL, to IBMMAIL(USIB56RZ)
–Comments on the AS/400 Information Center:
Be sure to include the following:
vThe name of the book.
vThe publication number of the book.
vThe page number or topic to which your comment applies.
viii Setting Up Your 5075 Expansion Unit V4R5

Chapter 1. Preparing to set up your 5075 Expansion Unit
This chapter explains what you need to do before you set up your 5075 Expansion
Unit. This includes the following tasks:
1. Unpack your 5075 (refer to the instructions for unpacking that came with your
expansion unit).
2. Plan layouts for your cables.
3. Power down your system unit.
4. Install the 7002 cable (if needed).
Before you begin the installation process, carefully plan where you will install your
new expansion unit. You should consider several factors that include size, security,
and environmental factors. Before you set up your new expansion unit, refer to the
AS/400 Site Preparation guide at the Technical Studio web site:
http://www.as400.ibm.com/tstudio
Hardware requirements
You can connect your 5075 directly to your system unit if it is an AS/400e server
270 or 820. If your system unit is an AS/400e server 820, you also may connect
your 5075 to another expansion unit.
If you are connecting your 5075 directly to your system unit, you need to have
these prerequisites:
vAn unused system power control network (SPCN) connector.
vAn unused high speed link (HSL) connector.
If you are connecting your 5075 to another expansion unit, your 820 can have a
maximum of five expansion units in a loop.
Planning your cable layout
When you decide where to place your cables, do the following:
vRefer to the AS/400 Site Preparation guide or web site.
vFollow your site plan.
vAvoid creating a safety hazard.
vAvoid damaging the cable.
vAvoid placing cables parallel to high-voltage lines.
Identifying HSL and SPCN Cables
Use the following tables to identify your High Speed link (HSL) and System Power
Control Network cables. Your system uses HSL cables to communicate with your
5075. SPCN cables are used to control power to your 5075.
Depending on your requirements, you might not have every HSL or SPCN cable
listed below.
© Copyright IBM Corp. 2000 1

Table 1. HSL Cables
CCIN number Length Part Number
0343 3 Meters 44L0005
0361 6 Meters 97H7490
0368 15 Meters 97H7491
Table 2. SPCN Cables
CCIN number Length Part Number
9206 2 Meters 87G6235
9219 6 Meters 21F9469
9213 15 Meters 21F9358
9214 30 Meters 21F9359
Using a redundant link
Aredundant link is a secondary HSL connection that your system can use if the
primary link experiences a failure. You can create a redundant link configuration
by connecting an extra HSL cable link between the expansion units and the system
unit.
To ensure continued access to your disk units in the event of a link failure, use a
redundant link configuration when you plan your cable layout.
Connecting your 5075 directly to an AS/400 system-unit
Figure 1 shows an example cable plan that uses a redundant link configuration.
Connecting your 5075 in a loop
Figure 2 on page 3 shows an example cable plan that uses a redundant link
configuration.
Figure 1. Planning for redundant link with one expansion unit
2Setting Up Your 5075 Expansion Unit V4R5

Powering down your system unit
You must power down your system unit before you install your 5075.
__ 1. If you have logical partitions on your system unit, refer to the AS/400
Information Center to find instructions on powering down a system with
partitions.
__ 2. Ensure that all jobs are complete.
__ 3. When all jobs are complete, type pwrdwnsys *immed on an AS/400 command
line and press the Enter key.
__ 4. After your system unit has completely powered down, power off all PCs
and devices, such as printers and display stations, that are connected to it.
__ 5. Unplug any power cords, such as for printers, expansion units, and display
stations, that are connected to your system unit.
__ 6. Unplug the power cord for your system unit from the electrical outlet.
__ 7. Did you receive a 7002 internal flex cable with your 5075?
Yes No
↓Go to “Chapter 2. Installing your 5075 directly to your system unit”
on page 7 or “Chapter 3. Connecting your 5075 to another
expansion unit”on page 9.
__ 8. Go to “Installing the 7002 cable”.
Installing the 7002 cable
If your 5075 came with the 7002 internal flex cable, you need to install it into your
AS/400 270 before you can set up your 5075. To install the 7002 cable follow these
steps:
__ 1. Remove the right side cover (view from back):
__ a. Loosen the screws.
__ b. Slide the cover from front to back until it stops.
__ c. Pull the cover out.
Figure 2. Planning for redundant link with two expansion units
Chapter 1. Preparing to set up your 5075 Expansion Unit 3

Your system unit contains a battery that only trained personnel can replace.
CAUTION:
The battery is a lithium battery. Only trained service personnel may replace this
battery using the instructions in the Problem Analysis, Repair, and Parts service
manual. To avoid possible explosion, do not burn or charge the battery.
Exchange only with the IBM-approved part. Discard the battery as instructed by
local regulations. (RSFTC241)
__ 2. Attach the disposable wrist strap to prevent electrostatic discharge from
damaging a device. Figure 4 on page 5 shows an example of where to attach
the adhesive part of the foil on the wrist strap to an unpainted surface.
Figure 3. Remove system unit side cover
4Setting Up Your 5075 Expansion Unit V4R5

__ 3. Remove the tape covering the HSL cable ports at E (Figure 5 on page 6).
__ 4. Place gasket D over connectors C.
__ 5. Install connector C in HSL cable port at E.
__ 6. Install retaining screws into connector B.
__ 7. Plug connector B into backplane at A.
Figure 4. Attach wrist strap
Chapter 1. Preparing to set up your 5075 Expansion Unit 5

__ 8. Remove the wrist strap.
__ 9. Figure 6 on page 7 shows how to install the system unit side cover by
aligning the tabs on the top and bottom edge. Press forward to make sure
that all tabs enter the slots. Slide the cover toward the front of the system
unit until it stops and install the screws.
Figure 5. Installing the 7002 internal flex cable
6Setting Up Your 5075 Expansion Unit V4R5

Chapter 2. Installing your 5075 directly to your system unit
This chapter describes how to install your 5075 directly to your AS/400 system
unit. If you are installing a 5075 in a loop with other expansion units, skip this
chapter and go to “Chapter 3. Connecting your 5075 to another expansion unit”on
page 9.
Make sure that you have powered down your system unit before you begin. See
“Powering down your system unit”on page 3 for instructions.
If you encounter difficulties during the installation, contact your authorized dealer
or service provider.
Figure 6. Install system unit side cover
© Copyright IBM Corp. 2000 7

DANGER
To prevent a possible electrical shock from touching two surfaces with
different electrical grounds, use one hand, when possible, to connect or
disconnect signal cables. (RSFTD004)
__ 1. Remove the back covers from your system unit and your 5075. Go to
“Appendix A. Removing the covers”on page 19 if you need instructions.
__ 2. Connect an HSL cable to the HSL connector 0 on your 5075. Go to
“Appendix B. Connector Locations”on page 23 for connector locations.
__ 3. If you are installing a redundant link, connect an HSL cable to HSL
connector 1 on your 5075.
__ 4. Connect an SPCN cable to connector J15 on your 5075.
__ 5. Install the power cable to your 5075. Do not plug it into the electrical
outlet.
__ 6. Connect the HSL cable from connector 0 on your expansion unit to
connector A0 on your system unit.
__ 7. If you are installing a redundant link, install the cable from connector 1 on
your expansion unit to connector A1 on your system unit.
__ 8. Connect the SPCN cable from connector J15 on your expansion unit to
connector J15 on your system unit.
__ 9. Install the back cover to your system unit and expansion unit.
__ 10. Go to “Chapter 4. Completing your installation”on page 15.
8Setting Up Your 5075 Expansion Unit V4R5

Chapter 3. Connecting your 5075 to another expansion unit
This section only applies to the AS/400e server 820. If your system unit is an
AS/400e server 270, you can connect only one 5075. If your system unit is an
AS/400e server 820, you can connect up to five expansion units in one loop. This
section describes how to connect your 5075 expansion unit in a loop with other
expansion units. You can only connect your 5075 with other expansion units that
have HSL hardware.
When you connect your 5075 to a loop, there are three possible locations in the
loop that it can go. The procedures below contain instructions for the three
possible locations:
v“Connecting your 5075 to the beginning of a loop”.
v“Connecting your 5075 to the middle of a loop”on page 11.
v“Connecting your 5075 to the end of a loop”on page 12.
Follow the procedure that best matches your system configuration.
Make sure that you have powered down your system unit before you begin. See
“Powering down your system unit”on page 3 for instructions.
See “Appendix B. Connector Locations”on page 23 if you need help finding the
connectors on your expansion units or system unit.
If your 820 has a 503x Migration Unit connected to it, read “Appendix D. Cabling
rules for systems with a 503x Migration Unit”on page 29 before you proceed.
If you encounter difficulties during the installation, contact your authorized dealer
or service provider.
Connecting to a 503x migration unit
If your system unit has a 503x Migration Unit read “Appendix D. Cabling rules for
systems with a 503x Migration Unit”on page 29 before you proceed.
Connecting your 5075 to the beginning of a loop
Use this procedure to connect your 5075 in the first position in a loop of expansion
units. In this procedure you will connect your 5075 between your system unit and
the expansion unit which is currently in the first position. These instructions refer
to the expansion unit which is currently in the first position as unit X as is shown
in Figure 7 on page 10 and Figure 8 on page 10.
© Copyright IBM Corp. 2000 9

__ 1. Remove the back covers from your expansion units and system unit. Go to
“Appendix A. Removing the covers”on page 19 if you need instructions.
__ 2. Connect the cables to the 5075. Go to “Appendix B. Connector Locations”
on page 23 for connector locations.
__ a. Connect a new HSL cable to the HSL connector 1.
__ b. Connect a new SPCN cable to connector J16.
__ c. Connect the power cable. Do not plug into the electrical outlet.
__ 3. At unit X, remove the HSL cable from HSL connector 0. This cable runs
between unit X and your system unit.
__ 4. At unit X, remove the SPCN cable from connector J15. This cable runs
between Unit X and your system unit.
__ 5. Connect the HSL cable from your system unit to the HSL connector 0 on
your 5075. This cable should now run between your system unit and your
5075.
__ 6. Connect the SPCN cable from your system unit to the SPCN connector J15
on your 5075. This cable should now run between your system unit and
your 5075.
__ 7. Connect the HSL cable from your 5075 HSL connector 1 to HSL connector 0
on unit X. This cable should now run between your 5075 and Unit X.
__ 8. Connect the SPCN cable from your 5075 connector J16 to connector J15 on
unit X. This cable should now run between your 5075 and Unit X.
__ 9. Install the covers on all of your expansion units and your system unit.
Figure 7. HSL connections
Figure 8. SPCN connections
10 Setting Up Your 5075 Expansion Unit V4R5
Table of contents
Other IBM Computer Hardware manuals

IBM
IBM Computer Instructions for use

IBM
IBM WebSphere DataPower XC10 User manual

IBM
IBM AS/400e 270 User manual

IBM
IBM 4764 User manual

IBM
IBM EMX0 PCIe3 Instruction Manual
IBM
IBM Power System 9009-41A User manual

IBM
IBM 4767 User manual

IBM
IBM System x3630 M4 User manual

IBM
IBM WebSphere DataPower XC10 User manual

IBM
IBM THINKCENTER 8128 Owner's manual
Popular Computer Hardware manuals by other brands

MSI
MSI 919-98H2-001 manual

JS Automation Corp
JS Automation Corp CPU-2616 PCI-104 user manual

Symcod
Symcod TermiCom XPe 15 inch user manual

Fujitsu
Fujitsu MPA3022AT Maintenance manual

National Instruments
National Instruments NI PXI-8185 user manual

Alphacool
Alphacool Eisblock Aurora Acryl RTX 4070TI TUF Gaming manual