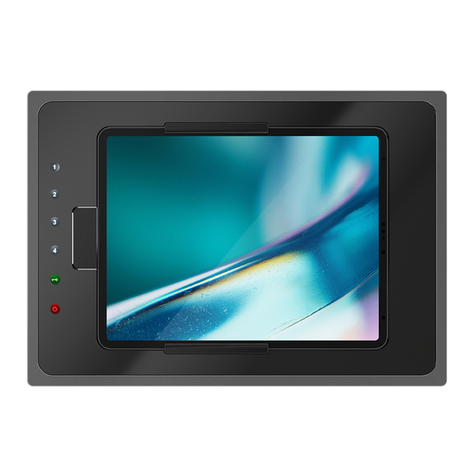
iRoom iDock Landscape User manual

iRoom‘s iDock Landscape
Assembly instructions
Please read these operating instructions and adhere to the
content and recommendations they contain before installing,
starting up and operating the iRoom iDock Landscape.
iPad® Docking Station
Ihe iDock backbox S. 2
Scope of delivery S. 3
Important information S. 3
Mounting S. 3
Important components S. 4
List of contents Connections S. 5
Specications S. 6 – 7
Setting options S. 8 – 9
Important infomartion S. 9
Notes S. 10
Guarantee S. 11

2 3
NB: The backbox is not included in the scope of delivery and must
be purchased separately. The backbox has four break-through
outlets for leads (2 x 25mm / 2 x 20 mm) and four mounting clips
to be xed with Phillips screws (PH1). The device can be tted
into existing walls.
If the backbox has already been installed, please continue from
point 8.
1. Prepare a recess in the wall (W/H/D: 295.00 / 205.00 / 65.00
mm)
2. Break through the pre-prepared hole for the leads.
3. Feed in the power leads through the hole in the back box
from above [!]. Use a suitable cable grip sleeve.
4. Place the backbox in the recess. Make sure you do not damage
the power lead. Fix the recess box ‘ush’ to the wall using the
mounting clips. Do not deform the backbox.
5. Cut some small thread gaps in the safety strips that cover the
recess spaces for the mounting clips. Do not remove the safe-
ty strips! Feed the mounting clips into the recesses and screw
them tight.
6. Prepare the power supply lead for connection to the pre-
mounted adaptor.
7. Reduce the length of the lead to avoid mechanical blockages
due to too many wires and cables. Fix the position of the po-
wer lead with the adhesive base and a cable tie.
8. Attach the power lead to pre-mounted adaptor (electrical
wire connector - L/N/GROUND).
9. Push the iRoom iDock Landscape into the backbox. Make
sure you do not damage the power lead and that the me-
chanisms are not inhibited by the power lead.
10. Attach the power supply lead using the clamp provided and
reduce the strain on the lead using the clamp block.
11. Use the four M3x20 screws to mount the iRoom iDock Land-
scape in backbox.
12. Unpack the cover plate. (Take care: High gloss nish!)
13. Remove the protective foil from the double-sided adhesive
tape, and remove the protective foil on the front of the cover
plate!
14. Attach the cover plate to the frame of the iDock Landscape.
15. Switch on the mains power supply.
16. For information on how to operate the device correctly,
please read the operating instructions.
The iDock backbox
General information
During installation it is important to ensure the backbox has not been misshapen in any way! Excess blobs of cements and llers must
be removed to reduce the risk of deformation. The protective box must remain in the recess housing during installation to minimise
deformation.
Description of function
The iRoom iDock may only be used in connection with this backbox! Starting and operating the device without this backbox shall lead
to loss of guarantee rights. Use for purposes not intended by the manufacturer is forbidden.
Important mounting information:
If you are using a backbox with the iDock Landscape
(horizontal format), all leads must be fed in from above!
Please note iDock Landscape should not be mounted in
the middle of the recess box!
Recess dimensions: W/H/D 295.00 / 205.00 / 65.00 mm
Outer dimensions – backbox: W/H/D 305.00 / 214.13 / 65.00 mm
Leads enter
from above!
Scope of delivery
iRoom‘s iDock Landscape assembly instructions
All connection and installation work must be conducted by certied electricians in compliance with the general rules and directives
for electrical installations.
The iRoom iDock Landscape has a smooth and shiny surface which is prone to scratches. Handle with care to avoid damage. Do not
clean with liquids or uids. We recommend wearing soft cotton wool gloves during installation.
Select a suitable place to mount the device
• DonotmountorusetheiRoomiDockLandscapeinwetormoistenvironments.
• Theplacechosentomountthedevicemustprovideenoughrecessdepthtoallowuseofthebackboxandtheentryoftheleads.
• MountthedeviceinaplacethatenablesreceptionofasuitablystrongWi-FisignalsothattheiPad™canalsobeusedwhenitis
docked.
Detailed diagram:
iRoom’siDockLandscape(1x)•cover(1x)•adhesivebaseforcabletie(1x)•cabletie(1x)•operatinginstructions(1x)•mountinginstruc-
tions(1x)•M3x20mountingscrews(4x)•M3x45mountingscrews(4x).Recommendedaccessories:iRoomiDockbackbox
Important information
Mounting

45
Model Landscape 110-230V
Important components
Pic. 1 1.Sticker with software version
2. Module connection: i.e. for the integrated code keyboard
3. 8-input DIP switch
4. Electrical wire connectors for external potential-free contact: An ex-
ternal key switch or a similar application can be connected up here.
5. Relay output: An external key switch or a similar application can be con-
nected up here.
5.Relayoutput:TherelayoutputcloseswhentheiPad™isinitsrecharging
position.If there is noiPad™intheDock, thecontact remains open. One
applicationforhotels is thatthefrontdeskcanidentifywhetheraniPad™
is in the Dock or not. Technical details: relay contact potential-free. Voltage:
max. 250V/AC or 30V/DC. Current: max. 8A
6. Audio output socket (red, white): Frequency range: 20 Hz to 20,000 Hz,
fullvolume.Thesoundistransferredfrom theiPad™totheaudiosockets.
The video output (yellow) is not activated!
7. Electrical wire connector for power supply
8.Label with serial number
3 4 5 6 7
PENL
21 8
1. Sticker with software version
2. Module connection: i.e. for the integrated code keyboard
3. 8-input DIP switch
4. Electrical wire connectors for external potential-free contact: An ex-
ternal key switch or a similar application can be connected up here.
5. Relay output: An external key switch or a similar application can be con-
nected up here.
5.Relayoutput:TherelayoutputcloseswhentheiPad™isinitsrecharging
position.If there is noiPad™intheDock, thecontact remains open. One
applicationforhotels is thatthefrontdeskcanidentifywhetheraniPad™
is in the Dock or not. Technical details: relay contact potential-free. Voltage:
max. 250V/AC or 30V/DC. Current: max. 8A
6. Audio output socket (red, white): Frequency range: 20 Hz to 20,000 Hz,
fullvolume.Thesoundistransferredfrom theiPad™totheaudiosockets.
The video output (yellow) is not activated!
7. Mini USB connection
8. RJ45 PoE connection
9.Label with serial number
Model Landscape PoE
1. Sticker with software version
2. Module connection: i.e. for the integrated code keyboard
3. 8-input DIP switch
4. Electrical wire connectors for external potential-free contact: An
external key switch or a similar application can be connected up here.
5. Relay output: An external key switch or a similar application can be con-
nected up here.
5.Relayoutput:TherelayoutputcloseswhentheiPad™isinitsrecharging
position.IfthereisnoiPad™intheDock,thecontactremainsopen.One
applicationforhotelsisthatthefrontdeskcan identifywhetheraniPad™
is in the Dock or not. Technical details: relay contact potential-free. Voltage:
max. 250V/AC or 30V/DC. Current: max. 8A
6. Audio output socket (red, white): Frequency range: 20 Hz to 20,000
Hz,full volume.ThesoundistransferredfromtheiPad™totheaudio so-
ckets. The video output (yellow) is not activated!
7. 12V adaptor to connect up mains power
8. Label with serial number
Model Landscape 12V 12V Power supply
Pic. 6
1. Plus 12 V electrical wire connector
2. Minus 12V electrical wire connector
3. Earth connection
Pic. 5
1. RJ45 PoE connection to the connection for mains voltage power
supply compliant with PoE standard IEEE 802.3af. This connection is
for power supply only.The PoE connection cannot be used to transfer data!
2. Mini USB connection This connection is for power supply only. The USB
interface cannot be used to transfer data!
PoE & USB Module
1 2 3
1 2
Connections
1. Live
2. Neutral
3. Earth
230V electrical wire connector
1 2
Pic. 4
Pic. 2 21 3 4 5 6 7 8 9
Pic. 3 3 4 5 621 7 8
iRoom‘s iDock Landscape assembly instructions
3

67
General specications
Dimensions iDock Landscape (W/H/D) ...................................................................351.9 / 226.4 / 68.2mm
Dimensions backbox (W/H/D).......................................................................................305.0 / 214.13 / 65.0 mm
Dimensions recess for backbox (W/H/D)................................................................295.0 / 205.0 / 65.0 mm
Power requirements .............................................................................................................Dependent on model
Outputs.........................................................................................................................................Composite Audio / RCA
Weight...........................................................................................................................................1.700 g
Operating and storage conditions..............................................................................0°C – 35°C; 20% – 95% RH no condensation
Touch sensor .............................................................................................................................capacitive proximity sensor
Externer Kontakt......................................................................................................................Yes (deactivated on despatch)
Secure-open function ........................................................................................................ Yes (can be deactivated via DIP switch for voltage jumps, drops
and cut-os)
Position installed.....................................................................................................................vertical – max. angle of inclination: +/- 50° in all directions
Horizontal table integration possible. max. angle of inclination:
+50°
Pic. 7
Specications
Specications & connection model with 110V-230V power supply
Power supply.............................................................................................................................110-240V AC, 50-60 Hz / 15 W
The device can be connected up via the electrical wire connector socket in pic.4 or directly using the adaptor. The device must be
connected up in compliance with the respectively valid legal norms.
Switched o with the iPad power completely run down, recharging takes approximately 7 hours.
Function Labelling European colour
code according
to IEC
UK colour
code accor-
ding to IEC
UK colour
code
old
US colour code ac-
cording to Nati¬onal
Electrical Code
Canadian colour
code according to
CEC
Earth PE or earth
symbol
Green/yellow Green/yellow Green/yellow Green or
green/yellow
Green or
green/yellow
Neutral
conductor
N Blue Blue Black White White
Live wire L Brown Brown Red Black or red Black or red
Specications & connection model with 12V power supply
Power supply.............................................................................................................................9,2 to 18V DC; 2A
The device is connected to the power supply via the adaptor (pic.6). It is imperative that the adaptor is earthed; otherwise the iDocks
will not work!!! The device must be connected up in compliance with the respectively valid legal norms.
Switched o with the iPad power completely run down, recharging takes approximately 7 hours.
Function Labelling European colour code UK colour code
old
US colour code ac-
cording to National
Electrical Code
Earth Pe or earth symbol Green/yellow Green/yellow Green or green/yellow
Negative - Input - Black or blue Black Black
Positive + Input + Red Red Red
Specications & connection model with PoE and USB power supply
Power supply PoE...................................................................................................................48V; 15.4W PoE standard compliant with IEEE 802.3af
Power supply USB..................................................................................................................5V DC; 15W USB standard compliant with USB 2.0
PoE
The device is connected via a RJ45 socket (pic.5) with a patch cable. Power supply is provided via a typical commercially available PoE
switch or PoE injector.
Switched o with the iPad power completely run down, recharging takes approximately 9 hours.
USB
Connection is made using a Mini USB socket (pic.5) via a USB cable. Popwer is supplied via the Apple 15W adaptor. Only premium
quality USB cables with a maximum length of 1.5m may be used. iDock functionality cannot be guaranteed if longer or inferior quality
cables and leads are used!
Switched o with the iPad power completely run down, recharging takes approximately 10 hours.
iRoom‘s iDock Landscape assembly instructions
Proximity sensor

89
Protection against theft
iRoom’siDockDOESNOTPROVIDEANYPROTECTIONagainsttheft.UnauthorisedforcefulremovalofaniPad™cannotbe
prevented. iRoom GmbH shall accept no liability whatsoever for the theft of iPads!
Safety instructions
• Protectthedevicefromuidstoavoiddamagecausedbyreorelectricshocks!
• Thedevicemustnotbesubjecttomaintenancebyusers!Installationanddeinstallationmustbeconductedbycertied
electrics technicians!
• Donotputanyforeignbodiesintothedevice!
• Shouldanyuidsorobjectsenterorfallintothedevice,orshouldthedevicebecomedamaged,disconnectthedevice
from the power supply immediately!
Important information
DIP Switch Number
and Name
O On
DIP 1: Open without iPad When an external contact has been connected up to
open the iDock the proximity sensor is deactivated (nor-
mal operation). Only works when DIP 8 is ON!
When an external contact has been connected up to
open the iDock, the iDock can still be opened via the
proximity sensor without an iPad. If an iPad has been do-
cked on, the iDock can only be opened via the external
contact. Only works when DIP 8 is ON!
DIP 2: Open at power on The iDock opens automatically when connecting up to
the power supply (= normal operation).
When connecting up to the power supply there is no
change (i.e. when the supply of power is operated via
an access card).
DIP 3: Open at power o If there is a power failure the iDock opens up automa-
tically to allow the iPad to be used/removed (= normal
operation).
If there is a power failure the iDock remains closed (i.e. if
the iDock is located in a public place).
DIP 4: Table version After being opened the iDock closes automatically after
10 seconds (= normal operation).
The iDock remains open and can only be closed by trig-
gering the proximity sensor (i.e. when built into a table
to guarantee an angled view).
DIP 5: Cover plate Sensor sensitivity and algorithms are set for use with the
plastic cover plate. Please leave the settings when using
the Dock with the plastic cover plate.
Sensor sensitivity and algorithms can be set for use with
the aluminium cover plate. Please set when using the
Dock with the aluminium cover plate.
DIP 6: Demo mode The iDock can be opened and closed via a proximity
sensor (= normal operation).
The iDock automatically opens and closes continuously
(i.e. exhibitions and showrooms).
DIP 7: Audio function The audio signal is transmitted through the loudspeaker
of the iPad and not via the sockets
The iPad audio signal is transmitted via the audio cinch
socket.
DIP 8: External contact If an external enabling contact has been activated (i.e.
ngerprint scanner, external switch etc.), it can be used
for opening and closing the iDock.
The external contact is deactivated. The iDock operates
using the built-in proximity sensor (= normal operation).
The DIP switch enables the iRoom iDock to be easily adapted to
the desired purpose. Simply make sure the individual switches
on the DIP switch are in the correct position. DIPs 1 to 7 are deli-
vered in the original deactivated (OFF) position, DIP 8 is ON.
Pic.8: Standard position of the DIP switch on delivery
Setting options
Standard on delivery
Modelle Dip
QSS, QWW, QSS-12V, QWW-12V, QSS-PoE, QWW-PoE DIP 1 to 7 are delivered in the original deactivated (OFF) position, DIP 8 is
activated (ON).
QSS-Code, QWW-Code, QSS-Code-12V, QWW-Code-12V, QSS-Code-
PoE, QWW-Code-PoE
DIP 1, 4, 5, 6, 7 are delivered in the original deactivated (OFF) position, DIP
2, 3, 8 is activated (ON).
QSS-Tr, QWW-Tr, QSS-Tr-12V, QWW-Tr-12V, QSS-Tr-PoE, QWW-Tr-PoE DIP 1, 4, 5, 6, 7, 8 are delivered in the original deactivated (OFF) position,
DIP 2, 3 are activated (ON).
iRoom‘s iDock Landscape assembly instructions
10 11
Guarantee
The guarantee period shall run for two (2) years from the date of purchase made by the original end customer, unless the device has
been repaired or replaced due to the invocation of guarantee rights. In such a case the guarantee shall remain valid until the expiry of
the original guarantee period or six (6) months from the date of repair/replacement – whichever period expires rst.
Claims for defects and claim validation
Should your iDock fail or cease to function as desired, please contact your dealer and provide the original invoice, the serial number
and a description of the error.
The dealer will arrange for the device to be inspected by the manufacturer or a technician authorised by the manufacturer. The ins-
pector can then conrm a defect has been identied within the guarantee period, has been caused by defective materials or manu-
facturing, and is not subject to exclusion from the guarantee.
Exclusion from guarantee coverage
The following damages and sources of damage are excluded from the guarantee:
• ActsofGod;
• Misuse,including(butnotlimitedto)failuretocomplywithassembly,mountingoroperatinginstructions;
• Incorrectoperation;
• Connectiontoanunsuitablepowersupply;
• Repairsandattemptedrepairsconductedbyunauthorisedindividuals;
• Useofthedeviceinconnectionwithproductsfromothersources;
• Deviceswhosemanufacturerserialnumberhasbeenchanged,deleted,removedormadeillegible;
• Upgradingofdevicesaboveandbeyondthespecications,featuresorfunctionslistedintheoperatingmanual
Limits to liability
The above guarantee portrays the entire scope of liability applicable to iRoom GmbH. Hence, iRoom GmbH shall decline any further
claims for liability for loss or damage (except in proven cases of gross negligence) resulting from the purchase, acquisition, ownership,
possession, sale or use, of this device.
Under no circumstances shall iRoom GmbH accept any liability for subsequent consequential damages, delays, unsuitable or incorrect
information or advice, and violation of copyright. The rights of the purchaser as regards defects shall not be aected.
Various conditions
Absolutely nobody, including all sales and distribution partners, dealers, agents and sales representatives, shall have any right
whatsoever to take on responsibility for guarantee rights or to alter them in any way on behalf of iRoom GmbH.
The purchaser shall take sole responsibility for ensuring the device is suitable for the purpose for which it is to be used.
GuaranteeNotes
Here is some space to make notes
iRoom‘s iDock Landscape assembly instructions
© 2010-2011 iRoomGmbH. All rights reserved. Subject to changes in technical details at any time. The technical details and specications do not equate to any form
of guarantee. All products mentioned (Apple iPad® in particular) remain the property of the respective manufacturer and are protected by international copyright and
patent laws.
iRoom‘s iDock Landscape
Assembly instructions
iRoom GmbH – intelligente Technik
Bayerhamer Str. 5
A-5020 Salzburg
Austria
Visit our website:
www.iroomidock.com
Table of contents
Other iRoom Docking Station manuals

iRoom
iRoom iDock Basic User manual

iRoom
iRoom iTop User manual

iRoom
iRoom touchDock User manual

iRoom
iRoom surDock-mini User manual

iRoom
iRoom iBezel Series User manual

iRoom
iRoom iDock Basic User manual

iRoom
iRoom iTop OnWall User manual

iRoom
iRoom miniDock User manual

iRoom
iRoom iDock Basic User manual

iRoom
iRoom fixDock mini User manual