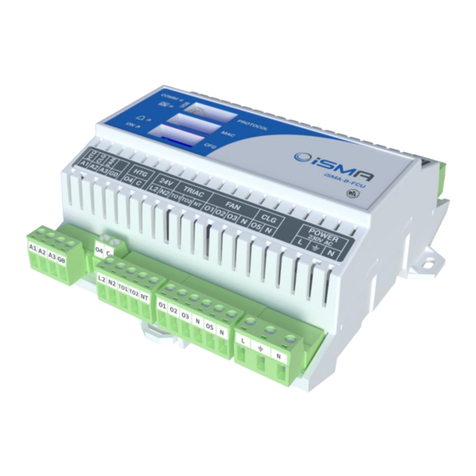
iSMA B-FCU User manual

www.ismacontrolli.com
DMP245en | 1st Issue rev. 1 | 04/2022
iSMA-B-FCU
User Manual
Quick Start-up

iSMA-B-FCU Quick Start-up
www.ismacontrolli.com
DMP245en | 1st Issue rev. 1 | 04/2022
page 2 of 56
Table of Contents
1 Introduction ........................................................................................................................... 4
1.1 Revision History............................................................................................................................. 4
2 Overview ................................................................................................................................. 5
2.1 Box Contents ................................................................................................................................. 5
2.2 Tools ................................................................................................................................................ 5
2.3 Dimensions and Mounting......................................................................................................... 5
2.4 Technical Specification ................................................................................................................ 5
3 Configuring and Connecting the Controller................................................................... 6
3.1 Controller Overview ..................................................................................................................... 6
3.2 Step 1: Selecting Protocol and Baud Rate; Restoring the Default Settings.................... 7
3.2.1 PROTOCOL DIP Switch Configuration................................................................................ 7
3.2.2 Restoring Default Settings.................................................................................................... 8
3.3 Step 2: Setting Controller Address........................................................................................... 9
3.3.1 MAC DIP Switch Configuration ............................................................................................ 9
3.4 Step 3: Choosing the FCU Pipe Type .....................................................................................10
3.4.1 4-Pipe Heating and Cooling ...............................................................................................10
3.4.2 2-Pipe Only Heating or Only Cooling ............................................................................... 11
3.5 Step 4: Switching Between 1 Heating Stage and 2 Heating Stages Modes..................12
3.5.1 2 Stages of Heating in 4-Pipe Fan Coil Unit.................................................................... 13
3.6 Step 5: Switching Between 1 Cooling Stage and 2 Cooling Stages Modes...................13
3.6.1 2 Stages of Cooling in 4-Pipe Fan Coil Unit .................................................................... 13
3.7 Step 6: Selecting Type of Control Required by the FCU Valves and Connection
Details............................................................................................................................................14
3.8 Step 7: Selecting the Temperature Control Value Source and its Connection
Details............................................................................................................................................16
3.8.1 Temperature Source: iSMA-B-LP/Touch Point Room Panel....................................... 16
3.8.2 Temperature Source Connected to S3 ........................................................................... 16
3.8.3 Temperature Source Connected to S1 ........................................................................... 17
3.8.4 Temperature Source Connected to RS485 Network................................................... 17
3.9 Step 8: Selecting Type of Fan Used Within the Project and its Connection Details...18
3.9.1 Analog Controlled Fan Connection .................................................................................. 18
3.9.2 1 Speed Fan Connection.....................................................................................................18
3.9.3 2 Speeds Fan Connection................................................................................................... 19
3.9.4 3 Speeds Fan Connection................................................................................................... 20
4 Examples: Connecting Actuators and Sensors to the Controller ...........................21
iSMA-B-FCU Quick Start-up
www.ismacontrolli.com
DMP245en | 1st Issue rev. 1 | 04/2022
page 3 of 56
4.1 Connections Overview...............................................................................................................21
4.2 Connection Examples................................................................................................................21
4.2.1 4-Pipe Installation with 1 Stage Digital Controlled Heating and Cooling and
Analog Controlled Fan......................................................................................................... 21
4.2.2 4-Pipe Installation with 1 Stage Digital Controlled Heating and Cooling and 1
Speed Fan............................................................................................................................... 22
4.2.3 4-Pipe Installation with 1 Stage Digital Controlled Heating and Cooling and 2
Speeds Fan............................................................................................................................. 22
4.2.4 4-Pipe Installation with 1 Stage Digital Controlled Heating and Cooling and 3
Speeds Fan............................................................................................................................. 23
4.2.5 4-Pipe Installation with 1 Stage Analog Controlled Heating and Cooling and
Analog Controlled Fan......................................................................................................... 23
4.2.6 4-Pipe Installation with 1 Stage Analog Controlled Heating and Cooling and 1
Speed Fan............................................................................................................................... 24
4.2.7 4-Pipe Installation with 1 Stage Analog Controlled Heating and Cooling and 2
Speeds Fan............................................................................................................................. 24
4.2.8 4-Pipe Installation with 1 Stage Analog Controlled Heating and Cooling and 3
Speeds Fan............................................................................................................................. 25
4.2.9 2-Pipe Installation with 1 Stage Digital Controlled Cooling and Analog Controlled
Fan............................................................................................................................................ 25
4.2.10 2-Pipe Installation with 1 Stage Digital Controlled Heating and 1 Speed Fan .......26
4.2.11 2-Pipe Installation with 1 Stage Digital Controlled Cooling and 2 Speeds Fan...... 26
4.2.12 2-Pipe Installation with 1 Stage Digital Controlled Heating and 3 Speeds Fan ..... 27
4.2.13 2-Pipe Installation with 1 Stage Analog Controlled Cooling and Analog Controlled
Fan............................................................................................................................................ 27
4.2.14 2-Pipe Installation with 1 Stage Analog Controlled Cooling and 2 Speeds Fan ....28
4.2.15 2-Pipe Installation with 1 Stage Analog Controlled Heating and 3 Speeds Fan.... 29
5 All Configurations for FCU Default Application............................................................30

iSMA-B-FCU Quick Start-up
www.ismacontrolli.com
DMP245en | 1st Issue rev. 1 | 04/2022
page 4 of 56
1 Introduction
This manual explains basic procedures for using the controller, setting up the built-in
application and information on connection details. It is recommended to read this
manual before using the controller. For detailed operating procedures and
troubleshooting information, see user manuals: FCU Programming, FCU Application, FCU
Hardware, FCU Updater.
1.1 Revision History
Rev. Date Description
1.0 5 Mar 2021 First edition
1.1 21 Apr 2022 Rebranded
Updated Touch Point panel references
Table 1. Revision history

iSMA-B-FCU Quick Start-up
www.ismacontrolli.com
DMP245en | 1st Issue rev. 1 | 04/2022
page 5 of 56
2 Overview
2.1 Box Contents
The iSMA-B-FCU controller comes in a box along with the connectors and the iSMA-B-FCU
installation instruction.
2.2 Tools
To safely and properly set up the iSMA-B-FCU controller, the flat head screwdriver 3.0 x
0.5 mm is necessary.
2.3 Dimensions and Mounting
The controller dimensions and mounting details are presented on the figure 1. There are
no additional requirements for controller’s orientation and placement.
Figure 1. FCU dimensions and mounting
2.4 Technical Specification
For detailed technical specification, see the FCU Hardware manual.

iSMA-B-FCU Quick Start-up
www.ismacontrolli.com
DMP245en | 1st Issue rev. 1 | 04/2022
page 6 of 56
3 Configuring and Connecting the Controller
3.1 Controller Overview
This section outlines the differences between the FCU hardware versions and describes
steps required to properly configure the controller. For further information, please see
the iSMA-B-FCU Hardware manual.
Figure 2. FCU controller HH version; HL and LL versions with different power voltages
The PROTOCOL DIP switch is responsible for configuring the communication protocol.
The MAC DIP switch is responsible for addressing the controller.
The CFG DIP switch is responsible for configuring the application.
Note: The detailed information about the DIP switches configuration is available in the
FCU Hardware manual.
The iSMA-B-FCU controller configuration step by step is described in chapter 3 of this
document and consists of steps:
Step 1: configuration of the PROTOCOL DIP switch responsible for selecting used
protocol and its baud rate, and restoring the controller to the default settings;
Step 2: selecting the address of the controller by the MAC DIP switch;
Step 3: selecting the FCU pipe type;
Step 4: selecting 1 or 2 stages of heating;
Step 5: selecting 1 or 2 stages of cooling;
Step 6: selecting the type of control the FCU valves require, and heating and cooling
actuators connection details;
Step 7: selecting the temperature control value source;
Step 8: selecting the type of fan used within the project.

iSMA-B-FCU Quick Start-up
www.ismacontrolli.com
DMP245en | 1st Issue rev. 1 | 04/2022
page 7 of 56
Steps 3-8 describe configuration of the CFG DIP switch. Their overview with default
positioning is presented in the table below.
No. Name On Off Default
1 Pipe Mode 2-pipe 4-pipe 4-pipe
2Heating 2nd Stage Enable Disable Disable
3Cooling 2nd Stage Enable Disable Disable
4 Heating/cooling control mode Analog Digital Digital
Table 2. The CFG DIP switch configuration
3.2 Step 1: Selecting Protocol and Baud Rate; Restoring the Default
Settings
3.2.1 PROTOCOL DIP Switch Configuration
Depending on the communication protocol, used within the network the controller is
connected to, there is a possibility to switch the protocol used by the controller so it
matches the network protocol.
The protocol, which the controller operates with, and baud rate selection is made with
the PROTOCOL DIP switch.
The 1st, 2nd, and 3rd switches are responsible for baud rate, while the 4th and 5th are
responsible for the protocol. The 6th switch is responsible for restoring the default
settings.
The PROTOCOL DIP switch settings for baud rate and protocol selection are shown in
tables below.
1 2 3 Baud Rate
OFF (0) OFF (0) OFF (0) Defined by user
OFF (0) OFF (0) ON (1) 76800
OFF (0) ON (1) OFF (0) 4800
OFF (0) ON (1) ON (1) 9600
ON (1) OFF (0) OFF (0) 19200
WARNING! Before attempting to configure the controller, make sure to have
acquainted with all the required documentation, or have a good knowledge of the fan
coil unit application–this will make configuration of the controller easy-going and
trouble-free.

iSMA-B-FCU Quick Start-up
www.ismacontrolli.com
DMP245en | 1st Issue rev. 1 | 04/2022
page 8 of 56
•
•
•
•
1 2 3 Baud Rate
ON (1) OFF (0) ON (1) 38400
ON (1) ON (1) OFF (0) 57600
ON (1) ON (1) ON (1) 115200
Table 3. Baud rate configuration
4 5 Protocol
OFF (0) OFF (0) Modbus RTU
OFF (0) ON (1) Modbus ASCII
ON (1) OFF (0) BACnet Master
ON (1) ON (1) BACnet Slave
Table 4. Protocol configuration
3.2.2 Restoring Default Settings
To restore the default iSMA-B-FCU device settings, follow the steps below:
Turn off the power supply.
Set the 6th switch of the PROTOCOL DIP switch to ON.
Turn on the power supply, wait until the power LED is blinking.
Set the 6th switch to OFF to restore the default settings. To cancel the reset, turn off
the power supply and set the 6th switch to the OFF position.
Out of the box device, as well as after restoring default values procedure, has the default
settings as shown in the table below. All parameters can be changed using the iSMATool
software with the controller connected, only the baud rate and used protocol can be
modified with DIP switches.
Name Default Value
USER BAUD RATE 76800
STOP BITS 1
DATA BITS 8
PARITY BITS 0
RESPONSE DELAY 0
I1 – I4 DIGITAL INPUT COUNTERS 0
Table 5. Default values
For more information on changing the protocol parameters, check the iSMA-B-FCU
Application manual and iSMA-B-FCU Hardware manual.

iSMA-B-FCU Quick Start-up
www.ismacontrolli.com
DMP245en | 1st Issue rev. 1 | 04/2022
page 9 of 56
3.3 Step 2: Setting Controller Address
3.3.1 MAC DIP Switch Configuration
For the controller to operate correctly in the network, its address needs to be set to the
desired value. The controller address is set by the MAC DIP switch. The state of the MAC
DIP switch represents binary information of the controller address. The first 10 addresses
and corresponding DIP switch setting is shown below.
Address S1 S2 S3 S4 S5 S6 S7 S8 MAC DIP Switch
Configuration
1 On
2 On
3 On On
4 On
5 On On
6 On On
7 On On On
8 On
9 On On

iSMA-B-FCU Quick Start-up
www.ismacontrolli.com
DMP245en | 1st Issue rev. 1 | 04/2022
page 10 of 56
Address S1 S2 S3 S4 S5 S6 S7 S8 MAC DIP Switch
Configuration
10 On On
Table 6. MAC DIP switch configuration
For another address DIP switch configuration, see the iSMA-B-FCU Hardware manual.
3.4 Step 3: Choosing the FCU Pipe Type
The iSMA-B-FCU can be used in 4-pipe installations as well as in 2-pipe installations. In
order for the controller to operate correctly in the application, it is necessary to know the
fan coil pipe type and set the CFG DIP switch to the corresponding settings as described
below.
3.4.1 4-Pipe Heating and Cooling

iSMA-B-FCU Quick Start-up
www.ismacontrolli.com
DMP245en | 1st Issue rev. 1 | 04/2022
page 11 of 56
Figure 3. 4-pipe FCU installation
3.4.2 2-Pipe Only Heating or Only Cooling

iSMA-B-FCU Quick Start-up
www.ismacontrolli.com
DMP245en | 1st Issue rev. 1 | 04/2022
page 12 of 56
Figure 4. 2-pipe FCU installation
For connection details go to steps 6, 7, and 8.
For more information on configuring the FCU pipe types, check the iSMA-B-FCU
Application manual.
3.5 Step 4: Switching Between 1 Heating Stage and 2 Heating Stages
Modes
The fan coil unit can operate with one heating device or with two heating devices. This
needs to be configured with the 2nd section of the CFG DIP switch.

iSMA-B-FCU Quick Start-up
www.ismacontrolli.com
DMP245en | 1st Issue rev. 1 | 04/2022
page 13 of 56
3.5.1 2 Stages of Heating in 4-Pipe Fan Coil Unit
Figure 5. 2 stages of heating in 4-pipe FCU installation
For more information on configuring stages of heating, check the iSMA-B-FCU Application
manual.
3.6 Step 5: Switching Between 1 Cooling Stage and 2 Cooling Stages
Modes
The fan coil unit can operate with one cooling device or with two cooling devices. This
needs to be configured with the 3rd DIP switch CFG.
3.6.1 2 Stages of Cooling in 4-Pipe Fan Coil Unit

iSMA-B-FCU Quick Start-up
www.ismacontrolli.com
DMP245en | 1st Issue rev. 1 | 04/2022
page 14 of 56
•
•
•
Figure 6. 2 stages of cooling in 2-pipe FCU installation
For more information on configuring stages of cooling, check the iSMA-B-FCU Application
manual.
3.7 Step 6: Selecting Type of Control Required by the FCU Valves and
Connection Details
The figure belowThe controller’s outputs can operate in digital or analog mode.
Depending on the fan coil unit actuators control type, the corresponding DIP switch has
to be set to a desired position.
The figure below pictures the connection of heating actuators:
A1 for analog 0-10 V control;
TO1 for analog PWM or digital ON-OFF control;
O4 for digital ON-OFF control.

iSMA-B-FCU Quick Start-up
www.ismacontrolli.com
DMP245en | 1st Issue rev. 1 | 04/2022
page 15 of 56
•
•
•
•
•
Note that, when using the second stage heating, the additional second stage heater can
be controlled only by the O4 output, leaving the A1 or TO1 for the first stage. Otherwise,
when using only the first stage heating, the O4 output can be used for digital control of
the first stage heating actuator.
Figure 7. Heating actuators connection
The figure below pictures the connection of cooling actuators:
A1 for analog 0-10 V control while operating in 2-pipe mode;
A2 for analog 0-10 V control while operating in 4-pipe mode;
TO1 for analog PWM or digital ON-OFF control while operating in 2-pipe mode;
TO2 for analog PWM or digital ON-OFF control while operating in 4-pipe mode;
O5 for digital ON-OFF control.
Note that, when using the second stage cooling, the additional second stage cooler can
be controlled only by the O5 output, leaving the A1, A2, TO1, or TO2 for the first stage.
Otherwise, when using only the first stage cooling, the O5 output can be used for digital
control of the first stage cooling actuator.
Figure 8. Cooling actuators connection
For more information on control types and connection details, check the iSMA-B-FCU
Application manual and iSMA-B-FCU Hardware manual.

iSMA-B-FCU Quick Start-up
www.ismacontrolli.com
DMP245en | 1st Issue rev. 1 | 04/2022
page 16 of 56
3.8 Step 7: Selecting the Temperature Control Value Source and its
Connection Details
The temperature control value source has to be specified with the DIP switches 5 and 6.
By default, the sensor’s type, served by the controller’s inputs S1 and S3, is the 10K3A1
NTC.
The temperature sensor type can be changed using the iSMA Tool software.
Figure 9. FCU connectors
3.8.1 Temperature Source: iSMA-B-LP/Touch Point Room Panel
Figure 10. The LP/Touch Point room panel set as a temperature source
3.8.2 Temperature Source Connected to S3

iSMA-B-FCU Quick Start-up
www.ismacontrolli.com
DMP245en | 1st Issue rev. 1 | 04/2022
page 17 of 56
Figure 11. Temperature sensor connected to S3 as a temperature control value source
3.8.3 Temperature Source Connected to S1
_
_
_
_
_
Figure 12. Returning air temperature sensor connected to S1
3.8.4 Temperature Source Connected to RS485 Network
Figure 13. Temperature control value source set to the RS485 network
For more information, check the iSMA-B-FCU Application manual and iSMA-B-FCU
Hardware manual.

iSMA-B-FCU Quick Start-up
www.ismacontrolli.com
DMP245en | 1st Issue rev. 1 | 04/2022
page 18 of 56
3.9 Step 8: Selecting Type of Fan Used Within the Project and its
Connection Details
There are many fan types the iSMA-B-FCU supports, and it can be configured for the fan
coil unit used in the project.
3.9.1 Analog Controlled Fan Connection
Figure 14. Analog controlled fan connection
3.9.2 1 Speed Fan Connection

iSMA-B-FCU Quick Start-up
www.ismacontrolli.com
DMP245en | 1st Issue rev. 1 | 04/2022
page 19 of 56
Figure 15. 1 speed fan connection
3.9.3 2 Speeds Fan Connection
Figure 16. 2 speeds fan connection

iSMA-B-FCU Quick Start-up
www.ismacontrolli.com
DMP245en | 1st Issue rev. 1 | 04/2022
page 20 of 56
3.9.4 3 Speeds Fan Connection
Figure 17. 3 speeds fan connection
Table of contents
Other iSMA Controllers manuals

iSMA
iSMA MVE2 Series User manual

iSMA
iSMA SMA-B-LP User manual

iSMA
iSMA iSMA-B-AAC20 User manual

iSMA
iSMA iSMA-B-MAC36NL User manual

iSMA
iSMA iSMA-B-MAC36NL User manual

iSMA
iSMA iSMA-B-MAC36NL Installation manual

iSMA
iSMA iSMA-B-MAC36NL User manual

iSMA
iSMA iSMA-B-MAC36NL User manual

iSMA
iSMA B-AAC20 User manual

iSMA
iSMA iSMA-B-AAC20 User manual
Popular Controllers manuals by other brands

Advantech
Advantech WISE-2210 Startup manual

kincrome
kincrome K13350 instruction manual

Andover Controls
Andover Controls CMX 240 Series installation guide

Mitsubishi Electric
Mitsubishi Electric RJ51AW12AL user manual

Victron energy
Victron energy BlueSolar MPPT 150/70 manual

INFOSEC
INFOSEC Z1 Zenergy Cube EX user guide