manuals.online logo
Brands
  1. Home
  2. •
  3. Brands
  4. •
  5. Jaga
  6. •
  7. Heater
  8. •
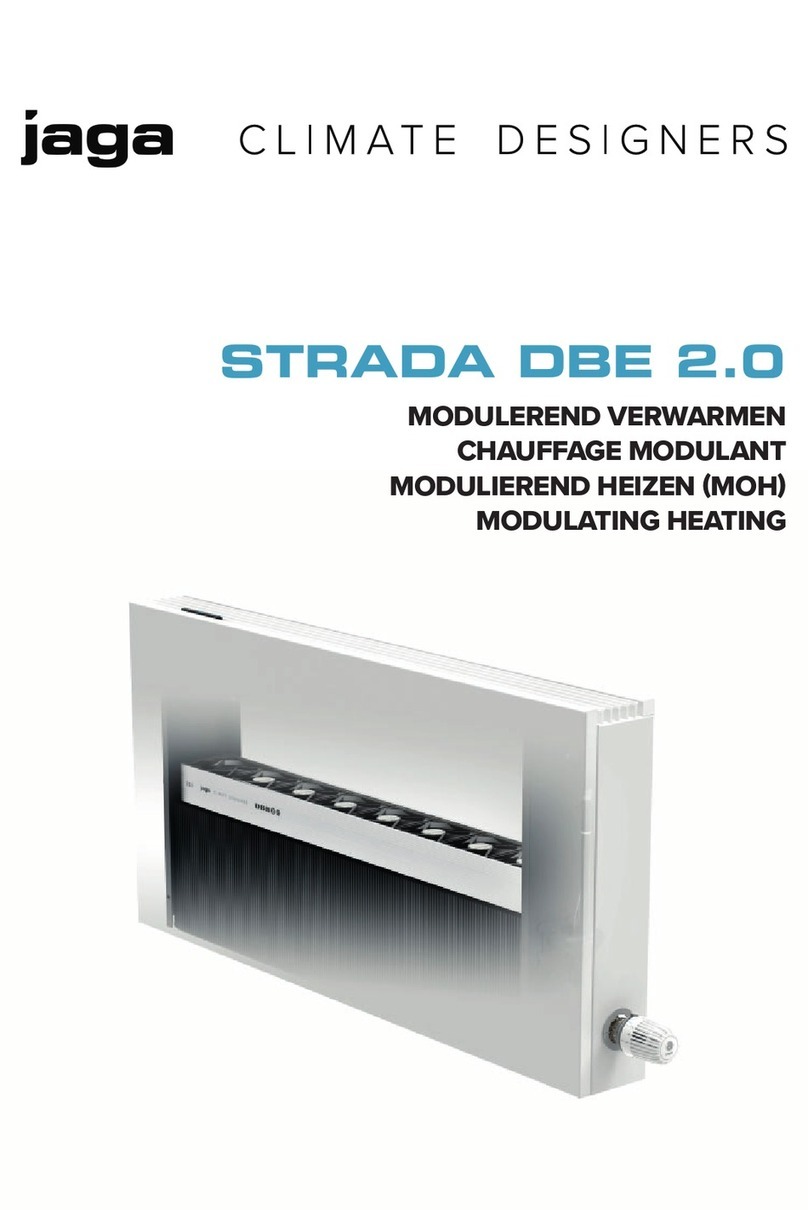
  9. Jaga eCAB User manual

Jaga eCAB User manual

Handleiding / Instructions / Hinweis / Instructions
JAGA eCAB
Lees deze handleiding aandachtig voor een correcte installatie van het product.
Lire attentivement la totalité de la notice avant l' installation.
Bevor Sie mit der Montage beginnen, lesen Sie daher dieses Handbuch sorgfältig durch.
Please read this manual carefully before installing.
www.theoxygenradiator.com
JAGA eCAB / eCAB CO2
www.theoxygenradiator.com
Beschrijving van de meest gebruikte aansluitingen / Bescription des connexions les plus courantes / Beschreibung der gängigsten Anschluß / description of the most common connections
1
2
3
5
4
3Data communicatie / Communication Data / Datenkommunikation / Data communication
• PC Data kabel
• RF Link RFL.001
40...10V UIT / 0...10V SORTIE / 0...10V AUS / 0...10V OUT
DBE ventilator / ventilateur / fan (PROF 0-7) Briza (PROF 8-9)
• aansluitkabel meegeleverd
• câble de connexion inclus
• Anschlusskabel im Lieferumfang enthalten
• connection cable included
• aansluiting in fabriek bij HYBRID
• assemblé à l’usine avec HYBRID
• werkseitig montiert bei HYBRID
• factory assembled with HYBRID
ECAB
BRIZA
0..10 VDC
COM
[
[
ECAB
BRIZA
0..10 VDC
COM
[
[
5Temperatuur instelling DBE/Briza - Réglage de la température DBE / Briza
Temperatureinstellung DBE / Briza - Temperature setting DBE / Briza
• Selecteer het gewenste kamertemperatuur profiel
• Sélectionnez le profil de la température ambiante souhaitée
• Wählen Sie die gewünschte Raumtemperatur Profil
• Select the desired room temperature profile
012345 012345
PROF °C %
DBE T06/10/10PRO
0
12
16 18 20 21 23 0
058 66 74 82 90
117 20 21 22 24 1
220 21 22 24 26 2
DBE T15 312 16 18 20 21 23 3062 74 86 98 110
420 21 22 24 26 4
DBE T15PRO
5
12
16 18 20 21 23 5
056 62 68 75 82617 20 21 22 24 6
720 21 22 24 26 7
BRIZA 812 16 18 20 21 23 8030 40 50 60 80
920 21 22 24 26 9
Fabrieksinstellingen / Réglages d’usine
Werkseinstellungen / Factory Settings
°C
12 16 18 20 21 23
- +
- +
eCAB software: www.jaga.be/software
1Aansluiting afsluitklep
Connection vanne d’arrêt
Anschluß Absperrventil
Shutoff valve connection
N
OPEN CLOSE
Bruin
Brun
Braun
Brown
Wit
Blanc
Weiß
White
OPGELET / ATTENTION / WARNUNG:
230VAC
2Ventilatie instelling
Paramètres de ventilateur
Ventilatie Einstellungen
Ventilation settings
• Vooringesteld in fabriek
Mag niet gewijzigd worden, anders functi-
oneert de module niet correct!
• Pré-réglage d’usine
Ne peux pas être modifié, sinon le module
ne fonctionne pas correctement
• Werkseinstellung
Darf nicht geändert werden, da sonst das
Modul nicht richtig funktioniert!
• Factory pre-set
May not be changed, otherwise the mod-
ule does not function properly
CLOSE
OPEN
JAGA eCAB / eCAB CO2
www.theoxygenradiator.com
6
Ingang verwarmen / koelen
Entrée chauffage / refroidissement
Eingang Heizen / Kühlen
Input heating / cooling
12 VDC
6
8
7RS 485
Niet combineerbaar met RF Link RFL.001.
Ne peut être combiné avec RF Link RFL.001.
Kann nicht mit RF-Link-RFL.001 kombiniert werden.
Cannot be combined with RF Link RVL.001.
Geel / jaune / gelb / yellow = A
Groen / vert / Grün / green = B
8
(a)
12VDC
Ventielaansluiting / Raccordement vanne
Ventilanschluss / Valve connection
12 VDC
+
-COM
0..10V OUT
8
(b)
0..10V Slave OUT
2de Refresh Unit (slave)
12 VDC
+
-
COM
0..10V OUT
Andere aansluitmogelijkheden
/
Autres options de connexion
Weitere Anschlussmöglichkeiten / Other connection options
Voorgemonteerde aansluitkabels / Câbles pré-assemblés
Vorkonfektionierten Kabeln / Pre-assembled cables
6 7
8a
8b
0 0
I 0
0 I
I I 󰋝
WAARSCHUWING / ACHTUNG / ATTENTION
De voorgemonteerde kabels mogen nooit, zelfs als ze niet gebruikt worden, van de module ver-
wijderd worden!
Les câbles pré-assemblés ne peuvent jamais, même s’ils ne sont pas utilisés - être retiré du
module!
Die vorkonfektionierte Kabel dürfen nie, auch wenn sie nicht verwendet werden - aus dem Modul
entfernt werden!
The pre-assembled cables may never, even if they are not used, be removed from the module!
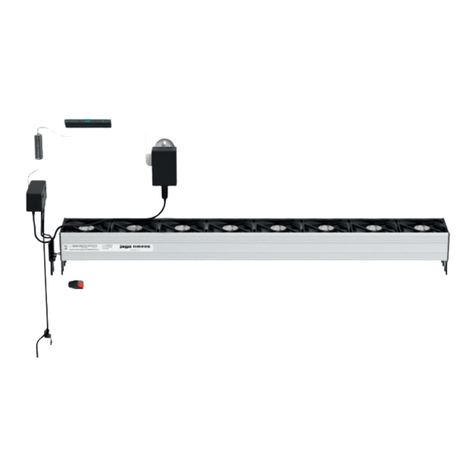
ABedieningspaneel
Panneau de contrôle
Control Panel
BWatertemperatuursensor
Capteur de température de l’eau
Wassertemperatur Sensor
Water temperature Sensor
CKamertemperatuursensor
Capteur température d’ambiance
Zimmertemperatur Sensor
Roomtemperature Sensor
max. 4 Refresh units
min. Ø 0.75 mm2
max. L = 6 meter / metre
JAGA eCAB / eCAB CO2
www.theoxygenradiator.com
A
C
B
→
→
A
Bedieningspaneel / Panneau de contrôle / Control Panel
• Plug de meegeleverde kabel in op het bedieningspaneel.
• Branchez le câble dans le panneau de contrôle.
• Stecken Sie das Kabel in das Control Panel.
• Plug the cable into the control panel.
• Verwijder de schutfolie van de kleefstrip.
• Retirez le pellicule de protection de la bande adhésive.
• Entfernen Sie die Schutzfolie vom Klebestreifen.
• Remove the protective film from the adhesive strip.
• Kleef het Control Panel met de kleefstrip tegen het voorpaneel. Zie illustratie.
• Installez le panneau de contrôle avec la bande adhésive contre la façade. Voir
illustration.
• Installieren Sie das Control Panel mit dem Klebestreifen gegen die Frontplatte.
Siehe Abbildung.
• Stick the Control Panel with the adhesive strip against the front panel. See illustra-
tion.
B
Watertemperatuursensor / Capteur de température de l’eau
Wassertemperatur Sensor / water temperature Sensor
• Plug de watertemperatuursensor op de Low-H
2
O warmtewisselaar.
• Branchez le capteur de température de l’eau sur l’échangeur de chaleur Low-H
2
O.
• Stecken Sie die Wassertemperatur Sensor auf der Low-H
2
O Wärmetauscher.
• Plug the water temperature on the Low-H
2
O heat exchanger.
C
Kamertemperatuursensor / Température d’ambiance / Zimmertemperatur / Roomtemperature
2 cm
→
Opgelet ! Attention ! Warnung !
• Verwijder de schutfolie van de kabelhouder (1), kleef de houder op de console en
bevestig de sensor-kabel tussen het klemmetje. Het uiteinde van de sensor moet ±
2 cm onder de radiator omkasting uitkomen.
• Eloignez le film protecteur du support de câble (1), collez le support sur la console
et fixez le câble du capteur avec la pince. L’extrémité du capteur doit dépasser de ±
2 cm sous le caisson du radiateur.
v.b./ ex:STRADA
→
→
Let op / Attention / Warnung
Bij de opstart gebeurt er een interne software-test. De LED’s zullen gedurende ±
5 sec. in een bepaalde volgorde oplichten.
Au moment de la mise en marche, un test interne du logiciel est effectué. Les
LED s’allumeront pendant ± 5 secondes dans un ordre déterminé.
Beim Start wird eine interne Prüfung der Software uebernommen. Die LED
leuchtet für 5 Sekunden ± in einer bestimmten Reihenfolge.
Upon startup, an internal test of the software is made. The LED will turn on for 5
seconds ± in a certain order.
Jaga Refresh UnitJaga eCAB
JAGA eCAB / eCAB CO2
www.theoxygenradiator.com
Modes / Modi: ventileren / ventilation / Lüften / ventilation
Standen / Réglage / Einstellung / Setting (0....5)
- +
0 1 2 3 4 5
Automatische CO2 mode / Automatic mode CO2 / Automatischer Modus
CO2
De LEDS indiceren het ventilatieniveau i.f.v. de gemeten luchtkwaliteit.
Les LED indiquent le niveau des ventilation e.f.d. la qualité d'air mesurée.
LEDS zeigen die Lüftungsstufe in Abhängigkeit von der gemessenen Luft-
qualität.
LEDS indicate the ventilation level in function of the measured air quality.
- +
Let op / Attention / Warnung
Toets knippert snel (groen): toestel staat in vorstbeveiliging.
La touche clignote rapidement (vert):
l’appareil est en protection antigel.
Taste blinkt schnell (grün): Apparat steht in Antifrostschutz.
The key flashes green quickly: the system is in frost-protection mode.
- +
Mode ventileren: Mode de ventilation:
Automatische CO2mode (de toets licht groen op)
De binnenlucht is in balans: de toets licht op.
De LED’s geven de luchtkwaliteit aan (van 1 tot 5).
Manueel aanpassen van ventilatieniveau:
Het ventilatieniveau kan gedurende een bepaalde tijd in
5 standen manueel ingesteld worden. (standaard instel-
ling 2 uur). Indicatie stand manueel: de LED van de
laatst gekozen stand knippert.
Bedieningspaneel: ventilatieniveau manueel aanpas-
sen:
• verhoog de luchttoevoer door op “+” te drukken.
• verlaag de luchttoevoer door op “-” te drukken.
Terug naar automatische Mode: LEDs knipperen 1”
Druk gedurende 10” op de toets tot alle LEDS snel knip-
peren.
Mode CO2automatique (la touche s’allume sur le vert)
L’air ambiant est en équilibre : la touche s’allume
Les LED indiquent la qualité de l’air (de 1 à 5).
Adapter manuellement le niveau de ventilation :
Le niveau de ventilation peut être augmenté et baissé ma-
nuellement pendant un certain temps. (Réglage standard
2 heures). Indication position manuelle : le LED affiche le
dernier réglage.
Panneau de commande : adapter manuellement le
niveau de ventilation:
• augmentez l’arrivée d’air en poussant sur “ + “
• baissez l’arrivée d’air en poussant sur “ - “
Retour au mode automatique: la touche clignote 1’’
Pression sur la touche pendant 10’’ jusqu’à ce que les
LED clignotent rapidement.
Lüftungs-Modus: Ventilation mode:
Automatischer CO2Modus (die Taste leuchtet grün auf)
Die Raumluft ist im Gleichgewicht: die Taste blinkt auf.
Die LED’s geben die Luftqualität an (von 1 bis 5).
Manuelle Anpassung der Lüftungsstufe:
Die Lüftung kann während einer bestimmten eingestellt
werden. (Standard Einstellung 2 Stunden).
In diesem Modus (manuell) die LED der zuletzt gewählte
Einstellung leicht auf.
Bedienungspaneel: Lüftungsstufe manuell anpassen:
• Erhöhen der Luftzufuhr durch drücken auf “+”
• Vermindern der Luftzufuhr durch drücken auf “-”
Zurück zum Modus Automatisch: die Taste blinkt 1“
Drücken Sie 10“ lang auf die Taste bis alle LED’s schnell
blinken.
CO2automatic mode (test light shows green)
Ambient air is in balance: the button lights up. The LEDs
are lit according to the air quality (1 to 5).
To manually adapt the rate of ventilation:
The air refresh rate can be set manually for a preset time
(standard setting 2 hours).
To indicate that the manual setting is active, the LED of the
previously selected setting flashes.
Control panel: to manually adjust the air refresh rate:
• increase the air volume by pressing “+”
• reduce the air volume by pressing “-”
To return to the automatic method: LEDs flash 1”.
Press down the key for 10 seconds until all LEDs flashing
fast.
Bediening ventileren / Utilisation ventilation / Bedienung Lüften / Control ventilation
JAGA eCAB / eCAB CO2
www.theoxygenradiator.com
Bediening ventileren - verwarmen - koelen / Utilisation ventilation - chauffer - rafraîchissement - / Bedienung Lüften - Heizung - Erfrischen / Control ventilation - heating - freshen
Modes / Modi:
verwarmen / chauffer / Heizung / heating
Modes / Modi:
verfrissen / rafraîchissement / Erfrischen /freshen
Modes / Modi:
ventileren / ventilation / ventilieren / ventilation
+-
- +
Selecteren van modes / Sélection des modes / Auswahl des Anzeigemodus / Selecting modes
3
3
42
4 2
51
5 1
v
e
r
w
a
r
m
e
n
c
h
a
u
f
f
e
r
H
e
i
z
u
n
g
h
e
a
t
i
n
g
v
e
r
f
r
i
s
s
e
n
r
a
f
r
a
î
c
h
i
r
E
r
f
r
i
s
c
h
e
n
f
r
e
s
h
e
n
2
45
1
3
l
u
c
h
t
v
e
r
v
e
r
s
i
n
g
/
r
a
f
r
a
î
c
h
i
s
s
e
m
e
n
t
d
e
l
'
a
i
r
/
L
u
f
t
e
r
f
r
i
s
c
h
u
n
g
a
i
r
r
e
f
r
e
s
h
m
e
n
t
1”
3”
3”
1”
verwarmen / chauffer / Heizung / heating
verfrissen / rafraîchissement / Erfrischen / freshen
ventileren / ventilation / ventilieren / ventilation
Let op / Attention / Warnung
vorstbeveiliging bij ventilatie / ventilation antigel / ventilieren Antifrostschutz / ventilation frost-protection mode
Toets knippert snel (groen): toestel staat in vorstbeveiliging
Taste blinkt schnell (grün): Apparat steht in Antifrostschutz
- +
La touche clignote rapidement (vert): l’appareil est en protection
antigel
The key flashes green quickly: the system is in frost-protection
mode.
verwarmen / chauffer / Heizung / heating
LED laatst gekozen stand knippert: het aanvoerwater is te koud
LED mit zuletzt gewählte Einstellung blinkt: das Vorlaufmedium ist
zu kalt
+-
LED clignotent dans le dernière mode: l’eau acheminée est trop
froide
LED with last selected setting flashes: water temperature is too low
verfrissen / rafraîchissement / Erfrischen / freshen
LED laatst gekozen stand knippert: het aanvoerwater is te warm
LED mit zuletzt gewählte Einstellung blinkt: das Vorlausmedium ist zu
warm
LED clignotent dans le dernière mode: l’eau acheminée est trop chaude
LED with last selected setting flashes: water temperature is too
high
Let op / Attention / Warnung
Bij de opstart gebeurt er een interne software-test. De LED’s
zullen gedurende ± 5 sec. in een bepaalde volgorde oplichten.
Au moment de la mise en marche, un test interne du logiciel
est effectué. Les LED s’allumeront pendant ± 5 secondes dans
un ordre déterminé.
Beim Starten wird ein interner Software-Test durchgeführt.
Die LED´s leuchten für ± 5 Sek. in einer bestimmten Sequenz
auf
Upon startup, an internal test of the software is made. The
LED will turn on for 5 seconds ± in a certain order.
www.theoxygenradiator.com
Automatische CO
2
mode / Automatic mode CO2 / Automatischer Modus CO2
De LEDS indiceren het ventilatieniveau i.f.v. de gemeten luchtkwaliteit.
Les LED indiquent le niveau des ventilation e.f.d. la qualité d’air mesurée.
- +
LEDS zeigen die Lüftungsstufe in Abhängigkeit von der gemessenen
Luftqualität.
LEDS indicate the ventilation level in function of the measured air
quality.
Manuele mode ventileren / Mode ventilation manuelle / Manuellen Modus Belüftung / Manual mode ventilation
Automatische CO2mode (de toets licht groen op)
• De binnenlucht is in balans: de toets licht op.
• De LED’s geven de luchtkwaliteit aan (van 1 tot 5).
Manueel aanpassen van ventilatieniveau:
• Het ventilatieniveau kan gedurende een bepaalde tijd in 5 standen manueel
ingesteld worden. (standaard instelling 2 uur).
• Indicatie stand manueel: de LED van de laatst gekozen stand knippert.
Bedieningspaneel: ventilatieniveau manueel aanpassen:
• verhoog de luchttoevoer door op “+” te drukken.
• verlaag de luchttoevoer door op “-” te drukken.
Terug naar automatische Mode: LED knippert 1”
Druk gedurende 10” op de toets tot alle groene LEDS snel knipperen.
-+
Mode CO2automatique (la touche s’allume sur le vert)
• L’air ambiant est en équilibre : la touche s’allume.
• Les LED indiquent la qualité de l’air (de 1 à 5).
Adapter manuellement le niveau de ventilation :
• Le niveau de ventilation peut être augmenté et baissé manuellement pendant
un certain temps. (Réglage standard 2 heures).
• Indication position manuelle : le LED affiche le dernier réglage.
Panneau de commande : adapter manuellement le niveau de ventilation:
• augmentez l’arrivée d’air en poussant sur “ + “
• baissez l’arrivée d’air en poussant sur “ - “
Retour au mode automatique: la touche clignote 1’’
Pression sur la touche pendant 10’’ jusqu’à ce que les LED vert clignotent
rapidement.
Automatischer CO2Modus (die Taste leuchtet grün auf)
• Die Raumluft ist im Gleichgewicht: die Taste blinkt auf.
• Die LED’s geben die Luftqualität an (von 1 bis 5).
Manuelle Anpassung der Lüftungsstufe:
• Die Lüftung kann während einer bestimmten eingestellt werden.
(Standard Einstellung 2 Stunden).
• In Modus (manuell) die LED der zuletzt gewählte Einstellung leicht auf.
Bedienungspaneel: Lüftungsstufe manuell anpassen:
• Erhöhen der Luftzufuhr durch drücken auf “+”
• Vermindern der Luftzufuhr durch drücken auf “-”
Zurück zum Modus Automatisch: die Taste blinkt 1“
Drücken Sie 10“ lang auf die Taste bis alle grüne LED’s schnell blinken.
CO2automatic mode (test light shows green)
• Ambient air is in balance: the button lights up.
• The LEDs are lit according to the air quality (1 to 5).
To manually adapt the rate of ventilation:
• The air refresh rate can be set manually for a preset time (standard setting
2 hours).
• To indicate that the manual setting is active, the LED of the previously se-
lected setting flashes.
Control panel: to manually adjust the air refresh rate:
• increase the air volume by pressing “+”
• reduce the air volume by pressing “-”
To return to the automatic method: LEDs flash 1”.
Press down the key for 10 seconds until all green LEDs flashing fast.
Om naar de modus verwarmen en verfrissen te gaan:
Houd de toets (±3 sec) ingedrukt tot de gewenste Mode bereikt is.
(De module gaat automatisch terug naar de laatst gekende instelling.) -+
± 3 sec
Pour aller au mode chauffer et rafraîchir :
Maintenez la touche enfoncée (+/- 3 sec) jusqu’à ce que le mode souhaité soit
atteint. (Le module retourne automatiquement au dernier réglage connu.)
Um zum Modus Heizen und erfrischen zu gehen:
Halten Sie die Taste (+- 3 Sek) eingedrückt bis der gewünschte Modus er-
reicht ist. (Das Modul geht automatisch zur letzten bekannten Einstellung
zurück)
To go to heating and air refresh mode: press the key (approx. 3 seconds) until
the desired status is reached. (Unit returns automatically to the right-hand
known setting.)
Modus verwarmen / chauffer / Heizung / heating - Modus verfrissen / rafraîchissement / Erfrischen / freshen
Aanpassen van Mode verwarmen / verfrissen:
Scroll met “- en +” tot de gewenste stand bereikt is (0...5).
Scroll met “- en +” tussen verfrissen en verwarmen
+-
0 1 2 3 4 5 Adaptation du Mode chauffer / rafraîchir:
Scrollez avec “- et + “jusqu’à ce que la position souhaitée soit atteinte (0...5).
Défiler avec “- +” entre rafraîchissement et de chauffage,
Anpassen von Modus heizen / erfrischen:
Blättern mit “- und +” bis der gewünschte Stand erreicht ist (0...5).
Blättern Sie mit “- +” zwischen refresh und Heizung,
Adaptation of the heating/air refresh mode
Scroll with “- and +” until the desired position is reached (0...5).
Scroll with “- +” between refresh and heating,
+-+-
0 1 2 3 4 5 0 1 2 3 4 5
Waarschuwing: Avertissement Warnhinweis Warning
Dit apparaat is niet bedoeld voor gebruik
door personen (waaronder kinderen) met
verminderde lichamelijke, zintuiglijke of
geestelijke vermogens, of die gebrek aan
ervaring of kennis hebben, tenzij iemand
die verantwoordelijk is voor hun veiligheid
toezicht houdt of uitgelegd heeft hoe het ap-
paraat gebruikt dient te worden.
Houd kinderen onder toezicht om ervoor te
zorgen dat ze niet met het apparaat spelen.
Cet appareil n’est pas destiné à être utilisé
par des personnes (notamment des enfants)
dont les capacités physiques, sensorielles
ou intellectuelles sont réduites, ou par des
personnes manquant d’expérience ou de
connaissances, à moins que celles-ci ne
soient sous surveillance ou qu’elles n’aient
reçu des instructions quant à l’utilisation de
l’appareil par une personne responsable de
leur sécurité.
Veillez à ce que les enfants ne puissent pas
jouer avec l’appareil.
Dieses Gerät ist für Benutzer (einschl. Kin-
der) mit eingeschränkten physischen, sen-
sorischen oder psychischen Fähigkeiten
bzw. ohne jegliche Erfahrung oder Vorwis-
sen nur dann geeignet, wenn eine angemes-
sene Aufsicht oder ausführliche Anleitung
zur Benutzung des Geräts durch eine ver-
antwortliche Person sichergestellt ist.
Achten Sie darauf, dass Kinder nicht mit
dem Gerät spielen
This appliance is not intended for use by
persons (including children) with reduced
physical, sensory or mental capabilities,
or lack of experience and knowledge, un-
less they have been given supervision or in-
struction concerning use of the appliance by
a person responsible for their safety.
Children should be supervised to ensure
that they do not play with the appliance.
Alleen wanneer de inhoud van deze handlei-
ding volledig wordt nageleefd kunnen fou-
ten worden voorkomen en is een storings-
vrij gebruik mogelijk.
Het recht op garantie vervalt bij:
• fouten of beschadigingen die voortkomen door
het niet naleven van de montage, reiniging - of
gebruiksinstructies van de fabrikant
• een onjuist, oneigenlijk en/of onverantwoorde-
lijk gebruik of behandeling van het apparaat
• foutieve of ondeskundige reparaties en defecten
ontstaan door externe factoren
• zelf aangebrachte veranderingen aan het appa-
raat
In geval van vragen of klachten, kunt u zich wenden
tot uw leverancier of installateur.
Het auteursrecht van deze handleiding is eigen-
dom van de firma Jaga n.v.
Les erreurs ne peuvent être évitées et une
utilisation exempte de pannes n'est possible
que si le contenu de ce manuel est totale-
ment respecté.
Le droit à la garantie est supprimé en cas de:
• fautes ou dommages générés par le non-respect
des instructions de montage, de nettoyage ou
d'utilisation du fabricant.
• utilisation incorrecte, inappropriée et/ou utilisa-
tion ou usage irresponsable de l'appareil.
• réparations fautives ou incompétentes et pannes
causées par des facteurs externes
• modifications personnelles apportées à l'appa-
reil
Pour toute question ou plainte, vous pouvez vous
adresser à votre fournisseur ou installateur.
Le droit d'auteur de ce manuel est la propriété de
la société Jaga n.v.
Nur wenn der Inhalt dieser Gebrauchsan-
weisung vollständig eingehalten wird, kön-
nen Fehler vermieden werden und ist eine
störungsfreie Verwendung möglich.
Der Garantieanspruch erlischt bei:
• Fehlern oder Beschädigungen, die durch Nicht-
einhaltung der Montage-, Reinigungs- oder Ge-
brauchsanweisungen des Herstellers entstehen.
• einer falschen, unsachgemäßen und/oder ver-
antwortungslosen Nutzung oder Behandlung
des Geräts
• falschen oder unsachgemäßen Reparaturen und
Mängeln, die aufgrund externer Faktoren ent-
standen sind
• selbst angebrachten Veränderungen am Gerät.
Bei Fragen oder Beschwerden können Sie sich an
Ihren Lieferanten oder Installateur wenden.
Das Urheberrecht dieser Gebrauchsanweisung be-
sitzt die Firma Jaga n.v.
Please follow these instructions carefully in
order to allow for an error-free installation
and a carefree use.
Entitlement to warranty is cancelled in case of:
• errors or damage resulting from not following
the assembly, cleaning or user instructions sup-
plied by the manufacturer,
• wrong, improper and/or irresponsible use or
treatment of the device,
• wrong or incompetent repairs and defects due to
external factors,
• self-applied changes to the device.
If you have any questions or complaints, please
contact your supplier or installer.
The copyright of these instructions is the property
of the company Jaga Inc.
27200.23200090 - 14 april 2015 9:33 AM - Jaga N.V.Gelieve deze instructies te volgen en te bewaren! S’il vous plaît garder cette instruction!
Bitte bewahren Sie diese Anleitung! Please follow and keep these instructions!
Other Jaga Heater manuals

Jaga BRIZA 12 User manual

Jaga

Jaga BRIZA 12 User manual

Jaga IGUANA APLANO APLW User manual

Jaga

Jaga IGUANA APLANO APLW User manual

Jaga STRADA User manual

Jaga

Jaga STRADA User manual

Jaga Aristocrat User manual

Jaga

Jaga Aristocrat User manual

Jaga IGUANA CIRCO Corner User manual

Jaga

Jaga IGUANA CIRCO Corner User manual

Jaga IGUANA ARCO ARCW User manual

Jaga

Jaga IGUANA ARCO ARCW User manual

Jaga VERTIGA HYBRID User manual

Jaga

Jaga VERTIGA HYBRID User manual

Jaga IGUANA VISIO User manual

Jaga

Jaga IGUANA VISIO User manual

Jaga TWINE BT User manual

Jaga

Jaga TWINE BT User manual

Jaga Micro Canal User manual

Jaga

Jaga Micro Canal User manual

Jaga heatwave User manual

Jaga

Jaga heatwave User manual

Jaga Eyecatchers Accolade Sani User manual

Jaga

Jaga Eyecatchers Accolade Sani User manual

Jaga VERTIGA HYBRID Series User manual

Jaga

Jaga VERTIGA HYBRID Series User manual

Jaga KNOCKONWOOD User manual

Jaga

Jaga KNOCKONWOOD User manual

Jaga Helios User manual

Jaga

Jaga Helios User manual

Jaga Eyecatchers Geo 150/50 User manual

Jaga

Jaga Eyecatchers Geo 150/50 User manual

Jaga CLIMA CANAL HYBRID User manual

Jaga

Jaga CLIMA CANAL HYBRID User manual

Jaga FREEDOM User manual

Jaga

Jaga FREEDOM User manual

Jaga heatwave medium User manual

Jaga

Jaga heatwave medium User manual

Jaga Eyecatchers Iguana_Aplano Plus User manual

Jaga

Jaga Eyecatchers Iguana_Aplano Plus User manual

Jaga Maxi WT 2020 User manual

Jaga

Jaga Maxi WT 2020 User manual

Jaga CLIMA CANAL HYBRID User manual

Jaga

Jaga CLIMA CANAL HYBRID User manual

Jaga Eyecatchers Aristocrat User manual

Jaga

Jaga Eyecatchers Aristocrat User manual

Jaga LINEA PLUS User manual

Jaga

Jaga LINEA PLUS User manual

Popular Heater manuals by other brands

emerio FH-106145 instruction manual

emerio

emerio FH-106145 instruction manual

Clarke DEVIL 4003 Operation & maintenance instructions

Clarke

Clarke DEVIL 4003 Operation & maintenance instructions

BGS technic 3390 Instructions for use and maintenance

BGS technic

BGS technic 3390 Instructions for use and maintenance

Sawo MX-30NB manual

Sawo

Sawo MX-30NB manual

Ducasa The Vitro-i+ Instruction for operation manual

Ducasa

Ducasa The Vitro-i+ Instruction for operation manual

Blaze 400 G Installation instructions, manual, maintenance,parts list

Blaze

Blaze 400 G Installation instructions, manual, maintenance,parts list

IVIGO EPK4550E05 user manual

IVIGO

IVIGO EPK4550E05 user manual

Infiniton HPT-300T user manual

Infiniton

Infiniton HPT-300T user manual

Tesla TH301WR user manual

Tesla

Tesla TH301WR user manual

Toyotomi LC-44 instruction manual

Toyotomi

Toyotomi LC-44 instruction manual

EUROM 307030 instruction manual

EUROM

EUROM 307030 instruction manual

ALKOTA Infrared RH150 Operation & service manual

ALKOTA

ALKOTA Infrared RH150 Operation & service manual

BGE BGO30B instruction manual

BGE

BGE BGO30B instruction manual

T.B.D. R 25X-TC datasheet

T.B.D.

T.B.D. R 25X-TC datasheet

Carbest IVALO user manual

Carbest

Carbest IVALO user manual

DeLonghi TCH8093ER Instructions for use

DeLonghi

DeLonghi TCH8093ER Instructions for use

VisionAIR 1VAHW09 owner's manual

VisionAIR

VisionAIR 1VAHW09 owner's manual

HERKULES DIESELHEIZER 10 manual

HERKULES

HERKULES DIESELHEIZER 10 manual

manuals.online logo
manuals.online logoBrands
  • About & Mission
  • Contact us
  • Privacy Policy
  • Terms and Conditions

Copyright 2025 Manuals.Online. All Rights Reserved.