manuals.online logo
Brands
  1. Home
  2. •
  3. Brands
  4. •
  5. Jamara
  6. •
  7. Transmitter
  8. •
  9. Jamara SCX User manual

Jamara SCX User manual

FR - Notice d’utilisation
GB - Instruction
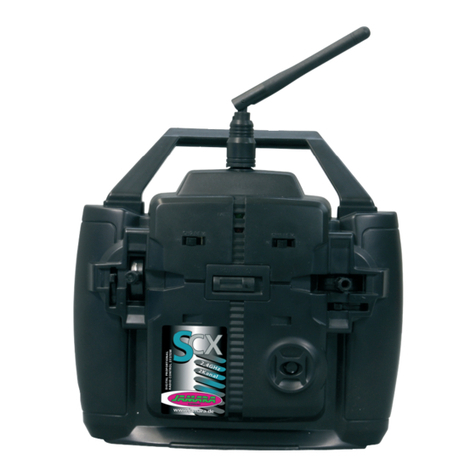
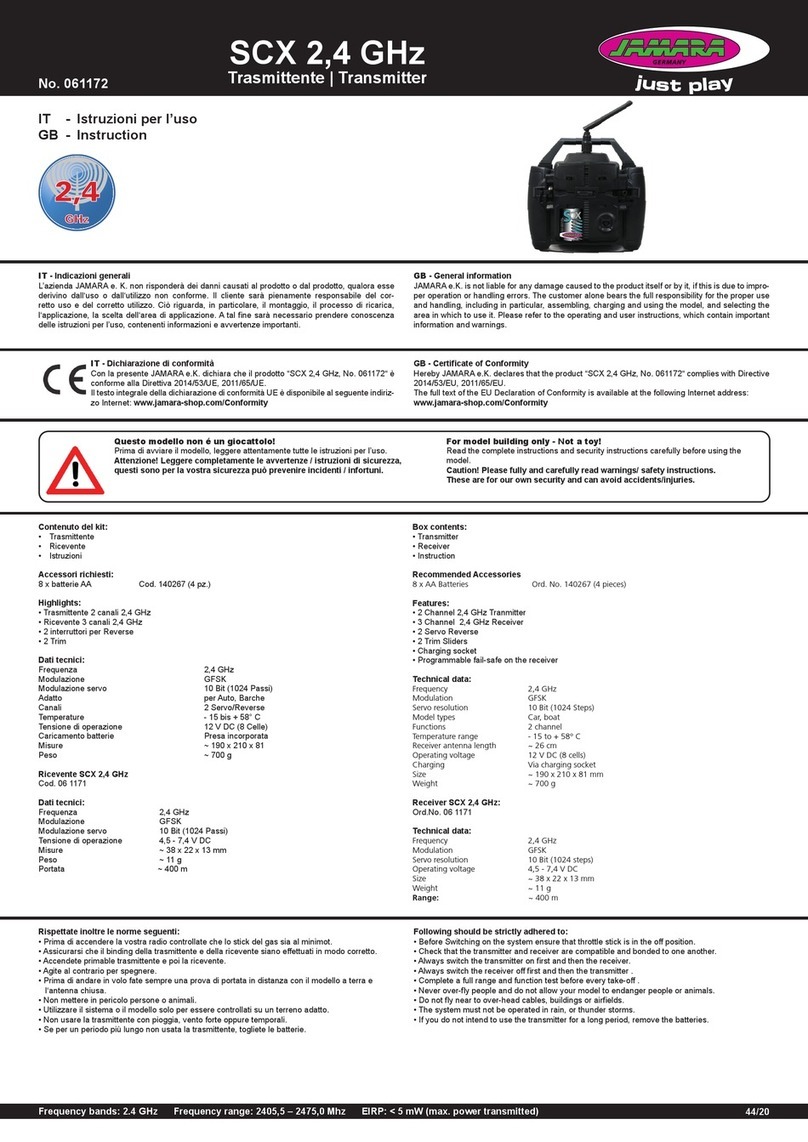
SCX 2,4 GHz
Emetteur | Transmitter
No. 061172
44/20
FR - Remarques générales
La société Jamara e. K. n’est pas responsable de dommages, que ce soit au niveau du modè-
le ou causé par celui-ci, résultant d’une utilisation non appropriée. Seul le client est responsable
concernant la mise en oeuvre et l’utilisation conforme du matériel; cela va de l’assemblage, en
passant par la charge des accus et allant jusqu’au choix du lieu d’utilisation. Pour cela, veillez à lire
attentivement la notice d’utilisation, elle contient d’importantes informations ainsi que les consignes
de sécurité.
GB - General information
JAMARA e.K. is not liable for any damage caused to the product itself or by it, if this is due to impro-
per operation or handling errors. The customer alone bears the full responsibility for the proper use
and handling, including in particular, assembling, charging and using the model, and selecting the
area in which to use it. Please refer to the operating and user instructions, which contain important
information and warnings.
FR - Déclaration de conformité
Par la présente, la société Jamara e.K. déclare que le modèle réduit‚ “SCX 2,4 GHz,
No. 061172“ est conforme en tous points avec les exigences fondamentales et les
autres dispositions concernées des directives 2014/53/EU et 2011/65/EU.
Vos pourrez également trouver des informations sur notre site Internet:
www.jamara-shop.com/Konformitaet
GB - Certicate of Conformity
Hereby JAMARA e.K. declares that the product “SCX 2,4 GHz, No. 061172“ complies with Directive
2014/53/EU, 2011/65/EU.
The full text of the EU Declaration of Conformity is available at the following Internet address:
www.jamara-shop.com/Conformity
Contenu du kit
• Radiocommande
• Récepteur
• Notice
Accessoires recommandés:
8 x AA Piles Réf. 140267 (UV. 4pcs)
Ameublement
• Radiocommande 2 canaux 2,4 GHz
• Récepteur 3 canaux 2,4 GHz
• 2 Commutateurs
• 2 Curseur de trim
• Prise de chargement
• Fail-safe programmable sur le récepteur
Données techniques:
Bande de fréquence 2,4 GHz
Type de modulation GFSK
Résolution Servo 10 Bit (1024 pas)
Type de modèle Auto, bateau, avions
Fonctions de commande 2 voies
Gamme de température - 15 bis + 58° C
Longueur d’antenne de réception env. 26 cm
Tension d’alimentation 12 V DC (8 éléments)
Charge de l’accu au travers la prise de charge
Dimensions ~ 190 x 210 x 81 mm
Poids ~ 700 g
Récepteur SCX 2,4 GHz
Réf. 061171
Données techniques:
Bande de fréquence 2,4 GHz
Type de modulation GFSK
Résolution Servo 10 Bit (1024 pas)
Tension d’alimentation 4,5 - 7,4 V DC
Dimensions ~ 38 x 22 x 13 mm
Poids ~ 11 g
Porté: ~ 400 m
Box contents:
• Transmitter
• Receiver
• Instruction
Recommended Accessories
8 x AA Batteries Ord. No. 140267 (4 pieces)
Features:
• 2 Channel 2,4 GHz Tranmitter
• 3 Channel 2,4 GHz Receiver
• 2 Servo Reverse
• 2 Trim Sliders
• Charging socket
• Programmable fail-safe on the receiver
Technical data:
Frequency 2,4 GHz
Modulation GFSK
Servo resolution 10 Bit (1024 Steps)
Model types Car, boat
Functions 2 channel
Temperature range - 15 to + 58° C
Receiver antenna length ~ 26 cm
Operating voltage 12 V DC (8 cells)
Charging Via charging socket
Size ~ 190 x 210 x 81 mm
Weight ~ 700 g
Receiver SCX 2,4 GHz:
Ord.No. 061171
Technical data:
Frequency 2,4 GHz
Modulation GFSK
Servo resolution 10 Bit (1024 steps)
Operating voltage 4,5 - 7,4 V DC
Size 38 x 22 x 13 mm
Weight ~ 11 g
Range: ~ 400 m
Ce modèle réduit n’est pas un jouet!
Avant de mettre en marche toute l‘unité il faut lire attentivement le mode d‘emploi.
Attention! La mise en garde et les consignes de sécurités sont à lire
entièrement pour votre sécurité et éviter tout accidents et blessures.
For model building only - Not a toy!
Read the complete instructions and security instructions carefully before using the
model.
Caution! Please fully and carefully read warnings/ safety instructions.
These are for our own security and can avoid accidents/injuries.
Veillez respecter les consignes suivantes:
• Avant de mettre en marche votre récepteur, assurez-vous que le manche des gaz soit bien en
position Off.
• Assurez-vous que l’émetteur et le récepteur soient compatibles et se trouvent mutuellement.
• Allumez toujours l‘émetteur en premier, puis le récepteur.
• Eteignez toujours le récepteur en premier puis votre radiocommande.
• Effectuez toujours un test de porté et de bon fonctionnement avant le décollage.
• Ne survolez jamais des personnes, ne mettez jamais en danger les gens ou les animaux.
• N‘utilisez le système ou le modèle à contrôler que sur un terrain adapté.
• N’utilisez jamais votre émetteur lorsqu’il y a une tempête, qu’il pleuve ou par orage.
• Sortez les piles de votre émetteur lorsque vous n’utilisez plus votre équipement.
Following should be strictly adhered to:
• Before Switching on the system ensure that throttle stick is in the off position.
• Check that the transmitter and receiver are compatible and bonded to one another.
• Always switch the transmitter on rst and then the receiver.
• Always switch the receiver off rst and then the transmitter .
• Complete a full range and function test before every take-off .
• Never over-y people and do not allow your model to endanger people or animals.
• Do not y near to over-head cables, buildings or airelds.
• The system must not be operated in rain, or thunder storms.
• If you do not intend to use the transmitter for a long period, remove the batteries.
Frequency bands: 2.4 GHz Frequency range: 2405,5 – 2475,0 Mhz EIRP: < 5 mW (max. power transmitted)

2
FR - Emetteur
1 Antenne
2 Poignée
3 LED d’alimentation
4 Inversion de sens de rotation du
servo CH1
5 Manche de commande
6 Trim de manche de commande
7 Touche de synchronisation
8 Interrupteur On/Off
9 Manche des gaz
10 Trim du manche des gaz
11 Inversion de sens de rotation
du servo CH2
12 LED d’état
Compartiment de piles
Au dos de l’émetteur se trouve le compartiment
des piles. Pour l’ouverture du compartiment il
faut appuyer sur le couvercle aux endroits no-
tés ‘push’ et de le faire glisser. Lors de la mise
en place des piles veillez respecter la bonne
polarité.
Récepteur
Le récepteur permet le branchement direct de
deux servos.
Affectation des sorties du récepteur:
Canal 1 direction
Canal 2 Gaz
Bind/Canal 3 câble de synchronisation
Receiver
2 Servos can be connected directly to the re-
ceiver.
Receiver Channel Allocation:
Channel 1: Steering
Channel 2: Throttle
Binding Channel 3: Binding Cable
GB - Transmitter
1 Antenna
2 Handle
3 Power LED
4 Servo Reverse CH 1
5 Left/Right Stick
6 Left/Right Trim
7 Binding Button
8 ON/OFF Switch
9 Throttle Stick
10 Throttle Trim
11 Servo Reverse CH 2
12 Indicator LED
Battery Hatch
The battery hatch is located on the rear side
of the transmitter and to open it simply push
down on the position marked ‚Push‘ and slide
the cover away. When tting the batteries al-
ways be very careful not to short circuit them
by observing the correct polarity.
Synchronisation du récepteur
Comme pour chaque système 2,4GHz il faut également synchroniser votre émetteur SCX 2,4GHz
avec le récepteur. Ce procédez est vital, sans effectuer le processus décrit ci-dessous votre ensem-
ble ne fonctionnera pas. De ce fait procédez comme suit :
1. branchez le câble de synchronisation sur la sortie 3 de votre récepteur. Ensuite alimentez votre
récepteur. La LED d’état du récepteur clignote.
2. maintenez la touche de synchronisation de votre émetteur appuyée et allumez celui-ci. L’émetteur
passe en mode synchronisation ou Binding
3. Dès que le processus de synchronisation est terminé la LED d’état du récepteur brillent.
4. Eteignez l’émetteur et le récepteur.
5. Enlevez le câble de synchronisation.
Remarque importante
La radiocommande ne fonctionne pas avec la touche de synchronisation appuyée. De plus, assurez
vous que l’ensemble ne reste pas trop longtemps en mode synchronisation.
Binding
As with all 2,4 GHz systems the transmitter and the receiver must be bound together and this process is
vital. Before the system is bound together it will not function and therefore cannot be used and so the
following steps must be followed before you attempt to operate the system:
1. Fit the binding plug to socket 3 on the receiver and connect the power supply.
The receiver LED will begin to blink:
2. Press and hold down the binding button on the transmitter and switch the power on.
This will put the transmitter into binding mode.
3. Once the binding process has finished the LED will shine.
4. Switch the transmitter and receiver off.
5. Remove the binding plug.
Important Information
The system will not function whilst the binding button is pressed. Also, the system should not be left in
binding mode for long periods of time.
Réglages
Avant d’utiliser votre modèle, vériez soigneusement si les servos bougent dans le bon sens. Si cela
ne devait pas être le cas, inversez le sens de rotation du servo concerné en manipulant le commuta-
teur sur la partie avant de l’émetteur. Ensuite réglez pour toutes les fonctions la position de neutre en
ajustant mécaniquement les tringles de commandes. Les leviers de commandes des différents ser-
vos doivent êtres en position centrale ainsi que les trims de l’émetteur. Il ne faut effectuer que de
petites corrections avec les trims. Pour l’utilisation d’un moteur thermique il est conseillé d’ajuster
parfaitement la tringle de commande du carburateur. Les servos ne doivent pas entrer en butée
mécanique en n de course.
Settings
Before you operate your model carefully check that the servo operate in the correct direction.
If they do not rotate in the correct direction use the servo reverse switches located on the front of
the transmitter to change the direction. The servo neutral positions should then be set by moving the
servo arms until they are at exactly 900 with the trim central. The trim should only be used to make
ne adjustments when operating the model. If you are using this system with an Internal Combus-
tion engine make sure that the linkage cannot bind in either the full throttle or tick-over positions.
Séquence de mise en marche
1. Branchez tous les composants du système de réception
2. Mettez en marche l’émetteur
3. Branchez l’accu de réception/BEC avec le récepteur
4. Vériez que la LED de l’émetteur et du récepteur s’allument en permanence
5. Le système est actif et peut être utilisé
Switching On
1. Connect all of the components together.
2. Switch ion the transmitter.
3. Connect the power supply to the receiver and switch on if required.
4. Check that all of the LEDs are correctly illuminated.
5. The system is now switched on and ready to operate.
Séquence d’arrêt
1. Débranchez l’accu de réception
2. Eteignez l’émetteur
Switching Off
1. Switch off and unplug the receiver power supply.
2. Switch off the transmitter.
12
11
10
9
8
1
2
3
7
4
5
6
33
Direction
Avec cette fonction vous déterminez la direction que prendra votre modèle. Lorsque vous bougez
votre manche de commande vers la droite ou vers la gauche, les roues de l’axe avant de votre
voiture ou le gouvernail de votre bateau devront s’incliner dans la même direction. Si vous bougez
le manche à droite la direction ou le gouvernail devra également s’incliner à droite.
Steering
This function is used to steer the model in the correct direction. Moving the steering stick to the left
or right will make the wheels, or hull if operating a boat, move in that direction. Moving the stick to
the left should make the model steer to the left.
FR - Pilotage du modèles GB - Operating The Model
Gaz
Avec cette fonction vous commandez la vitesse des mouvements en avant et en arrière. Si vous
poussez le manche des gaz en avant votre modèle avancera. Si vous bougez le manche des gaz en
arrière vous allez freiner votre modèle dans un premier temps puis celui-ci va reculer.
Throttle
This function is used to make the model move forward or in revers and it also is used to control the
model‘s speed. Pushing the stick forwards makes the model accelerate forwards and pulling it to
the rear will make the model brake rst and then to accelerate in reverse.
Consignes de recyclage
Les appareils électriques ne doivent strictement pas être jetés dans les ordures mé-
nagères, mais doivent être jetés séparément. Vous êtes tenues – dans la possibilité
– de déposer vos piles et appareils électriques dans les centres communaux de coll-
ectes. Si des informations personnelles sont présents sur les appareils électriques,
celles-ci doivent être retirés par vous-même avant tout élimination du produit.
Disposal restrictions
Electrical appliances must not be disposed of in domestic waste and must be disposed of separately.
You are obliged to take out the batteries, if possible, and to dispose of the electrical equipment at
the communal collection points. Should personal data be stored on the electrical appliance you must
remove them by yourself.
Reitter Modellbau Versand
Patricia Reitter
Degerfeldstrasse 11
72461 Albstadt
Tel 07432 9802700
Fax 07432 2009594
Mail [email protected]
Web www.modellbauversand.de
PenTec s.r.o.
distributor Jamara for Czech Republic and Slovakia
Veleslavínská 30/19
CZ -162 00 Praha 6
Tel +420 235 364 664
Mobil. +420 739 075 380
Mail servis@topdrony.cz
Web www.topdrony.cz
DE
Bay-Tec
Martin Schaaf
Am Bahndamm 6
86650 Wemding
Tel 07151 5002192
Fax 07151 5002193
Mail [email protected]
Web www.bay-tec.de DE
JAMARA e.K.
Manuel Natterer
Am Lauerbühl 5
DE-88317 Aichstetten
Tel +49 (0) 75 65/94 12-0
Fax +49 (0) 75 65/94 12-23
Mail [email protected]
Web www.jamara.com EU CZ
FR - Revendeur de service GB - Service centre
Modellbau Zentral
Peter Hofer
Bresteneggstrasse 2
CH-6460 Altdorf
Tel +41 79 429 62 25
Mobil. +41 41 870 02 13
Mail [email protected]
Web www.modellbau-zentral.ch CH
JAMARA e.K.
Inh. Manuel Natterer
Am Lauerbühl 5 - DE-88317 Aichstetten
Tel. +49 (0) 75 65/94 12-0 - Fax +49 (0) 75 65/94 12-23
[email protected] ●www.jamara.com
Service - Tel. +49 (0) 75 65/94 12-777
kundenservice@ jamara.com
Irrtum und technische Änderungen vorbehalten. Copyright JAMARA e.K. 2021
Kopie und Nachdruck, auch auszugsweise, nur mit Genehmigung von JAMARA e. K.
All rights reserved. Copyright JAMARA e.K. 2021
Copying or reproduction in whole or part, only with the expressed permission of JAMARA e.K.
Fordern Sie noch Heute den aktuellen Hauptkatalog mit
unserem gesamten Warensortiment an.
Name _______________________________
Vorname _______________________________
Straße _______________________________
Wohnort _______________________________
Telefon _______________________________
E-mail _______________________________
Bitte senden Sie den Katalog für mich an folgenden
Fachhändler:
Ihr Fachhändler
_______________________________________________
_______________________________________________
_______________________________________________
_______________________________________________
Der Katalog wird mit der nächsten Bestellung des Händ-
lers auf Ihren Namen mitgeliefert.
Order the current catalogue with our complete
assortment of modelling goods today.
Name _______________________________
First name _______________________________
Street _______________________________
City _______________________________
Phone _______________________________
E-mail _______________________________
Please send the catalogue to the following specialist
dealer:
Your dealer
_______________________________________________
_______________________________________________
_______________________________________________
_______________________________________________
We will include a catalogue for your attention with the
next order placed by your dealer.
Gutschein Coupon

This manual suits for next models

1

Other Jamara Transmitter manuals

Jamara CCX Pro 2,4 GHz User manual

Jamara

Jamara CCX Pro 2,4 GHz User manual

Jamara CCX Lipo User manual

Jamara

Jamara CCX Lipo User manual

Jamara CCX Lipo User manual

Jamara

Jamara CCX Lipo User manual

Jamara SCX 2,4 GHz User manual

Jamara

Jamara SCX 2,4 GHz User manual

Jamara Compa XR3 User manual

Jamara

Jamara Compa XR3 User manual

Jamara SCX User manual

Jamara

Jamara SCX User manual

Jamara Compa X3 Evo User manual

Jamara

Jamara Compa X3 Evo User manual

Jamara CCX Lipo 2,4 GHz 3 CH User manual

Jamara

Jamara CCX Lipo 2,4 GHz 3 CH User manual

Jamara FCX6 Pro Tel User manual

Jamara

Jamara FCX6 Pro Tel User manual

Jamara FCX6 Pro Tel User manual

Jamara

Jamara FCX6 Pro Tel User manual

Jamara CCX Lipo User manual

Jamara

Jamara CCX Lipo User manual

Jamara SCX User manual

Jamara

Jamara SCX User manual

Jamara CCX Pro 2,4 GHz User manual

Jamara

Jamara CCX Pro 2,4 GHz User manual

Jamara Compa X3 Evo User manual

Jamara

Jamara Compa X3 Evo User manual

Jamara Compa X3 Evo User manual

Jamara

Jamara Compa X3 Evo User manual

Jamara SCX 2,4 GHz User manual

Jamara

Jamara SCX 2,4 GHz User manual

Jamara FCX6 Pro Tel User manual

Jamara

Jamara FCX6 Pro Tel User manual

Jamara CX 2,4 GHz User manual

Jamara

Jamara CX 2,4 GHz User manual

Jamara CCX Pro 2,4 GHz User manual

Jamara

Jamara CCX Pro 2,4 GHz User manual

Jamara CCX Lipo 2,4 GHz 3 CH User manual

Jamara

Jamara CCX Lipo 2,4 GHz 3 CH User manual

Jamara FCX6 Pro Tel User manual

Jamara

Jamara FCX6 Pro Tel User manual

Jamara FCX6 Pro Tel User manual

Jamara

Jamara FCX6 Pro Tel User manual

Jamara CCX Pro User manual

Jamara

Jamara CCX Pro User manual

Jamara Compa User manual

Jamara

Jamara Compa User manual

Popular Transmitter manuals by other brands

Lutron Electronics RAdioRA RA-VCTX installation instructions

Lutron Electronics

Lutron Electronics RAdioRA RA-VCTX installation instructions

IROX JKR-1 user manual

IROX

IROX JKR-1 user manual

Dolphin STM 431J user manual

Dolphin

Dolphin STM 431J user manual

Philips SJM2306/10 user manual

Philips

Philips SJM2306/10 user manual

Iniven IT-30DSP instruction manual

Iniven

Iniven IT-30DSP instruction manual

Speaka Professional 2751052 operating instructions

Speaka Professional

Speaka Professional 2751052 operating instructions

Sekonic RT-20PW operating manual

Sekonic

Sekonic RT-20PW operating manual

KROHNE OPTISOUND 3010 C Handbook

KROHNE

KROHNE OPTISOUND 3010 C Handbook

TQ-Systems MODUL NO.1 Operating	 instruction

TQ-Systems

TQ-Systems MODUL NO.1 Operating instruction

Elinchrom EL-Skyport 19351 Instructions for use

Elinchrom

Elinchrom EL-Skyport 19351 Instructions for use

Audio Resource ARG-TX72BP Manual and user guide

Audio Resource

Audio Resource ARG-TX72BP Manual and user guide

Dometic Waeco PerfectView VT100DIG Installation and operating manual

Dometic

Dometic Waeco PerfectView VT100DIG Installation and operating manual

Rain Bird TBOS-II manual

Rain Bird

Rain Bird TBOS-II manual

DSE V340, T340, FM2WLED1B, FM2WLED4B user guide

DSE

DSE V340, T340, FM2WLED1B, FM2WLED4B user guide

KROHNE OPTIWAVE 400 Series Supplementary instructions

KROHNE

KROHNE OPTIWAVE 400 Series Supplementary instructions

PCB Piezotronics IMI Sensors 682C33 Installation and operating manual

PCB Piezotronics

PCB Piezotronics IMI Sensors 682C33 Installation and operating manual

Rosemount 702 quick start guide

Rosemount

Rosemount 702 quick start guide

Siro SIS1605 manual

Siro

Siro SIS1605 manual

manuals.online logo
manuals.online logoBrands
  • About & Mission
  • Contact us
  • Privacy Policy
  • Terms and Conditions

Copyright 2025 Manuals.Online. All Rights Reserved.