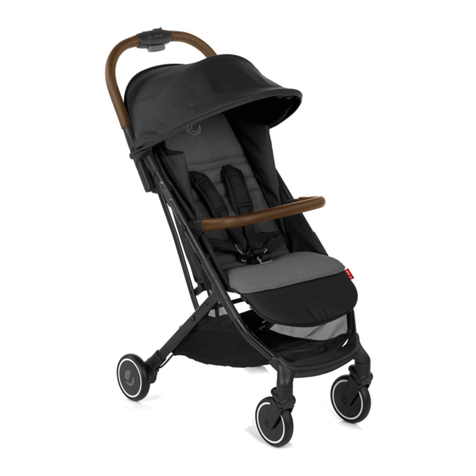
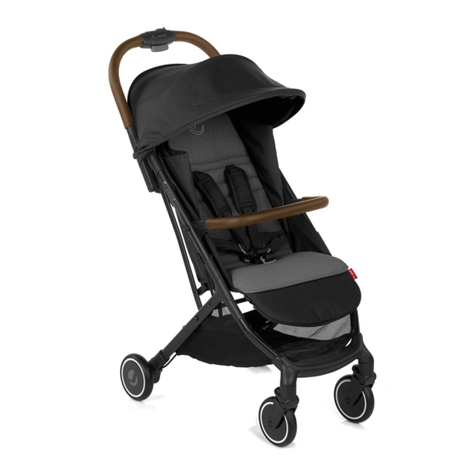
JANE Be Cool slide User manual

Silla de paseo apta desde recién nacido
Pushchair suitable for use from birth
IM 1628,10 SLIDE INST ok 2.indd 1 19/4/21 17:19

IM 1628,10 SLIDE INST ok 2.indd 2 19/4/21 17:19

LANGUAGES
03
ESPAÑOL 13
ENGLISH 17
FRANÇAIS 21
PORTUGUÊS 25
ITALIANO 29
IM 1628,10 SLIDE INST ok 2.indd 3 19/4/21 17:19

04
PARTLIST
1
3
6
7
8
9
4
2
5
IM 1628,10 SLIDE INST ok 2.indd 4 19/4/21 17:19

PARTLIST
05
1. Capote
2. Bouton du guidon
3. Bouton de sécurité
4. Manette de pliage
5. Connecteur
6. Bouton du hamac
7. Rainure
8. Bouton du repose-pieds
9. Bouton de blocage des roues
1. Canopy
2. Handlebar Button
3. Safety Button
4. Folding Trigger
5. Connector
6. Hammock Button
7. Slot
8. Foot Rest Button
9. Swivel Lock Button
1. Capottina
2. Pulsante del manubrio
3. Pulsante di sicurezza
4. Leva di chiusura
5. Connettore
6. Pulsante della seduta
7. Alloggiamento
8. Pulsante del poggiapiedi
9. Pulsante di blocco delle ruote
1. Capota
2. Botão do guiador
3. Botão de segurança
4. Alavanca de dobragem
5. Conector
6. Botão da cadeira
7. Ranhura
8. Botão do apoio de pés
9. Botão de bloqueio das rodas
1. Capota
2. Botón del manillar
3. Botón de seguridad
4. Palanca de plegado
5. Conector
6. Botón de la silla
7. Ranura
8. Botón del reposapiés
9. Botón de bloqueo de las ruedas
ESPAÑOL FRANÇAISENGLISH
PORTUGUÊS ITALIANO
IM 1628,10 SLIDE INST ok 2.indd 5 19/4/21 17:19
INSTRUCTIONS
06
TOP PLUS CRIB ONEZERO
IM 1628,10 SLIDE INST ok 2.indd 6 19/4/21 17:19

INSTRUCTIONS
07
REVERSE
IM 1628,10 SLIDE INST ok 2.indd 7 19/4/21 17:19

INSTRUCTIONS
08
1a 1b 1c
IM 1628,10 SLIDE INST ok 2.indd 8 19/4/21 17:19

INSTRUCTIONS
09
3a 3b
A
2a
1
2
2b 2c
IM 1628,10 SLIDE INST ok 2.indd 9 19/4/21 17:19

INSTRUCTIONS
10
4a 4b
5.1 5.2 6
IM 1628,10 SLIDE INST ok 2.indd 10 19/4/21 17:19

INSTRUCTIONS
11
8b
7
8a
1
2
3
IM 1628,10 SLIDE INST ok 2.indd 11 19/4/21 17:19

INSTRUCTIONS
12
8
1
9
2
PRO FIX
IM 1628,10 SLIDE INST ok 2.indd 12 19/4/21 17:19

ES
13
ADVERTENCIAS 14
INSTRUCCIONES DE MONTAJE 15
MANTENIMIENTO 16
INFORMACIÓN SOBRE LA GARANTÍA 16
IM 1628,10 SLIDE INST ok 2.indd 13 19/4/21 17:19

ES
14
IMPORTANTE - Leer detenidamente y
mantenerlas para futuras consultas.
ADVERTENCIA: Debe accionarse el dispositivo de
frenado durante la carga y descarga de los niños.
ADVERTENCIA: Cualquier carga jada al manillar y/o
a la parte trasera del respaldo y/o a los laterales del
vehículo afectará a la estabilidad de éste.
ADVERTENCIA: Solo deben utilizarse los repuestos
suministrados o recomendados por el distribuidor o
BE COOL.
ADVERTENCIA: No dejar nunca al niño desatendido.
ADVERTENCIA: Asegúrese que todos los dispositivos
de bloqueo están engranados antes del uso.
ADVERTENCIA: Para evitar lesiones, asegúrese de que
el niño se mantiene alejado durante el desplegado y el
plegado de este producto.
ADVERTENCIA: No permita que el niño juegue con
este producto.
ADVERTENCIA: Use un arnés tan pronto como el niño
se pueda sentar por sí mismo.
ADVERTENCIA: Usar siempre el sistema de retención.
CUMPLE CON LAS NORMAS DE SEGURIDAD
EUROPEA EN 1888-1:2018
ADVERTENCIA: Este producto no es adecuado para
correr o patinar.
No utilice nunca accesorios que no hayan sido aproba-
dos por BE COOL.
Este cochecito sólo puede ser usado por un niño.
La masa máxima permitida de la cestilla portaobjetos
nunca puede superar lo indicado en la cestilla (4 kg).
Tenga cuidado al bajar escaleras mecánicas, ya que
podría desbloquearse el seguro trasero.
ADVERTENCIA: No utilice nunca la tira entrepiernas
sin el cinturón abdominal.
ADVERTENCIA: Mover la posición del arnés según la
edad del niño, utilizar la posición más baja del respaldo
y ajustar ambos para los niños menores de 6 meses.
Este vehiculo es para niños desde 0 meses y hasta
15kg.
ADVERTENCIA Comprobar que los dispositivos de
sujeción del capazo, del asiento o de la silla de coche
están correctamente activados antes de su uso.
Este vehículo no reemplaza a una cuna o una cama.
Si el niño necesita dormir, entonces se debería colocar
en un capazo, cuna o cama adecuados.
IM 1628,10 SLIDE INST ok 2.indd 14 19/4/21 17:19

ES
15
INSTRUCCIONES DE MONTAJE Y UTILIZACIÓN
1. APERTURA DEL CHASIS
A: Abra el cierre en la dirección de la echa.
B: Sujete el manillar con una mano y la barra delantera con la
otra; a continuación, abra la estructura siguiendo la dirección
que indican las echas hasta que se escuche un “clic”.
2. MONTAJE DE LAS RUEDAS DELANTERAS
A: Conecte la rueda delantera a los dispositivos de conexión en
la dirección de la echa.
B: Para bloquear la rueda: eleve el botón de bloqueo de la
rueda.
C: Para soltar la rueda delantera: pulse el botón de los disposi
tivos de conexión.
3. MONTAJE DE LAS RUEDAS TRASERAS
A: Conecte las ruedas traseras en la dirección que indica la
echa.
B: Para soltar las ruedas traseras: tire del botón de metal y
retire las ruedas traseras como indica la echa.
4. APLICACIÓN DEL FRENO
A: Para poner los frenos: baje el pedal del freno.
B: Para quitar los frenos: eleve la palanca con el pie.
5. ACOPLAR Y RETIRAR LA HAMAQUITA
SLIDE está equipada con el sistema pro-x. Con este sistema,
la silla se puede adaptar perfectamente a la estructura (5 a).
Para quitar la silla, pulse simultáneamente los botones de
desbloqueo situadas a ambos lados de la silla (5 b). Además,
la silla es reversible, de manera que se puede colocar mirando
hacia usted o hacia fuera.
6. AJUSTE DE ALTURA DEL MANILLAR
A: Pulse los botones en ambos laterales y tire del asa hacia
arriba o hacia abajo.
7. RECLINADO DE HAMACA
Pulse la palanca y tire hacia abajo para reclinar el respaldo.
8. PLEGADO DEL COCHECITO / APERTURA DEL COCHECITO
A: Pulse el segundo botón de seguridad y tire hacia arriba
de las palancas de plegado en la parte de atrás de las barras
laterales; a continuación, presione el manillar hacia abajo hasta
que el cochecito se pliegue. Conseguirá que el cochecito se
pliegue en horizontal.
A: Suelte el cierre de plegado en la dirección que indica echa
y eleve el manillar con las dos manos hasta que escuche un
“clic”.
ADVERTENCIA: EL COCHECITO NO SE PUEDE PLEGAR CUAN-
DO LA HAMACA ESTÁ MIRANDO HACIA EL MANILLAR Y ESTÁ
EN POSICIÓN VERTICAL
9. SISTEMA PRO-FIX
El chasis de su cochecito incluye el sistema PRO-FIX, prepa-
rado para incorporar los siguientes elementos de seguridad
para auto: Top Plus, Crib, One y Zero. El sistema PRO-FIX le
facilitará el acople y la extracción de estos accesorios al chasis,
IM 1628,10 SLIDE INST ok 2.indd 15 19/4/21 17:19
ES
16
de un modo rápido, fácil y seguro, quedando éstos anclados al
chasis. Para ello siga detenidamente las instrucciones de estos
accesorios.
ADVERTENCIA: Es imprescindible desmontar la hamaca del
cochecito para poder acoplar cualquier accesorio de auto.
10. AJUSTE LOS CINTURONES A LOS NIÑOS SIEMPRE QUE USE
EL COCHECITO
Los dos puntos de jación laterales de los asientos pueden
ser utilizados para la jación de un arnés suplementario. Su
cochecito está homologado para bebés recién nacidos. Para
adaptar los cinturones a su bebé (cuando sea menor de 6
meses) pase las cintas de hombros por los ojales inferiores. A
partir de los 6 meses de edad puede pasar los cinturones por
los ojales que sean más cómodos para el niño.
MANTENIMIENTO
Mantenga las piezas metálicas limpias y bien secas para evitar
oxidación.
Engrase regularmente las partes móviles y mecanismos con un
spray a base de siliconas.
No usar aceite o grasa. Para limpiar las piezas de plástico use solo
detergente suave y agua templada.
No exponga el tapizado al sol durante largos periodos. El tapizado
puede desmontarse para ser lavado.
INFORMACIÓN SOBRE LA GARANTÍA
- Este artículo dispone de garantía contra defectos de fabricación
según lo estipulado en las Directivas y/o Normativas legales vigentes
sobre garantías de bienes de consumo aplicables a la Unión Europea y
propias del país de comercialización.
- Es imprescindible presentar la factura o tique de compra para poder
tramitar la garantía a través del vendedor del artículo o, en su defecto,
a través del fabricante.
- La garantía excluye anomalías o averías producidas por un uso
inadecuado, por incumplimiento de las normas de seguridad e
instrucciones de uso y mantenimiento proporcionadas, o a causa del
desgaste por uso y manejo normal periódico del artículo.
- La etiqueta que contiene el número de serie de su modelo no debe
ser arrancada bajo ningún concepto ya que contiene información
relevante para la garantía.
IM 1628,10 SLIDE INST ok 2.indd 16 19/4/21 17:19

EN
17
WARNINGS 18
INSTRUCTIONS FOR ASSEMBLY AND USE 19
MAINTENANCE 20
INFORMATION ABOUT THE GUARANTEE 20
IM 1628,10 SLIDE INST ok 2.indd 17 19/4/21 17:19
EN
18
¡IMPORTANT! Keep these instructions
for future reference.
WARNING! Never leave your child unattended.
WARNING! Ensure that all the locking devices are
enganged before use.
WARNING! To avoid injury ensure that your child is
kept away when unfolding and folding this product.
WARNING! Do not let your child play with this product.
WARNING! Use a harness as soon as your child can sit
unaided.
WARNING! Always use the restraint system.
WARNING! Check that the pram body or seat unit or
car seat attachment devices are correctly engaged
before use.
WARNING! This product is not suitable for running or
skating.
Suitable for children under 6 months old only with
accessories approved by BE COOL.
This pushchair may only be used by one child at the
same time.
The maximum load carried in the basket must never
exceed the limit indicated on the basket (4 kg).
Take care when going down escalators as the rear
safety catch may come undone.
The parking device shall be engaged when placing
and removing the children.
Any load attached to the handle and/or on the back
of the backrest and/or on the sides of the vehicle will
affect the stability of the vehicle.
Only replacement parts supplied or recommended by
BE COOL shall be used.
WARNING: Move the harness position according to the
age of the child, use the lowest backrest position and
adjust both for children under 6 months.
This vehicle is intended for children from 0 months
and up to 15 kg.
WARNING: Never use the strap between the legs
without using the lap belt.
COMPLIES WITH EUROPEAN SAFETY REGULATIONS
EN 1888-1:2018
IM 1628,10 SLIDE INST ok 2.indd 18 19/4/21 17:19

EN
19
INSTRUCTIONS FOR ASSEMBLY AND USE
1. OPENING THE CHASSIS
A:Open the catch as the arrow direction.
B:Hold the handlebar with one hand, and hold the front
tube with another hand, then open the chasis as the arrows
direction until “click” sound.
2. ASSEMBLING THE FRONT WHEELS
A:Connect the front wheel to the connect pieces as the arrow
direction.
B:To close the swivel-function: lift up the swivel lock button.
C:To release the front wheel: press the button on the connec-
tor pieces.
3. ASSEMBLING THE REAR WHEELS
A:Connect the rear wheels as the arrow direction.
B:To release the rear wheels: pull out the metal button and
remove the rear wheels as the arrow direction.
4. APPLYING THE BRAKES
A:To engage the brakes: step down the brake pedal.
B:To release the brakes: lift up the brake pedal with your foot.
5. FITTING AND REMOVING THE HAMMOCK
Your Slide is tted with the pro-x system. With this system,
the hammock can be attached perfectly to the chassis. To
take the hammock off, simultaneously pull the unlocking
levers situated on both sides of the hammock (5.1 - 5.2). The
hammock is reversible so it can be positioned facing you or
facing forwards
6. ADJUSTING THE HANDLEBAR HEIGHT
A:Press the buttons of bothside and pull the handlebar
upwarkds or downwards.
7. RECLING HAMMOCK
Press the lever and pull down to recline the backrest.
8. FOLD AND OPENING THE STROLLER
A: Press down the 2nd safety button and pull upwards the
folding triggers on the backside of side bars. then press down
the handlebar until the pushchair is folded
B: Release the folding catch as the arrow direction and lift up
the handlebar with your two hands until “click” sound.
ATTENTION: THE PUSHCHAIR COULDN’T BE FOLDED WHEN
THE HAMMOCK IS FACING THE PUSHER AND THE HAMMOCK
IS ON THE UPRIGHT POSITION!
9. PRO-FIX SYSTEM
The chassis of your pushchair includes the PRO-FIX system,
ready to t the following car safety elements: Top Plus, Crib,
One and Zero. The PRO-FIX system makes it easy to t and
detach these accessories on and off the chassis, quickly,
simply and safely locking them securely onto the chassis. To
do this, carefully follow the instructions for these accessories.
WARNING: It is essential to remove the seat from the push-
chair to be able to t any of the car accessories
IM 1628,10 SLIDE INST ok 2.indd 19 19/4/21 17:19

EN
20
10. ADJUST THE SEAT BELTS TO FIT THE CHILDREN WHENEVER
THEY USE THE PUSHCHAIR
The two side fastening points of the seats can be used to at-
tach an additional harness. Your pushchair is approved for new
born babies. To t the belts on your baby when he is under 6
months old, pass the shoulder straps through the lower holes.
When your child is over 6 months old, pass the straps through
the holes that are most comfortable for the child.
MAINTENANCE
Keep the metal parts clean and dry to prevent rusting.
Grease the mobile parts and mechanisms regularly with a silicone
based spray.
Do not use oil or grease.
To clean the plastic parts just use mild detergent and warm water.
Do not expose the upholstery to sunlight for long periods of time.
The upholstery may be taken off for washing.
GUARANTEE INFORMATION
- This item is guaranteed against manufacturing defects as
stipulated in the legal Directives and/or regulations in force on
guarantees for consumer goods applicable to the European Union
and those of the country in which it is marketed.
- It is essential to present the purchase invoice or receipt in order
to process the guarantee through the seller of the item or, failing
that, through the manufacturer.
- The guarantee excludes anomalies or faults caused by misuse,
non-compliance with the safety regulations and instructions for
use and maintenance provided, or due to wear and tear caused by
normal use and regular handling of the item.
- The label containing the serial number of your model must not
be torn off under any circumstances as it contains information
relevant to the guarantee.
IM 1628,10 SLIDE INST ok 2.indd 20 19/4/21 17:19
Table of contents
Languages:
Other JANE Stroller manuals