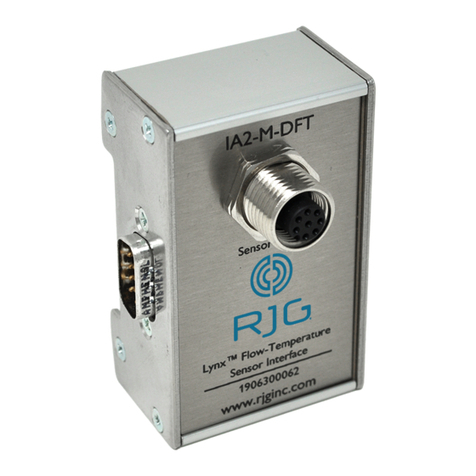
JENCO VisionPlus 9020M User manual

9020M使用说明书
溶解氧测定仪
沪制02270148号
9020M
官网:www.open17.com

1
目录
概述…………………………………………....................2
产品检视……...……………….........................................2
防水外壳….……...…………………………....................2
电池的更换..………….....................................................3
显示及按键功能…..…………………………….…...…………3
A. 显示 .....................................................................3
B. 按键......................................................................4
操作步骤..……................................................................5
A. 电极的准备..........................................................5
B. 溶解氧的校正..........................................................6
C. 溶解氧的测量..........................................................7
D. 存储、回叫和清除数据...............................................7
错误显示及原因..............................................................8
规格………………………………………..........................9
质量保证…………………………...................................10

2
概述
感谢您选购9020M。9020M是一台测量溶解氧及温度的精密仪器,内
建的微处理器,计算和补偿所有与溶解氧和温度有关的测量数据。
本仪器拥有防水的外壳,机械式的按键提供高可信任度,高触觉及
声响告知等功能,使用单一9V的干电池为电源,校正数据永久储存在
EEPROM内存中,下次使用时不需再次校正。
此仪器使用大型的LCD,可显示具有温度补偿的溶氧值及相关的指
示。即使在校正或测量程序下,也会提供使用者各种提示。
9020M具有50组测量数据的记忆功能,可以通过回叫界面轻松的查询
所存储的测量数据。存储的数据也可通过清除界面选择全部删除还是
单一删除。
9020M专配一支原电池式溶氧电极:LD-900G-01,此溶氧电极内置一
温度传感器,可以自动感测温度。9020M还包含自动切换测试量程、自
动温度补偿、超长电池寿命以及50/60HZ交流噪声排除能力,此仪器适
合在野外和实验室。
产品检视
小心地打开包装,检视仪器及配件是否有因运输而损坏,如有发现,
请立即通知 JENCO 的代理。
防水外壳
9020M具有防水外壳但不可在水中使用(因溶解氧电极与仪器连接处
不具防水功能)。这个防水特性可避免仪器因为不小心掉入非腐蚀性
溶液中而造成的损坏。若仪器不小心掉入溶液中时,请立即做以下步
骤处理:
(1) 用蒸馏水小心的清洗仪器,在清洗及晒干后,须将连接器
内的污物清理干净,否则会影响电极的连接。
(2) 再重新使用之前须确定仪器及电极已晒干。
(3) 若完成上述步骤仍无法使用,请联络JENCO的代理商。(请
参考“质量保证”章节)

3
电池的更换
当LCD上的“BAT”闪烁时,表示电力不足,大概可再使用1小时即需更
换新电池,更换电池步骤如下:
1. 使用螺丝起子取出两颗螺丝,即可取下电池盖。(请参考图一)
2. 取出9V旧电池并装上新电池,更换时,请注意电池极性放置要正
确。
3. 放回防水圈和电池盖,并将刚取出的两个螺丝锁紧即可。
图一: 电池安装图
显示及按键功能
A. 显示
1
2
3
4
5
10
8
9
7
6
11 12 1413
图二: LCD 显示

4
1. BAT-
表示需更换电池信号。
8. mBar-
在校正模式提示使用者在压
力参数的设定界面。
2. Save-
表示存储当前的测量值。
9. %/ppm-
表示溶解氧单位。
3. MAIN DISPLAY-
显示溶氧值. 10. 显示温度及其温度单位。
4. 显示存储数据位置。
11. Full-
表示存储值已满 50 组,需
要删除才能再次存入。
5. CAL-
表示进入校正模式。
12. Recall-
表示进入回叫模式,可回叫
存储的数据记录。
6. Delete-
表示进入清除模式,可清除存
储的数据记录。
13. SAL ppt-
在校正模式提示使用者在
盐度参数的设定界面。
7. Each-
表示选择了单个清除功能,存
储数据将单个单个的被清除。
14. All-
表示选择了全部清除功能,
存储数据将一次性全部清除。
B. 按键
ON/OFF-
开关键。按住开关键打开或关闭主机。
MODE-
选择键。
选择仪器的显示模式。连续按此键,显示的顺序为
“溶解氧--%”、“溶解氧—ppm(mg/L)” “Recall(回
叫)”和“Delete(清除)”四个模式。
校正模式下,按此键退出校正模式。
在校正“Recall”和“Delete”模式,按此键可以
退出此两个模式。

5
UP/DOWN-
上键和下键在校正状态下起增加、减少需变动的设
置项目值。在测试状态不起作用。
在“Recall”模式,按上键和下键可以翻看存储的
数据记录。
在“Delete”模式,按上键和下键可选择删除的方
式 “Delete Each”或者“Delete All”;在“Delete
Each”删除方式中,按此两键可以选择需删除的存储
的数据记录。
CAL-
按此键进入校正状态。
ENTER-
在校正状态按此键,把当前的设定值存储到微处理
中。
在测量状态下,按此键一次,机器将存储此时界面
的显示值并记录相对应的位置号。9020M 可存储 50 组
数据。
在“回叫”模式,按此键一次,机器将显示最后一
个存储的数据。
在“清除”模式,按此键一次,机器将进入清除方
式:“Delete All”和“Delete Each”选择,按上键
下键进行选择。在“Delete All”界面,再按此键一
次,机器将删除所有存储的数据。在“Delete Each”
界面,再按此键一次,机器将进入删除单个存储数据
的界面,此时,可以按上键和下键,选择需要删除的
数据,按此键确认,机器将删除此位置号的存储数据,
同时,由后一存储数据代替此位置号的存储数据。
操作步骤
A. 电极的准备
A
B
C
D
(A) 电极头 (B) 电极盖 (C) 膜片 (D) 电极盖保护帽

6
1. 移除电极盖保护帽。
2. 移除旧的膜并清洁电极盖顶
部。
3. 换上新膜到电极盖顶部,按紧
电极盖保护帽,并修剪过多的膜。
4. 用所附注射器加电解液到电极
帽内,然后旋回电极头
B. 溶解氧的校正
9020M在空气中就能做校正,校正过程简单、快速。
1. 连接溶解氧电极LD-900G-1到主机的输入端口,然后按开关键开
机。用蒸馏水清洗电极,并吸干电极膜头上的水珠,但注意不要
碰伤膜头顶部的膜片。
2. 把准备好的电极垂直放置在空气中,按“MODE” 键选择到“溶
解氧--%”模式。

7
3. 等待温度及溶氧值稳定后,按“CAL”键进入“校正”模式,此
时“CAL” 的字体将显示在界面上,主显示会显示“1013
mBar” (出厂定值),整机提示输入当地的大气压力。
4. 按“上键”和“下键”可增加和减少大气压力值(调整范围:
600~1100 mBar),按“ENTER” 键确认,机器将存储此大气压
力值并进入下一个校正界面:空气中饱和氧(100%)的设定。如
果此时按“MODE”键,机器将不存储新的大气压力值,还是计算
上次存储的大气压力值,并进入下一个校正界面:空气中饱和氧
(100%)的设定。
5. 在此界面中,用户将看到次显示100%的饱和氧校正值,等主显示
数值稳定后,请按“ENTER” 键,此时整机将存储次显示的100%
的饱和氧校正值并进入下一个校正界面:盐度的设定。如果此时
按“MODE”键,机器不存储100%的饱和氧校正值,还是计算上次
存储的100%的饱和氧校正值,并进入下一个校正界面:盐度的设
定。
6. 盐度的出厂值设定为0.0ppt,调整此出厂值请按按“上键”和 “下
键”,调整范围是:0.0 ~ 40.0ppt,按“ENTER” 键,此时整
机将存储此设定值并直接进入测量模式。此时整机校正已完成。
如果按“MODE”键,机器不存储此盐度值,还是计算上次存储的
盐度值,并直接进入测量模式。
C. 溶解氧的测量
按“MODE”键选择“溶解氧--%”或“溶解氧—ppm(mg/L)”模式。把
溶氧电极用蒸馏水清洗后放入被测溶液中,稍作搅动,就可直接测量。
D. 存储、回叫和清除数据
a. 存储数据。
1. 在“溶解氧--%”和“溶解氧—ppm(mg/L)”模式,按“CLEAR/
ENTER”键一次,机器将存储当前数据值。此时“Save”显示将
显示一次,并且有一位置号也同时显示,表示当前界面值已被存
储并做了此位置号的记录。
2. 如果界面上显示“Full”,则代表机器的50组数据已存储满了,
不能再存储其他数据。使用者只能删除或删除部分数据才能存储
新的数据。
b. 回叫存储数据。

8
1. 按“MODE”键进入回叫模式,按“CLEAR/ENTER”键,机器将显
示最后一组存储数据。
2. 此时按上键或下键选择位置号,找到自己需要读取的存储数据。.
3. 读取完存储数据后可按“MODE”键退出回叫模式。
c. 清除存储数据。
1. 按“MODE”键进入清除模式,按“CLEAR/ENTER”键,机器将进
入清除方式的选择,可按上键或下键在“Delete All”和
“Delete Each”之间选择。
2. 在“Delete All”界面,按此键一次,机器将删除所有存储的数
据,并显示None,表示没有存储数据。
3. 在“Delete Each”界面,按此键一次,机器将进入删除单个存
储数据的界面,此时,可以按上键和下键选择需要删除的位置号,
按此键确认,机器将删除此位置号的存储数据,同时,此位置号
的存储数据将由下一个位置号的存储数据所代替。
例如:01,100.0%,25℃;
02,7.65ppm,23.8℃;
03,5.43ppm,15.6℃;
…
如果清除了02位置号的存储数据,则机器存储数据变为:
01,100.0%,25℃;
02,5.43ppm,15.6℃;
…
4. 清除完数据后可按“MODE”键退出清除模式。
错误显示及原因
[注意:如果机器仍然不能正常工作,请联系 Jenco 的服务部门。]
主显示 可能的原因
“OvEr”or“Undr” 1. 检查膜片及电解液。
2. 清洗电极的阳极和阴极。
次显示 可能的原因
“Udr” 1. 被测溶液温度低于-6.0℃.
“Ovr” 1. 被测溶液温度高于46.0℃.

9
规格
显示 测量范围 分辨率 精确度
溶氧值ppm
(mg/L)
0~20.00ppm
(mg/L) 0.01ppm(mg/L) ±0.5%FS
溶氧值% 0~200.0 % 0.1% ±0.5%FS
温度 -6.0~46.0°C 0.1°C ±0.3°C±1个字
压力补偿 600 ~ 1100mBar
(450 ~ 825mmHg)
盐度补偿 0.0 ~ 40.0ppt
温度探棒 热敏电阻, 10 k
Ω(
25°C)
电源 9V电池
校正数据存储 EEPROM
测量数据存储 50组
自动关机功能 未做任何操作,45钟后自动关机。
音效回馈 所有按键
显示 (溶氧值: 温度) 12mm : 8mm 字高 LCD
环境温度 0 ~ 50 °C
相对湿度 90%以下
外壳 IP65
尺寸 (长 x 宽 x 高) 70mm x 198mm x 37mm
重量 260g (包含电池)

10
质量保证
仪器保修一年(以购买日为准)。在保修期内如有质量问题,本
公司将无偿代为修复;如有人为因素造成故障或损坏,本公司竭
诚代为修复,但需酬收工本费(配件如电极头、标准液等消耗品
不在保证范围内)。在将本机退回本公司时,请用包装材料妥为
包好,以避免运输途中碰伤。无论何种情况,在退回本机前,请
先与本公司联系,并得到本公司认可,方可退回本机。
JENCO (中国)公司:上海任氏电子有限公司
地址:上海市松江区泗泾镇望东中路18号
邮编:201601
电话:57619600,57619008
传真:57619240

11
CONTENTS
GENERAL INTRODUCTION………………..................12
INITIAL INSPECTION……...………………..................12
WATER PROOF…….……...………………..................12
INSTALLING THE BATTERIES..…………..................13
DISPLAY & KEYS FUNCTIONS…..……………...……14
A. Display ..............................................................14
B. Keys...................................................................15
OPERATIONAL PROCEDURES..…….......................16
A. Probe Preparation...............................................16
B. Dissolved Oxygen Calibration...............................17
C. Dissolved Oxygen Measurements..........................17
D. Save, Recall and Delete Data.................................18
ERROR DISPLAYS AND TROUBLESHOOTING.......19
SPECIFICATIONS………………..……........................19
WARRANTY………………………….........................20

12
GENERAL INTRODUCTION
Thank you for selecting the 9020M meter. The 9020M is a precision
tool that measure dissolved oxygen in % and ppm (mg/L) and
temperature. A built-in microprocessor stores, calculates and
compensates for all parameters related to DO determinations
including DO electrode temperature characteristics.
This unit has a waterproof IP65 case. The touch mode keys are
highly reliable with tactile and audio feedback. This meter can
operate with one 9V battery. Re-calibration is not required when
power is turned on again.
The front of the meter has a large LCD that displays DO % or ppm,
and temperature simultaneously along with user prompts and mode
indicators. The unit prompts the user through calibration and
measurement procedures.
The 9020M uses a galvanic electrode with convenient screw-on cap
membranes. The LD-900G-01 field probe comes with a built-in
temperature sensor for automatic temperature compensation.
The unit is also equipped with a non-volatile memory allowing the
user to store 50 different sets of readings. This unit will assign a site
number for each set of reading, so the user can review the data
easily.
Other features include long battery life and 50/60Hz AC noise
rejection. This meter is user-friendly for field, industrial and
laboratory applications.
INITIAL INSPECTION
Carefully unpack the unit and accessories. Inspect for damages
made in shipment. If any damage is found, notify your Jenco
representative immediately. All packing materials should be saved
until satisfactory operation is confirmed.
WATER PROOF
Though the 9020M meter is housed in a watertight case, DO NOT
use it underwater. The watertight case prevents permanent damage
to the unit if accidentally dropped into non-corrosive solutions.
Follow these steps immediately if the unit is immersed in any
solution:

13
1. Rinse unit carefully with distilled water. After rinsing and drying,
inspect and clean connectors to remove all contaminants that
may affect probe connections.
2. Wait for the unit and probe to dry completely before resuming
operation.
3. If the unit does not function correctly after steps1 and 2, call
JENCO for possible repair or replacement (see Warranty).
INSTALLING THE BATTERIES
The 9020M meter is packaged with one 9V battery required for
operation. To insert the batteries into the meter, follow the
procedure outlined below.
Figure 1: Battery compartment
1. Use a screw driver to remove the two screws and battery
cover to expose the battery compartment. (Figure 1.)
2. Replace the 9V battery.
3. Replace the battery cover and make sure to secure the two
screws for the water-tight feature.
[Note: Press the “ON/OFF” key to turn the unit on. If the unit is
running then you can press the ”ON/OFF “ key to turn the unit
off. The unit will automatically turn off after 45 minutes of no key
activity.]

14
DISPLAY & KEYS FUNCTIONS
A. Display
1
2
3
4
5
10
8
9
7
6
11 12 1413
Figure 2: Active LCD screen
1. BAT-
Low battery indicator.
8. mBar-
Display during calibration to
prompt user for barometric
pressure.
2. Save-
To save a reading into the data
storage.
9. %/ppm-
Unit indicators.
3. MAIN DISPLAY-
Main display for DO dissolved
oxygen values.
10. Temperature and unit
display
4. Data storage site number.
11. Full-
This will indicate that all 50
data storage sites are used
up.
5. CAL-
Calibration mode indicator
12. Recall-
To recall data from the data
storage.
6. Delete-
To delete stored data.
13. SAL ppt-
Displays during calibration
when user is prompted for the
approximate salinity of the
sample in parts per thousand
(ppt).
7. Each-
To delete a single set of data
from the data storage.
14. All-
To delete all the data in the
data storage.

15
B. Keys
ON/OFF-
Powers on and shuts off the meter.
MODE-
Selects display mode. In normal operation, press this
key to sequentially display Dissolved Oxygen in % air
saturation, Dissolved Oxygen in ppm (mg/L), Recall
and Delete interface.
In calibration mode, press this key to exit the current
calibration parameter and enter into the next one.
In “Recall” and “Delete” modes, press this key to exit
“Recall” and “Delete” modes respectively.
UP/DOWN-
Increases or decreases the display value as desired.
In “Recall” mode, view saved data and data storage
site number by pressing these keys.
In “Delete” mode, press these keys to select between
the “Delete Each” and “Delete All” mode.
In “Delete Each” mode, view to be deleted data and
data site numbers by pressing these keys.
CAL-
In “Measurement” mode, press this key to enter into
“Calibration” mode.
ENTER-
In “Calibration” mode, press this key to save the
current parameter to memory.
In “Measurement” mode, press this key to save
reading into the next available data storage site.
At the Recall interface, press this key to display the
last set of saved data.
At the Delete interface, press this key to go into
“Delete” mode.
In the “Delete All” mode, press this key to delete all
saved data.
In the “Delete Each” mode, press this key to delete a
single set of data.

16
OPERATIONALPROCEDURES
A. Probe Preparation
A
B
C
D
(A) Lead (B) Cover Cap (C) Membrane (D) Guard Cap
1. Remove guard cap.
2. Remove the old membrane and
clean top of cover cap.
3. Place new membrane over top
of cover cap and press tight guard
cap, trim excessive membrane
4. Fill solution into cover cap,
then twist cover cap back on to
the probe.

17
B. Dissolved Oxygen Calibration
The 9020M can be calibrated quickly and easily in air.
1. Connect the DO probe LD-900G-1 to the unit and turn the unit
on. Rinse the probe well with distilled water. For best accuracy,
wipe the end of the probe dry. Do not touch the membrane.
2. Hold the probe in the air gently with the sensor facing down
and press “MODE” key to select “Dissolved Oxygen in %”
mode.
3. Allow temperature reading to stabilize, press the “CAL” key to
enter the “Calibration” mode. The “CAL” icon appears on the
LCD. The main screen will display “1013mBar” (factory default
value). The meter is now ready for atmospheric pressure
calibration.
4. To change the pressure factor, use the “UP” and “DOWN”
keys to adjust the value between 600 and 1100mBar. Press
“ENTER” key to save the new value and the unit will
automatically go into the next calibration parameter which is
the value of 100% saturation in air. If “MODE” key is pressed
instead of the “ENTER” key, any changes made will be
cancelled and the previous calibration settings will be retained.
5. In this interface, the user can views the calibration value in the
secondary display. Once the value in the main display
stabilizes, press “ENTER” key to save the new value and the
unit will automatically go into the salinity compensation
parameter. If “MODE” key is pressed instead of the “ENTER”
key, any changes made will be cancelled and the previous
calibration settings will be retained.
6. The salinity default factor value is 0.0 ppt. To change the
salinity compensation factor, use the “UP” and “DOWN” keys
to adjust the value between 0 and 40 ppt. Press “ENTER” key
to save the new value and the unit will automatically switch to
“Measurement” mode. Calibration is now complete. If “MODE”
key is pressed instead of the “ENTER” key, any changes
made will be cancelled and the previous calibration settings
will be retained and will automatically switch to “Measurement”
mode.
C. Dissolved Oxygen Measurements
Press “MODE” key to choose the dissolved oxygen in % mode or
dissolved oxygen in ppm mode. Rinse the DO probe with distilled
water and immerse it in the sample to be measured.

18
D. Save, Recall and Delete Data
a. Saving readings to memory.
1. In “Measurement” mode, press the “ENTER” key to save data.
The “Save” icon with the corresponding site number will lit up
for a brief moment to indicate a successful data save.
2. If the “Full” icon is displayed, this means that all 50 data saving
sites are used up. No new data can be saved until existing
saved data are deleted.
b. Recalling readings from memory.
1. To recall saved data, press “ENTER” key at the Recall
interface to go into “Recall” mode.
2. Press the “UP” or “DOWN” keys to select the storage site
number.
3. Press “MODE” key to exit “Recall” mode.
c. Deleting data.
1. Press the “ENTER” key at the Delete interface to go into
“Delete” mode.
2. Select “Delete All” or “Delete Each” mode by pressing the “UP”
or “DOWN” key.
3. In the “Delete all” mode, press “ENTER” key to clear all stored
data. Deletion is now complete.
4. In the “Delete Each” mode, use “UP” and “DOWN” key to
select data to be deleted. Then press “ENTER” key to delete.
Deletion is now complete. The next set of saved data will
automatically move up a slot in the storage site.
5. Press “MODE” key to exit “Delete” mode.

19
ERROR DISPLAYS AND TROUBLESHOOTING
[Note: If the meter still does not perform normally after the above
measures are taken, call Jenco Service Department.]
SPECIFICATIONS
Display Range Resolution Accuracy
Dissolved Oxygen
ppm (mg/L)
0 to 20.00 ppm
(mg/L)
0.01 ppm
(mg/L) ±0.5FS
Dissolved Oxygen
% 0 to 200.0 % 0.1% ±0.5FS
Temperature -6.0 to 46.0 °C 0.1 °C ±0.3°C±1 digit
Pressure compensation 600 to 1100 mBar
(450 to 825 mmHg)
Salinity compensation 0.0 to 40.0 ppt
Temperature sensor Thermistor, 10 k
Ω
at 25°C
Power 9Volt battery
Calibration Back-up EEPROM
Datalogging capabilities 50 data sets
Automatic shut off function 45 minutes of non-use
Audio Feedback All Touch Keys
Display (pH / mV : Temp) 12mm : 8mm high LCD
Ambient Temperature Range 0 to 50 °C
Relative Humidity At 90% RH
Case IP65 waterproof
Dimensions (W x D x H) 70mm x 198mm x 37mm
Weight 260 grams
(Batteries included)
Main Display Possible Cause(s)
“OvEr” or Undr 1. Check membrane and electrolyte solution.
2. Clean anode and cathode.
Secondary Display Possible Cause(s)
"Udr" 1. Heat the sample to above -6.0℃.
“Ovr” 1. Cool the sample to below 46.0℃.
Table of contents
Other JENCO Measuring Instrument manuals
JENCO
JENCO 6230M User manual

JENCO
JENCO 6250 User manual
JENCO
JENCO VisionPlus pH6810 User manual
JENCO
JENCO 6010N User manual

JENCO
JENCO VisionPlus 6177 User manual

JENCO
JENCO 6360 User manual

JENCO
JENCO 6011B User manual

JENCO
JENCO 3175-307A User manual
JENCO
JENCO VisionPlus 6377 User manual
JENCO
JENCO 6377MB User manual
JENCO
JENCO 3011M User manual
JENCO
JENCO 6179 User manual
JENCO
JENCO VisionPlus EC 330 User manual
JENCO
JENCO 6010M User manual
JENCO
JENCO VisionPlus pH630FA User manual
JENCO
JENCO 3173 User manual
JENCO
JENCO 3321 User manual
JENCO
JENCO 6308CST User manual

JENCO
JENCO pH610N User manual

JENCO
JENCO VisionPlus pH630 User manual
