5
DANGER Warnings!
These warning refer to dangerous situations, which may result in serious accidents and be life
threatening, if the instructions are not strictly abided by.
CAUTION Warnings!
This type warns on dangerous situations and informs on necessary precautions in order to
avoid any possible accidents.
SAFETY PRECAUTIONS
- Read the instruction Manual before turning on the machine. Pay attention and abide by all
the recommendations for safely operating the equipment. SHARE THIS INFORMATION
WITHALLOTHER USERS.
- Do not operate the machine while or after drinking alcoholic beverages or medications which
affect your normal condition. Pay attention to what you are doing and use your good sense.
Any lack of attention while operating the machine can result in a serious accident.
TECHNICAL MANUAL OF OPERATION - JF 15D
Environmental conservation
Safety
JF Máquinas is continually concerned with the environmental conservation, in the
development phase, as well in the utilization of processes and materials ecologically
appropriate in its production and its products.
PROTECT AND RESPECT THE ENVIRONMENT, remember that conservation is the social
responsibility of everyone. These concepts include compliance with legally defined disposal
of used lubrication products and fluids, old tires, and packaging. Never dispose of these
products or empty packaging in swamplands, lakes, rivers, puddles etc. Share these
recommendations with others and make other people aware of the importance of conserving
the environment.
The JF Máquinas is concerned about the safety of people involved in operating and
performing maintenance procedures on the machine. In developing this design, we have
considered every detail in order to avoid unexpected accidents while operating it.
We have developed safety shielding and eliminated dangerous situations. Remember,
keeping people healthy and their physical integrity must always be considered to the upmost.
We have prepared this manual to make you familiar with your machine and, so that you can
use it correctly and safety.
We recommend carefully reading it before operating the machine the first time. If you have any
doubts or questions, please get In touch with us at your JF Máquinas reseller or our technical
support department.
Safety Warnings
Safety warnings alert on situations that can be dangerous in some away.
They are accompanied by instructions for protecting the operator and other
users.
English
26
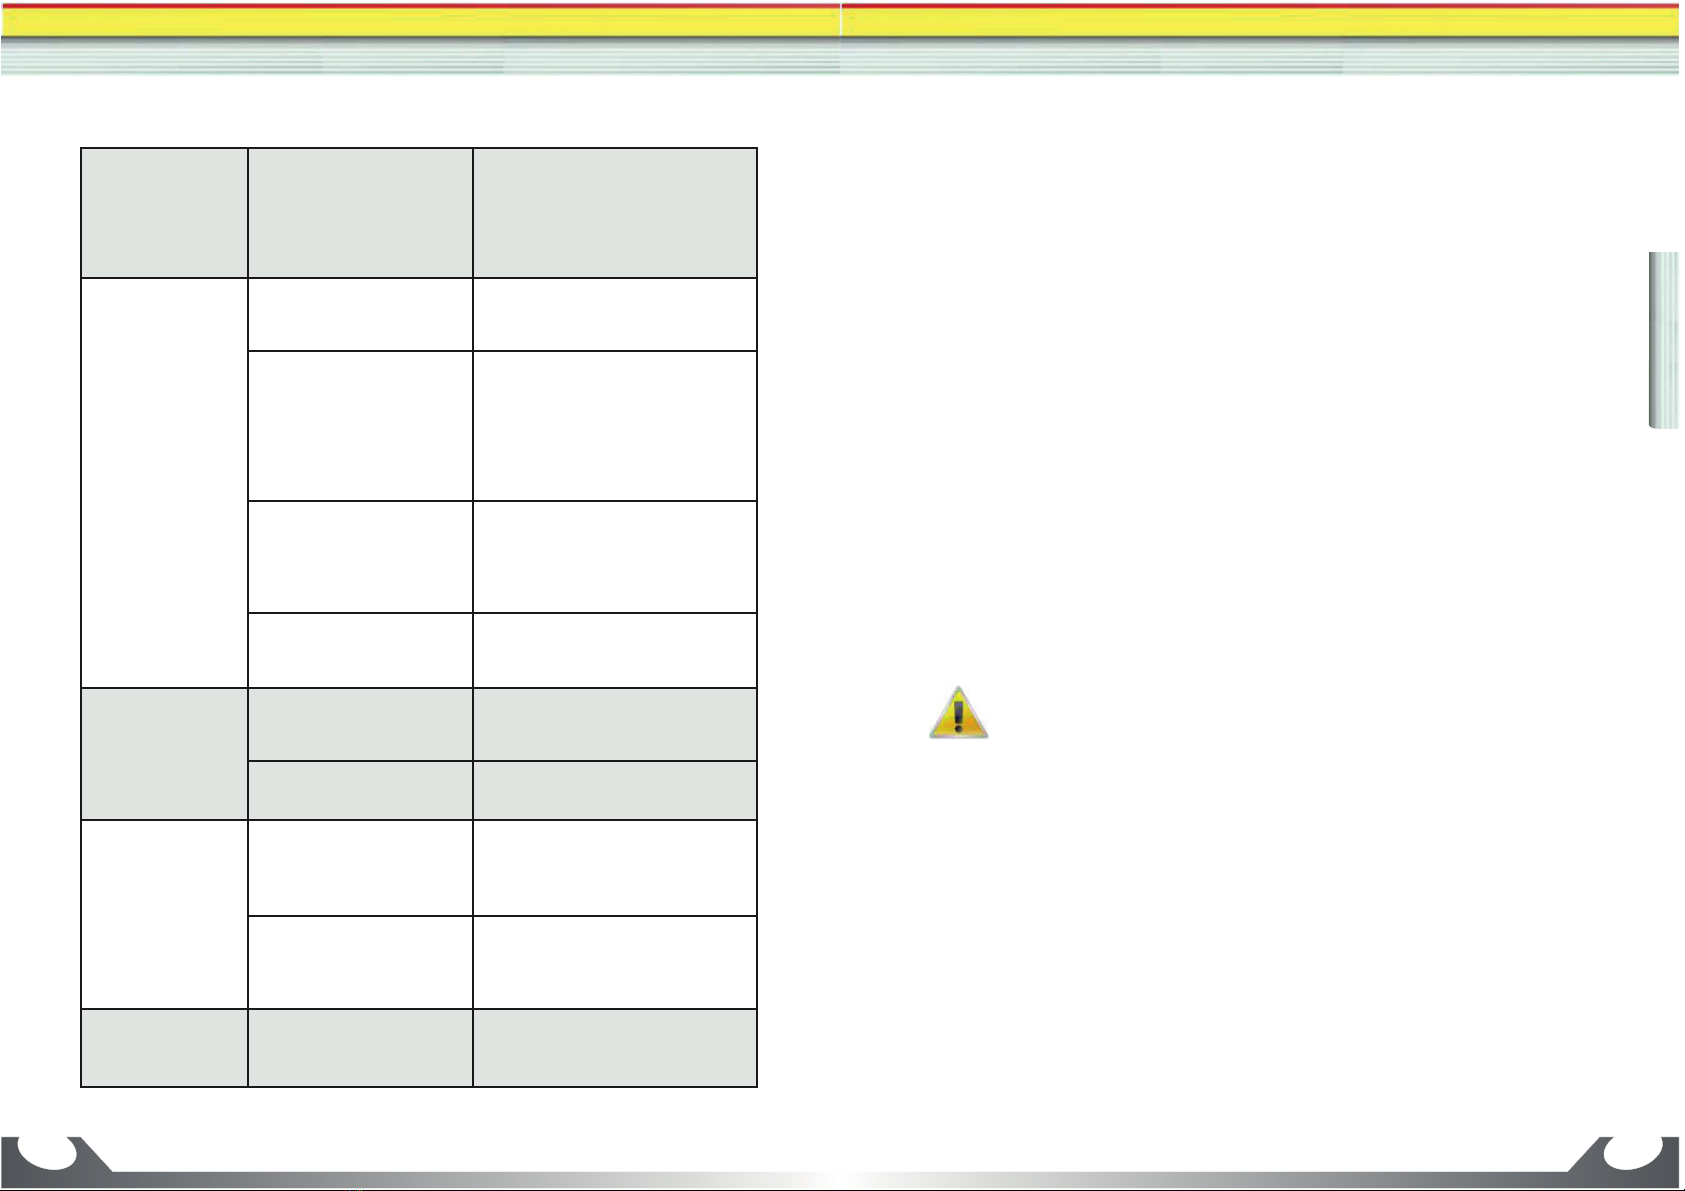
Guía práctico
Debido al exceso de
alimentación, el motor no
consigue mantener la
rotación necesaria y el
producto se acumula
dentro de la máquina
Parar el motor, limpiar el exceso de
producto, arrancar nuevamente y
controlar la alimentación de la
máquina de manera que no exija
más que la capacidad indicada.
1- Alimentación insuficiente
de la máquina
1- La alimentación debe ser
continua, aunque no en exceso,
pues puede causar trabado
2- Rotación de la máquina
debajo de la indicada
2- Si la rotación de la máquina
estuviere debajo de la indicada, los
martillos tardarán más para triturar
el producto y con eso, caerá la
producción. Por tanto, se debe
mantener la rotación indicada para
la máquina
3- Si los productos estuvieren muy
húmedos, los orificios de los filtros
podrán quedar bloqueados. Por
tanto, se deben triturar solo
productos secos
4- Regulado de la máquina
incompatible con el
producto a ser obtenido
4- Se debe verificar si el filtro
usado es compatible con el
producto a ser obtenido
Corte irregular del
producto
1- Falta de filo en las
cuchillas
1- Afilar nuevamente las cuchillas
conforme indicado en el item
“Afilado de las cuchillas”
2- Contracuchilla gastada o
desregulada
2- Seguir el indicado en el ítem
“Regulado de la contracuchilla”
Deficiencia al moler
productos secos
1- Martillos gastados o
dañados
1- Cambiar los lados de los
martillos o por nuevos, procediendo
conforme indicado en el item
“cambio de martillos”
2- Lavar los picos, cuchillas y martillos,
con agua después de picar productos
verdes principalmente antes de
paradas prolongadas
Dificuldad de
arranque del
accionamiento
Exceso de producto dentro
de la máquina
Al terminar el trabajo, dejar a
máquina en funcionamiento, hasta
la salida completa del producto