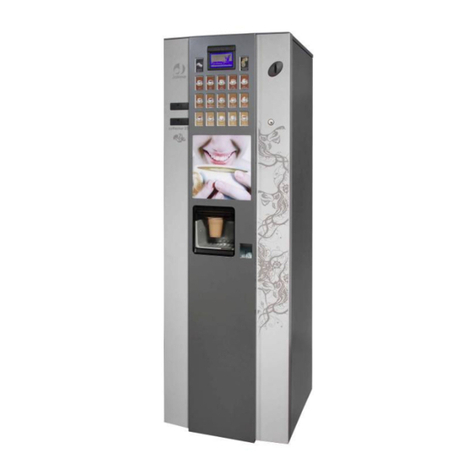
Jofemar Coffeemar G-250 Product manual

Page 1 of 20
Installation and
maintenance guide
Contents
:
Characteristics and machine Layout
Installation review
Programming mode
Function of the buttons on programming mode
Water input
Machine start up
Product Loading
Programming options
Changing settings for products and prices
Faults checking
Coin mech start and review
Cleaning
Accountancy and tickets gathering
Read the safety instructions at page 19 of this manual be-
fore starting working on the machine.
Ctra, Marcilla, Km.2. 31350 PERALTA, Navarra SPAIN
www.Jofemar.com
www.Jofemar.com
www.Jofemar.com
www.Jofemar.com
MNP116M01ENV03R00
Tel. +34 948 75 12 12Tel. +34 948 75 12 12Tel. +34 948 75 12 12
Fax +34 948 75 04 20Fax +34 948 75 04 20Fax +34 948 75 04 20
Coffeemar
G250

Page 2 of 20
Page 3 of 20
Sizes
:
High
x Wide x Deep: 1500 x 500 x 561mm
Weight
: 100Kg
Electric
:
Power supply: 220-240 VAC. or 110 VAC
Verify the ground connection is proper
Power supply: 220-240 VAC. or 110 VAC
Verify the ground connection is proper
Power supply: 220-240 VAC. or 110 VAC
before turning on the machine
Verify the ground connection is proper
before turning on the machine
Verify the ground connection is proper
Capacity
Coffee beans: 2.300 gr
Powdered Milk:1700 gr
Chocolate: 1350 gr
Sugar: 2100gr
Instant coffee: 700gr
Tea and herbal Drinks: 1000gr
Cups and Stirrers 500
Pressurised boiler 370 ml.
Characteristics and layout of the machine:
Machine back
1.- On/Off switch
2.- Electric plug connection
3.- Ventilation grid
4.- Steam output
5.- Water entry
Coin Acceptance:
Coin Mech J2000 with refund tubes
for ve diferent coin values and
fraud proof security measures
Options
Bill reader
Card reader
Telemetry modem
Water softener
Flavour lter
Water self-feeding kit (One or two
25-litre tanks).
Exterior of the machine
1.- Optional
Bill validator entry
2.- Graphic Display
3.-
Coins entry
4.- Door lock
5.-
Optional
Cards/Keys reader entry
6.-
Selection and refund buttons
7.- Product colection output
8.- Refund output
1
2
3
5
6
7
4
8
1
3
5
4
2

Page 2 of 20
Page 3 of 20
1
9
9
2
3
3
5
11
6
4
4
8
12
13
2
5
6
8
14
7
7
10
1.- Main Power switch (At the cabinet back)
2.- Coffee beans canisters
3.- Instant products canisters
4.- Cups columns
5.- Coin mechanism compartment
6.- Grinded coffee dose unit
7.-
Stirrers column
8.- Instant products mixer
9.- Sugar canister (At the back)
10.- Coffee beans Brewer
11.- Product colection tray
12.- Coin box
13.- Wastes bag position
14.- Spilled liquids deposit
15.- Space for selffeeding water depossits
Interior of the machineInterior of the machineInterior of the machine

Page 4 of 20
Page 5 of 20
Installation steeps resume
:
Installation steeps of the machine
:
1.- Near the nal location unpack the
machine, carefully remove it from the
pallet, due the machine weigh and
height is recommended to perform
this operation between two persons.
2.- Level the machine, using the front
adjustable paws we will be able
to leave the machine levelled and
without the wheels touching the oor
so it can not be move pushing.
3.- Connect the machine to the water
mains or instal the self feeding kit.
4.- Push the machine to its nal position
and check is levelled, plug the
machine to the electric main.
5.- Fill cups and stirrers.
6.- Place the wastes bag.
7- Turn on the machine so the water
circuit starts lling up.
8.- Fill the products canisters.
9.- Place the product labels on the
buttons.
10.- Program the prices
11.-
Insert change in the coin mechanism.
12.- If necessary change product labels
and doses adjustments.
13.- Wash the water circuit before leaving
the machine working.
Connect the
machine to the
water mains or
install the water
self feeding kit.
Remove all the packaging, cut
the precint and the platic lm, the
machine will be standing on the
palet, near its nal location get the
machine down the palet tilling it
very carefully.
Once on the oor we will move it
on its weels untill its nal position.
When the machine its on its
position we can unescrew and
udjust the front paws of the base
so it gets leveled.
Fill cups, insert
them for the top
part of the roulette
on at least one of
the columns.
Remove the stirrers
weight
Insert the stirrers
and place the weight
on top
Fill the products
canisters
Place the products
labels.
Place the wastes bag
Program prices, doses and
necessary adjustments on
programming mode

Page 4 of 20
Page 5 of 20
Elements of the programming system:
1.- Programming button
Press this button to get into the
programming mode.
2.- Display
This element allows you to visualise
the programming option that the ma-
chine is in and its status
3.-
Front buttons, once on programming
mode using these buttons we will
move among the options and we will
use them to edit the settings.
Programming mode:
Detail of the
programming
button on the
interior of the door
In the programming mode, the display
will display the different options
Button functions on programming
mode:
�
�
Scroll among the
programming options.
Enter the option, edit its
value or enter its sub-menu.
Exit the menu or sub-
menu, cancel the editing of
an option.
/
�
Numeric inserting of
data.

Page 6 of 20
Page 7 of 20
Perform this operation with the machine off.
At the back of the machine we will nd the
water entry connection, this connection
has a measure of 3/4” gas, female, so on
the water main we will need the correct
male of this same measure.
Water mains speci cations:
- Make sure the water is drinkable
- Pressure: 05 - 10 bars, on case the
pressure is lower it will be needed to
install a support bomb, if the pressure is
higher a pressure reducer will be needed.
- Minimal internal diameter of the water
tube: 6 mm
- There are available lters for lime and
odour, these lters improve the water
quality and therefore the coffee, also
increasing the machine working life as
they avoid impurities on the water circuit.
Once the connection is properly made it
will be necessary to open it so the water
enters the machine.
Connecting the machine to the water mains:
Water inlet at the back of the machine.
Technical data:
Water inlet on the
machine:
3/4 Gas
Female
Necessary
connection on the
water main
3/4 Gas
Male
Water pressure on
the mains:
0,5 - 10
Bars
Minimum internal
diameter on the
water main tube
6 mm

Page 6 of 20
Page 7 of 20
If there is not an available water main, as-
sembling the self feeding water tank
Perform this operation with the machine off.
Access the machine back, unscrew the
back cover plate
Remove the small plate from the position on
which we will screw the rubbers to hang the
pump, screw each of the rubbers on the holes
to which previously was screw the plate, place
rings between the rubber and the screws head.
Access the machine base and place the
pump between the holding part of the
rubbers, connect on the pump output the
tube that comes with the self feeding kit
and take that tube to the machine back by
the hole for this purpose.
On the back of the machine disconnect
the tube linking the original machine
electrovalve to the air break and connect
into the air break entrance the tube that
comes with the pump.
On the machine base place the water tank,
connect the tube from the tank to the pump water
entrance.
Disconnect the electrical terminals from the
machine water entrance electrovalve and
connect these terminals to the pump.
Further details on the process to install the self
feedding kit on the speci c manual included on
the kit.
Position to assamble the
rubers for holding the punp
AirBreak water entrance
possition, disconect the
original tube and conect
there the tube comming
from the pump
On the same holes of the small plate we
will remoove we will screw the rubers to
hold the pump. Also disconect the electrical
terminals of the original electrovalve.
Place the pump
between the rubers
holders accesing
to them from the
machine front base
Conect the tube
included on the kit
to the pump output,
take it by the hole to
the machine back
were the AirBreak is
located
Place the water
tank on the machine
base, connect the
tube on the pump
water entrance.
Disconnect the tube which links the
original electrovalve to the Airbreak
entrance, and on the AirBreack
entrance connect the tube comming
from the pump.
On the pump of
the pump we will
nd its electrical
conection, connect
there the terminals
which previously
were connected
to the machine
electrovalve.

Page 8 of 20
Page 9 of 20
Fill cups and stirrers
Perform this operation with the machine
off..
Insert the cups on the door roulette by the
top.
Remove the weight from the stirrers
column, place the stirrers and place back
the weight on top of them.
The machine can be adapted to several
cups and stirrers sizes, check with your
Jofemar provider on case you have doubts
about one indicating the length of the cup
and its diameter just beneath the top ring.
Break the lower end of the
cups bag, insert that end
on top of the column and
leave the cups to fall into
the column.
Without breaking the
precinct, place the stirrers,
once on place break the
precinct and remove it,
place the weight on top of
the stirrers.
Remove the stirrers
weight.
On/off switch
position
Turn on the machine
So the water circuit start to get ll turn on
the machine using the on/o switch, this
way the water will start lling the boiler and
will start heating the machine.
Check the position of the wasted liquids deposit
On the machine base we will verify the
wasted liquids deposit its on place and the
pipe for wasted water enter the deposit.
We will also check the level detection float
is inside the deposit and if we hold it in our
hand the micro switch is activated.
Wasted liquids deposit,
the wasted water pipe
and the level detection
oat must be inside it.

Page 8 of 20
Page 9 of 20
Fill product canisters
The canister are lled dropping the
products by its top. Each canister is
labelled with the correct product to
dispense depending on how the machine
has been set.
Coffee beans canister has a moving led,
we will need to release it so the beans
can fall to the brewing unit.
Sugar canister is placed behind the cups/
stirrers unit
Place the waste bag
At the machine base we will nd a funnel
with a metal ring.
Moving it up we will be able to extract it
from its position.
Pressing the ring sides we will be able to
remove it from the funnel.
Once out we will place the wastes bag
opening inside the ring
Then we will insert the funnel inside the
opening of the wastes bag and the ring on
its original position.
Place back the funnel on the machine
now with the wastes bag hanging.
Break the lower end
of the cups bag,
insert that end on top
of the column and
leave the cups to fall
into the column.r
With the bag
inside the
ring press
the sides,
and place
the funnel
back.
Place the products labels
Access the internal part of the buttons
using the latch of its cover.
Insert the labels by the top part of each
button.
If there is any doubt we are placing the
correct label press the button on vend
mode and the machine will inform you of
the product linked to it.
Position of the
funnel were we
will place the
wastes bag.
Screw to
access the
back of the
buttons,
unescrew
and push the
cover up to
access the
buttons.

Page 10 of 20
Page 11 of 20
Programming map:
(207) CUSTOM MENU
Options to be chosen by the user
(201)OPERATOR
MENU
(003) MONEY ACCOUNTING
(004) SALES PER PRODUCT
(018) SALES BY MACHINE
(015) TUBE RELOADING
(016)TUBE DISCHARGING
(050) MACHINE ID NUMBER
(049) PRODUCT CODES
(202)TECHNICIAN
MENU
(024) EVENT LOG REVIEW
(026)
CUSTOM MENU add OPTION S
(022) PASSWORD MAINTENANCE
(023) PASSWORDS THE OPTIONS
(079 ) USB
(202)VENDING
MENU
(006)
TYPE OF SALE
(001) MONEY SALES PRICES
(002) PRICES SALES WITH CARD
(009) RETURN OPTION
PROGRAMMING
(020) MAXIMUM ACCEPTANCE
(021) MAXIMUM CHANGE
(203)MACHINE
MENU
(210) OPTIONS OF MAINTENANCE
(211)
COFFEE MACHINE CONFIGURATION
(212)
CUPS SUGAR SPOON OPTIONS
(064)
BUTTON/CHANNEL LINKING
(065)
MANUAL TEST COFEE MACH
(204)
PERIPHERALS
MENU
(209) COIN CHANGE OPTIONS
(216) BILL READER MENU
(205)
SETTINGS
MENU
(007) DATE AND TIME SET
(043) CLOCK MODE 12/24 HOURS
(010) BEEP PROGRAMMING
(008)
NUMBER OF DECIMAL PLACES
(012) CURRENCY PROGRAMMING
(042) LCD Display contrast
(027) LANGUAGE CONFIGURATION
(206)
COMMUNICATIONS
MENU
(213) MODEM OPTIONS MENU
�
�
�
�
�
�
�
�
�
�
�
�
�
�
�
�
�
�
�
�
�
�
�
�
MAIN MENU:

Page 10 of 20
Page 11 of 20
Language selection:
(Spanish by default)
Scroll through the programming options until you
reach option “SETTINGS MENU” and press
Scroll through the options until “LANGUAGE
CONFIGURATION” and press
Scroll the languages until reaching the
correct one and press
�
to con rm.
The name of the products won’t be
changed, to change these names you
will need to inject a doses le set on the
correct language or edit the name of the
product. (Machine Menu>Cups Sugar
Spoon and product name)
Scroll through the programming options
until you reach
“
SETTINGS MENU
”
and
�
Scroll through the options until
“
DATE AND
TIME SET
”
and press
Using buttons
�
�
we will change among
changing the date or changing the hour.
Pressing
�
we will change to edit mode
for date or hour.
With buttons
�
we will move among the
digits .
With buttons
�
�
we will edit the selected
digit.
Once the date or the hour is correct
pressing
�
the data will be recorded.
Set the clock:
�
�
�
�
SETTINGS MENU
LANGUAGE
LANGUAGE
Spanish
English
SETTINGS MENU
DATE AND TIME SET
Current hour
15:30
SETTINGS MENU
15-01-2011

Page 12 of 20
Page 13 of 20
Pricing the selections:
Scroll through the programming options
until “VENDING MENU” enter it and select
“PRICES FOR VEND WITH MONEY”
and
�
Scroll through the options until “PRICES
MODIFICATION” and press
At this point we will be asked to enter a
price, well do that using the key pad as
numeric, when we have the desired price
�
At this point the machine we’ll ask us to
“PUSH SELECTIONS” we will press all
the buttons which needs to vend under
the price entered before.
Once we have pressed all the buttons
with the same price press
�
to record it.
At this moment the display will ask us to
introduce a new price, we can follow the
same proccess to stablish a new price
for certain selections or we can exit the
option pressing
�
Review and ressting faults on the machine:
Whenerver the machine door is opened
if the machine has any type of error on
a component it will be shown on display
and the red led will blink.
At this moment we can procced to erase it
entering programming mode
VENDING MENU
TYPE OF SALE
PRICES FOR VEND WITH MONEY
PRICES MODIFICATION
PRICES REVIEW
PRICES MODIFICATION
PRICE: _ _
1
2
3
R
PRICES MODIFICATION
PRICE: 00,50
PRICE 00,50
PUSH SELECTIONS
PRICES MODIFICATION
PRICE: 00,50

Page 12 of 20
Page 13 of 20
Wash the water circuit
Press the programming button on the machine door back.
Press the cups extraction button on cups roulette base.
On this moment the pump will start working and water will ow by all the machines
electro-vales cleaning this way all the water circuit.
Its recommended to perform this operation at least 5 times the rst time the machine is
placed
Botón de
Botón de
Botón de
programación, para
realizar el lavado
primero pulse este
botón.
Botón de extracción
de vasos, una vez
se ha usado este
botón se podrá
usar este para que
comience el lavado
del circuito de agua

Page 14 of 20
Page 15 of 20
Change the product linked to a button:
Scroll through the programming options
until “MACHINE MENU” enter it and select
“BUTTONS/CHANNEL LINKING”
and
press
Scroll through the options until
“MODIFICATION OF CONFIGURATION”
and press
�
At this point we will be asked to press
a selection, we will press the button to
which we want to assign a new product
The display will show the selection
statistical number, the channels with
that very same product and the name
of the product, beneath this information
the display will show the list of available
products, using
�
�
we can select a new
product to be link to that button, pressing
the product will be recorded.
After every product is linked we will be
ask to press another selection to change
its product linked.
To exit this option press again
�
�
�
MACHINE MENU
BUTTONS/CHANNEL LINKS
MODIFICATION OF CONFIGURATION
REVIEW CONFIGURATION
NEW CONFIGURATION
NEW PRODUCT
PRESS SELECTION
PRODUCT N0: XX
PXX - Name of the selected product
--------------------------------------------------
Expresso
Black Coffee
Capuccino
Coffee with cream
Cafe late
Capuccino
Capuccino
Capuccino
PRODUCT N0: XX
PXX - Name of the selected product
--------------------------------------------------
Expresso
Black Coffee
Capuccino
Coffee with cream
Cafe late
Capuccino
Capuccino
Capuccino
PRESS SELECTION
Product N0 is the statistical number of that Product N0 is the statistical number of that Product N0 is the statistical number of that
productproductproduct
P is the buttons linked to that selectionP is the buttons linked to that selectionP is the buttons linked to that selection

Page 14 of 20
Page 15 of 20
Modify a product dosage
Scroll through the programming options
until you reach
“MACHINE MENU” and
press
Scroll through the options until
“SELECTION DOSE ADJUSTMENT”
and
�
The list of available products will be shown on
display, using
�
�
we can scroll among them,
we will enter to modify the selected
product dosage.
The rst menú will give us oportunity to enter
to modify the dosage of the different elements
composing the product (teh diferent instant
powders or expresso coffee), test the product,
exit without saving changes or exit saving the
changes, using
�
�
we can move among the
options and pressing
we select the option, to
enter the product dosage select the element to
be modi ed.
The doses changes menú will give us the
following options to be modi ed:
- Adjust water dosage
- Adjust instant productu dosage (this is
not shown on expresso coffee)
�
�
we will select the element to
modify and pressing
�
we will be able to
The modi ying menu will sow us the
number of programmed pulses for the
water (pulses given by the volumetric
counter) or the turns programmed for the
product canister spring.
�
�
we will be able to modify them,
when we have set the desired data we
�
, this will return us to the previous
screen, and test the product or go back to
select another device.
When we have made all the changes
select “EXIT SAVING CHANGES”
COFFEE MACHINE CONFIGURATION
SELECTION DOSE ADJUSTMENT
CAFE CORTO
CAFE LARGO
CAFE CORTADO
DESCAFE CON LECHE
CAPUCCINO DESCAFE
CHOCOLATE
MACHINE MENU
OPTIONS OF MAINTENANCE
COFFEE MACHINE CONFIGURATION
�
�
�
�
�
DESCAFEINADO
LECHE
CHOCOLATE
TEST DE PRODUCTO
SALIR SIN GUARDAR
GUARDAR Y SALIFR
�
�
AJUSTAR DOSIS AGUA
AJUSTAR DOSIS SOLUBLE
AJUSTAR DOSIS PULSOS
80
AGUA 80 PULSOS
PROBAR DOSIS
AJUSTAR DOSIS PULSOS
XX
AGUA XX PULSOS
PROBAR DOSIS

Page 16 of 20
Page 17 of 20
Load of the coin changer:
First load of the coin changer J-2000:
If the tubes of the coin changer are totally
empty, do the rst initial load:
Press once button 1 of the coin changer
to get to option 25 and insert coins in this
order(*)
Three coins for tube 2
Three coins for tube 3
Three coins for tube 4
Three coins for tube 1
Three coins for tube 5
Important notes:
-
Every time you introduce three coins
for one tube, the slide will move: Wait
until it stops and then proceed with the
next tube.
-
The coin changer will get out of
programming mode after the last coin
is inserted. If this happens without
completing the rst initial reload, go
back to option 25 and nish the reload.
Once you’ve done the rst load, you may
reload the tubes in any order.
After reloads through the machine
(recommended):
Scroll to option “2” of the machine
programming “Reload of Change Tubes”
and insert coins in any order
Pressing buttons 1 to 5 will show you the
value of the coin and how many coins
there are in that tube.
(*) The combination of change of the coin changer and
order of the rst load you may consulted in the manual
of the coin changer J-2000.
Insert three coins in the
correct order to each tube

Page 16 of 20
Page 17 of 20
Checking and resetting faults on the coin mechanism
Functioning of the coin changer
programming:
Button 1:
To go into programming mode and
scroll through the options
Button 2:
To get into a speci c option and go
through its different elds.
Button 3:
To consult that option or modify the
data of that option.
Button 4:
To get out of the programming
Checking and resetting faults:
1.-
Press button 1 until you get to option
27
2.-
Press button 2 to see all the elds of
option 27
3.-
On each eld press button 3
4.-
In case another number different than
0 appears on the display of the coin
changer, it will be necessary to press
button 2 to reset the faults
5.-
To get back into the eld that you
were in before press button 3, press
button 1 and continue with the check-
ing
2.-
TO CHECK THE
OPTION
3.-
TO MODIFY
THE OPTION
1.-
ACCESS
TO THE
PROGRAMMING
OPTIONS
4.-
TO GET
OUT OF
PROGRAMMING

Page 18 of 20
Page 19 of 20
Canisters output, mixers, collection tray
and spilled liquids tray and deposit, its
recommended to clean them everyday with a
damp cloth, not using any detergent.
The rest of the machine is recommended to
clean it once a week using a mild cleaning
product.
Recommended cleaning:
Maintain always the steam
output and the ventilation
grid free from any obstacle.
Clean daily or very frecuently with a lightly
damph cloth and not using cleaning
products the following parts:
- Containers output chutes
- Product collection tray.
- Product wippers (desasamble them to
clean them more easily)
Clean the rest of the machine periodicaly
(weekely is recomended) using a soft
cleaning product diluted on a lot of water.
Allways check the ventilation entrance grid
and the steam output grid and remove any
element bloking them.
On general maintain our machines
clean and on good conditions will
increase its working life besides
obtaing fidelity from the users and a
better performance.

Page 18 of 20
Page 19 of 20
WARNING!
Read the following instructions carefully before installing the unit:
◊ Take the machine down from the pallet and remove the metal chucks to place it on the oor before
opening and removing the packaging.
◊ When discarding packaging material or an old machine, please consult about recycling.
◊ Before connecting to mains, make sure that the power supply characteristics coincide with those
of the machine.
◊ The power cable plug should be installed so the machine can be easily disconnected from
mains.
◊ If the power cable is damaged, it should be replaced by the manufacturer or after sales service or
similar quali ed personnel to prevent hazards.
◊ Place a rubber protection around the power cable in the slot of the lid of the cable winding
recess.
◊ Do not burn or throw away the battery. Batteries should be disposed of in accordance with local
laws and regulations and can be recycled.
◊ Protect the machine against humidity, dust, dirt, etc. You should particularly avoid any obstruction
of the ventilation grilles.
◊ Do not clean the machine with concentrated products as they may attack the paint and alter the
colour.
◊ Frequent cleaning, can prevent breakdowns and extend the machine’s life.
◊ The machine should be installed in a vertical position, both laterally and back to front, with a
maximum inclination of 5% (~2°).
◊ If you need to replace the power supply cable, please replace it with the appropriate one for your
country:
Argentina, Jofemar code 5500014.
Australia, Jofemar code 5500006.
Spain (STANDARD), Jofemar code 5500000.
UK, Jofemar code 5500011.
Switzerland, Jofemar code 5500004.
USA, Jofemar code 5500010.

Page 20 of 20
Tel. +34 948 75 12 12
Fax +34 948 75 04 20
Ctra, Marcilla, Km.2. 31350 PERALTA, Navarra SPAIN
www.Jofemar.com
www.Jofemar.com
www.Jofemar.com
www.Jofemar.com
Programming resume
�
�
Scroll among the program-
�
Enter the option, edit its value or
enter its sub-menu.
�
Exit the menu or sub-menu,
cancel the editing of an option.
�
Numeric inserting of data.
(207) CUSTOM MENU
(207) CUSTOM MENU
Options to be chosen by the user
(201)OPERATOR
MENU
(003) MONEY ACCOUNTING
(004) SALES PER PRODUCT
(018) SALES BY MACHINE
(015) TUBE RELOADING
(016)TUBE DISCHARGING
(050) MACHINE ID NUMBER
(049) PRODUCT CODES
(049) PRODUCT CODES
(202)TECHNICIAN
MENU
(024) EVENT LOG REVIEW
(026)
CUSTOM MENU add OPTION S
(022) PASSWORD MAINTENANCE
(023) PASSWORDS THE OPTIONS
(079 ) USB
(079 ) USB
(202)VENDING
MENU
(006) TYPE OF SALE
(001)
MONEY SALES PRICES
(002) PRICES SALES WITH CARD
(009) RETURN OPTION PROGRAMMING
(020) MAXIMUM ACCEPTANCE
(021) MAXIMUM CHANGE
(203)MACHINE
MENU
(210) OPTIONS OF MAINTENANCE
(211)
COFFEE MACHINE CONFIGURATION
(212)
CUPS SUGAR SPOON OPTIONS
(064)
BUTTON/CHANNEL LINKING
(065)
(065)
MANUAL TEST COFEE MACH
(204)
PERIPHERALS
MENU
(209) COIN CHANGE OPTIONS
(216) BILL READER MENU
(205)
SETTINGS
MENU
(007)
DATE AND TIME SET
(043) CLOCK MODE 12/24 HOURS
(010) BEEP PROGRAMMING
(008)
NUMBER OF DECIMAL PLACES
(012) CURRENCY PROGRAMMING
(042) LCD Display contrast
(027)
(027)
LANGUAGE CONFIGURATION
(206)
COMMUNICATIONS
MENU
(213) MODEM OPTIONS MENU
�
�
�
�
�
�
�
�
�
�
�
�
MAIN MENU:
Page 14
(To Change
the product linked to a button)
Page 12
(To set
prices to the selections)
Page 11
Page 11
Page 15
(To Change
products recipies)
Detail of the programming
button on the interior of the
door use it to access to
programming mode, once
pressed we can work
using the front pad:
Other manuals for Coffeemar G-250
1
Other Jofemar Vending Machine manuals

Jofemar
Jofemar TAOS Series User manual

Jofemar
Jofemar Vision Easy Combo Operating manual

Jofemar
Jofemar COFFEEMAR G-500 V2 User manual

Jofemar
Jofemar vision multiseller Product manual
Jofemar
Jofemar Vision ES-PLUS User manual
Jofemar
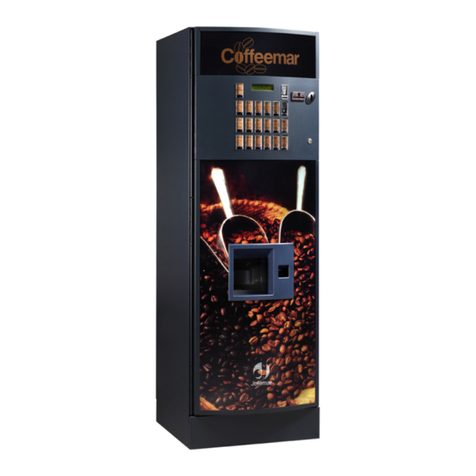
Jofemar Coffeemar G-250 User manual
Jofemar
Jofemar Vision Snack Plus User manual
Popular Vending Machine manuals by other brands

Azkoyen
Azkoyen Zensia technical information
Crane
Crane Dixie-Narco Glassfront BevMax 3 5800 Installation & setup guide

BIANCHI VENDING
BIANCHI VENDING LEI300 Use and maintenance manual

Westomatic
Westomatic Signature Operator's & installation manual

VT
VT VendMine Connect T313 user manual

Unicum
Unicum Foodbox user manual