manuals.online logo
Brands
  1. Home
  2. •
  3. Brands
  4. •
  5. Johnson Controls
  6. •
  7. Security Sensor
  8. •
  9. Johnson Controls Tyco Visionic MP-843/XHM2 User manual

Johnson Controls Tyco Visionic MP-843/XHM2 User manual

D-307788 MP-843/XHM2 1
Installation Guide
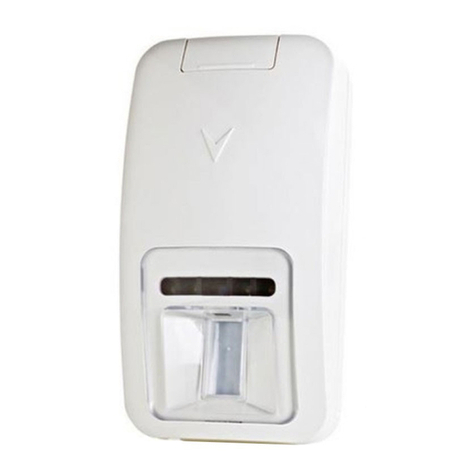
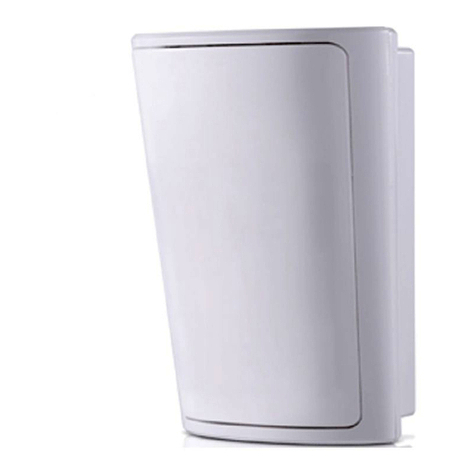
MP-843/XHM2
ZigBee 3.0 Home Automation
Wireless Digital Pet Immune PIR Motion Detector
Introduction
The MP-843/XHM2 PIR motion detector is wireless, digital, and immune
to the movements of pets. The detector is controlled by a micro-
processor and supports ZigBee 3.0. The detector has the following
features:
•
Detection distance of up to 49 ft.
•Uniform detection.
•White light immunity
Note: This feature is not evaluated by UL.
•Target Specific Imaging™ (TSI) enables immunity from pets
weighing up to 85 lb.
Note: This specification is not evaluated by UL.
•The patented True Motion Recognition™ algorithm enhances false
alarm rejection.
•Requires no vertical adjustment.
•To save battery power, the detector goes to sleep after a detection
while in normal mode. If there is no detection during the following
2-minute period, the detector returns to a ready state.
•Temperature compensation.
•Front tamper protection.
•Black mirror technology provides excellent white light protection.
•Elegant, sturdy case.
Figure 1: Legend
Callout
Description
1
Red LED
2
Green LED
3
Tamper switch
Specifications
•Detector type: dual element low-noise pyroelectric sensor
•Optical data:
o9 far parabolic black mirrors provide 18 beams.
o5 near cylinder black mirrors provide 10 curtains.
oAn optical attenuator on the mirror provides pet immunity
protection.
•Maximum coverage: 90° and 15 x 15 m or 49.2 ft x 49.2 ft
•Pet immunity: up to 85 lb
Electrical
•Internal batteries: two 3 V CR-123A lithium batteries.
Note: For UL installations, use only GP batteries.
•Nominal battery capacity: 1400 mAh
•Battery life: over 5 years *
Note:
•The battery life reduces faster if the device cannot connect to
a wireless network or the wireless connection quality is lower
than 20%.
•This specification is not evaluated by UL.
•Battery power test: occurs when you insert the battery and
periodically every several hours
Functional
•Alarm period: 3 s
•Visual indications:
oThe red LED lights for 3 seconds when the detector transmits
an alarm or tamper message.
oThe red LED lights for 3 seconds when the detector detects
motion while it is in walk test mode.
Note: Outside of walk test mode, the red LED does not light
when the detector detects alarm, or when it sends
transmission or supervision messages.
oThe red LED flashes during the power-up stabilization period
and when you press the tamper switch
•Rearm timer: rearms the detector 2 minutes after the last alarm.
The timer is disabled in walk test mode.
Wireless
•Supported network: ZigBee 3.0
•Frequency: 2.405 to 2.480 Ghz as per IEEE 802.15.4
•Tamper alert: reports when a tamper event occurs and in any
subsequent message until the tamper switch is restored
Mounting
•Height: 6 ft to 7 ft. For pet immunity, the optimal height is 7 ft.
•Installation options: flat surface or corner
Environmental
•RFI protection: >20 V/m up to 1000 MHz
•Operating temperatures: -10°C or 14°F to 50°C or 122°F
•Storage temperatures: -20°C or -4°F to 60°C or 140°F
Physical
•Size (H x W x D): 4.68 in. x 3.11 in. x 1.31 in.
•Weight including batteries: 4.2 oz.
•Color: white
•Patent: U.S. patents 5,693,943 and 6,211,522
Installation
General Guidance
Note: Install the device in accordance with the Standard for
Installation and Classification of Residential Alarm Systems, UL 1641.
Do not install the device in any of the following locations. See Figure
2:
1. Near high-voltage electrical lines
2. Near heat sources
3. Outdoors
4. In direct sunshine
5. In an area exposed to air drafts
2 D-307788 MP-843/XHM2
6. Behind partitions or objects
7. On unstable surfaces
Warning:Do not obscure partially or completely the detector’s field
of view.
Figure 2: General installation guidance
Mounting the MP-843/XHM2
1. To remove the bracket, turn the detector so that the flat side is
facedown and the detector spine is faceup. Press the spine
below the snap and slide off the cover. See Figure 3.
2. Mountthe bracket on the wall with screws. To mount the
bracket in a corner, use either hole set A1 or hole set A2. To
mountthe bracket on a flat surface or hole set B. See Figure 4.
3. Activate the detector with one of the following options:
•If batteries are already installed, pull the activation tab that
protrudes from the battery compartment. See Figure 5.
•If there are no batteries, insert new ones with the correct
polarity. For more information, see Inserting or replacing
the batteries.
4. To mount the detector on the bracket, align the groove of the
detector with the rail of the bracket and slide the detector
downward until you hear a click.
5. When the unit is mounted in its final location and ready for the
walk test, remove the protective film on the front of the unit.
Replacing the batteries
1. Press upward to slide off the detector from the bracket. See
Figure 7.
2. Optional: Remove the batteries and wait for 1 minute.
Note: Dispose of used batteries according to the manufacturer's
instructions.
3. Insert the new batteries.
Caution! Risk of explosion if battery is replaced with an
incorrect type. For more information, see Batteries in
Specifications.
4. To mount the detector on the bracket, slide it downward until
you hear a click.
Figure 7: Replacing the batteries
Pairing the detector and the panel
Pair the detector and control panel before you install the detector.
Note: For UL listed installations, only use the device with UL listed
control panels.
1. Set the panel to pairing mode. For more information, refer to
the panel user guide.
2. Set the detector to pairing mode.
3. To activate the detector, pull the activation strip that protrudes
from the battery compartment. See Figure 5.
4. Verify that the detector is searching for the panel: the green LED
blinks 3 times every 5 seconds and continues to blink for up to 1
minute.
Note: If you press the tamper switch or trip the motion
detector, the search process fails and restarts.
5. Complete the pairing procedure on the touchscreen control
panel. For more information, refer to the panel’s installation
guide.
6. On the panel screen, ensure that the Received Signal Strength
Indicator (RSSI) is stronger than -70dBm and the Link Quality
Indicator (LQI) is stronger than 250. If the RSSI and LQI values
do not meet the minimum required values, change the location
of the detector until they do.
Rebooting the detector
1. Remove the detector from the bracket. For more information,
see step 1 in Mounting the detector.
2. Press and hold the tamper switch for 2 seconds. For more
information on the tamper switch, see Figure 1.
3. Close the battery cover. For more information, see step 4 in
Mounting the detector.
Resetting the detector to default mode
If you reset the detector to default mode, the device disconnects from
the network and is ready to pair with the panel.
1. Remove the detector from the bracket. For more information,
see step 1 in Mounting the detector.
2. Press and hold the tamper switch. For more information on the
Figure 3: Opening the unit
Figure 4: Bracketmounting
Figure 5: Removing the
activ ation tab
Figure 6: Mounting detector on
bracket
D-307788 MP-843/XHM2 PIR 3
tamper switch, see Figure 1.
3. Insert one of the two batteries into the battery compartment
with correct polarity and release the tamper switch within 4
seconds. The LED blinks 3 times every 5 seconds.
4. Pair the detector. For more information on pairing the detector,
see Pairing the detector and the panel.
Performinga walk test
Instruct the home owner to perform a walk test at least once a week
to verify that the detector functions correctly.
1. To put the detector in walk test mode, complete one of the
following actions:
•Insert the batteries. For more information, see Inserting or
replacing the batteries.
•Remove the detector from the bracket and then return it to
the bracket to activate the tamper switch. For more
information on returning the device to the bracket, see step
4 in Mounting the MP-843/XHM2.
2. Wait for the detector to enter walk test mode. The red LED
flashes for 2 minutes before the detector enters walk test mode.
Walk test mode lasts 15 minutes.
3. Walk across the far end of detector coverage pattern in both
directions.
4. Verify that the red LED lights for 2 to 3 seconds each time the
detector detects your motion.
Note: In walk test mode the red LED lights for every motion detected.
After 15 minutes the detector enters normal mode in which the LED
will not blink when it detects movement.
Figure 8: Walk test detector coverage pattern
Callout
Description
1
Top view
2
Side view
Troubleshooting
If you encounterone of the following problems with the MP-
843/XHM2, perform the suggested solution:
Problem
Solution
The detector and control
panel do not pair successfully.
Reset the detector to default
mode and pair the detector and
the panel again. For more
information, see Resetting the
detector to default mode and
Pairing the detector and the
panel.
The detector and the panel do
not communicate.
Try the following options:
1. Ensure the RSSI and LQI
meet the required values.
For more information, see
step 8 in Pairing the
detector and the panel.
2. Refer to the signal strength
test procedure in the
control panel installation
guide.
3. Replace the batteries.
The device transmits a low
battery indication.
To ensure continuous full
operation, replace both batteries
within two weeks of the first low
battery indication.
The panel does not arm
because of an unrecognized
detector malfunction.
Disable the zone. For more
information, refer to the control
panel user guide.
Note:
•Consult with your installer
or system provider before
you disable a zone.
•The overall system security
level lowers if you disable a
detector zone.
Compliance with standards
The MP-843/XHM2 detector complies with the following standards:
USA: FCC-CFR 47 Part 15
Canada: IC-RSS 247
USA: UL-UL639
Canada:ULC-S306
WARNING! Changes or modifications to this unit not expressly
approved by the party responsible for compliance could
void the user’s authority to operate the equipment.
This device complies with Part 15 of the FCC Rules with Industry
Canada license-exempt RSS standard(s). Operation is subject to
the following two conditions: (1) this device may not cause
interference, and (2) this device must accept any interference,
including interference that may cause undesired operation of the
device.
Le présent appareil est conforme aux CNR d'Industrie Canada
applicables aux appareils radio exempts de licence. L'exploitation
est autorisée aux deux conditions suivantes : (1) l'appareil ne doit
pas produire de brouillage, et (2) l'utilisateur de l'appareil doit
accepter tout brouillage radioélectrique subi, même si le
brouillage est susceptible d'en compromettre le fonctionnement.
To comply with FCC Section 1.1310 for human exposure to radio
frequency electromagnetic fields and IC requirements, implement
the following instruction: A distance of at least 20cm. between the
equipment and all persons should be maintained during the
operation of the equipment.
Le dispositif doit être placé à une distance d'au moins 20 cm à
partir de toutes les personnes au cours de son fonctionnement
normal. Les antennes utilisées pour ce produit ne doivent pas être
situés ou exploités conjointement avec une autre antenne ou
transmett
Note:This equipment has been tested and found to comply with the
limits for a Class B digital device, pursuant to part 15 of the FCC Rules.
These limits are designed to provide reasonable protection against
harmful interference in a residential installation. This equipment
4 D-307788 MP-843/XHM2
generates, uses and can radiate radio frequency energy and, if not
installed and used in accordance with the instructions, may cause
harmful interference to radio communications. However, there is no
guarantee that interference will not occur in a particular installation. If
this equipment does cause harmful interference to radio or television
reception, which can be determined by turning the equipment off and
on, the user is encouraged to try to correct the interference by one or
more of the following measures:
•Reorient or relocate the receiving antenna.
•Increase the separation between the equipment and receiver.
•Connect the equipment into an outlet on a circuit different from
that to which the receiver is connected.
•Consult the dealer or an experienced radio/TV technician for help.
This Class B digital apparatus complies with Canadian ICES-003.
Cet appareil numerique de la classe B est conforme a la norme NMB-
003 du Canada.
Devicefailure
Even the most sophisticated detectors can sometimes be defeated or
may fail to warn. Possible causes of failure are DC power failure or
improper connection, malicious masking of the lens, tampering with
the optical system, decreased sensitivity in ambient temperatures
close to that of the human body and unexpected failure of a
component part.
The above list includes the most common reasons for failure to detect
intrusion, but is by no means comprehensive. It is therefore
recommended that the detector and the entire alarm system be
checked weekly, to ensure proper performance.
An alarm system should not be regarded as a substitute for insurance.
Home and property owners or renters should continue to insure their
lives and property, even though they are protected by an alarm
system
Warranty
V is o nic Limit ed ( the “Manufacturer") wa rrants t his p ro d uc t o nly (the "P ro d u c t") to the o rig inal p urc has er o nly
( the “Purc has er”) ag ains t d e fec tiv e wo rkmans hip a nd ma terials und er no rma l us e o f the Pro d uc t f o r a p erio d of
twelve (12) mo nths fro m the date o f s hip ment b y the Manuf ac turer.
This W arranty is ab s o lutely c o nd itio nal up o n the Pro d uc t hav ing b een p ro p erly ins ta lled , maintained and o p erated
und er co nd itio ns o f no rmal us e in ac co rd anc e with the Manufac tur ers rec o mmend ed ins tallat io n and o p eratio n
ins truc tio ns . Pro d uc ts whic h hav e b ec o me d ef ec tiv e f o r any o ther reas o n, ac co rd ing to the Manufa cture r s
d is c retio n, s uc h as imp ro p er ins tallatio n, failure to f o llo w rec o mmend ed ins talla tio n and o p eratio na l ins t ruc tio n s ,
neg lec t, willf ul d amag e, mis us e o r v and a lism, accidental d amage, alteration or tampering, o r repair by anyone
o ther than the manuf ac tur er, are no t c o vered b y this W arra nty .
There is a b s o lutely no wa rranty o n s o f tware, and all s o f twa re p ro d uc ts are s o ld a s a us er licens e und er t he t erm s
o f the s o ftwa re lic ens e ag reement inc lud ed with s uc h Pr o d uct."
The Manuf ac turer d o es no t rep res ent that t his Pro d uc t may no t b e c o mp ro mis ed and /o r circ umv ented o r that
the Pro d uc t will p revent any d eath a nd /o r p ers o na l injury a nd /o r d amag e to p ro p er ty res ulting fr om burglary ,
ro b b ery, fire o r o therwis e, o r that the Pro d uc t will in all c as es p ro v id e a d eq uate warning o r p ro tec tio n. The
Pro d uc t, p ro p er ly ins ta lled and maintained , o nly red uc es t he ris k o f s uc h ev ents witho ut wa rning and it is no t a
g uarantee o r ins uranc e that s uc h ev ents will no t o cc ur.
Conditions to Void Warranty
This warranty a p p lies o nly t o d ef ec ts in p ar ts and wo r kmans hip relating t o no rmal us e o f t he Pr o d ucts . I t d o es
not cover:
•d ama g e incurred in s hip p ing o r ha nd ling ;
•damage caused by d isas ter s uc h as f ire, f lo o d , wind , earthq uake o r lig htning ;
•damage due to causes beyo nd the co ntrol of the Seller such as exces s ive vo ltage, mechanical shock o r water
damage;
•d amag e c aus ed b y unautho riz ed att ac hment , alteratio ns , mo d ific atio ns o r f o reig n o b jec ts b eing us ed with o r
in c o njunctio n with the Pro d uc ts ;
•damage caused b y peripherals (unless s uch peripherals were s upp lied by the Seller;
•d efec ts c aus ed b y f ailur e t o p ro v id e a s uit ab le ins tallat io n env iro nment fo r the p ro d uc ts ;
•damage caused b y use o f the Pro d uc ts f o r p urp o s es o ther than tho s e fo r which they wer e d es ig ned ;
•damag e fro m impro p er maintenance;
•d amag e ar is ing o ut o f any o ther ab us e, mis hand ling o r imp ro p er ap p lic at io n o f t he Pro d uc ts .
I tem s N o t C o vered b y W arran ty:
I n a d d itio n to the items whic h v o id the W arrant y, t he f o llo wing items s hall no t b e c o ver ed b y W arranty : ( i) fr eig ht
cost to the repair centre; (ii) customs fees, taxes , or VAT that may b e d ue; (iii) Products which are not identifie d
with the Seller's p ro d uc t lab el and lo t numb er o r s erial numb e r; ( iv) Pr o d ucts d is as s emb led o r rep aired in s uc h a
manner as to ad versely affect performance o r p revent adequate insp ection or tes ting to verify any warranty cla im .
Access cards or tags returned fo r rep lacement under warranty will be credited or replaced at the Seller's o ption.
THIS WARRANTY IS EXCLUSIVE AND EXPRESSLY IN LIEU OF ALL OTHER WARRANTIES, OBLIGATIONS OR
LIABILITIES, WHETHER WRITTEN, ORAL, EXPRESS OR IMPLIED, INCLUDING ANY WARRANTY OF
MERCHANTABILITY OR FITNESS FOR A PARTICULAR PURPOSE, O R OT H ERWISE. IN NO CASE SHALL T H E
MANUFACTURER BE LIABLE TO ANYONE FOR ANY CONSEQUENTIAL OR INCIDENTAL DAMAGES FOR
BREACH O F TH IS WARRAN T Y O R ANY O T H ER WARRANT IES WHATSOEVER, AS AFO RESAID.
THE MANUFACTURER SHALL IN NO EVENT BE LIABLE FOR ANY SPECIAL, INDIRECT, INCIDENTAL,
CONSEQUENTIAL OR PUNITIVE DAMAGES OR FOR LOSS, DAMAGE, OR EXPENSE, INCLUDING LOSS OF
USE, PROFITS, REVENUE, OR GOODWILL, DIRECTLY OR INDIRECTLY ARISING FROM PURCHASER’S USE OR
INABILITY TO USE THE PRODUCT, OR FOR LOSS OR DESTRUCTION OF OTHER PROPERTY OR FROM ANY
OT H ER CAUSE, EVEN IF MANUFACT URER H AS BEEN ADVISED O F T H E PO SSIBILIT Y O F SUCH DAMAGE.
THE MANUFACT URER SHALL H AVE NO LIABILIT Y FO R ANY DEATH , PERSONAL AND/O R BODILY INJURY
AND/OR DAMAGE TO PRO PERT Y O R OTHER LOSS WHET H ER DIRECT , INDIREC T , INCIDENT AL,
CONSEQUENTIAL OR OTHERWISE, BASED ON A CLAIM THAT THE PRODUCT FAILED TO FUNCTION.
HOWEVER, IF THE MANUFACTURER IS HELD LI ABLE, WHETHER DIRECTLY OR INDIRECTLY, FOR ANY LOSS OR
DAMAGE ARISING UNDER THIS LIMITED WARRANTY, THE M ANUFACTURER'S MAXIMUM LIABILIT Y (IF ANY )
SHALL NO T IN ANY CASE EXCEED T HE PURCHASE PRICE O F T H E PRO DUCT INVOLVED, W HI CH SHALL BE
FIXED AS LIQUIDATED DAMAGES AND NOT AS A PENALTY, AND SHALL BE THE COMPLETE AND EXCLUSIVE
REMEDY AGAINST THE MANUFACTURER.
W hen ac cep ting the d eliv ery o f the Pro d uc t, the Purc has er ag rees to the s aid c o nd itio ns o f s ale and warranty and
he reco g nizes having b een info rmed o f .
So me juris d ic tio ns d o no t a llo w t he ex c lus io n o r limit atio n o f inc id ental o r c o ns eq uentia l d amag es , s o thes e
limit at io ns ma y no t ap p ly und er c ertain c irc ums t anc es .
The Manuf ac turer s hall b e und er no liab ility whats o ev er a ris ing o ut o f the c o rrup t io n and /o r malf unctio ning of
any telec o mmunic atio n o r elec tro nic eq uip ment o r any p r o g rams .
The Manuf ac turers o b lig at io ns und er this Wa rrant y a re limited s o lely t o rep air and /o r rep lac e a t the
Manufac turer’s
d is cretio n a ny Pro d uc t o r p art thereof that may p ro ve defective. Any repair and/or rep lacement shall not extend
the o rig ina l W arrant y p erio d . The Ma nufac turer s hall no t b e res p o ns ib le f o r d is mantling a nd /o r r eins ta llat io n
c o s ts . To ex erc is e this W arranty the Pr o d uct mus t b e returned t o the Manuf ac turer f reig ht p re-paid and ins ure d .
All f reig ht and ins uranc e c o s ts are the res p o ns ib ility o f the Pur chas er and are no t inc lud ed in this W arr anty .
For sales in Israel only:
The Purc has er s hall c o mp ly with t he p ro vis io ns o f the I s raeli C o ns umer Protection Law – 1981("Co nsum e r
Pro tec tio n L aw") related reg ulat io ns , inc lud ing the I s ra eli C o ns umer Pro tec tio n R eg ula tio ns ( W arrant y St icker) ,
5772-2012) ( "R eg ula tio ns ") , inc lud ing , witho ut limit atio n ( i) p ro v id ing its c us to mers wit h at leas t the minimum
warranty req uired b y the C o ns umer Pro t ec tio n L aw, a nd ( ii) ens uring t hat a wa rra nty c er tific at e and a warrant y
s tic ker (as d ef ined in the R eg ulatio ns ) ( "W arranty Stic ke r") s hall b e at tac hed to a ny s o ld Pr o d ucts and the d at e of
the s ale o f the Pro duct t o the c o ns umer o r the end -us er s hall b e a d d ed in a read ab le manner o n the W arranty
Sticker.
I n no ev ent s ha ll the Purc has er’s c o mp lianc e with the C o ns umer Pro t ec tio n L aw and R eg ula tio ns ex p and any of
the Manufac turer's wa rranty o b lig atio ns und er t his warr anty , and the Purc has er s hall b e res p o ns ib le f o r any
warranty that it provides with resp ect to the Prod ucts which exceeds or is different from this warranty.
This warranty s hall no t b e mo d if ied , v aried o r ex tend ed , a nd the Ma nufa cturer d o es no t autho riz e any p ers o n to
ac t o n its b ehalf in t he mo d if icatio n, v ar iatio n o r ex tens io n o f t his warranty . This warr anty s hall ap p ly to the Pro d uct
o nly. A ll p ro d uc ts , ac ces s o ries o r attac hments o f o thers us ed in c o njunctio n with the Pro d uc t, inc lud ing b at teries ,
s hall b e c o ver ed s o lely b y their o wn warrant y, if any . The Ma nufac turer s hall no t b e lia b le f o r any d amag e o r lo ss
what s o ev er, whether d ir ec tly , ind ir ec tly , inc id enta lly, c o ns eq uent ially o r o therwis e, c aus ed b y the malf unc tio n of
the Pro d uc t d ue to p ro d uc ts , ac ces s o ries , o r a ttac hments o f o ther s , inc lud ing b atter ies , us ed in c o njunctio n with
the Pro d uc ts . This W arranty is e xc lus iv e to t he o rig inal Purc has er and is no t as s ig nab le.
This W arranty is in ad d itio n to and d o es no t affect your leg al rig hts . Any p ro vis io n in this warranty which is co ntrary
to the Law in t he s t ate o r c o untry were the Pro d uc t is s up p lied s ha ll no t ap p ly.
Governing Law:
This d is cla imer o f wa rrant ies a nd limited war ranty are g o ver ned b y the d o mes tic laws o f I s rael.
Warning
The us er mus t f o llo w the Ma nufa cturer’s ins tallatio n and o p eratio nal ins truc tio ns inc lud ing t es ting the Pro d uc t
and its whole s ystem at least once a week and to take all necessary p recautions fo r his/her s afety and the
pro tection o f his/her prop erty.
* I n c as e o f a c o nflic t, c o ntrad ic tio n o r interp retatio n b etween the E ng lis h v ers io n o f the warr anty a nd o ther
vers io ns , the Eng lis h v ers io n s hall p r ev ail.
W .E.E.E. Product Recycling Declaration
For information regarding the recycling of thisproduct you must contact the
company from which you orignially purchased it. If you are discarding this
product and not returning it for repair then you must ensure that it is returned
as identified by your supplier. This product is not to be thrown away with
everyday waste.
Directive 2002/96/EC Waste Electrical and Electronic Equipment.
©2020 Johnson Controls. All rights reserved. JOHNSON CONTROLS,
TYCO and VISONIC are trademarks of Johnson Controls.
email:info@visonic.com
Website:www.visonic.com
VISONIC LTD. 2020 MP-843/XHM2 D-307788 (Rev. 0, 05/20)
Other Johnson Controls Security Sensor manuals

Johnson Controls FS-1300 User manual

Johnson Controls

Johnson Controls FS-1300 User manual

Johnson Controls PGP922 User manual

Johnson Controls

Johnson Controls PGP922 User manual

Johnson Controls tyco Bentel Security BW-SHK User manual

Johnson Controls

Johnson Controls tyco Bentel Security BW-SHK User manual

Johnson Controls tyco Bentel Security BW-DTM User manual

Johnson Controls

Johnson Controls tyco Bentel Security BW-DTM User manual

Johnson Controls NEXT CAM PG+ Instruction sheet

Johnson Controls

Johnson Controls NEXT CAM PG+ Instruction sheet

Johnson Controls PG9350SL User manual

Johnson Controls

Johnson Controls PG9350SL User manual

Johnson Controls F62AA User manual

Johnson Controls

Johnson Controls F62AA User manual

Johnson Controls LC-200S User manual

Johnson Controls

Johnson Controls LC-200S User manual

Johnson Controls PG8932 User manual

Johnson Controls

Johnson Controls PG8932 User manual

Johnson Controls FTX-P2J User manual

Johnson Controls

Johnson Controls FTX-P2J User manual

Johnson Controls Tyco Kantech T.REX Assembly instructions

Johnson Controls

Johnson Controls Tyco Kantech T.REX Assembly instructions

Johnson Controls PG9200AX User manual

Johnson Controls

Johnson Controls PG9200AX User manual

Johnson Controls LC-203 User manual

Johnson Controls

Johnson Controls LC-203 User manual

Johnson Controls PENN RLD-H10P Manual

Johnson Controls

Johnson Controls PENN RLD-H10P Manual

Johnson Controls LC-224 User manual

Johnson Controls

Johnson Controls LC-224 User manual

Johnson Controls Tyco SR Series User manual

Johnson Controls

Johnson Controls Tyco SR Series User manual

Johnson Controls PG9200AX User manual

Johnson Controls

Johnson Controls PG9200AX User manual

Johnson Controls PGP914 User manual

Johnson Controls

Johnson Controls PGP914 User manual

Johnson Controls tyco Bentel Security BW-IRC User manual

Johnson Controls

Johnson Controls tyco Bentel Security BW-IRC User manual

Johnson Controls MP-802 PG+ User manual

Johnson Controls

Johnson Controls MP-802 PG+ User manual

Johnson Controls LC-200 User manual

Johnson Controls

Johnson Controls LC-200 User manual

Johnson Controls HTD-432 PG2 User manual

Johnson Controls

Johnson Controls HTD-432 PG2 User manual

Johnson Controls DSDN User manual

Johnson Controls

Johnson Controls DSDN User manual

Johnson Controls LC-203 User manual

Johnson Controls

Johnson Controls LC-203 User manual

Popular Security Sensor manuals by other brands

IGM Vega FD 330-4-1 user manual

IGM

IGM Vega FD 330-4-1 user manual

B.E.G. LUXOMAT PD4-S-K manual

B.E.G.

B.E.G. LUXOMAT PD4-S-K manual

Lince 1926BOBBY-T-AM/U Installation, operation and maintenance manual

Lince

Lince 1926BOBBY-T-AM/U Installation, operation and maintenance manual

Abra AK-325 quick start guide

Abra

Abra AK-325 quick start guide

ipf electronic UT990895 manual

ipf electronic

ipf electronic UT990895 manual

U-Prox WDC mini user manual

U-Prox

U-Prox WDC mini user manual

LEGRAND Mosaic 0 489 22 manual

LEGRAND

LEGRAND Mosaic 0 489 22 manual

Tractel Stopcable EN 353-1 Operating and maintenance instructions

Tractel

Tractel Stopcable EN 353-1 Operating and maintenance instructions

Wenglor I08G003 operating instructions

Wenglor

Wenglor I08G003 operating instructions

Datalogic SG4-14-030-OO-P instruction manual

Datalogic

Datalogic SG4-14-030-OO-P instruction manual

STEINEL PROFESSIONAL IS 3360 PF Information

STEINEL PROFESSIONAL

STEINEL PROFESSIONAL IS 3360 PF Information

PASCO PS-2194 Product guide

PASCO

PASCO PS-2194 Product guide

jablotron JA-151TH manual

jablotron

jablotron JA-151TH manual

SICK deTem4 Core Ex operating instructions

SICK

SICK deTem4 Core Ex operating instructions

NuAire 230-PIR installation manual

NuAire

NuAire 230-PIR installation manual

Siemens OOH740-A9-Ex Technical manual

Siemens

Siemens OOH740-A9-Ex Technical manual

Dilo SF6-LeakPointer operating manual

Dilo

Dilo SF6-LeakPointer operating manual

Lince 1896BOBBY-AM/U Installation, operation and maintenance manual

Lince

Lince 1896BOBBY-AM/U Installation, operation and maintenance manual

manuals.online logo
manuals.online logoBrands
  • About & Mission
  • Contact us
  • Privacy Policy
  • Terms and Conditions

Copyright 2025 Manuals.Online. All Rights Reserved.