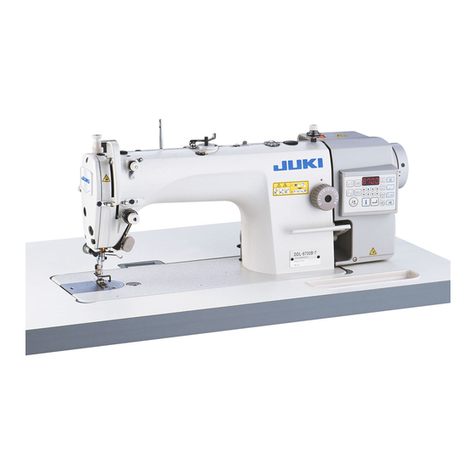
JUKI DDL-9000A User manual

DDL-9000A
取扱説明書
使用说明书
INSTRUCTION MANUAL
MANUAL DE INSTRUCCIONES
注意: このたびは、当社の製品を、お買い上げいただきまして、有難うございました。
安全に使用していただくために、使用前に必ずこの取扱説明書をお読みください。
また、いつでもすぐに読めるように、この取扱説明書を保管してください。
NOTE : Read safety instructions carefully and understand them before using.
Retain this Instruction Manual for future reference.
注意 : 为了安全地使用,请您在使用之前一定阅读本使用说明书。
另外,请您注意保管本使用说明书,以便随时查阅。
NOTA : Antes de comenzar a usar esta máquina lea con detención hasta comprender todas las
instrucciones de sequridad. Conserve este Manual de instrucciones a mano para futuras
consultas.
No.03
40042306

i
ミシン、自動機、付帯装置( 以下機械と言う )は、縫製作業上やむをえず機械の可動部品の近くで作業する
ため、可動部品に接触してしまう可能性が常に存在していますので、実際にご使用されるオペレータの方お
よび、保守、修理等をされる保全の方は、事前に以下の 安全についての注意事項 を熟読されて、十分理
解された上でご使用ください。この取扱説明書 安全についての注意事項 に書かれている内容は、お客
様が購入された商品の仕様には含まれない項目も記載されています。
なお、本取扱説明書および、製品の警告ラベルを十分理解していただくために、警告表示を以下のように
使い分けております。これらの内容を十分に理解し、指示を守ってください。
安全にご使用していただくために
(
!
)危険の水準の説明
機械操作時、保守時、当事者、第 3 者が取り扱いを誤ったり、その状況を回避
しない場合、死亡または、重傷を招く潜在的可能性のあるところ。
機械操作時、保守時、当事者、第 3 者が取り扱いを誤ったり、その状況を回避
しない場合、死亡または、重傷を招く差し迫った危険のあるところ。
機械操作時、保守時、当事者、第 3 者が取り扱いを誤ったり、その状況を回避
しない場合、中・軽傷害を招くおそれのあるところ。
危険
警告
注意
(
@
)警告絵表示および表示ラベルの説明
警
告
絵
表
示
運動部に触れて、怪我をする
恐れがあります。
ベルトに巻き込まれ、怪我を
する恐れがあります。
高電圧部に触れて、感電の恐
れがあります。 指
示
ラ
ベ
ル
正しい回転方向を指示してい
ます。
高温部に触れて、ヤケドの恐
れがあります。
アース線の接続を指示してい
ます。
1・中・軽傷害、重傷、死亡を招く恐れがあります。
・運動部に触れて、怪我をする恐れがあります。
2・安全ガードを付けて縫製作業をすること。
・安全カバーを付けて縫製作業をすること。
・安全保護装置を付けて縫製作業をすること。
3・
電源を切ってから、「糸通し」・「ボビンや針の交換」・「掃除」・「調整」・「給油」をすること。
3
2
1
1
23

ii
安全についての注意事項
1.感電事故防止のため、電装ボックスを開ける必要のある場合は、電源を切り、念のため 5 分以上経
過してから蓋を開けてください。
危険
基本的注意事項
1. ご使用される前に本取扱説明書および、付属に入っている全ての説明書類を必ずお読みください。
また、いつでもすぐに読めるように、この取扱説明書を大切に保存してください。
2.本項に書かれている内容は、購入された機械の仕様に含まれていない項目も記載されています。
3.針折れによる事故防止のため、安全眼鏡を着用してください。
安全装置、警告ラベル
1. 安全装置の欠落による事故防止のため、この機械を操作する際は、安全装置が所定の位置に正しく
取
り付けられている事を確認してから操作してください。安全装置については、vi 頁を参照してください。
2.人身事故防止のため、安全装置を外した場合は、必ず元の位置に取り付け、正常に機能することを確
認してください。
3.人身事故防止のため、機械に貼り付けてある警告ラベルは、常にはっきり見えるようにしておいてく
ださい。剥がれたり汚損した場合、新しいラベルと交換してください。
用途、改造
1. 人身事故防止のため、この機械は、本来の用途および本取扱説明書に規定された使用方法以外には
使用しないでください。
用途以外の使用に対しては、当社は責任を負いません。
2.人身事故防止のため、機械には、改造等を加えないでください。改造によって起きた事故に対しては、
当社は責任を負いません。
教育訓練
1. 不慣れによる事故防止のため、この機械の操作についての教育、並びに、安全に作業を行うための教
育を雇用者から受け、適性な知識と操作技能を有するオペレータのみが、この機械をご使用ください。
そのため雇用者は、事前にオペレータの教育訓練の計画を立案し、実施することが必要です。
電源を切らなければならない事項
1. 人身事故防止のため、異常、故障が認められた時、停電の時は直ちに電源を切ってください。
2.機械の不意の起動による事故防止のため、次のような時は、必ず電源を切ってから行ってください。
2-1. たとえば、針、ルーパ、スプレッダ等の糸通し部品へ糸通しする時や、ボビンを交換する時。
2-2.たとえば、機械を構成する全ての部品の交換、または調整する時。
2-3.たとえば、点検、修理、清掃する時や、機械から離れる時。
3.感電、漏電、火災事故防止のため、電源プラグを抜く時は、コードではなくプラグを持って抜いてく
ださい。
4. 不意の起動による事故防止のため、クラッチモータを使用している場合は電源を切った後、完全に止
まっていることを確認してから、上記 2 の作業を行ってください。
注意
事故とは:人身並びに財産
に損害を与える
ことをいう。
電源を切るとは : 電源スイッチを切ってから、電源プラグを
コンセントから抜くことを言う。以下同じ

iii
各使用段階に於ける注意事項
運 搬
1. 人身事故防止のため、機械の持ち上げは 2 人以上で行い、移動には台車等を使用してください。
2. 人身事故防止のため、持ち上げ、移動の際は転倒、落下等を起こさないよう十分安全策をとってくだ
さい。
3.予期せぬ事故や、落下事故防止のため、再梱包する場合は、着荷時と同じ状態に再梱包してください。
特に機械に付着した油は、十分に拭き取ってから再梱包してください。
開 梱
1. 人身事故防止のため、開梱は上から順序よく行ってください。木枠梱包の場合は、特に釘には十分注
意してください。また、釘は板から抜き取ってください。
2.人身事故防止のため、機械は重心位置を確かめて、慎重に取り出してください。
据え付け
(
!
)テーブル、脚
1. 人身事故防止のため、テーブル、脚は、純正部品を使用してください。やむをえず、非純正部品を使
用する場合は、機械の重量、運転時の反力に十分耐え得るテーブル、脚を使用してください。
2. 人身事故防止のため、テーブルと脚の固定は、ボルト結合を推奨しますが、木ねじでの固定はφ 5.1
x 長さ 32 mm 以上のねじで固定してください。また、下穴を電気ドリル等で深く開けますと、強度
不足となりますので、下穴は喰いつき程度の深さとしてください。固定後、十分なる結合強度が得ら
れているか、必ず確認してください。
3.人身事故防止のため、脚にキャスタを付ける場合、十分な強度をもったロック付きキャスタを使用して
ください。
(@)ケーブル、配線
1. 感電、漏電、火災事故防止のため、ケーブルは使用中無理な力が加わらないようにしてください。また、
V ベルト等の運転部近くにケーブル配線する時は、30mm 以上の間隔をとって配線してください。
2.感電、漏電、火災事故防止のため、タコ足配線はしないでください。
3.感電、漏電、火災事故防止のため、コネクタは確実に固定してください。また、コネクタを抜く時は、
コネクタ部を持って抜いてください。
(#)接地
1. 漏電、絶縁耐圧による事故防止のため、電源プラグは電気の専門知識を有する人に、適性なプラグ
を取り付けてもらってください。また、電源プラグは必ず接地されたコンセントに接続してください。
2.漏電による事故防止のため、アース線は必ず接地してください。
($)モータ
1. 焼損による事故防止のため、モータは指定された定格モータ ( 純正品 ) を使用してください。
2. 市販クラッチモータを使用する際は、V ベルトへの巻き込まれ事故防止のため、巻き込み防止付きプー
リカバーが付いたクラッチモータを選定してください。
操作前
1. 人身事故防止のため、電源を投入する前に、コネクタ、ケーブル類に損傷、脱落、緩み等がないこと
を確認してください。
2.人身事故防止のため、運動部分に手を入れないでください。また、プーリの回転方向が矢印と一致し
ているか、確認してください。
3.キャスタ付き脚卓を使用の場合、不意の起動による事故防止のため、キャスタをロックするか、アジャ
スタ付きの時は、アジャスタで脚を固定してください。
操作中
1. 巻き込みによる人身事故防止のため、機械操作中ははずみ車、V ベルト、モータ付近に指、頭髪、
衣類を近づけたり、物を置かないでください。
2.人身事故防止のため、電源を入れる時、また機械操作中は針の付近や、天びんカバー内に指を入れ
ないでください。

iv
3.機械操作中、釜は高速で回転しています。手への損傷防止のため、操作中は釜付近へ絶対に手を近
づけないでください。また、ボビン交換の時は電源を切ってください。
4. 人身事故防止のため、機械を倒す時、また元の位置へ戻す時、指等をはさまれないように注意してく
ださい。
5. 不意の起動による事故防止のため、機械を倒す時、またベルトカバーおよび、V ベルトを外す時は電
源を切ってください。
6.サーボモータをご使用の場合は、機械停止中はモータ音がしません。不意の起動による事故防止のた
め、電源の切り忘れに注意してください。
給油
1. 自動給油の機械には、JUKI純正オイルを使用してください。
2.炎症、カブレを防ぐため、目や身体に油が付着した時は直ちに洗浄してください。
3.下痢、嘔吐を防ぐため、誤って飲み込んだ場合、直ちに医師の診断を受けてください。
保守
1. 不慣れによる事故防止のため、修理、調整は機械を熟知した保全技術者が本取扱説明書の指示範囲
で行ってください。また、部品交換の際は、当社純正部品を使ってください。不適切な修理・調整お
よび非純正部品使用による事故に対しては、当社は責任を負いません。
2. 不慣れによる事故や、感電事故防止のため、電気関係の修理、保全 ( 含む配線 ) は電気の専門知識
の有る人、または当社、販売店の技術者に依頼してください。
3.不意の起動による事故防止のため、エアーシリンダ等の空気圧を使用している機械の修理や保全を行
う時は、空気の供給源のパイプを外し、残留している空気を放出してから行ってください。
4.人身事故防止のため、修理調整・部品交換等の作業後は、ねじ・ナット等が緩んでいないことを確
認してください。
5.機械の使用期間中は、定期的に清掃を行ってください。この際、不意の起動による事故防止のため、
電源は必ず切ってから行ってください。
6.保守、点検、修理の作業の時は、必ず電源スイッチを切り、ミシンおよびモータが完全に停止した
ことを確認してから行ってください。(クラッチモータの場合、電源スイッチを切った後もモータは
惰性でしばらく回り続けますので注意してください。)
7.人身事故防止のため、修理・調整した結果、正常に操作できない場合は直ちに操作を中止し、当社
または販売店に連絡し、修理依頼してください。
8.人身事故防止のため、ヒューズが切れた時は、必ず電源を切り、ヒューズ切れの原因を取り除いて
から、同一容量のヒューズと交換してください。
使用環境
1.誤動作による事故防止のため、高周波ウエルダ等強いノイズ源 ( 電磁波 ) から影響を受けない環境
下で使用してください。
2. 誤動作による事故防止のため、定格電圧± 10% を超える所では使用しないでください。
3.誤動作による事故防止のため、エアーシリンダ等の空気圧を使用している装置は、指定の圧力を確
認してから使用してください。
4.安全にお使いいただくために、下記環境下でお使いください。
動作時雰囲気温度 5℃〜 35℃
動作時 相対湿度 35% 〜 85%
5.電装部品損壊・誤動作による事故防止のため、寒いところから急に暖かいところなど環境がかわっ
た時、結露が生じることがありますので、十分に水滴の心配がなくなってから電源を入れてください。
6.電装部品損壊・誤動作による事故防止のため、雷が発生している時は安全のため作業をやめ、電源
プラグを抜いてください。
7.電波状態によっては、近くのテレビ、ラジオに雑音を与えることがあります。
この場合には、少しミシンより離してご使用ください。

v
DDL-9000A シリーズをより安全にお使いいただくための注意事項
危険
注意
1.電源スイッチを入れる時および、ミシン運転中は、針の下付近に指を入れないでください。
2.ミシン運転中に天びんカバー内に指を入れないでください。
3.ミシンを倒す時は電源スイッチを切ってください。
4.ミシン運転中は、はずみ車、天秤付近に指、頭髪、衣類を近づけたり、物を置かないでください。
5.指ガードは外した状態で運転しないでください。
6.ミシンを倒す時、指等をはさまないよう注意してください。
1.安全のため電源アース線を外した状態で、ミシンを運転しないでください。
2.電源プラグ挿抜の際は、前もって必ず電源スイッチを切ってください。
3.雷が発生している時は安全のため作業をやめ、電源プラグを抜いてください。
4.寒い所から急に暖かい所に移動した時など、結露が生じることがあるので、十分に水滴の心配
がなくなってから、電源を入れてください。
5.火災防止の為に電源プラグは定期的にコンセントから抜いてプラグの刃の根元、 及び刃と刃の
間を清掃してください。
6.ミシン操作中、釜は高速で回転しています。手への損傷防止のため、運転中は釜付近へ絶対に
手を近づけないでください。また、ボビン交換の時は電源を切ってください。
7.ミシン停止中はモータ音がしません。不意の起動による事故防止のため、電源の切り忘れに注
意してください。
8.本製品は精密機器のため、水や油をかけたり、落下させるなどの衝撃を与えないように、取扱
いには十分注意してください。
9.ミシンを倒す時、また元の位置へ戻す時、指等をはさまないよう両手で頭部上側を持ち、静か
に行ってください。

vi
電撃危険ラベル
感電を防止するため、危険
回避への安全上の注意事項
が記載されてます。
安全装置について
ここに記載されている機械および安全装置はあくまで、日本国内仕様として製造された機種およびそれに
装着・同梱された安全装置であり、仕向地、仕様により異なる場合もあります。
天びんカバー
人体と天びんの接触を
防止するカバーです。
安全ラベル
ミシン操作時の最低限の
注意が記載されてます。
指ガード
指と針との接触を防
止するカバーです。
挟込注意ラベル
天びんと天びんカバー内の間
に指等を挟み込まないための
注意ラベルです。
挟込注意ラベル
メンテナンス時、ベッドと
テーブルの間に指等を挟み込
まないための注意ラベルです。
•ミシンベッドに取り付けてあるエアー抜きキャップ(赤色)を取り外してください。
•最初に機械を使用する前にはきれいに掃除してください。
•輸送中にたまったほこりを全て取り除いてください。
•正しい電圧設定になっているか確認してください。
•電源プラグが正しくつながっているかを確認してください。
•絶対に電圧仕様の異なった状態で使用しないでください。
•ミシンの回転方向は、プーリー側からみて反時計方向です。逆回転させないように注意してく
ださい。
•油もれや部品の破損を起こしますので、ミシンを手前側には倒さないでください。
•このミシンは頭部を倒した状態では、ミシンが運転できないように安全スイッチが付いていま
す。
•ミシンを運転する時は、テーブルに正しく設置してから電源スイッチを入れてください。
•試運転する時は、ボビンケースと上糸を外してください。
•ミシンが確実に停止してから、はずみ車操作をしてください。
注意 機械の誤動作や損傷をさけるために、次の項目を確認してく
ださい。
ミシン運転前のご注意
プーリーカバー
はずみ車による手、頭髪、
衣類への巻き込みを防止
するカバーです。

vii
IMPORTANT SAFETY INSTRUCTIONS
Putting sewing systems into operation is prohibited until it has been ascertained that the sewing systems in which
these sewing machines will be built into, have conformed with the safety regulations in your country.
Technical service for those sewing systems is also prohibited.
1. Observe the basic safety measures, including, but not limited to the following ones, whenever you use the machine.
2. Read all the instructions, including, but not limited to this Instruction Manual before you use the machine.
In addition, keep this Instruction Manual so that you may read it at anytime when necessary.
3. Use the machine after it has been ascertained that it conforms with safety rules/standards valid in your country.
4. All safety devices must be in position when the machine is ready for work or in operation.
The operation without the specied safety devices is not allowed.
5. This machine shall be operated by appropriately-trained operators.
6. For your personal protection, we recommend that you wear safety glasses.
7. For the following, turn off the power switch or disconnect the power plug of the machine from the receptacle.
7-1 For threading needle(s), looper, spreader etc. and replacing bobbin.
7-2 For replacing part(s) of needle, presser foot, throat plate, looper, spreader, feed dog, needle guard, folder, cloth guide etc.
7-3 For repair work.
7-4 When leaving the working place or when the working place is unattended.
7-5 When using clutch motors without applying brake, it has to be waited until the motor stopped totally.
8. If you should allow oil, grease, etc. used with the machine and devices to come in contact with your eyes or skin or
swallow any of such liquid by mistake, immediately wash the contacted areas and consult a medical doctor.
9. Tampering with the live parts and devices, regardless of whether the machine is powered, is prohibited.
10. Repair, remodeling and adjustment works must only be done by appropriately trained technicians or specially skilled
personnel. Only spare parts designated by JUKI can be used for repairs.
11. General maintenance and inspection works have to be done by appropriately trained personnel.
12. Repair and maintenance works of electrical components shall be conducted by qualied electric technicians or under
the audit and guidance of specially skilled personnel.
Whenever you nd a failure of any of electrical components, immediately stop the machine.
13. Before making repair and maintenance works on the machine equipped with pneumatic parts such as an air cylinder,
the air compressor has to be detached from the machine and the compressed air supply has to be cut off. Existing
residual air pressure after disconnecting the air compressor from the machine has to be expelled. Exceptions to this
are only adjustments and performance checks done by appropriately trained technicians or specially skilled personnel.
14. Periodically clean the machine throughout the period of use.
15. Grounding the machine is always necessary for the normal operation of the machine. The machine has to be
operated in an environment that is free from strong noise sources such as high-frequency welder.
16. An appropriate power plug has to be attached to the machine by electric technicians. Power plug has to be
connected to a grounded receptacle.
17. The machine is only allowed to be used for the purpose intended. Other used are not allowed.
18. Remodel or modify the machine in accordance with the safety rules/standards while taking all the effective safety
measures. JUKI assumes no responsibility for damage caused by remodeling or modication of the machine.
19. Warning hints are marked with the two shown symbols.
Danger of injury to operator or service staff
Items requiring special attention
3
2
11
3
2
1• There is the possibility that slight to serious injury or death may be caused.
• There is the possibility that injury may be caused by touching moving part.
2• To perform sewing work with safety guard.
• To perform sewing work with safety cover.
• To perform sewing work with safety protection device.
3• Turn OFF the power and perform “threading”, “replacement of bobbin or
needle”, “cleaning”, “adjustment” and “lubrication”.
viii
FOR SAFE OPERATION
1. For the safety, never operate the sewing machine with the ground wire for the power
supply removed.
2. Be sure to turn OFF the power switch in prior when connecting/disconnecting the power
plug.
3. When thunders occurs, stop the work for the safety and disconnect the power plug.
4. When the sewing machine is suddenly moved from a cold place to a warm place, there
is a case where dew condensation may occur. Turn ON the power after there is no worry
of the drop of water.
5. To prevent res, periodically draw out the power plug from the plug socket and clean
the root of the pins and the space between pins.
6. The hook rotates at a high speed while the machine is in operation.
To prevent possible injury to hands, be sure to keep your hands away from the vicinity
of the hook during operation. In addition, be sure to turn OFF the power to the machine
when replacing the bobbin.
7. The motor does not produce noise while the machine is at rest.
To avoid possible accidents due to abrupt start of the machine, be sure to turn OFF the
power to the machine.
8. Be careful of handling this product so as not to pour water or oil, shock by dropping, and
the like since this product is a precision instrument.
9. When tilting or returning the sewing machine to the home position, hold the upper side of
the machine head with both hands and perform the work quietly so that ngers or the like
are not caught in the machine.
1. To avoid personal injury, never put your ngers under the needle when you turn ON the
power switch or operate the sewing machine.
2. To avoid personal injury, never put your ngers into the thread take-up cover while the
sewing machine is in operation.
3.
To avoid personal injury, turn OFF the power switch when you tilt the machine head.
4. To prevent possible personal injury caused by being caught in the machine, keep your
ngers, head and clothes away from the handwheel and the thread take-up while the
sewing machine is in operation. In addition, place nothing around it.
5. To avoid personal injury, never operate the sewing machine with the nger guard
removed.
6. To avoid personal injury, be careful not to allow your ngers in the machine when tilting
the machine head.

ix
CAUTION BEFORE OPERATION
• Remove the air-vent cap (red color) attached to the sewing machine bed.
• Clean the sewing machine thoroughly before using it for the rst time.
• Remove all dust collected on the sewing machine during the transportation.
• Conrm that the voltage and phase are correct.
• Conrm that the power plug is properly connected.
• Never use the sewing machine in the state where the voltage type is different from the
designated one.
• The direction of rotation of the sewing machine is counterclockwise as observed from the
handwheel side. Be careful not to rotate it in reverse direction.
• Do not tilt the machine head toward this side since oil leakage or parts breakage occurs.
• A safety switch is installed so that the sewing machine cannot be operated with the machine
head tilted.
• When operating the sewing machine, turn ON the power switch after properly setting the head
on the table.
• Before starting a test run, remove the bobbin case and the needle thread from the machine.
• Operate the handwheel after the sewing machine has totally stopped.
WARNING :
To avoid malfunction and damage of the machine, conrm the following.

x
重要安全事项
此缝纫机在有的国家(设置场所)由于该国的安全规定而被禁止使用。同时,技术服务也同样被禁止。
1. 使用此缝纫机时,必须遵守包括如下项目的基本安全措施。
2. 使用此缝纫机之前,请阅读本使用说明书在内的所有指示文件。同时应将此使用说明书妥善保管,以便能够随时
查阅。
3. 此缝纫机应与贵国的有关安全规定一起使用。
4. 使用此缝纫机和缝纫机动作中,所有的安全装置应安装到规定的位置。没有安装规定的安全装置的缝纫机禁止使用。
5. 此缝纫机应由接受过培训的操作人员来操作。
6. 使用缝纫机时,建议戴安全防护眼镜。
7. 发生下列情况时,应立即关掉电源开关,或拔下电源线插头。
7-1 机针、弯针、分离器等穿线和更换旋梭时。
7-2 更换机针、压脚、针板、弯针、分离器、送布牙、护针器、支架、布导向器等时。
7-3 修理时。
7-4 工作场所无人了或离开工作场所时。
7-5 使用离合马达时,请等待马达完全停止之后再进行。
8. 缝纫机以及附属装置使用的机油、润滑脂等液体流入眼睛或沾到皮肤上时,或被误饮时,应立即清洗有关部分并
去医院治疗。
9. 禁止用手触摸打开了缝纫机开关通电的零件或装置。
10. 有关缝纫机的修理、改造、调整应由受过专门训练的技术人员或专家来进行。
11. 一般的维修保养应由受过训练的人员来进行。
12. 有关缝纫机的电气方面的修理、维修应由有资格的电气技术人员或专家的监督和指导下进行。
13. 修理、保养有关空气、气缸等压缩空气的零件时,应切断空气压缩机供气源后再进行。如有残留压缩空气时,应
放掉压缩空气。但,受过相当训练的技术人员或专家进行有关调整或确认动作时除外。
14. 缝纫机的使用期间应定期进行清扫。
15. 为了正常安全运转,应安装地线。同时应在不受高频焊接机等强噪音源影响的环境下使用。
16. 电源插头应用具有电气专门知识的人来安装。电源插头必须连接到接地插座上。
17. 缝纫机指定用途以外不能使用。
18. 对缝纫机的改造、变更应符合安全规格,并采取有效的安全措施。
另外,对于有关改造和变更,JUKI 公司概不负责。
19. 本使用说明书上采用以下 2 个警告符号。
有损伤操作人员、维修人员的危险。
安全上需要特别加以注意的事项。
1
・有发生中轻度伤害、重伤、死亡的危险。
・触摸了活动部分的话,有发生负伤的危险。
2
・应安装安全防护器,然后再进行缝制。
・应安装安全护罩,然后再进行缝制。
・应安装保护装置,然后再进行缝制。
3
・应关掉电源之后,再进行「穿线」、「更换梭芯、机针」、「清扫」、「调整」、
「加油」。
3
2
11
3
2

xi
为了安全地使用 DDL-9000A 系列的缝纫机的注意事项
注意
危险
1. 接通电源开关时和缝纫机运转中 , 请不要把手指放到机针下附近。
2. 缝纫机运转中 , 请不要把手指放到挑线杆护罩内。
3. 放倒缝纫机时 , 请关闭电源开关。
4. 缝纫机运转中 , 请不要把手指、头发、衣服靠近飞轮、挑线杆附近 , 也不要把物品放到上面。
5. 在卸下手指防护器的状态下 , 请不要运转缝纫机。
6. 放倒缝纫机时 , 请注意不要夹到手指。
1. 为了安全 , 在卸下电源地线的状态下 , 请不要运转缝纫机。
2. 拔插电源插头时 , 请一定先关闭电源开关。
3. 打雷时 , 为了安全请不要进行操作 , 同时请把电源插头拔下。
4. 从寒冷的地方移动到暖和的地方等时 , 因为会结露 , 所以请待水分完全干后再接通电源。
5. 为了防止火灾 , 请定期地从插座拔下电源插头 , 清扫插头的根部和插簧之间。
6. 缝纫机操作中 , 旋梭高速地旋转。为了防止手受到伤害 , 运转中请绝对不要把手靠近旋梭。
7. 缝纫机停止时马达没有声音。为了突然的起动造成的事故 , 请注意不要忘记关掉电源。
8. 因为本产品属于精密机器,所以操作时请充分注意,不要把水、油溅到机器上面,也不要
让机器掉落给与机器冲击。
9. 放倒缝纫机时 , 或者返回原来位置时 , 请用两手拿缝纫机头的上部 , 轻轻地抬起 , 并注意不
要夹到手指。

xii
运转缝纫机前的注意事项
注意 为了避免机械的错误动作或损伤 , 请确认如下项目内容。
· 请卸下安装在缝纫机机头上的空气栓盖 ( 红色 )。
· 第一次使用缝纫机之前 , 请把缝纫机打扫干净。
· 请把运送中积的灰尘打扫干净。
· 请确认是否设定的电压是否正确。
· 请确认电源插头是否正确地插好。
· 电源规格不同的情况时 , 请绝对不要使用缝纫机。
· 缝纫机的转动方向是 , 站在飞轮侧看为逆时针方向。请注意不要让缝纫机反向转转。
· 请不要让缝纫机倒向跟前 , 以免发生漏油或损坏零件。
· 本缝纫机上安装有放到本缝纫机的情况下不能运转缝纫机的安全开关。
· 运转缝纫机时 , 正确地设置到机台之后再打开电源开关。
· 进行试运转时 , 请卸下旋梭壳和上线。
· 待缝纫机确实停止之后再操作飞轮。

xiii
INSTRUCCIONES IMPORTANTES DE SEGURIDAD
Está prohibido poner en operación la máquina de coser hasta no cerciorarse de que los sistemas de cosido en los que este
tipo de máquinas se tienen que incorporar, están en conformidad con las regulaciones de seguridad vigentes en su país.
También está prohibido el servicio técnico para estos sistemas de cosido.
1. Observe la medidas básicas de seguridad, incluyendo, pero no limitándose, a las siguientes, siempre que use la máquina.
2. Lea todas las instrucciones, incluyendo, pero no limitándose a este Manual de Instrucciones, antes de usar la máquina.
Además, guarde este Manual de Instrucciones de modo que usted lo pueda leer cuando sea necesario.
3. Use la máquina después de haberse cerciorado de que se conforma a las reglas y normas de seguridad válidas en su pais.
4. Todos los dispositivos de seguridad deben estar en posición cuando la máquina esté lista para entrar en servicio o ya
esté en operación. No está permitido operar la máquina sin los dispositivos de seguridad especicados.
5. Esta máquina debe ser operada por operadores debidamente entrenados.
6. Para la protección del personal, recomendamos la colocación de gafas de seguridad.
7. Para lo siguiente, desconecte la alimentación o desconecte el cable de alimentación de la máquina desde la toma.
7-1 Para el enhebrado de la(s) aguja(s), enlazador, estiradora, etc., y para el reemplazo de la bobina.
7-2 Para el reemplazo de las piezas de la aguja, prensatelas, placa de agujas, enlazador, estiradora,dentado de
transporte, protector de aguja, plegador, guía de tela, etc.
7-3 Para los trabajos de reparo.
7-4 Al dejar el lugar de trabajo o cuando el lugar de trabajo está desatendido.
7-5 Cuando use motores de embrague sin aplicar el freno, se debe esperar hasta que el motor pare totalmente.
8. En caso de que el aceite, grasa, etc. que se usa en su máquina y dispositivos toque sus ojos o piel, o que trague por
descuido cualquier líquido semejante, lávese inmediatamente las partes afectadas o consulte a un médico.
9. Está prohibido manipular las piezas y dispositivos móviles mientras esté conectada la corriente eléctrica a la máquina.
10. Los trabajos de reparo, remodelación y ajuste se deben hacer solamente por técnicos debídamente entrenados o por
personal especializado.
Para los reparos, se pueden utilizar solamente las piezas de repuesto designadas por JUKI.
11. Los trabajos de mantenimiento e inspección generales se deben llevar a cabo por personal debidamente entrenado.
12. Los trabajos de reparo y mantenimiento de los componentes eléctricos se deben conducir por técnicos eléctricos
calicados o bajo la vericación y dirección de personal especializado.
Siempre que descubra una falla en cualquier componente eléctrico, pare inmediatamente la máquina.
13. Antes de llevar a cabo los trabajos de reparo y mantenimíento en la méquina equipada con piezas neumáticas, tales
como un cilindro de aire, se debe desmontar el compresor de aire desde la máquina, y también se dabe cortar el
suministro de aire comprimido. Además, se debe expeler la presión de aire existente después de la desconexión de
la máquina. Las excepciones para eso son solamente los ajustes y vericaciones de rendimiento que se hacen por
técnicos debidamente entrenados o por personal especializado.
14. Limpie periódicamente la máquina durante todo el período de uso.
15. La puesta a tierra de la máquina es siempre necesario para la operación normal de la misma.
La máquina deberá ser operada en un ambiente exento de ruidos fuertes tales como en lugares de soldadura de alta
frecuencia.
16. Los técnicos eléctricos deberán montar en la máquina un enchufe apropiado para la corriente eléctrica.
El enchufe de la corriente eléctrica se deberá conectar a un tomacorriente conectado a tierra.
17. Sólo se puede utilizar esta máquina para el propósito que fue fabricada. No se permiten otros usos.
18. Remodele o modique la máquina de acuerdo a las normas y reglas de seguridad mientras toma todas las medidas
de seguridad efectivamente. JUKI no asume ninguna responsabilidad por daños causados por la remodelación o
modicación de la máquina.
19. Los puntos de advertencia están marcados con los dos símbolos mostrados.
Peligro de lesión al operador o personal de servicio
Itemes que requieren atención especial
1• Existe la posibilidad de que se cause una lesión grave o muerte.
• Existe la posibilidad de que se cause una lesión al tocar alguna parte en
movimiento.
2• Realizar el trabajo de cosido con el protector de seguridad.
• Realizar el trabajo de cosido con la cubierta de seguridad.
• Realizar el trabajo de cosido con el dispositivo protector de seguridad.
3• Apagar la máquina y realizar el “enhebrado”, “reemplazo de la bobina o la
aguja”, “limpieza”, “ajuste” y “lubricación”.
3
2
11
3
2

xiv
PARA SEGURIDAD EN LA OPERACION
1. Para seguridad, nunca opere la máquina de coser cuando esté desconectado el cable de
puesta a tierra.
2. Posicione de antemano sin falta en ON el interruptor de la corriente de alimentación al
conectar y desconectar el enchufe de la corriente.
3. Cuando haya tormenta, para mayor seguridad, interrumpa el trabajo y desconecte el
enchufe de la corriente.
4. Cuando tenga que cambiar de lugar la máquina de coser con urgencia de un lugar frío
a otro lugar caliente, es posible que se formen gotas de rocío. Conecte la corriente
después de vericar que no se forman gotas de agua por condensación.
5. Para evitar incendios, extraiga periódicamente el enchufe de la corriente y limpie bien la
parte inferior de las patillas de enchufe y los espacios intermedios de las mismas.
6. El gancho gira a alta velocidad cuando la máquina de coser está funcionado. Para evitar
posibles lesiones en sus manos, cerciórese de mantenerlas lejos del gancho durante la
operación. Además, cerciórese de desconectar de la máquina la corriente eléctrica cuan-
do reemplace la bobina.
7. El motor no produce ningún ruido cuando la máquina está en descanso. Para evitar po-
sibles accidentes debido a un arranque brusco de la máquina, cerciórese de desconectar
de la máquina de coser la corriente eléctrica.
8. Tenga cuidado al manipular este producto para evitar que le caiga agua o aceite o cau-
sarle caídas o golpes etc., dado que este producto es un instrumento de precisión.
9. Cuando se inclina o se devuelve la máquina de coser a su posición original, mantenga el
lado superior del cabezal de la máquina con ambas manos y ejecute el trabajo con cuida-
do de modo que ni sus dedos ni otra parte del cuerpo queden atrapados en la máquina.
1. Para evitar lesiones personales, nunca ponga sus dedos debajo de la aguja cuando
el interruptor de la corriente esté posicionado en ON o la máquina de coser esté
funcionando.
2. Para evitar lesiones personales, nunca ponga sus dedos en la cubierta del tirahilo
mientras la máquina de coser está funcionando.
3. Para evitar lesiones personales, posicione en OFF el interruptor de la corriente siempre
que usted incline el cabezal de la máquina de coser.
4. Para evitar posibles lesiones personales por haber sido atrapado por la máquina de
coser, mantenga sus dedos, cabeza y vestidos bien separados del volante y del tirahilo
siempre que la máquina de coser esté funcionando. Además. No permita que haya
ningún objeto junto a la máquina.
5. Para evitar lesiones personales, nunca opere la máquina de coser sin el protector de sus
dedos.
6. Para evitar lesiones personales, ponga cuidado en no poner sus dedos en la máquina
cuando incline el cabezal de la máquina.

xv
PRECAUCIONES ANTES DE LA OPERACION
• Quite la tapa del aire (color rojo) colocada en el cabezal de la máquina de coser.
• Limpie bien la máquina de coser antes de usarla por primera vez.
• Quite bien el polvo acumulado durante el transporte.
• Conrma que el voltaje y la fase son los correctos.
• Conrme que el enchufe está bien conectado.
• Nunca use la máquina de coser en el estado en que el tipo de voltaje sea diferente del
designado.
• La dirección rotacional de la máquina de coser es hacia la izquierda si se observa desde el
lado del volante. Tenga cuidado en no girarla en dirección inversa.
• No incline el corriente eléctrica hacia este lado pues ocurrirá fuga de aceite o se romperá
alguna pieza.
• El interruptor de seguridad está instalado de modo que la máquina de coser no pueda
funcionar con el cabezal de la máquina de coser inclinado.
• Cuando opere la máquina de coser, posicione en ON el interruptor de la corriente eléctrica
después de colocar debidamente el cabezal de la máquina de coser sobre la mesa.
• Antes de comenzar una prueba de funcionamiento, extraiga de la máquina de coser la cápsula
de canilla y el hilo de bobina.
• Opere el volante después que la máquina de coser está completamente parada.
PRECAUCION :
Compruebe los siguientes ítemes para evitar mal funcionamiento o daños de la
máquina de coser.

xvi
仕 様...................................................................................................... 1
DDL-9000A取扱説明書の使い方..................................................... 1
1. ミシンの据え付け........................................................................ 2
2. ひざ上げ高さの調整................................................................... 3
3. 糸立装置の取り付け.................................................................... 3
4. 給油 (DDL-9000A-S ,-M )............................................ 4
5. 針の取り付け方............................................................................ 5
6. ボビンの入れ方............................................................................ 5
7.
釜部油量 ( 跡 ) 調整方法 (DDL-9000A-MS,-MA,-SS,-SH)
... 6
8. 釜油量の調整 (DDL-9000A-S ,-M )............................ 7
9. 上糸の通し方................................................................................ 8
10. 糸調子............................................................................................ 8
11. 下糸の巻き方................................................................................ 9
12. 押え圧力の調節......................................................................... 10
13. 縫い目長さの調節..................................................................... 10
14. 糸取りばねと糸取り量の調整.................................................. 11
目 次
15. 針停止位置の調整..................................................................... 12
16. ペダル圧とストローク.............................................................. 13
17. ペダルの調整............................................................................. 13
18. ペダル操作................................................................................. 14
19. 針と釜の関係............................................................................. 15
20. ワンタッチ手動返し縫い.......................................................... 16
21. ワイパー位置の調整 (DDL-9000A- -WB,-0B)........ 18
22. 固定メスについて..................................................................... 19
23. 逆送り量の調整 (DDL-9000A-S ,-MD,-DS).............. 19
24. 送り歯の高さと傾き................................................................. 20
25. 送りのタイミング..................................................................... 21
26. 糸ゆるめの解除機構................................................................. 22
27. 微量押え上げ............................................................................. 23
28. コンデンス縫いの方法.............................................................. 24
29. 送り変換ばね機構 (DDL-9000A-S ,-M ).................. 24
30. お手入れ..................................................................................... 25
CONTENTS
SPECIFICATIONS............................................................................... 1
HOW TO USE THE INSTRUCTION MANUAL FOR DDL-9000A ...... 1
1. INSTALLATION........................................................................ 2
2. ADJUSTING THE HEIGHT OF THE KNEE LIFTER ...............3
3. INSTALLING THE THREAD STAND ....................................... 3
4. LUBRICATION (DDL-9000A-S , -M ) ...................................4
5. ATTACHING THE NEEDLE ..................................................... 5
6. SETTING THE BOBBIN INTO THE BOBBIN CASE............... 5
7.
ADJUSTING THE AMOUNT OF OIL IN THE HOOK (DDL-9000A-MS, -MA, -SS, -SH)
.. 6
8. ADJUSTING THE AMOUNT OF OIL (OIL SPLASHES)
IN THE HOOK(DDL-9000A-S , -M ) .................................... 7
9. THREADING THE MACHINE HEAD ....................................... 8
10. THREAD TENSION.................................................................. 8
11. WINDING THE BOBBIN THREAD .......................................... 9
12. PRESSER FOOT PRESSURE............................................... 10
13. ADJUSTING THE STITCH LENGTH .................................... 10
14.
THREAD TAKE-UP SPRING AND ADJUSTING THE THREAD TAKE-UP STROKE
... 11
15. ADJUSTING THE NEEDLE STOP POSITION ...................... 12
16. PEDAL PRESSURE AND PEDAL STROKE......................... 13
17. ADJUSTMENT OF THE PEDAL ........................................... 13
18. PEDAL OPERATION ............................................................. 14
19. NEEDLE-TO-HOOK RELATIONSHIP.................................... 15
20. ONE-TOUCH TYPE REVERSE FEED STITCHING CHANISM.16
21.
ADJUSTING THE POSITION OF THE WIPER (DDL-9000A- -WB, -0B)
... 18
22. COUNTER KNIFE .................................................................. 19
23. ADJUSTING THE AMOUNT OF THE REVERSE FEED
(DDL-9000A-S , -MD, -DS) ..................................................19
24. HEIGHT AND TILT OF THE FEED DOG .............................. 20
25. ADJUSTING THE FEED TIMING...........................................21
26. THREAD TENSION RELEASE RELEASING MECHANISM 22
27. MICRO-LIFTING MECHANISM OF THE PRESSER FOOT.. 23
28. SEWING CONDENSED STITCHES ...................................... 24
29.
FEED CONVERSION SPRING MECHANISM (DDL-9000A-S , -M )
. 24
30. CARE...................................................................................... 25
规 格 ................................................................................................................................1
DDL-9000A 使用说明书的使用方法 .....................................................................1
1. 缝纫机的安装 ....................................................................................................2
2. 膝动提升高度的调整 .....................................................................................3
3. 线架的安装 .........................................................................................................3
4. 加油 (DDL-9000A-S , -M ) ...........................................................4
5. 机针的安装 .......................................................................................................5
6. 旋梭的放入方法................................................................................................5
7.
旋梭部油量 ( 油迹 ) 的调整方法 (DDL-9000A-MS, -MA, -SS, -SH)
..6
8. 旋梭油量的调整 (DDL-9000A-S , -M )
........................................7
9. 上线穿线方法 ....................................................................................................8
10. 线张力 ..................................................................................................................8
11. 底线卷绕方法 ...................................................................................................9
12. 压脚压力的调节.............................................................................................10
13. 缝距长度的调节.............................................................................................10
14. 挑线弹簧和挑线量的调整 ........................................................................11
15. 机针停止位置的调整 ................................................................................... 12
16. 踏板压力和行程.............................................................................................13
17. 踏板的调整 ......................................................................................................13
18. 踏板操作 ........................................................................................................... 14
19. 机针和旋梭的关系 ........................................................................................ 15
20. 单触手动倒缝 .................................................................................................16
21. 挑线杆的位置的调整 (DDL-9000A- -WB, -0B)..................18
22. 固定刀 ............................................................................................................... 19
23. 倒送量的调整 (DDL-9000A-S , -MD, -DS) .............................19
24. 送布牙的高度和倾斜的调整 .....................................................................20
25. 送布的动作 ......................................................................................................21
26. 松线的解除机构.............................................................................................22
27. 微量压脚提升 .................................................................................................23
28. 缩缝的方法 ......................................................................................................24
29. 传送变换弹簧机构 (DDL-9000A-S , -M ) ............................24
30. 保养 ....................................................................................................................25
目 录
INDICE
ESPECIFICACIONES......................................................................... 1
CÓMO USAR EL MANUAL DE INSTRUCCIONES PARA DDL-9000A ......1
1. INSTALACION ......................................................................... 2
2.
MODO DE AJUSTAR LA ALTURA DEL ELEVADOR DE RODILLA
.. 3
3. MODO DE INSTALAR EL PEDESTAL DE HILOS .................. 3
4. LUBRICACION (DDL-9000A-S , -M )................................... 4
5. MODO DE COLOCAR LA AGUJA .......................................... 5
6.
MODO DE FIJAR LA BOBINA EN LA CÁPSULA DE CANILLA
.... 6
7.
MODO DE AJUSTAR LA CANTIDAD DE ACEITE (EL ACEITE
SALPICA) EN EL GANCHO (DDL-9000A-MS, -MA, -SS, -SH)
.... 6
8. MODO DE AJUSTAR LA CANTIDAD DE
ACEITE EN EL GANCHO (DDL-9000A-S , -M ).................. 7
9. MODO DE ENHEBRAR EL CABEZAL DE LA MAQUINA...... 8
10. TENSION DEL HILO ................................................................ 8
11. MODO DE BOBINAR EL HILO DE BOBINA........................... 9
12. PRESION DEL PRENSATELAS............................................ 10
13. MODO DE AJUSTAR LA LONGITUD DE PUNTADA ........... 10
14
. AJUSTE DEL MUELLE TIRA-HILO Y CARRERA DEL TOMAHILOS
........ 11
15.
MODO DE AJUSTAR LA POSICION DE PARADA DE AGUJA...
12
16. PRESION DE PEDAL Y RECORRIDO DE PEDAL............... 13
17. AJUSTE DEL PEDAL ............................................................ 13
18. OPERACION DE PEDAL....................................................... 14
19. RELACION DE AGUJA A GANCHO ..................................... 15
20. MECANISMO DE PESPUNTE DE
TRANSPORTE INVERSO TIPO SIMPLE-TACTO................. 16
21.
PARAAJUSTAR LA POSICIÓN DEL RETIRAHILO (DDL-9000A- -WB, -0B)
.. 18
22. CONTRACUCHILLA.............................................................. 19
23.
AJUSTE DE LA MAGNITUD DEL TRANSPORTE INVERSO (DDL-9000A-S , -MD, -DS)
.. 19
24.
ALTURA E INCLINACION DEL DENTADO DE TRANSPORTE
.. 20
25.
MODO DE AJUSTAR LA TEMPORIZACIÓN DE TRANSPORTE
.. 21
26. MECANISMO RELAJADOR DE TENSION DE HILO ........... 22
27. MECANISMO MICRO-ELEVADOR DEL PRENSATELAS.... 23
28. COSIDO DE PUNTADAS CONDENSADAS.......................... 24
29.
MECANISMO DEL MUELLE DE CONVERSIÓN DE TRANSPORTE
(DDL-9000A-S , -M )........................................................... 24
30. CUIDADO Y MANTENIMIENTO ............................................ 25

– 1 –
-SS -SH
-MS -MA
*3
-DS
最高縫い速度
5,000rpm 4,500rpm 5,000rpm 4,000rpm
最大縫い目長さ
5mm*1 4mm 5mm*1
押えの高さ
(ひざ上げ)
10mm(標準)15mm(最大)
使用針 *2
DB × 1
#9 〜 #18
DP × 5
#65 〜 #110
DB × 1
#20 〜 #23
DP × 5
#125 〜 #160
DB × 1
#9 〜 #18
DP × 5
#65 〜 #110
DB × 1SF
#8 〜 #11
DP × 5
#60 〜 #75
DB × 1
#9 〜 #18
DP × 5
#65 〜 #110
使用油 JUKI ニューデフレックスオイル No.1
または JUKIMACHINEOil#7
-
仕様
SPECIFICATIONS
DDL-9000A-
-SS
-SH
-MS -MA
*3
-DS
Max. sewing speed
5,000 rpm 4,500 rpm 5,000 rpm 4,000 rpm
Stitch length 5mm *1 4mm 5mm*1
Presser foot lift
(by knee lifter)
10 mm (standard) 15 mm (max.)
Needle*2 DB×1
#9 to #18
DP×5
#65 to #110
DB×1
#20 to #23
DP×5
#125 to #160
DB×1
#9 to #18
DP×5
#65 to #110
DB×1SF
#8 to #11
DP×5
#60 to #75
DB×1
#9 to #18
DP×5
#65 to #110
Lubricating oil
JUKI NEW DEFRIX OIL No. 1
or JUKI MACHINE OIL #7 -
Noise Workplace-related noise at sewing speed
n = 5,000 min-1 : LpA≦80.5 dB (A)
Noise measurement according to DIN 45635-48-A-1.
-SS
-SH
-MS -MA
*3
-DS
最高缝制速度
5,000rpm 4,500rpm 5,000rpm 4,000rpm
最大针脚长度
5mm*1 4mm 5mm*1
压脚高度
(
膝动提升
)
10mm(标准)15mm(最大)
使用机针 *2
DB×1
#9 〜 #18
DP×5
#65 〜 #110
DB×1
#20 〜 #23
DP×5
#125 〜 #160
DB×1
#9 〜 #18
DP×5
#65 〜 #110
DB×1SF
#8 〜 #11
DP×5
#60 〜 #75
DB×1
#9 〜 #18
DP×5
#65 〜 #110
使用机油 JUKINEWDEFRIXOILNo.1
或 JUKIMACHINEOil#7
-
规格
ESPECIFICACIONES
-SS
-SH
-MS -MA
*3
-DS
Máx. velocidad de
cosido
5,000 ppm 4,500 ppm 5,000 ppm 4,000 ppm
Longitud de puntada
5mm *1 4mm 5mm*1
Elevación del
prensatelas (con
elevador de rodilla)
10 mm (estándar) 15 mm (max.)
Aguja*2 DB×1
#9 a #18
DP×5
#65 a #110
DB×1
#20 a #23
DP×5
#125 a #160
DB×1
#9 a #18
DP×5
#65 a #110
DB×1SF
#8 a #11
DP×5
#60 a #75
DB×1
#9 a #18
DP×5
#65 a #110
Aceite
lubricante Aceite JUKI NEW DEFRIX OIL No. 1 ó aceite
de máquina JUKI MACHINE OIL #7 -
Ruido
Nivel de ruido ralacionado con el puesto de trabajo a velocidad de costura
n = 5.000 min-1 : Medición de ruido LpA≦80.5 dB (A) en
conformidad con DIN 45635-48-A-1.
●回転数は縫製条件によって異なります。出荷回転数は 4000rpm です。
*
1:4mm を超える場合は最高回転数を 4000rpm 以下に設定してお使い
ください。また、逆送り量は 4mm で規制して出荷しております。それ
以上で使用する場合、規制を解除してください。
*2:針は仕向け地により異なります。
*3:MA 仕様は薄物仕様となっています。4000rpm 以上で使用する場合、
△ S 仕様の押え調節ばねや糸調子ばね等を交換願います。
DDL-9000A取扱説明書の使い方/HOW TO USE THE INSTRUCTION MANUAL FOR DDL-9000A /
DDL-9000A 使用说明书的使用方法 /CÓMO USAR EL MANUAL DE INSTRUCCIONES PARA DDL-9000A
注意:
安全に関する注意が書いて
あります。必ず注意を守っ
てください。
WARNING :
Caution regarding the
safety is described. Be
sure to keep the caution.
注意 :
写着有关安全的注意事
项。请一定遵守安全注意
事项。
AVISO :
Se describe la precaución
con respecto a la seguridad.
Cerciórese de que guardan
las debidas precauciones.
説明図の下に説明文が書か
れています。
日本語で説明を読まれる方
は常にこの欄の説明文を読
んでください。
Explanation is described
under the illustration.
Those who read
the explanation in
English should read
the explanation in this
column.
说明图的下面写着说明文。
用中文写着阅读说明的方
法 , 请一定仔细阅读本栏的
说明文。
La explicación se
describe debajo de la
ilustración.
Los que opten por
leer la explicación en
español deberán leer
la explicación en esta
columna.
1. 項目のタイトル/
Title of the item /
项目的标题 /
Título de ítem
説明図
Illustration /
说明图 /
Ilustración
説明図
Illustration /
说明图 /
Ilustración
S中厚物 / Medium-weight materials
中厚料 / Materiales de peso mediano
H厚物 / Heavy-weight materials
厚料 /Materiales pesados
A薄物 / Light weight materials
薄料 / Materiales de peso ligero
S微量給油
/ Micro-quantity lubrication
微量加油
/ Lubricación micro-cantidad
M
セミドライ
/ Semi-dry
半干式 / Semi-seca
D
ドライ
/ Dry
干式
/ Materiales de peso ligero
•
Sewing speed varies in accordance with the sewing conditions. Sewing
speed at the time of delivery is 4,000 rpm.
* 1 : When stitch length exceeds 4 mm or more, set the max. sewing speed
to 4,000 rpm or less for use. In addition, the amount of reverse feed has
been regulated to 4 mm at the time of delivery. Release the regulation
when using the machine with the amount more than the regulated one.
*2 : Needle used depends on the destination.
*3 : MA type is for light-weight materials. When using the machine at a
speed of 4,000 rpm or more, replace the presser adjusting spring,
the thread tension spring, etc. for S type.
● 缝制条件不同,使用转速也不同。出货时的转速设定为 4000rpm。
* 1 : 超过 4mm 时,请将最高转速设定为 4000rpm 以下进行使用。另外,
出货时倒送量限制为 4mm。如果在此以上使用时,请解除限制。
* 2 : 出口地区不同使用机针也有可能不同。
* 3 : MA 规格是薄料规格。如果要使用 4000rpm 以上的转速时,请更换△
S 规格的压脚调节弹簧和线张力弹簧等。
• La velocidad de cosido varía de acuerdo con las condiciones de cosido.
La máquina se entrega con la velocidad de cosido ajustada a 4.000 ppm.
* 1 :Cuando la longitud de puntada excede de 4 mm o más, ajuste la máx.
velocidad de cosido a 4.000 ppm o menos para su uso. Además, la
magnitud del transporte inverso se encuentra regulada a 4 mm al
momento de la entrega de la máquina. Libere la regulación cuando
utilice la máquina con una magnitud mayor que la regulada.
* 2 :La aguja utilizada depende del destino de su uso.
* 3 :El tipo MA es para materiales livianos. Cuando utilice la máquina a una
velocidad de 4.000 ppm o mayor, reemplace el resorte de ajuste del
prensatelas, resorte de tensión del hilo, etc. con los del tipo S.

– 2 –
23.5 mm 19.5 mm
1
2
4
3
AB
1)ミシンは図のように二人で
持って運んでください。
( 注意 ) プーリーを持たないでくだ
さい。
2) ミシンを置く場所にドライ
バー等の突起物を置かないで
ください。
3) テーブル溝の四隅でアンダーカ
バーを支えるようにしてください。
4)手前側 Aの 2 つは頭部支え
ゴム座 1を釘 2でテーブル
の張り出した部分に打ちつ
け、ヒンジ側 Bの 2 つは頭
部クッション座 3をゴム系
接着剤で固定し、アンダーカ
バー 4をのせてください。
5) ベッドのエアー抜きキャップ
5を外してください。
( 注意 )
1.エアー抜きキャップ 5を外さず
にミシンを運転すると、ギアボッ
クス部 Cから油漏れが発生する
場合があります。
2.頭部をテーブルから外した状態
で輸送する場合は、必ずキャッ
プ5を取り付けてください。
6)
ひざ上げ押し棒
6
を入れてくだ
さい。
ヒンジ 7をベッドの
穴に入れ、テーブルのゴムヒ
ンジ 8にかみ合わせて、頭部
を四隅の頭部クッション 9の
上におろしてください。
7) 頭部支え棒 !0 をテーブルに
最後までしっかり取り付けて
ください。(但し、AK 装置 !1
付きの場合は不要です)コン
トロールパネル !2 を使用す
る場合、窓板止めねじ !32 本
をはずし、コントロールパネ
ル!2 の付属品内のゴムパッ
キン !4 を頭部と !2 の間に挟
み、固定して下さい。
( 注意)コントロールパネル !2 の付
属品ねじは使用しないで下さい。
8) 頭部付属品の束線バンド!5 をケー
ブル根元で結束してください。
1) Carry the sewing machine with
two persons as shown in the gure
above.
(Caution) Do not hold the handwheel.
2) Do not place any protruding thing
such as screwdriver and the like on
the place where the sewing
3
) The under cover should rest on the four
corners of the machine table groove.
4) Fix two rubber seats 1on side A
(operator’s side) using nails 2as
illustrated above. Fix two cushion
seats 3on side B(hinged side)
using a rubber-based adhesive.
Then place under cover 4on the
xed seats.
5) Remove air vent cap 5attached
to the machine bed.
(Caution)
1. If the sewing machine is
operated without removing air
vent cap 5, oil leakage from
gear box portion C may occur.
2. Be sure to attach cap 5when
transporting the machine head
in the state that the machine
head is removed from the
machine table.
6) Fit knee lifter pressing rod 6. Fit
hinge 7 into the opening in the
machine bed, and t the machine
head to table rubber hinge 8
before placing the machine head
on cushions 9on the four corners.
7) Securely attach head support
rod !0 to the table until it goes no
further. (However, in case of the
machine with AK device !1, it is
not necessary.) In case of using
control panel !2, remove two side
plate setscrews !3, insert rubber
packing !4 among the accessories
of control panel !2 between the
machine head and !2, and x the
control panel.
(Caution) Do not use the screws
supplied as accessories of
control panel !2.
8) Bundle cable clip band !5 supplied
as accessories of the machine
head at the root of the cable.
1)请如图所示用 2 个人来搬运
缝纫机。
( 注意 ) 请不要拿着皮带轮搬运缝
纫机。
2)请不要在放置缝纫机的地方
3) 把底槽支到机台沟的四角上。
4) 用螺钉 2 把前侧 A的 2 个头
部橡胶支座 1钉到机台的伸
出部 , 用黏接剂黏接固定好铰
链侧 B的 2 个头部胶垫座 3,
然后把底槽 4放上去。
5) 请卸下机台的放气盖 5。
(注意)
1. 不卸下放气盖 5运转缝纫
机的话 , 从齿轮箱 7就会有
油漏出。
2. 在从机台卸下的状态下搬动
机头时,请一定把放气盖 5
盖上。)
6) 请插入膝动提升押杆 6。
用螺丝把合页 7固定到缝纫
机主体。镶进机台的橡胶合
页8, 把机头放到四角的机头
减震垫 9上。
7) 请把机头支撑杆 !0 牢牢地安
装到机台上。( 但是,带有
AK 装置 !1 时则不需要安装 )
使用控制盘 !2 时,请卸下窗
板固定螺丝 !3(2 个 ),然后
把控制盘 !2 的附属品中的橡
胶垫 !4 夹到机头和 !2 的中
间,然后进行固定。
( 注意)请注意不要使用控制盘 !2
的附属品螺丝。
8) 最后请把机头附属品的扎线
带!5 捆扎到电缆线的根部。
1) La máquina de coser debe ser portada por
dos personas, tal como se muestra en la
gura de arriba.
(Precaución) No sostenga la máquina por
el volante.
2) No ponga ninguna cosa saliente, tal como
un destornillador o algo similar, en el lugar
donde se coloque la máquina de coser.
3) La tapa inferior deberá descansar en las
cuatro esquinas en la ranura de la mesa
de la máquina.
4) Fije los dos asientos 1de goma en el lado
A
(lado de la operadora) usando los clavos
2como se ilustra arriba.
Fije los dos cojines de goma 3en el lado
B
(lado de bisagra) usando la base con goma.
Luego coloque la tapa inferior 4en los
asientos ya jos.
5) Quite la tapa 5del agujero de ventilación
montada en la base de la máquina.
(Precaución)
1. Si opera la máquina de coser sin quitar
la tapa 5del agujero de ventilación,
es posible que se escape aceite desde
la porción 7de la caja de engranajes.
2. Cerciórese de colocar la tapa 5
siempre que transporte el cabezal
de la máquina en el estado en que el
cabezal esté desmontado de la mesa
de la máquina de coser.
6) Instale la varilla presionante 6del elevador
de rodilla. Acomode la bisagra 7en la
abertura de la base de la máquina, y je
el cabezal de la máquina en la bisagra
8de goma de la mesa antes de colocar
el cabezal de la máquina sobre los
amortiguadores 9en las cuatro esquinas.
7) Fije rmemente la varilla de soporte
!0
del cabezal a la mesa hasta que no pueda
avanzar más. (Sin embargo, en el caso de
la máquina equipada con el dispositivo AK
!1
, esto no es necesario.) En caso de que
use el panel de control
!2
, retire los dos
tornillos
!3
de la placa lateral, inserte la
empaquetadura de goma
!4
(que viene
entre los accesorios del panel de control
!2
), entre el cabezal de la máquina y
!2
,
y je el panel de control.
(Precaución) No utilice los tornillos
suministrados como accesorios del
panel de control !2.
8) Coloque en la raíz del cable la cinta
sujetadora
!5
de cable que se suministra
como accesorio del cabezal de la
máquina.
1. ミシンの据え付け /
INSTALLATION /
缝纫机的安装 /
INSTALACION
5
C
9
7
11
3
3
1) 2)
3) 4) 5)
6) 6), 7) 8)
6
!0
!1
!2
!3 !3
!2
!4
!3
7
8
!5
4

– 3 –
注意:
ミシンの不意の起動による人身の損
傷を防ぐため、電源を切り、モータ
の回転が止まったことを確認してか
ら行なってください。
WARNING :
Turn OFF the power before start-
ing the work so as to prevent
accidents caused by abrupt start
of the sewing machine.
注意 :
为了防止缝纫机的意外起动 , 请
关掉电源之后再进行操作。
AVISO :
Desconecte la corriente eléctrica an-
tes de comenzar el trabajo para evitar
accidentes causados por un arranque
brusco de la máquina de coser.
ひざ上げによる押えの高さは標準
10mm です。
ひざ上げ調節ねじ 1によって押え
高さは最大 15mm まで調整するこ
とができます。
(注意)押え 3を 10 mm 以上上げた
状態では、針棒 2と押え 3が当
たるためミシンを運転しないでく
ださい。
The standard height of the presser foot
lifted using the knee lifter is 10 mm.
You can adjust the presser foot lift up to
15 mm using knee lifter adjust screw
1.
(Caution)
Do not operate the sewing
machine in the state that the
preser foot 3is lifted by 10 mm
or more since the needle bar
2comes in contact with the
presser foot 3.
膝动提升压脚的标准高度为
10mm。
调节膝动提升调节螺丝 1可以
把压脚最高提升到 15mm。
(注意)在把压脚 3提升 10mm
以上的状态 , 因为针杆 2与压脚
3相碰 , 所以请不要运转缝纫机。
La altura estándar del prensatelas
elevado usando el elevador de
rodilla es 10 mm. Ud puede ajustar
el prensatelas elevador hasta 15 mm
usando el tornillo 1de ajuste del
elevador de rodilla.
(Precaución)
No opere la máquina de coser en el
estado en que el prensatelas 3
esté elevado 10 mm o más, dado
que la barra de aguja 2tocaría el
prensatelas 3.
1
3
2
2. ひざ上げ高さの調整/
ADJUSTING THE
HEIGHT OF THE KNEE
LIFTER /
膝动提升高度的调整 /
MODO DE AJUSTAR LA
ALTURA DEL ELEVADOR
DE RODILLA
3. 糸立装置の取り付け/
INSTALLING THE THREAD STAND /
线架的安装 /
MODO DE INSTALAR EL
PEDESTAL DE HILOS
1) 糸立装置を図のように組み付
け、テーブルの穴に取り付けて
ください。
2) ナット 1を締めてください。
3) 天井配線をおこなう場合は、電
源コードを糸立棒 2の中に通
してください。
1) Assemble the thread stand unit,
and insert it in the hole in the
machine table.
2) Tighten nut 1.
3) For ceiling wiring, pass the power
cord through spool rest rod 2.
1)如图所示那样把线架安装到
机台孔上。
2) 请拧紧螺母 1。
3) 可以进行顶部配线时 , 请把
电源线从线架杆 2的里面穿
过。
1
) Ensamble la unidad del pedestal de
hilos, e insértela en el agujero en la
mesa de la máquina de coser.
2) Apretar la tuerca 1.
3) Para el alambrado en el techo,
pase el cable de la corriente
eléctrica por la varilla de descanso
2del carrete.
2
1
Other manuals for DDL-9000A
2
Table of contents
Other JUKI Sewing Machine manuals

JUKI
JUKI LBH-772NV-1 User manual

JUKI
JUKI AK85C User manual

JUKI
JUKI LU-2216N-7 User manual

JUKI
JUKI IP-310/ACF-172-1790 User manual

JUKI
JUKI ACF-172-1790 User manual

JUKI
JUKI MS-1261 User manual

JUKI
JUKI MOL-254 User manual

JUKI
JUKI DDL-9000C-S Series Quick start guide

JUKI
JUKI FLS-350N Series Quick start guide

JUKI
JUKI MO-644 User manual

JUKI
JUKI LH-3500A series User manual

JUKI
JUKI LBH-1790A Series User manual

JUKI
JUKI DDL-8700L User manual

JUKI
JUKI PLK-J4040R3 User manual

JUKI
JUKI TL-98E User manual

JUKI
JUKI DSC-245 User manual

JUKI
JUKI LZ-2290A Series User manual

JUKI
JUKI DLN-6390 User manual

JUKI
JUKI LBH-1796A User manual

JUKI
JUKI SC-510 User manual