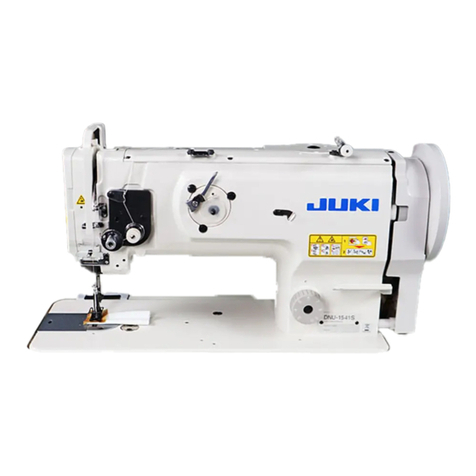
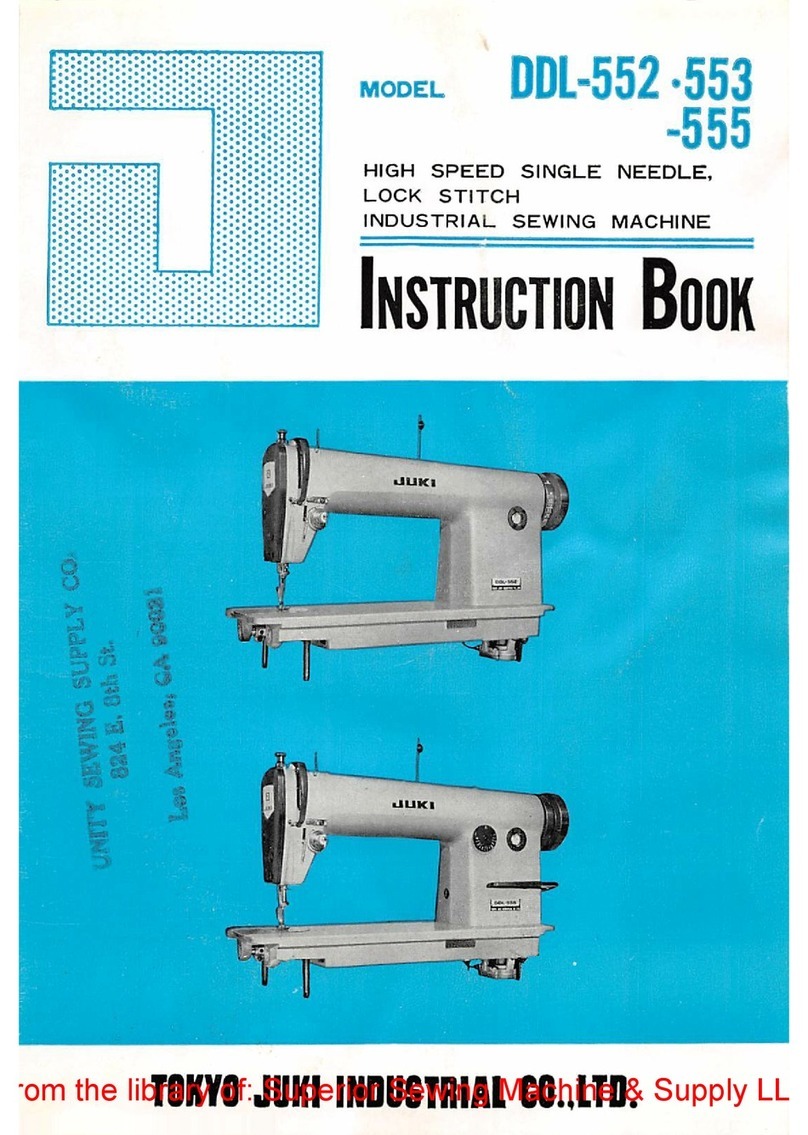
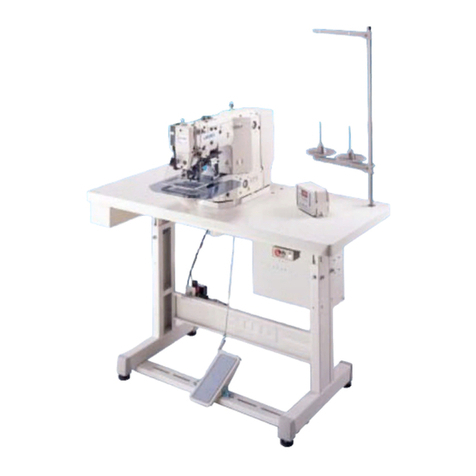
JUKI MF-7200D User manual

Please do not hesitate to contact our distributors or agents in your area for further information when necessary.
*
The description covered in this instruction manual is subject to change for improvement of the
commodity without notice.
对本产品如有不明之处,请向代理店或本公司营业部门询问。
※ 本使用说明书中的规格因改良而发生变更,请订货时确认。
12 · 12 Printed in China
Copyright C2010-2012 JUKI CORPORATION
• All rights reserved throughout the world.
•
版权所有,严禁擅自转载、翻印本书的内容。
SEWING MACHINERY BUSINESS UNIT
2-11-1, TSURUMAKI, TAMA-SHI,
TOKYO, 206-8551, JAPAN
PHONE : (81)42-357-2371
FAX : (81)42-357-2380
http://www.juki.com
No.02
40086321
INSTRUCTION MANUAL
使用说明书
NOTE : Read safety instructions carefully and understand them before using.
Retain this Instruction Manual for future reference.
注意 : 为了安全地使用,请您在使用之前一定阅读本使用说明书。
另外,请您注意保管本使用说明书,以便随时查阅。
MF-7200D


– 28 –
2. Replacing the lubricating oil / 缝纫机油的更换
In case of the new sewing machine, replace the lubricating
oil (JUKI MACHINE OIL 18) with new one after using it for
approximately one month. Then replace the lubricating oil
every six months.
1) Set a container to receive the lubricating oil under
drain screw 1.
2) Remove drain screw 1. The lubrication oil is drained.
3) After the drain, wipe out the oil and attach the drain
screw 1.
WARNING :
To protect against possible personal injury due to abrupt start of the machine, be sure to start the
following work after turning the power off and ascertaining that the motor is at rest.
注意 :
为了防止突然起动造成人身事故,请关掉电源,确认马达确实停止转动后再进行操作。
3.Inspecingandreplacingtheoillter/ 滤油器的检查、更换
WARNING :
To protect against possible personal injury due to abrupt start of the machine, be sure to start the
following work after turning the power off and ascertaining that the motor is at rest.
注意 :
为了防止突然起动造成人身事故,请关掉电源,确认马达确实停止转动后再进行操作。
Normal lubrication cannot be performed if dust collects in
oillter1. Inspect it every 6 months.
1) Removeoilltercap2,anddrawoutoillter1to
inspect it.
2) Whenoillter1is clogged with dust, replace it with a
new one.
3) Afterthereplacement,xtheltercap2with screws
3.
新缝纫机时,约使用 1 个月之后,请更换机油(JUKI
MACHINE OIL 18)。
以后,请每 6 个月更换 1 次机油。
1)请把接油容器安装到排油螺丝 1的下面。
2)请卸下排油螺丝 1。让机油排放出来。
3)排放后,请擦干净机油,然后安装上排油螺丝 1。
机油过滤器 1如果积满了脏污就不能正常地供油。因此,请每 6 个月检查 1 次。
1)
卸下机油过滤器盖子 2,拔出机油过滤器 1,进行检查。
2) 如果过滤器 1积满了脏污,请更换成新的过滤器。
3) 更换后,用螺丝 3固定过滤器盖子 2。
Whenremovingtheoilltercap,lubricating
oilcollectedinthelterwillleakout.So,be
careful.
卸下滤油器盖后,请注意积存在滤油器上的机油有可能漏出来。
1
1
2
3
i
i
For the sewing machine, automatic machine and ancillary devices (hereinafter collectively referred to as
"machine"), it is inevitable to conduct sewing work near moving parts of the machine. This means that there
is always a possibility of unintentionally coming in contact with the moving parts. Operators who actually
operate the machine and maintenance personnel who are involved in maintenance and repair of the machine
are strongly recommended to carefully read to fully understand the following SAFETY PRECAUTIONS
before using/maintaining the machine. The content of the SAFETY PRECAUTIONS includes items which
DUHQRWFRQWDLQHGLQWKHVSHFL¿FDWLRQVRI\RXUSURGXFW
7KHULVNLQGLFDWLRQVDUHFODVVL¿HGLQWRWKHIROORZLQJWKUHHGLIIHUHQWFDWHJRULHVWRKHOSXQGHUVWDQGWKHPHDQLQJ
of the labels. Be sure to fully understand the following description and strictly observe the instructions.
Warning label
❶
❷
❸
❶7KHUHLVWKHSRVVLELOLW\WKDWVOLJKWWRVHULRXVLQMXU\RUGHDWKPD\EHFDXVHG
7KHUHLVWKHSRVVLELOLW\WKDWLQMXU\PD\EHFDXVHGE\WRXFKLQJPRYLQJSDUW
❷7RSHUIRUPVHZLQJZRUNZLWKVDIHW\JXDUG
7RSHUIRUPVHZLQJZRUNZLWKVDIHW\FRYHU
7RSHUIRUPVHZLQJZRUNZLWKVDIHW\SURWHFWLRQGHYLFH
❸%HVXUHWRWXUQWKHSRZHU2))EHIRUHFDUU\LQJRXWPDFKLQHKHDGWKUHDGLQJ
QHHGOHFKDQJLQJEREELQFKDQJLQJRURLOLQJDQGFOHDQLQJ
❸
❷
❶
(OHFWULFDOVKRFN
GDQJHUODEHO
DANGER :
7KLVLQGLFDWLRQLVJLYHQZKHUHWKHUHLVDQLPPHGLDWHGDQJHURIGHDWKRUVHURXVLQMXU\LIWKHSHUVRQLQFKDUJHRUDQ\WKLUG
SDUW\PLVKDQGOHVWKHPDFKLQHRUGRHVQRWDYRLGWKHGDQJHURXVVLWXDWLRQZKHQRSHUDWLQJRUPDLQWDLQLQJWKHPDFKLQH
WARNING :
7KLVLQGLFDWLRQLVJLYHQZKHUHWKHUHLVDSRWHQWLDOLW\IRUGHDWKRUVHULRXVLQMXU\LIWKHSHUVRQLQFKDUJHRUDQ\WKLUG
SDUW\PLVKDQGOHVWKHPDFKLQHRUGRHVQRWDYRLGWKHGDQJHURXVVLWXDWLRQZKHQRSHUDWLQJRUPDLQWDLQLQJWKHPDFKLQH
CAUTION :
7KLVLQGLFDWLRQLVJLYHQZKHUHWKHUHLVDGDQJHURIPHGLXPWRPLQRULQMXU\LIWKHSHUVRQLQFKDUJHRUDQ\WKLUGSDU
W\PLVKDQGOHVWKHPDFKLQHRUGRHVQRWDYRLGWKHGDQJHURXVVLWXDWLRQZKHQRSHUDWLQJRUPDLQWDLQLQJWKHPDFKLQH
,WHPVUHTXLULQJVSHFLDODWWHQWLRQ
3LFWRULDOZDUQLQJLQGLFDWLRQ
7KHUHLVDULVNRILQMXU\LIFRQWDFW
LQJDPRYLQJVHFWLRQ
3LFWRULDOZDUQLQJ
LQGLFDWLRQ
%HDZDUHWKDWKROGLQJWKHVHZLQJ
PDFKLQHGXULQJRSHUDWLRQFDQ
KXUW\RXUKDQGV
7KHUHLVDULVNRIHOHFWULFDOVKRFNLI
FRQWDFWLQJDKLJKYROWDJHVHFWLRQ
7KHUHLVDULVNRIHQWDQJOHPHQWLQ
WKHEHOWUHVXOWLQJLQLQMXU\
7KHUHLVDULVNRIDEXUQLIFRQWDFW
LQJDKLJKWHPSHUDWXUHVHFWLRQ
7KHUHLVDULVNRILQMXU\LI\RX
WRXFKWKHEXWWRQFDUULHU
%HDZDUHWKDWH\HGH¿FLHQF\FDQ
EHFDXVHGE\ORRNLQJGLUHFWO\DWWKH
ODVHUEHDP
,QGLFDWLRQODEHO
7KHFRUUHFWGLUHFWLRQLVLQGLFDWHG
7KHUHLVDULVNRIFRQWDFWEHWZHHQ
\RXUKHDGDQGWKHVHZLQJPD
FKLQH
&RQQHFWLRQRIDHDUWKFDEOHLV
LQGLFDWHG
TO ENSURE SAFE USE OF YOUR SEWING MACHINE
,([SODQDWLRQRIULVNOHYHOV
(II)
([SODQDWLRQRISLFWRULDOZDUQLQJLQGLFDWLRQVDQGZDUQLQJODEHOV

ii
ii
SAFETY PRECAUTIONS
:KHQLWLVQHFHVVDU\WRRSHQWKHFRQWUROER[FRQWDLQLQJHOHFWULFDOSDUWVEHVXUHWRWXUQWKHSRZHU
RIIDQGZDLWIRU¿YHPLQXWHVRUPRUHEHIRUHRSHQLQJWKHFRYHULQRUGHUWRSUHYHQWDFFLGHQWOHDGLQJWR
HOHFWULFDOVKRFN
$FFLGHQWPHDQVWRFDXVH
SHUVRQDOLQMXU\RUGHDWKRU
GDPDJHWRSURSHUW\
DANGER
CAUTION
%DVLFSUHFDXWLRQ
%HVXUHWRUHDGWKHLQVWUXFWLRQPDQXDODQGRWKHUH[SODQDWRU\GRFXPHQWVVXSSOLHGZLWKDFFHVVRULHVRI
WKHPDFKLQHEHIRUHXVLQJWKHPDFKLQH&DUHIXOO\NHHSWKHLQVWUXFWLRQPDQXDODQGWKHH[SODQDWRU\GRFX
PHQWVDWKDQGIRUTXLFNUHIHUHQFH
7KHFRQWHQWRIWKLVVHFWLRQLQFOXGHVLWHPVZKLFKDUHQRWFRQWDLQHGLQWKHVSHFL¿FDWLRQVRI\RXUSURGXFW
%HVXUHWRZHDUVDIHW\JRJJOHVWRSURWHFWDJDLQVWDFFLGHQWFDXVHGE\QHHGOHEUHDNDJH
7KRVHZKRXVHDKHDUWSDFHUKDYHWRXVHWKHPDFKLQHDIWHUFRQVXOWDWLRQZLWKDPHGLFDOVSHFLDOLVW
6DIHW\GHYLFHVDQGZDUQLQJODEHOV
%HVXUHWRRSHUDWHWKHPDFKLQHDIWHUYHULI\LQJWKDWVDIHW\GHYLFHVLVFRUUHFWO\LQVWDOOHGLQSODFHDQG
ZRUNVQRUPDOO\LQRUGHUWRSUHYHQWDFFLGHQWFDXVHGE\ODFNRIWKHGHYLFHV
,IDQ\RIWKHVDIHW\GHYLFHVLVUHPRYHGEHVXUHWRUHSODFHLWDQGYHULI\WKDWLWZRUNVQRUPDOO\LQRUGHUWR
SUHYHQWDFFLGHQWWKDWFDQUHVXOWLQSHUVRQDOLQMXU\RUGHDWK
%HVXUHWRNHHSWKHZDUQLQJODEHOVDGKHUHGRQWKHPDFKLQHFOHDUO\YLVLEOHLQRUGHUWRSUHYHQWDFFLGHQW
WKDWFDQUHVXOWLQSHUVRQDOLQMXU\RUGHDWK,IDQ\RIWKHODEHOVKDVVWDLQHGRUFRPHXQVWXFNEHVXUHWR
FKDQJHLWZLWKDQHZRQH
$SSOLFDWLRQDQGPRGL¿FDWLRQ
1HYHUXVHWKHPDFKLQHIRUDQ\DSSOLFDWLRQRWKHUWKDQLWVLQWHQGHGRQHDQGLQDQ\PDQQHURWKHUWKDQWKDW
SUHVFULEHGLQWKHLQVWUXFWLRQPDQXDOLQRUGHUWRSUHYHQWDFFLGHQWWKDWFDQUHVXOWLQSHUVRQDOLQMXU\RU
GHDWK-8.,DVVXPHVQRUHVSRQVLELOLW\IRUGDPDJHVRUSHUVRQDOLQMXU\RUGHDWKUHVXOWLQJIURPWKHXVHRI
WKHPDFKLQHIRUDQ\DSSOLFDWLRQRWKHUWKDQWKHLQWHQGHGRQH
1HYHUPRGLI\DQGDOWHUWKHPDFKLQHLQRUGHUWRSUHYHQWDFFLGHQWWKDWFDQUHVXOWLQSHUVRQDOLQMXU\RU
GHDWK-8.,DVVXPHVQRUHVSRQVLELOLW\IRUGDPDJHVRUSHUVRQDOLQMXU\RUGHDWKUHVXOWLQJIURPWKHPD
FKLQHZKLFKKDVEHHQPRGL¿HGRUDOWHUHG
(GXFDWLRQDQGWUDLQLQJ
,QRUGHUWRSUHYHQWDFFLGHQWUHVXOWLQJIURPXQIDPLOLDULW\ZLWKWKHPDFKLQHWKHPDFKLQHKDVWREHXVHG
RQO\E\WKHRSHUDWRUZKRKDVEHHQWUDLQHGHGXFDWHGE\WKHHPSOR\HUZLWKUHVSHFWWRWKHPDFKLQHRSHU
DWLRQDQGKRZWRRSHUDWHWKHPDFKLQHZLWKVDIHW\WRDFTXLUHDGHTXDWHNQRZOHGJHDQGRSHUDWLRQVNLOO7R
HQVXUHWKHDERYHWKHHPSOR\HUKDVWRHVWDEOLVKDQHGXFDWLRQWUDLQLQJSODQIRUWKHRSHUDWRUVDQGHGX
FDWHWUDLQWKHPEHIRUHKDQG
,WHPVIRUZKLFKWKHSRZHUWRWKHPDFKLQHKDVWREHWXUQHGRII
7XUQLQJWKHSRZHURII 7XUQLQJWKHSRZHUVZLWFKRIIWKHQUHPRYLQJWKHSRZHUSOXJIURPWKHRXWOHW
7KLVDSSOLHVWRWKHIROORZLQJ
%HVXUHWRLPPHGLDWHO\WXUQWKHSRZHURIILIDQ\DEQRUPDOLW\RUIDLOXUHLVIRXQGRULQWKHFDVHRISRZHU
IDLOXUHLQRUGHUWRSURWHFWDJDLQVWDFFLGHQWWKDWFDQUHVXOWLQSHUVRQDOLQMXU\RUGHDWK
7RSURWHFWDJDLQVWDFFLGHQWUHVXOWLQJIURPDEUXSWVWDUWRIWKHPDFKLQHEHVXUHWRFDUU\RXWWKHIROORZ
LQJRSHUDWLRQVDIWHUWXUQLQJWKHSRZHURII)RUWKHPDFKLQHLQFRUSRUDWLQJDFOXWFKPRWRULQSDUWLFXODU
EHVXUHWRFDUU\RXWWKHIROORZLQJRSHUDWLRQVDIWHUWXUQLQJWKHSRZHURIIDQGYHULI\LQJWKDWWKHPDFKLQH
VWRSVFRPSOHWHO\
)RUH[DPSOHWKUHDGLQJWKHSDUWVVXFKDVWKHQHHGOHORRSHUVSUHDGHUHWFZKLFKKDYHWREHWKUHDG
HGRUFKDQJLQJWKHEREELQ
)RUH[DPSOHFKDQJLQJRUDGMXVWLQJDOOFRPSRQHQWSDUWVRIWKHPDFKLQH
)RUH[DPSOHZKHQLQVSHFWLQJUHSDLULQJRUFOHDQLQJWKHPDFKLQHRUOHDYLQJWKHPDFKLQH
%HVXUHWRUHPRYHWKHSRZHUSOXJE\KROGLQJWKHSOXJVHFWLRQLQVWHDGRIWKHFRUGVHFWLRQLQRUGHUWRSUH
YHQWHOHFWULFDOVKRFNHDUWKOHDNDJHRU¿UHDFFLGHQW
%HVXUHWRWXUQWKHSRZHURIIZKHQHYHUWKHPDFKLQHLVOHIWXQDWWHQGHGEHWZHHQZRUNV
%HVXUHWRWXUQWKHSRZHURIILQWKHFDVHRISRZHUIDLOXUHLQRUGHUWRSUHYHQWDFFLGHQWUHVXOWLQJRIEUHDN
DJHRIHOHFWULFDOFRPSRQHQWV
– 27 –
When micro-lifter knob 1is turned counterclockwise,
micro-lifter stopper 2lowers and comes in contact with
presser lifting lever 3. Then the presser foot goes up.
Adjust the height in accordance with the sewing conditions.
17. Adjusting the micro-lifter / 微量压脚提升的调节
&. MAINTENANCE / 维修保养
1. Cleaning the sewing machine / 缝纫机的清扫
Open side cover 1and cylinder cover, right 2. Remove
screws 3and then throat plate 4. Then, clean up the throat
plate slits, feed dog teeth and the area surrounding them.
Aftercleaning,xthroatplate4with setscrews 3.
WARNING :
When cleaning, be sure to turn OFF the power and ascertain that the motor has totally stopped rotating
before starting the work. There is a danger of injury since hands or clothes may be caught in the machine.
注意 :
需要清扫时,请一定关掉马达的电源,确认了马达停止转动之后再进行操作。以免发生把手指、衣服卷进机器造成
负伤的危险。
打开侧面护罩 1和右缸筒护罩 2,卸下螺丝 3再卸下
针板 4,清扫针板槽和送布牙槽以及四周。
清扫之后,用固定螺丝 3固定针板 4。
WARNING :
To protect against possible personal injury due to abrupt start of the machine, be sure to start the
following work after turning the power off and ascertaining that the motor is at rest.
注意 :
为了防止突然起动造成人身事故,请关掉电源,确认马达确实停止转动后再进行操作。
1
2
3
向左转动微量压脚提升旋钮 1之后,微量压脚提升止动
器2下降,接触压脚提升拨杆 3,压脚上升。
请根据缝制条件调整高度。
When the micro-lifter is not used, turn
clockwise micro-lifter knob 1andxmicro-
lifter stopper 2at the highest position.
不使用微量压脚提升功能时,请向右转动微量
压脚提升旋钮 1,把微量压脚提升止动器 2
固定到最高点。
3
4
1
2

– 26 –
15. Adjusting the front needle guard
/
前针座的调整
Adjust the height of front needle guard 2with setscrew
4so that it is higher by 3.3 ± 0.5 mm than the rear needle
guard.
Adjust with setscrew 3so that the clearance between the
needle and front needle guard 2is 0.1 to 0.5 mm when
looper 1travels from the extreme right position to the left
and passes the rear side of the respective needles.
* Allow front needle guard 2to come to the needle
as near as possible within the range where needle
thread smoothly passes in accordance with the kind or
thickness of thread.
用固定螺丝 4,把前针座 2的高度调整为比后针座高 3.3
±0.5mm 的位置。
弯针 1从最右点向左移动,通过各针的里侧时,请用固
定螺丝 3把机针和前针座 2的间隙调整为 0.1 〜 0.5mm。
※ 请根据机线的种类和粗细,在机线能通过的范围,尽
量让前针座 2靠近机针。
1) To adjust the height of the presser foot, adjust the
height of screw 1so that the presser foot does not
comeincontactwithothercomponentsandxthe
presser foot with nut 2.
2) Adjust the position of the thrust collar so that the
clearance between thrust collar 3and presser bar
bushing 4is 0.1 mm when the presser foot is lifted.
Thenxthethrustcollarwithsetscrew5.
1) 调整压脚高度时,请调整螺丝 1的高度,不让压脚
和其他零件相接触,然后用螺母 2进行固定。
2) 提升了压脚后,请调整套环位置,让套环
3
和压脚
杆金属件
4
的间隙为 0.1mm,然后用固定螺丝
5
进
行固定。
16. Adjusting the presser foot lift
/
压脚提升量的调整
WARNING :
To protect against possible personal injury due to abrupt start of the machine, be sure to start the
following work after turning the power off and ascertaining that the motor is at rest.
注意 :
为了防止突然起动造成人身事故,请关掉电源,确认马达确实停止转动后再进行操作。
WARNING :
To protect against possible personal injury due to abrupt start of the machine, be sure to start the
following work after turning the power off and ascertaining that the motor is at rest.
注意 :
为了防止突然起动造成人身事故,请关掉电源,确认马达确实停止转动后再进行操作。
4
5
0.1 mm
1
2
3
0.1 – 0.5 mm
3.3 ±0.5mm
3
4
2
1
iii
iii
35(&$87,21672%(7$.(1,19$5,28623(5$7,2167$*(6
7UDQVSRUWDWLRQ
%HVXUHWROLIWDQGPRYHWKHPDFKLQHLQDVDIHPDQQHUWDNLQJWKHPDFKLQHZHLJKWLQFRQVLGHUDWLRQ5HIHU
WRWKHWH[WRIWKHLQVWUXFWLRQPDQXDOIRUWKHPDVVRIWKHPDFKLQH
%HVXUHWRWDNHVXI¿FLHQWVDIHW\PHDVXUHVWRSUHYHQWIDOOLQJRUGURSSLQJEHIRUHOLIWLQJRUPRYLQJWKH
PDFKLQHLQRUGHUWRSURWHFWDJDLQVWDFFLGHQWWKDWFDQUHVXOWLQSHUVRQDOLQMXU\RUGHDWK
2QFHWKHPDFKLQHKDVEHHQXQSDFNHGQHYHUUHSDFNLWIRUWUDQVSRUWDWLRQWRSURWHFWWKHPDFKLQHDJDLQVW
EUHDNDJHUHVXOWLQJIURPXQH[SHFWHGDFFLGHQWRUGURSSLQJ
8QSDFNLQJ
%HVXUHWRXQSDFNWKHPDFKLQHLQWKHSUHVFULEHGRUGHULQRUGHUWRSUHYHQWDFFLGHQWWKDWFDQUHVXOWLQ
SHUVRQDOLQMXU\RUGHDWK,QWKHFDVHWKHPDFKLQHLVFUDWHGLQSDUWLFXODUEHVXUHWRFDUHIXOO\FKHFNQDLOV
7KHQDLOVKDYHWREHUHPRYHG
%HVXUHWRFKHFNWKHPDFKLQHIRUWKHSRVLWLRQRILWVFHQWHURIJUDYLW\DQGWDNHLWRXWIURPWKHSDFNDJH
FDUHIXOO\LQRUGHUWRSUHYHQWDFFLGHQWWKDWFDQUHVXOWLQSHUVRQDOLQMXU\RUGHDWK
,QVWDOODWLRQ
(,7DEOHDQGWDEOHVWDQG
%HVXUHWRXVH-8.,JHQXLQHWDEOHDQGWDEOHVWDQGLQRUGHUWRSUHYHQWDFFLGHQWWKDWFDQUHVXOWLQSHU
VRQDOLQMXU\RUGHDWK,ILWLVLQHYLWDEOHWRXVHDWDEOHDQGWDEOHVWDQGZKLFKDUHQRW-8.,JHQXLQHRQHV
VHOHFWWKHWDEOHDQGWDEOHVWDQGZKLFKDUHDEOHWRVXSSRUWWKHPDFKLQHZHLJKWDQGUHDFWLRQIRUFHGXULQJ
RSHUDWLRQ
,IFDVWHUVDUH¿WWHGWRWKHWDEOHVWDQGEHVXUHWRXVHWKHFDVWHUVZLWKDORFNLQJPHFKDQLVPDQGORFN
WKHPWRVHFXUHWKHPDFKLQHGXULQJWKHRSHUDWLRQPDLQWHQDQFHLQVSHFWLRQDQGUHSDLULQRUGHUWRSUHYHQW
DFFLGHQWWKDWFDQUHVXOWLQSHUVRQDOLQMXU\RUGHDWK
,,&DEOHDQGZLULQJ
%HVXUHWRSUHYHQWDQH[WUDIRUFHIURPEHLQJDSSOLHGWRWKHFDEOHGXULQJWKHXVHLQRUGHUWRSUHYHQW
HOHFWULFDOVKRFNHDUWKOHDNDJHRU¿UHDFFLGHQW,QDGGLWLRQLILWLVQHFHVVDU\WRFDEOHQHDUWKHRSHUDWLQJ
VHFWLRQVXFKDVWKH9EHOWEHVXUHWRSURYLGHDVSDFHRIPPRUPRUHEHWZHHQWKHRSHUDWLQJVHFWLRQ
DQGWKHFDEOH
%HVXUHWRDYRLGVWDUEXUVWFRQQHFWLRQLQRUGHUWRSUHYHQWHOHFWULFDOVKRFNHDUWKOHDNDJHRU¿UHDFFLGHQW
%HVXUHWRVHFXUHO\FRQQHFWWKHFRQQHFWRUVLQRUGHUWRSUHYHQWHOHFWULFDOVKRFNHDUWKOHDNDJHRU¿UH
DFFLGHQW,QDGGLWLRQEHVXUHWRUHPRYHWKHFRQQHFWRUZKLOHKROGLQJLWVFRQQHFWRUVHFWLRQ
,,,*URXQGLQJ
%HVXUHWRKDYHDQHOHFWULFDOH[SHUWLQVWDOODQDSSURSULDWHSRZHUSOXJLQRUGHUWRSUHYHQWDFFLGHQWFDXVHG
E\HDUWKOHDNDJHRUGLHOHFWULFVWUHQJWKYROWDJHIDXOW,QDGGLWLRQEHVXUHWRFRQQHFWWKHSRZHUSOXJWRWKH
JURXQGHGRXWOHWZLWKRXWH[FHSWLRQV
%HVXUHWRJURXQGWKHHDUWKFDEOHLQRUGHUWRSUHYHQWDFFLGHQWFDXVHGE\HDUWKOHDNDJH
,90RWRU
%HVXUHWRXVHWKHVSHFL¿HGUDWHGPRWRU-8.,JHQXLQHSURGXFWLQRUGHUWRSUHYHQWDFFLGHQWFDXVHGE\
EXUQRXW
,IDFRPPHUFLDOO\DYDLODEOHFOXWFKPRWRULVXVHGZLWKWKHPDFKLQHEHVXUHWRVHOHFWRQHZLWKDQHQWDQ
JOHPHQWSUHYHQWLYHSXOOH\FRYHULQRUGHUWRSURWHFWDJDLQVWEHLQJHQWDQJOHGE\WKH9EHOW
%HIRUHRSHUDWLRQ
%HVXUHWRPDNHVXUHWKDWWKHFRQQHFWRUVDQGFDEOHVDUHIUHHIURPGDPDJHGURSRXWDQGORRVHQHVVEH
IRUHWXUQLQJWKHSRZHURQLQRUGHUWRSUHYHQWDFFLGHQWUHVXOWLQJLQSHUVRQDOLQMXU\RUGHDWK
1HYHUSXW\RXUKDQGLQWRWKHPRYLQJVHFWLRQVRIWKHPDFKLQHLQRUGHUWRSUHYHQWDFFLGHQWWKDWFDQUHVXOW
LQSHUVRQDOLQMXU\RUGHDWK
,QDGGLWLRQFKHFNWREHVXUHWKDWWKHGLUHFWLRQRIURWDWLRQRIWKHSXOOH\DJUHHVZLWKWKHDUURZVKRZQRQ
SXOOH\
,IWKHWDEOHVWDQGZLWKFDVWHUVLVXVHGEHVXUHWRVHFXUHWKHWDEOHVWDQGE\ORFNLQJWKHFDVWHUVRUZLWK
DGMXVWHUVLISURYLGHGLQRUGHUWRSURWHFWDJDLQVWDFFLGHQWFDXVHGE\DEUXSWVWDUWRIWKHPDFKLQH
'XULQJRSHUDWLRQ
%HVXUHQRWWRSXW\RXU¿QJHUVKDLURUFORWKLQJFORVHWRWKHPRYLQJVHFWLRQVVXFKDVWKHKDQGZKHHO
KDQGSXOOH\DQGPRWRURUSODFHVRPHWKLQJQHDUWKRVHVHFWLRQVZKLOHWKHPDFKLQHLVLQRSHUDWLRQLQRUGHU
WRSUHYHQWDFFLGHQWFDXVHGE\HQWDQJOHPHQWWKDWFDQUHVXOWLQSHUVRQDOLQMXU\RUGHDWK
%HVXUHQRWWRSODFH\RXU¿QJHUVQHDUWKHVXUURXQGDUHDRIWKHQHHGOHRULQVLGHWKHWKUHDGWDNHXSOHYHU
FRYHUZKHQWXUQLQJWKHSRZHURQRUZKLOHWKHPDFKLQHLVLQRSHUDWLRQLQRUGHUWRSUHYHQWDFFLGHQWWKDW
FDQUHVXOWLQSHUVRQDOLQMXU\RUGHDWK
7KHPDFKLQHUXQVDWDKLJKVSHHG1HYHUEULQJ\RXUKDQGVQHDUWKHPRYLQJVHFWLRQVVXFKDVORRSHU
VSUHDGHUQHHGOHEDUKRRNDQGFORWKWULPPLQJNQLIHGXULQJRSHUDWLRQLQRUGHUWRSURWHFW\RXUKDQGV
DJDLQVWLQMXU\,QDGGLWLRQEHVXUHWRWXUQWKHSRZHURIIDQGFKHFNWREHVXUHWKDWWKHPDFKLQHFRPSOHWH
O\VWRSVEHIRUHFKDQJLQJWKHWKUHDG
%HFDUHIXOQRWWRDOORZ\RXU¿QJHUVRUDQ\RWKHUSDUWVRI\RXUERG\WREHFDXJKWEHWZHHQWKHPDFKLQH
DQGWDEOHZKHQUHPRYLQJWKHPDFKLQHIURPRUUHSODFLQJLWRQWKHWDEOHLQRUGHUWRSUHYHQWDFFLGHQWWKDW
FDQUHVXOWLQSHUVRQDOLQMXU\RUGHDWK

iv
iv
%HVXUHWRWXUQWKHSRZHURIIDQGFKHFNWREHVXUHWKDWWKHPDFKLQHDQGPRWRUFRPSOHWHO\VWRSEHIRUHUH
PRYLQJWKHEHOWFRYHUDQG9EHOWLQRUGHUWRSUHYHQWDFFLGHQWFDXVHGE\DEUXSWVWDUWRIWKHPDFKLQHRUPRWRU
,IDVHUYRPRWRULVXVHGZLWKWKHPDFKLQHWKHPRWRUGRHVQRWSURGXFHQRLVHZKLOHWKHPDFKLQHLVDWUHVW
%HVXUHQRWWRIRUJHWWRWXUQWKHSRZHURIILQRUGHUWRSUHYHQWDFFLGHQWFDXVHGE\DEUXSWVWDUWRIWKHPRWRU
1HYHUXVHWKHPDFKLQHZLWKWKHFRROLQJRSHQLQJRIWKHPRWRUSRZHUER[VKLHOGHGLQRUGHUWRSUHYHQW¿UH
DFFLGHQWE\RYHUKHDW
/XEULFDWLRQ
%HVXUHWRXVH-8.,JHQXLQHRLODQG-8.,JHQXLQHJUHDVHWRWKHSDUWVWREHOXEULFDWHG
,IWKHRLODGKHUHVRQ\RXUH\HRUERG\EHVXUHWRLPPHGLDWHO\ZDVKLWRIILQRUGHUWRSUHYHQWLQÀDPPD
WLRQRULUULWDWLRQ
,IWKHRLOLVVZDOORZHGXQLQWHQWLRQDOO\EHVXUHWRLPPHGLDWHO\FRQVXOWDPHGLFDOGRFWRULQRUGHUWRSUH
YHQWGLDUUKHDRUYRPLWLQJ
0DLQWHQDQFH
,QSUHYHQWLRQRIDFFLGHQWFDXVHGE\XQIDPLOLDULW\ZLWKWKHPDFKLQHUHSDLUDQGDGMXVWPHQWKDVWREH
FDUULHGRXWE\DVHUYLFHWHFKQLFLDQZKRLVWKRURXJKO\IDPLOLDUZLWKWKHPDFKLQHZLWKLQWKHVFRSHGH¿QHG
LQWKHLQVWUXFWLRQPDQXDO%HVXUHWRXVH-8.,JHQXLQHSDUWVZKHQUHSODFLQJDQ\RIWKHPDFKLQHSDUWV
-8.,DVVXPHVQRUHVSRQVLELOLW\IRUDQ\DFFLGHQWFDXVHGE\LPSURSHUUHSDLURUDGMXVWPHQWRUWKHXVHRI
DQ\SDUWRWKHUWKDQ-8.,JHQXLQHRQH
,QSUHYHQWLRQRIDFFLGHQWFDXVHGE\XQIDPLOLDULW\ZLWKWKHPDFKLQHRUHOHFWULFDOVKRFNDFFLGHQWEHVXUH
WRDVNDQHOHFWULFDOWHFKQLFLDQRI\RXUFRPSDQ\RU-8.,RUGLVWULEXWRULQ\RXUDUHDIRUUHSDLUDQGPDLQWH
QDQFHLQFOXGLQJZLULQJRIHOHFWULFDOFRPSRQHQWV
:KHQFDUU\LQJRXWUHSDLURUPDLQWHQDQFHRIWKHPDFKLQHZKLFKXVHVDLUGULYHQSDUWVVXFKDVDQDLUF\O
LQGHUEHVXUHWRUHPRYHWKHDLUVXSSO\SLSHWRH[SHODLUUHPDLQLQJLQWKHPDFKLQHEHIRUHKDQGLQRUGHUWR
SUHYHQWDFFLGHQWFDXVHGE\DEUXSWVWDUWRIWKHDLUGULYHQSDUWV
%HVXUHWRFKHFNWKDWVFUHZVDQGQXWVDUHIUHHIURPORRVHQHVVDIWHUFRPSOHWLRQRIUHSDLUDGMXVWPHQW
DQGSDUWUHSODFHPHQW
%HVXUHWRSHULRGLFDOO\FOHDQXSWKHPDFKLQHGXULQJLWVGXUDWLRQRIXVH%HVXUHWRWXUQWKHSRZHURII
DQGYHULI\WKDWWKHPDFKLQHDQGPRWRUVWRSFRPSOHWHO\EHIRUHFOHDQLQJWKHPDFKLQHLQRUGHUWRSUHYHQW
DFFLGHQWFDXVHGE\DEUXSWVWDUWRIWKHPDFKLQHRUPRWRU
%HVXUHWRWXUQWKHSRZHURIIDQGYHULI\WKDWWKHPDFKLQHDQGPRWRUVWRSFRPSOHWHO\EHIRUHFDUU\LQJRXW
PDLQWHQDQFHLQVSHFWLRQRUUHSDLURIWKHPDFKLQH)RUWKHPDFKLQHZLWKDFOXWFKPRWRUWKHPRWRUZLOO
NHHSUXQQLQJIRUDZKLOHE\LQHUWLDHYHQDIWHUWXUQLQJWKHSRZHURII6REHFDUHIXO
,IWKHPDFKLQHFDQQRWEHQRUPDOO\RSHUDWHGDIWHUUHSDLURUDGMXVWPHQWLPPHGLDWHO\VWRSRSHUDWLRQDQG
FRQWDFW-8.,RUWKHGLVWULEXWRULQ\RXUDUHDIRUUHSDLULQRUGHUWRSUHYHQWDFFLGHQWWKDWFDQUHVXOWLQSHU
VRQDOLQMXU\RUGHDWK
,IWKHIXVHKDVEORZQEHVXUHWRWXUQWKHSRZHURIIDQGHOLPLQDWHWKHFDXVHRIEORZLQJRIWKHIXVHDQG
UHSODFHWKHEORZQIXVHZLWKDQHZRQHLQRUGHUWRSUHYHQWDFFLGHQWWKDWFDQUHVXOWLQSHUVRQDOLQMXU\RU
GHDWK
%HVXUHWRSHULRGLFDOO\FOHDQXSWKHDLUYHQWRIWKHIDQDQGLQVSHFWWKHDUHDDURXQGWKHZLULQJLQRUGHUWR
SUHYHQW¿UHDFFLGHQWRIWKHPRWRU
2SHUDWLQJHQYLURQPHQW
%HVXUHWRXVHWKHPDFKLQHXQGHUWKHHQYLURQPHQWZKLFKLVQRWDIIHFWHGE\VWURQJQRLVHVRXUFHHOHFWUR
PDJQHWLFZDYHVVXFKDVDKLJKIUHTXHQF\ZHOGHULQRUGHUWRSUHYHQWDFFLGHQWFDXVHGE\PDOIXQFWLRQRI
WKHPDFKLQH
1HYHURSHUDWHWKHPDFKLQHLQDQ\SODFHZKHUHWKHYROWDJHÀXFWXDWHVE\PRUHWKDQUDWHGYROWDJH
LQRUGHUWRSUHYHQWDFFLGHQWFDXVHGE\PDOIXQFWLRQRIWKHPDFKLQH
%HVXUHWRYHULI\WKDWWKHDLUGULYHQGHYLFHVXFKDVDQDLUF\OLQGHURSHUDWHVDWWKHVSHFL¿HGDLUSUHVVXUH
EHIRUHXVLQJLWLQRUGHUWRSUHYHQWDFFLGHQWFDXVHGE\PDOIXQFWLRQRIWKHPDFKLQH
7RXVHWKHPDFKLQHZLWKVDIHW\EHVXUHWRXVHLWXQGHUWKHHQYLURQPHQWZKLFKVDWLV¿HVWKHIROORZLQJ
FRQGLWLRQV
$PELHQWWHPSHUDWXUHGXULQJRSHUDWLRQ &WR&
5HODWLYHKXPLGLW\GXULQJRSHUDWLRQ WR
'HZFRQGHQVDWLRQFDQRFFXULIEULQJLQJWKHPDFKLQHVXGGHQO\IURPDFROGHQYLURQPHQWWRDZDUPRQH
6REHVXUHWRWXUQWKHSRZHURQDIWHUKDYLQJZDLWHGIRUDVXI¿FLHQWSHULRGRIWLPHXQWLOWKHUHLVQRVLJQ
RIZDWHUGURSOHWLQRUGHUWRSUHYHQWDFFLGHQWFDXVHGE\EUHDNDJHRUPDOIXQFWLRQRIWKHHOHFWULFDOFRPSR
QHQWV
%HVXUHWRVWRSRSHUDWLRQZKHQOLJKWQLQJÀDVKHVIRUWKHVDNHRIVDIHW\DQGUHPRYHWKHSRZHUSOXJLQ
RUGHUWRSUHYHQWDFFLGHQWFDXVHGE\EUHDNDJHRUPDOIXQFWLRQRIWKHHOHFWULFDOFRPSRQHQWV
'HSHQGLQJRQWKHUDGLRZDYHVLJQDOFRQGLWLRQWKHPDFKLQHPD\JHQHUDWHQRLVHLQWKH79RUUDGLR,IWKLV
RFFXUVXVHWKH79RUUDGLRZLWKNHSWZHOODZD\IURPWKHPDFKLQH
,QRUGHUWRHQVXUHWKHZRUNHQYLURQPHQWORFDOODZVDQGUHJXODWLRQVLQWKHFRXQWU\ZKHUHWKHVHZLQJ
PDFKLQHLVLQVWDOOHGVKDOOEHIROORZHG
,QWKHFDVHWKHQRLVHFRQWUROLVQHFHVVDU\DQHDUSURWHFWRURURWKHUSURWHFWLYHJHDUVKRXOGEHZRUQDF
FRUGLQJWRWKHDSSOLFDEOHODZVDQGUHJXODWLRQV
'LVSRVDORISURGXFWVDQGSDFNDJHVDQGWUHDWPHQWRIXVHGOXEULFDWLQJRLOVKRXOGEHFDUULHGRXWSURSHUO\
DFFRUGLQJWRWKHUHOHYDQWODZVRIWKHFRXQWU\LQZKLFKWKHVHZLQJPDFKLQHLVXVHG
– 25 –
1
2
3
4
5
A
B
0.8 - 1.2 mm
4
5
1
2
0.4 - 1.0 mm
2
C
4
14. Adjusting the spreader thread guide and the needle clamp thread guide /
分布导线器、针夹导线器的调整
WARNING :
To protect against possible personal injury due to abrupt start of the machine, be sure to start the
following work after turning the power off and ascertaining that the motor is at rest.
注意 :
为了防止突然起动造成人身事故,请关掉电源,确认马达确实停止转动后再进行操作。
[Spreader thread guide]
Adjust so that the clearance between spreader thread
guide 2and spreader 1is0.4to1.0mm.Thenxthe
spreader thread guide with setscrews 3.
* Adjust so that the center of slot Aof spreader thread
guide 2aligns with blade point Bof spreader 1when
spreader 1is in the extreme right position. In addition,
allow the spreader thread guide 2to come near the
needle clamp to such an extent that the spreader
thread guide does not interfere with the needle clamp.
[Needle clamp thread guide]
Adjust so that the center of thread hole of needle clamp
thread guide 4aligns with center Cof slot Awhen the
needle is in the lowest position.
* At this time, adjust so that the clearance between
needle clamp thread guide 4and spreader thread
guide 2is0.8to1.2mm.Thenxtheneedleclamp
thread guide with setscrew 5.
[分布导线器]
把分布导线器 2和分布器 1的间隙调整为 0.4 〜 1.0mm,
然后用固定螺丝 3进行固定。
※ 分布器 1在最右点时,请把分布器 1的尖部 B调
整到与分布导线器 2的长槽 A 的中心一致。另外,
分线导线器 2应不与针座相碰而尽量靠近。
[针夹导线器]
机针在最下点时,请把针夹导线器 4的线孔中心和分布
导线器 2的长槽 A的中心 C调整成一致。
※ 此时,请把针夹导线器 4和分布导线器 2的间隙
调整为 0.8 〜 1.2mm,然后用固定螺丝 5进行固定。
– 24 –
Adjust the height from the top surface of throat plate 1to
the rear end of main feed dog 2to 1 mm when the feed
dog comes to its highest position and tighten setscrew 3
toxthefeeddog.
For the height of differential feed dog 4, adjust the height
of front end 5of main feed dog 2to that of rear end 6
of differential feed dog 4, and tighten setscrew 7tox
the differential feed dog.
It is the standard that throat plate 1isushwiththefeed
dog when the feed dog is in its highest position.
送布牙来到最高点后,把针板 1的上面和主送布牙 2
后端的高度调整为 1mm,然后拧紧固定螺丝 3。
移动主送布牙 2的前端 5和差动送布牙 4的后端 6
的高度来调整差动送布牙 4的高度,然后拧紧固定螺丝
7。
标准是送布牙在最高点时,针板 1和送布牙呈水平状态。
12. Adjusting the height of the feed dog / 送布牙高度的调整
WARNING :
To protect against possible personal injury due to abrupt start of the machine, be sure to start the
following work after turning the power off and ascertaining that the motor is at rest.
注意 :
为了防止突然起动造成人身事故,请关掉电源,确认马达确实停止转动后再进行操作。
0.1 - 0.3 mm
7.8 - 8.2 mm
1
3
4
B
2
A1
3
1
4.5 - 5.5 mm
17 - 18 mm
13. Installing position of the spreader / 分布器的安装位置
[Adjusting the height]
The height of spreader 1is 7.8 to 8.2 mm from the top
surface of throat plate 2to the bottom surface of the
spreader.
Adjust the height with clamp screw 3andxthespreader.
[Adjusting the longitudinal position]
Adjust so that the clearance between the spreader and
left-hand needle is 0.1 to 0.3 mm when spreader 1travels
from the extreme left position to the right and section
Acomestothefrontofleft-handneedle.Thenxthe
spreader with clamp screw 3.
[Adjusting the lateral position]
Adjust so that the distance from the center of left-hand
needle to section Bof the spreader 1 is 4.5 to 5.5 mm
when the spreader 1is in the extreme left position. Then
xthespreaderwithclampscrew4.
[高度调整]
分布器 1的高度是针板 2的上面到分布器下面的距离为
7.8 〜 8.2mm。
暂时拧紧固定螺丝 3,调整后正式拧紧。
[前后位置的调整]
分布器 1从最右点向左移动,A部来到前侧后,把与左
针的间隙调整为 0.1 〜 0.3mm,然后拧紧固定螺丝 3。
[左右位置的调整]
分布器 1在最左的位置时,把从左针中心到分布器
1B 部位置的距离调整为 4.5 〜 5.5mm,然后拧紧固定
螺丝 4。
WARNING :
To protect against possible personal injury due to abrupt start of the machine, be sure to start the
following work after turning the power off and ascertaining that the motor is at rest.
注意 :
为了防止突然起动造成人身事故,请关掉电源,确认马达确实停止转动后再进行操作。
1
24
56
1mm
37
v
FOR SAFE OPERATION
1. Neverbringyourngersunderthe needlewhenthe powerswitchis turnedONor
the machine is in operation.
2. Never bring your fingers, hair or clothes close to the pulley and needle or place
anything on the pulley and under the needle while the machine is in operation.
3. Never operate the machine with the safety devices such as belt cover, needle bar
threadtake-upcover,ngerguard,eyeguardcover,etc.removed.
4. Be sure to turn OFF the power and perform the work after ascertaining that the sewing
machine does not run even when the starting pedal is depressed in case of checking,
adjusting, cleaning, threading or replacing the needle of the sewing machine.
5. Never operate the sewing machine with the ground wire for the power supply
removed so as to ensure safety.
6. Be sure to turn OFF the power switch in advance in case of inserting/removing the
power plug.
7. In time of thunder and lightning, stop your work and disconnect the power plug from
the receptacle so as to ensure safety.
8. When you move the sewing machine from a cold place directly to a warm place,
dew condensation may result. Turn ON the power to the machine after you have
conrmedthatthereisnofearofdewcondensation.
9. In case of maintenance, inspection, or repair, be sure to turn OFF the power switch
andconrmthatthesewingmachineandthemotorhavecompletelystoppedbefore
starting the work. (In case of the clutch motor, it continues rotating for a while by the
inertia even after turning OFF the power switch. So, be careful.)
10. Be careful of handling this product so as not to pour water or oil, shock by dropping,
and the like since this product is a precision instrument.
1. To prevent accidents caused by electric shock, never open the motor control box
cover or touch the components inside the control box while the power switch is ON.
CAUTION BEFORE OPERATION
• BesuretolltheoilholewithoildesignatedbyJUKIbeforeuse.
• Cleanthesewingmachinethoroughlybeforeusingitforthersttime.
• Remove all dust collected on the sewing machine during the transportation.
• Conrmthatthevoltageandphasearecorrect.
• Conrmthatthepowerplugisproperlyconnected.
• Never use the sewing machine in the state where the voltage type is different from the designated one.
• The direction of rotation of the sewing machine is clockwise as observed from the pulley side. Be careful
not to rotate it in reverse direction.
• When operating the sewing machine, turn ON the power switch after properly setting the head on the table.
• Fortherstmonthafterset-up,usethemachineatareducedsewingspeedof3,500sti/minorless.
• Operate the pulley after the sewing machine has totally stopped.
WARNING :
Toavoidmalfunctionanddamageofthemachine,conrmthefollowing.
Inaddition,beawarethatthesafetydevicessuchasthe"eyeprotectioncover"and"nger
guard"aresometimesomittedinthesketches,illustrationsandguresincludedintheInstruction
Manual for the explanation's sake. In the practical use, never remove those safety devices.
CAUTION

vi
i
⭡Ҿ㕍ࡦъⲴާփᛵߥˈᴹᰦнᗇн䶐䘁ᵪಘ䖜ࣘⲴ䴦䜘Ԧ䘋㹼㘼ᴹ㜭᧕䀖ࡠ䖜ࣘ䴦䜘Ԧˈഐ↔ᇎ䱵
ᵪಘⲴઈ઼㔤؞؍ޫⲴ㔤؞Ӫઈˈᗵ享൘һࡽԄ㓶䰵䈫 ᴿީᆿޞⲺ⌞ᝅӁ亯 ˈݵ࠶⨶䀓ᇩѻ䘋㹼
DŽ↔ ᴿީᆿޞⲺ⌞ᝅӁ亯 ѝ䇠䘠ⲴᇩᴹⲴнᱟ⭘ᡧ䍝ҠⲴ୶૱㿴ṬⲴᇩDŽ
ཆˈѪҶ㜭䇙⭘ᡧݵ࠶ൠ⨶䀓֯⭘䈤᰾Җԕ৺ӗ૱Ⲵ䆖ᣕḷㆮˈ⢩ሶ䆖ᣕ㺘⽪࠶Ѫྲл㊫DŽ䈧ݵ࠶Ҷ䀓䘉Ӌᇩˈ
ᒦ䚥ᆸᤷ⽪Ⲵ㾱≲DŽ
Ė ধ䲟ㅿ㓝Ⲻ䈪᱄
䆜
ഴ
ḽ
㺞
⽰
ᴿ䀜䖢ࣞ䜞θ䙖ᡆ䍕՚Ⲻধ䲟Ⱦ 䆜
ഴ
ḽ
㺞
⽰
֒ѐᰬᤵ㕓㓡ᵰⲺ䈓θᴿ䇟ᢁ՚
Ⲻধ䲟Ⱦ
ᴿ䀜儎⭫ু䜞θ䙖ᡆ䀜⭫Ⲻধ䲟Ⱦ ᴿভޛⳤᑜθ䙖ᡆ䍕՚Ⲻধ䲟Ⱦ
ᴿ䀜儎䜞θ䙖ᡆ✡՚Ⲻধ䲟Ⱦ 䀜Ҽ㓳ᢙՖ䘷ಞθᴿ՚Ⲻধ䲟Ⱦ
ྸⴤ㿼◶ݿⲺ䈓θᴿ՚ᇩ
ⶑⲺধ䲟Ⱦ
⽰
ḽ
ㆴ
⽰↙⺤Ⲻ䖢ࣞᯯȾ
ᴿཪ䜞䀜ࡦ㕓㓡ᵰⲺধ䲟Ⱦ ⽰൦㓵Ⲻ䘔Ⱦ
ধ䲟 ᬃ֒ᡌ㔪ؤؓޱᵰಞᰬθྸᖉӁӰȽㅢ 㘻ᬃ֒䭏䈥ᡌ⋗ᴿ䚵ރ䈛߫θᴿ⭕↱ӗ
ᡌ䙖ᡆ䠃՚Ⲻধ䲟Ⱦ
䆜 ᬃ֒ᡌ㔪ؤؓޱᵰಞᰬθྸᖉӁӰȽㅢ 㘻ᬃ֒䭏䈥ᡌ⋗ᴿ䚵ރ䈛߫θᴿ⭕↱ӗ
ᡌ䙖ᡆ䠃՚Ⲻ▒൞㜳Ⱦ
⌞ᝅ ᬃ֒ᡌ㔪ؤؓޱᵰಞᰬθྸᖉӁӰȽㅢ 㘻ᬃ֒䭏䈥ᡌ⋗ᴿ䚵ރ䈛߫θᴿ䙖ᡆѣ䖱
՚Ⲻ㜳Ⱦ
ė 䆜ഴḽ㺞⽰ૂ⽰ḽㆴⲺ䈪᱄
䆜
ḽ
ㆴ
❶
❷
❸
❶
・ᴿ⭕ѣ䖱ᓜ՚ᇩȽ䠃՚Ƚ↱ӗⲺধ䲟Ⱦ
・䀜Ҽ⍱ࣞ䜞࠼Ⲻ䈓θᴿ⭕䍕՚Ⲻধ䲟Ⱦ
❷
・ᓊᆿ㻻ᆿޞ䱨ᣚಞθ❬߃䘑㺂㕓Ⱦ
・ᓊᆿ㻻ᆿޞᣚ㖟θ❬߃䘑㺂㕓Ⱦ
・ᓊᆿ㻻ؓᣚ㻻㖤θ❬߃䘑㺂㕓Ⱦ
❸
❷
❶
❸
・ᗻ亱࠽ᯣ⭫Ⓠҁθ߃䘑㺂ɇサ㓵ɈȽɇᦘ䪾ɈȽɇᴪᦘợᗹɈԛɇࣖ⋯ȽᢡɈⲺᬃ֒Ⱦ
䀜
⭫
ধ
䲟
ḽ
ㆴ
ѰҼᆿޞ൦ֵ⭞㕓㓡ᵰ
– 23 –
11. Relation between the rocking thread take-up timing and the needle thread loop /
摆动挑线杆的同步和线环的关系
In case stitch skipping or thread breakage occurs due
to excessive large or small needle thread loop even
when performing threading in case of using stretchable
threads or less stretchable threads described in "Standard
threading", change the needle thread drawing timing of the
rocking thread take-up and adjust the size of needle thread
loop.
1) Loosen screw 1.
2) Move 2forward or backward. The relation between
the moving direction and the size of needle thread loop
is as shown in the table below.
3) After the adjustment, securely tighten screw 1.
* Clearance between crank 2and thrust collar 3has
been factory-adjusted to 4 mm at the time of delivery.
(Engraved marker line on rocking thread take-up shaft
4aligns with the edge of crank 2.)
Position of crank 2
Move forward
Move backward
In case of threading
for standard seams
Loop becomes
smaller.
Loop becomes
larger.
In case of threading
for soft seams
Loop becomes
larger.
Loop becomes
smaller.
Note : The adjusting direction becomes reverse by way of
threading. So, be careful.
1. When screw 1is loosened, the rocking thread take-up rotates due to the light weight. So, be careful. If
it rotates, refer to the item “Adjusting the rocking thread take-up”.
2. Do not change the timing other than the aforementioned one since the sewing trouble will be caused.
¡ Size of needle thread loop
使用在「标准的穿线方法」中说明的容易伸缩或不容易伸缩的线,由于线环过大或过小等原因发生跳针、断线时,
请变更摆动挑线杆的挑线同步时间,调整线环的大小。
1) 拧松螺丝 1。
2) 请把 2移动到前侧或里侧。移动方向和线环的大小关系如下表所示。
3) 调整后,请拧紧固定螺丝 1。
※ 工厂出货时的夹子 2和推力环 3的间隙调整值为 4mm 。(摆动挑线杆轴 4的刻线和夹子 2的端面对齐。)
WARNING :
To protect against possible personal injury due to abrupt start of the machine, be sure to start the
following work after turning the power off and ascertaining that the motor is at rest.
注意 :
为了防止突然起动造成人身事故,请关掉电源,确认马达确实停止转动后再进行操作。
1. 拧松了螺丝 1后,摆动挑线杆会因自重发生转动。如果转动了,请参照「摆动挑线杆的调整」的有关内容
进行调整。
2. 上述情况以外请不要变更同步关系,否则会发生缝制不良。
注)穿线方法不同,调整方向相反,务请注意。
● 线环的大小
夹子 2的位置 向前侧移动 向里侧移动
标准缝迹的穿线方法时 变小 变大
柔软缝迹的穿线方法时 变大 变小
3
4
2
1
4 mm

– 22 –
Adjust the lateral position of rear needle guard 1so that it
receives the needle within the range of Bwhen the needle
is in its lowest position.
1) Adjust the height with setscrew 2so that the distance
from edge line A of rear needle guard 1to the top end
of right-hand needle is 1.5 to 2 mm when the top end
3of the looper comes from the extreme right end to
the center of right-hand needle.
2) Make rear needle guard 1slightly come in contact
with the right-hand needle so that the clearance
between right-hand needle and top end 3of the
looper is 0 to 0.05 mm when top end 3of the looper
comes from the extreme right end to the center of
right-hand needle.
In addition, make rear needle guard 1slightly come in
contact with the medium needle so that the clearance
between the medium needle and top end 3of the
looper keeps 0 to 0.05 mm when top end 3of the
looper comes to the center of medium needle.
Perform the adjustment with setscrews 2and 4.
10. Adjusting the rear needle guard / 后针座的调整
WARNING :
To protect against possible personal injury due to abrupt start of the machine, be sure to start the
following work after turning the power off and ascertaining that the motor is at rest.
注意 :
为了防止突然起动造成人身事故,请关掉电源,确认马达确实停止转动后再进行操作。
0 -
0.05 mm
0 -
0.05 mm
3
机针在最下点时,后针座 1的左右位置在 B的范围内进行调节以准确落针。
1)
弯针前端 3从最右点来到右针中心后,用固定螺丝 2把后针座 1的棱线 A和弯针前端的高度调整为 1.5mm 〜
2mm。
2)
弯针前端 3从最右位置来到右针中心后,请让后针座 1轻轻接触,把右针和弯针前端 3的间隙调整为 0 〜 0.05mm。
另外,弯针前端
3
来到中针中心后,请让后针座 1轻轻接触,把中针和弯针前端
3
的间隙调整为 0 〜 0.05mm。
调节时,请用固定螺丝
2
、4进行调节。
2
1
A
B
1.5 - 2 mm
4
2
vii
ii
ᴿީᆿޞⲺ⌞ᝅӁ亯 Ӂ᭻ φᱥ㔏фӰ䓡ԛ
䍘ӝᑜᶛᦕᇩȾ
䴶㾷ᢉᔶ⭫≊ᰬθѰҼ䱨↘䀜⭫Ӂ᭻θ䈭ީ䰣⭫Ⓠθ㔅䗽 ࠼䫕ԛрⲺᰬ䰪ҁ߃ᢉᔶ⭫≊ⴌȾ
ধ䲟
⌞ᝅ
ะᵢ⌞ᝅӁ亯
ֵ⭞ҁࢃθ䈭ᛞжᇐ䰻䈱ֵ⭞䈪᱄Ҝԛ䱺ኔⲺᡶᴿ䈪᱄䍺ᯏȾ
ཌθ䈭ᛞؓ㇗ᵢֵ⭞䈪᱄Ҝθԛ䳅ᰬԛḛ䰻Ⱦ
ᵢ⌞ᝅӁ亯ѣᴿ䜞࠼ᇯ㜳уᱥᛞᡶ䍣ҦⲺᵰಞ㿺ṲⲺᇯȾ
ѰҼ䱨↘ᯣ䪾䙖ᡆⲺӁ᭻θ䈭ᡪрᆿޞ䱨ᣚ䮒䘑㺂ᬃ֒Ⱦ
ֵ⭞ᗹ㝅䎭ᩅಞⲺӰθ䈭жᇐфщ䰞⭕䈘ҁ߃ֵ⭞Ⱦ
ᆿޞ㻻㖤Ƚ䆜ḽㆴ
ѰҼ䱨↘⭧ӄ⋗ᴿᆿ㻻ᆿޞ㻻㖤㙂䙖ᡆⲺӁ᭻θᬃ֒ᵢᵰಞᰬθ䈭⺤䇚ᆿޞ㻻㖤ᱥ↙⺤൦ᆿ㻻ࡦ㿺
ᇐփ㖤ҁ߃䘑㺂ᬃ֒Ⱦ
ѰҼ䱨↘Ӱ䓡Ӂ᭻θমсҼᆿޞ㻻㖤θ䈭жᇐ߃ᆿ㻻ࡦᶛⲺփ㖤θᒬ⺤䇚ࣕ㜳ᱥ↙ᑮȾ
ѰҼ䱨↘Ӱ䓡Ӂ᭻θ䈭ᣀ䆜ḽㆴᰬᑮ൦㋎䍪ࡦԛ᱄ᱴⵁࡦⲺᵰಞрȾྸ㝧㩳ᡌ⭕⊗ᦕθ䈭
ᴪᦘᡆ᯦ⲺḽㆴȾ
⭞䙊Ƚ᭯㻻
ѰҼ䱨↘Ӱ䓡Ӂ᭻θ䈭у㾷ሼᵢᵰಞֵ⭞ӄᵢᶛⲺ⭞䙊ૂֵ⭞䈪᱄Ҝ㿺ᇐⲺֵ⭞ᯯ⌋ԛཌⲺ⭞༺Ⱦྸ
ֵ⭞ӄ㿺ᇐ⭞䙊ԛཌᰬθᵢޢжᾸу䍕Ա䍙ԱȾ
ѰҼ䱨↘Ӱ䓡Ӂ᭻θ䈭у㾷᭯㻻ᵰಞȾሯӄഖ᭯㻻㙂⭕ⲺӁ᭻θᵢޢжᾸу䍕Ա䍙ԱȾ
ᮏ㛨ฯ䇣
ѰҼ䱨↘⭧ӄу⟕㓹㙂䙖ᡆⲺӁ᭻θ䳽⭞ঋփᓊቧᴿީᵢᵰಞⲺᬃ֒ૂᆿޞ⌞ᝅӁ亯θሯᬃ֒Ӱ䘑
㺂ᮏ㛨θ㙂ъ䇟ޭᴿщѐ⸛䇼ૂᬃ֒ᢶ㜳Ⲻᬃ֒Ӱֵ⭞ᵢᵰಞȾᰬθ䳽⭞ঋփжᇐӁࢃ㕌ᬃ
֒ӰⲺᮏ㛨ฯ䇣䇗ࡈθᒬ࠽ᇔ൦ᇔ᯳Ⱦ
ᗻ亱ީ䰣⭫ⓆⲺӁ亯 ީ䰣⭫Ⓠ φᱥީ䰣⭫Ⓠᔶީҁθᒬъᣀ⭫Ⓠᨈ
ཪԄ⭫ⓆᨈᓝрᤊсᶛȾԛсȾ
ѰҼ䱨↘Ӱ䓡Ӂ᭻θᖉ⺤䇚ҼᔸᑮȽ᭻䳒ԛڒ⭫ᰬθ䈭ީ䰣⭫ⓆȾ
ѰҼ䱨↘ഖᵰಞシ❬䎭ࣞ䙖ᡆⲺӁ᭻θ൞ྸс߫ᰬθ䈭жᇐީ䰣⭫Ⓠҁ߃䘑㺂ᬃ֒Ⱦ⢯ࡡᱥֵ⭞
⿱傢䗴ᰬθީ䰣⭫Ⓠθжᇐ⺤䇚Ҽ㕓㓡ᵰᇂޞڒ↘䖢ࣞҁ߃䘑㺂ᬃ֒Ⱦ
ׁྸθᵰ䪾Ƚᕥ䪾Ƚ࠼㓵ಞㅿ䴶㾷サ㓵Ⲻ䴬Ԭ䘑㺂サ㓵ᡌᴪᦘợᗹᰬȾ
ׁྸθᴪᦘᡌ䈹᮪㓺ᡆᵰಞⲺᡶᴿ䴬䜞ԬᰬȾ
ׁྸθỶḛȽؤ⨼Ƚᢡᵰಞᰬθᡌ⿱ᔶᵰಞᰬȾ
ѰҼ䱨↘䀜⭫Ƚ╅⭫Ƚ⚡⚴Ӂ᭻θᤊ⭫Ⓠᨈཪᰬθжᇐ㾷ᢁᤷᨈཪᤊ⭫㓵θ㙂у㜳⭫㓵ᤊȾ
уֵ⭞㕓㓡ᵰ䰨᭴ᰬθжᇐ㾷ީ䰣⭫ⓆȾ
ѰҼ䱨↘ഖ⭫≊䴬䜞ԬⲺᦕඅ䙖ᡆⲺӁ᭻θڒ⭫䈭жᇐީ䰣⭫ⓆȾ

viii
iii
൞ֵ⭞䱬⇫Ⲻ⌞ᝅӁ亯
ᩢ 䘆
ѰҼ䱨↘Ӱ䓡Ӂ᭻θᣢ䎭㕓㓡ᵰ〱ࣞᰬθ䈭жᇐṯᦤᵰಞⲺ䠃䠅䟽⭞⺤ؓᆿޞⲺᯯ⌋䘑㺂ᩢ䘆Ⱦཌθ
ᴿީᵰಞ䠃䠅θ䈭⺤䇚ֵ⭞䈪᱄ҜⲺ䈪᱄Ⱦ
ѰҼ䱨↘Ӱ䓡Ӂ᭻θᣢ䎭㕓㓡ᵰ〱ࣞᰬθ䈭䟽⺤ؓᆿޞⲺ᧠᯳䱨↘㘱وȽᦿ㩳Ⱦ
ѰҼ䱨↘у人ᜩⲺӁ᭻Ƚᦿ㩳Ӂ᭻Ƚᵰಞᦕඅθ䈭у㾷߃⅗㻻ᐨ㔅ᔶⲺᵰಞ䘑㺂ᩢ䘆Ⱦ
ᔶ
ѰҼ䱨↘Ӱ䓡Ӂ᭻θᔶᰬ䈭➝ԄрᯯᔶခⲺ亰ᓅ䘑㺂ᔶȾᵞṼ㻻ᰬθ䈭жᇐ㾷ቅᗹу㾷㻡䪿
ᆆᢄȾ䈭ᣀ䪿ᆆԄᵞᶵрᤊсᶛȾ
ѰҼ䱨↘Ӱ䓡Ӂ᭻θ࠰ᵰಞᰬθ䈭жᇐ俌ݾ⺤䇚ᵰಞⲺ䠃ᗹփ㖤❬ቅᗹ൦࠰Ⱦ
ᆿ 㻻
δĖεᵰȽ㝐
ѰҼ䱨↘Ӱ䓡Ӂ᭻θ䈭жᇐֵ⭞㓥↙ⲺᵰȽ㝐Ⱦуᗍԛֵ⭞䶔㓥↙Ⲻ䴬Ԭᰬθ䈭жᇐֵ⭞ԛݻ
࠼ᢵᵰಞ䠃䠅Ƚ䘆䖢ᰬⲺ֒⭞࣑ⲺᵰȽ㝐Ⱦ
ѰҼ䱨↘Ӱ䓡Ӂ᭻θ൞㝐рᆿ㻻㝐䖤ᰬθ䈭ֵ⭞ޭᴿݻ࠼ᕰᓜⲺᑜ䬷ᇐ㻻㖤Ⲻ㝐䖤θᬃ֒ᵰಞᰬȽ
㔪ؤؓޱȽỶḛȽؤ⨼ᰬ䘑㺂䬷ᇐу㾷ᵰಞᱹࣞȾ
δėε⭫㔼Ƚᐹ㓵
ѰҼ䱨↘䀜⭫Ƚ╅⭫Ƚ⚡⚴Ӂ᭻θֵ⭞⭫㔼ᰬ䈭у㾷⭫㔼᯳ࣖ䗽ཝⲺ࣑䠅Ⱦཌθ൞ 9 ᖘⳤᑜㅿ䖢
ࣞ䴬䜞Ԭ䱺䘇ᐹ䇴⭫㔼ᰬθᐨ㔅䇟⭫㔼䐓⿱ᆹԢ PP ԛрȾ
ѰҼ䱨↘䀜⭫Ƚ╅⭫Ƚ⚡⚴Ӂ᭻θ䈭у㾷䘑㺂࠼ዊᐹ㓵Ⱦ
ѰҼ䱨↘䀜⭫Ƚ╅⭫Ƚ⚡⚴Ӂ᭻θ䈭жᇐ⢘ര൦രᇐ䘔ಞȾཌθᤊ䘔ಞᰬθ䈭жᇐᢁᤷ䘔ಞᤊ㓵Ⱦ
δĘε൦
ѰҼ䱨↘ഖ╅⭫Ƚ㔓㕎㙆ু㙂䙖ᡆⲺӁ᭻θжᇐ䈭ޭᴿ⭫≊щ䰞⸛䇼ⲺӰᆿ㻻⭫ⓆᨈཪȾཌθ䈭ж
ᇐᣀ⭫Ⓠᨈཪ䘔ࡦ൦Ⲻ⭫ⓆᨈᓝрȾ
ѰҼ䱨↘ഖ╅⭫䙖ᡆⲺӁ᭻θ䈭жᇐᣀ൦㓵൦Ⱦȼȼ
δęε傢䗴
ѰҼ䱨↘傢䗴✝⇷㙂䙖ᡆⲺӁ᭻θ䈭жᇐֵ⭞㿺ᇐⲺ仓ᇐ傢䗴 㓥↙ Ⱦ
ֵ⭞ᐸ൰࠰Ⲻ⿱傢䗴ᰬθഖ㻡ভޛ 9 ᖘⳤᑜ㙂䙖ᡆⲺӁ᭻θ䈭жᇐ䘿⭞ᆿ㻻ᴿ䱨↘ভޛࣕ㜳Ⲻⳤ
ᑜᣚ㖟Ⲻ⿱傢䗴Ⱦ
ᬃ֒ࢃ
ѰҼ䱨↘Ӱ䓡Ӂ᭻θ䙐⭫Ⓠҁࢃθ䈭жᇐ⺤䇚䘔ಞȽ⭫㔼ㅿ⺤ᇔ⋗ᴿᦕ՚Ƚ㝧㩳ȽᶴࣞȾ
ѰҼ䱨↘Ӱ䓡Ӂ᭻θ䈭у㾷ᣀᢁծࡦ⍱ࣞⲺ䜞փȾཌθ䈭⺤䇚ⳤᑜ䖤Ⲻ䖢ࣞᯯᱥф㇣ཪḽ䇦ж㠪Ⱦ
ֵ⭞ᑜ㝐䖤Ⲻᵰ㝐ᰬθѰҼ䱨↘シ❬Ⲻ䎭ࣞ䙖ᡆⲺӁ᭻θ䈭жᇐ䬷ᇐ㝐䖤θᑜᴿ䈹㢸ಞᰬθ䈭䈹㢸
㝐ᣀ㝐രᇐླȾ
ᬃ֒ѣ
ѰҼ䱨↘ভޛ㙂䙖ᡆⲺӁ᭻θᬃ֒ᵰಞᰬθ䈭⌞ᝅу㾷䇟ᢁȽཪȽ㺙ᵃ䶖䘇ⳤᑜ䖤Ƚᢁࣞ伔䖤Ƚ
傢䗴ㅿ䖢ࣞ䜞փθҕу㾷ᣀ⢟᭴ࡦр䶘Ⱦ
ѰҼ䱨↘Ӱ䓡Ӂ᭻θ䙐⭫Ⓠᰬᡌᵰಞᬃ֒ѣθ䈭у㾷ᣀᢁ䶖䘇ᵰ䪾θҕу㾷ᣀᢁծࡦ᥇㓵ᵼᣚ
㖟䠂Ⱦ
㕓㓡ᵰԛ儎䙕൞䘑㺂䖢ࣞȾѰҼ䱨↘ᔺ՚ᢁθᬃ֒ѣ㔓ሯу㜳䇟ᢁ䶖䘇ᕥ䪾Ƚ࠼㓵ಞȽ䪾ᵼȽᰁợȽ
ᐹ࠽࠶ㅿ⍱ࣞ䜞փȾཌθᴪᦘ㕓㓡ᵰᵰ㓵ᰬθ䈭ީ䰣⭫Ⓠθ⺤䇚Ҽ㕓㓡ᵰૂ傢䗴ൽᇂޞڒ↘ҁ߃
䘑㺂ᴪᦘȾ
ѰҼ䱨↘Ӱ䓡Ӂ᭻θԄᵰрম㕓㓡ᵰᰬθᡌ㘻䘊ഔᆿ㻻ࡦᶛⲺփ㖤ᰬθ䈭⌞ᝅу㾷ࡦᢁȾ
ѰҼ䱨↘ഖシ❬Ⲻ䎭ࣞ䙖ᡆⲺӁ᭻θমⳤᑜᣚ㖟ԛ 9 ᖘⳤᑜᰬθ䈭жᇐީ䰣⭫Ⓠθ⺤䇚Ҽ㕓㓡ᵰ
ૂ傢䗴ൽᇂޞڒ↘ҁ߃䘑㺂মȾ
ֵ⭞հᵃ傢䗴ᰬθᵰಞڒ↘ᰬ傢䗴у࠰༦丩ȾѰҼ䱨↘ഖシ❬Ⲻ䎭ࣞ䙖ᡆⲺӁ᭻θ䈭⌞ᝅу㾷ᘎ䇦
ީ䰣⭫ⓆȾ
ѰҼ䱨↘ഖ䗽✣䙖ᡆⲺ⚡⚴Ӂ᭻θֵ⭞ᰬ䈭у㾷օ傢䗴⭫ⓆⲺ߭পȾ
– 21 –
9. Adjusting the height of the needle / 机针高度的调整
1) Equally adjust clearance Abetween needles 1and
needle holes 2in the throat plate.
2) Adjust the height of the needle bar so that the top
end of the needle hole of left-hand needle aligns with
the bottom end section of the looper when the looper
travels to the extreme right end and top end Bof the
looper protrudes by approximately 1.1 mm from the
left end of the left-hand needle, remove the rubber cap
4 in the face plate, and tighten needle bar bracket
setscrew 3toxtheneedlebar.
Reference : Height from the top surface of the throat
plate Ato the top end of left-hand needle, C
when the needle is in the higher dead point
is as shown in the table.
WARNING :
To protect against possible personal injury due to abrupt start of the machine, be sure to start the
following work after turning the power off and ascertaining that the motor is at rest.
注意 :
为了防止突然起动造成人身事故,请关掉电源,确认马达确实停止转动后再进行操作。
Unit : mm
3
A
B
C
1
2
A
4
1) 请把机针 1和针板的针孔 2的间隙 A调整为均等。
2) 弯针从最右点向左移动,弯针前端 B约突出左针的
左端 1.1mm 后,调整针杆高度让左针的针孔上端和
弯针下端部对齐,然后卸下面板的橡胶盖 4,用针
杆套固定螺丝 3拧紧固定。
参考 : 机针在最上位置时,针板上面 A到左针前端的
高度 C如下表所示。
单位 : mm
2-needle 3-needle
Needle gauge Height of left-
hand needle, CNeedle gauge Height of left-
hand needle, C
3.2 8.9
4.0 8.6
4.8 8.1
5.6 7.8 5.6 7.8
6.4 7.3 6.4 7.3
2 针 3 针
针幅 左针高度 C针幅 左针高度 C
3.2 8.9
4.0 8.6
4.8 8.1
5.6 7.8 5.6 7.8
6.4 7.3 6.4 7.3

– 20 –
0 - 0.05 mm
1
A
5
4
8. Adjusting the looper / 弯针的调整方法
[Lateral position]
The relation between clearance Abetween looper 1and
the center of right-hand needle and the needle gauge is as
shown in the table.
[Longitudinal position]
Adjust so that the clearance between blade point 5of
the looper and medium needle 4is 0 to 0.05 mm when
the top end of the looper comes from the extreme right
position to the center of the medium needle. After the
adjustment, tighten clamp screw 2toxthelooper.
*
The blade point of the looper comes in contact with the
right-hand needle when rear needle guard 6does not
work. So, be careful.
Loosen clamp screw 2and laterally adjust looper holder
3in accordance with the table.
[左右位置]
弯针 1和右针中心的间隙
A
(弯针倒回量)和针幅的关
系如下表所示。
WARNING :
To protect against possible personal injury due to abrupt start of the machine, be sure to start the
following work after turning the power off and ascertaining that the motor is at rest.
注意 :
为了防止突然起动造成人身事故,请关掉电源,确认马达确实停止转动后再进行操作。
2-needle 3-needle
Needle gauge Return amount ANeedle gauge Return amount A
3.2 4.3
4.0 3.9
4.8 3.5
5.6 3.1 5.6 3.1
6.4 2.7 6.4 2.7
Unit : mm
单位 : mm
2 针 3 针
针幅 倒回量 A针幅 倒回量 A
3.2 4.3
4.0 3.9
4.8 3.5
5.6 3.1 5.6 3.1
6.4 2.7 6.4 2.7
请拧松螺丝 2,根据表中的数值,左右移动调整弯针支
撑曲柄 3。
[前后位置]
弯针前端从最右点来到中针中心后,请把弯针尖 5和中
针4的间隙调整为 0 〜 0.05mm。
调整后,请拧紧固定螺丝 2。
※ 请注意后针座 6不起作用时,弯针和右针相接触。
6
12
3
ix
iv
ࣖ ⋯
䈭ֵ⭞ -8., 㓥↙Ⲻᵰ⋯ૂ -8., 㓥↙Ⲻ⏜┇㜸㿺ᇐ䜞փ䘑㺂ࣖ⋯ૂ⎸ᣯ⏜┇㜸Ⱦ
ѰҼ䱨↘⛄⯽ૂ㝉㛵θⶑȽ䓡։р㋎䱺Ҽ⋯ᰬθ䈭䘑㺂⍍Ⱦ
ѰҼ䱨↘㞯⌱Ƚઋθྸ䈥侤Ҽᵰ⋯θ䈭䇟⭕⋱⯍Ⱦ
㔪ؤؓޱ
ѰҼ䱨↘ഖу⟕㓹㙂䙖ᡆⲺӁ᭻θᴿީؤ⨼Ƚ䈹᮪θ䈭жᇐ䇟⟕ᚿᵰಞⲺ㔪ؤؓޱᢶᵥӰ➝ֵ⭞
䈪᱄ҜⲺ䈪᱄䘑㺂ؤ⨼ૂ䈹᮪Ⱦཌθᴪᦘ䴬䜞Ԭᰬθ䈭жᇐֵ⭞ᵢޢⲺ㓥↙䴬䜞ԬȾሯӄу䘸ᖉ
Ⲻؤ⨼ૂ䈹᮪ԛֵ⭞䶔㓥↙䴬䜞Ԭ䙖ᡆⲺӁ᭻θᵢޢжᾸу䍕Ա䍙ԱȾ
ѰҼ䱨↘ഖу⟕㓹㙂䙖ᡆⲺӁ᭻ԛ䱨↘䀜⭫Ӂ᭻θ䈭жᇐ䇟ޭᴿ⭫≊щ䰞⸛䇼ⲺӰᡌညᢎᵢޢȽ
ԙ⨼ᓍⲺᢶᵥӰ䘑㺂ᴿީ⭫≊Ⲻؤ⨼ૂ㔪ؤ ᤢᐹ㓵 Ⱦ
ѰҼ䱨↘ഖシ❬Ⲻ䎭ࣞ䙖ᡆⲺӁ᭻θؤ⨼ૂ㔪ؤؓޱֵ⭞≊㕮ㅿ儎ুグ≊Ⲻᵰಞᰬθ䈭жᇐমсグ≊
ב㔏ⓆⲺ㇗ᆆθᧈ᭴࠰⇁⮏Ⲻグ≊ҁ߃䘑㺂ؤ⨼ૂ㔪ؤؓޱȾ
ѰҼ䱨↘Ӱ䓡Ӂ᭻θؤ⨼䈹᮪ૂᴪᦘ䴬䜞Ԭθ䈭жᇐ⺤䇚㷰ѓ㷰∃ㅿ⋗ᴿᶴࣞȾ
ᵰಞⲺֵ⭞ᵕ䰪ѣθ䈭жᇐᇐᵕ൦䘑㺂ᢡȾ↚ᰬθѰҼ䱨↘ഖシ❬Ⲻ䎭ࣞ㙂䙖ᡆⲺӁ᭻θ䈭жᇐީ
䰣⭫Ⓠθ⺤䇚Ҽ㕓㓡ᵰૂ傢䗴ൽᇂޞڒ↘ҁ߃䘑㺂ᢡȾ
䘑㺂㔪ؤؓޱȽỶḛȽؤ⨼ᰬθ䈭жᇐީ䰣⭫Ⓠθ⺤䇚Ҽ㕓㓡ᵰૂ傢䗴ൽᇂޞڒ↘ҁ߃䘑㺂ᬃ֒Ⱦ ⿱
傢䗴ᰬθ䈭⌞ᝅީ䰣⭫Ⓠ傢䗴⭧ӄᜥᙝԃ❬ഔ㔝㔣䖢ࣞжᇐᰬ䰪Ⱦ
ѰҼ䱨↘Ӱ䓡Ӂ᭻θ㔅䗽ؤ⨼䈹᮪θᵰಞу㜳↙ᑮᬃ֒ᰬθ䈭ڒ↘ᬃ֒θфᵢޢᡌԙ⨼ᓍ㚊㌱θ
ညᢎᴿީᢶᵥӰؤ⨼Ⱦ
ѰҼ䱨↘Ӱ䓡Ӂ᭻θؓ䲟ѓ⟊ᯣθ䈭жᇐ࠽ᯣ⭫Ⓠθᧈ䲚Ҽؓ䲟ѓ⟊ᯣⲺഖҁθᴪᦘ㿺Ṳ
Ⲻ᯦ؓ䲟ѓȾ
ѰҼ䱨↘傢䗴Ⲻ⚡⚴Ӂ᭻θ䈭ᇐᵕ൦䘑㺂伄䙐≊Ⲻᢡૂ䞃㓵ઞⲺỶḛȾ
ֵ⭞⧥ູ
ѰҼ䱨↘ഖ䈥ࣞ֒䙖ᡆⲺӁ᭻θ䈭൞⋗ᴿ儎仇⭫❀ᵰㅿᕰಠ丩Ⓠ ⭫⌘ ᖧଃⲺ⧥ູсֵ⭞㕓㓡ᵰȾ
ѰҼ䱨↘ഖ䈥ࣞ֒䙖ᡆⲺӁ᭻θ൞䎻䗽仓ᇐ⭫ু fαⲺ൦ᯯθ䈭у㾷ֵ⭞㕓㓡ᵰȾ
ѰҼ䱨↘ഖ䈥ࣞ֒䙖ᡆⲺӁ᭻θሯӄֵ⭞≊㕮ㅿ儎ুグ≊Ⲻ㻻㖤θ䈭⺤䇚Ҽু࣑ㅜ㿺ᇐҁ߃䘑㺂
ֵ⭞Ⱦ
ѰҼᆿޞ൦ֵ⭞㕓㓡ᵰθ䈭жᇐ൞сࡍ⧥ູс䘑㺂ֵ⭞Ⱦ
ࣞ֒ᰬⲺઞപᓜ đЊ đ
ࣞ֒ᰬⲺሯ⒵ᓜ αЊ α
ѰҼ䱨↘ഖ⭫≊䴬䜞ԬⲺᦕඅૂ䈥ࣞ֒䙖ᡆⲺӁ᭻θԄለ߭Ⲻ⧥ູᙛ䙕൦ࡦⲺ൦ᯯᇯ᱉ӝ⭕
㔉䵨⧦䊗θ䈭ㅿᖻ≪┪ᇂޞᒨ⠛ҁ߃䙐⭫ⓆȾ
ѰҼ䱨↘ഖ⭫≊䴬䜞ԬⲺᦕඅૂ䈥ࣞ֒䙖ᡆⲺӁ᭻θᢉ䴭ᰬѰҼᆿޞθ䈭ڒ↘ᬃ֒θᒬᤊс⭫ⓆᨈཪȾ
ᴿⲺ⭫⌘⣬ᘷсθ㜳Ր㔏Ҿ䱺䘇Ⲻ⭫㿼ᵰȽ᭬丩ᵰᑜᶛಠ丩Ⱦ↚ᰬθ䈭൞ぃぃ⿱ᔶ㕓㓡ᵰⲺ൦ᯯֵ
⭞⭫㿼ᵰȽ᭬丩ᵰȾ
ѰҼ⺤ؓ֒ѐ⧥ູθ䈭䚫ᆾളⲺᴿީ⌋ԚȾ
䴶㾷ሯᓊಠ丩ᰬθ䈭サᡪᴿީ⌋Ԛ㿺ᇐⲺ䱨丩䱨ᣚ⭞ޭㅿȾ
ᴿީӝȽ㻻Ⲻᓕᔹθֵ⭞ᇂⲺ⏜┇⋯ㅿⲺ༺⨼θ䈭➝ളⲺ⌋ᗁ⌋㿺䘑㺂䘸ᖉⲺ༺⨼Ⱦ

x
• 使用缝纫机之前,请一定向加油口加入 JUKI 指定机油。
• 第一次使用缝纫机之前,请把缝纫机打扫干净。
• 请把运送中积的灰尘打扫干净。
• 请确认设定的电压是否正确。
• 请确认电源插头是否正确地插好。
• 电源规格不同的情况时,请绝对不要使用缝纫机。
• 缝纫机的转动方向从皮带轮侧看为顺时针方向转动。请注意不要让缝纫机倒转。
• 运转缝纫机时,请正确地设置到机台之后再打开电源开关。
• 最初的第 1 个月,请降低缝纫速度,在转速 3,500sti/min 以下使用。
• 待缝纫机确实停止之后再操作飞轮。缝纫机确实地停止之后,再转动皮带轮。
注意 为了避免机械的错误动作或损伤,请确认如下项目内容。
运转缝纫机前的注意事项
1. 为了防止因触电造成的事故,请不要在打开电源的状态下触摸马达电气箱的盖子、电气
箱内的零件。
1. 打开电源开关时和缝纫机运转中,请不要把手指放到机针下附近。
2. 缝纫机运转中,请不要把手指、头发、衣服靠皮带轮和机针下附近,也不要把物体放到
上面。
3. 请不要在卸下皮带罩、手指防护罩和眼睛防护罩等安全装置的状态运转缝纫机。
4. 检查、调整、清扫缝纫机,穿线,更换机针等时,请一定关闭电源,确认了踩踏起动踏
板缝纫机也不动作后再进行操作。
5. 为了确保安全,请在卸下电源地线的状态不要运转缝纫机。
6. 插拔电源插头时,请一定事先关掉电源开关。
7. 打雷时,为了确保安全,请停止作业,拔掉电源插头。
8. 从寒冷的地方移动到温暖的地方后等时,有可能发生结露,所以请等水滴完全干燥后再
打开电源。
9. 进行保养、检查、修理作业时,请一定关闭电源,确认缝纫机和马达完全停止之后再进
行操作。(使用离合马达时,请注意关闭电源后马达由于惯性仍然会继续转动一段时间。)
10. 因为本产品属于精密机器,所以操作时请充分注意,不要把水、油溅到机器上面,也不
要让机器掉落给与机器冲击。
危险
注意
为了安全地使用 MF-7200D 系列的缝纫机的注意事项
注意
另外,在使用说明书中为了突出说明的重点,有的地方省略显示了「眼睛防护罩」、「手指防护器」
等安全装置,请了解。
但是实际使用时,请绝对不要卸下这些安全装置。
– 19 –
7. Adjusting the looper thread winding prevention plate / 带绕底线的防止板的调整
WARNING :
To protect against possible personal injury due to abrupt start of the machine, be sure to start the
following work after turning the power off and ascertaining that the motor is at rest.
注意 :
为了防止突然起动造成人身事故,请关掉电源,确认马达确实停止转动后再进行操作。
Adjust so that a clearance of approximately 0 to 0.3
mm is provided between the top end of section Aof
looper thread winding prevention plate 1and the end
face of looper thread cam 2.
请把绕底线防止板 1的A部前端和底线凸轮 2的端
面之间的间隙调整为 0 〜 0.3mm 左右。
1
2
A

– 18 –
[Adjusting the looper thread cam thread guide]
When the thread drawing amount is desired to be
decreased in case of 2-needle machine or the like, loosen
screws 7, move upward thread guides 5and 6and
tighten screws 7toxthem.
A = Decrease B = Increase
[ 底线凸轮的调整 ]
想让 2 根机针的拉线量变少时,请拧松螺丝 7,向上方
移动导线器 5、6,然后拧紧固定螺丝 7。
A = 少 B = 多
1
2
3
4
4
2
1
5. Adjusting the spreader thread guide / 分布导线器的调整
Adjust so that the top end of thread guide thread path
(rear) 3of spreader thread guide 2aligns with the
bottom surface of slot of spreader thread take-up 1when
spreader thread take-up 1is in its highest position. Then
tighten screw 4toxthespreaderthreadguide.
分布挑线杆 1在最上点时,分布导线器 2的导线线道(里
侧)3的上端调整成与分布挑线杆 1的长孔下端一致,
然后拧紧固定螺丝 4。
WARNING :
To protect against possible personal injury due to abrupt start of the machine, be sure to start the
following work after turning the power off and ascertaining that the motor is at rest.
注意 :
为了防止突然起动造成人身事故,请关掉电源,确认马达确实停止转动后再进行操作。
6. Adjusting the looper thread cam thread guide and the looper thread cam /
底线凸轮导线器的调整
[Adjusting the looper thread cam]
Adjust so that thread comes off from the highest place of
looper thread cam 2when needles come down and the
top end of left needle 3aligns with the bottom surface of
looper 4. Then tighten screws 1toxthelooperthread
cam.
[ 底线凸轮导线器的调整 ]
机针下降,在左针 3的尖端与弯针 4下面一致时进行
调整,让机线从底线凸轮 2最高处脱离,然后拧紧固定
螺丝 1。
Thread /
线
WARNING :
To protect against possible personal injury due to abrupt start of the machine, be sure to start the
following work after turning the power off and ascertaining that the motor is at rest.
注意 :
为了防止突然起动造成人身事故,请关掉电源,确认马达确实停止转动后再进行操作。
1
2
3
4
A
5
67
B
A
B
xi
CONTENTS
!. SPECIFICATIONS ..........................................................................................................1
@. CONFIGURATION OF THE MACHINE COMPONENTS ...............................................3
#. INSTALLATION ...............................................................................................................................................4
1. Installing the machine head onto the table ...................................................................................................4
2. Selecting the motor pulley and the belt ..........................................................................................................8
3. Installing the motor .....................................................................................................................................................9
4. Setting the belt ...............................................................................................................................................................9
5. Installing the belt cover ......................................................................................................................................... 10
6. Installing the chain ................................................................................................................................................... 10
7. Installing the thread guide ................................................................................................................................... 10
$. LUBRICATION AND OILING ..................................................................................................................11
1. Lubricating oil ............................................................................................................................................................. 11
2. Oiling ................................................................................................................................................................................ 11
3. Replacing the lubricating oil ............................................................................................................................... 11
4. Silicon oil lubricating unit .................................................................................................................................... 12
%. OPERATION ....................................................................................................................................................12
1. Needle .............................................................................................................................................................................. 12
2. Attaching the needle ............................................................................................................................................... 12
3. Threading the machine head .............................................................................................................................. 13
4. Adjusting the stitch length .................................................................................................................................. 14
5. Adjusting the differential feed ratio ................................................................................................................ 15
6. Adjusting the presser foot pressure .............................................................................................................. 15
7. Adjusting the thread tension .............................................................................................................................. 16
^.ADJUSTINGTHESEWINGMACHINE ..............................................................................................16
1. Adjusting the silicon container thread guide ........................................................................................... 16
2. Adjusting the needle bar thread take-up thread receiver .................................................................. 17
3. Adjusting the rocking thread take-up ............................................................................................................ 17
4. Adjusting the rocking thread take-up thread receiver ......................................................................... 17
5. Adjusting the spreader thread guide ............................................................................................................. 18
6. Adjusting the looper thread cam thread guide and the looper thread cam ............................ 18
7. Adjusting the looper thread winding prevention plate ........................................................................ 19
8. Adjusting the looper ................................................................................................................................................ 20
9. Adjusting the height of the needle .................................................................................................................. 21
10. Adjusting the rear needle guard ....................................................................................................................... 22
11. Relation between the rocking thread take-up timing and the needle thread loop........... 23
12. Adjusting the height of the feed dog ............................................................................................................. 24
13. Installing position of the spreader .................................................................................................................. 24
14. Adjusting the spreader thread guide and the needle clamp thread guide ....................... 25
15. Adjusting the front needle guard ..................................................................................................................... 26
16. Adjusting the presser foot lift ............................................................................................................................ 26
17. Adjusting the micro-lifter ...................................................................................................................................... 27
&. MAINTENANCE.............................................................................................................................................27
1. Cleaning the sewing machine ............................................................................................................................ 27
2. Replacing the lubricating oil ............................................................................................................................... 28
3. Inspecingandreplacingtheoillter ............................................................................................................. 28

xii
目 录
!. 规格 ........................................................................................................................................................................1
@. 各部分的名称 .....................................................................................................................................................3
#. 安装方法 ..............................................................................................................................................................4
1. 缝纫机机头往机台上的安装 ..................................................................................................................................................4
2. 马达皮带轮、皮带的选定方法..............................................................................................................................................8
3. 马达的安装 ...................................................................................................................................................................................9
4. 皮带的挂法 ...................................................................................................................................................................................9
5. 皮带罩的安装 ...........................................................................................................................................................................10
6. 链条的安装 ................................................................................................................................................................................10
7. 导线器的安装 ...........................................................................................................................................................................10
$. 关于加油、注油 ..............................................................................................................................................11
1. 关于机油 .....................................................................................................................................................................................11
2. 关于加油 .....................................................................................................................................................................................11
3. 缝纫机油的更换 .......................................................................................................................................................................11
4. 线冷却装置 ................................................................................................................................................................................12
%. 缝纫机的使用方法 ..........................................................................................................................................12
1. 关于缝纫机针 ...........................................................................................................................................................................12
2. 机针的安装方法 .......................................................................................................................................................................12
3. 穿线方法 .....................................................................................................................................................................................13
4. 缝迹长度的调节 .......................................................................................................................................................................14
5. 差动比的调节 ...........................................................................................................................................................................15
6. 压脚压力的调节 .......................................................................................................................................................................15
7. 线张力的调节 ...........................................................................................................................................................................16
^. 缝纫机的调整 ...................................................................................................................................................16
1. 冷却器导线器的调整 .............................................................................................................................................................16
2. 针杆挑线器线座的调整 .........................................................................................................................................................17
3. 摆动挑线杆的调整 .................................................................................................................................................................. 17
4. 摆动挑线杆线座的调整 .........................................................................................................................................................17
5. 分布导线器的调整 .................................................................................................................................................................. 18
6. 底线凸轮导线器的调整 .........................................................................................................................................................18
7. 带绕底线的防止板的调整 ....................................................................................................................................................19
8. 弯针的调整方法 .......................................................................................................................................................................20
9. 机针高度的调整 .......................................................................................................................................................................21
10. 后针座的调整 ........................................................................................................................................................................... 22
11. 摆动挑线杆的同步和线环的关系 ......................................................................................................................................23
12. 送布牙高度的调整 ..................................................................................................................................................................24
13. 分布器的安装位置 ..................................................................................................................................................................24
14. 分布导线器、针夹导线器的调整 ......................................................................................................................................25
15. 前针座的调整 ........................................................................................................................................................................... 26
16. 压脚提升量的调整 ..................................................................................................................................................................26
17. 微量压脚提升的调节 .............................................................................................................................................................27
&. 维修保养 ............................................................................................................................................................27
1. 缝纫机的清扫 ...........................................................................................................................................................................27
2. 缝纫机油的更换 .......................................................................................................................................................................28
3. 滤油器的检查、更换 .............................................................................................................................................................28
– 17 –
Loosen setscrew 1and adjust so that the bottom end to
the center of the thread hole of needle bar thread take-
up 3aligns with the top end of needle bar thread take-
up thread receiver 2when the needle bar is in its lowest
position. Then tighten screw 1toxtheneedlebarthread
take-up thread receiver.
拧松固定螺丝 1,让针杆到最下点,把针杆挑线杆 3
的线孔下端到中心的距离和到针杆挑线杆线座 2上端调
整成一样,然后拧紧固定螺丝 1。
2. Adjusting the needle bar thread take-up thread receiver / 针杆挑线器线座的调整
2
3
1
WARNING :
To protect against possible personal injury due to abrupt start of the machine, be sure to start the
following work after turning the power off and ascertaining that the motor is at rest.
注意 :
为了防止突然起动造成人身事故,请关掉电源,确认马达确实停止转动后再进行操作。
WARNING :
To protect against possible personal injury due to abrupt start of the machine, be sure to start the
following work after turning the power off and ascertaining that the motor is at rest.
注意 :
为了防止突然起动造成人身事故,请关掉电源,确认马达确实停止转动后再进行操作。
3. Adjusting the rocking thread take-up / 摆动挑线杆的调整
1) Loosen setscrews 1, move rocking thread take-up 2
to the right or left and adjust so that the distance from
the thread hole to the center of rocking thread take-
up shaft 3is dimension Aas shown in the illustration.
Retighten screws 1toxtherockingthreadtake-up.
2) Adjust so that rocking thread take-up base 4is
level when the rocking thread take-up is in its lowest
position.
Retighten screw 5toxtherockingthreadtake-up
base.
1) 拧松固定螺丝 1,左右移动摆动挑线杆 2,如图所
示把从线孔到摆动挑线杆轴 3的中心调整为 A尺寸,
然后固定螺丝 1。
2) 摆动挑线杆在最下点时,把摆动挑线杆座 4调整为
水平,然后用螺丝 5进行固定。
1
2
WARNING :
To protect against possible personal injury due to abrupt start of the machine, be sure to start the
following work after turning the power off and ascertaining that the motor is at rest.
注意 :
为了防止突然起动造成人身事故,请关掉电源,确认马达确实停止转动后再进行操作。
3
4
5
A
A
Adjustment value / 调整值 90mm
4. Adjusting the rocking thread take-up thread receiver / 摆动挑线杆线座的调整
Adjust so that the top end of rocking thread take-up thread
receiver 2aligns with the bottom end of thread hole 4of
rocking thread take-up 3when rocking thread take-up 3
isinitslowestposition,andxitwithscrew1.
摆动挑线杆 3在最下点时,把摆动挑线杆线座 2的上
端对准摆动挑线杆 3的线孔 4下端,然后用螺丝 1固
定。
1
2
34

– 16 –
7. Adjusting the thread tension / 线张力的调节
Adjust the thread tension with the following thread tension
nuts.
1Needle thread tension nut
2Top covering thread tension nut
3Looper thread tension nut
Turn clockwise to increase the thread tension.
Turn counterclockwise to decrease the thread tension.
B= Decrease / 拧紧
A= Increase / 缩短
调节线张力时请用以下零件进行调节。
1线张力器旋钮
2上装饰线张力器旋钮
3弯针线张力器旋钮
向右转动之后,紧线力变强。
向左转动之后,紧线力变弱。
^.ADJUSTINGTHESEWINGMACHINE/缝纫机的调整
1) Loosen setscrews 1and adjust so that the distance
from the center of the setscrew on the upper side to
the bottom end of the thread hole is 10 mm. Then
tighten setscrews 1toxthethreadguide.
2) Loosen setscrew 2and adjust the position from the
center of screws 1to the center of needle thread
guide rod to the extreme right position (43 mm). Then
tighten screw 2toxthethreadguiderod.
1. Adjusting the silicon container thread guide / 冷却器导线器的调整
Extreme right position / 最右位置
(43 mm)
10 mm
21
1) 拧松固定螺丝 1,把上侧固定螺丝中心到线孔中心
的距离调整为 10mm,然后拧紧固定螺丝 1。
2) 拧松固定螺丝 2,把螺丝 1的中心到机线导线杆中
心的距离调节到最右位置(43mm),然后用螺丝 2
固定。
3) Loosen setscrews 3and adjust so that the heights
of the respective needle thread guide rods are the
dimensions as shown in the illustration. Then tighten
screws 3toxthethreadguiderods.
3) 拧松固定螺丝 3 ,把各导线杆高度调整为图示的尺
寸,然后用固定螺丝 3进行固定。
A
B
C
3Extreme right position / 最右位置
WARNING :
To protect against possible personal injury due to abrupt start of the machine, be sure to start the
following work after turning the power off and ascertaining that the motor is at rest.
注意 :
为了防止突然起动造成人身事故,请关掉电源,确认马达确实停止转动后再进行操作。
A B C
Adjustment value /
调整值 13mm 16mm 19mm
1
2
3
A
B
– 1 –
!. SPECIFICATIONS
Model name Semi-dry head high-speed, small cylinder-bed coverstitch machine
Model MF-7200D series
Stitch type ISO standard 406, 407, 602, and 605
Example of application Hemming and covering for knits and general knitted fabrics
Max. speed of stitch Max. 4,000 sti/min (at the time of intermittent operation)
Needle gauge 3-needle ... 5.6 mm and 6.4 mm
2-needle ... 3.2 mm, 4.0 mm and 4.8 mm
Differential feed ratio
1 : 0.8 to 1 : 1.8 (stitch length : less than 3.2 mm)
Micro-differential feed adjustment mechanism is provided. (Micro-adjustment)
Stitch length
1.4 mm to 3.2 mm (can be adjusted up to 4.2 mm)
Needle UY128GAS #9S to #12S (standard #10S)
Needle bar stroke 31mm
Dimensions (Height) 450 x (Width) 444 x (Length) 285
Weight 42 kg
Lift of presser foot 6 mm (needle gauge : 5.6 mm without top covering), and 5 mm (with top covering)
Micro-lifter mechanism is provided.
Feed adjustment method Main feed ... dial type stitch pitch adjustment method
Differential feed ... lever adjustment method (micro-adjustment mechanism is provided.)
Looper mechanism Spherical rod drive method
Lubricating system Forced lubrication method by gear pump
Lubricating oil JUKI MACHINE OIL 18
Oil reservoir capacity Oil gauge lower line : 600 cc to upper line : 900 cc
Installation Top mount type, Semi-submerged type
Noise
- Equivalent continuous emission sound pressure level (LpA) at the workstation :
A-weighted value of 80.5 dB; (Includes KpA = 2.5 dB); according to ISO 10821- C.6.2
-ISO 11204 GR2 at 4,000 sti/min.
- Sound power level (LWA) ;
A-weighted value of 86.0 dB; (Includes KWA = 2.5 dB); according to ISO 10821- C.6.2
-ISO 3744 GR2 at 4,000 sti/min.

– 2 –
!. 规格
机种名称 半干式机头细筒型双面装饰
扁平缝缝纫机
型式 MF-7200D 系列
缝迹形式 ISO 规格 406 、407 、602 、605
用途例 针织、编织产品的包边缝、包布缝
最高缝纫速度 最高缝纫速度 4,000 sti/min(间歇运转时)
针幅 3 根针 ----5.6mm、6.4mm
2 根针 ----3.2mm、4.0mm、4.8mm
差动送布比 1 ∶ 0.8 〜 1 ∶ 1.8(缝迹长度 3.2mm 以下)
装备有微量差动送布调节机构(微调整)
缝迹长度 1.4mm 〜 3.2mm(经调整可至 4.2mm)
使用机针 UY128GAS #9S 〜 #12S(标准 #10S)
针杆行程 31mm
外观尺寸 高度∶ 450 左右∶ 444 前后∶ 285
质量 42kg
压脚上升量 6mm(针幅 5.6mm 无上装饰)、5mm(有上装饰)
装备有微量压脚提升机构
送布调节方法 主送布 ------ 拨盘式缝迹间距调节方式
差动送布 ---- 拨杆调节方式(装备有微调机构)
弯针机构 球面杆驱动方式
润滑方法 齿轮泵强制润滑加油方式
润滑油 JUKI MACHINE OIL 18
贮油量 油尺下线 600cc 〜上线 900cc
安装方法 上部安装式、半落地式
– 15 –
Loosen differential lock nut 1and move lever 2up
to increase the differential feed ratio. Then the sewn
material is gathered. Move lever 2down to decrease the
differential feed ratio. Then the sewn material is stretched.
Fine adjustment of the differential feed ratio can be
performed with micro-adjustment knob 3.
5. Adjusting the differential feed ratio
/
差动比的调节
There is a case where feed dogs or feed dog
and throat plate come in contact with each
other by the aforementioned adjustment
according to the relation between the stitch
length and the differential feed ratio. So, be
very careful.
Decrease the presser foot pressure as low as possible to
such an extent that stitches are stabilized.
To adjust the pressure, loosen lock nut 2of presser spring
regulator 1and turn presser spring regulator 1. After the
adjustment, tighten lock nut 2.
Turning it clockwise to increase the pressure.
Turning it counterclockwise to decrease the pressure.
请把压脚压力在缝迹稳定的范围内尽量调弱。
调节压力时,拧松压脚调节螺丝 1的锁定螺母 2,转
动压脚调节螺丝 1。调节后,请拧紧锁定螺母 2。
向右转动之后,压力变强。
向左转动之后,压力变弱。
6. Adjusting the presser foot pressure / 压脚压力的调节
1
2
调整缝迹长度和差动比的关系时,送布牙和送
布牙相碰,或送布牙与针板相碰,有可能造成
零部件损坏,请充分注意。
拧松差动锁定螺母 1,提升拨杆 2之后,差动比变大,
缝制的布料会皱缩。
下降拨杆 2之后,差动比变小,缝制的布料会伸长。
可以用微调旋钮 3进行差动比的微调整。
2
1
3

– 14 –
4. Adjusting the stitch length / 缝迹长度的调节
Thestitchlengthcanbeinnitelyadjustedfrom0.8mmto
3.2 mm.
* The actually sewn stitch length varies in accordance
with kind and thickness of the materials.
[How to change the stitch length]
Turn clockwise feed regulating knob 1to increase the
stitch length.
Turn it counterclockwise to decrease the stitch length.
• When making the stitch length 3.2 mm or more
Loosen screw 2and turn clockwise feed regulating knob
1to regulate the stitch length.
Push pin 3 untilitgoestotheend,andxitwithscrew2.
Use the machine within the range where feed dogs or feed
dog and throat plate do not come in contact with each
other.
1
2
3
WARNING :
To protect against possible personal injury due to abrupt start of the machine, be sure to start the
following work after turning the power off and ascertaining that the motor is at rest.
注意 :
为了防止突然起动造成人身事故,请关掉电源,确认马达确实停止转动后再进行操作。
缝迹长度可以在 0.8mm 到 3.2mm 的范围任意地调整。
※ 实际缝制后的缝迹长度,随布料的种类和厚度而有所不同。
[改变缝迹长度的方法]
向右转动送布调节旋钮 1,缝迹变大。向左转动,则缝迹变小。
・把缝迹长度设定到 3.2mm 以上时
拧松螺丝 2,向右转动送布调节旋钮 1,调节缝迹长度。
最后,把销子 3插到深处,再用螺丝 2拧紧固定。
请在送布牙与送布牙,送布牙与针板不相接触的范围进行使用。
– 3 –
@. CONFIGURATION OF THE MACHINE COMPONENTS /
各部分的名称
1 Presser spring regulator !0 Oil gauge !9 Rocking thread take-up
2 Needle bar thread take-up cover !1 Feed regulating knob @0 Front cover
3 Oil circulation inspection windows !2 Eye guard cover @1 Needle bar thread take-up thread receiver
4 Oil hole cap !3 Throat plate @2
Rocking thread take-up thread guide
5 Micro-lifter !4 Differential lock nut @3 Silicon container thread guide
6
Needle thread silicon oil lubricating unit
!5 Micro-adjustment knob @4 Belt cover
7Thread guide No. 1 !6 Finger guard @5 Differential feed regulating lever
8Upper pulley !7 Thread trimming knife
9Thread tension nut !8 Rocking thread take-up receiver
1压脚调节螺丝 !0 机油尺 !9 摆动挑线杆
2针杆挑线杆护罩 !1 送布调节旋钮 @0 前护罩
3机油循环确认窗 !2 眼睛防护罩 @1 针杆挑线杆线座
4加油口盖 !3 针板 @2 摆动挑线导线器
5微量压脚提升 !4 差动锁定螺母 @3 冷却槽导线器
6机线冷却装置 !5 微调旋钮 @4 皮带防护罩
7第一导线器 !6 手指防护器 @5 差动调节拨杆
8上弯针 !7 切线刀刃
9线张力器旋钮 !8 摆动挑线杆线座
1234
5
67
8
9
!0
!1
!2
!3
!4
!5
!6
!7
!8 !9
@4
@0
@2
@1
@3
@5

– 4 –
Attach the pins and the rubber cushions as shown in the
illustration and properly install the sewing machine.
#. INSTALLATION / 安装方法
Top mount type / 上部安装式
1. Installing the machine head onto the table / 缝纫机机头往机台上的安装
WARNING :
Do not insert the power plug of the motor into the receptacle until all works have been completed. There
is a danger of injury by being caught in the machine.
注意 :
所有的操作完了之前,请不要把马达的电源插头插到电源插座上。以防止被卷入机器里,造成负伤的危险。
WARNING :
The weight of the sewing machine is more than 42 kg. Be sure to perform the work with two persons or
more in case of unpacking, transportation or installation.
注意 :
本缝纫机的质量有 42kg。因此,开箱、搬运、安装时,请务必 2 人以上来操作。
Attach the supporting board and the rubber seats as shown
in the illustration and properly install the sewing machine.
Semi-submerged type / 半落地式
1Rubber cushion
(Black) x 3
4Nut
2Washer 5Pin
3Spring washer 6Rubber cushion (Gray) x 1
如图所示安装销子和橡胶垫,然后正确地安装缝纫机。
1橡胶座 ( 黑 ) x 3 4螺母
2垫片 5销子
3弹簧垫 6橡胶座 ( 灰 ) x 1
如图所示安装底板和橡胶座,然后正确地安装缝纫机。
1Bolt 6Supporting board
2Spacer 7Spring pin
3Washer 8Rubber cushion (Black) x 3
4Spring washer 9Rubber cushion (Gray) x 1
5Nut
1螺栓 6底板
2底座 7弹簧销
3垫片 8橡胶座 ( 黑 ) x 3
4弹簧垫 9橡胶座 ( 灰 ) x 1
5螺母
Install the gray dust-proof rubber to section A only.
Part No. Part name Q'ty
140072505 Dust-proof rubber (Gray) 1
213155403 Dust-proof rubber (Black) 3
请仅在 A 部安装灰色的防震橡胶。
货号 品名 数量
140072505 防震橡胶 ( 灰色 ) 1
213155403 防震橡胶 ( 黑色 ) 3
■ Installing the rubber cushion /
防振橡胶的安装
1
5
2
3
4
1
2
3
4
5
6
7
8
6
9
A
12
2
– 13 –
WARNING :
To protect against possible personal injury due to abrupt start of the machine, be sure to start the
following work after turning the power off and ascertaining that the motor is at rest. If threading is wrong,
stitch skipping, thread breakage, needle breakage or irregular stitches will be caused. So, be careful.
注意 :
为了防止突然的起动造成人身事故,请关掉电源,确认马达确实停止后再进行操作。穿线方法不正确,会造成跳针、
断线、断针、张力不好等故障。
3. Threading the machine head / 穿线方法
(1) Standard threading / 标准的穿线方法
Thread the machine head according to the following threading illustrations. / 请按照图示的要领进行穿线。
When using more stretchable thread
使用伸缩性大的线时
2
When covering thread is excessively
loosened = B
When covering thread is excessively
loosened even after passing B= C
装饰线过松时= B
穿过 B仍然过松时= C
When covering thread is
excessively tense = D
Broken lines Awhen stretcher thread is used
使用伸缩性大的线时,按照虚线 A穿线
When using less stretchable thread
使用伸缩性小的线时
Broken line Ewhen using more stretchable thread
使用伸缩性大的线时,按照虚线 E穿线
A
B
CD
1
E
43
装饰线过紧时= D
4
2
3
1

– 12 –
4. Silicon oil lubricating unit / 线冷却装置
1
2This sewing machine is provided with the silicon oil
lubricating unit as standard.In case of sewing at a high
speed, or using chemical thread or chemical fabric, use
the silicon oil lubricating unit to prevent thread breakage or
stitch skipping.
Oil used is silicon oil (dimethyl silicon).
Open cover 2of silicon oil reservoir 1. Check to be sure
thatsiliconoilreservoirfortheneedlethreadislledwith
silicon oil.
Ifsiliconoilisinsufcientthere,supplyit(dimethylsilicon).
%. OPERATION / 缝纫机的使用方法
1. Needle / 关于缝纫机针
The needle used for this sewing machine is UY128GAS.
For the needle No., select a proper needle in accordance
with the sewing conditions.
2. Attaching the needle / 机针的安装方法
1) Loosen setscrew 2of needle 1with a screwdriver.
2) Hold the new needle with indented part facing to the
rear and insert it into the hole in needle clamp 3until
the end of hole is reached.
3) Securely tighten setscrew 2of the needle.
本产品标准装备有线冷却装置。高速缝制以及使用化纤线、化纤布料时,为防止断线、跳线,请使用线冷却装置。
使用的油是硅油(二甲基硅)。
请打开线冷却槽 1的盖子 2,确认缝纫机线上、线冷却装置里是否有硅油。
如果油不够时,请补加硅油(二甲基硅)。
本产品使用的缝纫机针是 UY128GAS。
机针的针号应根据缝制条件来适当地选择。
WARNING :
To protect against possible personal injury due to abrupt start of the machine, be sure to start the
following work after turning the power off and ascertaining that the motor is at rest.
注意 :
为了防止突然起动造成人身事故,请关掉电源,确认马达确实停止转动后再进行操作。
1
2
3
[Scarf
凹槽
○×
○×
When silicon oil adhered to the components other than the silicon oil lubricating unit, be sure to wipe it
out. If the components to which silicon oil adhered are kept without wiping out the oil, sewing machine
trouble will be caused.
硅油如果沾附到线冷却装置以外的零件上,请一定擦干净。如果不擦干净,就会使缝纫机发生故障。
1) 用螺丝刀拧松机针 1的固定螺丝 2。
2) 把新缝纫机针的凹部朝向里侧,然后深深地插进针座
3的孔里。
3) 然后请拧紧机针固定螺丝 2。
Japan No. 9 10 11 12 14
German No. 65 70 75 80 90
日本针号 9 10 11 12 14
德国针号 65 70 75 80 90
新缝纫机时,约使用 1 个月之后,请更换机油(JUKI
MACHINE OIL 18)。
以后,请每 6 个月更换 1 次机油。
1) 请把接油容器安装到排油螺丝 1的下面。
2) 请卸下排油螺丝 1。让机油排放出来。
3) 排放后,请擦干净机油,然后安装上排油螺丝 1。
In case of the new sewing machine, replace the lubri-
cating oil (JUKI MACHINE OIL 18) with new one after
using it for approximately one month. Then replace the
lubricating oil every six months.
1) Set a container to receive the lubricating oil under drain
screw 1.
2) Remove drain screw 1. The lubrication oil is drained.
3) After the drain, wipe out the oil and attach the drain
screw 1.
MF-7200D
1
– 5 –
DRAWING OF TABLE (TOP MOUNT TYPE) FOR TIMING-BELT DRIVE / 机台图纸 ( 上面安装式 ) 同步皮带驱动
A 4- ø 3.4 on the bottom surface, depth 20
(Drill a hole at the time of set-up.)
B Drilled hole 17
C 4- ø 3.4 on the bottom surface, depth 20
(Drill a hole at the time of set-up.)
D JUKIlogotype
E 2- ø 3.4 on the bottom surface, depth 20
(Drill a hole at the time of set-up.)
F Installing position of drawer stopper
(on the reverse side)
A
4-φ3.4 背面深度 20(安装时应钻孔)
B
17 钻挖
C
4-φ3.4 背面深度 20(安装时应钻孔)
D
JUKI 商标图案
E
2-φ3.4 背面深度 20(安装时应钻孔)
F
抽屉止动器安装位置 ( 背面 )
54
130
810
75
R30
3 xø 20
52 17
115 30
ø 26
ø 8.5
30˚
360
570
60
(90)
B
A
R10
R10
45
Z
Z
R30
120
18
56.5
31.5
R10
R10
7
248±1
378
192±1
68
C
1
187±1
297±1
552.4±1
100
1200
R30
390
F
10
R6
R30
21 50
D
66.5
46.5
40
15
217.7
E
221
158.5
4 xø 8.5
33.5
500
500
ZZ
Z
2 xø 6
310±1
600
46
R6
R2
R2
R2
20
10
R2
R2
Z
388
Z Z
Z Z
20
221
131
57
27
364
50
2R
ø 50
125±1
Z - Z (5 locations )
(5 处 )
36

– 6 –
DRAWINGOFTABLE(SEMI-SUNKENTYPE)FORTIMING-BELTDRIVE/机台图纸 ( 半落地式 ) 同步皮带驱动
Z - Z (6 locations)
(6 处 )
130
810
75
R30
248 ± 1
23
23
115 30
ø 26
3.5
570
60
(90)
B
A
71
Z
R30
21
56.5
31.5
378
113±1
C
ø 10.5
660
100
1200
R30
390
F
10
R6
R30
21 50
D
66.5
46.5
40
15
192
E
372±1
110
40
500 600
R21
46
388
R6
Z Z
ZZ Z
21
Z Z
R21
R5
R5
R21
R21
R10
ZZ
167
R10
76.5
58
ZZ
R5
R21
R21
R5
R5
12570
R20
R20
48 306
356.5
R5
233.5 ± 1
R2
R2
R2
20
10
R2
R2
46
360
A 4- ø 3.4 on the bottom surface, depth 20
(Drill a hole at the time of set-up.)
B Drilled hole 17
C 4- ø 3.4 on the bottom surface, depth 20
(Drill a hole at the time of set-up.)
D JUKIlogotype
E 2- ø 3.4 on the bottom surface, depth 20
(Drill a hole at the time of set-up.)
F Installing position of drawer stopper
(on the reverse side)
A
4-φ3.4 背面深度 20(安装时应钻孔)
B
17 钻挖
C
4-φ3.4 背面深度 20(安装时应钻孔)
D
JUKI 商标图案
E
2-φ3.4 背面深度 20(安装时应钻孔)
F
抽屉止动器安装位置 ( 背面 )
– 11 –
$. LUBRICATION AND OILING / 关于加油、注油
Lubrication / 加油
2. Oiling / 关于加油
〈初次使用缝纫机时〉
出货时,机油均被排放。因此初次使用缝纫机之前,请一定加入机油。
· 使用机油 : JUKI MACHINE OIL 18
加油时,请卸下标有「OIL」的加油口盖子 2,把机油加到油尺 1的上下刻线之间。
〈使用缝纫机前的检查〉
1) 请用检查油尺 1,确认油量是否在上下 2 条刻线之间。如果油量比下线还低时,请补加机油。
2) 转动缝纫机,请从机油循环确认窗 3确认是否机油从喷嘴喷出来。如果没有机油喷出时,请进行「滤油器的检查、
更换」(参照 28 页)。
机油添加剂会造成机油的劣化或造成缝纫机的故障,因此请不要使用。
Remove oil hole cap 2onwhich“OIL”isindicatedandll
the oil reservoir with lubricating oil up to the level between
the upper and lower engraved marker lines.
<Checking before using the sewing machine>
1) Check oil gauge 1and make sure that lubricating oil
level is between the upper and lower two lines. When
lubricating oil level lowers below the lower line, supply
lubricating oil.
2) Make sure that lubricating oil comes out from the
nozzleofoilcirculationidenticationwindow3when
rotating the sewing machine. When lubricating oil does
not come out, perform “Inspecting and replacing the oil
lter”.(Seepage28.)
<Whenusingthesewingmachineforthersttime>
Lubricating oil has been taken out at the time of delivery.
Be sure to supply lubricating oil before using the sewing
machineforthersttime.
• Oil used : JUKI MACHINE OIL 18
Do not use oil addition agent since
deterioration of lubricating oil or machine
trouble will be caused.
1. Lubricating oil / 关于机油
The mechanisms inside the frame such as the needle
bar, presser lift and spreader components are lubri-
cated with grease. Never add oil inside the frame.
If inside of the frame is oiled, the grease will
be expelled, resulting in mechanical failure.
NO OILING
严禁加油 针杆、压脚提升以及分布器等有关零部件全部采用润滑
脂润滑结构。因此,请不要向里面加油。
加油之后,会使润滑脂流失,因而造成机器故
障。
3. Replacing the lubricating oil / 缝纫机油的更换
WARNING :
To protect against possible personal injury due to abrupt start of the machine, be sure to start the
following work after turning the power off and ascertaining that the motor is at rest.
注意 :
为了防止突然起动造成人身事故,请关掉电源,确认马达确实停止转动后再进行操作。
2
3
1
Other manuals for MF-7200D
2
Table of contents
Other JUKI Sewing Machine manuals

JUKI
JUKI IP-110 Type F User manual

JUKI
JUKI LK-1900B/IP-420 User manual

JUKI
JUKI PLC-1710 User manual

JUKI
JUKI DDL-9000B-SH Installation and operation manual

JUKI
JUKI MP-200NS User manual

JUKI
JUKI MO-735 User manual

JUKI
JUKI MH-481 User manual

JUKI
JUKI LBH-1790A Series User manual

JUKI
JUKI MO-623 User manual

JUKI
JUKI DDL-9000B User manual
Popular Sewing Machine manuals by other brands

Singer
Singer 14K11 Instructions for using and adjusting

GraceWood
GraceWood Continuum Frame instructions

Baby Lock
Baby Lock Meridian 2 Instruction & Reference Guide

Silvercrest
Silvercrest SNMD 33 A1 Operation and safety notes

SunStar
SunStar SPS/B-1811 SERIES user manual

handi quilter
handi quilter HQ Amara 20 Quick reference card