JVC XL-R2010BK User manual

For Customer Use:
Model No.
Serial No.
Enter below the Model No. and Serial No.
which are located on the rear, bottom or
side of the cabinet. Retain this information
for future reference.
STANDBY
STANDBY/ON
MAXMIN
LEVEL PHONES
PLAY MODE CD EDIT
REC SOURCE
SELECTOR
CD REC
STOP PLAY PAUSE
REC SOURCE
DIGITAL CD LINE MIC
OPEN/CLOSEOPEN/CLOSE
CANCELSETMENU
PAUSE REC/
REC MUTING
PLAYSTOP
SYNCHRO
FINALIZE
MIX BLANCE
CD
LINE
LINE
MIC
MIC
STANDBY/ON
CD REC
PLAY
MODE
•
REC
REC MUTING
REC
SOURCE
MENU
PITCH
0
CHANCEL
REPEAT CD
PITCH+
SET
PITCH–
RM–SXLR2010A
REMOTE CONTROL
CDR
CD EDIT FINALIZE DISPLAY
1 2
4 5
7 8
3
6
9
10 +10
FAD E SYNCHRO
CONTROL
MULTI JOG/REC LEVEL
+
–
CD/CDR MULTIPLE COMPACT DISC RECORDER
XL-R2010BK
LET0190-002A
[ J ]
INSTRUCTIONS
Eng.book Page 1 Monday, May 28, 2001 9:46 AM

G-1
Warnings, Cautions and Others
CAUTION
To reduce the risk of electrical shock, fire, etc.:
1. Do not remove screws, covers or cabinet.
2. Do not expose this unit to rain or moisture.
IMPORTANT FOR LASER PRODUCTS
1. CLASS 1 LASER PRODUCT
2. DANGER: Invisible laser beam emiited when opened and
interlock fails or malfunctions. Avoid direct exposure to beam.
3. CAUTION: Do not open the top cover. There are no user
serviceable parts inside this unit; leave all servicing to qualified
service personnel.
Caution: Proper Ventilation
To avoide risk of electric shock and fire and to protect from damage,
position the main unit as follows:
Front: Open space with no obstructions.
Sides: At least 3cm of space on each side.
Top: At least 5cm of space between the top of the unit and
the nearest object.
Back: At least 15cm of space between the back panel and the
nearest object/wall.
Bottom: Place the unit on a flat, level surface with no
obstructions.
CAUTION: TO REDUCE THE RISK OF ELECTRIC SHOCK,
DO NOT REMOVE COVER (OR BACK).
NO USER SERVICEABLE PARTS INSIDE.
REFER SERVICING TO QUALIFIED SERVICE PERSONNEL.
RISK OF ELECTRIC SHOCK
DO NOT OPEN
The lightning flash with arrowhead symbol,
within an equilateral triangle is intended to
alert the user to the presence of uninsulated
"dangerous voltage" within the product's
enclosure that may be of sufficient
magnitude to constitute a risk of electric
shock to persons.
The exclamation point within an equilateral
triangle is intended to alert the user to the
presence of important operating and
maintenance (servicing) instructions in the
literature accompanying the appliance.
CAUTION
IMPORTANT
This equipment has been tested and found to comply with the
specifications for a Class B digital device, pursuant to Section 15
of the FCC Regulations. The specifications are designed to
provide reasonable protection against harmful interference in
residential dwellings.
This equipment generates, uses and emits radiowaves and, if not
installed and used in accordance with the instructions, may
cause interference to radio communications. However, there is no
guarantee that interference will not occur in a particular structure.
If it is found that the equipment does cause interference to radio
or television reception, which can be determined by turning the
unit on and off, we recommend that that you perform one or more
of the following measures to correct the interference problem.
- Change the position or location of the reception antenna.
- Increase the space between the unit and receiver.
- Plug the unit into a wall socket that is on a circuit different from
that which the receiver is plugged in to.
- Contact your nearest JVC dealership or a professional radio/TV
technican for assistance.
WARNING: TO REDUCE THE RISK OF FIRE
OR ELECTRIC SHOCK, DO NOT EXPOSE
THIS APPLIANCE TO RAIN OR MOISTURE.
Caution –– STANDBY/ON BUTTON!
Disconnect the mains plug to shut the power off completely.
The STANDBY/ON button in any position does not
disconnect the mains line. The power can be remote control.
Spacing 15 cm or more
Wall or other objects
Front
Stand height 15 cm or more
XL-R2010BK
Floor
Eng.book Page 1 Monday, May 28, 2001 9:46 AM

1
English
Table of Contents
Warnings, Cautions and Others...................................................1
Precautions ......................................................... 2
Features .............................................................. 2
Connections ........................................................ 3
Analog Connections ....................................................................3
Digital Connections.....................................................................4
Components........................................................ 5
Main Unit ....................................................................................5
Display Window..........................................................................6
Using the Remote Control................................. 7
Remote Control ...........................................................................7
Inserting the Batteries .................................................................8
Using the Remote Control...........................................................8
Turning the Power On and Standby Mode..................................9
Listening to CDs............................................... 10
CD player Continuous Playback ...............................................10
CDR Playback Operations ........................................................11
Using the Remote Control to Control Playback........................12
Direct Playback of a Specific Track..........................................12
Forward and Reverse Search.....................................................13
Skipping Tracks ........................................................................13
Repeat Playback ........................................................................14
Random Playback......................................................................14
CD Playback Pitch Control .......................................................15
Disc Lock Function ...................................................................15
Programming Playback Using Main Unit Controls ..................16
Programming Playback Using the Remote Control..................17
Recording onto CD-R/RW Discs .................... 19
Add Finalize Feature .................................................................19
Manual Recording.....................................................................20
Synchronized Recording of CD player Playback......................22
1 Disc Dubbing .........................................................................24
Listening Edit Recording ..........................................................25
Program Edit Recording............................................................26
CD player to CDR Recording Options......................................27
Setting the Unit for High-speed Recording...............................28
Setting the Auto Track Spacing Function .................................28
Synchronized Recording from External Sources ......................29
Mixed Input Recording .............................................................30
Special Recording Edit Operations ...............32
Skipping a Recorded Track on a CD-R or CD-RW
(Track Skip)...........................................................................32
Erasing a Track or Tracks (Erase Function)..............................32
Erasing All Tracks (Disc Erase Function).................................33
Finalizing a Disc........................................................................34
Making Recording of a Finalized CD-RW Disc Possible
(Unfinalize Function) ............................................................34
Bypassing the FS Converter (Sampling Frequency Converter) for
More Efficient Digital Recording..........................................35
Setting Up Synchronized Start Recording for External Digital
Sources (CD, MD, and DAT only)........................................36
Resetting the Unit to the Factory Default Settings....................36
SLEEP TIMER ................................................37
COMPU LINK Function.................................38
CD and CDR Messages....................................39
SCMS (Serial Copy Management System) ...............................41
Troubleshooting ...............................................42
Main Specifications..........................................43
Eng.book Page 1 Monday, May 28, 2001 9:46 AM

2
Precautions
Thank you for purchasing the XL-R2010BK CD/CDR Multiple
Compact Disc Recorder. Please read these instructions thoroughly
and carefully before using the unit to ensure that you will obtain
optimum performance and a long service life.
Safeguarding against electric shock, fire hazards
and damage
1) A very low electrical current continues to flow when the
STANDBY/ON (power) button is in the standby mode. To
save power and ensure safety when the unit is not going to be
used for an extended period of time, disconnect the power cord
from the wall socket.
2) Do not handle the power cord with wet hands.
3) To unplug the power cord from the wall socket, always take
hold of the molded plug part and pull the plug rather than pull-
ing on the cord.
4) If the power cord is damaged or a disconnected wire or worn
contact is found, consult the nearest JVC dealership.
5) Do not bend the cord at a sharp angle or pull or twist it.
6) Do not modify the power cord in any way.
7) Do not attempt to disassemble the unit. Do not remove casing
screws or touch any of the parts inside the unit.
8) Do not insert metallic objects into the unit.
9) Unplug the power cord from the wall socket during electrical
storms.
10) If water should find its way inside the unit, unplug the power cord
from the wall socket and consult the nearest JVC dealership.
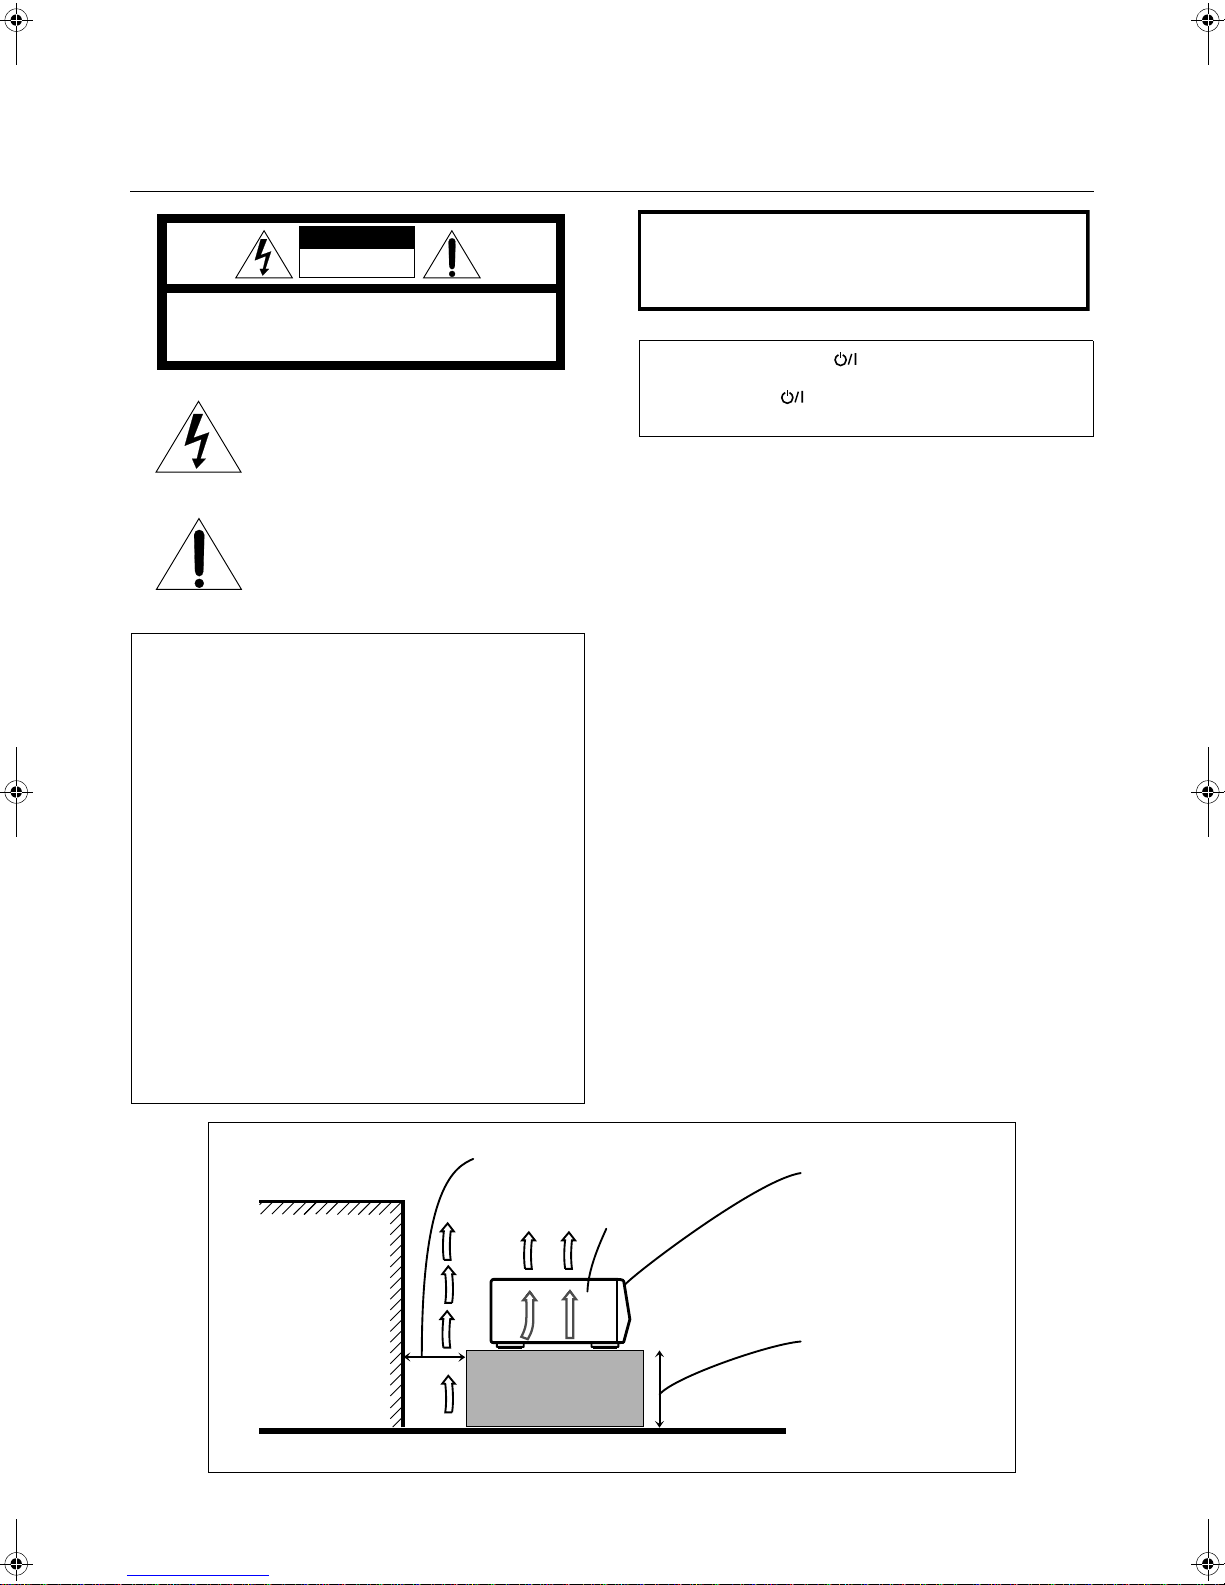
11) Do not install the unit in a poorly ventilated location.
Installation
1) Do not place the unit on or next to an amplifier. This is to pre-
vent the humming caused by the unit’s proximity to some types
of amplifiers. Be sure to place the unit where operation will not
be affected by other electrical equipment.
2) Do not place the unit in a location where the ambient temperature
will exceed 35°C (95°F) (namely, in direct sunlight, near a heating
appliance, etc.) or fall below 5°C (41°F), where it is very humid or
dusty, or where the unit will be subject to vibration.
3) The unit may not function properly if it is moved suddenly from
a cold place (0°C, 32°F) to a warm place since condensation
may form inside. In such a case, leave the unit in standby mode
for about 2 hours, after which time it should function normally.
Disc care
•StoringCDs
• Always be sure to store each CD in its own case.
• Do not place CDs in direct sunlight, near a heating appliance
or any other location that is susceptible to high temperatures.
• If cellophane tape, a sticker or some other form of adhesive is
found on the label side of the disc, clean it off before loading the
disc in the unit.
• Do not stick adhesive labels or write anything on a CD.
• Do not bend CDs.
• Do not insert shaped CDs, such as CDs in heart, flower or other
shapes, as the shape does not match that of the CD tray, and
using such a CD will cause the unit to malfunction.
Cleaning the cabinet
Never use benzine or paint thinners to clean the cabinet as they
may mar the unit’s surface finish.
Features
The following is a list of some of the functions and conveniences
obtained by having a CD player changer and CDR combined in a
single unit.
•Compatibility between CD player and CDR assured.
•High-speed recording from source discs in the CD player to the target disc
in the CDR unit (4x for CD-R, 2x for CD-RW).
•Digital optical and coaxial I/O (input/output) terminals, analog I/O termi-
nals, and a microphone jack are provided for external audio signal source
connections.
•Sampling frequency converter capable of converting digital signals with
sampling frequency of 32 kHz and 48 kHz to digital signals with a sampling
frequency of 44.1 kHz for quality recording from a variety of sources.
•No sampling frequency conversion of 44.1 kHz signals for optimal record-
ing of CDs.
•Mixing and recording of CD player playback and an external source input
such as from a microphone, or even combined input from a microphone
and another external source.
•Many convenient recording options including: one-button full CD and single
track recording, Listening and Program Edit recording, manual recording,
synchronized start/stop recording, and mixed input recording.
•CD playback pitch control that can adjust the speed of play up to 12% faster
or slower than the normal speed to alter the pitch for singing along with
songs or other customized uses.
•OPC (Optimize Power Control), power adjustment performed for best pos-
sible recording onto CD-R and CD-RW media.
•COMPU LINK-4 synchronized component operation.
Compatible Disc Formats
The following disc formats can be used for
recording in the CDR.
In addition to the marks shown right side, the
phrases shown below or their equivalent
should also be present somewhere on the
packaging or accompanying documentation:
Discs that cannot be used for recording are as follows:
•Discs bearing marks other than those shown above
•Discs intended for professional use and/or marked
“FOR PROFESSIONAL USE ONLY”
•Discs intended for recording computer data
In addition to the two disc formats shown
above, the following disc format can also be
played in either the CD player or CDR.
Notes
• The unit can playback audio data recorded on CD-G, CD-EXTRA and
CD-Text discs as well, however the text information of CD-Text discs
cannot be displayed.
• If a CD-R or CD-RW has been recorded using a personal computer,
playback is only possible if the disc is recorded in the CD-Digital Audio
format.
• You can play CD-R and CD-RW discs recorded in the music CD format.
Some of them, however, may not be played depending on the disc char-
acteristics or recording condition.
• Do not use a CD-R or CD-RW disc that has been recorded in any format
other than the music CD format or a CD-RW disc that has been used in
any format other than the music CD format with this unit. Using such a
disc with this unit may cause loud sound to damage the speakers or
cause hearing disorder.
Notes on playing unfinalized CD-R or CD-RW discs with
the CD player
• It will take some time before play starts.
• CD-R or CD-RW discs of the short recording time may not be played.
• An unfinalized CD-RW may not be played properly. For example,
sound files that you have deleted may be played. In such a case, finalize
the disc first or use the CDR of this unit for play.
• You cannot skip tracks on an unfinalized CD-R or CD-RW disc.
FOR CONSUMER
FOR CONSUMER USE
FOR MUSIC USE ONLY
Eng.book Page 2 Monday, May 28, 2001 9:46 AM

3
English
Connections
Do not turn on the power until all connections have been completed.
Use the accessory pin cables to connect this unit’s LINE terminals with those for the TAPE/CD/VCR on the receiver, etc.
Analog Connections
TAPE
/CDR
IN
(PLAY)
OUT
(REC)
COMPU LINK
-4
SYNCHRO
COMPU LINK
-3
SYNCHRO
COMPU LINK
-4
(SYNCHRO)
DIGITAL IN
COAXIAL OPTICAL
DIGITAL OUT AC IN
MODE
CDR TD
COAXIAL OPTICAL
LINE
IN
REC
( )
OUT
PLAY
LL
RR
( )
CDR
MODE
TD
Recording signals
(line input)
Accessory pin cables
Playback signals
Amplifier, receiver etc.
made by JVC
Selecting a COMPU LINK-4 MODE switch position
•When connected with CDR
input/output terminals of the
amplifier or receiver
•When connected with TAPE
input/output terminals of the
amplifier or receiver
•For more details regarding COMPU LINK, see page 38.
CD player, cassette deck or
other component made by JVC
Note
•The COMPU LINK-4 feature is only supported by other JVC
products also equipped with the COMPU LINK feature. Please
check the manual(s) of your JVC product for compatibility.
•Before selecting the COMPU LINK-4 MODE switch position
(CDR or TD), turn off the power and disconnect the power cord
from the wall socket. The function cannot be reset while the power
is on.Alternatively, if the COMPU LINK-4 MODE switch position
(CDR or TD) is changed while the power is on, turn off the power,
disconnect the power cord and then reconnect it. The new setting
will be read into the system when power to the main unit is turned
back on.
•Misconnections can be avoided by using the white plugs on the
accessory pin cables for the LEFT channel and the red plugs for
the RIGHT channel.
•Insert the plugs all the way in. Incomplete connections may cause
noise.
•When plugging the power cord into the AC outlet, be sure to match
the width of the plug blades with the outlet.
CDR
MODE
TD
to AC wall socket
Accessory
connecting cable
(with black plugs)
Mode switch
Optional connecting cable
Main Unit
Accessory power cord
Eng.book Page 3 Monday, May 28, 2001 9:46 AM

4
Digital Optical and Coaxial Cable Connections
Optical Cable Input/Output Terminals
•Connect a receiver or amplifier with digital audio capability via
the optical Input/Output cables. A single cable transmits stereo
signals (L/R channels) as digital data.
•If analog audio connections are also being made, try using the
digital connectors on the receiver/amplifier that are labeled
digital terminals on the receiver or amplifier that are labeled the
same way as the analog terminals.
•Make sure the optical cable (not supplied) can be connected to
the amplifier, etc. before purchasing it.
•Do not bend the optical cable at a sharp angle.
•The filament in the cable shines red when activated. This beam
sends the digital signal. It is not harmful to the eyes.
Notes
•Connect an external digital recording device to the digital out-
put terminal on an amplifier or receiver, and then connect the
amplifier or receiver to this unit.
•The sound from an external device cannot be digitally output
from this unit. To listen to the sound from the external device,
connect an amplifier or receiver to the LINE OUT (PLAY) ter-
minal on this unit.
•Depending on the device, a digital device is connected to the
DIGITAL OUT terminal of this unit may not correctly recog-
nize this unit (UNLOCKED appears in the display of the
attached device.) If this happens, press the PLAY 3button on
this unit to check that the unit it is being recognized by the
attached device.
Digital Connections
COMPU LINK
-4
(SYNCHRO)
DIGITAL IN
COAXIAL OPTICAL
DIGITAL OUT AC IN
MODE
CDR TD
COAXIAL OPTICAL
LINE
IN
REC
( )
OUT
PLAY
LL
RR
( )
Optical digital cable
(not supplied)
Receiver or amplifier with
digital optical/coaxial terminal
Optical digital cable
(not supplied)
To OPTICAL INPUT
terminal
How to use optical terminals for connections
1Check that the end of the optical digital cable is
not dirty, and insert it securely.
Coaxial Cable Terminals
•Coaxial Input/Output terminals are provided on the XL-R2010
for enhanced connectivity. Simply connect the corresponding
Input/Output terminals of other components using coaxial
cables for fast, easy data transfer.
Input signal
Main Unit
CD player, etc.
To OPTICAL OUTPUT
terminal
Output signal
Coaxial digital cable
(not supplied)
Coaxial digital cable
(not supplied)
To COAXIAL OUTPUT
terminal
To COAXIAL INPUT
terminal
Eng.book Page 4 Monday, May 28, 2001 9:46 AM

5
English
Components
Description (For details, refer to page in parentheses.)
STANDBY/ON button and STANDBY lamp
Press to turn the power on or to put the unit in standby mode. When
the unit is in standby, the STANDBY lamp is lit. (see page 9)
CD Tray
Load a CD in the CD player playback. (see page 10)
CD Control OPEN/CLOSE 0Button
Press to open and close the CD tray.
Source Selection Lamps
The selected source is indicated by activation of the lamp under the
source name. (see page 20, 29, 30)
CDR Disc Tray
Load a recordable CD-R or CD-RW in this tray for recording. CD
playback is also possible using this tray.
CDR Control OPEN/CLOSE 0Button
Press to open and close the CDR disc tray.
MULTI JOG/REC LEVEL Control
Use this control for selecting and setting use options, changing
clock settings, skipping forward/backward through tracks on a CD,
etc. Also use it to adjust the level of the source signal when record-
ing discs.
MIX BALANCE Control
Use the MIX BALANCE control to adjust the mixing levels of
independent signals being recorded simultaneously. (see page 31)
MIC (Microphone) Jack
Use this jack to connect a microphone (not supplied) to the unit for
recording.
CDR Control Operation Buttons
SYNCHRO: Press to select synchronized recording.
(see page 29)
MENU: Press to enter the menu options.
SET: Press to enter an operation or selection.
CANCEL: Press to cancel an operation or selection.
FINALIZE: Press to finalize a CD-R/RW disc when recording
has been completed. (see page 34)
STOP 7: Press to stop recording or playing of the CDR.
(see page 11, 21)
PLAY 3: Press to start playing, or resume recording if the
CDR is in the recording pause mode.
(see page 11, 21)
PAUSE 8: Press to pause play or recording. (see page 11)
REC/
REC MUTING: Use to start recording, or when recording to mute
the recording signal. (see page 21, 26, 27)
Display Window
Displays operation modes and system information. (see page 6)
Remote Control Sensor
This sensor receives commands from the remote control.
REC SOURCE SELECTOR Button
Use to select the type of source the signal is to be recorded from.
CD Control Operation Buttons
PLAY MODE: Press repeatedly to select one of the play modes for
the CD player. (see page 10, 16)
CD EDIT: Press to select either Listening Edit or Program
Edit recording mode. (see page 25, 26)
CD REC: Press to perform synchronized recording of the
currently selected CD in the CD player.
(see page 23)
STOP7: Press to stop play of the selected disc in the CD
player. (see page 10)
PLAY3: Press to start play of the selected disc in the CD
player. (see page 10)
PAUSE8: Press to pause play of the selected disc in the CD
player. (see page 10)
PHONES (Headphones) Jack
Use this jack to connect headphones (not supplied) to the unit.
PHONES LEVEL (Volume) Control
Use this to adjust the volume being output to headphones con-
nected to the unit.
Note
In this manual, procedures using buttons on the front panel of the
unit are depicted by the name of the button in capital letters with
the button illustration immediately after it. Procedures using the
buttons on the remote control are depicted by the button illustration
with the name of the button in small letters and parentheses imme-
diately after it.
Example: CD Control PAUSE 8 button Front panel
8 (pause) button Remote control
Main Unit
STANDBY
STANDBY/ON
MAXMIN
LEVEL PHONES
PLAY MODE CD EDIT
REC SOURCE
SELECTOR
CD REC
STOP PLAY PAUSE
REC SOURCE
DIGITAL CD LINE MIC
OPEN/CLOSEOPEN/CLOSE
XL-R2010 CD/CDR MULTIPLE COMPACT DISC RECORDER
CANCELSETMENU
PAUSE REC/REC MUTING
PLAYSTOP
SYNCHRO
FINALIZE
MULTI JOG/REC LEVEL
+
–
MIX BLANCE
CD
LINE
LINE
MIC
MIC
Eng.book Page 5 Monday, May 28, 2001 9:46 AM

6
Music calendar
Indicates the number of tracks on the currently selected CD or
CDR, and the track on the disc that is being played or recorded.
Recording type indicators and sampling frequency
indicators
Light to indicate whether the recording is analog or digital. During
digital recording, the appropriate frequency indicator lights to indi-
cate the sampling frequency of the source being played back.
CD indicator
Lights when the CD player is selected for play.
PLAY MODE indicators
Light according to which play mode has been selected.
EDIT recording indicators
Indicates if the listening edit or program edit mode is being used.
(see page 25, 26)
PITCH indicator
Indicate that the pitch of CD play has been adjusted in one direc-
tion or the other. (see page 15)
FADE indicator
This indicator is displayed when fade-in or fade-out are selected
for recording setting.
SKIP indicator
Lights when the currently selected disc contains SKIP TRACK
markers.
CDR indicator
Lights when the CDR has been selected for play or recording.
CDR deck operation indicators
Light to indicate the operation mode of the CDR.
Disc format indicators
Light to indicate the type of disc that is loaded in the CDR, and
whether or not it is finalized.
AUTO TRACK indicator
Lights when automatic track marking has been turned on.
(see page 22)
2X, 4X indicator
Lights when the high-speed (4x, 2x) recording function is being
performed. (see page 28)
Level meters
Indicate the levels of the right and left channels during playback
and recording operations. When the input signal exceeds 0 dB, the
OVER indicator lights. (see page 21)
SYNC (synchronized) recording indicator
Lights to indicate synchronized recording is on. (see page 23)
Information display
Displays track, time, and operation information.
Display Window
1234
5678
9101112
13 14 15 16
ANALOG
DIGITAL
32kHz
44.1kHz
48kHz
CD PROG RND1 L EDIT P EDIT
PITCH
FADE
SKIP
CDR REC
CD-RW
FINALIZED
SYNC 2X 4X
AUTO TRACK
L
R–40 30 20 10
dB
630
Eng.book Page 6 Monday, May 28, 2001 9:46 AM

7
English
Using the Remote Control
When following the procedures in this manual, the
buttons on the remote control have the same func-
tion as the corresponding buttons on the main
unit.
STANDBY/ON Button
Press to turn the power of this unit on or to put it in the standby
mode. (see page 9)
CD REC Button
Press to start the CD REC function. (see page 23)
CD EDIT Button
Press repeatedly to select Listening Edit or Program Edit functions.
(see page 25, 26)
Number Buttons
Press to select tracks for playback. (see page 12)
PLAY MODE Button
Press repeatedly to select a play mode for the CD player. (see page
14)
REPEAT Button
Press repeatedly to select one of the repeat play modes. (see page 14)
¶REC/REC MUTING Button
Press to put the unit into recording pause mode from CDR stop
mode.
Press to mute recording signal during recording. (see page 21)
4(reverse skip) Button
Press to skip back to the beginning of previous tracks. (see page 13)
7(stop) Button
Press to stop playback of the currently selected disc in the CD
player or stop playback/recording of the disc in the CDR. (see page
12)
3(play) Button
Press to play the currently selected CD. (see page 12)
1(reverse) Button
Press to perform fast reverse search of the CD currently being
played. (see page 13)
REC SOURCE Button
Press to select the source for recording to the CDR.
2MULTI JOG Control (menu) Button
Press to select menu operations.
Pitch 0 Button
Press to restore playback speed of the CD player to normal.
DISPLAY Button
Press to change the type of information that is shown in the infor-
mation display (see page 23).
FINALIZE Button
Press to start finalization of a CD-R or CD-RW. (see page 34)
CD and CDR Deck Selection Buttons
Press to select the type of operation you want to use, CD player or
CDR. (see page 12)
SYNCHRO Button
Press to select synchronized recording. (see page 29)
FADE Button
Press to create fade-in and fade-out of data being recorded. (see
page 21)
¢(forward skip) Button
Press to skip forward to other tracks on the disc. (see page 13)
8
88
8(pause) Button
Press to pause playback of the currently selected disc. (see page 12)
¡(forward) Button
Press to perform fast forward search of the currently selected CD.
(see page 13)
PITCH+ Button
Press to increase the speed of CD playback.
MENU Button
Press to access Menu options.
3 MULTI JOG Control (menu) Button
Press to select menu operations.
SET Button
Press to enter a selection on the menu. Also used for registering
tracks in the program mode.
CANCEL Button
Press to cancel an operation.
PITCH- Button
Press to decrease the speed of CD playback.
Remote Control
STANDBY/ON
CD REC
PLAY
MODE
•
REC
REC MUTING
REC
SOURCE
MENU
PITCH
0
CANCEL
REPEAT CD
PITCH
+
SET
PITCH–
RM–SXLR2010A
REMOTE CONTROL
CDR
CD EDIT FINALIZE DISPLAY
1 2
4 5
7 8
3
6
9
10 +10
FADE SYNCHRO
CONTROL
Eng.book Page 7 Monday, May 28, 2001 9:46 AM

8
1Press down on the point shown by the arrow at
the top of the compartment cover, and lift the
cover to open the compartment.
2Place the two accompanying R6P(SUM-3)/
AA(15F) batteries in the remote control making
sure to match the battery polarities with the
markings (“+”/“–”) inside the compartment.
3Place the cover over the compartment and
press down lightly until it locks in place.
•Point the remote control toward the left side of the front panel of
the main unit before you begin pressing buttons.
•The remote control can be operated at a distance of up to
approximately 7 m (23ft) or so from the main unit. This dis-
tance will be less if the remote control is operated from a posi-
tion that is not directly in front or on the same level as the main
unit.
•When the distance over which the remote control can be oper-
ated starts to drop, it means that the batteries are nearing the end
of their service life.
•Replace both R6P(SUM-3)/AA(15F) batteries with new batter-
ies.
•The dry-cell batteries provided with the unit are for the purpose
of checking system operations only. Replace them with new
batteries as soon as possible.
•Do not drop the remote control or subject it to strong impact.
•In order to ensure that the remote control does not fail to oper-
ate, avoid the following conditions:
•Exposure of the main unit and remote control to direct sun-
light or other intense sources of light.
•Objects blocking the path of signals being transmitted from
the remote control to the main unit.
Inserting the Batteries Using the Remote Control
STANDBY
STANDBY/ON
MAXMIN
LEVEL PHONES
PLAY MODE CD EDIT
REC SOURCE
SELECTOR
CD REC
STOP PLAY PAUSE
REC SOURCE
DIGITAL CD LINE MIC
OPEN/CLOSEOPEN/CLOSE
XL-R2010 CD/CDR MULTIPLE COMPACT DISC RECORDER
CANCELSETMENU
PAUSE REC/REC MUTING
PLAYSTOP
SYNCHRO
FINALIZE
MULTIJOG/REC LEVEL
+
–
MIX BLANCE
CD
LINE
LINE
MIC
MIC
STANDBY/ON
CD REC
PLAY
MODE
•
REC
REC MUTING
REC
SOURCE
MENU
PITCH
0
CHANCEL
REPEAT CD
PITCH
+
SET
PITCH–
RM–SXLR2010A
REMOTECONTROL
CDR
CD EDIT FINALIZE DISPLAY
1 2
4 5
7 8
3
6
9
10 +10
FADE SYNCHRO
CONTROL
Eng.book Page 8 Monday, May 28, 2001 9:46 AM

9
English
To turn power to the unit on
Press the STANDBY/ON button on the front panel or remote
control.
•The currently selected CD function is shown in the information
display.
To put the unit in standby mode during operation
Press the STANDBY/ON button on the front panel or remote
control.
•The unit can be put into the standby mode by pressing the
STANDBY/ON button.
If the STANDBY/ON button is pressed during a recording
operation, the standby lamp flashes while the unit brings the opera-
tion to an end. Once the operation has stopped, the unit enters the
standby mode and the standby lamp lights steady. From the time
the button is pressed until the standby lamp lights steady, the unit
will not respond to any button pressed on the front panel of the
main unit or remote control.
Turning the power on by pressing a function
button when the unit is in the standby mode
The unit can be turned on and a function selected simply by press-
ing one of the buttons shown in the figure below
•When the PLAY 3button for either the CD control or CDR
control is pressed on the main unit, the power is turned on. If a
disc is loaded in the tray, playback begins.
•When one of the CD control OPEN/CLOSE 0buttons or the
CDR control OPEN/CLOSE 0 button is pressed, the power is
turned on and the tray opens, but the currently selected function
(CD player or CDR) does not change.
•When the 3(play) button on the remote control is pressed, the
power is turned on, the last selected function (CD player or
CDR) is recalled. If a disc is loaded in the tray, playback begins.
•When the power is turned off, the Play mode returns to normal.
•If the power cord is unplugged from the wall , the main unit will
reset to the factory default settings.
Turning the Power On and
Standby Mode
STANDBY
STANDBY/ON
MAXMIN
LEVEL PHONES
PLAY MODE CD EDIT
REC SOURCE
SELECTOR
CD REC
STOP PLAY PAUSE
REC SOURCE
DIGITAL CD LINE MIC
OPEN/CLOSEOPEN/CLOSE
XL-R2010 CD/CDR MULTIPLE COMPACT DISC RECORDER
CANCELSETMENU
PAUSE REC/REC MUTING
PLAYSTOP
SYNCHRO
FINALIZE
MULTIJOG/REC LEVEL
+
–
MIX BLANCE
CD
LINE
LINE
MIC
MIC
STANDBY/ON
CD REC
PLAY
MODE
•
REC
REC MUTING
REC
SOURCE
MENU
PITCH
0
CHANCEL
REPEAT CD
PITCH
+
SET
PITCH–
RM–SXLR2010A
REMOTE CONTROL
CDR
CD EDIT FINALIZE DISPLAY
1 2
4 5
7 8
3
6
9
10 +10
FAD E SYNCHRO
CONTROL
STANDBY/ON ( )
STANDBY/ON ( )
33
00
STANDBY/ON
Lamp goes out.
Main Unit Remote Control
STANDBY
STANDBY/ON
Lamp lights
Main Unit Remote Control
STANDBY/ON
STANDBY
STANDBY/ON
Function Operation
Main unit
(CD control) CD player
The function is set to CD
player. The CD indicator is
shown in the display window.
Main unit
(CDR control) CDR
The function is set to CDR.
The CDR indicator is shown in
the display window.
Eng.book Page 9 Monday, May 28, 2001 9:46 AM

10
Listening to CDs
Compatible CDs
The CD player can be used to play back general audio CDs, CD-R
and CD-RW media.
1Press the CD Control OPEN/CLOSE 0button to
open the tray.
•The power comes on, and CD tray opens.
2Load a CD in position and close the tray by
pressing on the CD Control OPEN/CLOSE 0
button again.
•“CD READ DISC”flashes in the information display while the
disc is being read.
•The unit will not respond to commands when the tray is being
opened or closed.
3Press the CD control PLAY 3
33
3button.
•The function is set to CD, and playback starts from track 1.
•The track number is cleared from the music calendar when the
corresponding track has finished playing.
•Playback stops automatically at the end of the last track on the
disc.
Note
•The total track time does not always match total play time (time
shown in display window) exactly because the playback time
includes lead-in and lead-out spaces as well.
Stopping CD playback
To stop playback at any time
•Stop playback of a disc in the CD player by pressing the CD
Control STOP 7button. The total number of tracks and playing
time is shown in the information display.
•When all the tracks on a CD have been played through, play-
back stops automatically.
To stop playback temporarily
•If the CD Control PAUSE 8button is pressed, playback is
paused temporarily. When the CD Control PLAY 3button is
pressed, playback resumes from the place where it was paused.
•When playback is paused, the 8indicator is shown in the dis-
play window.
CD player Continuous Playback
STANDBY
STANDBY/ON
MAXMIN
LEVEL PHONES
PLAY MODE CD EDIT
REC SOURCE
SELECTOR
CD REC
STOP PLAY PAUSE
REC SOURCE
DIGITAL CD LINE MIC
OPEN/CLOSEOPEN/CLOSE
XL-R2010 CD/CDR MULTIPLE COMPACT DISC RECORDER
CANCELSETMENU
PAUSE REC/REC MUTING
PLAYSTOP
SYNCHRO
FINALIZE
MULTIJOG/REC LEVEL
+
–
MIX BLANCE
CD
LINE
LINE
MIC
MIC
1
3
2
78
OPEN/CLOSE
Place the CD with its label side facing up.
Place an 8-cm CD in the
center cutout.
1234
5678
9101112
DIGITAL
44.1kHz
CD
2X 4X
AUTO TRACK
L
R–40 30 20 10
dB
630
STOP
PAUSE
Eng.book Page 10 Monday, May 28, 2001 9:46 AM

11
English
The CDR can play general audio CDs, CD-R and CD-RW media.
1Press the CDR Control OPEN/CLOSE 0button
to open the CDR disc tray.
2Load a disc in position and close the tray by
pressing the CDR Control OPEN/CLOSE 0
button again.
•When a CD-R or CD-RW is loaded in the CDR, the unit deter-
mines the format of the disc and whether it is finalized or not.
3Press the CDR Control PLAY 3button to select
the CDR function and start playback at track 1.
•The track number is cleared from the music calender when the
correspending track has finished playing.
•Playback stops automatically at the end of the last track on the
disc.
To stop CDR playback
•Stop playback of a disc in the CDR by pressing the CDR Con-
trol STOP 7button. The total number of tracks and play time
will be shown in the information display.
To stop CDR playback temporarily
•Pressing the CDR Control PAUSE 8button at any time when a
CD is playing in the CDR pauses playback. Press the CDR Con-
trol PLAY 3button to resume playback.
•When playback is paused, the 8indicator is shown in the dis-
play window.
Removing a CD from the CDR
•To remove a CD from the CDR, press the CDR Control OPEN/
CLOSE 0button. To remove a CD when it is being played
back, it is recommended that playback first be ended by press-
ing the CDR Control STOP 7button before pressing the CDR
Control OPEN/CLOSE 0button. After pressing the CDR con-
trol OPEN/CLOSE 0button, the tray will open and the CD can
be removed. Press the CDR control OPEN/CLOSE 0button
once more to close the tray.
Notes
•When an unfinalized CD-R or CD-RW is loaded in the CDR
and the CDR Control OPEN/CLOSE 0button is pressed to
open the CDR disc tray, “FINALIZE?”is shown in the informa-
tion display. If you do not wish to finalize the CD at that time,
press the CDR Control OPEN/CLOSE 0button again. For
more information on finalizing a CD, see page 34.
•If playback of an unfinalized disc is stopped or if tracks are
skipped (forward or reverse), some data of the track (or begin-
ning of next track in the case of skipping) may be cut (not read)
when playback starts again.
•The total track time does not always match total playback time
(time shown in the information display) exactly because the
playback time includes lead-in and lead-out spaces as well.
CDR Playback Operations
STANDBY
STANDBY/ON
MAXMIN
LEVEL PHONES
PLAY MODE CD EDIT
REC SOURCE
SELECTOR
CD REC
STOP PLAY PAUSE
REC SOURCE
DIGITAL CD LINE MIC
OPEN/CLOSEOPEN/CLOSE
XL-R2010 CD/CDR MULTIPLE COMPACT DISC RECORDER
CANCELSETMENU
PAUSE REC/REC MUTING
PLAYSTOP
SYNCHRO
FINALIZE
MULTIJOG/REC LEVEL
+
–
MIX BLANCE
CD
LINE
LINE
MIC
MIC
1
3
2
78
OPEN/CLOSE
Place the CD with its label side facing up.
Place an 8-cm CD in the center cutout.
STOP
PAUSE
Eng.book Page 11 Monday, May 28, 2001 9:46 AM

12
•
The buttons on the remote control can be used to control CD player
playback and CDR recording and playback. When using the
remote control, be sure to point it directly at the front lefthand side
of the main unit (facing you) when pressing the buttons.
1Press the CD or CDR button to select the
device.
CD button: To control the disc in the CD player
CDR button: To control the disc in the CDR
•When the CD function is selected, the CD indicator is shown in
the display window. When the CDR function is selected, the
CDR indicator is shown.
2Press the command button of the operation you
want to perform.
•The buttons on the remote control perform the same operations
as the corresponding buttons on the main unit.
•The command is applied to the CD player or CDR depending on
the function currently selected.
CD playback can be started from a specific track by pressing the
corresponding number button(s) on the remote control.
1Press the CD and CDR Deck Selection button
corresponding to the tray holding the CD and
track to be played.
2Press the number button(s) of the track you
want to play.
The track number corresponding to the buttons pressed is shown in
the information display, and playback of that track starts.
To select tracks 1 through 10
Press the number button (1 through 10) corresponding to the track.
To select tracks 11 or above
First press the +10 button, and then press one of the number but-
tons 1 through 10.
Example: Track 15
Press +10 followed by 5.
Example: Track 20
Press +10 followed by 10.
Using the Remote Control to
Control Playback
STANDBY/ON
CD REC
PLAY
MODE
•
REC
REC MUTING
REC
SOURCE
MENU
PITCH
0
CHANCEL
REPEAT CD
PITCH
+
SET
PITCH–
RM–SXLR2010A
REMOTE CONTROL
CDR
CD EDIT FINALIZE DISPLAY
1 2
4 5
7 8
3
6
9
10 +10
FAD E SYNCHRO
CONTROL
1
2
Direct Playback of a Specific
Track
STANDBY/ON
CD REC
PLAY
MODE
•
REC
REC MUTING
REC
SOURCE
MENU
PITCH
0
CHANCEL
REPEAT CD
PITCH
+
SET
PITCH–
RM–SXLR5010A
REMOTE CONTROL
CDR
CD EDIT FINALIZE DISPLAY
1 2
4 5
7 8
3
6
9
10 +10
FAD E SYNCHRO
CONTROL
2
1
CD CDR
CONTROLCONTROL
CD
CON
CONTROL
CDR
For a CD in the CD player
For a CD in the CDR
Eng.book Page 12 Monday, May 28, 2001 9:46 AM

13
English
Direct Track Selection (selecting another track during
playback)
Press the number button(s) corresponding to the track to be played
(Step 2). The display will change to indicate the corresponding
track number, playback of the current track will stop and playback
of the newly selected track will begin.
•To select a track on a CD in another tray, repeat steps 1 and 2.
•Direct track selection cannot be initiated by pressing the +10
button alone: this button must be used in combination with one
of the other number buttons (1 through 10). This function is not
possible when either program or random play mode is in use.
The 1(reverse) and ¡(forward) buttons on the remote control
can be used to find a particular location on the CD being played.
1Press the CD and CDR Deck Selection button
(CD or CDR) corresponding to the tray holding
the CD currently playing.
2Press the 1(reverse) or ¡(forward) button
corresponding to the direction you want search.
Release the button when you find the location
you want to play.
•When forward or reverse searching is performed during play-
back of an unfinalized disc, the information display and/or the
search function may not operate properly depending on the type
of disc being played.
To skip forward or backward to different tracks on the currently
selected CD, use the MULTI JOG control on the main unit or the
4(reverse) or ¢(forward) buttons on the remote control.
•Turn the MULTI JOG control counterclockwise one notch to
return to the beginning of the current track, or keep turning it
until the track number you are searching for is shown in the
information display.
•Turn the MULTI JOG control clockwise one notch to move to
the beginning of the next track, or keep turning it until the track
number you are searching for is shown in the information dis-
play.
Press the CD and CDR Deck Selection button (CD or CDR) corre-
sponding to the tray holding the CD currently playing, and then
press the desired search direction.
•Press the 4(reverse skip) button once to return to the begin-
ning of the current track, or press it repeatedly until the track
number you are searching for is shown in the information dis-
play.
•Press the ¢(forward skip) button once to move to the begin-
ning of the next track, or press it repeatedly until the track num-
ber you are searching for is shown in the information display.
Forward and Reverse Search
•
REC
REC MUTING
REC
SOURCE
MENU
PITCH
0
CHANCEL
PITCH
+
SET
PITCH–
RM–SXLR2010A
REMOTE CONTROL
FAD E SYNCHRO
1/¡
Reverse
search
Forward
search
Skipping Tracks
STANDBY
STANDBY/ON
MAXMIN
LEVEL PHONES
PLAY MODE CD EDIT
REC SOURCE
SELECTOR
CD REC
STOP PLAY PAUSE
REC SOURCE
DIGITAL CD LINE MIC
OPEN/CLOSEOPEN/CLOSE
XL-R2010 CD/CDR MULTIPLE COMPACT DISC RECORDER
CANCELSETMENU
PAUSE REC/REC MUTING
PLAYSTOP
SYNCHRO
FINALIZE
MULTIJOG/REC LEVEL
+
–
MIX BLANCE
CD
LINE
LINE
MIC
MIC
•
REC
REC MUTING
REC
SOURCE
MENU
PITCH
0
CHANCEL
PITCH
+
SET
PITCH–
RM–SXLR2010A
REMOTE CONTROL
FAD E SYNCHRO
MULTI JOG control
Main Unit
Remote Control
Eng.book Page 13 Monday, May 28, 2001 9:46 AM

14
•
The repeat playback mode can be selected by pressing the
REPEAT button on the remote control when the main unit is set to
either CD player or CDR function.
Setting the repeat play mode
Press the REPEAT button on the remote control. The REPEAT
indicator will be shown in the PLAY MODE section of the display
window. Press the button repeatedly to choose the desired setting.
The selection in the information display changes in the following
order:
“”(REPEAT ALL) :Repeat playback of all of the tracks.
«
“”(REPEAT 1) : Repeat playback of the track currently
playing
«
Repeat off (normal display).
Using repeat mode during program or random play
modes
If the repeat playback mode is activated while the unit is in the pro-
gram or random play modes, the following settings are possible:
“”(REPEAT ALL) :Random mode - Repeats random playback
of all of the tracks.
Program mode - Repeats playback of the
entire program.
“”(REPEAT 1) : Repeats playback of the track currently
playing.
The setting selection will be shown by the or indicator
being lit in the PLAY MODE section of the display window.
Notes
•Repeat playback mode cannot be used during CD REC or CD
EDIT recording operations.
•Play is repeated in the selected mode when the CD Control
PLAY 3 button of the main unit or 3(play) button of the
remote control is pressed.
•When the power is turned off, Repeat mode is cancelled.
When in the CD player stop mode (CD indicator is shown in the
display window), press the PLAY MODE button (main unit/remote
control) repeatedly until “CD RANDOM”is shown in the informa-
tion display. The RND indicator will be shown in the PLAY
MODE section of the display window.
Note
The random playback mode cannot be used for the disc loaded in
the CDR.
•Random play is started by pressing the CD Control PLAY 3
button on the main unit or the 3 (play) button on the remote
control.
•When activated, tracks are chosen randomly for playback from
the CD loaded in the CD player. The tracks chosen will be lit in
the music calendar and the SKIP lamp turns off.
•Selection is made only once, from 1 to 99 tracks, and playback
ends after the last track is played.
•Tracks assigned a SKIP TRACK mark will not be chosen.
•The track number and playback time of the CD currently being
played are shown in the information display.
•Track selection via the 10-key input is not accepted during the
random playback mode.
To release the random playback mode
When the unit is in the CD player stop mode, press the PLAY
MODE button repeatedly until the RANDOM indicator is cleared
from the PLAY MODE section of the display window.
Note
•When the power is turned off, Random mode is cancelled.
Repeat Playback
PLAY
MODE
•
REC
REC MUTING
REC
SOURCE
MENU
PITCH
0
CANCEL
REPEAT CD
PITCH
+
SET
PITCH–
RM–SXLR2010A
REMOTE CONTROL
CDR
FAD E SYNCHRO
CONTROL
REPEAT
1
1
1
Random Playback
STANDBY
STANDBY/ON
MAXMIN
LEVEL PHONES
PLAY MODE CD EDIT
REC SOURCE
SELECTOR
CD REC
STOP PLAY PAUSE
REC SOURCE
DIGITAL CD LINE MIC
OPEN/CLOSEOPEN/CLOSE
XL-R2010 CD/CDR MULTIPLE COMPACT DISC RECORDER
CANCELSETMENU
PAUSE REC/REC MUTING
PLAYSTOP
SYNCHRO
FINALIZE
MULTIJOG/REC LEVEL
+
–
MIX BLANCE
CD
LINE
LINE
MIC
MIC
PLAY MODE
PLAY
MODE
•
REC
REC MUTING
REC
SOURCE
MENU
PITCH
0
CANCEL
REPEAT CD
PITCH
+
SET
PITCH–
RM–SXLR2010A
REMOTE CONTROL
CDR
10 +10
FAD E SYNCHRO
CONTROL
PLAY MODE
Eng.book Page 14 Monday, May 28, 2001 9:46 AM

15
English
•
There are 3 CD pitch control buttons on the remote control that can
be used to vary the speed of CD playback up to 12% faster or
slower than the standard playback speed. This function can be use-
ful in changing the pitch when adding vocals to a recording using
the microphone input or when matching the playback speed of the
CD with another source.
Note
•Pitch control cannot be used for the CDR.
To adjust the pitch of a CD during playback
To raise the pitch of CD playback (i.e., increase the speed of play-
back), press PITCH+. Likewise, to lower the pitch of CD playback
(i.e., slow down the speed of playback), press PITCH–.Each press
of a button raises or lowers playback speed 1% (up to 12% max.).
•To restore the playback speed to normal, press PITCH 0.
•The adjusted playback speed can only be recorded using analog
recording functions such as mixed recording.
•Even if the pitch has been adjusted, when digital synchronized
recording is performed, the pitch is automatically restored to 0
before recording begins.
•The amount of pitch adjustment (+/-/0) is shown in the informa-
tion display when one of the pitch buttons is pressed.
•When the speed of CD playback is changed using the pitch con-
trol buttons, there is no signal output from the DIGITAL OUT
OPTICAL terminal.
The Disc Lock function can be used to make it impossible for chil-
dren or anyone else to take CDs out of or load new ones into the
CD player and CDR.
•When the power is on press the CD Control OPEN/CLOSE 0
button while holding down the CD Control STOP 7button on
the front panel. “TRAY LOCKED”will be shown in the infor-
mation display for 3 seconds, after which it is no longer possi-
ble to remove from or load CDs into the unit.
To cancel the Disc Lock function.
Repeat the same step followed to lock the trays. “TRAY
UNLOCKED”will be shown in the information display for 3 sec-
onds, after which the Disc Lock function is canceled.
Note
The Disc Lock function is canceled if the AC power cord is
unplugged from the wall outlet.
CD Playback Pitch Control
•
REC
REC MUTING
REC
SOURCE
MENU
PITCH
0
CHANCEL
PITCH
+
SET
PITCH–
RM–SXLR2010A
REMOTE CONTROL
FAD E SYNCHRO
PITCH+/PITCH
PITCH 0
Disc Lock Function
STANDBY
STANDBY/ON
MAXMIN
LEVEL PHONES
PLAY MODE CD EDIT
REC SOURCE
SELECTOR
CD REC
STOP PLAY PAUSE
REC SOURCE
DIGITAL CD LINE MIC
OPEN/CLOSEOPEN/CLOSE
XL-R2010 CD/CDR MULTIPLE COMPACT DISC RECORDER
CANCELSETMENU
PAUSE REC/REC MUTING
PLAYSTOP
SYNCHRO
FINALIZE
MULTIJOG/REC LEVEL
+
–
MIX BLANCE
CD
LINE
LINE
MIC
MIC
0
7
Eng.book Page 15 Monday, May 28, 2001 9:46 AM

16
It is possible to select your own program (order of tracks being
played) using the program playback mode. Any of the tracks (1-99)
on the CD in the tray of the CD player can be selected.
If you want to program and record tracks, see “Program Edit
Recording”on page 26.
1Load a CD into the tray of the CD player.
•Only tracks on the CD loaded in the CD player can be registered
into the program (i.e., tracks on a CD loaded in the CDR cannot
be selected for playback).
•“CD READ DISC”will be shown in the information display as
the unit reads the information from each disc.
2Press the PLAY MODE button when the unit is
in the CD stop mode.
•The CD indicator is shown in the display window, PROG indi-
cator is shown in the display window, and if no program has
been registered, “PG NO PROGRAM”is shown in the informa-
tion display.
•If SET is pressed at this time, programming registration will
start (Step 3).
3Press the SET button to start program
registration.
•The information display will show the following, and disc
source columns will flash.
4Select and enter a track number (1-99) by
turning the MULTI JOG control, and then press
the SET button.
•The following is an example of track 2 being entered as Step 1.
•When the SET button is pressed, the programming of Step 1 is
registered, and programming for Step 2 is ready.
5Repeat Step 4 to program up to a maximum of
32 steps.
•If you try to program over 32 steps, “MEMORY FULL”is
shown in the information display, and the programming func-
tion ends automatically.
•Pressing the CD Control STOP 7button on the main unit ends
the programming function.
6Press the CD Control PLAY 3button to start
programmed play.
•During playback, track number and play time of the track are
shown in the information display.
•The numbers of the tracks that have been played are cleared
from the music calendar. They are displayed again when pro-
grammed play is completed.
•Operation stops automatically when all of the programmed
tracks have been played.
•If the CD Control PLAY 3button is pressed at a specific step
in a program, the programming function will end and playback
will start from Step 01, not the step currently shown in the infor-
mation display.
To clear a step (track) from the program
To erase a programmed track, turn the MULTI JOG Control while
in the CD stop mode until the track you want to erase is shown in
the information display. Press the CANCEL button to erase the
track from the program. The step number for each track following
the one erased is automatically reduced by one (i.e., steps are
renumbered). To erase the entire program, press the CANCEL but-
ton until “PG NO PROGRAM”is shown in the information dis-
play.
Programming Playback Using
Main Unit Controls
STANDBY
STANDBY/ON
MAXMIN
LEVEL PHONES
PLAY MODE CD EDIT
REC SOURCE
SELECTOR
CD REC
STOP PLAY PAUSE
REC SOURCE
DIGITAL CD LINE MIC
OPEN/CLOSEOPEN/CLOSE
XL-R2010 CD/CDR MULTIPLE COMPACT DISC RECORDER
CANCELSETMENU
PAUSE REC/REC MUTING
PLAYSTOP
SYNCHRO
FINALIZE
MULTIJOG/REC LEVEL
+
–
MIX BLANCE
CD
LINE
LINE
MIC
MIC
26 3,4
1 4
Programming step number Track number
SET
MULTI JOG / REC LEVEL
+
–
1. Select the track. 2. Enter the selection.
Eng.book Page 16 Monday, May 28, 2001 9:46 AM

17
English
To change the contents of the program
In the CD stop mode, press the SET button followed by the CAN-
CEL button. Programmed tracks will be erased in the reverse order
of when they were entered (starting from the last track pro-
grammed). Press the CANCEL button twice to erase one track.
Continue erasing in this manner until all of the tracks you wanted
to remove are erased. Enter new tracks into the program by follow-
ing programming Step 4.
To check the contents of the program
To check the tracks you have entered into the program, press the
CD Control STOP 7button, and use the MULTI JOG Control to
review the programmed tracks. The program steps (PG S**) and
track numbers will be shown in the information display one at a
time as you toggle through the program (S: Step; **: step number).
To return to continuous playback
In the CD stop mode, repeatedly press the PLAY MODE button on
the main unit until the total playing time is shown in the informa-
tion display.
Note
•When the power is turned off, the contents of the program are
erased.
If you want to program and record tracks, see “Program Edit
Recording”on page 26.
1Load a CD into the tray of the CD player.
•Only tracks on the CD loaded in the CD player can be registered
into the program (i.e., tracks on a CD loaded in the CDR cannot
be selected for playback).
•“CD READ DISC”will be shown in the information display as
the unit reads the information from each disc.
2Press the CD Deck Selection button to place the
unit in the CD mode.
•The CD indicator is shown in the display window.
3Press the PLAY MODE button.
•The PROGRAM indicator is shown in the display window, and
if no program has been registered, “PG NO PROGRAM”is
shown in the information display.
4Press the SET button.
•The information display will show the following.
5Select and enter a track number (1-99) using
the 4(reverse) or ¢(forward) buttons, and
then press the SET button.
(To be continued on the next page)
PLAY MODE
Main Unit
Programming Playback Using
the Remote Control
STANDBY/ON
CD REC
PLAY
MODE
•
REC
REC MUTING
REC
SOURCE
MENU
PITCH
0
CHANCEL
REPEAT CD
PITCH
+
SET
PITCH–
RM–SXLR2010A
REMOTE CONTROL
CDR
CD EDIT FINALIZE DISPLAY
1 2
4 5
7 8
3
6
9
10 +10
FAD E SYNCHRO
CONTROL
4
32
Program step number Track number
SET
1. Select the track. 2. Enter the selection
selection.
Eng.book Page 17 Monday, May 28, 2001 9:46 AM

18
6Repeat Step 5 to program up to a maximum of
32 steps.
•If you try to program over 32 steps, “MEMORY FULL”will be
shown in the information display, and the programming func-
tion ends automatically.
•Pressing the 7(stop) button ends the programming function.
•Operation stops automatically when all of the programmed
tracks have been played.
7Press the 3button to start program play.
•Operation stops automatically when all the programmed tracks
have been played.
•During playback, track number and play time of the track are
shown in the information display.
•The numbers of the tracks that have been played are cleared
from the music calendar. They are displayed again when pro-
grammed play is completed.
•If the 3(play) button is pressed at a specific step in a program,
the programming function will end and playback will start from
Step 01, not the step currently shown in the information display.
To clear a step (track) from the program
To remove a programmed track, while in the CD stop mode, press
the 4(reverse skip) or ¢(forward skip) buttons until the track
you want to erase is shown in the information display. Press the
CANCEL button to erase the track from the program. The step
number for each track following the one erased is automatically
reduced by one (i.e., steps are renumbered). To erase the entire pro-
gram, press the CANCEL button until “PG NO PROGRAM”is
shown in the information display.
To change the contents of the program
In the CD stop mode, press the SET button followed by the CAN-
CEL button. Programmed tracks will be erased in the reverse order
of when they were entered (starting from the last track pro-
grammed). Press the CANCEL button twice to erase one track.
Continue erasing in this manner until all of the tracks you wanted
to remove are erased. Enter new tracks into the program by follow-
ing programming Step 5.
To check the contents of the program
To check the tracks you have entered into the program, press the 7
(stop) button, and use the 4(reverse skip) or ¢(forward skip)
buttons to review the programmed tracks. The program steps (PG
S**) and track numbers will be shown in the information display
one at a time as you toggle through the program (S: Step; **: step
number).
To return to continuous playback
In the CD stop mode, repeatedly press the PLAY MODE button on
the remote control until the total playing time is shown in the infor-
mation display.
PLAY
MODE
Remote Control
Eng.book Page 18 Monday, May 28, 2001 9:46 AM
Other manuals for XL-R2010BK
1
Table of contents
Other JVC Recording Equipment manuals

JVC
JVC KA-MR100G User manual

JVC
JVC XL-R5000BK User manual

JVC
JVC XL-R910 User manual

JVC
JVC KSSRA100 - Vehicle Sirius Satellite Radio... Guide

JVC
JVC SA-F911E User manual

JVC
JVC SEA-60 User manual

JVC
JVC KD-G411 User manual

JVC
JVC SEA-70 User manual

JVC
JVC KSSRA100 - Vehicle Sirius Satellite Radio... Guide

JVC
JVC SR-S365U User manual