manuals.online logo
Brands
  1. Home
  2. •
  3. Brands
  4. •
  5. Kaba
  6. •
  7. Lock
  8. •
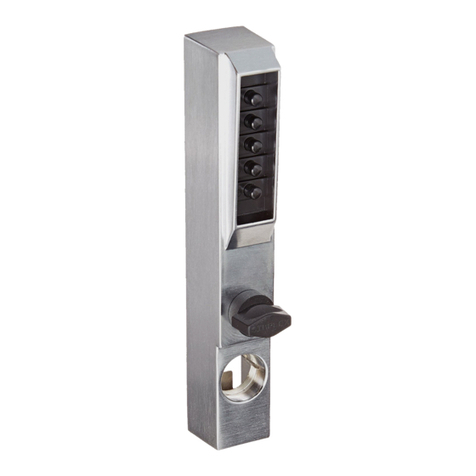
  9. Kaba Simplex 7104 Series User manual

Kaba Simplex 7104 Series User manual

Other manuals for Simplex 7104 Series

3

This manual suits for next models

3

Other Kaba Lock manuals

Kaba SIMPLEX 7102 Series User manual

Kaba

Kaba SIMPLEX 7102 Series User manual

Kaba E-PLEX 2000 User manual

Kaba

Kaba E-PLEX 2000 User manual

Kaba Simplex 506 Series User manual

Kaba

Kaba Simplex 506 Series User manual

Kaba PowerPlex 2000 Series User manual

Kaba

Kaba PowerPlex 2000 Series User manual

Kaba Saflok QuantumII MT RFID User manual

Kaba

Kaba Saflok QuantumII MT RFID User manual

Kaba Simplex 7104 Series User manual

Kaba

Kaba Simplex 7104 Series User manual

Kaba Simplex 3000 Series User manual

Kaba

Kaba Simplex 3000 Series User manual

Kaba Simplex 7104 Series User manual

Kaba

Kaba Simplex 7104 Series User manual

Kaba EX3600 User manual

Kaba

Kaba EX3600 User manual

Kaba Simplex 1000 Series Installation guide

Kaba

Kaba Simplex 1000 Series Installation guide

Kaba Simplex 8100 Series User manual

Kaba

Kaba Simplex 8100 Series User manual

Kaba 7102 series User manual

Kaba

Kaba 7102 series User manual

Kaba COMBOGARDPRO User manual

Kaba

Kaba COMBOGARDPRO User manual

Kaba SIMPLEX EE1000 Series User manual

Kaba

Kaba SIMPLEX EE1000 Series User manual

Kaba PowerLever PROX 9000 User manual

Kaba

Kaba PowerLever PROX 9000 User manual

Kaba SILCA SW- VAG GROUP-L0 User manual

Kaba

Kaba SILCA SW- VAG GROUP-L0 User manual

Kaba E-Flash EF680 User manual

Kaba

Kaba E-Flash EF680 User manual

Kaba La Gard MECHANICAL User manual

Kaba

Kaba La Gard MECHANICAL User manual

Kaba E-Plex 50 Series User manual

Kaba

Kaba E-Plex 50 Series User manual

Kaba E-Plex 1500 Series User manual

Kaba

Kaba E-Plex 1500 Series User manual

Kaba Simplex 6200 Series User manual

Kaba

Kaba Simplex 6200 Series User manual

Kaba E-Flash EF680 User manual

Kaba

Kaba E-Flash EF680 User manual

Kaba X-09 User manual

Kaba

Kaba X-09 User manual

Kaba 52 User manual

Kaba

Kaba 52 User manual

Popular Lock manuals by other brands

Magic 105 manual

Magic

Magic 105 manual

Gantner GAT NET.Lock 7020 System Installation, configuration & operation

Gantner

Gantner GAT NET.Lock 7020 System Installation, configuration & operation

Dorma Studio Classic Installation instruction

Dorma

Dorma Studio Classic Installation instruction

Securam ECSL-601 quick start guide

Securam

Securam ECSL-601 quick start guide

Sudhaus 3003 operating manual

Sudhaus

Sudhaus 3003 operating manual

Safety 1st 48517 user guide

Safety 1st

Safety 1st 48517 user guide

Pado FDS-10 user manual

Pado

Pado FDS-10 user manual

Esco systeQ Series installation instructions

Esco

Esco systeQ Series installation instructions

COMPX National D8951 instruction sheet

COMPX

COMPX National D8951 instruction sheet

secureo Key Box instruction manual

secureo

secureo Key Box instruction manual

Stock Loks C8713 instruction sheet

Stock Loks

Stock Loks C8713 instruction sheet

COMPX 1T-058 Information

COMPX

COMPX 1T-058 Information

Auslock T11 user manual

Auslock

Auslock T11 user manual

Stealth SAFES ShadowVault Instructions & Troubleshooting

Stealth SAFES

Stealth SAFES ShadowVault Instructions & Troubleshooting

Knox KeySecure 5 Admin & user guide

Knox

Knox KeySecure 5 Admin & user guide

Kwikset 48334/01 Quick installation guide

Kwikset

Kwikset 48334/01 Quick installation guide

Metra Electronics Door Access Terminal Combo Technical manual

Metra Electronics

Metra Electronics Door Access Terminal Combo Technical manual

Kilitronik miniK10m operating manual

Kilitronik

Kilitronik miniK10m operating manual

manuals.online logo
manuals.online logoBrands
  • About & Mission
  • Contact us
  • Privacy Policy
  • Terms and Conditions

Copyright 2025 Manuals.Online. All Rights Reserved.

Features
Access Control
Mechanical pushbutton lock eliminates problems and costs
associated with issuing, controlling, and collecting keys and cards.
Provides fully mechanical primary or auxiliary pushbutton access
control by exterior combination, while allowing free egress at all
times by interior thumbturn. Deadbolt models must be manually
relocked. Deadlocking latch models automatically relock each time
the door closes.
No Battery
Fully mechanical lock eliminates the material and labor expense
of battery replacements
Locking Device
Deadbolt—must be manually relocked
Deadlocking latch—relocks automatically when door closes
Rim locking latch—relocks automatically when door closes; also
has latch holdback
Number of Codes
Single access code—one easy-to-manage code for all users
Programming
Lock is easily programmed via keypad without removing lock from
the door
Handing
Field reversible
Operation Modes
Pushbutton Access
Latch Holdback (7106 only)
Economical
A cost eective access control solution
Simplex
®
7100
•1"(25mm)Tubular
Deadbolt,FlatFacePlate
•Backset2¾"(70mm)
•AuxiliaryLock
•ManualRelock
•NumerousFinishes
Model 7102
•½"(13mm)
 DeadlockingLatch,
 FlatFacePlate
•Backset2⅜"–2¾"(60-70
mm)—Adjustable
•Primary/AuxiliaryLock
•AutomaticRelock
•NumerousFinishes
Model 7104
•⅝"(16mm)Rim
 DeadlockingLatch,Flat
FacePlate
•Backset2⅜"(60mm)
•ForWoodDoorsOnly
•AuxiliaryLock
•AutomaticRelockand
 LatchHoldback
•SelectFinishes
Model 7106
•1"(25mm)Tubular
Deadbolt,FlatFacePlate
•Backset2⅜"(60mm)
•AuxiliaryLock
•ManualRelock
•NumerousFinishes
Model 7108
Kaba Access & Data Systems Americas
Winston-Salem NC 27105
1-800-849-8324
www.kaba-adsamericas.com KAA1356 0416
Mechanical Features
Construction All metal cast front housing; force-resistant, clutch-protected exterior thumbturn
Numeric Keypad Vandal resistant, solid metal pushbuttons
Door Handing Field reversible
Finishes
For all models except 7106: Bright Brass 03 (605), Satin Chrome 26D (626),
Antique Copper (AC) (059), Gold Vein (GV) (060), Antique White (AW) (062),
Silver Vein (SV) (061), Black 19 (676), and Antique Brass 05 (609)
Model 7106: Inside trim (Black only)
All other Black models, inside trim (Satin Chrome)
Latch
1" (25 mm) tubular deadbolt
½" (13 mm) deadlocking latch
⅝" (16 mm) rim deadlocking latch
Strike
Models 7102 and 7108: Flat deadbolt strike plate
Model 7104: Curved lip strike plate
Model 7106: Box strike for in-swing doors and at strike for out-swing doors
Minimum Stile Recommended
4" (102 mm)
Weight 2.5 lbs. (1.1 kg)
Installation
Installation 1⅜" (35 mm) diameter through bore; 1" (25 mm) diameter cross bore; ¾" (19 mm)
through bore; 2 x ¼" through bores
Backset 2¾" (70 mm) or 2⅜" (60 mm) backset
Door Thickness 1⅜" (35 mm) to 2¼" (57 mm), wood or metal
Items Supplied Include Installation manual, full-scale template and required installation hardware
Certication and Testing
Durability Weather resistant
Warranty
Warranty 1-year warranty
Exterior
6½"
(165 mm)
2½"
(64 mm)
Exterior Side
2½"
(64 mm)
6½"
(165 mm)
Interior
Models 7102, 7104, 7108
2"
(51 mm)
3⅝"
(92 mm)
2¼"
(57 mm)
Model 7106
3"
(76 mm)
3⅜"
(86 mm)
2⅛"
(54 mm)
1⅜"
(35 mm)
Latch
2¾"
(70 mm)
⅞"
(22 mm)
Changing the Code/Combination
Simplex 7000/7100
7000/7100 Series FAQ
Changing the Code/Combination
Note: If your lock is opening on every turn of the knob or lever, except upon entering a code, this may
be a ZERO CODE. Before attempting to remove the lock from the door, refer to the troubleshooting
procedures outlined at bottom of this document for a zero code symptom/solution.
Important: The following steps must be performed while the door is be
open.
The factory pre-set combination is 2 and 4 pressed simultaneously and re-
leased, then press 3 and release.
Read the instructions through once before attempting to change
the combination.
1. Turn the outside thumbturn to the left (counterclockwise) until it stops
then return it to the right (clockwise) slowly to the horizontal position
and release.
2. Enter the existing combination.
3. Insert a Phillips-head screwdriver into the central piece of the combina-
tion change assembly (see gure 1). Gently turn the screwdriver to the
right (clockwise) until it stops. A slight click should be felt. Do not force.
4. Remove the screwdriver from the combination change assembly.
Important: When removing the screwdriver, the central piece must return to its
initial position, if not, set it back to its original position using the screwdriver
(see Figure 1). If the central piece of the combination change assembly does not
return to its original position, the combination will be cancelled and the lock will
jam.
5. Turn the outside thumbturn to the left (counterclockwise) until it stops
and return it slowly to the right (clockwise) to the horizontal position
and release.
This clears the existing code (see gure 2).
6. Select a new combination and write it down. Some or all of the buttons
may be used for your new code, pressed individually or simultaneously.
Each button may be used only once. We do not recommend the use of a
one-button combination.
KAA1158 0108
7. With the door open, enter your new combination. Depress each button fully and release
it. You must feel a click each time you press a button to know that the button was
fully depressed.
8. Turn the outside thumbturn to the right (clockwise) until it stops; the latch/bolt
should retract.
9. For automatic relocking latches, release the outside thumbturn and the latch should return
to its initial extended position.
For manual relocking deadbolts, turn the outside thumbturn to the left (counterclockwise)
until it stops; the bolt should extend.
Keep the door open and test the operation of the lock 2–3 times to make sure your combination was
set correctly.
Note:
• Donotuseexcessiveforceatanytime.
• Ifawrongcombinationisenteredwhileoperatingthelock,turntheoutsidethumbturntothe
left (counterclockwise) to the top position and release (see Figure 2). This will clear any
previously depressed buttons. Enter in the correct combination.
Troubleshooting
Symptom/problem: Turning outside thumbturn clockwise always retracts latch without depressing
any buttons.
Cause: Lock is in zero combination.
Solution: Follow the procedure for setting a new combination except omit step 2.