(別売)「AERO-R1・補修用パッド」について
インナーパッドのお手入れについて
別売のインナーパッドセットをお買い求めの際は、お使いのヘルメットのモデ
ルをよくご確認のうえ、販売店などへご注文ください。
汗などで汚れたインナーパッドは、取り外して洗うことができますので、定期的にお手入れする
ことでインナーパッドを清潔に保てます。インナーパッドを洗う場合は、水もしくはぬるま湯
(35℃以下)にごく少量の洗髪用シャンプーもしくは家庭用中性洗剤を入れ、やさしく手もみ洗
いを行ってからよくすすいでください。洗い終わったら乾いた布などで水気をやさしく取り除き、
直射日光の当たらない風通しのよい場所で陰干しを行ってください。
つね日ごろよりご使用いただいているヘルメット内部のインナーパッドは、消耗品です。傷んだ
インナーパッドをそのまま、使い続けると破れてしまい、フィット感などに悪影響をおよぼしかね
ません。古くなったインナーパッドは、早期に交換される事をお薦めします。
ご 注 意:
インナーパッドは消耗品です!
補修用パッド各種について詳しくは、弊社カタログもしくはホームページに掲載の
パ ー ツ リ スト を ご 覧 く だ さ い 。 Kabuto 検索
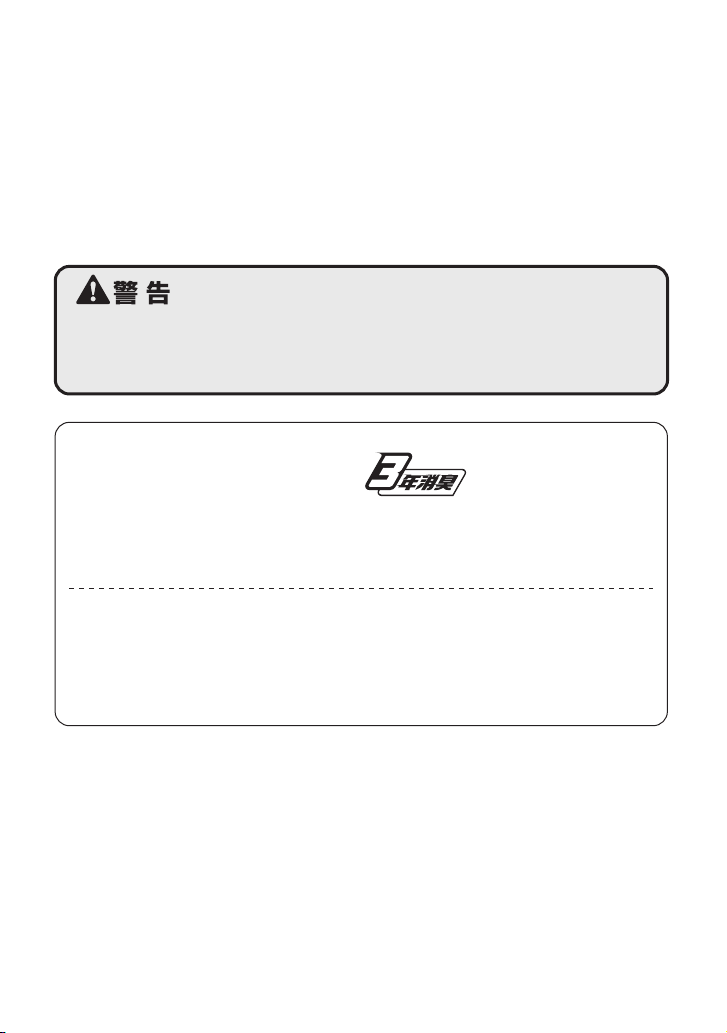
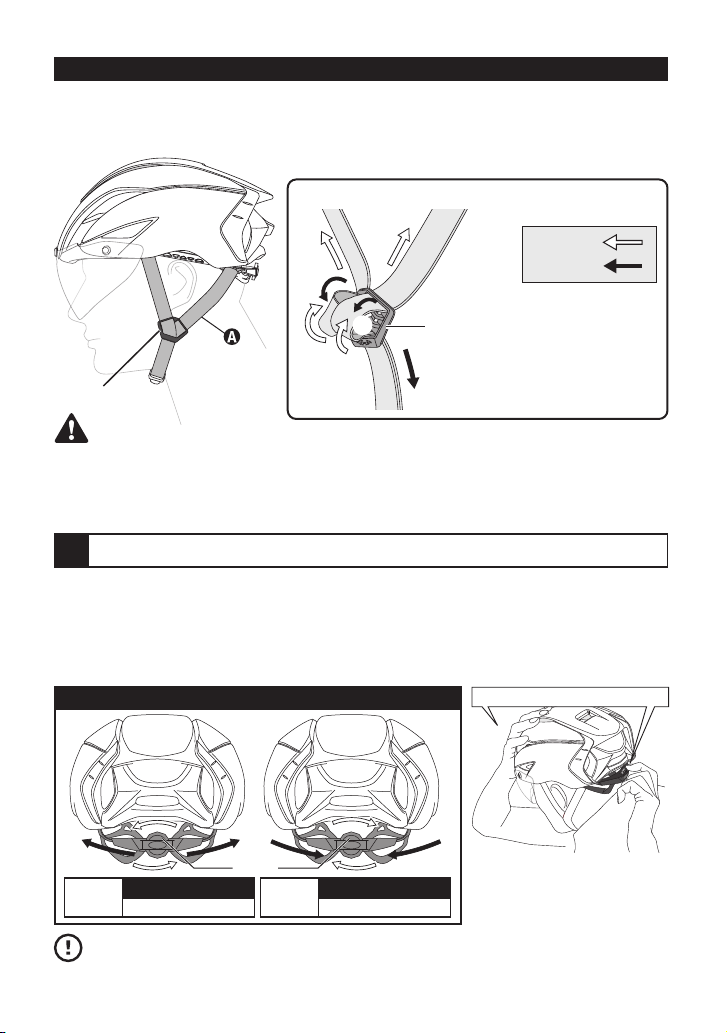
正しい位置でヘルメットを装着する
6
ヘルメットの正しい装着方法
ヘルメットは正しい位置で正しく装着し、あごひもを正確に締める事で、
はじめてヘルメット本来の安全性能を発揮します。
ヘルメットは走行前にしっかり正しく装着しましょう。
ご 注 意:
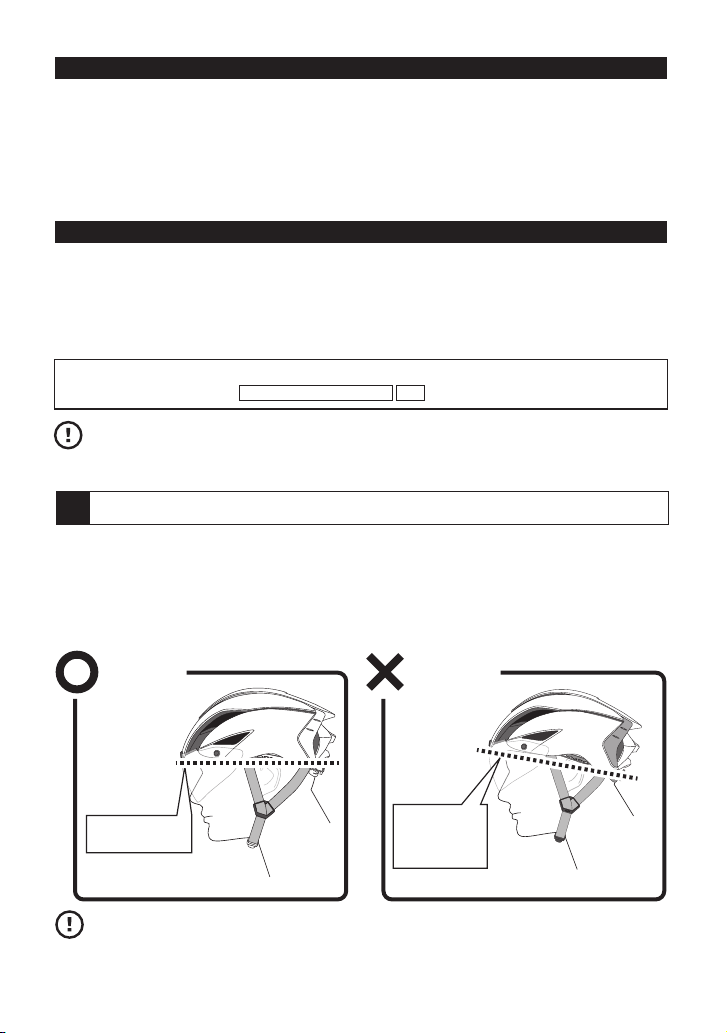
正しい装着例
ヘルメットを前から後にかけて水平になるように着用してください。このときにヘルメットの先端
がまゆ毛のすぐ上にない場合は、正しく装着できていません。(装着の際は鏡を見ながら調整し
てください)また、あごひもの長さやアジャストロックの調整もヘルメットを正しく装着するうえ
で大変重要な部分です。当説明書の該当項目をよくお読みのうえ、正しくかぶってください。
前から後ろにかけて水平になるように
装着します。
誤った装着例
ヘルメットの先が
眉毛のすぐ上にある
ヘルメットの先
が上を向き、前
頭部が見えて
いる
9