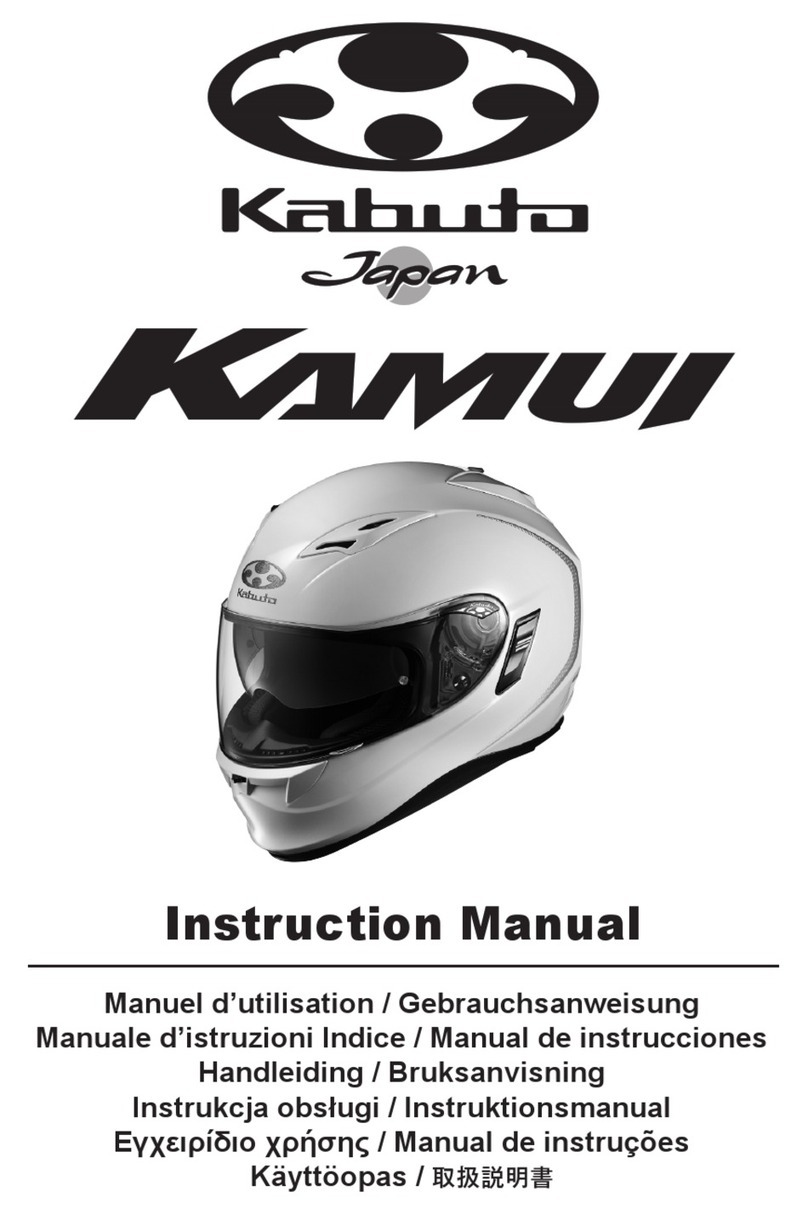
Kabuto Ryuki User manual

作成:2022.06.06.
Make sure to read this Instruction Manual before use.
Keep this instruction manual in a safe place when you
finish reading this manual.
This is a motorcycle helmet.
Do not use this helmet for any other purposes.
●
●
BEFORE USE
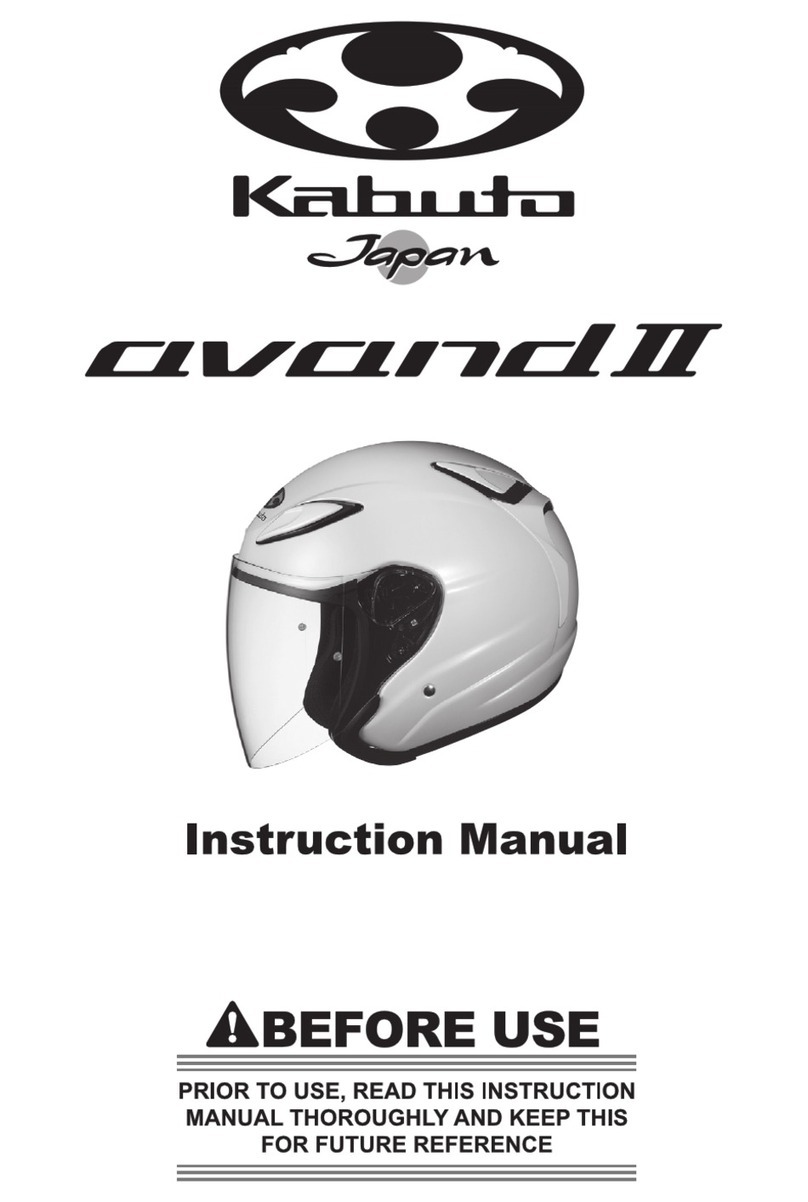
Instruction Manual
202206-E2206-YC www.ogkkabuto.com

Instruction Manual • Table of Contents
Inquiries, Repairs and Requests・・・・・ P-28
Parts Table and Repair Correspondence Table・・・・・ P-29
Table of Contents・・・・・P-1
Part Descriptions・・・・・P-2
1 2
1
2
3
4
5
–Exterior–
Ventilation ・・・・・ P-5
Shield ・・・・・ P-7
Pinlock® Original Insert Lens・・・・・ P-11
Inner Sunshade ・・・・・ P-14
Chin Cover・・・・・ P-17
6
7
8
9
a0
aa
–Interior–
Chinstrap ・・・・・ P-19
Cheek Pads ・・・・・ P-22
Inner Pad・・・・・ P-24
Interior Compatibility ・・・・・ P-25
Wind Shutter・・・・ P-26
Breath Guard・・・・ P-27
OPTION
NOTES BEFORE USE・・・・・ P-3
Shell Rear Ventilation
Chin Ventilation
●Shield Ratchet
●Collar
●Screw
Pinlock®Pin (eccentric pin)
Integrated
Wake Stabilizer
Head Ventilation
Shield
Inner
Sunshade
[Helmet Interior]
● Chinstraps
● Chinstrap Covers
● Cheek Pads
● Inner Pad
● Wind Shutter
Breath Guard
Chin Cover
Lock Lever
Inner Sunshade
Lever
Part Descriptions
PATENTED

3 4
NOTES BEFORE USE
Thank you very much for purchasing the Kabuto helmet.
This Instruction Manual describes proper handling, various functions, and
removal and replacement of each part of this helmet. Please read this
Instruction Manual thoroughly prior to use.
After reading this, keep the Manual for future reference.
The helmet is just an element of protection, intended to minimize the risk in
the event of an accident. It cannot ensure complete safety. Use this helmet
properly with understanding this point very well.
Please understand and follow the instructions and information in this
Instruction Manual to enjoy your pleasant and safe motorcycle ride.
It is very dangerous to wear too large size of the helmet. This may wobble while riding on a
motorcycle. If you wear too small size helmet, it tightens up and hurts your head. Thus, it is
important to select the helmet size that fits you.
The helmet is designed to be retained by straps under the chin. In order to assure proper protection,
the helmet should fit your head. When worn, adjust it to rest properly on the head, securely fasten
the chinstraps to ensure safety. The chinstraps prevent the helmet from coming off in most cases.
In order to fully maintain the performance of this helmet, do not attempt to take it apart or
change it in any manner such as making holes in it, or cutting it (or any of its parts).
Liners are essential for the intended performance of the helmet. This helmet has been
designed to absorb the impact energy when components such as shell and liners are partially
destroyed by an impact. Even if visually no damage is apparent, it could be seriously
damaged by a small impact. Regardless of the degree of damage, the helmet that underwent
an impact or was abused even only once should not be used anymore. Always handle the
helmet with care and make sure that no one sits on it or drops it.
Never use the helmet once impacted
To clean the helmet, use common ph-neutral detergent diluted with clear water. The cloth
should not be soaking wet, then wipe it gently with dry cloth. Finally wipe away the detergent
solution by using a cloth rinsed in clear water, and leave the helmet to completely dry, but not
in direct sunlight. With regard to helmets with removable interiors, carefully read the
instruction manual for that model before attempting to remove the interiors and carry out
cleaning according to the explanation provided.
To clean the helmet do not use saline water or hot water (above 50ºC).
Never remodel the helmet
Select the proper size!
The storage of the helmet
Shield care and cleaning
Notes for use of full-face helmet
After using the helmet, stow it away in the helmet bag and store on a level place such as a
shelf; the helmet may be damaged if it rolls around or falls down. Do not leave the helmet in
direct heat above 50ºC e.g. next to a heater or under direct sunlight in a car.
Cautions for shield
If the shield is marked “Day Time Use Only”, visibility is limited to daylight conditions and it is
not suitable for use at night. Tinted lenses are not suitable for use at night.
A shield and goggles with scratches lowers the visibility and this is very dangerous. Such
shields should never be used at night and should be replaced.
Contact with petroleum products and other solvents may impair the optical properties and
weaken the strength of the shield. Never try to open and close or to remove the shield while
riding.
After using your helmet, with a wet soft cloth, lightly wipe off any grime (e.g. dead insects,
dirt, sand, dust, etc.) on the shield and then fully wipe it clean using a dry soft cloth. When
the shield gets wet (e.g. rainwater), it should always be wiped with a soft cloth after use.
When cleaning the shield, never use any petroleum-based solvents or detergents containing
abrasives.
Contact with petroleum products and other solvents may impair the optical properties and
reduce the mechanical strength.
To clean the shield, apply some common ph-neutral detergent diluted with clear water using a
soft cloth and wipe gently. Finally, wipe it dry with a lint-free soft cloth. To clean the shield, do
not use saline water or hot water (above 50ºC).
When you wear a full-face helmet, the temperature in the helmet is maintained nearly constant
during riding but the surroundings are constantly changing since you are moving at a high
speed. For this reason, in case of sudden rain, immediately after entering a tunnel or in a
place with a large difference in height such as a mountain path cause difference in
temperature between inside and outside of the helmet. As a result, the shied of the helmet
may be fogged suddenly. In case such a risk is expected, please use caution with adjusting
the shield or slowing down your speed in advance. Never open and close the shield or adjust
the ventilation shutter while riding since it is very dangerous. Thus, operate them before riding.
Handle your helmet with care
Do not toss your helmet over a floor or sit on it. The helmet absorbs an impact every time it is
handled roughly and its impact-absorbing capacity will be decreased. Handle your helmet with
care so as to assure its full intended function in the event of an accident.
Do not use your helmet for any purpose other than to use for protecting your head while riding.
Fasten the chinstraps before riding
Helmet care and cleaning
Any paint, glue, adhesive stickers, etc. (or the use of detergents and solvents other than those
prescribed) may not only reduce the original protective performance of the helmet considerably,
but may also cause damage to the helmet that cannot be detected by the naked eye.
Do not paint or apply solvent
5 6
1Ventilation —Head Ventilation—
—Ventilation Structure—
Chin Ventilation
Head Ventilation
Rear Ventilation
*No open/close function
Humid air
Outer air
Outer air
Rear Ventilation
*No open/close function
LinerLiner
Liner
Shell Shell
Head Ventilation
Humid air inside the
helmet
To CloseTo Open
Air duct
Move the shutter to the back. Move the shutter to the front.
—Chin Ventilation—
To CloseTo Open Air duct
Lower the shutter. Raise the shutter.
CAUTION!
Ventilations will be damaged if subjected to strong forces.
Never operate the shutter while riding. It is very dangerous.
WARNING!

7 8
2Shield
Fig.1 Fig.2
Fully open the shield.
①While pulling the lever on the
shield ratchet, lift the shield to
remove it.
②
Attach the upper hook on the shield by pressing on the part shown in Figure 1
of the shield while hooking it to the upper groove located in the shield ratchet.
Install the opposite side in the same way, and implement the opening and
closing operations about 3-4 times to check for any abnormalities.
①
②
—Removal—
Pull the
lever to
remove
the
shield. Fig.1
—Attaching—
CAUTION!
Never apply force to pull or twist when removing the shield.
The shield and other parts may become damaged.
CAUTION!
Do not forcefully insert the shield or twist it because the shield or its parts can
become damaged.
①Hitch the upper hook on the shield
to the upper groove on the ratchet
side and hold it down.
②Press the shield
edge forcefully.
If the shield is not completely attached, there is the danger that it will not
move correctly or it can come off while you are riding. For that reason,
check that the shield will not come off by pulling it gently in the direction to
pull it out after it is attached, and that the shield behaves normally by
opening and closing it 3-4 times. If there is any noise or abnormality in how
it opens or closes, reinstall it from the beginning.
The shield is a consumable part. Do not continue its use if the scratches or
dirt are significant. Replace it soon.
●
●
WARNING!

9 10
—Removal—
The shield ratchet appears when the shield is completely removed.
<Shield Ratchet>
Remove the shield.
(See 2. Shield)
Remove the collar screw using a
hexagonal wrench (4 mm). (Figure 1)
Remove the hook on the underside of
the shield ratchet from the shield
ratchet mounting hole. (Figure 2)
Do this also for the other side.
①
②
③
④
—Attaching—
Check the direction of the shield
ratchet and the collar. (Figure 1)
Insert the shield ratchet (L) hook into
the mounting port on the left side of
the helmet to mount the collar (L).
Mount the shield ratchet with the collar
screw using a hexagonal wrench
(4 mm).
①
②
③
(Fig.1)
(Fig.2)
Hexagonal WrenchHexagonal Wrench
Collar
Collar
Collar
Screw
Collar
Screw
Shield Ratchet
Shield Ratchet
Shield Ratchet
Shield Ratchet
Shield
Ratchet
Mounting
Hole
Shield
Ratchet
Mounting
Hole
CAUTION!
Use the proper tools otherwise the collar screws and its peripheral parts may
be damaged.
* The collar has an engraving of
right = R, left = L.
Left(L)Right(R)
(Fig.1)
(Fig.3)
Shield Ratchet
Collar
Collar
Collar Screw
Shield Ratchet
(Fig.2)
Chin Cover
Shield Ratchet (L)
Collar (L)
Collar Screw
Hook
hexagonal
wrench
(4 mm)
Tightening the collar screw more
than necessary can damage the
part.
Use the proper tools otherwise
the collar screws and its
peripheral parts can be damaged.
●
●
When mounting has been
correctly implemented and the
mounting process has ended,
always check that the shield can
be opened and closed correctly.
The collar screw should be
checked regularly for looseness
and tightened.
●
●
WARNING!
CAUTION!

11 12
—Attaching—
—Removal—
3OPTION
Pinlock®
Original Insert Lens For CM-2-P
Pinlock® Original Insert Lens prevents the shield from fogging caused by thermal
changes in winter or rainy weather etc.
Maintaining the proper space between the shield and the Pinlock® Original Insert Lens
provides clear vision by balancing the inner and outer temperature.
Pinlock® Original Insert Lens is the effective anti-fog sheet. The shield of your helmet is
equipped with the Pinlock® pins (eccentric pins) which allows the exclusive Pinlock®
Original Insert Lens to be attached to it. The Pinlock® Original Insert Lens is available to
purchase at the dealers.
Original Insert Lens
Pinlock® Original Insert Lens has international patent
protection and is a registered brand name of Pinlock®
fog-free systems B.V.. Further patents have been applied for.
Apply the silicon seal side of the Pinlock® Original Insert Lens on inside the shield,
without peeling off the protective film on the lens. At the time, apply the Pinlock®
Original Insert Lens on inside the shield by clicking it into the eccentric pins.
(Fig 1 and 2)
①
(Fig.2)(Fig.1)
Section view
Protective film
Silicon seal Shield
Inside the shield
Pinlock
®
Original Insert Lens
Flex the shield carefully until the shield becomes flat .Then, click the other side of
the Pinlock® Original Insert Lens into the eccentric pins and then allow the shield to
return carefully to its original curved shape. (Fig. 3,4,5)
②
(Fig.3) (Fig.4)
*Flex the shield when applying the
Pinlock®Original Insert Lens into
the eccentric pins.
Silicon seal
Make sure if the overall silicon seal of the Pinlock® Original Insert Lens is attached
firmly to the shield by mounting the shield on the helmet. If there is any space
between them, refer to “How to Adjust Pinlock® Original Insert Lens after
Attachment” and adjust the lens.
③
*Please mount the shield on the helmet when checking if the Pinlock® Original Insert Lens is
attached firmly to the shield. Otherwise, the shield might be spread out by the pressure from the
lens and it cannot be assured if the lens has attached on the shield firmly.
Fig.5
Shield
Silicon seal
Pinlock
®
Original Insert Lens
Correct Wrong
Protective film
Shield
Section view
of the shield
Eccentric pins
Silicon seal
*without any space
Make sure the Pinlock® Original
Insert Lens to be fit inside the chase.
Peel off the protective film on the Pinlock® Original Insert Lens.
④
Remove the shield from the helmet.
Remove the Pinlock® Original Insert Lens from
the eccentric pins with flexing the shield.(Fig.6)
①
②
Remove the shield from the helmet and detach
the Pinlock® Original Insert lens from the
shield.
Adjust the eccentric pins by turning them with
a tool. (Fig. 7)
Fit the Pinlock® Original Insert Lens back on
the shield. Make sure the Pinlock® Original
Insert Lens and the shield do not have any
space in-between after attaching the shield on
the helmet. If there is any space please follow
the same steps again.
①
②
③
—How to Adjust Pinlock
®
Original Insert
Lens after attached it to the shield—
Fig.6
Fig.7
Face the eccentric pins inwards
Face the eccentric pins outwards
Facing the eccentric pins inwards
Facing the eccentric pins outwards
Adjust the Pinlock® Original Insert Lens if there
is any space between the lens and the shield.
* Please read carefully the next page.
so that the Pinlock® Original Insert Lens will be pushed
out and there would not be any space between the
Pinlock® Original Insert Lens and the shield.
so that the Pinlock® Original Insert Lens
will be loose.
Pinlock® Original Insert
Lens is pushed out so
that it will be in close
contact with the shield.
Pinlock® Original Insert
Lens becomes loose fit.

13 14
Slide the sunshade lever upward to close
the inner sunshade.
Slide the sunshade lever downward to
open the inner sunshade.
Always operate using the sunshade lever, otherwise the parts
may be damaged.
CAUTION!
CAUTION!
CAUTION! *Pinlock® Original Insert Lens
•
•
•
•
Attach the Pinlock®Original Insert Lens after you made the shield to be
adequately flat. The eccentric pin could be damaged.
Remove any dirt from the inside of the shield when attaching. Be very careful not
to touch the anti-fog surface on the silicone seal side of the Pinlock® Original
Insert Lens.
Never use solvents such as benzine, thinners, gasoline, glass cleaners, or the like
when cleaning because they can damage the material.
Never leave in locations that are 50°C or higher, near a heater, or to use anything
that produces heat, such as a hair dryer or a flame when drying because of the
risk to the material.
•
•
•
•
•
•
Use the Pinlock® Original Insert Lens only with a dedicated shield.
If the area between the shield and Pinlock® Original Insert Lens becomes
foggy, or water has penetrated the area, remove the Pinlock® Original Insert
Lens and dry both the shield and the Pinlock® Original Insert Lens thoroughly
before re-attaching.
The silicone seal may stick to the shield, so regularly remove it to clean the
Pinlock® Original Insert Lens.
Beware that the Pinlock® Original Insert Lens can become foggy when the chin
ventilation is closed or when the wind shutter is used.
If the anti-fogging effect decreases or the shield is scratched, do not use it as
it is. Replace it with a new one.
The silicone seal can enter your field of view depending on your riding
position.
4Inner Sunshade
Inner Sunshade
開閉レバーLever
—How to Open and Close—
To Open
LeverLever
Open
To Close
LeverLever
Close
Inner Sunshade
Inner Sunshade
WARNING: Opening/Closing lever
The sunshade lever must be slid completely when opening the inner sunshade
because it can unexpectedly drops.
Do not use an inner sunshade in dark areas.
Open the inner sunshade when expecting change in temperature, because
the inner sunshade can be fogged suddenly.
●
●
WARNING!

15 16
—Removal— —Attaching—
Close the inner sunshade
completely.
①
Pull out the other side in the same
way.
③
One side will come off by pulling
forward while lifting the stopper
located in the mounting part.
②
(Fig.1)
イ ン ナ ー サ ン シェ ードInner Sunshade
(Fig.2)
Stopper
Close completely.
(Fig.3)
Stopper
CAUTION!
Always remove the inner sunshade or its parts according to the instructions.
Pulling them forcefully or removing them by the wrong procedures can cause
the damage.
LeverLever
①Raise the sunshade lever (the inner
sunshade will be fully closed).
②Insert the end of the inner
sunshade into the
mounting port on the
helmet all the way.
③Insert the other side in
the same way.
Check that the
sunshade lever is
upward.
Mounting Port
Mounting Port
CAUTION!
After mounting, move it 3-4 times to check
that it can be opened and closed correctly
without any odd sounds or erroneous
behavior.

17 18
Hold the chin cover and
lower it completely.
* Always close the chin
cover securely until it is
locked.
While pressing the lock lever (the red part) shown in the drawing, raise the chin
cover until it stops.
5Chin Cover
—How to Open the Chin Cover—
—How to Close the Chin Cover—
Chin Cover
Lock Lever (Red Part)
Push the
lock lever
forward.
Raise the
chin cover
until it stops.
Click!
Roughly opening or closing the chin cover may damage the helmet.
Be careful not to pinch your fingers or the like when opening or closing.
●
●
Do not open or close the chin cover while riding because it is very dangerous.
Always use the chin cover fully closed while riding.
The collar screw on the chin cover should be tightened regularly. Parts can fall
off, or you could have a serious accident if used while the collar screw is loose.
●
●
●
WARNING!
CAUTION!
Pull the chin cover forward while
releasing the lock lever to remove it.
—Removal—
①
②
③
Remove the shield. (Refer to the
relevant page for details on removal.)
Remove the shield ratchet and the
collar. (Refer to the relevant page for
details on removal.)
Place the helmet in a stable position
and remove the chin cover by pulling it
forward while releasing the lock lever
on the chin cover.
—Attaching—
①
②
③
When the mounting part of the chin
cover is inserted into the mounting
port in the helmet, it is locked.
Mount the left and right shield
ratchets, the collar and the shield as
they were mounted. (Refer to the
respective page for information on
mounting each part.)
Insert the locking part of the chin
cover into the insertion part on the
helmet.
Open and close the chin cover 3-4
times to check for any abnormalities
in its behavior.
Always check that the opening and closing behaviors are normal before
riding because it can lead to a serious accident.
The collar screw should be tightened regularly.
●
●
WARNING!
Insert the locking part of the chin cover into
the insertion part on the helmet.

19 20
—Length Adjustment—
<Proper Length>
Wear the helmet and secure the buckle.
The length of the chinstrap is appropriate if you can insert one finger between the
chinstrap and your throat. If the length is incorrect, adjust it again.
<Micro Ratchet Buckle>
(Fasten) (Remove)
Insert Remove
Pull Tabs
If the buckle is incorrectly tightened or if the length of the chinstrap is
incorrect, the helmet may come off if you fall off your bike, or it might be
over-tightened around your neck. The chinstrap is very important, so carefully
and accurately adjust the chinstrap.
WARNING!
<Side View>
Shortening Lengthening
Chinstrap edge Buckle
Chinstrap
6Chinstrap
—Removal—
Remove the chinstrap cover from the hook and loop fastener at the base of the
chinstrap.
<Chinstrap Cover>
—Attaching—
①
②
Check the front and back of the chinstrap cover (front: leather; back: cloth) and
pass the chinstrap through the inlet.* The chinstrap cover is the same part on
the left and right.
Firmly press the chinstrap cover onto the hook and loop fastener attached to
the chinstrap.
Mounted State Mounted State
Strap
Buckle
Hook and
loop
Fastener
(Inside)
Inlet
Outlet
Buckle
Buckle
Surface
Fastener
(Inside)
Surface
Fastener
(Inside)
Hook and
loop
Fastener
Hook and
loop
Fastener
Chinstrap
cover
Chinstrap
cover

<D-ring Buckle>
<Chinstrap Cover>
Be sure to fasten the chinstrap
securely. Otherwise, in case of
falling down or an accident while
riding, the helmet may drop off,
and may cause serious injuries.
WARNING!
Chinstrap
—Attaching—
① In the reverse order of
detaching (pay attention to
the direction of the chinstrap
cover), let the chinstrap go
through from the upper
portion of the chinstrap
cover.
②Finally, fasten the
hook-and-loop fastener.
-Detaching-
① Undo the hook-and-loop
fastener at the end of each
chinstrap.
② Pull the chinstrap cover from
the chinstrap to detach it.
Normal
condition
Normal
condition
Chinstrap
cover
hook-and-loop fastenerhook-and-loop fastener
hook-and-loop fastener
①Let the strap go through the D ring,
and pull the strap to the direction of
the arrow to fasten it.
② Fasten the snaps to prevent
looseness in the chinstrap.
D-ring Chinstrap
Snap
When washing the chinstrap covers, put them into a washing net or a
similar item to prevent fibres from being damaged by a washing machine.
If fastening the chinstrap cover in the reverse direction, the D ring will be
hidden, therefore, pay attention to its direction when attaching it.
●
●
CAUTION!
2221
—Removal—
(Fig.3)
7Cheek pad
(Fig.1)
Cheek pad
ChinstrapChinstrap
(Fig.2)
Front Side
Back Side
①Remove the three snaps on the
back side of the cheek pad.
②Pull out the core material on the
front side of the cheek pad
(Figure 2) and rotate it in the rear
direction to remove it.
SnapSnap
Rotate to the
rear direction
to remove the
core material
Firmly hold the base of the snap
and pull it slowly. Do not pull it
forcefully to avoid damage.
CAUTION!

4
Cheek pad
Insert Core
3
ArrowArrow
2
Cheek pad
23 24
Snap
—Attaching—
—Removal—
—Attaching—
Direction of the Cheek Pads
RightLeft
Core Material
Core Material
The part that touches the cheek
Front Front
Insert the rear side of
the core material into
the back of the head
portion in the helmet.
Cheek pad
(Fig.1) (Fig.2)
(Fig.1)
(Fig.1)
(Fig.3)
(Fig.2)
(Fig.2)
①Check the direction of the cheek
pads.
②Insert the leading end of the core
material into the rear-side insert. ①Remove the three snaps near the
forehead by pulling them forward.
②Remove the two snaps on the
back of the head portion and
then pull out the inner pad.
①Insert the core material of the
temple portion first.
③Install each of the two snaps on
the back of the head portion.
②Mount the three central snaps.
③・④ Insert the core material
sequentially along the rail.
⑤Fasten the snaps at 3 locations.
(This is the same for the other side.)
Insert the core material along the
rail in the order of ②and ③.
Rail
Chinstrap
Snap
(Fig.3) (Fig.4)
Riding is dangerous if the cheek pads are not mounted correctly.
CAUTION!
8Inner pad
2 Locations
2 Locations
Pull slowly to remove them.
Do not pull them forcefully to
avoid damage.
If the paddings are not placed
correctly, helmet can be
unstable while riding causing
dangerous situation.
●
●
CAUTION!

Hold a portion near the core material of
the entire wind shutter and pull it in the
direction of the arrows in the order ①to
④ in the figure on the right to remove the
hook.
25 26
Wind Shutter
Front (Leather)
Wind Shutter
Back (Cloth Fabric)
34
12
ウィンドシャッター(表・レザー側)Wind Shutter (Front: Leather)
1 2
3 4
Wind Shutter
Hold near the entire core material
and remove it slowly because if you
pull it forcefully, it can be damaged.
CAUTION!
Inner Pad
Cheek Pad
Chinstrap Covers set
InclusionCompatibility
Compatibility Inclusion
Inner pad x 1
Helmet size
OPTION
S
M
L
XL
OPTION
Pad thickness (default)
21mm
18mm
12mm
15mm
10mm
8mm
Shell size
M
L
M
L
Compatibility Inclusion
Cheek pad set
(R+L) x 1
Helmet size
OPTION
S
M
L
XL
OPTION
Pad thickness (default)
5 0mm
45mm
35mm
45mm
35mm
25mm
Shell size
Compatible
among S and M
Compatible
among L and XL
Compatible
among all sizes
Exchangeableamong
allsizes
Chinstrapcover(R/L)
×1set
9Interior Compatibility
10
Wind Shutter
Precautions for Cleaning the Interior
(Inner Pad, Cheek Pads and Chinstrap covers)
IMPORTANT
Hand washing is recommended for the interior. (Always put it in a washing net when using a
washing machine.)
Never use hot water, chemical detergents (acidic, alkaline, or the like), or organic solvents, or
the like, because this can cause deterioration in the quality of the cloth or other components.
Use commercially available household laundry detergents with regular water or warm water.
Wash separately from other garments or the like because some discoloration may occur
depending on the type of laundry detergent commercially available.
Do not use washing machines or dryers with a drying function of 50˚C or higher, because this
can cause a deterioration in the quality of the cloth or other parts.
After washing, drain the water thoroughly, and dry in the shade. Attach to the helmet body
after thoroughly drying.
The interior pad is a consumable item. Depending on the frequency of use, deterioration of the
cloth and interior foam will continue, so we recommend that it be replaced regularly.
●
●
●
●
●
●
—Removal—
—Attaching—
①
②
Check the front and back.
Using the △mark as a guide, securely insert the wind shutter hook.
CAUTION!
If this is not mounted correctly, there is the danger that it can fall off while you
are riding.

27 28
Breath Guard
Insert
Breath Guard
Breath Guard
Mounting Port
11
Breath Guard
Hold the breath guard securely and
pull it in the upward direction to
remove it.
—Removal—
Securely insert the three inserts into
the mounting port on the helmet at
the bottom of the breath guard.
—Attaching—
After inspected, there may be a case that your order of repairing cannot be
accepted if it is judged that the safety performance of the helmet cannot be assured
by repairing.
• Helmet body (shell)
• Shock absorbing liner (main body, chin area)
• Chinstraps including buckles
*Contact authorized Kabuto dealers for detailed information about repair and others.
Inquiries, Repairs and Requests
Request for Repair
Parts that Cannot be Repaired
Contact the authorized Kabuto dealer for request of repair.
Following parts cannot be repaired in terms of assuring the
performance of the helmet.

29 30
1
11
B
5
6
OPTION
(L)
(L)
(R)
(L)
(R)
(R)
2
3
4
234
D
10
C
A
8
10
7
9
9
(L)
(R)
Parts Table and Repair
Correspondence Table
Replacement Parts List
CM-2-P Shield(Standard:Clear)×1
CM-2 Shield Ratchet(L/R)× 1
CM-2 Collar(L/R )× 1
CM-2 Collar Screw(6×14)× 2
CM-2 Inner Sunshade(Standard:TA Smoke)×1
YS-17 Chin Cover × 1
※see page 25 (S, M, L, XL, OPTION)Inner pad × 1
※see page 25 (S, M, L, XL, OPTION)Cheek pad(L/R)× 1
Ear cap No.2 × 2
YS17 Chinstrap Cover (L/R)× 1
Breath Guard No.11 × 1
Wind Shutter No.6 ×1
No.
Parts Contains
CM-2-P Shield
CM-2 Shield Ratchet set
CM-2 Collar set
CM-2 Collar Screw set
CM-2 Inner Sunshade
YS17 Chin Cover
YS17 Inner Pad
YS17 Cheek Pad set
Ear Cap set No.2
YS17 Chinstrap Cover set
Breath Guard No.11
Wind Shutter No.6
1
2
3
4
5
6
7
8
9
10
11
12
Repair Compatible and Commercially Available Parts
Part name and Repair
Head Ventilation
Chin Ventilation
Rear Ventilation
Inner Sunshade・Open/close Lever
A
B
C
D
Color/ Side Remarks
OPTION CM-2-PPinlock®OriginalInsertLens
www.ogkkabuto.com
Each color / Right side
Each color/ Left side
Each color / Right side
Each color/ Left side
Each color
Each color
* Purchase parts at an authorized Kabuto dealer.
* If the part has a choice of colors, check the color at the time of purchase.
* In order to improve product performance, materials, specifications, prices, and other elements are subject to
change, without notice.
* Parts details can also be found on the Kabuto website.
CAUTION!
The following parts cannot be repaired because they retain the performance of the helmet.
•Helmet body (shell) •Shock absorbing liner (main body) •Chinstraps including buckles.
*Contact us for details.
These parts are repaired at cost to the user except damage attributable to a defect in
material and workmanship of Kabuto helmets.
Purchasable
Repair Only
Purchasable
Repair Only
Table of contents
Other Kabuto Motorcycle Accessories manuals

Kabuto
Kabuto WG-1 User manual

Kabuto
Kabuto REDIMOS-CV User manual

Kabuto
Kabuto Japan IBUKI User manual

Kabuto
Kabuto FIGO User manual

Kabuto
Kabuto Japan RT33 User manual

Kabuto
Kabuto avand2 User manual

Kabuto
Kabuto FLAIR User manual

Kabuto
Kabuto AERO-R2 Series User manual

Kabuto
Kabuto Japan FF-5V User manual

Kabuto
Kabuto AERO-R1 User manual