Kane 100-1 User manual

KANE 100-1
Gas Analyzer and Logger
for
Ambient Carbon Monoxide
and
Ambient Carbon Dioxide
Kane International Ltd
Kane House, Swallowfield
Welwyn Garden City
Hertfordshire, AL7 1JG
Tel: +44 (0) 1707 375550
Fax: +44 (0) 1707 393277
www.kane.co.uk
Stock No: 18259 December 2005
© Kane International Ltd

Page 2English 18259
The Kane 100-1 tests for ambient CO and ambient CO2concentrations.
The large display shows 2 readings at a time and all data can be printed via
an optional infrared printer. The printed data can be 'live' data or 'stored
data'.
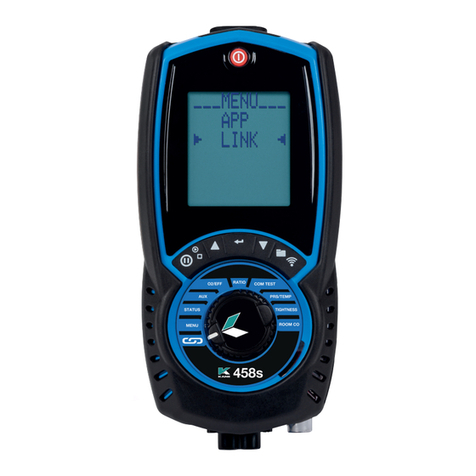
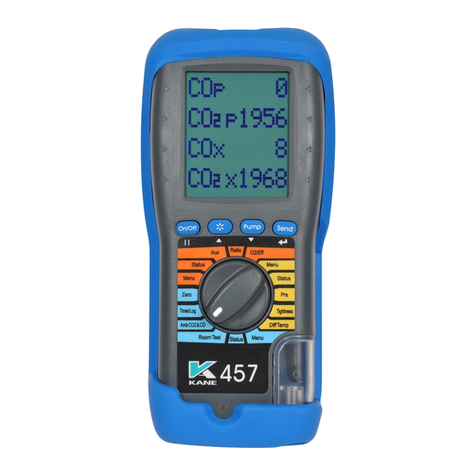
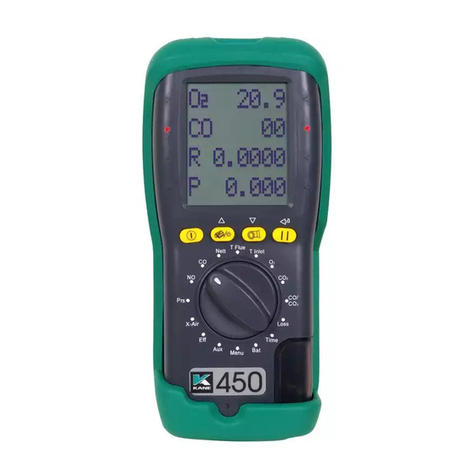
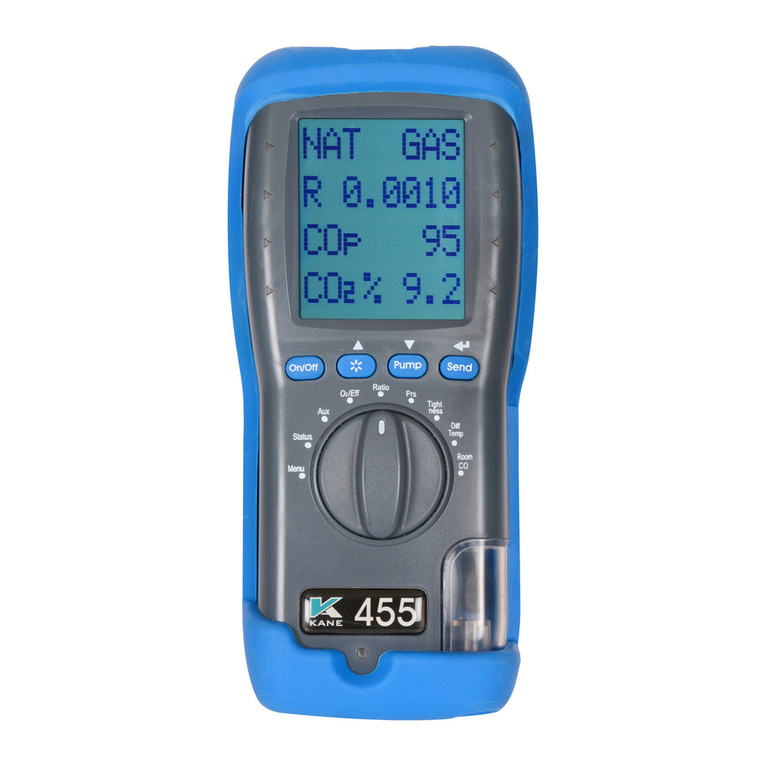
The KANE 100-1 is controlled using 4 buttons and a rotary dial.
The four buttons (from left to right)
switch the instrument on and off,
print actual or saved data, switch the backlight on and off,
switch the pump on and off, change the top line data display,
save data or temporarily hold or ‘freeze’ the current reading.
The buttons with UP, DOWN and ENTER arrows also change settings
such as date, time, when in menu mode.
The rotary dial changes the display’s 2nd line and selects access to the
menu to make changes to the date, time, fuel, etc.
The KANE 100-1 can store up to 255 sets of readings.
The Kane 100-1 is powered by internal re-chargeable NiMH batteries.
The internal battery will power the analyser for about 6Hr, from full
charge.
The KANE 100-1 has a protective rubber sleeve with a magnet for
“hands–free” operation.
NOTE: Fresh air is referred to in this manual. Sometimes it may be
convenient to use thin flexible tubing (min ID. 3mm.) to supply fresh
outside air, if a tube is used ensure that the inlet is at least 1 meter away
from any possible source of CO2such as an open window.
Fuel combustion of any sort may cause high and fluctuating levels of CO2
over surprisingly large areas. Exhaled breath can easily reach 10,000 to
20,000ppm.

Page 3English 18259
1. BEFORE USING THE ANALYSER FOR THE FIRST TIME:
The analyser may be supplied with either or both of the following chargers.
To fully charge the battery, you may use a Kane trickle charger, plugged into the base
of the unit for 12-24 hours. Alternatively the Kane fast charger which plugs into the
side will take about 1-2 hours, after which it will switch to low trickle charge. Do not
fast charge the unit unless the battery charge indicator reads less than 70% otherwise
over heating could cause an internal thermal cutout to operate. The unit will then not
operate on its internal battery until it has cooled.
Avoid leaving the unit on charge and switched off for more than 1 –2 days at a time
or the internal battery life could be reduced.
Set the correct time, date etc, after it is switched on and calibrated – See USING
THE ROTARY DIAL below. These are stored when the analyser is switched off.
2. BEFORE USING THE ANALYSER EVERY TIME:
Check the water trap is empty and the particle filter is not dirty:
- To empty the water trap, unplug its rubber stopper and re-plug once it is empty.
- To change the filter, remove protective rubber sleeve, pull out the water trap ,
remove the water trap’s particle filter from the spigot and replace. Reconnect
the water trap and rubber protective sleeve.
After switch on check that date and time are correct and battery power is sufficient.
Avoid exposing the instrument to sudden large temperature changes, and ensure that
the unit reads zero for CO and approx. 400 ppm CO2in fresh air before use. If
necessary re-zero (see: Menu Selection).
Avoid very close proximity to radio transmitting devices, otherwise readings may be
affected.
SAFETY WARNING
This analyser can be used to extract combustion gases that may be toxic in relatively
low concentrations. These gases are exhausted from the back of the instrument. This
analyser must only be used in well-ventilated locations by trained and competent
persons after due consideration of all the potential hazards.

Page 4English 18259
3. USING THE ANALYSER AND ITS FOUR BUTTONS:
Switching
ON the
analyser
Press the button to switch the unit ON in fresh air. This allows
the analyser’s sensors to be calibrated. This will set CO to zero and
CO2may be set to 400 ppm if required.
At switch on, the analyser beeps four times and displays the model
number. The bottom line counts down from typically 45 .
The Analyser will then indicate AIR ZERO NO?
Select NO? using the push button marked with an enter symbol, the
CO2setting will not be altered, CO is always set to zero at this stage.
Select YES only if you are in fresh air and wish to adjust the CO2
zero offset. Use the UP/DOWN buttons to set the required value (this
should be 400ppm in fresh air), allow a few seconds after each button
press for readings to settle, and then press ENTER to confirm.
After ENTER is pressed it will take about 4 seconds before the unit is
ready to respond to the controls.
The sensors are now ready to use. If the analyser will not calibrate,
one or more of the sensors may need to be replaced or recalibrated by
an authorized repair centre.
When countdown and zero is finished the display’s top line shows the
last selected function and the bottom line displays whatever the rotary
dial is turned to.
Switching
OFF the
analyser
Press the button to switch the analyser OFF. The display
counts down from 30 with the pump on to allow time for the sensors
to be cleaned or purged with fresh air. If the probe is connected,
make sure both analyser and probe are in fresh air.
Press HOLD / ENTER if you want to stop the count-down to off and
return to making measurements.

Page 5English 18259
Using UP /
DOWN /
ENTER
Buttons
Once the “on” countdown has been completed:
Press the DOWN button for more than 1 second after the short tone
or “beep” to change the display’s top line, if you hold this button
down there is an “auto repeat” on this function . The Rotary Dial
changes the display’s bottom line.
The top line display options are:
Time
Date
CO2
CO
TL ( -- or Logging interval in minutes if set)
BAT %
For example, the analyser will display CO2on the top line and CO on
the bottom line if you turn the rotary dial to CO and hold down the
DOWN button until CO2is displayed on the top line.
Use the UP / DOWN / ENTER keys to change settings (such as time
and date ) when the rotary dial is turned to MENU.
Enter key
to Hold
or
Store
readings
In normal operation (not MENU) the ENTER key is used to either
HOLD the readings for printing (a short button press of about 1
second release the button on the first beep, the display flashes when
held) or to save readings if memory locations are available (a long
button press … wait until after the second beep).
The display will flash LOG xxx (or FULL) to give the store location
of the saved data or will continue to flash if held until reset by a short
button press.
Note: the HOLD function is inhibited whilst AUTOSTORE is
operating.
Switching
on and off
the
backlight.
Press PRINT / BACKLIGHT for about 2 sec. and release to switch
backlight on or off.
Note: use of the backlight increases the drain on the battery.

Page 6English 18259
Printing
Data
Press print key quickly for about 1 sec. to start the analyser printing.
The analyser displays "PRINTING" until this is completed.
Make sure the printer is switched on, ready to accept data and its
infrared receiver is in line with the emitter on top of the analyser.
Switching
PUMP on /
off
The analyser normally operates with the pump on. Press the PUMP
key quickly to switch the pump off and on.
When the pump is switched off, the analyser displays "PUMP OFF"
approx every 20 seconds.
“Freezing”
the display
Press HOLD / ENTER to freeze all readings. The display flashes and
can be printed by pressing the PRINT key. Press HOLD / ENTER
again for “live” measurements.
Note: the HOLD function is inhibited whilst AUTOSTORE is
operating

Page 7English 18259
4. USING THE ROTARY DIAL (starting from Menu):
Rotating the dial selects the display’s 2nd line, unless MENU is selected.
Rotor positions are:
•Menu the MENU options are listed below
•Count displays time to next Autostore in minutes if set.
•Gas 1 displays CO reading in ppm
•Gas 2 displays CO2reading in ppm
•Date the date format is user defined
•Time military time format
4.1 MENU SELECTION (auto store must be off to access menu).
MENU
Rotate the dial to MENU and use the UP, DOWN and ENTER buttons
as described fully below to select and change the following functions:
1. Time – Uses “Military” time as standard:
7am = 07:00, 7pm = 19:00
2. Date with date format selection
3. Pump speed control: full speed or 'quiet' mode which reduces
power consumption.
4. The display’s contrast
5. Language (this product is configured for English only)
6. ZERO – AIR - to set apply fresh air then use up or down to set for
about 400ppm
ZERO -TRUE – to set use a CO2zero calibration module (or
‘stripper’)
Press enter to start. Zero will run for about 45 seconds.
7. Alarm setting- user settable alarms to audibly warn of high
readings. Pre-sets are 35 ppm for CO and 1000ppm for CO2
8. Service – Password protected, for authorized service personnel
only.
9. Memory functions

Page 8English 18259
Using up down and enter keys.
When you have selected the function to change, press ENTER to select.
Repeat this to scroll through the menu and select (using the ENTER
key) and change (using the UP / DOWN keys) the function.
The final, logical ENTER returns you to the main menu display.
To exit the Menu function at any time, rotate the dial to another position
- Unless the final logical ENTER is pressed, no changes are made.
Note: in AIR ZERO this mode will continue until terminated by the
pressing of ENTER..
You can choose from the menu, fresh air zeroing which allows CO2to
be set to a user defined value (normally 400 ppm in fresh air) and CO
to 0 ppm, Allow a few seconds after each button press for readings to
settle, and then press ENTER to confirm.
Alternatively you can make a menu selection for, and use a TRUE zero
calibration module (if available), which is used to set CO2to 0 ppm
(and also CO to 0 ppm).
This mode will take about 40 seconds to operate.

Page 9English 18259
4.2 MEMORY Functions
With the rotor pointing to MENU use the UP/DOWN keys to select MEMORY
and press ENTER
The UP/DOWN keys can then be use to select :
VIEW
AUTO STO (Auto store)
PRINT (Summary print of stored readings)
CLEAR
Press ENTER to choose.
VIEW
The top line displays VIEW
The bottom line displays LOG 0000
Use UP/DOWN to select next view number ( within the range of data
stored up to 255 maximum )
In view mode only stored readings “wrap round” so that using the up
key you pass from maximum reading back to the first reading or using
the down key directly from the first reading to maximum.
Press ENTER to select
The top line displays for example : V 01
The bottom line displays the stored information as selected on the rotary
dial.
Use UP/DOWN to scroll to later or earlier data.
Hold down the print button to print one set of stored data
( example shown as Manually logged print ).
Press ENTER to exit back to start.

Page 10 English 18259
AUTOSTORE
Hold will be inhibited during auto store. If you push the Hold button during auto
store AUTO STO will be indicated on the top line. It is recommended that you select
ZERO via the menu and perform a zero before starting a series of Auto stored
readings.
Memory is always cleared before a new autostore sequence is initiated. Be sure to
print out your previous results before starting a new sequence.
When store intervals greater than one minute are set and the pump is switched off it
will power up automatically one minute before a reading is due to be stored. The
pump will run whatever speed (high or low ) was previously set. Where the store
interval is set to 1 minute the pump momentarily switches off every minute.
You can maximize the number of stored readings by switching the pump to low
speed (QUIET) and after initiating store switch the pump off. Typically if the
batteries are fully charged you will be able to store 255 readings at up to 3 minutes
interval.
To store for longer periods above 12 hours you should connect the Kane trickle
charger.
The top line displays AUTO STO
Use the UP/DOWN keys to select from OFF or ON
Press ENTER to select
The display will show:
AUTO STO
TIME 01
Use the UP /DOWN keys to set any store interval
between 1 and 10 minutes.
The display top line will then revert to MENU
Select any required position on the rotary dial.
Every time readings are stored the top line will flash LOG and the STORE number
until the memory is full or until the autostore is switched off. There will also be a
beep for every store to a maximum of 255 sets of readings.
You can only exit AUTOSTORE by returning to MENU mode and setting
AUTOSTO to OFF.

Page 11 English 18259
SUMMARY PRINT
The bottom line displays PRINT
Press ENTER to select and EXIT
Maximum, minimum and average readings are shown.
CLEAR
The top line will display CLEAR
The bottom line will display NO
Use the UP/DOWN keys to toggle between NO and YES
Press ENTER to select and exit .
4.3 CHANGING THE PUMP SPEED
The pump speed is toggled using the UP or Down key.
The choices are Full Speed or Quiet.
Press ENTER to select and exit
4.4 MANUAL ZEROING
From the MENU function you can choose to re-zero at any time except when auto
storing.
The zeroing options are fresh air zero or true zero
Use the UP or Down button to chose and ENTER to select. Once zeroing has
commenced it will continue until completed whatever you do with the rotary dial.
Fresh air zero should be completed by pressing enter. The normal value of 400 for
fresh air may be adjusted using the up or down keys. (The value first displayed when
entering this mode is the analysers current measured value).
4.5 ALARMS
Select ALARMS from the menu and use the UP or Down buttons and Enter to alter
the alarm points if different alarm positions are required to the preset alarms. The
instrument will store new alarm settings. The last CO2alarm point set will be recalled
at switch on. As a safety measure the CO alarm will be set to 35ppm at switch on
unless a lower level is set.

Page 12 English 18259
5. MEASURING GASES
After the countdown is finished and the analyser is correctly set up sampling can take
place either by using a sampling tube/probe to reach into ducts or flues or simply by
taking a direct ambient air measurement without a probe or hose connected.
CAUTION: Just by breathing you are emitting a relatively high level of CO2in the
local area and this can affect the measurements. We do recommend that a probe or
flexible hose is used so that the point where the ambient air is being sampled is at
least 1 metre away from where anyone is breathing.
Make sure you do not exceed the operating specifications. In particular:
•Do not exceed the probe’s maximum temperature (any plastic parts must not
contact hot flues).
•Do not exceed the temperature operating range
•Do not put the analyser on a hot surface
•Do not exceed the water trap’s levels
•Do not let the particle filter become dirty and blocked
•Ensure that the magnetic boot is free from metallic particles and any surfaces
used when attaching the analyser are appropriate.
View data and rotate the dial to see changes as you make adjustments.
Press HOLD first to hold or ‘freeze’ the readings before printing. Press PRINT to
print the results.
Before starting a test sequence it is recommended to check that the value for CO
reads zero and CO2reads about 400ppm in fresh air, if required you can “re-zero” the
sensors by using the ZERO functions in MENU.

Page 13 English 18259
6. EXAMPLE PRINTOUT IN AMBIENT AIR
The standard printouts are:
Instant print
press print button.
KANE 100-1
CO & CO2 MONITOR
DATE: 01-01-06
TIME: 14:27:08
………………………….……..
CO2
CO
ppm
ppm
950
12
Manually logged print
via VIEW stored data.
KANE 100-1
CO & CO2 MONITOR
DATE: 01-01-06
TIME: 16:27:08
LOG NUMBER 123
………………………….……..
CO2
CO
ppm
ppm
950
12

Page 14 English 18259
Summary Print of autolog
via MEMORY.
KANE 100-1
CO & CO2 MONITOR
AUTOLOG REPORT
DATE 01-01-06
TIME 18:27:08
Start Time 06-6-04
14:00:00
Stop Time 06-6-04
17:59:00
No of readings 255
………………………….……..
Max CO2
Av CO2
Max CO
Av CO
ppm
ppm
ppm
ppm
950
06-06-04
14:10:00
650
12
06-06-04
15:30:00
06

Page 15 English 18259
7. WHEN YOU FINISH USING THE ANALYSER
Always try to switch the analyser off in fresh air .
The analyser counts down from 30 before switch off with the pump running to self
clean its sensors. If the measured CO level is more than 30 ppm do not switch off the
analyser. It will need to sample fresh air until the CO level falls below 30 ppm. This
extends the sensor's life and helps to eliminate any unwanted offset on next start-up.
8. PROBLEM SOLVING
If any problems are not solved with these solutions, contact us or an authorized repair
centre.
Fault symptom Causes / Solutions
•Batteries not holding charge. •Batteries exhausted.
•AC charger not giving correct output.
•Fuse blown in charger plug.
•Analyser does not respond to
gas
•Particle filter blocked.
•Probe or tubing blocked.
•Pump not working or damaged with
contaminants.
•Water Trap Bung not fitting tightly.
•Sensor fault
TROUBLE SHOOTING
I have set the analyser to AUTOLOG but it has stopped logging:
•Memory might be full
•Menu
•Memory
•View ….. displayed number is last log number. 255 is full
•PUMP is OFF
•Analyser is PRINTING

Page 16 English 18259
Display is totally clear or totally dark
•Set the rotary dial to MENU switch on and leave unit for five minutes.
•Press UP three times (listen for three beeps) then press ENTER
•Press and hold down UP until the display becomes visible again (this can take
up to 20 seconds). Use UP and DOWN to adjust the display's contrast.
•Press ENTER to exit.
The analyser continually beeps and the display has frozen.
•You have exited a menu function without completing the required sequence.
•Rotate the dial back to MENU
•Press ENTER until MENU appears on the top line
- (NB You may be changing settings when you do this)
•Rotate the dial to the required display position.
The unit will not turn off.
•Do not hold down the on/off button.
•Try connecting the charger.
9. ANNUAL RECALIBRATION AND SERVICE
Although sensor life is typically more than two years the analyser should be re-
calibrated and serviced annually to stop any long-term sensor or electronics drift or
accidental damage.
Local regulations may require more frequent re-calibration.
SERVICE MODE
This mode can be selected from MENU and gives password protected access to
certain functions WARNING: entering inappropriate codes may corrupt the
calibration of this instrument.
The User level pass code to view software issue is 1111

Page 17 English 18259
10. SPECIFICATION
Parameter
Resolution
Accuracy*1
Specified
Range
Over
Range
Gas Measurement
Carbon Monoxide
Carbon Dioxide
1 ppm
1 ppm
+/-5 ppm <100ppm
+/-5% > 100ppm
+/-10% >1000ppm
+/-20ppm <400ppm
+/-5% < 4000ppm
+/-10% >4000ppm
1000 ppm
200 to 4000 ppm
2000ppm
9999ppm
Dimensions
Weight
Handset
1kg / 2.2lb
200mm / 7.9” x 45mm / 1.8” x 90mm / 3.5”
Ambient Operating Range
+0°C to +45°C / 32-104°F
10% to 90% RH non- condensing
Battery Life
6 hours from full charge and with pump on
Battery Charger (standard
type trickle charger)
Input: 100 - 240 V ac 50 - 60 Hz
Output: 12V dc. @ 800 mA. Max.
*1 Using dry gases at STP with the instrument not subjected to sudden changes of temperature,
position or severe vibration

Page 18 English 18259
11. ELECTROMAGNETIC COMPATIBILITY
European Council Directive 89/336/EEC requires electronic equipment not to
generate electromagnetic disturbances exceeding defined levels and have adequate
immunity levels for normal operation. Specific standards applicable to this analyser
are stated below.
As there are electrical products in use pre-dating this Directive, and radio transmitting
devices which may not be covered by this Directive, they may emit excess
electromagnetic radiation levels and, occasionally, it may be appropriate to check the
analyser before use by:
Use the normal start up sequence in the location where the analyser will be
used.
Switch on all localized electrical equipment capable of causing interference.
Check all readings are as expected. A level of disturbance is acceptable.
If not acceptable, adjust the position to minimize interference or switch off, if
possible, the offending equipment during your test.
At the time of writing this manual (December 2004) we are not aware of any field
based situation where such interference has occurred and this advice is only given to
satisfy the requirements of the Directive.
This product has been tested for
compliance with the following generic
standards:
EN 61000-6-3
EN 61000-6-1
and is certified to be compliant
Specification EC/EMC/KI/KANE 100
details the specific test configuration,
performance and conditions of use.

Page 19 English 18259
APPENDIX
Carbon Monoxide:
Current World Health Organisation recommended maximum exposure
levels to Carbon Monoxide:
15 minutes 89ppm = 100mg/m3
30 minutes 53ppm = 60mg/m3
60 minutes 27ppm = 30mg/m3
8 hours 9ppm = 10mg/m3
Carbon Dioxide:
HSE Regulation EH40 sets the maximum occupational exposure limit at
5000ppm.
BSRIA recommend a maximum of 800ppm over an eight hour time
weighted average.
ASHRAE (62/99) recommends a maximum level of 1000ppm.
Data on ambient CO2:
NOAA observatory
(US. National Oceanic and Atmospheric Administration)
http://www.cmdl.noaa.gov/ccgg/insitu.html
http://www.cmdl.noaa.gov/ccgg/iadv/
Table of contents
Other Kane Measuring Instrument manuals