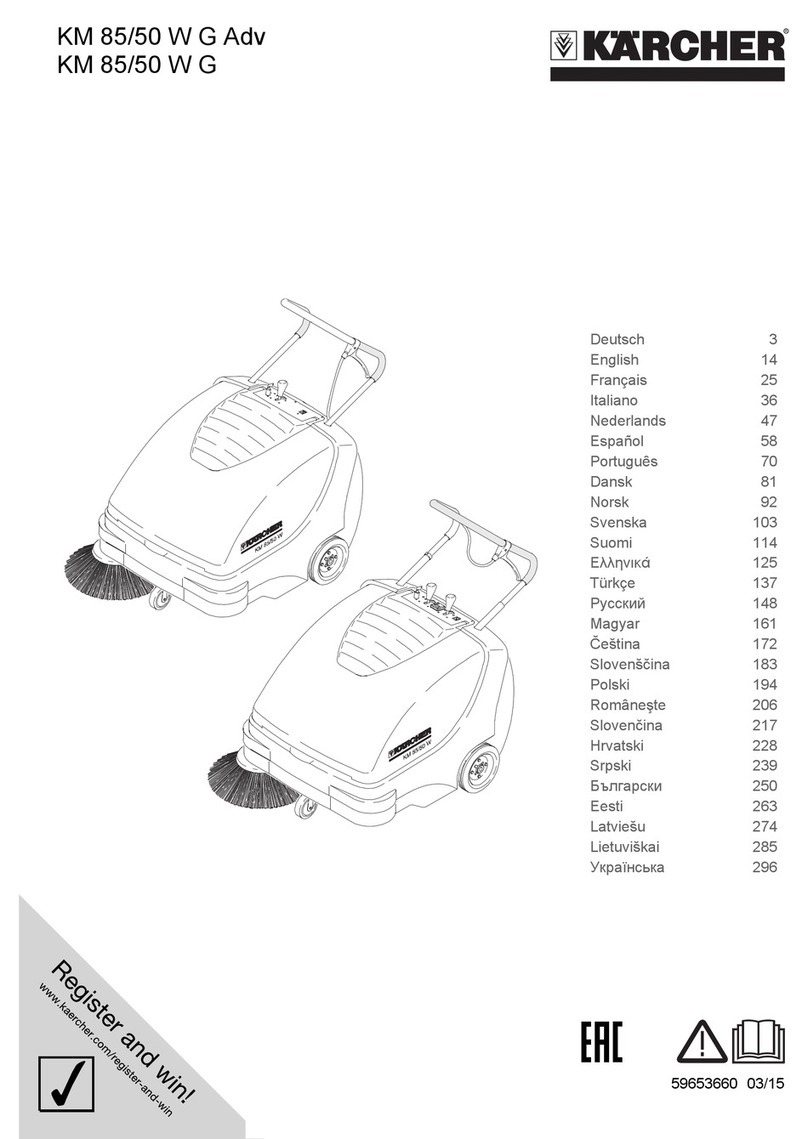
Kärcher KM 100/40 W User manual

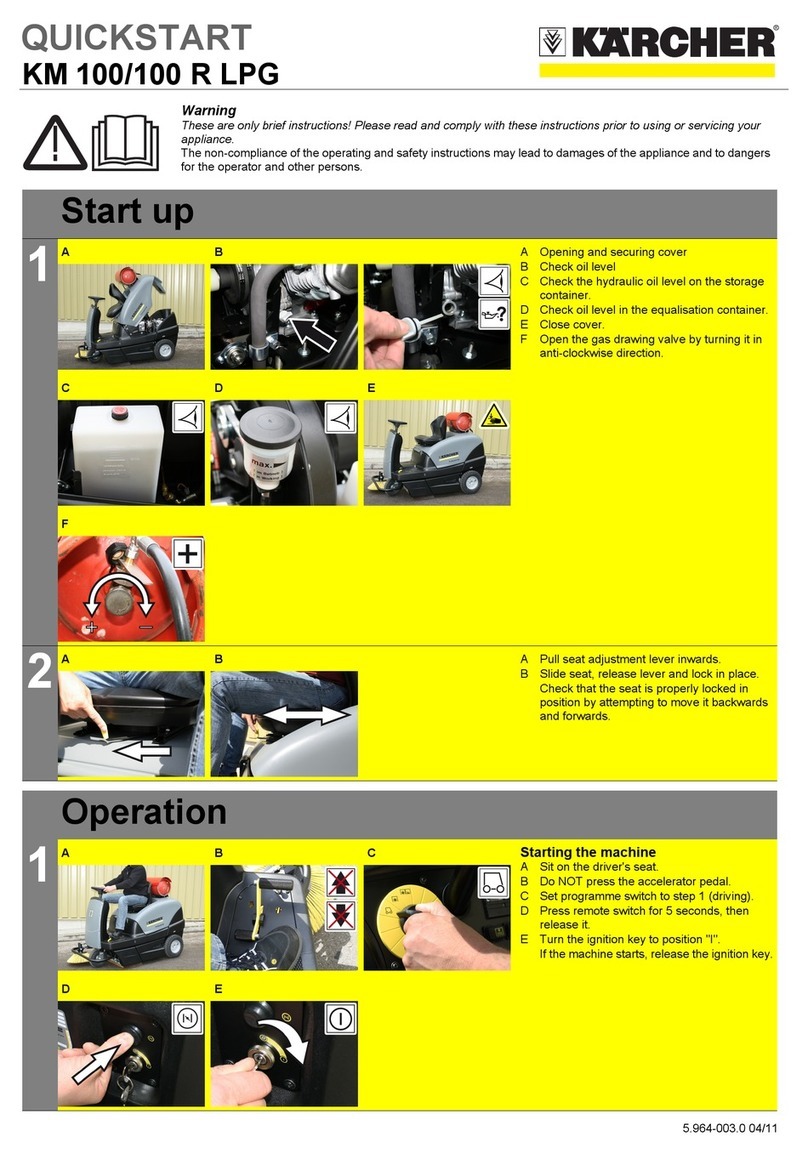
5.960 - 535 A2003105 (08/02)
KM 100/40 W
750 XL
KSM
www.karcher.com
1.049 - 984

KM 100/40 W
Operating Instructions 3
Spare Parts List 40
Notice d'instructions 15
Liste des pièces de rechange 40
Instrucciones de servicio 28
Lista de piezas de requesto 40

English KM 100/40 W 3
CONTENTS
For your safety! 4
General information 4
Tip hazard when slope
too steep! 4
Opening/closing the
unit‘s cover 4
Power drive 4
To protect our environment 4
Caution! E austed batteries
can cause pollution! 4
Use only for intended
purpose 5
Functional description of
the sweepin machine 5
Device elements 5
Before first-time operation 5
Unloading instructions 5
Assembly 5
Each time before operation 5
General information 5
Inspection and
maintenance work 5
Commissionin 6
Sweeping operation 6
Start-up the machine 6
Run the machine 6
Shut-down the machine 6
Filter clean-down 6
Empty the sweepings
container 6
Application instructions 7
Safety instructions for
sweeping 7
Sweep dry floor 7
Sweep moist or wet floor 7
Run over obstructions 7
Sweeping corners 7
Sweeping under objects 7
Sweeping around barriers 8
Moving the machine in
tight passages 8
Shut-down 8
Transport 8
Transportation instructions 8
Cleanin and care 8
Interior cleaning 8
E terior cleaning 8
Maintenance intervals 8
Elapsed-time meter 8
Maintenance by the
customer 8
Maintenance by the
customer service 9
Maintenance tasks 9
Safety instructions 9
Installing the pushing handle 9
Positioning the sweeping
belt assembly 9
Opening/closing the
unit‘s cover 9
Safety instructions for
the battery 10
Mounting the battery 10
Charge the battery 10
Fuses/machine relays 10
Setting the drive system’s
Bowden cable 10
Check the sweep roller 11
Replace the sweep roller 11
Check and adjust the
sweeping drum's sweeping
area 11
Replace sweeping strap 12
Setting raising of the
sweeping belt 12
Setting raising of the
coarse-dirt flap 12
Replace the sealing strips 13
Replace the dust filter 13
Accessories 13
Fault tracin instructions 14
Technical data 14

English KM 100/40 W 4
FOR YOUR SAFETY!
General instructions
It is mandatory to read and
observe this prior to usin the
appliance!
♦
Notify your sales outlet if during
unpacking you detect damage that
has occurred in transit.
♦
Read the operating instructions of
your appliance prior to putting it into
operation, especially the safety
information.
♦
The danger and caution signs
attached to the appliance give
important tips on its safe operation.
♦
In addition to the instructions in the
operating instructions, general
safety- and accident
prevention-regulations from
lawgivers must be followed.
Use
♦
Prior to utilization the appliance and
its working facilities must be
checked regarding their proper
condition and that they operate
safely. It must not be used if its
condition is not faultless.
♦
No modifications permitted on the
machine.
♦
Never absorb e plosive liquids,
inflammable gases or undiluted
acids and solvents! This includes
petrol, paint thinner or fuel oil,
which can form e plosive fumes
due to the swirling suction air, in
addition acetone, undiluted acids
and solvents, since they corrode
the materials used for the
appliance.
♦
Do not sweep up/absorb burning or
smouldering objects.
♦
Only if e pressely marked is this
appliance suitable for sucking up
health-hazardous dusts. Comply
with notices concerning safety
regulations given in the operating
instructions.
♦
Suitable only for the surfaces listed
in the operating instructions.
♦
The appliance may be used on only
the areas cleared for its use by the
factory owner or a person
authorized by him.
♦
Keep clear of the danger area. Its
operation in e plosion hazardous
locations is prohibited.
♦
The following applies generally:
Keep combustible materials away
from the machine (danger of
e plosions-/fire).
Operation
♦
The rules, regulations and
stipulations applying to motor
vehicles must always be observed.
♦
The operator must use the unit in
accordance with its intended
purpose. She must adapt her mode
of operation to the local conditions
and when working with the
appliance keep a look out for third
parties, especially children.
♦
The appliance may only be used by
persons instructed in its handling or
who have proved their capability of
operating it and who are e pressely
authorized to use it.
♦
The unit must not be operated by
children and youths.
♦
To prevent unauthorized utilization
of appliances provided with an
ignition key the ignition key must be
removed.
♦
The appliance must never be left
unattended as long as the motor is
running. The operator may not
leave the appliance until the motor
is turned off, the appliance is
safeguarded against unintentional
motion, if necessary the parking
brake actuated and the ignition key
removed.
♦
On slopes the angle of inclination to
the side and in the direction of
motion must not e ceed the value
given in the operating instructions.
Transport
♦
The motor must be turned off when
the appliance is transported.
♦
To lock the parking brake.
♦
To secure the machine with tension
belts, ropes or chains.
♦
To secure the machine at the
wheels with wedges.
Maintenance
♦
Repairs may only be carried out by
approved customer service centres
or by technical personnel trained in
this field which are familiar with all
relevant safety regulations.
♦
Industrially used appliances in
changing locations are subject to
the safety inspection according to
VDE 0701.
♦
Prior to beginning work on the
electrical equipment of battery-
driven units the battery plug
connection must be unplugged or
the battery disconnected and the
battery must be disconnected in the
case of combustion engine driven
units.
♦
The unit must be switched off and,
if necessary, the ignition key
removed prior to cleaning it,
performing maintenance work on it,
replacing parts or resetting it to a
different operation.
♦
Unless e pressly permitted the unit
may not be cleaned with hose or
high-pressure water jets. (Danger
of short circuits or other
impairments).
Accessories and spare parts
♦
Only accessories and spare parts
cleared by the manufacturer may
be used. Genuine accessories and
spare parts guarantee that the
appliance can be operated safely
and trouble-free.
Battery driven appliances
♦
Warranty is valid only when you
use the batteries and charging units
recommended by Kärcher.
♦
It is mandatory to comply with the
battery manufacturer's operating
instructions. Heed the legislative
recommendations on handling of
batteries.
♦
Never leave a battery in a run down
condition but recharge it as soon as
possible.
♦
Keep the batteries always clean
and dry to prevent leaking currents.
Protect from contamination, e.g.. by
metallic powder.
♦
No tools and similar objects. to be
placed on the battery. Hazard of
short circuits and e plosion.
♦
Do not under any circumstances
work with an open flame, create
sparks or smoke near a battery or
in a battery recharging room.
E plosion hazard.
♦
Do not touch hot parts, e.g. drive
motor (danger of burns).
♦
Take care when handling
accumulator acid. Heed the
relevant safety regulations!
♦
Used batteries are to be disposed
of in an environmentally friendly
way, according to
EC-guideline 91/157 EWG.
Tip hazard if slope too steep!
♦
The machine could topple over
when driving and turning on slopes.
♦
In direction of travel only negotiate
gradients up to 15 %
♦
At right angles to direction of travel
only negotiate gradients up to
15 %.
Open/close the unit‘s cover
On opening cover, make sure cover
latch engages.
The lock of the unit’s cover prevents it
from slamming shut again.
Lift cover latch before closing cover.
Power drive
The engine takes appro . 3...4 s to
run down after being shut off.
Never enter operating area during
this period!
FOR PROTECTION OF OUR
ENVIRONMENT
Caution, exhausted batteries can
cause pollution!
♦
Do not dispose of e hausted
batteries as ordinary household
garbage.
♦
All plastic materials are designated
for sorted recycling.
♦
Ensure environmentally compatible
disposal.
English KM 100/40 W 5
UTILISATION FOR THE INTENDED
PURPOSE ONLY
♦
This sweeper is intended for
sweeping inside- and outside
surfaces.
♦
It corresponds to the L utilisation
classification for non-health
hazardous dusts.
♦
It is not intended for use on public
traffic routes
FUNCTIONAL DESCRIPTION OF
SWEEPER
The KM 100/40 W work using the
throw-over principle.
•
The sweeping strap (1) cleans
corners and edges of the sweeping
surface and transports the dirt into
the path of the main brush.
•
The rotating main brush (2)
transports the dirt directly into the
debris container (3).
•
The dust swirled up in the container
is separated by way of the dust
filter (4) and the filtered, clean air
removed by the suction turbine (5).
DEVICE ELEMENTS
1. Push handle
2. Lever for forward travel
3. Charging control indicating
instrument for batteries
4. Battery charger plug connection
5. Unit cover
6. Sweeping strap
7. Lever for lowering and raising the
sweeping strap
8. Drive wheels
9. Filter shaker for the dust filter
10. Debris container with transport
rollers and push handle
11. Latch for debris container
1. Main switch
2. Lever for lowering and raising the
coarse-dirt flap
3. Coarse-dirt flap
4. Swivel caster with parking brake
5. Cover latch
BEFORE OPERATION FOR THE
FIRST TIME
Unloadin instructions
The machine was secured on a pallet
with stretch belts or ropes for safe
transport. Proceed as follows when
unloading:
Cut the plastic packing tape and
remove the film
Knock aside the wheel securing
blocks and lift the machine off the
pallet by hand
Installation
Fitting thrust clip
Positioning the sweeping belt
Install the batteries
Charge the batteries
See maintenance tasks chapter for
description
EACH TIME BEFORE OPERATION
General instructions
Park the sweep suction machine on
a level surface
Shut-off the engine
Set parking brakes on the front of
the swivel caster
Inspection and maintenance work
♦
Check the battery charge state
Master switch setting "1"
Battery indicating instrument with
deep-discharge protection
•
If red diode (1) lights, battery is flat
•
If yellow diode (2) lights, battery
charge is still 20%
•
If green diode (3) lights, battery
charge is more than 20%
Note:
The units turns off automatically in
case of deep discharging.
Recharge the battery when the
yellow or red diode is lit.
Check sweeping strap
Check the sweep roller
Clean filter
Empty the swept material container
See maintenance tasks chapter for
description

English KM 100/40 W 6
COMMISSIONING
Note:
Initial operation permissible only if the
unit‘s cover is closed!
Sweepin operation
Lower sweeping strap.
Start-up the machine
Release parking brake
Switch-on the engine
•
Master switch setting "1"
Note:
Main brush and sweeping strap
revolve
Run the machine
Drive forwards
Pull lever
Idling
When the lever is released the unit
comes to a stop.
Machine shut-down
Shut-off the engine
•
Master switch setting "0"
Raise sweeping strap
Lock the hand brake
Turn the key beyond its "0" position
and withdraw it
Clean-down the filter
Move handle of the filter de-duster
back and forth several times
Empty the swept material
container
De-dust the filter first before
opening emptying the debris
container.
Open th catch.
Unhook the catch.

English KM 100/40 W 7
Pull out debris container.
Empty the swept material
container.
Push-in the swept material
container.
Hook-in the catch on the swept
material container.
Close the catch.
INSTRUCTIONS FOR USE
Safety precautions when sweepin
Never sweep up packing straps,
wires or the like as this could damage
the sweeping mechanism.
When the coarse-dirt flap is open, the
main brush can hurl stones or stone
chips forwards.
Be careful that no persons, animals,
or objects are endangered.
Raise coarse-dirt flap
Lifted coarse-dirt flap
Note:
The coarse dirt flap must be raised
briefly for sweeping larger objects of
up to 70 mm in height, such as drink
cans.
Let down the coarse-dirt flap
Note:
An optimal cleaning effect can be
achieved only when the coarse-dirt
flap is completely lowered
Sweepin a dry surface
For optimum cleaning effect, match
the driving speed to suit the actual
conditions.
Regularly clean-down the filter and
empty the swept material container
during operation.
Sweepin a moist or wet surface
Open the latch of the debris
container, leave the latch hooked in
•
Debris container opens
appro . 8 cm.
Note:
Filter is protected from moisture.
Drivin over obstructions
Fixed obstacles of up to 30 mm in
hei ht
Raise coarse-dirt flap
Slowly and carefully drive over
them in the forward direction
Fixed obstacles over 30 mm in
hei ht
Lift unit or guide it over a ramp.
Sweepin corners
Hold the contact to the wall with the
sweeping strap.
Sweep slowly up to the corner.
Swivel the machine to the left.
Hold the contact to the wall with the
sweeping strap.
Sweepin under objects

English KM 100/40 W 8
Sweepin around barriers
Travel slowly toward the barrier.
•
Sweeping strap yields toward the
back.
Movin the machine in ti ht
passa es
Pull slowly backwards towards
obstacle.
•
Sweeping strap yields toward the
front.
DISCONTINUATION OF USAGE
Please observe the following points
when the machine will not be used for
a lengthy period.
Park the sweep suction machine on
a level surface
Remove the master switch key
Lock the hand brake
Secure the sweeper-vacuum
cleaner against inadvertent rolling
Raise sweeping strap
Clean the sweep suction machine
internally and e ternally
Disconnect the batteries
Charge batteries at intervals of
appro . two months
TRANSPORTATION
Instructions for transportation
♦
The machine must be secured
against displacement during
transportation
Lock the hand brake
Secure the machine with stretch
belts or ropes
Secure the machine with wedges
on the wheels
Fastening areas
1. over the push handle
2. beneath the unit‘s cover
Note:
Observe markings for fastening areas
on base frame!
(chain symbols)
CLEANING AND CARE
Stand sweeper on a flat surface
Remove the master switch key
Lock the hand brake
Internal cleanin
Wear dust mask!
Wear safety o les!
Blow-out with compressed air
Clean with a rag
External cleanin
Clean with a moist rag.
Note:
Do not use aggresive cleaning
agents!
MAINTENANCE INTERVALS
Elapsed-time meter
Elapsed-time meter indicates
maintenance interval times.
Maintenance by the customer
Daily maintenance
Check main brush and side brush
for wear and wrapped up straps
Inspect the tight fit of the bristle
clips and bristling on the sweeping
strap
Check voltage of the sweeping
strap
Check function of all controls and
indicator lamps
Maintenance every 50 operatin
hours
Check voltage, wear, and function
of the drive belt
Check freedom of movement of
Bowden cables and moving parts
Check setting and wear of sealing
strips in sweeping area
Check sweeping pattern of the
main brush
Check voltage of the sweeping
strap
Check sweeping pattern of the
sweeping strap
Clean flat pleated filter
Measure battery voltage
Note:
All service and maintenance work, for
maintenance undertaken by the
customer, must be carried out by
qualified technical personnel.
A KÄRCHER specialist dealer can be
consulted at any time if required.

English KM 100/40 W 9
Maintenance by the customer
service or anisation
Maintenance after 20 operatin
hours
♦
First inspection
Maintenance every 100 operatin
hours
Maintenance every 300 operatin
hours
Maintenance every 500 hours
Note:
To ensure the guarantee, all service
and maintenance work must be
carried out by authorised KÄRCHER
customer service during the
guarantee period..
MAINTENANCE TASKS
Safety instructions
Preparations
Park the sweep suction machine on
a level surface
Pull-off the key
Lock the hand brake
Installin the pushin handle
Loosen star grip nuts and push
screws outwards
Set the push handle upright
Tighten star grip nuts
Note:
Ensure that the square bolt barrel
engages.
Positionin the sweepin belt
assembly
Lock the hand brake
Tilting and supporting sweeper.
Lower sweeping strap
1. Split pin
2. Locating plate
Insert the positioning plate into the
side arm from above and feed it
through the recesses of the stacked
sheet metal parts.
Fit split pin
Open/close the unit‘s cover
Open unit cover
Insert the master switch key and
turn it 180°
Close unit cover
Raise the lock of the unit cover.
Close unit cover.
Lock the unit‘s cover with the
master switch key.
Note:
The unit cover is lockable and can be
opened and locked only with the
master switch key.

English KM 100/40 W 10
Safety instructions for the battery
♦
Observe the operating instructions
♦
Work on batteries is permitted only
after instruction by trained
personnel
♦
Observe the safety instructions of
the battery manufacturer.
♦
Only when you use batteries and
battery chargers prescribed by
Kärcher
is the guarantee valid.
♦
Wear safety goggles and protective
clothing
♦
Observe the instructions for the
prevention of accidents as well as
DIN VDE 0510, VDE 0105 T.1
Risk of fire and explosion!
♦
Smoking prohibited
♦
No naked flames, glowing embers
or sparks in the vicinity of batteries
Corrosive burn hazard with wet
batteries!
♦
Rinse out or rinse off splashes of
acid in the eye or on the skin with
copious quantities of clean water
♦
Then consult a doctor immediately
♦
Wash contaminated clothing with
water
Risk of explosion and fire!
♦
Do not place any objects or tools
on the battery because voltage is
always present between the battery
poles
♦
Areas in which batteries are
charged must be well ventilated, as
highly e plosive gas forms during
charging
♦
Old batteries with this symbol are
reusable commodities and must
therefore be returned for recycling
♦
Old batteries which are not
returned for recycling must be
disposed of as special waste,
thereby observing all statutory
regulations
Mountin the battery
Put battery in the battery bo
Secure the battery with a battery
holding strap
Note:
When using batteries with a liquid
electrolyte coat the battery terminals
adequately with terminal grease to
protect them from corrosion!
Screw on the positive-terminal lead
on the battery
Screw on the negative-terminal
lead on the battery
Char in the battery
Always heed safety precautions for
handlin batteries!
♦
Charge the battery with the
smallest possible charging current
♦
It is essential to observe the
instructions provided by the
manufacturerer of the charging unit
Pull the battery’s connecting
bushing cap off.
Connect the connecting plug of the
battery charger.
Insert power plug
Switch the battery charger on
Fuses/machine relays
1. Fuse load circuit (50 A)
2. Fuse control circuit (3 A)
3. Machine relays
Settin the drive system’s Bowden
cable
♦
A readjustment is necessary when
the engine’s uphill tractive force is
insufficient.
Unscrew the locking nut
Readjust the setscrew
Tighten the locking nut

English KM 100/40 W 11
Check the sweep roller
Lock the hand brake
Remove the swept material
container
Remove tapes and string from the
sweep roller
Insert the swept material container
Replacin the sweep roller
♦
Replacing it is necessary if the
sweeping result is visibly
diminished due to worn bristles.
Lock the hand brake
Remove the swept material
container
Unscrew fastening screw
Take out main brush
♦
Pay attention to the position of the
bristle set when installing the new
main brush!
Insert new main brush and fasten
♦
Ensure that the flat washer is in the
correct position!
You must overlap the main brush at
the top and at the bottom
Insert the swept material container
Check and adjust swe epin ran e
of roller
Cover a level surface evenly with
dust
Raise the sweeping machine on the
front and put it on the prepared
surface
Lock the hand brake
Let the main brush run for appro .
1530 s
Raise the sweeping machine on the
front and move it to the side
The shape of the sweeping area
forms a symmetrical rectangle which
is between 30 - 40 mm wide.
Adjusting the width of the sweep
mirror
Turn clockwise to increase the
sweep scope
Turn anticlockwise to decrease the
sweep scope
Adjusting the position of the sweep
mirror
Loosen the fastening screws
Through shifting of the a le
suspension over the elongated
hole, the sweeping pattern position
is adjusted
Tighten the fastening screws
Check the sweep mirror again

English KM 100/40 W 12
Replace sweepin strap
♦
Replacing it is necessary if the
sweeping result is visibly
diminished due to worn bristles.
Loosen the fastening nut from the
deflector plate
Relieving the sweeping strap
Unscrew the tensioning screw in
the cover plate completely
Grip the bristles of the sweeping
belt with both hands and press
them toward the a le centre of the
gearwheel disc
Move gently back and forth and pull
out sweeping belt whilst doing so
Inspect the sliding rails of the
sweeping strap
Note:
Replace if worn.
♦
Inserting sweeping belt
Note:
When inserting new sweeping belt,
make sure that toothed belt engages
in toothing of sprocket
♦
Press the sweeping belt onto the
gear disc with both hands
Note:
When inserting new sweeping belt,
make sure that toothed belt engages
in toothing of sprocket
Tighten the sweeping strap
Tighten the fastening nut of the
deflector plate
Note:
♦
At its straight section (middle point)
the sweeping belt must be slightly
tensioned.
♦
The sweeping band must be
slightly retensioned if it emits a
rattling noise during operation.
Settin raisin of the sweepin
belt
Slacken off bolts of adjuster (1).
Push the setting plate forward, the
raising level of the sweeping belt is
increased
Push the setting plate rearwards,
the raising level of the sweeping
belt is decreased
Tighten bolts of adjuster (1).
Settin liftin of the coarse-dirt
flap
♦
A readjustment is necessary when
the coarse-dirt flap cannot be lifted
to the required e tent.
♦
When the sweeping result
deteriorates, e.g. due to a worn
front squeegee, it is necessary to
slightly slacken the Bowden cable.
Unscrew the locking nut
Readjust the setscrew
Tighten the locking nut

English KM 100/40 W 13
Replacin the sealin strips
Front sealing strip
Loosen the fastening of the sealing
strip
Replace sealing strip
Don’t tighten the sealing strip yet
Adjust the ground clearance of the
sealing strip such that there is a
spacing of 10 15 mm toward the
back
Align the sealing strip
Tighten the fi ing screws of the
sealing strip
Rear sealing strip
Remove the swept material
container
Unscrew the fastening of the
sealing strip
Replace sealing strip
Tighten the fi ing screws of the
sealing strip
Side sealing strips
Loosen the fastening of the sealing
strip
Replace sealing strip
Don’t tighten the sealing strip yet
Slide a support under it with
1 2 mm thickness to adjust the
ground clearance
Align the sealing strip
Tighten the fastenings of the
sealing strip
Replacin the dust filter
♦
Wear a dust protection mask when
working on the filter system
♦
Observe the safety precautions for
handling fine dust
Lock the hand brake
Remove the swept material
container
Remove safety cotter pin of the
shaker rod
Pull out rod.
Loosen fastening screws.
Remove sheet steel chassis
Replace the dust filter
Note:
Make sure that the vanes remain
undamaged when mounting the new
filter
ACCESSORIES
Sweepin strap 6.906-131
With standard bristling for inside- and
outside cleaning.
Sweepin strap soft 6.906-161
Bristling for inside.
Sweepin strap
anti-static 6.906-162
Bristling for plastic floors and inside.
Standard main brush 6.905-587
Wearproof and wetproof.
Universal bristles for indoor and
outdoor cleaning.
Main brush soft 6.905-870
With natural bristles specially for
sweeping fine dust on smooth indoor
floors. Not wetproof, not for abrasive
surfaces.
Main brush hard 6.905-868
For removing stubborn e ternal dirt,
damp-proof.
Main brush anti-static 6.906-026
For cleaning carpeted surfaces.
Fluff filter add-on kit
for sweepin carpets 2.638-851
Prevents clogging of the flat pleated
filter.
Flat pleated filter 5.731-585
Replace flat fold filters at least once a
year.
We t pro of, washable. Filt er effic ien cy
> 99,9 %, corresponds to category C
of ZH 1/487 of BIA.

English KM 100/40 W 14
FAULT INDICATIONS
Machine will not start
Charge the battery
Check overload fuse
Notify KÄRCHER customer service
Motor runnin but machine not
movin
Set the Bowden cable to the driving
operation mode
Notify KÄRCHER customer service
Machine remains stationary on
inclines
Select flatter route
Check overload fuse
Notify KÄRCHER customer service
Machine not sweepin properly
Check the main brush and the
sweeping belt
Make the coarse dirt flap movable
Slacken the bowden cable of the
coarse-dirt flap (adjusting screw)
Check the tension and the function
of the belt, replace it, if necessary
Re-adjust main brush
Replace the sweep roller
Notify KÄRCHER customer service
Machine makin dust
Make the coarse dirt flap movable
Slacken the bowden cable of the
coarse-dirt flap (adjusting screw)
De-dust or replace the dust filter
Empty debris container
Replace sealing profile on debris
container
Adjust or replace the sealing strip
Poor sweepin around the ed es
Replace sweeping belt
Notify KÄRCHER customer service
Sweepin belt swivel mechanism
does not reset/operate
Insert locating plate correctly
Notify KÄRCHER customer service
Raisin of sweepin belt does not
operate
Check the cable for the raising
mechanism
Engage deflection pulley
Notify KÄRCHER customer service
Sweepin strap ets severely
folded up while sweepin
Engage or replace relief spring of
sweeping belt.
Notify KÄRCHER customer service
Sweepin strap rotates with jerky
motion
Check the tension of the sweeping
belt.
Notify KÄRCHER customer service
TECHNICAL DATA
Unit data
Length width height
1240 690 1150 mm
Weight (without battery) 67 kg
Travel- and sweeping
speed 4 km/h
Climbing ability ma . 15 %
Main brush diameter 265 mm
Sweeping strap length 500 mm
Surface performance 4000 m²/h
Working width without
sweeping strap 550 mm
Working width with
sweeping strap 990 mm
Volume of the swept
material container 40 Litres
Protection class drip-proof
IPX 3
En ine
Type permanent magnet
D.C. motor
Turning direction, right
Voltage 12 V
Rated current 50 A
Rated power 450 W
r.p.m. 2700-2800 1/min
Design MP80S/3B14
Safety class III
Type of protection IP 20
Electric fuse protection
Central 50 A
Control 3 A
Deep-discharge
protection via relays
Filter and suction system
Fine dust filter surface 2,1 m²
Filter utilisation classification L
for non-health hazardous dusts
Rated vacuum of
suction system 5 mbar
Rated volumetric flow
of suction system 55 l/s
Vibrations of unit accordin to
ISO 5349 and ISO 2631-1
upper limbs 2,4 m/s²
Ambient conditions
Temperature -5 - +40° C
Atmospheric humidity,
non-dew developing 0 - 90 %
Noise emission
Workplace related
Emission level according to
DIN EN 60704-1
at operating speed 67 dB (A)

KM 100/40 W 40
07.2002
1.049-984.0 *USA
4.777-043.0
6.905-587.0
6.365-454.0
7.306-040.0
5.047-121.0
5.731-585.0
6.375-213.0
6.634-196.0 6.634-201.0
4.070-217.0
7.312-291.0
6.303-057.0
6.365-395.0
6.365-411.0
6.365-412.0
6.682-383.0
1.049-921.0
6.654-021.0 1.049-921.0
6.654-068.0 1.049-921.0
6.906-131.0
6.906-162.0 1.049-984.0 *USA
5.034-555.0
6.437-467.0
6.431-124.0
6.647-696.0
6.321-135.0
6.437-467.0
6.431-198.0
6.321-135.0
7.306-154.0
5.115-565.0
6.435-396.0
6.435-394.0
Other Kärcher Blower manuals

Kärcher
Kärcher KM 85/50 W Bp User manual

Kärcher
Kärcher S 650 User manual

Kärcher
Kärcher T 100 User manual

Kärcher
Kärcher AB 20 User manual

Kärcher
Kärcher KB 5 User manual

Kärcher
Kärcher KM 90 R Bp User manual

Kärcher
Kärcher KM 75/40 W G User manual

Kärcher
Kärcher KM 85/50 W B User manual

Kärcher
Kärcher KM 85/50 W G Adv User manual

Kärcher
Kärcher KMR 1250 LPG User manual
Popular Blower manuals by other brands

Labconco
Labconco Intelli-Sense CS 10 user manual

HOME REFINEMENTS
HOME REFINEMENTS ABYSS 306207 Installation and care guide

Ryobi
Ryobi RBL26BP user manual

Chicago Electric
Chicago Electric 96503 Set up and operating instructions

Gardener's Choice
Gardener's Choice GCB-260 user manual

FPZ
FPZ SCL K07R use instructions