manuals.online logo
Brands
  1. Home
  2. •
  3. Brands
  4. •
  5. Kärcher
  6. •
  7. Blower
  8. •
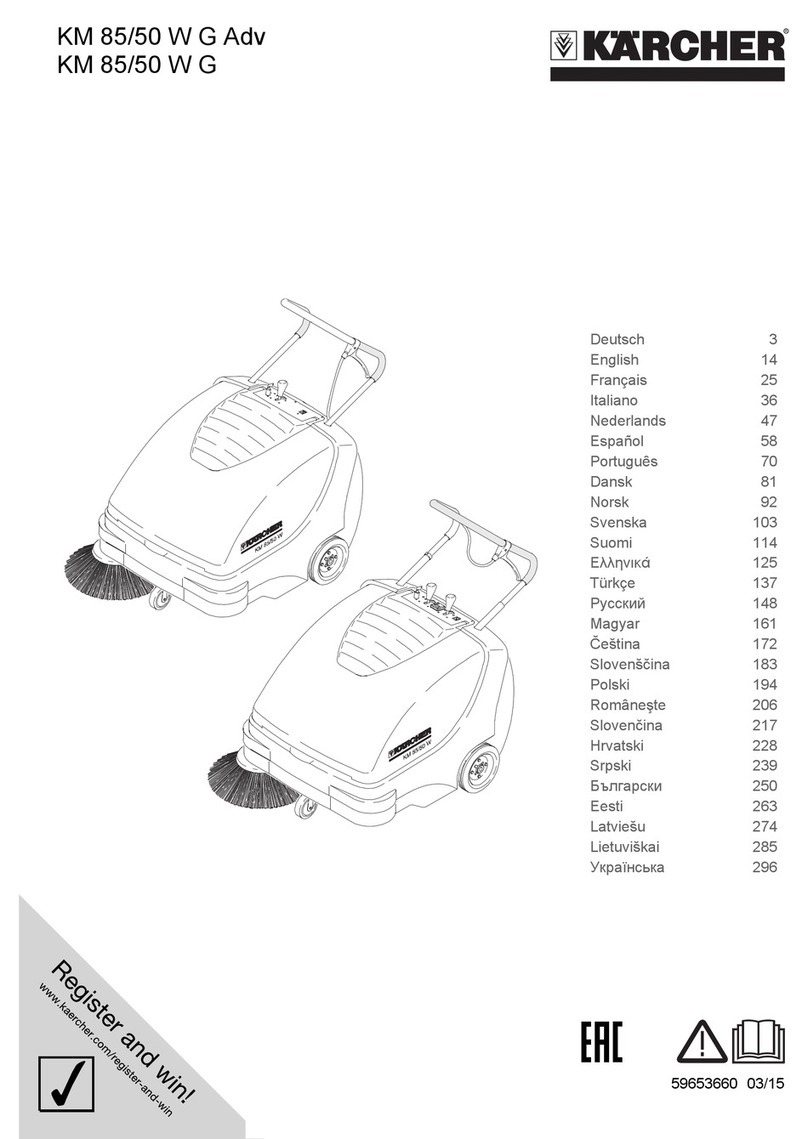
  9. Kärcher KM 85/50 W B User manual

Kärcher KM 85/50 W B User manual

www.karcher.com
5.960-501 F2001370 06/02
KM 85/50 W B
1.351-105.0
Operating instructions KM 85/50 W B English
19
Contents
For your own safety! 20
General notes 20
Risk of overturning on too
high gradients! 21
For our environment 21
Caution, danger to the
environment from engine
or hydraulic oil! 21
Intended use 21
Function description -
sweeping machine 21
Machine components 21
Before first operating 21
Unloading instructions 21
Tests 21
nstallation 21
Push handle with bowden
cable and cover support
assembly 22
Bowden cable assembly 23
Side broom installation 23
Before every operation 23
General notes 23
Testing and maintenance
work 23
Commissioning 23
Start machine 23
Sweeping operation 24
Run machine 24
sage instructions 24
Safety instructions when
sweeping 24
Sweeping dry ground 25
Sweeping damp or wet
ground 25
Driving over obstacles 25
Stop machine 25
Clean filter 25
Empty the swept material
container 25
Cleaning and maintenance 26
nternal cleaning 26
External cleaning 26
Decommissioning 26
Transport 26
Transport instructions 26
Maintenance intervals 26
Elapsed-time meter 26
Maintenance by the
customer 26
Maintenance by the
customer service
department 27
Maintenance tasks 27
Preparations 27
Checking the safety switch 27
Safety notes 27
Check the engine oil level 27
Top up engine oil 28
Change the engine oil 28
Check the air cleaner 28
Clean and change spark
plug 28
Empty fuel tank 28
Check the sweep roller 29
Replace the sweep roller 29
Checking and adjusting
sweeping area of the
sweeping roller 30
Replacing the side broom 30
Adjusting lowering of side
brush 30
Adjusting raising of coarse- dirt
flap 30
Adjusting and replacing
sealing strips 31
Replace the dust filter 31
Accessories 32
Fault instructions 32
Technical data 32
Unit data 32
Engine 32
Filter and suction system 32
Unit vibrations ( SO 5349) 33
Ambient conditions 33
EC conformity declaration 33
Operating instructions KM 85/50 W B English
20
For your own safety!
eneral notes
It is mandatory to read and
observe this prior to using the
appliance!
—
Notify your sales outlet if during
unpacking you detect damage
that has occurred in transit.

Read the operating instructions
of your appliance prior to putting
it into operation, especially the
safety information.
—
The danger and caution signs
attached to the appliance give
important tips on its safe
operation.
—
n addition to the instructions in
the operating instructions,
general safety- and accident
prevention-regulations from
lawgivers must be followed.
—
To increase your safety during
work on downward slopes with a
gradient greater than 2% we
recommend installation of the
additional brake 2.640-301.0
accessory kit (ABS).
se

Prior to utilization the appliance
and its working facilities must be
checked regarding their proper
condition and that they operate
safely. t must not be used if its
condition is not faultless.
—
No modifications permitted on the
machine.
—
Never absorb explosive liquids,
inflammable gases or undiluted
acids and solvents! This includes
petrol, paint thinner or fuel oil,
which can form explosive fumes
due to the swirling suction air, in
addition acetone, undiluted acids
and solvents, since they corrode
the materials used for the
appliance.
—
Do not sweep up/absorb burning
or smouldering objects.
Only if expressely marked is this
appliance suitable for sucking up
health-hazardous dusts.
Comply with notices concerning
safety regulations given in the
operating instructions.
—
Suitable only for the surfaces
listed in the operating
instructions.
—
The appliance may be used on
only the areas cleared for its use
by the factory owner or a person
authorized by him.
—
Keep clear of the danger area. ts
operation in explosion hazardous
locations is prohibited.
—
The following applies generally:
Keep highly inflammable
materials away from the machine
(explosion/fire hazard).
Operation
—
The rules, regulations and
stipulations applying to motor
vehicles must always be
observed.
—
The operator must use the unit in
accordance with its intended
purpose. She must adapt her
mode of operation to the local
conditions and when working with
the appliance keep a look out for
third parties, especially children.
—
The unit can reverse and drive
forwards at the same speed.
Therefore, take care when pulling
back push handle for reversing.
—
The appliance may only be used
by persons instructed in its
handling or who have proved
their capability of operating it and
who are expressely authorized to
use it.
—
The unit must not be operated by
children and youths.

The appliance must never be left
unattended as long as the motor
is running. The operator may not
leave the unit unless the engine
is shut down, the unit is secured
against inadvertent motions and,
if necessary, the parking brake is
applied.
—
On slopes the angle of inclination
to the side and in the direction of
motion must not exceed the
value given in the operating
instructions.
Transport

The motor must be turned off
when the appliance is
transported.

To lock the parking brake.

Secure the machine with guy
belts, ropes or chains.

mmobilise the machine at the
wheels with chocks.
Maintenance
—
Repairs may only be carried out
by approved customer service
centres or by technical personnel
trained in this field which are
familiar with all relevant safety
regulations.
—
ndustrially used appliances in
changing locations are subject to
the safety inspection according to
VDE 0701.
—
The unit must be switched off
prior to cleaning the unit and
performing maintenance work on
it, or setting it to another
operation.
—
Unless expressly permitted, the
unit may not be cleaned with
hose or high-pressure water jets
(danger of short-circuits or other
impairments).
Accessories and spare parts
—
Only accessories and spare parts
cleared by the manufacturer may
be used. Genuine accessories
and spare parts guarantee that
the unit can be operated safely
and trouble-free.
Combustion engine

The exhaust opening must not be
sealed.

Do not bend over or touch the
exhaust opening (danger of
burns).

Do not touch or grasp the drive
motor (danger of burns).

Adequate ventilation and
extraction of exhaust must be
provided when operating the unit
indoors. (Danger of poisoning)

Exhaust gases are toxic and
damaging to health; do not inhale
them.

The engine takes approx. 3...4 s
to run down after being shut off. t
is imperative to keep away from
the area of the drive unit during
this period!
Observe the following when
refuelling:

Only the fuel specified in the
operating instructions may be
used. An explosion hazard exists
with unsuitable fuels.

The engine must be switched off.

Do not fill-in fuel in closed rooms.

Make sure that no fuel comes
into contact with hot surfaces.

Do not use any burning or
smouldering objects during filling
up or carry them with you or bring
them in the vicinity of the
appliance (explosion hazard).

Fill the tank at the most 1 cm
below the lower edge of the filler
neck, since the fuel expands in
heat.

Wipe off spilled over fuel and
close tank cap tightly.
Operating instructions KM 85/50 W B English
21
Risk of overturning on too
high gradients!
Danger!
The machine could topple over
when driving and turning on slopes.
—
n direction of travel only
negotiate gradients up to 18 %
—
At right angles to direction of
travel only negotiate gradients up
to 18 %.
For our environment
Caution, danger to the
environment from eng ine
or hydraulic oil!

Take spent oil after an oil change
to an oil collecting point or a
waste disposal company.
Intended use
—
This sweeper is predominantly
intended for sweeping outside
surfaces.
—
Ít complies with the "L"
application category for non-
health hazardous dusts.
—
t is not intended for use on
public traffic routes
Suitable surfacings:
—
Asphalt
—
Paving stones
—
Screed
—
Concrete
Function description -
sweeping machine
The KM 85/50 W B works according
to the throw-over principle.
—
The side brush (3) cleans corners
and edges of the sweeping
surface and transports the dirt in
the path of the main brush.
—
The rotating main brush (4)
transports the dirt directly into the
debris container (5).
—
The dust swirled up in the
container is separated by way of
the dust filter (1) and the filtered,
clean air removed by the suction
turbine (2).
Machine components
1. Push handle
2. Lever for coarse-dirt flap
3. Unit cover
4. Swivel caster with parking brake
5. Side brush
6. Debris container with transport
rollers
7. Filter shaker for the dust filter
8. Push handle lock
1. Starter rope
2. Raise / lower main brush
3. Elapsed-time meter
4. Lifting/lowering side brush
5. Multifunctional lever
Multifunctional lever
1. Setting "CHOKE" starting aid
2. "HARE" setting – operating speed
3. "0" setting – engine OFF
Before first operating
Unloading instruct ions
—
The machine was secured on a
pallet with stretch belts or ropes
for safe transport. Proceed as
follows when unloading:

Cut the plastic packing tape and
remove the film

Knock aside the wheel securing
blocks and lift the machine off the
pallet by hand
Warning!
Do not use a fork lifter for unloading;
the machine can be damaged by it.
Tests

Check the engine oil level
See maintenance tasks chapter for
description

Check that the spark plug
connector is tightend securely
See maintenance tasks chapter for
description
Installation

nstall push handle with bowden
cable and cover support
See below for description

Mount the side broom
See below for description
Operating instructions KM 85/50 W B English
22
Push handle w ith bowden
cable and cover support
assembly

Lock swivel caster with parking
brake
1. Opening for push handle
2. Fastening for bowden cable
Push handle components
1. Push handle
A,B,C hexagon head screw (2x) with
lock nut (2x) and
washers (6x)
3. Push handle lock
4. Bowden cable
5. Lock ring for push handle
lock
11. Cover support

Feed push handle through the
left and right openings into
interior

Raise unit cover and have it held
up by a helper
Observe sequence!

Slip push handle lock (3) over the
bowden cable (4)

Then slide lock ring of push
handle lock (5) over bowden
cable (4)

Slip push handle lock (3) and
lock ring for push handle lock (5)
over push handle (1)

Slide push handle lock (3) up to
stop at the push handle, outside
the container

Position stop plate (6) behind the
bulge (7)

Position and centre screw (8) of
lock ring (5)
Screw (8) serves as a stop

Tighten screw (8)
Sequence from the inside to the
outside

nsert hexagon head screw (A)
with washer (B) from the inside
through bottom part of push
handle (10)

Slip washer (B) onto hexagon
head screw

Position push handle (1) outside
bottom part of push handle (10)
and insert screw (A)

Slip washer (B) onto hexagon
head screw
Warning!

The inner bowden cable (12)
must be laid below screw (A).
Operating instructions KM 85/50 W B English
23
Sequence from the inside to the
outside

nsert hexagon head screw (A)
with washer (B) from the inside
through push handle (1)

Slip washer (B) onto hexagon
head screw

Push hexagon head screw (A)
through bottom part of push
handle (10)

Slip washer (B) onto hexagon
head screw

Push both sides of cover
support (11) onto hexagon head
screws

Slip one washer (B) on each of
the two hexagon head screws

Screw one nut (C) on each of the
two hexagon head screws and
tighten nuts so that the joint is
still flexible
Bowden cable assembly
Laying the bowden pull cable

Hinge adjusting nut (1) in
retaining plate (4)

Tighten locking nut (6), flat
washers (3 and 5), onto locking
nut (2)

Take out pin from fork head (7)

Position fork head (7) to lever (8)

Push pin through fork head (7)
and lever (8) and secure it
Side broom insta llation
Warning!
Close fuel shut-off valve prior to
starting assembly work.

Close the fuel feed line
—
Rotary knob is transverse to fuel
hose

Unlock push handle lock by
turning it anticlockwise

Danger!
—
The permissible maximum tank
filling when the sweeper is tilted
back onto the push handle is half!

Remove the debris container
prior to tilting the sweeper (see
section on "Emptying debris
container") and unlock the push
handle lock!

Tilt the machine back

Push side brush onto shaft

Fasten with screws (3 pieces)

Tilt the machine back upright
Before every operation
eneral notes

Stand sweeper on a flat surface

Shut-off the engine

Set parking brakes on the front of
the swivel caster

Turn push handle lock clockwise
—
The lock is interlocked
Testing and maintenance
work

Check the engine oil level. *

Check fuel level in tank.

Check the side brush.

Check the sweep roller. *

Clean filter. **

Empty the swept material
container. **
* See chapter on maintenance work
** See chapter on shutting off the
machine
Commissioning
Note:
—
nitial operation permissible only
if the unit‘s cover is closed!
—
For the protection of the operator,
the unit is provided with a safety
switch. The engine only runs
when the unit cover is closed.
Start machine

Open unit cover

Open fuel supply
—
Rotary knob is horizontal to fuel
hose

Close unit cover

Release parking brake
Operating instructions KM 85/50 W B English
24
To lock push handle (idling)

Turn push handle lock clockwise;
lock is interlocked
—
The unit can be moved manually

Push the multi-functional lever
into the "Operating speed"
position
Note:
Set it to "CHOKE" in cold or wet
weather
Note:
Only when set to "Operating speed"
does the sweeper operate at its best

Pull the starter rope slowly until
resistance is felt

Pull the starter rope strongly
Note:
—
The sweep roller and side broom
rotate

Once the motor is running, move
the multi-function control stalk
from "CHOKE" to "Operating
speed"
Sweeping operation
Lower side brush

Release lever lock
Lower main brush

Release lever lock
Run machine
Danger!
The unit can reverse and drive
forwards at the same speed.
Therefore, take care when pulling
back push handle for reversing.

Turn push handle lock
anticlockwise; the lock is
released
—
Press push handle forward; drive
forward
—
Pull push handle back; reverse.
Usage instructions
Safety instructions when
sweeping
Warning!
Never sweep up packing straps,
wires or the like as this could
damage the sweeping mechanism.
Danger!
When the coarse-dirt flap is open,
the main brush can hurl stones or
stone chips forwards.
Make sure that nobody, no animals
or objects are endangered.
Note:
The coarse-dirt flap must be briefly
raised for sweeping up largish
objects up to a height of 50 mm, for
example, drinks cans.

Raise coarse-dirt flap
Operating instructions KM 85/50 W B English
25
Lifted coarse-dirt flap

Let down the coarse-dirt flap
Note:
An optimal cleaning effect can be
achieved only when the coarse-dirt
flap is completely lowered
Sweeping dry ground

For optimum cleaning effect,
match the driving speed to suit
the actual conditions.

Regularly clean-down the filter
and empty the swept material
container during operation.
Sweeping damp or wet
ground

Open latch of debris container,
leave latch engaged
—
Debris container opens approx.
8 cm.
Note:
The dust filter is protected from
moisture.
Driving over obstacles
Fixed obstacles of up to 30 mm in
height

Slowly and carefully drive over
them in the forward direction
Fixed obstacles over 30 mm in
height

Drive the unit over a ramp.
Stop machine
Switch-off engine

Push the multi-functional lever
into the "0" position

Raise the side broom

Raise the sweep roller
Warning!
For shut off the side brushes and
the main brush must always be
raised (deformation hazard of main
brush or side brushes).

Lock the hand brake

Close the fuel feed line
—
Rotary knob is transverse to fuel
hose
Clean filter

Move the handle of the filter
clean-down device to and fro
several times
Empty the swept material
container

De-dust the filter first before
opening emptying the debris
container.
(See chapter on de-dusting filter)

Release latch
Operating instructions KM 85/50 W B English
26

Unhinge latch

Pull out debris container.

Empty the swept material
container.

Push-in the swept material
container.

Engage latch at debris container

Close latch
Note:
The debris container is provided
with transport rollers
Cleaning and maintenance

Stand sweeper on a flat surface

Lock the hand brake
Internal cleaning
Danger!
Wear dust mask!
Wear safety goggles!

Blow-out with compressed air

Clean with a rag
External cleaning
Clean with a moist rag.
Note:
Do not use aggresive cleaning
agents!
Decommissioning
Please observe the following points
when the machine will not be used
for a lengthy period:
1.

Turn off the machine on a
protected and dry place

Stand sweeper on a flat surface

Lock the hand brake

Safeguard the sweeping machine
from rolling away

Lock push handle
2.

Raise the sweep roller

Raise the side broom
3.

Clean inside and outside of
sweeper

Empty fuel tank
4.

Pull the spark plug connector off
and screw the spark plug out

Pour approx. 3 cm³ engine oil in
the spark-plug hole and crank
engine several times without
spark-plug

Screw in the spark plug
Transport
Transport instructions
Warning!
When it is transported the machine
must be secured against dislocation

Lock the hand brake

Empty fuel tank

Secure the machine with stretch
belts or ropes

Secure the machine with wedges
on the wheels

Lock push handle
Fastening areas
1. over the push handle
2. beneath the unit‘s cover
Note:
Observe markings for fastening
areas on base frame!
(chain symbols)
Maintenance inte rvals
Elapsed-time meter
Elapsed-time meter indicates
maintenance interval times.
Maintenance by the
customer
Warning!
For a new engine, an oil change is
necessary after the first month or
after the first 5 operating hours!
Daily maintenance

Check the engine-oil level, top up
as requred

Check air filter

Check roller and side brush for
wear and trapped straps

Check the function of all
operating controls
Maintenance every 25 hours

Clean air filter
Operating instructions KM 85/50 W B English
27
Maintenance every 50 operating
hours

For oil change, filling quantity,
and type see Technical Data

Check the air cleaner, replace if
greatly fouled

Check the spark plug, clean it if
required

Check operation of safety switch

Check tension, wear and
operation of traction belts and
drive chain

Check freedom of movement of
owden cables and moving parts

Check sealing strips at dust filter
and operation of filter shaker

Check setting and wear of
sealing strips in sweeping area

Check sweeping pattern and
operation of main brush and side
brush

Clean and check dust filter,
replace, if necessary

Check roller and side brush for
wear and trapped straps

Check operation of all operating
devices and indicator lights
Note:
Where maintenance is undertaken
by the customer, all service and
maintenance work must be carried
out by a qualified employee.
A Kärcher specialist dealer can be
consulted whenever support is
necessary.
Maintenance by the
customer service
department
(Comply with service manual)
Maintenance after the first month
or 5 operating hours
First inspection
Maintenance every 50 operating
hours
Maintenance every 100 operating
hours or half-yearly
Maintenance every 500 hours or
yearly
Note:
To safeguard warranty rights, during
the warranty period all service and
maintenance work must be
performed by an authorised Kärcher
after sales service.
Maintenance tasks
reparations

Stand sweeper on a flat surface

Lock the hand brake

Lock push handle
Checking the safety switch
Warning!
—
The engine must cut out if the
unit cover is opened while the
engine is running.
—
The safety switch is defective if
the engine does not cut out.

Inform After-Sales Service.

Open unit cover

Safeguard the unit cover from
shutting with the cover support
during work on the unit
Safety notes
Danger!
The engine takes approx. 3...4 s to
run down after being shut off.
It is imperative to keep away from
the area of the drive unit during this
period!
Danger!
Danger of burns!

Allow the machine to adequately
cool down prior to all
maintenance and repair work

Do not touch hot parts such as
drive motor and waste gas
system.
Caution, environment is
en angere by engine oil!

Take spent oil after an oil change
to an oil collecting point or a
waste disposal company.
Danger!
—
The permissible maximum tank
filling when the sweeper is tilted
back onto the push handle is half!

Close the fuel feed line

Remove the debris container
prior to tilting the sweeper (see
section on "Emptying debris
container") and unlock the push
handle lock!
Check the engine oi l level
Note:
Allow at least 5 minutes to elapse
after engine standstill before
checking it

Turn out oil dip stock
Operating instructions KM 85/50 W B English
28

Wipe oil dip stick and screw it in

Screw oil dip stick out again
—
The oil level must be between the
"Min" and the "Max" marks

Top up the engine oil if the oil
level is below the "Min" mark

Screw in oil dip stick and pull it
tight
Note:
Do not fill up beyond "Max"
Top up engine oil

Turn out oil dip stock

Fill-in engine oil
Oil types: See technical data

Screw in oil dip stick and pull it
tight

Wait for at least 5 min.

Recheck the engine-oil level
Change the engine oi l

Turn out oil dip stock

Suck out engine oil with oil-
change pump 6.491-538.0
through the oil filler

Fill-in engine oil.
—
Oil grades and oil quantity: See
technical data

Check the engine oil level

Screw in oil dip stick and pull it
tight
Check the air cleaner

Remove the cover

Take out filter cartridge.

Use a new filter cartridge.
—
Filter fins point to cover

Put on cover
Clean and change spark
plug

Remove the spark plug
connector

Screw the spark plug out and
clean it

Screw in cleaned or new spark
plug and tighten it

Plug in the spark plug connector.
Empty fuel tank

Close the fuel feed line
—
Rotary knob is transverse to fuel
hose
Operating instructions KM 85/50 W B English
29

Compress the fuel hose from the
tank to the fuel shut-off valve

Disengage the clamp at the fuel
shut-off valve.

Remove the fuel hose.

Open tank cap

Hold the fuel hose over a suitable
collecting basin and allow the fuel
to drain

!vReplace the fuel hose onto the
neck of the fuel shut-off valve
and replace the hose clamp
when the tank is empty!b!
Check the sweep roller

Lock the hand brake

Remove the swept material
container

Remove tapes and string from
the sweep roller

nsert the swept material
container
Replace the sweep roller
Replacement is necessary when the
main brush cannot be readjusted
any more and sweeping efficiency
obviously deteriorates due to worn
bristles.
Warning!
Close fuel shut-off valve prior to
starting.

Close the fuel feed line
—
Rotary knob is transverse to fuel
hose

Unlock push handle lock by
turning it anticlockwise
Danger!
—
The permissible maximum tank
filling when the sweeper is tilted
back onto the push handle is half!

Remove the debris container
prior to tilting the sweeper (see
section on "Emptying debris
container") and unlock the push
handle lock!

Tilt the machine back

Unscrew the left and right
fastening screws

Remove main brush downwards

Pay attention to the position of
the bristle set when installing the
new main brush!
Note:
The bristle pile is structured to an
arrow which must point towards the
rear wheels.

nsert new main brush and fasten
—
Make sure that the position of the
rectangular clamping plate is
proper!
—
t must overlap the main brush at
the top and bottom

nsert the swept material
container
Operating instructions KM 85/50 W B English
30
Checking and adjusting
sweeping area of the
sweeping roller

Cover a level surface evenly with
dust

Raise the sweeping machine on
the front and put it on the
prepared surface

Lock the hand brake

Run the main brush for
approx. 15-30 s

Raise the sweeping machine on
the front and move it to the side
The shape of the sweeping area
forms a symmetrical rectangle which
is between 30 - 40 mm wide.
Note:
f the sweeping pattern is uneven it
can be corrected by readjusting the
sweeping pattern width!
The bowden cable must be
readjusted if the sweeping pattern is
insufficient and the bowden cable is
tight when the main brush is in its
lowered position.
Danger!
For all work in this area care must
be taken to ensure that the exhaust
pipe has cooled down.
Burns can be caused by touching it.
Adjusting the width of the sweep
mirror

Set sweeping pattern at the
bowden cable

Check the sweep mirror again
Replacing the side broom
Replacing it is necessary when the
sweeping effect visibly deteriorates
due to wear of the bristles.
Warning!
Close fuel shut-off valve prior to
starting assembly work.

Close the fuel feed line
—
Rotary knob is transverse to fuel
hose

Unlock push handle lock by
turning it anticlockwise
Danger!
—
The permissible maximum tank
filling when the sweeper is tilted
back onto the push handle is half!

Remove the debris container
prior to tilting the sweeper (see
section on "Emptying debris
container") and unlock the push
handle lock!

Tilt the machine back

Undo screws (3 pieces) at
underside of the side brush

Take-off the side broom

Slide new side brush onto shaft

Fasten with screws (3 pieces)

Tilt the machine back upright
Adjusting lowering of side
brush
Readjustment is necessary when
the sweeping efficiency of the side
brush deteriorates due to worn
bristles.

Unscrew locking nut

Readjust the setscrew

Tighten the locking nut
Adjusting raising of coarse-
dirt flap
Readjustment is necessary when it
is not posible to sufficiently raise or
lower the coarse-dirt flap.

Unscrew the locking nut

Readjust the setscrew

Tighten the locking nut
Operating instructions KM 85/50 W B English
31
Adjusting and replacing
sealing strips
When the sweeping effect
diminishes due to wear of the
sealing strips they must be
readjusted or replaced
Warning!
Close fuel shut-off valve prior to
starting assembly work.

Close the fuel feed line
—
Rotary knob is transverse to fuel
hose

Unlock push handle lock by
turning it anticlockwise
Danger!
—
The permissible maximum tank
filling when the sweeper is tilted
back onto the push handle is half!

Remove the debris container
prior to tilting the sweeper (see
section on "Emptying debris
container") and unlock the push
handle lock!

Tilt the machine back
Front sealing strip

Loosen the fastening screws of
the sealing strip

Readjust the sealing strip
downwards by relocating it in the
elongated hole

Tighten the fastening screws of
the sealing strip

Set the vacuum sweeper upright
and push it slightly forwards
—
The clearance of the front sealing
strip to the floor must be set so
that its whole width folds back
with a lag of 10 - 15 mm

Repeat the adjustment as
required
Note:
—
The sealing strip must be
replaced if, due to being too
worn, the clearance of the front
sealing strip to the floor can no
longer be adjusted

Unscrew the fastening screws
and replace the whole sealing
strip
Rear sealing strip

Remove the swept material
container

Undo screws of sealing strip at
the debris container

Replace sealing strip

Tighten screws of sealing strip
Side sealing strips

Loosen the fastening of the
sealing strip

Replace sealing strip

To adjust clearance to floor push
a 1 - 2 mm thick spacer under it

Align the sealing strip

Tighten the fastenings of the
sealing strip
Replace the dust filter
Danger!

Empty and remove debris
container prior to starting to
replace the dust filter

Wear a dust protection mask
when working on the filter system

Observe the safety precautions
for handling fine dust

Lock the hand brake

Remove safety cotter pin of the
shaker rod

Pull out rod.
Operating instructions KM 85/50 W B English
32

Loosen fastening screws.

Remove frame

Replace the dust filter
Note:
Make sure when mounting the new
filter that the lamella are not
damaged
Accessories
Side brush 6.905-626
Provided with standard bristles for
indoor and outdoor surfaces.
Soft side broom 6.906-132
For fine dust on indoor surfaces,
resistant to moisture.
Hard side broom 6.905-625
For removing stubborn external dirt,
damp-proof.
Standard main brush 6.906-509
Wearproof and wetproof.
Universal bristles for indoor and
outdoor cleaning.
profi main brush 6.906-508
For the professional application,
especially resistant to wear.
Dust filter 5.731-585
Wetproof, washable. Filter efficiency
> 99,9 %, corresponds to category
C of ZH 1/487 of B A.
Fault instructions
Machine will not start

Close unit cover

Refuel

Check and clean spark plugs,
replace if necessary

Open the fuel tap

Notify the Kärcher service station
Motor running but machine not
moving

Check belts and chain

Release push handle lock

Notify the Kärcher service station
Machine remains stationary on
inclines

Select flatter route

Notify the Kärcher service station
Machine not sweeping properly

Check the main brush and the
side brushes

Check belt for tension and
operation; replace, if necessary

Re-adjust main brush

Replace the sweep roller

Notify the Kärcher service station
Machine making dust

De-dust or replace the dust filter

Empty debris container

Adjust or replace the sealing strip

Replace seal at debris container
and main brush box
Poor sweeping around the edges

Readjust lowering of the side
brush

Replacing the side broom

Notify the Kärcher service station
Raising the side brush does not
function

Check the Bowden cable of the
raising mechanism

Notify the Kärcher service station
Technical data
Unit data
Length x width x height
1355 x 910 x 1155 mm
Weight
126 kg
Sweeping speed
4,5 km/h
Climbing capacity, max.
18% with the additional
brake 2.640-301.0
approved up to a max. of 2%
without the additional brake
Main brush diameter
250 mm
Side brush diameter
410 mm
Area performance
3825 m²/h
Maximum operating time per full
fuel tank
1,5 h
Working width without side brush
610 mm
Working width with side brush
850 mm
Debris container volume
50 litres
Degree of protection
PX 3 drip-proof
Engine
Type
Honda, 1-cyl. four-stroke engine
Displacement
135 cm³
Operating speed
2500 ±100 1/min
Power output, max.
3,3 kW/4,5 PS
Fuel, premium (unleaded)
Tank capacity 1,1 l
Engine oil, SF, SG
0,55 l
SAE 10W30
Spark plug, NGK
BPR 6 ES
Filter and suct ion system
Dust filter filtering surface
2,3 m²
Filter application category for
non-health hazardous dusts
L
Nominal vacuum intake system
4 mbar
Intake system nominal volumetric
flow
45 l/s
Operating instructions KM 85/50 W B English
33
Unit vibrations (ISO 5349)
pper limbs
2,4 m/s²
Ambient conditions
Temperature
-5 - +40°C
Air humidity, non-dew developing
0-90%
Noise emission
Sound level (EN 60704-1)75 dB(A)
Guaranteed noise level
(2000/14/EU) 92 dB(A)
EC conformity declaration
We hereby declare that the machine
specified below
as the marketed desigh, the
machine specified below
complies with the relevant
fundamental safety and health
requirements of the EC directives
listed below.
Modification of the machine without
our approval invalidates this
declaration.
Product: Sweeper
Type: 1.351-xxx
Relevant EC directives
EC machine directive (98/37/EC)
EC directive on electromagnetic
compatability (89/336/EEC)
amended by 91/263/EEC,
92/31/EEC, 93/68/EEC
EC guideline on noise emissions
(2000/14/EU)
Applied harmonised standards
D N EN 60335-1
D N EN 60335-2-72
D N EN 50082-2:1994
Applied national standards
C SPR 12
Applied conformity valuation
method
Appendix V
Measured noise level:
90 dB(A)
Guaranteed noise level:
92 dB(A)
nternal measures ensure that the in
series produced units always
comply with the requirements of
current EC directives and applied
standards. The signatories act for
and in authority of management.
5.957-708 (04/02)
Alfred Kärcher Limited Partnership.
Registered office: Winnenden.
Company Register: Waiblingen,
HRA 169.
Personally liable partner. Kärcher
Reinigungstechnik GmbH.
Registered office Winnenden, 2404
Waiblingen Company Register, HRB
Managing directors:
Dr. Bernhard Graf, Hartmut Jenner,
Georg Metz, Thomas Schöbinger
Alfred Kärcher GmbH & Co.
Cleaning Systems
Alfred-Kärcher-Strasse 28-40
P.O.Box 160
D-71349 Winnenden
Phone: ++49 7195 14-0
Fax :++49 7195 14-2212
KM 85/50 W B
362

This manual suits for next models

1

Other Kärcher Blower manuals

Kärcher 1.142-114 User manual

Kärcher

Kärcher 1.142-114 User manual

Kärcher KB 5 User manual

Kärcher

Kärcher KB 5 User manual

Kärcher KMR 1250 LPG User manual

Kärcher

Kärcher KMR 1250 LPG User manual

Kärcher KM 70/30 C Bp User manual

Kärcher

Kärcher KM 70/30 C Bp User manual

Kärcher BR750 BAT Package User manual

Kärcher

Kärcher BR750 BAT Package User manual

Kärcher AB 84 User manual

Kärcher

Kärcher AB 84 User manual

Kärcher KM 85/50 W G Adv User manual

Kärcher

Kärcher KM 85/50 W G Adv User manual

Kärcher KM 100/40 W User manual

Kärcher

Kärcher KM 100/40 W User manual

Kärcher MC 50 User manual

Kärcher

Kärcher MC 50 User manual

Kärcher KM 85/50 W Bp User manual

Kärcher

Kärcher KM 85/50 W Bp User manual

Kärcher S 650 User manual

Kärcher

Kärcher S 650 User manual

Kärcher KM 100 R LPG User manual

Kärcher

Kärcher KM 100 R LPG User manual

Kärcher KM 90 R Bp User manual

Kärcher

Kärcher KM 90 R Bp User manual

Kärcher KM 75/40 W G User manual

Kärcher

Kärcher KM 75/40 W G User manual

Kärcher AB 20 User manual

Kärcher

Kärcher AB 20 User manual

Kärcher T 100 User manual

Kärcher

Kärcher T 100 User manual

Popular Blower manuals by other brands

Bad Boy BB80B000A Operator's manual

Bad Boy

Bad Boy BB80B000A Operator's manual

Silvercrest SABD 3.7 LI D4 operating instructions

Silvercrest

Silvercrest SABD 3.7 LI D4 operating instructions

FLORABEST FLB 2500 A1 translation of original operation manual

FLORABEST

FLORABEST FLB 2500 A1 translation of original operation manual

Powersmart PS76101A instruction manual

Powersmart

Powersmart PS76101A instruction manual

Craftsman BV225 Operator's manual

Craftsman

Craftsman BV225 Operator's manual

Feider Machines FAST175T-1 Original instructions

Feider Machines

Feider Machines FAST175T-1 Original instructions

Hopewind HOPWINN HS100-1900B user manual

Hopewind

Hopewind HOPWINN HS100-1900B user manual

EuroLite AF-650 user manual

EuroLite

EuroLite AF-650 user manual

RedMax EBZ7150 Owner's/operator's manual

RedMax

RedMax EBZ7150 Owner's/operator's manual

Dolmar SP-7650.4 R Original instruction manual

Dolmar

Dolmar SP-7650.4 R Original instruction manual

Homelite YARD BROOM II UT08012 Repair sheet

Homelite

Homelite YARD BROOM II UT08012 Repair sheet

DeWalt DCBL722 instruction manual

DeWalt

DeWalt DCBL722 instruction manual

Zephyr CBE-1000 Use, care and installation guide

Zephyr

Zephyr CBE-1000 Use, care and installation guide

Stihl BGA 45 instruction manual

Stihl

Stihl BGA 45 instruction manual

Ozito BVP-2400 Operation manual

Ozito

Ozito BVP-2400 Operation manual

Hilti NBL 4-22 operating instructions

Hilti

Hilti NBL 4-22 operating instructions

PSG CADDY PA08520 installation instructions

PSG

PSG CADDY PA08520 installation instructions

BUSCH SAMOS SI 0045 E 1 instruction manual

BUSCH

BUSCH SAMOS SI 0045 E 1 instruction manual

manuals.online logo
manuals.online logoBrands
  • About & Mission
  • Contact us
  • Privacy Policy
  • Terms and Conditions

Copyright 2025 Manuals.Online. All Rights Reserved.