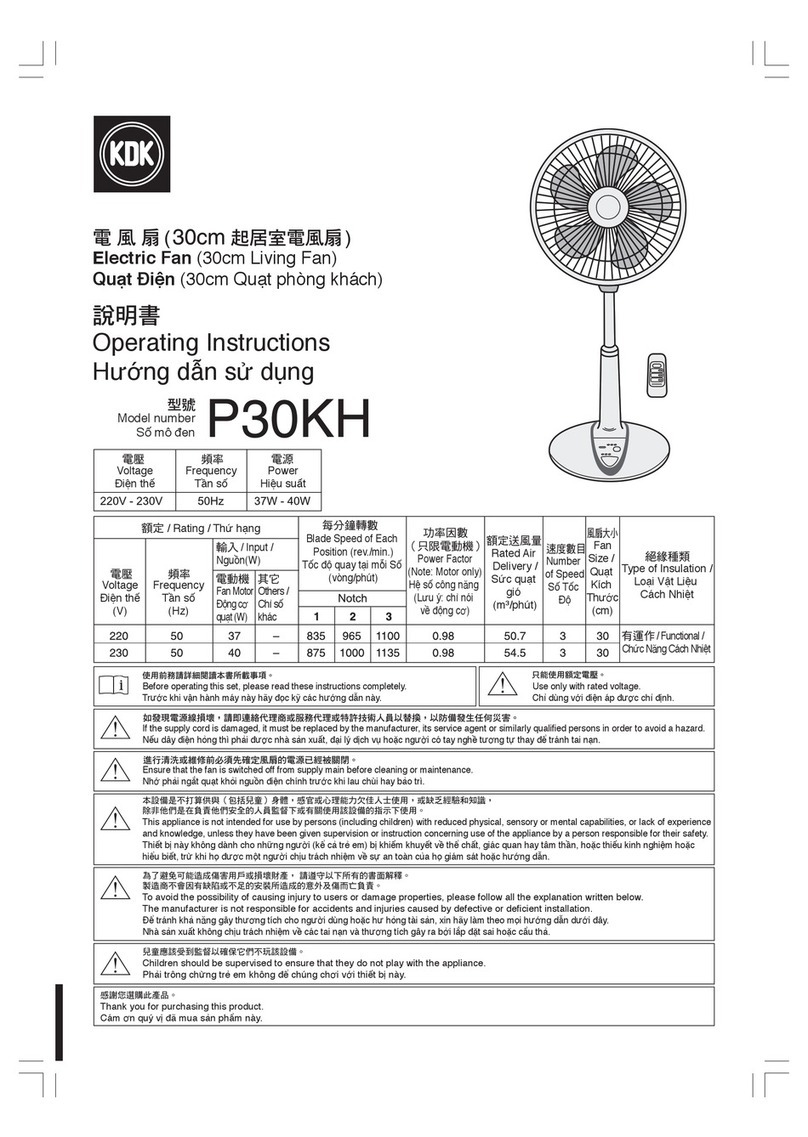
KDK SM30H User manual

型號 / Model No.
SM30H
使用說明書
電風扇 (30 cm 起居室電風扇)
Operating Instructions
Electric Fan (30 cm Living Fan)
Thank you very much for purchasing this KDK product.
Before operating this product, please read the instructions carefully,
and save this manual for future use.
安全注意事項
2-3
組裝方法
6-9
各部件名稱
10-11
使用方法
12-21
在必要時
22-23
․保養
․如何更換電池
․排解疑難
規格 封底
Safety precautions 4-6
How to assemble 6-9
Name of parts 10-11
How to use 12-21
When necessary 22-23
• Cleaning
• How to replace the battery
• Troubleshooting
Specifications Back cover
目錄
Contents
非常多謝你購買此 KDK 產品。
使用本產品前,請詳細閱讀本說明書,並保留作日後參考之用。
本產品只可在室內使用
This product is for indoor use only.

2
安全注意事項 請務必遵守這些指示
只應使用隨附的 AC 配接器。
不遵守指示可導致觸電、火災或故障。
切勿擅自拆散、修理或改造本產品。
可能著火或運行異常,引致觸電、火災或受傷。
․本產品故障時,請聯絡經銷商修理。
請勿使用超過額定功率的電插座或配
線器材。不要將本產品連接至額定電
壓及額定頻率以外的電源。
如使用電源延長線等超過額定功率,可能引致發熱,
造成火災。
出現故障時,立即停止使用本產品,
並拔除 AC 配接器。
可能引致發熱,造成觸電或火災。
[ 故障/失靈例子 ]
․雖然已接駁電源並開機,但電風扇沒有運行。
․運行時發出異常聲音。
․移動電源線時停止運行。
․扇葉不規則地轉動,或轉得很慢。
․發出焦味。
․馬達裝置、AC 配接器或電線異常地熱。
請立即聯絡經銷商進行保養/維修。
除非扇葉及保護網已經正確安裝,否
則不要開啟本產品的電源。
此舉可能引致受傷。
裝崁或儲存時,除非扇葉及保護網已經
正確安裝,否則不要按高度調整鈕。
馬達裝置及升降桿可能會瞬間鬆脫,並導致身體受傷。
不要令電線或 AC 配接器的插頭受損。
(切勿裁剪或改造。切勿強行折曲、扭曲或拉扯。
切勿放在發熱器具附近或負重。切勿捆成一札。)
使用損壞的電源線或插頭,可能引致短路等,並造成
觸電或火災。
․請聯絡經銷商維修電源線或插頭。
如果電源線已損壞,必須找製造商、服務代理商或合
資格人士更換,以免發生危險。
確保 AC 配接器的電源插頭已經完全插
入插座內。
如插頭鬆脫未插好,可能會引致觸電或插頭過熱而造
成火災。
․請勿使用已損壞的插頭或鬆脫的插座。
為避免引致使用者受傷或財物損壞的可能性,請務必遵守下
列注意事項。
․以下標誌是根據錯誤使用所產生的危險或受傷程度而分類。
警告 表示如不遵守該指示,可能造成死亡或
嚴重受傷。
注意 表示如不遵守該指示,可能造成人身傷
害或物品損壞。
․以下標誌為需要遵守的指示種類。(下列標誌為例子。)
此標誌表示為禁止
事項。
此標誌表示為強制
事項。
此標誌表示為必須小
心進行的事項。
警告
■此產品不適合身體、感官或精神功能遲緩,
或缺乏經驗與知識的人(包括兒童)使用,
除非他們在負責其安全的人的監督或指引
下使用。
■
請看管好兒童,確保他們不會以本產品玩耍。
■ 本電器只可使用隨附的電源裝置。
■ 本電器必須使用對應本電器上的標記的安
全特低電壓。
■清潔前確保已拔除 AC 配接器。
■請使用指定電池類型。
(鈕扣型鋰電池 (CR2025))
■拉出電池座並更換電池。(第 22 頁)
■確認正負極方向插入電池。
■耗盡的電池從本產品中取出並妥善處理。
■若長時間不使用本產品,請把電池取出。
■電源端子不可短路。

安全注意事項
3
SM30H
手濕時不要連接或拔除 AC 配接器。
此舉可能引致觸電。
不要將本產品放置在 AC 配接器的電線上。
此舉可能令電源線損壞,引致短路並造成觸電或火災。
使用本產品時不要把機身連接插頭推
向牆壁等的地方。
此舉可能令電源線損壞,引致短路並造成觸電或火災。
請勿把本產品浸於水中或沾水。
可能引致短路並造成觸電或火災。
請勿把本產品放置在發熱電器旁邊。
塑膠部件可能溶化而起火。
移動或收起本產品時請勿拉扯電源線。
此舉可能令電源線損壞,引致短路並造成觸電或火災。
請勿在風扇運行時拉緊電源線。
此舉可能令電源線損壞,引致短路並造成觸電或火災。
請勿拿著手柄擺動產品。
此舉可能引致受傷或產品受損。
不要將固定針或金屬等的異物放入
nanoeTM ( 納米離子 ) 出風口內。
這些物件會接觸到裡面的零件,並導致觸電或身體受傷。
裝嵌、清潔和儲存本產品時,確保拔
除 AC 配接器。
本產品可能會無預期地開始運作,引致受傷或觸電。
定期抹去 AC 配接器電源插頭上的塵埃。
如電源插頭上積聚了灰塵,潮濕的空氣等可能引致絕
緣不良而起火。
․拔除 AC 配接器,然後用乾布擦拭。
․長期不使用時,拔除 AC 配接器。
把鋰電池放在幼童觸及不到的地方。
幼童可能意外吞下。如出現此情況,請立即就醫。
切勿在以下場所使用本產品:
․接近易燃氣體或火源如爐具等場所。
․暴露於雨點或水的場所。
可能引致熄火、起火、爆炸、短路等,並造成觸電
或火災。
․不平坦或障礙物附近的場所。
本產品可能會跌下來,並導致身體受傷。
․直接陽光照射、雨淋風吹的位置。
可能引致過熱等並造成觸電或火災。
拔除 AC 配接器時,握住 AC 配接器並
將它拉出,而不是拉電線。
此舉可能令電源線損壞,引致短路並造成觸電或火災。
當 AC 配接器已經連接了電源時,皮膚
不要長時間接觸 AC 配接器。
不遵守指示可導致低溫燒傷。
* 低溫燒傷
即使物件只是比體溫高些少,但如果身體某點長時
間直接接觸那些物件,仍然可導致低溫燒傷。
不要將手指放進本產品的保護網或任
何運動的零件。
此舉可能引致受傷。
調節風向時,不要將手指放入運作中
的零件。
此舉可能引致受傷。
請勿拖拉本產品。
此舉可能損壞地板。
請勿讓身體對著本產品長時間吹風。
這可能會導致與健康有關的問題。
只應使用隨附的遙控器操作。
本產品可能會意外地開始操作,導致身體不適或受傷。
以下人士使用本產品時,應特別留意。
(幼兒、老人或不能自行調節體溫者)
讓身體對著本產品長時間吹風,可能會令他們感到不
適或脫水。
■要求事項 :
․不要將本產品放置於殺蟲劑或油類腐蝕性溶劑附近。
此可對品質產生壞影響,或破壞本產品。
․不要將本產品放置於高溫、潮濕或多塵的地方。
此可對品質產生壞影響,或破壞本產品。
․將本產品放置在離開電視機、收音機或其他影音器材 1 米
以上的地方使用。不這樣做可導致圖像受干擾或聲音失真。
注意

4
Safety precautions Always follow these instructions
Always use with the supplied AC
adaptor.
Failure to do so may cause electric shock, fire or
malfunction.
Never try to take apart, repair or
modify this product.
Ignition or abnormal operation may occur, and cause
electric shock, fire or injury.
• Contact the dealer for repairing this product.
Do not use more than the rating of the
electrical outlet or wiring accessories.
Do not connect this product to power
supply except rated voltage and rated
frequency.
If you exceed the rating using a power strip etc., heat
generation may occur and cause fire.
When a failure or malfunction occurs,
stop using the product immediately
and disconnect AC adaptor.
Heat generation etc. may occur and cause electric shock
or fire.
[Examples of failure/malfunction]
• Although connecting to power supply and turning on, the
fan does not operate.
• Abnormal noise is observed during operation.
• Moving the power cord stops operation.
• Blade rotates slowly, or irregularly.
• Burning smell is observed.
• Motor unit, AC adaptor or power cord becomes
abnormally hot.
Contact the dealer immediately for maintenance/
repairing.
Do not turn on the product unless
blade and guard are installed properly.
It may cause injury.
When assembling or storing, do not
press the height adjustment button
unless blade and guard are installed
properly.
Motor unit and slide pipe may come out rapidly and cause
injury.
To avoid the possibility of causing injury to users or damage to
properties, please follow all the explanations written below.
• The following symbols differentiate the levels of danger and injury
that may result if the product is improperly used.
WARNING
This symbol indicates that improper
handling may cause a risk of death or
serious injury.
CAUTION
This symbol indicates that improper
handling may cause a risk of injury or
damage to properties.
• The following symbols indicate type of instructions to be
observed. (The symbols given below are examples.)
This symbol denotes
an action that is
PROHIBITED.
This symbol denotes
a COMPULSORY
action.
This symbol denotes
an action that should
be carefully performed.
WARNING
■
This appliance is not intended for use by
persons (including children) with reduced
physical, sensory or mental capabilities,
or lack of experiences and knowledge,
unless they have been given supervision
or instruction concerning use of the
appliance by a person responsible for
their safety.
■
Children should be supervised to ensure
that they do not play with the appliance.
■
The appliance is only to be used with
the power supply unit provided with the
appliance.
■
The appliance must only be supplied at
safety extra low voltage corresponding to
the marking on the appliance.
■
Make sure to disconnect the AC adaptor
before cleaning.
■
Use the specified battery type.
(Lithium Button Cell Battery (CR2025))
■
Pull out the battery holder and replace
the battery. (p.22)
■
Batteries are to be inserted with the
correct polarity.
■
Exhausted batteries are to be removed
from the appliance and safely disposed
of.
■
If the appliance is to be stored unused
for a long period, the batteries should be
removed.
■
The supply terminals are not to be short-
circuited.

Safety precautions
5
SM30H
Do not damage the power cord or plug
of AC adaptor.
(Do not cut, modify. Do not forcefully bend, twist or pull.
Do not put near heating appliances, or put anything
heavy on. Do not bundle.)
If damaged power cord or plug is used, short circuit etc.
may occur and cause electric shock or fire.
• Contact the dealer for repairing the power cord or plug.
If the supply cord is damaged, it must be replaced
by the manufacturer, its service agent or similarly
qualified persons in order to avoid a hazard.
Make sure the power plug of AC
adaptor is fully inserted into socket.
Loose engagement of the plug and socket may cause
electric shock or fire due to overheat.
• Do not use the damaged plug or loosen socket.
Do not connect or disconnect the AC
adaptor with wet hands.
It may cause electric shock.
Do not place the product on its power
cord of AC adaptor.
It may damage the power cord, short circuit may occur
and cause electric shock or fire.
Do not use the product with pressing
the main body connection plug against
wall etc..
It may damage the power cord, short circuit may occur
and cause electric shock or fire.
Do not immerse the product in water,
or put water on it.
Short circuit may occur and cause electric shock or fire.
Do not place the product near heating
appliances.
Plastic parts may melt and catch fire.
Do not pull the power cord when
carrying and storing away the product.
It may damage the power cord, short circuit may occur
and cause electric shock or fire.
Do not stretch the power cord during
operation.
It may damage the power cord, short circuit may occur
and cause electric shock or fire.
Do not swing around the product with
the handle.
It may cause injury or damage the product.
Do not insert the pin, or foreign
objects such as metal, into the
nanoeTM emission outlet.
It may touch the parts inside and cause electric shock or
injury.
Do not use the product at the following
locations:
• Where it may be exposed to flammable gas or
near sources of flame such as gas ranges.
• Where it is exposed to rain or water.
Flame failure, catching fire, explosion, short circuit, etc.
may occur and cause electric shock or fire.
• Where it becomes unstable or place near the
obstacles.
The product may fall down and cause injury.
• Where it is exposed to direct sunlight or wind-
driven rain.
Overheat etc. may occur and cause electric shock or fire.
When disconnecting the AC adaptor,
grasp and pull the AC adaptor, not
the cord.
It may damage the power cord, short circuit may occur
and cause electric shock or fire.
Do not expose skin for a long time to
the AC adaptor, while connected to
power supply.
It may cause low-temperature burns.
*Low-temperature burns
Touching objects for a long time directly at same point in
body, even if it is slightly hotter than body temperature,
may cause low-temperature burns.
Do not put your fingers into the guard
or any moving part of the product.
It may cause injury.
Do not put your fingers into the moving
parts when adjusting wind direction.
It may cause injury.
Do not drag the product.
It may cause damage to the floor.
CAUTION
Make sure to disconnect the AC
adaptor when assembling, cleaning
and storing away the product.
The product may start operating unexpectedly and cause
injury or electric shock.
Wipe off dust on the power plug of AC
adaptor periodically.
If the plug is used with dust accumulated on it, humid air
etc. may cause poor insulation and fire.
• Disconnect the AC adaptor and wipe it with a dry cloth.
• Disconnect the AC adaptor when not using for a long
period.
Keep the lithium battery out of reach
of small children.
Small children may accidentally swallow it. If swallowed,
call your doctor for advice immediately.

6
A
B C
D
F
K
I
J
G H
E
組裝方法
How to assemble
Do not expose yourself to wind
generated by the product for a long
time.
It may cause health related issue.
Do not operate with the remote control
unit other than the supplied.
The product may start operating unexpectedly and cause
discomfort or injury.
Special attention should be paid when
people such as the following use this
product.
(Infants, children, elderly people, or people who cannot
control their own body temperature)
Exposed themselves directly to wind generated by
the product for a long time, they may feel sick or get
dehydrated.
■
Notice:
• Do not place the product near insecticide, oil corrosive solvent.
It may cause bad effects on quality, or damage the product.
• Do not place the product in high temperature, high humidity or
dusty place.
It may cause bad effects on quality, or damage the product.
• Use the product away more than 1 m from TV, radio, or other AV
appliances. Failure to do so may cause picture disturbance or
audio distortion.
Safety precautions
Always follow these instructions

How to assemble
組裝方法
7
SM30H
A
遙控器
E
底座
I
螺帽(將後保護網與馬達接合)
ARemote control
EBase
INut (to engage the rear
guard with the motor)
B
遙控器支架
F
後保護網
J
架子
BRemote control holder
FRear guard
JStand
C
旋轉器
G
扇葉
K
螺帽(將架子與底部接合)
CSpinner
GBlade
KNut (to engage the
stand with the base)
安裝架子
►8頁
Installing the stand
►P. 8
安裝後保護網
►9頁
Installing the rear guard
►P. 9
安裝扇葉
►8頁
Installing the blade
►P. 8
D
AC 配接器
H
前保護網
DAC adaptor
HFront guard
確保所有零件及配件齊備。
所有零件及配件均如左邊圖包裝著。
Make sure that all the parts and accessories are provided thoroughly.
They are packed as shown in the figure on the left.
裝嵌前
Before assembling
安裝前保護網
►9頁
Installing the front guard
►P. 9
裝上遙控器支架
►9頁
Attach the remote
control holder ►P. 9
1
1
2
345
23 4 5

8
組裝方法
How to assemble
e f g
1
將架子
J
底部的螺帽
K
移除。
1
移除蓋子
f
,並抹掉馬達
軸的油脂。
1Remove the cap fand
wipe grease off the motor
shaft.
1Remove the nut Kat the
bottom of the stand J.
2
將底座的凸桿
b
插入架子的
凹槽
a
中。
․將架子推入底座並固定好。
2
對齊馬達軸上的固定針
e
與扇葉的凹位
g
。
2Align the pin eon the
motor shaft with the slot g
in the blade.
2Insert the projection bof
the base into the groove a
of the stand.
• Push the stand in the base
and secure.
3
如圖將機身安放。
確切地將螺帽
K
,將架子固定到底座。
․輕輕地安放機身,以免架子從底座跌出。
■注意事項 :
․確切地將螺帽擰緊,確保不會鬆脫。
3
擰緊旋轉器
C
。
■注意事項 :
․確切地擰緊旋轉器,確保電風扇運作時不會鬆脫。
3
Tighten the spinner
C
.
■
Attention:
• Tighten the spinner securely, not to be loosened during
operation.
3Lay the main body as shown in the figure.
Tighten the nut Kto secure the stand to the base.
• Lay the main body softly to avoid the stand slipping off
the base.
■
Attention:
• Tighten the nut securely, not to be loosened.
1
1
2
2
3
3
K
C
K
J
a
b
■安裝架子
■安裝扇葉
■
Installing the blade
■
Installing the stand
1
4

How to assemble
組裝方法
d
c
1
9
SM30H
1
移除保護網停止器
螺帽
I
。
1Remove the guard
stopper nut I.
2
對齊 3 個凸桿
c
及 3 個孔洞
d
,然後將後保
護網
F
裝入馬達。
3
擰緊保護網停止器螺帽
I
。
■注意事項 :
․
確切地擰緊保護網停止器螺帽,確保電風扇運作時不會鬆脫。
2Align each of 3 projections cand 3 holes d,
then fix the rear guard Fto the motor.
3Tighten the guard stopper nut I.
■
Attention:
• Tighten the guard stopper nut securely, not to be
loosened during operation.
將遙控器支架
B
安裝在架子的背面。
Attach the remote control holder Bat rear
side of the stand.
k
1
打開前保護網的夾子
h
。
1Open the clip hof the
front guard.
3
對齊和將線材完全插入前
保護網及後保護網四周。
3Align and insert all the
way around of the front
and rear guard.
2對齊前保護網的鉤子 i與
後保護網頂部的配合標記
j,然後插入線材 k。
2Align the hook iof
front guard with the
marked spot jat the
top of rear guard, then
insert the wire rod k.
4
如圖接合夾子
h
,以固
定前保護網及後保護網。
4Engage the clip hto
fix the front and rear
guard as shown in the
figure.
12
2
3 4
3
B
II
F
■注意事項 : ․當打開夾子,請小心不要弄傷手指。
․將線材完全插入保護網四周,並確切地接合夾子,確保電風扇運作時不會鬆脫。
■
Attention: • When opening the clip, please be careful not to hurt your fingers.
• Insert all the way around of guard and engage the clip securely, not to be loosened during operation.
hh
i
j
■安裝後保護網
■
Installing the rear guard
■裝上遙控器支架
■
Attach the remote control holder
■
安裝前保護網
■
Installing the front guard
2
5
3

10
A
B
H
F
I
K
L
M
N
O
P
E
D
C
G
J
只應使用隨附的 AC 配接器。隨附的 AC 配接器只供本產品使用,不要用在其他電器上。
Always use with the supplied AC adaptor. The supplied AC adaptor is for this product only. Do not use with other appliances.
R
S
T
U V
各部件名稱
Name of parts
R
AC 配接器
RAC adaptor
S
AC 配接器器身
SAC adaptor body
T
電源插頭
TPower plug
U
電源線
UPower cord
V
機身連接插頭
VMain body connection plug
A
扇葉
E
指示器
I
nanoeTM ( 納米離子 ) 出風口
M
高度調整鈕
ABlade
EDisplay
InanoeTM emission outlet
MHeight adjustment button
B
前保護網
F
溫度感應器
J
後保護網
N
遙控器
BFront guard
FTemperature Sensor
JRear guard
NRemote control
C
夾子
G
控制板
K
手柄
O
遙控器支架
CClip
GControl panel
KHandle
ORemote control holder
D
架子
H
底座
L
升降桿
P
機身連接插頭用插座
DStand
HBase
LSlide pipe
PSocket for the main
body connection plug

Name of parts
各部件名稱
a
j k
r
l m
n o
p q
b
d
c
e
h
f
g
i
11
SM30H
指示器
Display
控制板 / 遙控器
Control panel / Remote control
i
[ 兒童安全鎖 ] 指示燈
m
開機定時器鈕
q
風速鈕 (+)
i[Child lock] lamp
mOn timer button
qSpeed button (+)
j
1/f Yuragi 鈕
n
上下擺動鈕
r
開/關鈕
j1/f Yuragi button
nVertical swing button
rOff/On button
k
溫度感應器
鈕
o
左右擺動鈕
s
NANOE 鈕
kTemp. Sensor button
oHorizontal swing button
sNANOE button
l
關機定時器鈕
p
風速鈕 (-)
t
晚間模式鈕
lOff timer button
pSpeed button (-)
tNIGHT MODE button
r n
q
p
m
s
j
o
t
k
l
a
[風速]指示燈
e
[ 左右擺動 ] 指示燈
a[Speed] lamp
e[Horizontal swing] lamp
b
[ 上下擺動 ] 指示燈
f
[ 溫度感應器 ] 指示燈
b[Vertical swing] lamp
f[Temp. Sensor] lamp
c
[1/f Yuragi] 指示燈
g
[ 開機定時器 ] 指示燈
c[1/f Yuragi] lamp
g[On timer] lamp
d
[nanoeTM ( 納米離子 )] 指示燈
h
[ 關機定時器 ] 指示燈
d[nanoeTM ] lamp
h[Off timer] lamp

12
1
將機身連接插頭
A
完全插入底座背面的插座
B
。
․注意要正確地接駁機身連接插頭。 (有凹槽
C
的那一面向上)
2
接駁 AC 配接器至電源。
1Insert fully the main body connection plug Ainto the socket Bat the back of
the base.
• Note that the main body connection plug should be connected correctly. (the side with
groove Cfacing up)
2Connect the AC adaptor to the power supply.
B
A
1
2
․將遙控器發射器
B
指向接收器
C
。
․有效的操作是距離接收器約 4.5 米,左右兩邊在 25 度以內的範圍。
■注意事項 :
․不要讓遙控器接觸液體。敬請小心不要摔下或踏遙控器。
此舉可能引致遙控器故障。
․不要擋住接收器。此舉將引致遙控器無法操作。
․如遙控器不能正常工作,請更換電池。
․請不要讓接收器直接受到陽光和強烈照燈的照射。( 此舉會引起遙控操作不靈。)
․不用遙控器的時候,將它放在遙控器支架內。
• Point the remote control transmitter Bin the direction of the receptor C.
• The controllable distance is about 4.5 m from the receptor and 25 degree angle to the
right and left.
■
Attention:
• Do not spill liquids on the remote control. Do not drop or step on it. It may damage the
remote control.
• Do not cover up the receptor. It prevents the remote control from functioning.
• If the remote control becomes ineffective, replace with a new battery.
• Keep the receptor out of direct sunlight and strong artificial light.
(It may diminish the remote control effectiveness.)
• When you do not use the remote control, keep it in the remote control holder.
․必先拉出並拆除保護膠紙
A
。
(請根據當地規定廢棄膠紙。)
• You must pull out and remove the protective plastic sheet A.
(Please dispose of the sheet according to the local regulations.)
使用遙控器前
使用前
Before use
Before using the remote control
遙控器使用方法
How to use the remote control
25°25°
A
C
B
4.5 m
使用方法
How to use
C

How to use
使用方法
13
SM30H
每次按下按鈕時,進行開關。
․第一次使用時,電風扇的運作設定是風速“1"及 nanoeTM ( 納米離子 )“開"。
․風速、定時器、溫度感應器 及 NANOE 鈕只能夠在電風扇開啟時使用。
Turn on or off with the button pressed.
• When the first time using, the fan operates at the setting of speed “1” and nanoeTM “On”.
• Speed, Timer, Temp. Sensor and NANOE buttons are effective only when the fan is turned on.
Off/On
(開/關)
Off/On
■說明 :
․使用計時器功能以節省能源或避免睡眠時過涼。
․為了提高升降溫效果,建議使用電風扇時同時開冷氣。
․按住任何按鈕 8 秒,電風扇會基於安全理由而關閉。
․長時間不使用時
關閉電源,並拔除 AC 配接器的電源以節省能源。
電風扇關閉時仍然會消耗大約 0.4 W 的電力。
■
Note:
• Use the timer function in order to save energy or avoid excess cooling while sleeping.
• Combination use of fan and air conditioner is recommended in order to enhance the effect of heating and
cooling.
• When pressing and holding any buttons for 8 seconds, the fan turns off for safety.
• For extended non-use
Turn off and disconnect the AC adaptor from power supply in order to save energy.
The fan consumes about 0.4 W even when turning off.
記憶功能
․電源開啟時,電風扇會使用之前設定的 風速、1/f Yuragi、nanoeTM ( 納米離子 )、
溫度感應器 及 搖頭 開始操作。
․計時器的設定將不會被儲存。
․拔出插頭後,記憶將會消除。
Memory function
• When turning on, the fan starts operation at previous setting of Speed, 1/f Yuragi, nanoeTM,
Temp. Sensor and Swing.
• Timer setting will not be retained in memory.
• When unplugged, memory will be deleted.

14
睡眠時可以校暗指示燈。
You can dim the display lamp when you sleep.
按住上下擺動鈕 2 秒。
․按一下按鈕,指示燈會變暗或變光。
Press and hold the Vertical swing button for 2 seconds.
• Display lamps become dim or bright with the button pressed.
按 NIGHT MODE 鈕。
․按一下按鈕,指示燈會變暗或變光。
Press NIGHT MODE button.
• Display lamps become dim or bright with the button pressed.
(Speed “1”) (Speed “2”) (Speed “8”)
Night mode
(晚間模式)
Night mode
Speed
(風速)
Speed (Wind speed)
:減弱
: To moderate
:增強
: To strengthen
■當覺得指示燈刺眼時
■
When you feel the display lamp is dazzling
按掣可轉換至另一個風速設定。
․風速有 8 個級別可供調校。
([ 風速 ] 指示燈顯示目前風速。)
Each press of the button will switch to next wind speed setting.
• Wind speed can be adjusted at 8 levels.
([Speed] lamp indicates current wind speed.)
控制板
Control panel
遙控器
Remote control
How to use
使用方法

How to use
使用方法
15
SM30H
按一下按鈕開啟或關閉 nanoeTM ( 納米離子 )。([nanoeTM ( 納米離子 )] 指示燈會亮起。)
․nanoeTM ( 納米離子 ) 運作時會發出微弱的聲音。
․第一次使用時,或關機然後再連接電源時,nanoeTM ( 納米離子 ) 將會開啟。
․nanoeTM ( 納米離子 ) 只會在電風扇運作時發揮功能。
․nanoeTM ( 納米離子 ) 有辟除衣服臭味的功效。
- 如要辟除衣服臭味,將風調校至吹向衣服,使它暴露於 nanoeTM (納米離子)中。
- 確保衣服不會碰到前保護網/後保護網。
nanoeTM operation is turned on or off with the button pressed. ([nanoeTM] lamp is lit.)
• During nanoeTM operation, faint sound is heard.
• When the first time using, or when disconnecting and then connecting to power supply again, nanoeTM is
turned on.
• nanoeTM can be functioned only while the fan operates.
• nanoeTM is effective to deodorise clothes.
- Adjust the wind direction for the clothes to be exposed to nanoeTM and deodorised.
- Make sure that the clothes do not hit the front/rear guards.
按 NANOE 鈕。
Press NANOE button.
同時按住按鈕 3 秒。
Press the buttons simultaneously and hold for 3 seconds.
nanoeTM
(納米離子)
nanoeTM
產生 nanoeTM ( 納米離子 ) 的條件
․nanoeTM ( 納米離子 ) 產生自周圍的空氣,在某些氣溫及濕度條件下可能無法產生。
․nanoeTM ( 納米離子 ) 產生的條件
室溫:約 5 ℃ 至 35 ℃ / 露點溫度:2 ℃或以上 / 相對濕度:約 30 % 至 85 %
少量臭氧會產生。
․
nanoeTM ( 納米離子 ) 運作時會產生少量臭氧。此臭氧量與存在於自然世界的量相同,不會對人有害。
Conditions to generate nanoeTM
• Because nanoeTM is generated from ambient air, it may not be generated under the certain conditions
of temperature and humidity.
• Conditions that nanoeTM is generated
Room temperature: about 5 °C to 35 °C / Dew point: 2 °C or above / Relative humidity: about 30 % to 85 %
A small amount of ozone is generated.
• During nanoeTM operation, a small amount of ozone is generated. It is the same amount as that exists
in the natural world and is not harmful to human.
控制板
Control panel
遙控器
Remote control
■說明 :
․nanoeTM ( 納米離子 ) 及 nanoeTM ( 納米離子 ) 標誌是 Panasonic Corporation 的商標。
■
Note:
• nanoeTM and the nanoeTM mark are trademarks of Panasonic Corporation.

16
拿著手柄並左右擺動,以調校至想要的角度。
■說明 :
․如要將左右風向調校回原本的位置(0∘),首先將電風扇
轉動至最大的 36∘,然後向反方向轉動,直至發出兩下咔
嗒聲。最後按開/關鈕。
Adjust to the desired angle with holding the handle and
oscillating to right and left.
■
Note:
• To return the horizontal wind direction to the original position (0°),
firstly turn to maximum 36° and then turn in the opposite direction
until it clicks twice, lastly press Off/On button.
握住機身,拿著手柄並上下擺動,以調校至想要的角度。
Adjust to the desired angle with grasping the main body,
holding the handle and oscillating up and down.
人手調校上下風向
To adjust the vertical wind direction by hand
人手調校左右風向
To adjust the horizontal wind direction by hand
36°
0°
36°
14°
21°
Swing
(搖頭)
Swing (Oscillation)
上下擺動
按一下使電風扇上下擺動。
([ 上下擺動 ] 指示燈會亮起。)
再按一下使電風扇停止擺動。
․擺動角度為向上約 15∘及向下約 5∘。
Vertical swing
Press to swing vertically.
([Vertical swing] lamp is lit.)
Press again to stop swing.
• Swing angle is about 15° upward and
about 5° downward.
左右擺動
按一下使電風扇左右擺動。
每按一下按鈕將會切換至下一個角度設定。
․[ 左右擺動 ] 指示燈顯示目前的設定角度。
․取消時,所有燈會熄滅。
Horizontal swing
Press to swing horizontally.
Each press of the button will switch to next angle setting.
• [Horizontal swing] lamp indicates current setting angle.
• When cancelling, all lamps turn off.
How to use
使用方法

How to use
使用方法
17
SM30H
按一下高度調整鈕以解鎖和使升降桿可調校高度。
■注意事項 :
․
提起前請先確保升降桿已固定。
․如果提高升降桿或按高度調整鈕時有困難,請先推低升降桿,然後按高度調整
鈕並提高升降桿。
Press the height adjustment button to release the lock and enable to adjust the
height of slide pipe.
■
Attention:
• Make sure to fix the slide pipe before carrying.
• When you have difficulty in raising up the slide pipe or pressing the height adjustment
button, once push down the pipe, then press the button and raise the pipe.
調校升降桿高度的方法
How to adjust the height of slide pipe
■說明 :
․設定左右擺動角度或恢復左右擺動運作後,電風扇可能會在最盡的位置停止
擺動以偵測角度,又或者會發出咔嗒聲。
■
Note:
• After setting horizontal swing angle or resuming operation with horizontal swing,
it may stop swing at the end position temporarily to detect the angle, or clicking
sound may be heard.
組合
上下及左右擺動按鈕的組合可造出立體擺動
的運作。
Combination
Combination of vertical and horizontal
swing buttons enables to operate with three-
dimensional swing.
注意
不要將手指放入運作中
的零件。
此舉可能引致受傷。
CAUTION
Do not put your fingers
into the moving parts.
It may cause injury.

18
按掣可轉換至另一個定時設定。 ([ 關機定時器 ] 指示燈顯示設定時間。)
按掣可轉換至另一個定時設定。 ([ 開機定時器 ] 指示燈顯示設定時間。)
Each press of the button will switch to next timer setting. ([On timer] lamp indicates the setting hours.)
Each press of the button will switch to next timer setting. ([Off timer] lamp indicates the setting hours.)
․取消時,所有燈會熄滅,但風扇會繼續運作。
․過了預設的時間後,電風扇會停止運作。
․
過了預設的時間後,電風扇會停止運作,然後恢復運作。
․隨著時間經過,指示燈會顯示電風扇恢復運
作前大約的剩餘時間。
․此按鈕只能夠在電風扇開啟時使用。
(電風扇關閉時無法設定。)
• The fan stops operation and resumes when the preset
hours has passed.
• As time elapses, the lamp shows the approximate
time before the fan resuming operation.
• The button is effective only when the fan is turned
on. (You cannot set while the fan is turned off.)
• When cancelling, all lamps turn off and the fan
operates continuously.
• The fan stops operation when the preset hours
has passed.
․
隨著時間經過,指示燈會顯示大約的剩餘時間。
․此按鈕只能夠在電風扇開啟時使用。 (電風
扇關閉時無法設定。)
․設定開機定時器後,即使電風扇已經關閉,
仍然可設定風速、搖頭、兒童安全鎖、1/f
Yuragi、溫度感應器及 nanoeTM ( 納米離子 )。
• When On timer is set, you can set Speed, Swing,
Child lock, 1/f Yuragi, Temp. Sensor operation
and nanoeTM even while the fan is turned off.
• As time elapses, the lamp shows the
approximate remaining time.
• The button is effective only when the fan
is turned on. (You cannot set while the fan is
turned off.)
Off timer
(關機定時器)
On timer
(開機定時器)
On timer
Off timer
Ex.
( 例子 ): 於 8:00 設定關機定時器為 [2]
Ex.
( 例子 ): 於 11:00 設定開機定時器為 [4]
Ex. (Example): When setting On timer [4] at 11:00
Ex. (Example): When setting Off timer [2] at 8:00
8:00 10:00
11:00 15:00
How to use
Ex.
Ex.
使用方法
■說明 :
․設定開機定時器時,所有指示燈會變暗。
►如要將燈變亮(14 頁)
■
Note:
• When setting On timer, all the display lamps are dimmed.
►To brighten the lamp (P.14)

How to use
使用方法
19
SM30H
開機/關機定時器設定的組合
Combination of Off/On timer setting
Ex. A
( 例子 ): 於 11:00 設定關機定時器為 [2],並於 12:00 設定開機定時器為 [4]
Ex. A(Example): When setting Off timer [2] at 11:00 and On timer [4] at 12:00
Ex. B
( 例子 ): 於 11:00 設定開機定時器為 [4],並於 12:00 設定關機定時器為 [2]
Ex. B(Example): When setting On timer [4] at 11:00 and Off timer [2] at 12:00
Ex. C
( 例子 ): 於 11:00 設定開機定時器為 [4],並於 14:00 設定關機定時器為 [2]
Ex. C(Example): When setting On timer [4] at 11:00 and Off timer [2] at 14:00
․開機及關機定時器可以同時設定。
․過了預設的關機定時器時間後,電風扇會停止運作。
過了預設的開機定時器時間後,電風扇會恢復運作。
• You can set Off and On timer simultaneously.
• When the preset hours of off timer has passed, the fan stops operation. When the preset hours of
on timer has passed, the fan resumes operation.
․電風扇於 13:00 停止運作,並於 16:00 恢復運作。
• The fan stops operation at 13:00, and resumes at 16:00.
․如果關機定時器的剩餘時間開始計算前已到了開機定時器的恢復時間,
則開機定時器的設定會被取消。
• When the time to resume with On timer comes before the remaining time of Off
timer, On timer is canceled.
․在電風扇已關閉並在已經設定了開機定時器的情況下設定關機定時器時,
系統將會優先處理關機定時器的設定。
• When you set Off timer during the fan turning off with On timer, Off timer setting
is priority.
11:00 12:00 14:00 15:00
11:00 14:00 16:00
11:00 12:00 13:00 16:00
Ex. A
Ex. B
Ex. C

20
按住 1/f Yuragi 鈕 3 秒。([ 兒童安全鎖 ] 指示燈會亮起。)
再按住 1/f Yuragi 鈕 3 秒以取消。
Press and hold 1/f Yuragi button for 3 seconds. ([Child lock] lamp is lit.)
Press and hold the button for 3 seconds again to cancel.
․只可使用控制板設定兒童安全鎖。
․如果在電風扇運作時設定兒童安全鎖,唯一可做到的是關閉電風扇或取消兒童安全鎖。
(關閉電風扇後,如果想恢復運作,必須取消兒童安全鎖。)
․如果電風扇關閉時設定兒童安全鎖,唯一可做到的是取消兒童安全鎖。
• You can set Child lock with the control panel only.
• If you set Child lock during operation, only what you can do is to turn off or to cancel Child lock.
(After turning off, if you want to resume operation, you must cancel Child lock.)
• If you set Child lock while the fan is turned off, only what you can do is to cancel Child lock.
每按一下按鈕會切換至下一個模式設定。([ 溫度感應器 ] 指示燈顯示目前設定。)
按風速鈕以取消溫度感應器運作。
Each press of the button will switch to next mode setting. ([Temp. Sensor] lamp indicates current setting.)
Press Speed button to cancel Temp. Sensor operation.
溫度感應器運作(自動控制溫度感應器)
Temp. Sensor operation (Automatic control with temperature sensor)
■注意事項 :
․不要遮蓋溫度感應器。否則會
阻礙感應器正確偵測溫度。
․
於低溫模式或高溫模式,就算電
風扇似乎已停止,但電源是尚未
關閉的。
不使用時,按開/關鈕以停止。
■
Attention:
• Do not cover up the temperature
sensor. It prevents the sensor from
detecting correctly.
• In Low mode or High mode, even
if the fan seems to stop, it is not off
the power.
Press Off/On button to stop, when
not using.
Child lock
(兒童安全鎖)
Child lock
How to use
透過溫度感應器探測室溫,電風扇會自動控制風速。
Detecting room temperature with the temperature sensor, the fan controls wind speed automatically.
■說明 :
當睡眠模式運作時
․所有指示燈會變暗。►如要將燈變亮(14 頁)
․
當睡眠模式運作時按風速鈕,睡眠模式會被取消。如要再次
啟動睡眠模式,按溫度感應器鈕,然後選擇睡眠模式。
․如要睡眠時自動停止運作,請設定關機定時器。
關閉睡眠模式運作後
․
按開/關鈕,電風扇會以上次同樣的風速啟動睡眠模式運作。
以開機定時器恢復運作時,電風扇會以上次停止運作時同樣
的風速啟動睡眠模式運作。
■
Note:
During Sleep mode operation
• All the display lamps are dimmed. ►To brighten the lamp (P.14)
• When pressing Speed button, Sleep mode is canceled. To return Sleep
mode, press Temp. Sensor button and select Sleep mode again.
• To stop operation automatically while sleeping, set Off timer.
After turning off sleep mode operation
• Pressing Off/On button, the fan starts sleep mode operation at
the same wind speed as last time.
Resuming with On timer, the fan starts sleep mode operation at
the same wind speed as when stopping.
使用方法
Table of contents
Other KDK Fan manuals