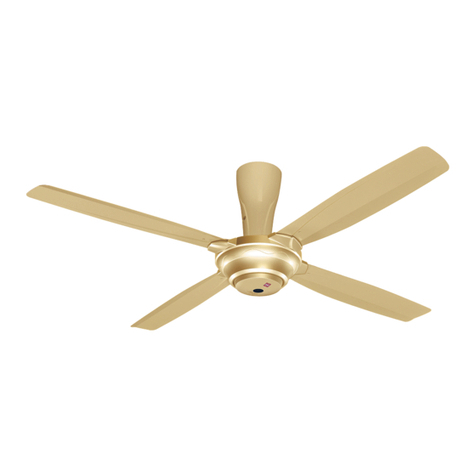
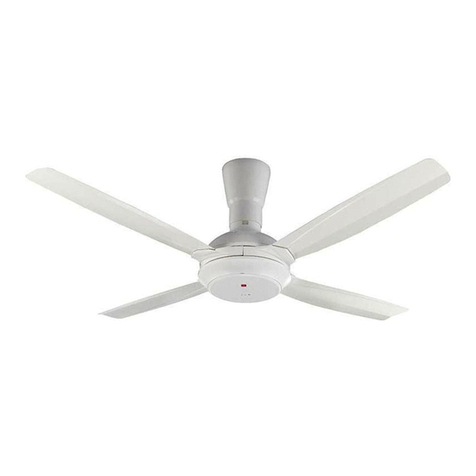
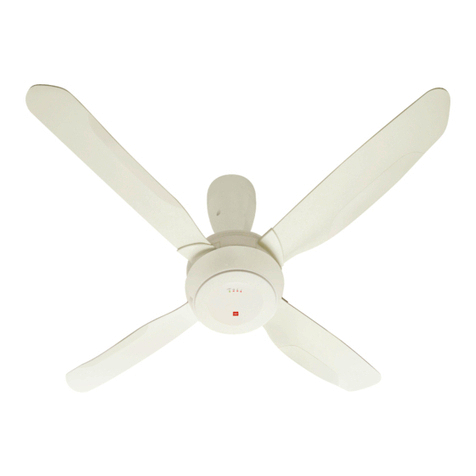
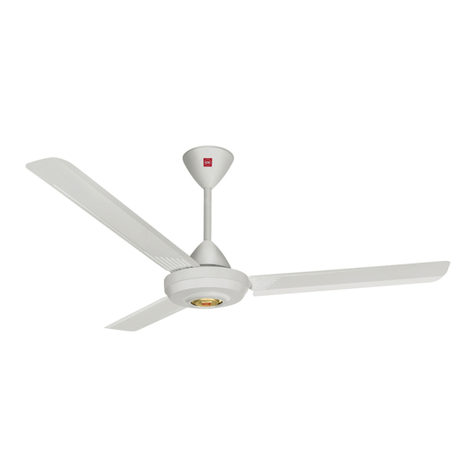
KDK E48HP User manual

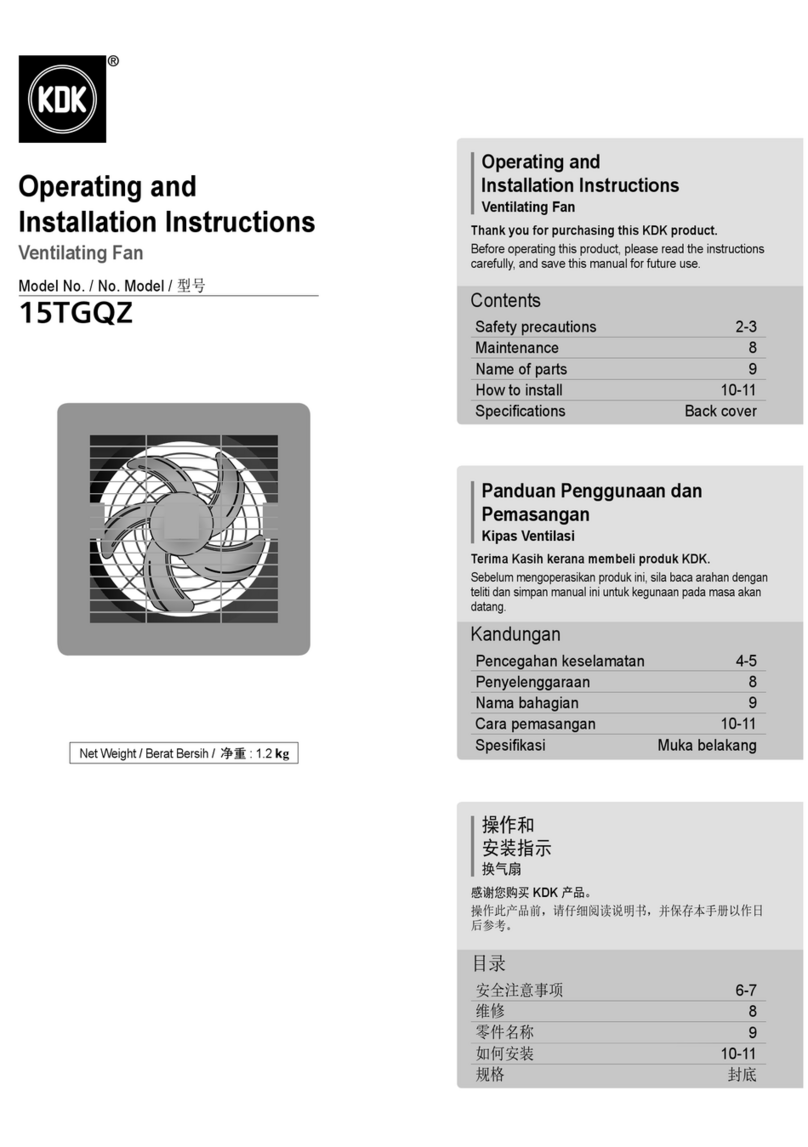
Operating and
Installation Instructions
Ceiling Fan
Model No. / ဴ
E48HP
E48GP
• E48HP • E48GP
Net Weight /
(E48HP) : 5.2
kg
Net Weight /
(E48GP) : 5.5
kg
Operating and
Installation Instructions
Ceiling Fan
Thank you for purchasing this KDK product.
Before operating this product, please read the instructions
carefully, and save this manual for future use.
Safety precautions 2 - 3
Maintenance 6
Name of parts 7
How to install 8 - 13
How to use 14 - 19
Specifications Back Cover
Contents
ᐇհڷ
Ԋ၆ࡾҰ
Ӥ
ཐᗂௌᗊີ KDK ࠢȄ
ᐇհԪࠢࠉȂрಠᎧᇳ݂Ȃٮ߳ԆҏЙыоհР
ࡣՃȄ
ԊӒݧཎٱ 4 - 5
ᆰওġġ 6
ႭӇӪᆎ 7
ԃդԊ၆ 8 - 13
ԃդٺҢ 14 - 19
ೣ ࡌۻ
Ҭᓃ
Complies with
IMDA Standards
DA108995

2
To avoid the possibility of causing injury to users or damage to properties, please follow all the explanations written below.
This symbol denotes an action that is COMPULSORY.
This symbol denotes an action that is PROHIBITED.
WARNING A state that may be caused by the mishandling of products, which, if not avoided,
may lead to the possibility of death or serious injury of users.
CAUTION A state that may be caused by the mishandling of products, which, if not avoided,
may result in the injury of users or property damage.
Safety precautions Always follow these instructions
WARNING
Do not install the Ceiling Fan near chemicals and
alkaline.
Can cause fire, explosion, short circuit and electrical
shock.
Do not damage the wire during installation e.g.
deform due to heat, twist, bend, etc.
Can cause fire, explosion, short circuit and electrical
shock.
Do not use power supply other than rated voltage
mentioned.
Overheating can cause electrical shock and fire.
Do not insert any metal items in the battery area
with the Battery.
Can cause fire, explosion, short circuit and electrical
shock.
Do not hang onto the Ceiling Fan.
Can cause injury if Ceiling Fan drops.
Do not use modified parts other than original supplied
parts.
Can cause injury if the Ceiling Fan drops.
Do not disassemble or remove the pipe from Motor Unit.
Can cause fire, electrical shock, injury and Ceiling Fan to
drop.
Do not disassemble the Ceiling Fan unless stated
by this manual.
Must use only supplied parts.
Can cause fire, electrical shock, injury and Ceiling Fan
to drop.
Do not touch the Ceiling Fan while it is operating.
Can cause injury, damage and Ceiling Fan to drop.
Do not sprinkle water to the Ceiling Fan or do not
wet the Ceiling Fan.
Can cause fire, explosion, short circuit and electrical
shock.
Do not install the Ceiling Fan at a wet, high
temperature and high humidity area such as shower
room.
If an electrical current leakage occurs, it can cause
electrical shock and fire easily.
Follow strictly all the instructions given in this
manual for installation.
Electrical or installation work needs to be performed
by a qualified individual.
Installation error can cause fire, electrical shock, injury
and Ceiling Fan to drop.
Switch off the power supply and wait until the
Blades is fully static, before cleaning or doing any
maintenance jobs.
Can cause injury and electrical shock if Ceiling Fan
move suddenly.
Kindly refer to your authorized dealer for repairing or
maintenance issue.
Tighten the Blade Screws firmly using a
screwdriver.
(250-300 N•cm)
Can cause injury if Blade drops.
Ensure that the Hanger Base can sustain more than
10 times the Ceiling Fan weight.
Can cause injury if Ceiling Fan drops.
Stop using the Ceiling Fan when any abnormality or
failure occurs and turn “OFF” the Miniature Circuit
Breaker (MCB).
Risk of smoke, fire, electrical shock and drop.
Please contact your authorized dealer for maintenance/
repair.
Dismantle the broken or damaged Ceiling Fan.
Can cause injury if Ceiling Fan drops.
If unusual oscillating movement is observed, immediately
stop using the Ceiling Fan and contact the manufacturer,
its service agent or suitably qualified persons.
Can cause injury if Ceiling Fan drops.
Safety Wire must be fixed correctly to the Pipe.
Can cause injury if the Ceiling Fan drops.
Do not install the Ceiling Fan at oily and dusty
places.
Can cause fire, explosion, short circuit and electrical
shock.
Do not install the Ceiling Fan near flammable areas
such as a gas cooker.
Can cause fire, explosion, short circuit and electrical
shock.

3
CAUTION
Safety precautions Always follow these instructions
To avoid the possibility of causing injury to
users or damage to properties, please follow
all the explanation written in this manual. The
manufacturer will not be responsible for any
accidents or injuries caused by defective, deficient
installation or installation which does not follow the
instruction manual.
Can cause the injury of users or property damage.
This appliance is not intended for use by persons
(including children) with reduced physical, sensory
or mental capabilities, or lack of experience
and knowledge, unless they have been given
supervision or instruction concerning use of the
appliance by a person responsible for their safety.
Children should be supervised to ensure that they
do not play with the appliance.
Can cause the injury of users or property damage.
The Ceiling Fan must be mounted above 2.3 m
from the floor and 1 m from the wall to the Blade.
Can cause unstable air flow and affect Ceiling Fan to
wobble.
Can cause injury if Ceiling Fan drops.
Refer to page 15 (step 2 -
1
) for the measurement
method.
After installation make sure the Ceiling Fan does
not wobble extremely.
Can cause injury if Ceiling Fan drops.
Replace all the Blades if any of them breaks or
cracks.
Wobbling can cause Ceiling Fan to drop.
The mounting of the suspension system shall be
performed by the manufacturer, its service agent or
suitably qualified persons.
Can cause injury if Ceiling Fan drops.
The Ceiling Fan suspension system should be
examined at least once every two years.
Can cause the injury of users or property damage.
The replacement of parts of the safety suspension
system device shall be performed by the
manufacturer, its service agent or suitably qualified
persons.
Can cause the injury of users or property damage.
This product is for in house use only. Do not install
at a windy places.
Can cause injury if Ceiling Fan drops.
Do not install at places where there is high vibration
and impact.
Can cause injury if Ceiling Fan drops.
Avoid fixing inside dome ceiling.
Can cause unstable air flow and affect Ceiling Fan to
wobble.
Can cause injury if Ceiling Fan drops.
Wipe away dirt with a clean soft cloth, ordinary soap
and water to keep the Ceiling Fan clean. Do not
use solvents (gasoline and petroleum) or any other
chemicals.
Can cause plastic part deformation and metal corrosion.
Can cause injury if parts drop.
Safety precautions
ԊӒݧཎٱ

4
ԊӒݧཎٱ ҆ᒳඉоήࡾҰ
࣏ᗗջᏲҢИڧ༌ܖސཬᚽޟџܒȂᒳԈоήܚޟܚԤࡾҰȄ
ԪಒဴߒҰԤᜰ࣏ڙܒޟȄ
ԪಒဴߒҰԤᜰ࣏ೝХޟȄ
ឌ֙ ᒿᇲᐇհࠢഅԙޟלȂϚᗗջџᏲҢИԫιܖᝒڧ༌Ȅ
ݧཎ ᒿᇲᐇհࠢഅԙޟלȂϚᗗջџᏲҢИڧ༌ܖސཬѶȄ
ឌ֙
ϸϼӤԊ၆ӵϽᏰࠢڷᢃܒސߣߖȄ
џЕଔЬخȃᛖࣔȃၯڷញႫȄ
ϸϼӵԊ၆ཬᚽႫጣȂٽԃӰዥ໔ȃׯԢȃ᠉Ԣഅԙޟ
ᡐל้้Ȅ
џЕଔЬخȃᛖࣔȃၯڷញႫȄ
ϸϼٺҢҏМࡾۡޟۡႫᔆоѴޟႫྛȄ
ႆዥོЕଔញႫڷЬخȄ
ϸϼඨΣߜ឴ސࠢӵልᏢޟႫԱᇄႫԱሴȄ
џЕଔЬخȃᛖࣔȃၯڷញႫȄ
ϸϼ௮ӵӤΰȄ
Ӥ௬ဣོᏲڧ༌Ȅ
ଶΟܚඪټޟনኅႭӇȂϚџٺҢڏтငওޟႭӇȄ
Ӥ௬ဣོᏲڧ༌Ȅ
ϼܶڣܖᆓၾีଢ଼ᐠಢӇΰڣήȄ
џоᏲЬخȃញႫȃڧ༌ڷӤ௬ဣȄ
ϼܶଶӤȂଶߨԪᇳ݂ࡾҰȄ
҆ѫٺҢߣளޟႭӇȄ
ོЕଔЬخȃញႫȃڧ༌ڷӤ௬ဣȄ
ϼӵӤғӵᐇհޟঐញᄥӤȄ
џоᏲڧ༌ȂཬᚽڷӤ௬ဣȄ
ϸϼөӤЫȄġܖޱȂϸϼיᕆӤȄ
џЕଔЬخȃᛖࣔȃၯڷញႫȄ
ϸϼӤԊ၆ܻዘᕆȃଽྣЅଽᕆ࡙ޟӴПȂٽԃࡉȄ
ีҡᅓႫȂ࡞ৠོܾᏲញႫڷЬخȄ
Ԋ၆ᝒӴᒳԈҏЙыϱܚޟܚԤࡾҰȄ
ႫጣጣڷԊ၆ώհ҆ҥഽӈޟΡষ໌Ȅ
Ԋ၆ᒿᇲོЕଔЬخȃញႫȃڧ༌ڷӤ௬ဣȄ
఼௭ڷ໌ӈդᆰওώհࠉȂᜰഖܚԤႫྛٮ้
ᖎׇӒᓗХȄ
ԃݎӤณᙽଢ଼џоᏲڧ༌ڷញႫȄ
өௌޟ௲᠌င୦ᒚၚԤᜰᆰওܖও౩ޟ၏Ȅ
ٺҢᖳ๛ଔυᖎᖳ๛ᚇᆧȄ
(250-300 N•cm)
ᖎ௬ဣོᏲڧ༌Ȅ
ጂۡࢆ႙υџоܛڧ຺ႆӤޟġ
10
ġ໔Ȅ
Ӥ௬ဣོᏲڧ༌Ȅ
ԃݎีҡӈդலܖ࢈ራȂҳ։ୄХӤٺҢٮ
ɆᜰഖɇཌᘞၯᏢġ(MCB)Ȅ
Ԥྭ᜴ȃЬخȃញႫڷ௬ဣޟӠᓎȄ
ᖒᛮௌޟ௲᠌င୦ᒚၚԤᜰᆰওİও౩ޟ၏Ȅ
ܶଶકཬܖཬᚽΟޟӤȄ
Ӥ௬ဣོᏲڧ༌Ȅ
ԃݎีҡலᘛଢ଼ĭҳ։ୄХٺҢӤٮᖒᇧഅ୦ȃ
ڏ݈ф౩୦ܖӫᎌޟԤၥΡষȄ
Ӥ௬ဣོᏲڧ༌Ȅ
߳ᓎጣ҆ғጂӴԊ၆ՍᏲᆓȄ
Ӥ௬ဣོᏲڧ༌Ȅ
ϼӤԊ၆ӵݶᑶЅӻშޟӴПȄ
џЕଔЬخȃᛖࣔȃၯڷញႫȄ
ϸϼԊӤ၆ӵྯج้ܾᐽӴୢߣߖȄ
џЕଔЬخȃᛖࣔȃၯڷញႫȄ

5
ݧཎ
ԊӒݧཎٱ ҆ᒳඉоήࡾҰ
࣏ᗗջᏲҢИڧ༌ܖސཬᚽޟџܒȂᒳԈҏᇳ݂
ϱޟܚԤࡾҰȄᇧഅ୦ᄇӈդӰϚғጂޟԊ၆ܖϚࡸྱᇳ݂
ࡾҰޟԊ၆ܚഅԙޟӈդཎѴڷཬ༌ϚӈդӈȄ
ོഅԙٺҢޱڧ༌ܖཬѶȄ
ଶߨҥԊӒᅿ៖Ρ൷ҏࠢ໌ᅿܖࡾᏲȂ֏ࠌ٘ᡝȃཐ
ۢܖසΨԤђራᛤޱȂܖޱીмࣺᜰငᡛڷޣᜋޟΡρ
Ȟѓࢂڋ็ȟϼٺҢҏႫᏢȄ࣏Οጂ߳ԑ҂ޟωࡆϚޖԪ
ႫᏢȂѺঈ၎ڧڗᅿȄ
ོഅԙٺҢޱڧ༌ܖཬѶȄ
Ӥ҆௮ӵᚔӴġ2.3ġԽоΰޟଽ࡙ȂՄᖎ҆ᚔᕓ
Ꮹġ1ġԽоΰȄ
џоᏲϚᛧۡࢺڷӤȄ
Ӥ௬ဣོᏲڧ༌Ȅ
ก໔ПݲᎧġ
15
ġġ
(
؏ġ
2 -
1
)
Ȅ
Ԋ၆ׇࡣȂጂ߳ӤϚོႆ࡙Ȅ
Ӥ௬ဣོᏲڧ༌Ȅ
ӈդΙаᖎᘞΟܖю౪ນ౷ȂܚԤᖎȄ
ོᏲӤ௬ဣȄ
ጂ߳௮فಛޟԊ၆ҥᇧഅ୦ȃڏ݈ф౩୦ܖӫᎌޟԤၥ
Ρষ໌Ȅ
Ӥ௬ဣོᏲڧ༌Ȅ
࡚ដؐڍԑՍЍᔮࢥӤ௮فಛΙԩȄ
ོഅԙٺҢޱڧ༌ܖཬѶȄ
ԊӒ௮فಛ၆ညഋӇޟᔖҥᇧഅ୦ȃڏ݈ф౩୦ܖ
ӫၥΡষ໌Ȅ
ོഅԙٺҢޱڧ༌ܖཬѶȄ
ҏࠢѫټࡉϱٺҢȄϸϼԊ၆ӵӻޟӴПȄ
Ӥ௬ဣོᏲڧ༌Ȅ
ϸϼԊ၆ӵଽଢ଼࡙ڷଽፐᔞ࡙ޟӴПȄ
Ӥ௬ဣོᏲڧ༌Ȅ
ᗗջԊ၆ӵ༫ഥЈ߆ݖȄ
џоᏲϚᛧۡࢺڷӤȄ
Ӥ௬ဣོᏲڧ༌Ȅ
ҢୁޟҀȂලغڷЫܡўԴၬо߳ࡻӤޟ఼ዓȂ
ϸϼٺҢྙᏘȞءݶڷݶȟܖӈդڏтϽᏰސࠢȄ
џᏲ༭ഋӇᡐלڷߜ឴ᆻᇟȄ
ႭӇ௬ဣȂࠌџᏲڧ༌Ȅ
Safety precautions
ԊӒݧཎٱ

6
1
Check the Ceiling Fan condition annually. If a
problem occurs, stop using the Ceiling Fan. Then
refer to authorized dealer.
Check point:
Loosened screws, safety wire condition, motor shaft
damage, etc.
2
Ensure the Safety Switch is in good condition.
If a problem occurs, stop using the Ceiling Fan.
Then refer to authorized dealer.
3
Keep the Ceiling Fan clean. Wipe away dirt with
a clean soft cloth, ordinary soap and water. Wipe
it again to dry it. Do not use solvents (gasoline,
petroleum, thinner, benzine, alcohol, cleaning
powder, alkaline detergent) or any other chemicals.
• Do not bend the Blade while cleaning.
4
Do not paint the Blades. If damaged, order a new set
of Blades (3 pieces) from an authorized dealer.
5
When referring to an authorized dealer, show these
instructions to them and maintain correctly.
6
If the product is broken or damaged, remove it from
the ceiling and replace with new. This is to avoid the
Ceiling Fan drops.
7
The Ceiling Fan suspension system should be
examined at least once every two years.
8
Do not modify or repair the LED light. If a problem
occurs, refer to authorized dealer (for E48GP).
Safety Switch / ԊӒᜰ
Switch Lever / ᜰ؋
Wrong Position /
ᒿᇲ՝ည
Correct Position /
ғጂ՝ည
Maintenance ᆰও
1
ؐԑۡᔮࢥӤޟޑݷȄԃݎю౪୰ᚠȂୄХٺ
ҢԤᜰӤȄġณࡣ፴ၚ݈ܖ௲᠌င୦Ȅ
ᔮࢥᘈ:
ᖳ๛ᚬಳȂ߳ᓎጣޑݷȂีଢ଼ᐠᙽଢ଼ཬᚽ้้Ȅ
2
ጂ߳ԊӒᜰġܻيԁޑᄘȄ
ԃݎю౪୰ᚠȂୄХٺҢԤᜰӤȄ
ณࡣ፴ၚ݈ܖ௲᠌င୦Ȅ
3
߳ࡻӤ఼ዓȄҢୁޟҀȃලغڷЫܡўԴ
ၬȄӔܡΙԩϞܡୁȄϸϼٺҢྙᏘȞءݶȂݶȂใ
ភᏘȂȂନᆠȂўԴڷᢃܒࢿᅥᏘȟܖӈդڏтϽ
ᏰސࠢȄ
ġ˙఼ࢿᖎϸϼ᠉ᖎȄ
4
ϸϼ࣏ᖎ༯ᅘȄᖎཬᚽΟȂ௲୦ᗊཱིޟᖎġ
(3ġݛ)Ȅ
5
࿋ௌ፴ၚ௲᠌င୦ȂөтঈюҰԪࡾҰо߯т
ঈғጂӴ໌ᆰওȄ
6
ࠢϐᘞܖཬᚽȂЈ߆ݖΰܶଶӤȂณࡣ
ΰཱིޟӤȄ࣏Ο٩ХӤ௬ဣȄ
7
࡚ដؐڍԑՍЍᔮࢥӤ௮فಛΙԩȄ
8
ϼ၆ܖও౩၎ġLEDġᐷȄԃݎีҡޑݷȂᖒ௲᠌
င୦ (ᎌҢܻ E48GP).

7
Name of parts ႭӇӪᆎ
■Attention:
• Do not place the Ceiling Fan directly on the floor.
Can cause scratches to the product.
• Do not use at the area near to hot spring and volcanic.
Can cause the lighting not lit. (for E48GP)
■
Note:
• The illustrations in this manual are for explanation purposes
only and may differ from the actual product.
WARNING
Do not use modified parts other than original
supplied parts.
Can cause injury if the Ceiling Fan drops.
Do not disassemble or remove the pipe from Motor
Unit.
Can cause fire, electrical shock, injury and Ceiling Fan
to drop.
Parts piece(s)
AUpper Canopy …………………………………………… 2
BLower Canopy…………………………………………… 2
CMotor Unit………………………………………………… 1
DBlade Assembly ………………………………………… 3
EBatteries AAA / R03 / LR03 …………………………… 2
FRemote Control Set …………………………………… 1
F1Remote Control ………………………………………… 1
F2Remote Control Holder ……………………………… 1
GScrew Set ………………………………………………… 2
HPart Set …………………………………………………… 6
ICarl Bolt Plug
(M5 × 35 mm)
…………………………… 1
JCarl Bolt Plug
(M8 × 60 mm)
…………………………… 3
KHanger Base …………………………………………… 1
ႭӇ Ӈ
Aΰဋᇐ……………………………………………………… 2
Bήဋᇐ……………………………………………………… 2
Cีଢ଼ᐠಢӇ………………………………………………… 1
DᖎಢӇ…………………………………………………… 3
EႫԱ AAA / R03 / LR03 ………………………………… 2
FልᏢಢӇ………………………………………………… 1
F1ልᏢ……………………………………………………… 1
F2ልᏢھۡᏢ……………………………………………… 1
Gᖳ๛Ӈಢ…………………………………………………… 2
HႭӇಢ……………………………………………………… 6
Iњᅭᖳ༬υġĩ
M5 × 35
ġయԽĪ …………………………… 1
Jњᅭᖳ༬υġĩ
M8 × 60
ġయԽĪ …………………………… 3
Kࢆ႙ġ ……………………………………………………… 1
ġ■
ཎ:
ġ˙ϸϼװӤޢܹညӵӴΰȄ
џᏲࠢೝژ߆Ȅ
ġ˙ϼӵྣࢶڷЬόߣߖٺҢȄ
ོᏲྱ݂Ϛ߫Ȅġ(ᎌҢܻ
E48GP
)
ġ■
രݧ:
ġ˙ҏЙыϛޟඨყ༉Ңܻᇳ݂ȂџᇄᄂሬಢӇԤܚϚӣȄ
ឌ֙
ଶΟܚඪټޟনኅႭӇȂϚџٺҢڏтငওޟႭӇȄ
Ӥ௬ဣོᏲڧ༌Ȅ
ϼܶڣܖᆓၾีଢ଼ᐠಢӇΰڣήȄ
џоᏲЬخȃញႫȃڧ༌ڷӤ௬ဣȄ
A
B
D
C
H
GE
• E48GP
F1F2F
• E48HP
F1F2F
I J K
Carl Bolt Plug / њᅭᖳ༬υ
Plain Washer / ලწ
Spring Washer / ኆᙋწ
Hexa Nut / ϲُלᖳൾ
Name of parts
ႭӇӪᆎ

8
1
■Install the Ceiling Hook
How to install ԃդԊ၆
1
Make 4 holes on the concrete ceiling.
Drill hole aø 6.5 mm (depth 30 mm) for Carl Bolt Plug
I.
Drill 3 holes bø 10.5 mm (depth 45 mm) for Carl Bolt
Plug J.
2
Use blower to remove dust in the holes.
3
Insert Carl Bolt Plug Ito hole aand insert Carl Bolt
Plug Jto holes b.
4
Tighten the supplied Plain Washer, Spring Washer,
Hexa Nut of the Carl Bolts. This is for making the Carl
Bolts fix to the ceiling.
5
Remove Hexa Nut, Spring Washer, and Plain Washer
from holes bCarl Bolt Plug J. Make sure Carl Bolts
remain strong on the ceiling.
6
Fix the Hanger Base Kto the concrete ceiling and
replace the removed Plain Washer, Spring Washer and
Hexa Nut, then tighten.
1
ӵᏗπЈ߆ݖΰᢣġĵġএЌȄ
њᅭᖳ༬υġ IġޟЌġ aġ࣏ġġķįĶġయԽȞ࡙࣏ġĴıġయԽȟȄ
њᅭᖳ༬υġ JġޟġĴġএЌġ bġ࣏ġġIJıįĶġయԽȞ࡙࣏ġĵĶġయԽȟȄ
2
ٺҢ֚ଶᐠ఼ଶЌϱޟԸშȄ
3
њᅭᖳ༬υġ IġඨΣЌġ aȂՄњᅭᖳ༬υġ JġඨΣЌġ bȄ
4
ᚇᆧњᅭᖳ༬υߣளޟලწȃኆᙋწȃϲُלᖳൾȄ
࣏ΟװњᅭᖳھۡӵЈ߆ݖȄ
5
њᅭᖳ༬υġ JġӨЌġ bġޟϲُלᖳൾȃኆᙋწڷලწ
ЌڥюȄጂ߳њᅭᖳൾٷณذھӴھۡӵЈ߆ݖΰȄ
6
ࢆ႙ġ KġھۡӵЈ߆ݖȂװϲُלᖳൾȃኆᙋწڷල
წΙΙ၆ΰȂശࡣᔡᆧ։џȄ
1
Ø 6.5 mm /
Ø 6.5 యԽ
Drill / ᢣЌᐠ
30 mm /
30 యԽ a
Ø 10.5 mm /
Ø 10.5 యԽ
Drill / ᢣЌᐠ
45 mm /
45 యԽ b
Blower / ֚ଶᐠ
Hammer /
ᗨυ
2 3 4 5
Spring Washer / ኆᙋწ
Hexa Nut / ϲُלᖳൾ
Plain Washer / ලწ
Spring Washer /
ኆᙋწ
Hexa Nut /
ϲُלᖳൾ
Plain Washer /
ලწ
J
125 mm /
125 యԽ
68 mm /
68 యԽ
b
b
b
a
37.5 mm /
37.5 యԽ
6
K
JI
37.5 mm /
37.5 యԽ
WARNING
Fix Hanger Base Kto the concrete ceiling, and
tighten Hexa Nuts firmly.
Ensure that the Hanger Base can sustain more
than 10 times the Ceiling Fan weight.
Can cause injury if Ceiling Fan drops.
ឌ֙
ࢆ႙ġ KġھۡӵЈ߆ݖȂװϲُלᖳൾᔡᆧȄġ
ጂۡЈ߆ݖ႙υџоܛڧ຺ႆӤޟġ10ġ໔Ȅ
Ӥ௬ဣོᏲڧ༌Ȅ
ġ■
Ԋ၆Ӥ႙

9
How to install ԃդԊ၆
2
■Install to Ceiling ġ■
Ԋ၆ՍЈ߆ݖ
1Remove the supplied Bolt a, Nut b, Cotter Pin c
and Pulley d.
2Ensure that the Hanger Base Kis not loosen.
For reference, the Hanger Base Kcan sustain 20 N.
3Place Pulley don the Hanger Base K.
4Tighten the Pulley Set Plate efirmly with the Bolt a
and Nut bprovided.
For reference, tightening torque is 1500-1800 N•cm.
• Cotter Pin cmust fix into Bolt aand bent.
1രޟᖳ aȃᖳൾġ bȃοġ cЅྤᎈ dܶଶȄ
2ጂ߳ࢆ႙ġ KġϐᔡᆧȄ
༉ټՃĭġࢆ႙ġ KġஊЛኤġ20 NȄ
3ྤᎈ dညܻࢆ႙ġ KȄ
4Ңᓍߣޟᖳġ aġڷᖳൾġ bġྤᎈ၆ညዺġ eġᔡᆧȄ
༉ټՃޟᔡᆧᙽઐ࣏ġ1500-1800 N•cmȄ
ġ˙οġ cġ҆ඨΣᖳġ aġณࡣ᠉Ȅ
5
Remove Hexa Nut, Spring Washer, and Plain Washer from
hole aCarl Bolt Plug I.
Loop the Safety Wire gto the Hanger Base Kand
install Safety Wire as shown.
Replace the removed Plain Washer, Spring Washer and
Hexa Nut and tighten them.
5
њᅭᖳ༬υġ IġӨЌġ aġޟϲُלᖳൾȃኆᙋწڷලწ
ЌڥюȄ
ԊӒᏲ㣶ġ gġᕗᙓӵࢆ႙ġ KġΰȂԃყܚҰԊ၆ԊӒᏲ
㣶Ȅ
װϲُלᖳൾȃኆᙋწڷලწΙΙ၆ΰࡣᔡᆧ։џȄ
5
g
Plain Washer / ලწ
Spring Washer / ኆᙋწ
Hexa Nut / ϲُלᖳൾ
K
KK
I
g
WARNING
Safety Wire must be fixed correctly to the Pipe.
Can cause injury if the Ceiling Fan drops.
ឌ֙
߳ᓎጣ҆ғጂӴԊ၆ՍᏲᆓȄ
Ӥ௬ဣོᏲڧ༌Ȅ
Check point after installation
Make sure Bolt and Nut are firmly tightened and Cotter
Pin is inserted and bent for safety reason.
ಢ၆ࡣޟᔮᡛᘈ
ጂ߳ܚԤᖳڷᖳൾ֯ϐᔡᆧȂи࣏ΟԊӒޟՃ໔Ȃ
ඨΣٮᔡ᠉Ȅ
Make sure Ceiling Fan is securely fixed on the Hanger
Base and Ceiling Fan not slanting after installation.
ጂ߳Ӥھۡԁӵ௮႙ΰȂٮиӤӵԊ၆ࡣϚོ༊ఇȄ
The Safety Wire is looped to the Hanger Base and
securely fixed to the Carl Bolt Plug
I
.
װ߳ᓎጣᕗᙓӵࢆ႙ĭٮذھӴھۡӵњᅭᖳ༬υġ Iġ
ΰȄ
d
24
1
b
c
3
a
Concrete Ceiling / ᏗπЈ߆ݖ
a
b
d
c
K
e
How to install
ԃդԊ၆

10
How to install ԃդԊ၆
E48HP
Wiring diagram / Litar pendawaian / ⭫㓵ഴ
DC Motor /
DC ีଢ଼ᐠ
Ceiling Fan / Ӥ
Terminal /
ತᆒ
Safety Switch /
ԊӒᜰ
Receiver PCB /
ԝᏢġPCB
Main Power PCB Assy /
кႫྛġPCBġϯӇ
Ferrite Core /
១ᡝᆄ߉
Motor PCB Assy /
ีଢ଼ᐠġPCBġಢӇ
Brown (Live) / ՓȞЬጣȟ
Source /
Ⴋྛ
Blue (Neutral) / ᙢՓȞႭጣȟ
Green•Yellow (Earth) / ᆦՓ•༁ՓȞӴጣȟ
Wi-Fi Module /
Wi-Fi ಢ
Wiring diagram / Ⴋጣყ
DC Motor /
DC ีଢ଼ᐠ
Ceiling Fan / Ӥ
Main Power PCB Assy /
кႫྛġPCBġϯӇ
Terminal /
ತᆒ
Safety Switch /
ԊӒᜰ
LED Circuit PCB Assy /
LED ႫၯġPCB ಢӇ Sub PCB Assy /
υġPCBġಢӇ
Ferrite Core /
១ᡝᆄ߉
Motor PCB Assy /
ีଢ଼ᐠġPCBġಢӇ
Brown (Live) / ՓȞЬጣȟ
Source /
Ⴋྛ
Blue (Neutral) / ᙢՓȞႭጣȟ
Green•Yellow (Earth) / ᆦՓ•༁ՓȞӴጣȟ
Wi-Fi Module /
Wi-Fi ಢ
E48GP
■
Wiring instruction
Connect the house’s supply wire cto the Terminal h
according to the diagram shown.
• Recommended wire stripping length is 7 ~ 8 mm.
Connect to the power supply according to the wiring diagram
below.
Switch Lever / ᜰ؋
Safety Switch / ԊӒᜰ
h
c
Brown (Live) /
ՓȞЬጣȟ
Blue (Neutral) /
ᙢՓȞႭጣȟ
Green•Yellow (Earth) /
ᆦՓȆ༁ՓȞӴጣȟ
ġ■
ጣࡾҰ
ԃყܚҰܘυޟႫྛጣġ cġڗತᆒġ hġȄ
ġ˙࡚ដথጣߝ࡙࣏ġ7 ~ 8ġయԽȄ
ᐃоήጣᇳ݂໌ႫྛȄ
3

11
4
■
Install the Blades
1Remove the Protection Film nfrom the LED Cover v
(for E48GP).
ġ■
Ԋ၆ᖎ
1ġLEDġᇐݖ vΰڥή߳៖ጰ nĩᎌҢܻġ
E48GP
ĪȄ
n
1
v
How to install ԃդԊ၆
WARNING
Electrical wiring must be done by a qualified
individual.
Can cause fire or electrical shock.
This product is not provided with a cord and plug
or with other means for connection to the supply.
When connecting or changing the power cord
or lead wire, it must be performed by a qualified
person in order to avoid a hazard.
Please use 227IEC53(RVV) or thickness of tube
1 mm or above. (If there are other requirements
such as the diameter of lead wire, please use
according to the regulation of the country).
Can cause fire or electrical shock.
Do not bypass and short circuit the Safety
Switch.
Can cause fire, electrical shock, injury or Ceiling Fan
to drop.
ឌ֙
Ⴋጣጣώհ҆ҥഽӈޟΡষ໌Ȅ
џོᏲЬخܖញႫ
ҏࠢϚඪټႫᢟڷඨᓞܖႫྛޟڏѺ၆ညȄġ
ܖႫᢟܖႫጣ҆ҥഽӈޟΡষ໌о
ᗗջӠᓎȄġ
ٺҢġ227IEC53(RVV)ġܖࠔ຺࡙ႆġ1ġయԽޟᏲᆓȄ
ȞڏѺؑȂٽԃႫጣޢ৷้้ȂᒳԈࣺᜰড়ޟ
నٽȟȄġ
џོᏲЬخܖញႫ
ϸϼᄇԊӒᜰġ໌ᙓၾڷၯȄ
џоᏲЬخȃញႫȃڧ༌ܖӤ௬ဣȄ
Check point after installation
The wiring is connected properly to the power supply.
ಢ၆ࡣޟᔮᡛᘈ
ႫጣϐғጂӴΟႫྛጣȄ
■
Attention:
1It is recommended to user to install OFF/ON switch on the
wall for the Ceiling Fan, replacing existing regulator or new
regulator point.
2This product should be installed with a double poles single
throw switch (breaker switch) with a minimum of 3 mm
contact gap in the fixed installation circuit.
3Do not use regulator or dimmer switch for this model.
(It can damage the Ceiling Fan)
4Should there be a regulator or dimmer switch, disconnect it
and reconnect the wiring as above.
ġ■
ཎ:
1࡚ដҢИӤޟ OFF/ON ᜰԊ၆ӵᕓᏩΰȂ౪Ԥޟ
ᏢܖཱིޟᘈȄ
2Ԫࠢ҆ӵھۡԊ၆Ⴋၯΰ၆ΰញᘈሪ࣏ശЍ 3 యԽޟᚖ
ྃᜰȞᘞၯᜰȟȄ
3ԪဴϸϼٺҢᏢܖӎᜰȄ
ȞོཬᚽӤȟ
4ԤᏢܖӎᜰȂࡸྱΰყܶଶณࡣཱིȄ
Connecting to the power supply / Ⴋྛ
Dimmer switch /
ӎᜰ
Regulator /
Ꮲ
Ceiling Fan / Ӥ
Wall Switch (OFF / ON) /
ᕓᏩᜰࡸ໖Ȟᜰ / ȟ
Rated voltage is mentioned on product. /
ࠢΰຝ݂ۡႫᔆȄ
Blue (Neutral) / ᙢՓȞႭጣȟ
Brown (Live) /
ՓȞЬጣȟ
Green•Yellow (Earth) /
ᆦՓ•༁ՓȞӴጣȟ
Earth / Ӵጣ
Double poles single throw switch
(Breaker Switch) /
ᚖྃᜰȞᘞၯᜰȟ
Only direct connection to wall switch is allowed.
Please refer to figure below.
ѫট೨ޢװႫྛܻҏӤȄ
ՃήყȄ 2
1
Power supply /
Ⴋྛ
Connect directly /
ޢ
Dimmer switch / ӎᜰ
Power supply /
Ⴋྛ
Connect directly /
ޢ
Regulator / Ꮲ
3 4
How to install
ԃդԊ၆

12
Check point after installation
The Blade Screws (6 pieces) fixing the Blades are securely
tightened.
ಢ၆ࡣޟᔮᡛᘈ
ጂۡҢհᚇۡᖎಢӇޟᖎᖳ๛Ȟ6ġݛȟϐೝᚇᆧȄ
WARNING
Tighten the Blade Screws firmly using a screw
driver. (250-300 N•cm)
Can cause injury if the Blade drops.
CAUTION
The Blade must be fixed correctly.
Can cause no air flow.
Can cause injury if the Blade drops.
ឌ֙
ٺҢᖳ๛ଔυᖎᖳ๛ᚇᆧȄ
(250-300 N•cm)
ᖎ௬ဣོᏲڧ༌Ȅ
ݧཎ
҆ғጂΰᆧᖎȄ
ོᏲؠԤࢺȄ
ᖎ௬ဣོᏲڧ༌Ȅ
2 3
D
C
D
H
C
2Assemble the Blade Assembly Dtowards the Motor
Unit C.
3Tighten the Blade Assembly Dfirmly with the Blade
Screws Hprovided.
Use 2 screws for one Blade Assembly.
For reference, tightening torque is 250-300 N•cm.
Ensure the Blade Assembly Dscrew hole is center
with the Motor Unit Cscrew hole. Hold the Blade
Assembly during installation.
2ᖎಢӇġ Dġ၆Σีଢ଼ᐠಢӇġ CȄ
3Ңᓍߣޟᖎᖳ๛ġ HġھۡԁᖎಢӇġ DȄ
ؐаᖎಢӇٺҢġ2ġݛᖳ๛Ȅ
༉ټՃޟᔡᆧᙽઐ࣏ġ250-300 N•cmȄ
ጂ߳ᖎಢӇᖳ๛Ќ Dีଢ଼ᐠಢӇġ CϛЖᖳ๛ЌȄӵԊ၆
ႆแϛණ՞ᖎಢӇȄ
5
■
Installing the Lower Canopy
1Detach the Lower Canopy Bfrom all hook w.
2Align the Upper Holder k
2
of the Motor Unit C
between the two Fixing Rib k
1
of the Lower Canopy
B(2 pieces) .
3Make sure two Fixing Rib k
1
sit between Upper Holder
k
2
of the Lower Canopy B. Clip it until a “click”
sound is heard.
How to install ԃդԊ၆
ġ■
Ԋ၆ήဋᇐ
1ܚԤ௮႙ wΰܶήήဋᇐ BȄġ
2ีଢ଼ᐠಢӇ Cήဋᇐġ Bޟڍএھۡన k
1
ϞޟΰЛ࢜
k
2
ᄇቆȞ2ݛȟȄ
3ጂ߳ڍھۡన k
1
՝ܻήဋᇐ BޟΰЛ࢜ k
2
ϞȄњ
՞Ȃޢڗ᠙ڗġ“ἤ” ޟΙᖐȄ
21 3
k2
B
Ck2
B
k1k1
Click /
ἤ
B
w

13
Check point after installation
The Upper Canopy is securely screwed.
ಢ၆ࡣޟᔮᡛᘈ
ΰဋᇐذھӴᔡᆧȄ
7
■
Install Remote Control Holder
Install the Remote Control Holder F2to wall. Fix the
Remote Control Holder F2using provided Screw o
(2 pieces) and Wall Plugs p(2 pieces) as shown in figure
below.
• Distance between holes qis 42 mm.
• Depth for Wall Plug ris 30 mm.
• Hole diameter sis Ø 6 mm.
■
Attention:
• The Wall Plugs are not needed for wooden wall.
q
r
o
p
Hole diameter Ø 6 mm /
ࢾЌޢ৷ 6 యԽ
F2
Bricks wall /
ᑒᕓ
42 mm /
42 యԽ
30 mm /
30 యԽ
s
Ԋ၆ልᏢھۡᏢġ F2ՍᕓᏩΰȄԊ၆ልᏢھۡᏢ F2Ңᓍߣޟ
ᖳ๛ oȞijġݛȟЅᕓᏩඨ৴ pȞijġݛȟԃήყܚҰȄ
ġ˙ࢾЌϞޟຽᚔġ q࣏ġ42ġయԽȄ
ġ˙ᕓᏩඨ৴࡙ġ r࣏ġ30ġయԽȄ
ġ˙ࢾЌޢ৷ġ s࣏ġØ 6ġయԽȄ
ġ■
ཎ:
ġ˙УᕓϚሯٺҢᕓᏩඨ৴Ȅ
1Remove the Screw (2 pieces) ifrom Upper Canopy A.
Align and insert the Fixing Rib m
1
of Upper Canopy A
into the Slot m
2
of Lower Canopy B.
2Check the gap between the Upper Canopy Aand
ceiling is approximately 5 mm or more.
The gap can be adjusted by fixing the Upper Canopy
Ainto different Slot m
2
of Lower Canopy B.
Ensure Upper Canopy A(2 pieces) is sit on top of
Lower Canopy B.
Clip it until it is fully fixed. Then, secure the Upper
Canopy Ausing Screw iand tighten them.
6
■
Installing the Upper Canopy
■
Attention:
• Do not assemble the Fixing Rib m
1
of Upper Canopy Ain
opposite direction.
• Can cause abnormal noise.
How to install ԃդԊ၆
1ΰဋᇐ AΰܶήᖳଫȞ2 ݛȟ iȄġ
ΰဋᇐ Aޟھۡన m
1
ᄇྥٮඨΣήဋᇐġ Bޟዀ m
2
ϱȄ
2ᔮࢥٮጂᇯΰဋᇐġ AġڷЈ߆ݖϞޟຽᚔ࣏ġ5 యԽܖȄ
ሪџႆΰဋᇐ Aھۡڗήဋᇐ BޟϚӣዀ՝ m
2
໌
ᐌȄ
ጂ߳ΰဋᇐġ AȞ2ġݛȟ՝ܻήဋᇐġ BġޟഥഋȄ
ֶ՞ޢڗѺׇӒھۡȄġณࡣȂҢᖳ๛ iھۡΰဋᇐ Aٮ
ᔡᆧȄ
ġ■
Ԋ၆ΰဋᇐ
ġ■
ཎ:
ġ˙ϼΰဋᇐġ Aġޟھۡనġ m
1
ІПөԊ၆Ȅ
ġ˙џЕଔȄ
i
A
A
m1
m2
Bi
A
Approximately 5 mm or more /
σġ5 యԽܖ
21
ġ■
Ԋ၆ልᏢھۡᏢ
How to install
ԃդԊ၆

14
tt
2 31
F1
E
■
Before use
1
■
Attention:
• Please remove all Batteries before disposing the Remote
Control. The life of Battery is about one year for a normal
usage.
• Replace all Batteries at one time and be careful not to mix
Battery type.
1Remove the Battery Cover tof Remote Control F1.
2Insert the Batteries E(2 pieces AAA / R03 / LR03).
• “+” “-” position should match.
3Close the Battery Cover t.
■
Attention:
• If your Remote Control missing or misplaced, the Ceiling Fan
will operate at user’s last setting when switched on by wall
switch or it can be switched on through App.
• If the Ceiling Fan is found to wobble during operation,
i.) Fix the Blades at different combination of position. Repeat
this step until the Ceiling Fan stop wobbling.
ii.) Make sure Ceiling Fan is securely fixed on Hanger Base
and Ceiling Fan not slanting after installation.
iii.)Ensure Bolt and Nut are fully tighten.
• If Ceiling Fan still wobbles after Step 3 - 3(page 12), please
refer to authorized dealer.
ġ■
ཎ:
ġ˙ԃݎልᏢҵΟܖܹᒿΟӴПȂႆᕓᏩᜰܖġAppġ҈
ӤȂӤࡸྱҢИޟΰΙԩ೩ညၼȄ
ġ˙ԃݎᐇհႆแϛี౪ӤȂ
ŪįĪġ ဨаޟ՝ညಢӫϣȄፒԪ؏ȂޢڗӤୄХᘛଢ଼Ȅ
ŪŪįĪġ ጂ߳ӤذھӴھۡӵࢆ႙ΰȂՄиӤԊ၆ӭӤϚ֕
༊ఇޑᄘȄ
ŪŪŪįĪġጂ߳ᖳڷᖳҔׇӒᔡᆧȄ
ġ˙ԃݎӤޟݷีҡӵ؏ġ3 - 3Ȟġ12ġȟϞࡣȂ
ᖒ௲᠌င୦Ȅ
ġ■
ཎ:
ġ˙ҵణልᏢϞࠉܶଶܚԤႫԱȄӵғலٺҢήȂႫԱޟٺҢ
ჰڼσΙԑȄ
ġ˙ΙԩܒܚԤႫԱٮຝཎϚӫٺҢϚӣࠢถႫԱȄ
1ܶήልᏢ F1ޟႫԱᇐ tȄ
2ඨΣႫԱ E(2 ݛAAA / R03 / LR03).
˙“+” “-”ġ՝ည҆ᄇᆎȄ
3ᇐԁႫԱᇐġ tȄ
WARNING
Do not insert any metal items in the battery area
with the battery.
Can cause fire or electrical shock due to short circuit.
ឌ֙
ϸϼඨΣߜ឴ސࠢӵልᏢޟႫԱᇄႫԱሴȄ
џоᏲЬخܖႫྛၯՄញႫȄ
How to use ԃդٺҢ
ġ■
ٺҢࠉ

15
■
Remote Control coverage
2
■
Attention:
• The power consumption when the operation is turned off and
Wi-Fi function is off by Remote Control is about 0.5 W.
• It is recommended to switch off wall switch or breaker if
Ceiling Fan is not in use for long period. This is for zero power
consumption purpose.
• Point the Remote Control directly to the desired Ceiling Fan.
If 2 or more Ceiling Fan are controlled by same Remote
Control, there is a possibility that the other Ceiling Fan
function/setting may be change at the same time.
1The figure above shows the best coverage area (W)
around 8 m. The ideal ceiling height (H) is 4 m. The
Remote Control must be pointed to the direction of the
Ceiling Fan when in use.
2Avoid the following situations:
• Netting and Glass ecan reduce the signal power or
reflect the infrared signal from the Remote Control.
• Lighting effect generated by Fluorescent Lighting Systems
fdirectly onto the product receiver area can affect the
signal transmission.
• Obstacles such as Walls or Glass gbetween the
product receiver and Remote Control can cause signal
transmission failure.
(H)
(W)
> 1 m
> 2.3 m
e
g
f
21
How to use ԃդٺҢ
ġ■
ልᏢ᙭ᇐ
ġ■
ཎ:
ġ˙ၼᜰഖиልᏢġWi-Fiġђᜰഖޟђૉ࣏ġ0.5 WȄ
ġ˙ߝϚٺҢӤȂ࡚ដௌᜰഖᕓᏩᜰܖᘞၯᏢȄоႀ
ڗႭႫྛૉޟҬޟȄ
ġ˙ልᏢޢࡾөሯ҈ޟӤȄԃݎ၎ልᏢӣڙڍ
এܖӻএӤȂӨӤޟђİ೩ۡџӣೝᡐȄ
1ΰყᡗҰശٹ᙭ᇐጒ൜ġĩŘĪġġĹġԽȄശٹЈ߆ݖଽ࡙ġĩʼnĪġġ
ĵġԽȄٺҢȂልġᏢ҆ࡾөӤޟПөȄ
2ᗗջоήޟל:
ġ˙ᆩڷ࣠ይġ eġོճ߬ဴђܖІৢՌልᏢޟѴ߬ဴȄ
ġ˙ᅬӎྱ݂فಛġ fҡޟྱ݂ݎޢৢӵࠢԝᏢୢΰ
ོኇ߬ဴ༈ଚȄ
ġ˙ӵࠢԝᏢڷልᏢϞԃᕓᏩܖ࣠ይ gޟራᛤސџ
Ᏺ߬ဴ༈ଚ࢈ራȄ
How to use
ԃդٺҢ

16
3
■
How to use Remote Control
OFF/ON
SPEED
REVERSE
OFF/ON
SPEED COLOR
WHITE
WARM
NIGHT
LIGHT
REVERSE
LIGHT
OFF/ON
LIGHT
• E48GP
1
2
3
4
5
8
9
710
611
• E48HP
1OFF/ONġࡸ໖
ࡸή։џంଢ଼ܖୄХӤȄ
“ON” - ีюߴޟɆქɇᖐȄ
“OFF” - ีюߝߝޟɆქɇᖐȄ
2‘+’ SPEED ࡸ໖
ቨёഀ࡙Ȃശσഀ࡙࣏ġ10Ȅ
3‘-’ SPEED ࡸ໖
ճഀ࡙Ȃശωഀ࡙࣏ġ1Ȅ
4REVERSE ࡸ໖
ᡐఋᙽПөĩବȃଛବĪȄ
5Wi-Fi ࡸ໖
҈ܖᜰഖӤฒጣᆩၯȄ
“ON” - ีюߴޟɆქɇᖐȄ
“OFF” - ีюߝߝޟɆქɇᖐȄ
6NIGHT LIGHT ࡸ໖
ᒵᐅۇӎ೩ညȄ
7WARM COLOR ࡸ໖
ᒵᐅᐷӎՓșླྀՓȄ
8WHITE COLOR ࡸ໖
ᒵᐅᐷӎՓșҩՓȄ
9‘+’ LIGHT ࡸ໖
ംᅚቨёӎޟ࡙߫Ȅ
10 ‘-’ LIGHT ࡸ໖
ംᅚЍӎޟ࡙߫Ȅ
11 LIGHT OFF/ON ࡸ໖
ᜰᐷܖᐷȄ
“ON” - ีюߴޟɆქɇᖐȄ
“OFF” - ีюߝߝޟɆქɇᖐȄ
1OFF/ON Button
Press to activate or stop the Ceiling Fan.
“ON” - Short beeping sound.
“OFF” - Long beeping sound.
2‘+’ SPEED Button
Increase Fan Speed, maximum fan speed is 10.
3‘-’ SPEED Button
Decrease Fan Speed, minimum fan speed is 1.
4REVERSE Button
Change the direction of fan rotation (clockwise,
anticlockwise).
5Wi-Fi Button
Press to activate or off the Ceiling Fan wireless network.
“ON” - Short beeping sound.
“OFF” - Long beeping sound.
6NIGHT LIGHT Button
Press to select Night Light setting.
7WARM COLOR Button
Press to select Light color - Warm.
8WHITE COLOR Button
Press to select Light color - White.
9‘+’ LIGHT Button
Increase light brightness gradually.
10 ‘-’ LIGHT Button
Decrease light brightness gradually.
11 LIGHT OFF/ON Button
Turn off or turn on the Light.
“ON” - Short beeping sound.
“OFF” - Long beeping sound.
How to use ԃդٺҢ
ġ■
ԃդٺҢልᏢ

17
■
Reverse
4
■
Fan Speed Control
SPEED
Increase speed /
ቨёഀ࡙
Decrease speed /
Ѝഀ࡙
LIGHT
Increase LED brightness /
ቨёġLEDġ࡙߫
Decrease LED brightness /
ճġLEDġ࡙߫
■
LED Brightness Control
Brightness of LED can be adjusted by Remote Control. This
fan is equipped with MEMORY FUNCTION to restore user’s
last setting whenever fan is switched on.
Press and hold “+” or “-” Light button to increase or
decrease the brightness gradually.
Two long beep sound is heard when reach the maximum or
minimum limit of LED brightness.
Fan Speed can be adjusted by Remote Control. This fan is
equipped with MEMORY FUNCTION to restore user’s last
setting whenever fan is switched on.
Press and hold “+” or “-” button to increase or decrease the
speed gradually until reaching the desired condition.
Two long beep sound is heard when reach the maximum or
minimum limit of fan speed.
REVERSE
Reverse rotation /
Іөఋᙽ
Press “REVERSE” button, fan will stop for a while then
continue rotate at opposite direction.
How to use ԃդٺҢ
џႆልᏢڙഀ࡙ȄԪԤᏹђȂᐠџඈ
ҢИޟΰΙԩ೩ညȄ
ࡸ՞ġ“+” ᗤܖġ“-” ᗤџംᅚቨёܖЍഀ࡙Ȃޢڗႀڗௌདޟ
ഀ࡙Ȅ
࿋ഀ࡙ႀڗശσܖശωȂོ᠙ڗڍᖐߝޟქქᖐȄ
E48GP
џҢልᏢġLEDġ࡙߫ȄԪԤᏹђȂᐠџඈҢ
ИޟΰΙԩ೩ညȄ
ࡸ՞ġ“+” ܖġ“-” ᐷӎࡸ໖џംᅚቨёܖճ࡙߫Ȅ
࿋ġLEDġ࡙߫ႀڗശσܖശωȂོ᠙ڗڍᖐߝޟქქᖐȄ
5
■
Note:
• LED light brightness may differ according to each unit.
ġ■
ഀ࡙ڙ
ġ■
І֚
ࡸġ“REVERSE” ࡸ໖Ȃୄᙽଢ଼Ȃ
ณࡣ៉өࣺІПөᙽଢ଼Ȅ
■
LEDġ࡙߫ڙ
ġ■
രݧ:
˙LEDġᐷޟ࡙߫ٷӨϯՄȄ
How to use
ԃդٺҢ

18
COLOR
WHITE
WARM
Select “WHITE” Color, hold to adjust Color Temperature
ᒵᐅġ“WHITE” ĩҩՓĪġՓȂࡸ՞ᐌՓྣ
Select “WARM” Color, hold to adjust Color Temperature
ᒵᐅġ“WARM” ĩླྀՓĪġՓȂࡸ՞ᐌՓྣ
■
Night Light Control
NIGHT
LIGHT
1st press for Low Light Control /
ġ1ġԩࡸ࣏ճᐷӎڙ
2nd press for Medium Light Control /
ġ2ġԩࡸ࣏ϛᐷӎڙ
3rd press for High Light Control /
ġ3ġԩࡸ࣏ଽᐷӎڙ
4th press for Light OFF /
ġ4ġԩࡸ࣏ᐷӎᜰഖ
5th press back to Low Light Control /
ġ5ġԩࡸ࣏ߕӱճᐷӎڙ
■
LED Color Temperature
The color temperature of the LED light can be changed and
adjusted by Remote Control.
White Color
Press and hold “WHITE” Color button to adjust the White
color temperature gradually.
Warm Color
Press and hold “WARM” Color button to adjust the Warm
color temperature gradually.
Two long beep sound is heard when reach the limit of color
temperature.
Press “NIGHT LIGHT” button to change the light brightness
to 3 different level.
■
Note:
• During this function, “WHITE”, “WARM” Color button, “+” , “-”
Light button have no response (no function when Night Light
is use).
How to use ԃդٺҢ
џႆልᏢپᡐٮġLEDġᐷޟՓྣȄ
ҩՓ
ߝࡸġ“WHITE” (ҩՓĪġՓᐷᗤџംᅚᐌҩՓྣ࡙Ȅġ
ླྀՓ
ߝࡸġ“WARM” ĩླྀՓĪġՓᐷᗤџംᅚᐌླྀՓྣ࡙Ȅ
࿋ՓྣႀڗྃȂġོ᠙ڗڍᖐߝޟქქᖐȄ
■
LEDġՓྣ
ġ■
ۇᐷڙ
ࡸ“NIGHT LIGHT” (ۇᐷĪġᗤџᐌᐷӎ࡙߫Ȃӓġ3ġএտȄ
ġ■
രݧ:
ġ˙ӵԪђϛȂ“WHITE” (ҩՓ)ȃġ“WARM” (ླྀ) Փᗤȃ“+”ȃ“-” ᐷ
ӎᗤϚӱᔖġĩٺҢۇᐷϚώհĪȄ

19
How to use ԃդٺҢ
Download the App “KDK Ceiling Fan” to use below
features.
1. Sleep mode
Ceiling Fan speed and timer will gradually reduce until the
fan is off.
2. Grouping function
Centralize control of up to 8 Ceiling Fans simultaneously.
3. Scheduling function (Functions include Fan and light
operation)
Set the Ceiling Fan to perform specific function at specific
time.
4. ON/OFF Timer
User can switch ON or OFF the Ceiling Fan by setting timer
count down.
5. 1/
f
YURAGI function (natural breeze)
Add smooth accent of air capacity that produces more
natural and comfortable wind. 1/
f
YURAGI function will be
activated according to speed setting.
6. Scene setting (for E48GP)
Preset 4 light settings for user daily activities.
7. Reverse Function (can operate through Remote Control
or App)
Fan rotates in opposite direction to drive air upwards and
circulate for even air distribution.
■
Additional Ceiling Fan feature (Operate
through App only)
6
ġ■
ߣёӤђĩ༉ႆġAppġᐇհĪ
ήၷġ“KDK Ceiling Fan”ġAppȂџٺҢоήђȄ
1. ᆃԒ
Ӥഀ࡙ڷᏢംᅚճȂޢڗᜰഖȄ
2. Ϸಢђ
ӣϛڙӻႀġ8 এӤȄ
3. หђġĩѓࢂȃᐷӎၼђĪ
೩ညӤӵۡஈۡђȄ
4. Ꮲİᜰ
ҢИџоႆ೩ညᏢইپంܖᜰഖӤȄ
5. 1/
f
YURAGI ђ (Ռณཌ)
ቨёҁྤޟ໔ȂҡՌณᎌޟȄᐃഀ࡙೩ညంଢ଼ġ1/f
YURAGIġђȄ
6. ൟශ೩ညġ(ᎌҢܻ E48GP)
࣏ҢИРலࣀଢ଼Ⴑ೩ġ4ġএᐷӎ೩ညȄ
7. І֚ђġĩџႆልᏢܖġAppġ໌ᐇհĪ
ІПөఋᙽȂளଢ଼ުөΰࢺଢ଼ȂٺࢺϷշ֯ϺȄ
How to use
ԃդٺҢ

■
Attention:
• Do not expose yourself continuously to direct wind from the
Ceiling Fan.
It can cause discomfort.
Model Name ဴӪᆎ E48HP E48GP
Blade Size ဨσω 48” / 1200 mm
No. of Blade ဨጡဴ 3
Voltage (VAC) Ⴋᔆ
(VAC)
230
Frequency (Hz) ᓜ (Hz) 50
Wattage (W)
(Speed 1 /
Speed 10)
Fan only ҟኵġ(W)
(ഀ࡙ġ1 /
ഀ࡙ġ10)
ѫٺҢђ
3 / 31
3 / 31
Fan and Light ӣٺҢЅ
ྱ݂ᐷ 22 / 50
Air Delivery
(m3/min)
ଚ໔
(m3/min) 200
Air Velocity (m/min) ഀ (m/min) 185
Rotation (RPM)
Speed 1 / Speed 10
ఋᙽ࡙ (RPM)
ഀ࡙ 1 / ഀ࡙ 10
Forward / : 55 / 170
Reverse / І֚ġ: 55 / 170
E48HP8001AM
M0722-1082
Printed in Malaysia
KDK Company, Division of PES
Head Office: 4017, Takaki-cho, Kasugai, Aichi, Japan.
© KDK Company, Division of PES 2022
Specifications ೣ
ġ■
ཎ:
• ϸϼߝᡱӤޢ֚ௌȄ
ġѺོЕଔϚᎌȄ
Other manuals for E48HP
1
This manual suits for next models
1
Table of contents
Other KDK Fan manuals
Popular Fan manuals by other brands

Alfa-Vent
Alfa-Vent VKR Installation instruction

Swegon
Swegon WISE Parasol a Instructions for use

Lasko
Lasko 1850 Important instructions & operating manual

Atlas fan company
Atlas fan company ALESSANDRA instructions

Airflow
Airflow Aura Smart Installation and operating instructions

commercial cool
commercial cool CCF45P20 user manual