© Knoll, Inc. 9 of 9
Cautions
Please read this manual carefully. If this desk changes hands,
please provide this manual to the new owner.
Make sure the desk top is not touching any obstacles or walls
and that no obstacles are in the desk’s path. Make sure all
cords are an appropriate length to accommodate the full range
of height adjustment.
Keep children away from desk components. There is risk of
injury and electric shock.
Do not sit or stand on the desk frame. Do not crawl or lie
under the desk frame.
Do not open or modify any of the components, including the
Lifting Columns, Control Box, or Handset. Doing so risks
electric shock and voids any warranty claims.
Do not place objects under the table that interfere with the travel
of the table. Doing so could damage the desk or other furniture.
Voltage Converters
Using a voltage converter could cause damage to the desk
and is considered improper use.
Resulting damage is not covered by the warranty.
Verify the voltage of the Control Box as labeled to avoid
damage.
Use & liability
This height adjustable desk is intended for commercial use in
dry work environments only.
This desk is adjustable so it can be positioned at an optimal
ergonomic height. Any extracurricular use is at user’s own risk.
Under no circumstances does the manufacturer accept warran-
ty claims or liability claims for damage caused by improper use
or handling of the desk frame.
Knoll, Inc. All rights reserved.
Specs
k. base Adjustable Height Standing Desk—Frame Only
Frame width min/max: 36"–64"
Maximum worksurface overhang 15" per side.
Back edge of the worksurface should be aligned with the
back edge of the foot.
600mm (24") feet are appropriate for 24" deep tops
675mm (26.5") Feet are appropriate for 27–30" deep tops
Maximum functional load 250 lb
Frame tested to a max worksurface of 60.5 lb, 84" x 30" x 1
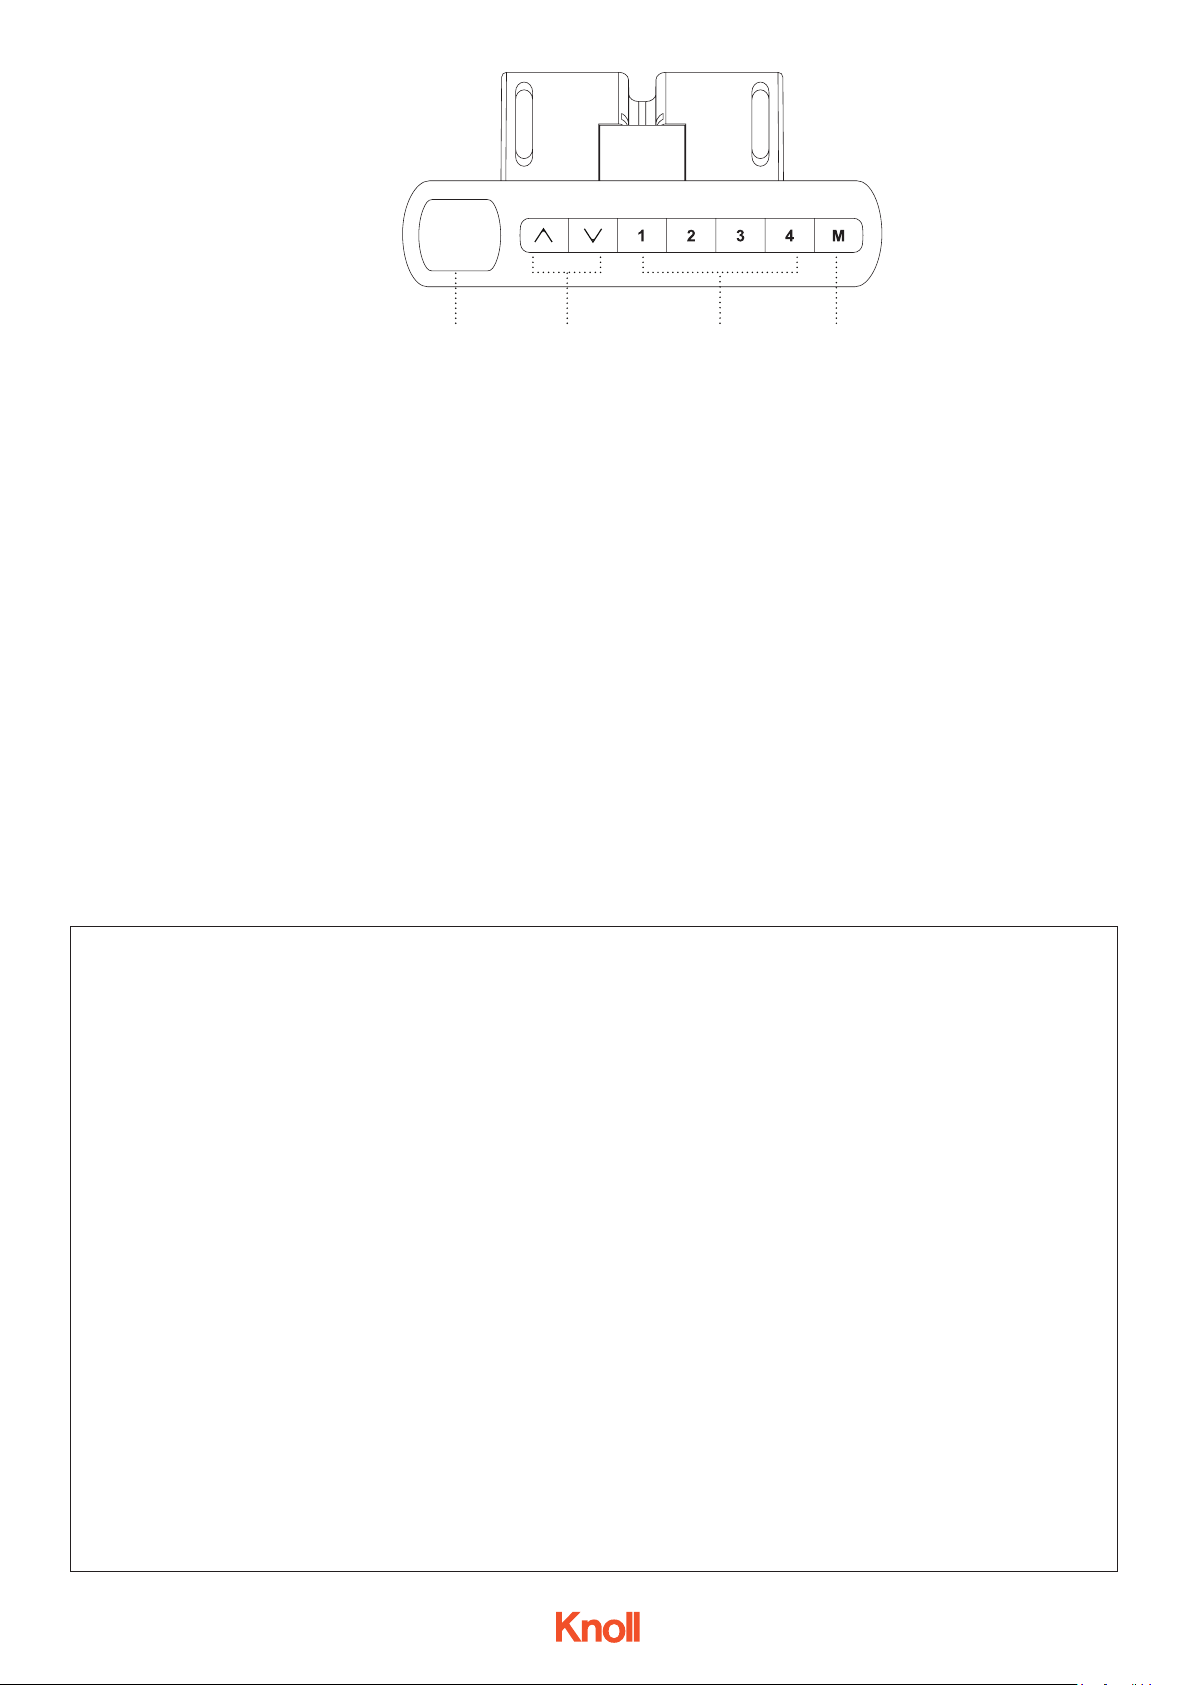
Initial calibration
After installation and before use, a reset must be performed to calibrate base components.
To Perform a Reset
• Press and hold the DOWN button until the display reads
RST. Release.
• Press and hold the DOWN button again, this time until the
desk rst lowers slightly, then rises slightly, and nally stops.
Release the DOWN button.
To set the upper limit:
• Use the UP/DOWN buttons to move the desk to the desired
maximum height.
• Press the M button and release, then press the UP button
and release. The display will ash S - indicating that it is
ready to set the upper limit.
• Press and hold the M button for about 2 seconds. The dis-
play will show "999" and then return to the height readout.
This indicates that the upper limit is set.
To set the lower limit
• Use the UP/DOWN buttons to move the desk to the desired
minimum height.
• Press the M button and release, then press the DOWN but-
ton and release. The display will ash S - indicating that it is
ready to set the lower limit.
• Press and hold the M button for about 2 seconds. The dis-
play will show "000" and then return to your selected height.
This indicates that the lower limit is set.
Step 9. Set up handset.
LED Display Up/Down Presets M Buttom
90.014.01.1169v.B