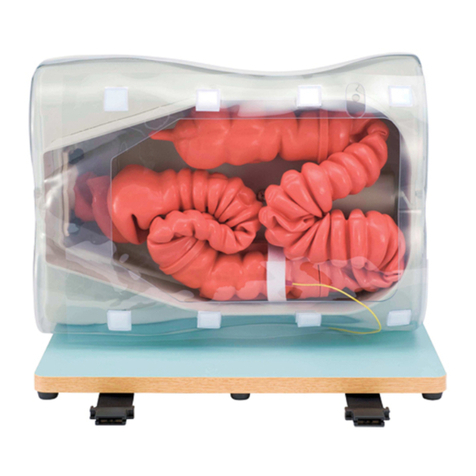
KOKEN LM-101D User manual

Umbilical Cord Kit
LM-101D
Instruction Manual
Thank you for purchasing the Umbilical Cord Kit.
Please read this instruction manual carefully to ensure correct use of the product,
and store it in a safe place for easy access.
KOKEN CO., LTD.
1-4-14 Koraku, Bunkyo-ku, Tokyo 112-0004 JAPAN
URL:http://www.kokenmpc.co.jp
E-mail:[email protected]
© 2013-2021 KOKEN CO.,LTD. C-1-1000-1-01-02

1
Handling and Safety Precautions
These precautions should be strictly observed in order to ensure safe,
long-term use of the product.
The following precautions should be observed particularly strictly:
1. The model is made with a special material to simulate the texture of human skin. We recommend
that it be handled carefully, in the same manner as an actual person. The model may become
damaged by pulling at it with excessive force or if it suffers a strong impact, for example if
dropped.
2. The material of the umbilical cord contained in this Umbilical Cord Kit has a distinct odor. This
odor is not harmful to the human body and does not indicate poor quality. The distinct odor
fades with time. There may also be a smell of baby powder remaining on the product, as baby
powder is applied to the model during the manufacturing process.
3. Wear disposable gloves when practicing with the model.
4. Apply a moderate amount of lubricant (glycerin) to the fetal model and placenta model before
use.
5. Please do not use oily lubricant (baby oil, olive oil etc.), alcohol lubricant, and lubricant containing
organic solvent. These may cause breakage of the model.
6. In caring for the model, do not use rubbing alcohol, thinners, or benzin or other organic solvents
on the model, as doing so may cause damage.
7. Do not use oil-based inks, pencil, chalk, or paints on the model, as they may cause permanent
staining.
8. Placing objects directly on top of the model or placing it on uneven surfaces may change the
shape of the model.
9. If the surface becomes sticky or after washing the model following use, apply baby powder all
over the model to reduce friction.
10. The umbilical cord contained in this Umbilical Cord Kit may lose its shape after a long time.
Check the shape of the model about 3 years after purchase. If it is deformed to the extent that
correct functioning is aected, consider replacing it.
11. Air bubbles or impressions in the umbilical cord contained in this Umbilical Cord Kit that may
remain from the manufacturing process do not affect the strength of the material, as the
material used is strongly tear-resistant.
2
Handling and Safety Precautions
These precautions should be strictly observed in order to ensure safe,
long-term use of the product.
Caring for the model after use
1. This model is washable. After washing, wipe o all the remaining water with a soft, dry gauze or
cloth. After wiping o the water, pat baby powder all over the model. Wipe o all the remaining
water to prevent the metal parts in the umbilical cord connector from rusting. If the metal parts
become rusted to the extent that their functioning is affected, consider replacing the model.
(Do not clean the model with rubbing alcohol, thinners, benzene or other organic solvents.)
2. Storing the umbilical cord contained in this Umbilical Cord Kit for an extended time in a high-
or low-temperature environment may cause its shape to change. Exposure to direct sunlight or
ultraviolet rays may also alter its shape or color. Store the model at a temperature of 0-50°C, in a
place where it will not be exposed to direct sunlight or ultraviolet rays.
3. Oil may leak from the umbilical cord contained in this Umbilical Cord Kit. When storing it, wrap
the umbilical cord in paper towel, gauze or another cloth, and place it in the re-sealable plastic
bag that comes with the kit.
1. The contents of this instruction manual are subject to change without notice.
2. This instruction manual may not be reproduced in part or in its entirety without permission.
3. Please contact the manufacturer in the event that any errors or omissions are found in the contents of
this instruction manual.
4. This product should be used only as described in this instruction manual. In particular, the product
should not be used in any way that contravenes the precautions noted in the instruction manual.

3
Table of Contents
1. Outline and Features
2. Components and Conguration
3. Attaching the fetal and placenta models
3-1. Attaching the fetal model (LM-0633) and placenta model (LM-0634)
3-2. Attaching the fetal model (LM-114A) and placenta model (LM-114B)
3-3. Attaching the fetal model (LM-114A) and placenta model (LM-0634)
3-4. Attaching the fetal model (LM-0633) and placenta model (LM-114B)
4. Model Conguration Chart
5. Specications

4
1. Outline and Features
Outline
This umbilical cord model can be used to practice actual tying and cutting. It can be attached to
Koken’s fetal model and placenta model to practice performing delivery without stopping the
sequence of steps from delivery of the fetus to delivery of the placenta. It therefore enables practice
that retains the tension that would be felt during actual delivery.
Features
1. This model can be attached to the fetal model (LM-0633, LM-114A) and placenta model
(LM-0634, LM-114B) to practice the entire sequence of steps from delivering the fetus to
tying and cutting the umbilical cord and delivering the placenta.
2. The umbilical cord contained in this Umbilical Cord Kit has a tear-resistant texture that slides
away from scissors when being cut. (There are no arteries or veins in the umbilical cord.)
3. The new material used is soft and tear-resistant, and enables trainees to practice tying an
umbilical cord with an umbilical cord clamp.
4. A single umbilical cord contained in this Umbilical Cord Kit can be used multiple times to
practice tying and cutting.
- 4 -
11,,概概要要とと特特長長
《《概概要要》》
実際に結紮、切断することができる臍帯です。当社の胎児モデル、胎盤モデルに接続し、娩出
させることで、胎児娩出から胎盤娩出までの一連の流れを止めることなく、現場の緊張感を保
った演習ができます。
《《特特長長》》
1. 当社の胎児モデル(LM-0633、LM-114A)と胎盤モデル(LM-0634、LM-114B)に接続でき、
胎児娩出、臍帯結紮、臍帯切断、胎盤娩出までの一連の流れを演習できます。
○胎児モデル
LM-0633 LM-114A
○胎盤モデル
LM-0634LM-114B
2. 臍帯結紮切断パーツ用臍帯の切断時は、臍帯がハサミから逃げる切りにくい感触で演習で
きます。(臍帯内に、動脈、静脈はありません。)
3. 柔らかく、切れにくい新素材は、実際に臍帯クリップで結紮して演習できます。
4. 臍帯結紮切断パーツ用臍帯は、1本で複数回の結紮、切断ができます。
臍クリップ
臍リング
先端フック
先端玉留め
Fetal model
Placenta model
Umbilical ring
Tip hook
Umbilical clip
Tip French knot

5
2. Components and Conguration
3. Attaching the fetal and placenta models
3-1 Attaching the fetal model (LM-0633) and placenta model (LM-0634)
1) Take the umbilical cord contained in this Umbilical Cord Kit and roll down the end that has a
hole in it until a string loop appears.
2) Roll down the end of the umbilical cord attached to the placenta model until a hook appears
on the end.
Umbilical cord Umbilical cord connector
String loop

6
3) Place the hook of the placenta model on the string loop of the umbilical cord contained in
this Umbilical Cord Kit. Unfold the edges of the ends that were rolled down so that the end
of the umbilical cord of the placenta model covers the end of the umbilical cord contained in
this Umbilical Cord Kit.
* If the end of the umbilical cord contained in this Umbilical Cord Kit is not covered by the end
of the umbilical cord of the placenta model, they will come apart during delivery.
* Make sure the parts are not lubricated when attaching them together. It will be difficult
to slide the umbilical cord of the placenta model over the umbilical cord contained in this
Umbilical Cord Kit if they are lubricated during this step.
4) Roll down the end of the umbilical cord connector with a hook attached until the hook is
visible, then attach the hook to the umbilical ring on the fetal model. After attaching the
hook, unfold the end.
Hook
Umbilical ring

7
5) Roll down the end of the umbilical cord connector with a clip until the clip is visible, then
clamp it onto the umbilical cord contained in this Umbilical Cord Kit. After clamping them
together, unfold the end of the umbilical cord connector and onto the umbilical cord
contained in this Umbilical Cord Kit.
* If the end of the umbilical cord contained in this Umbilical Cord Kit is not covered by the
umbilical cord connector, they may come apart.
6) Assembly is now complete. To re-attach the umbilical cord contained in this Umbilical Cord
Kit after it is cut o, start the procedure again from step 5.
* Apply adequate glycerin to the fetal model and placenta model as well as to the inside of the
vulva when practicing delivery.
Clip

8
3-2 Attaching the fetal model (LM-114A) and placenta model (LM-114B)
1) Take the umbilical cord contained in this Umbilical Cord Kit and roll back the end that has a
hole in it until a string loop appears.
2) Roll back the end of the umbilical cord connector with a hook attached until the hook is
visible, and then attach the hook to the umbilical ring of the umbilical cord contained in this
Umbilical Cord Kit. After attaching the hook, unroll the edge of the end that was rolled back
so it covers the end of the umbilical cord contained in this kit.
-8 -
33--22胎胎児児モモデデルル((LLMM--111144AA))とと胎胎盤盤モモデデルル((LLMM--111144BB))にに取取りり付付けけるる場場合合
1) 臍帯結紮切断パーツ用臍帯の穴が開いている端を捲ってください。紐輪が出てきます。
2) 臍帯接続部品のフック側を捲り、フックが見える状態にしてから、臍帯結紮切断パーツ用臍帯の
紐輪にフックを取り付けてください。その後、捲った部分を元に戻して臍帯結紮切断パーツ用臍帯
に被せてください。
紐輪
String loop
-8 -
33--22胎胎児児モモデデルル((LLMM--111144AA))とと胎胎盤盤モモデデルル((LLMM--111144BB))にに取取りり付付けけるる場場合合
1) 臍帯結紮切断パーツ用臍帯の穴が開いている端を捲ってください。紐輪が出てきます。
2) 臍帯接続部品のフック側を捲り、フックが見える状態にしてから、臍帯結紮切断パーツ用臍帯の
紐輪にフックを取り付けてください。その後、捲った部分を元に戻して臍帯結紮切断パーツ用臍帯
に被せてください。
紐輪

9
3) Roll back the end of the umbilical cord connector with a clip until the clip is visible, then
clamp it onto the French knot on the placenta model's umbilical cord. After clamping them
together, unroll the end of the umbilical cord connector that was rolled back so it covers the
end of the umbilical cord.
4) Remove the umbilical cover from the fetal model, and then thread the outer part of the
umbilical cord contained in this Umbilical Cord Kit through it.
5) Clamp the umbilical cord contained in this Umbilical Cord Kit in place using the clip attached
to the fetal model.
* Make sure the parts are not lubricated when attaching them together. If the parts are
lubricated with glycerin, etc. during this step, the umbilical cord contained in this Umbilical
Cord Kit will become slippery and come o .
-9 -
3) 臍帯接続部品のクリップ側を捲り、クリップが見える状態にしてから胎盤モデルの臍帯玉留め
部分を挟んでください。その後、臍帯に臍帯接続部品の捲った部分を被せてください。
4) 胎児モデルから臍カバーを外し、臍帯結紮切断パーツ用臍帯に通します。
5) 胎児モデルのクリップで臍帯結紮切断パーツ用臍帯を挟みます。
※※ググリリセセリリンンななどどのの潤潤滑滑剤剤ががつついいてていいるる状状態態でで取取りり付付けけ作作業業をを行行ううとと、、臍臍帯帯結結紮紮切切断断パパーーツツ用用臍臍帯帯
がが滑滑っってて取取れれややすすくくななるるののでで、、潤潤滑滑剤剤ななどどががつついいてていいなないい状状態態でで取取りり付付けけ作作業業をを行行っっててくくだだささいい。。

10
6) Attach the umbilical cover to the fetal model.
* Make sure the parts are not lubricated when attaching them together. If the parts are
lubricated with glycerin, etc. during this step, the umbilical cover will become slippery and
come o .
* Internal structure of the fetal model and the umbilical cover's connector
There is a grove in the fetal model's umbilicus as shown in the fi gure below. Make sure to fi t
the umbilical cover's fl ange into the groove.
7) Assembly is now complete. To re-attach the umbilical cord contained in this Umbilical Cord
Kit after it has been cut, restart the procedure from step 4.
* Apply adequate glycerin to the fetal model and placenta model as well as to the inside of
the vulva when practicing delivery.
-10 -
6) 臍カバーを胎児モデルに取り付けます。
※※ググリリセセリリンンななどどのの潤潤滑滑剤剤ががつついいてていいるる状状態態でで取取りり付付けけ作作業業をを行行ううとと、、臍臍カカババーーがが滑滑っってて取取れれややすすくく
ななるるののでで、、潤潤滑滑剤剤ななどどががつついいてていいなないい状状態態でで取取りり付付けけ作作業業をを行行っっててくくだだささいい。。
※胎児モデルと臍カバー接続部の内部構造
胎児モデルの臍部分の内部には下図の様に溝があります。臍カバーのフランジ部分と溝
がはまる様に取り付けてください。
7) 以上で取り付けは終了です。臍帯結紮切断パーツ用臍帯を切断してから再度、取り付ける場合は、
4)からの手順で取り付けを行ってください。
※※娩娩出出ささせせるる時時はは、、胎胎児児モモデデルルとと胎胎盤盤モモデデルル、、及及びび外外陰陰部部のの内内側側にに十十分分ググリリセセリリンンをを塗塗っっててかからら
ごご使使用用くくだだささいい。。
胎胎児児臍臍側側
臍臍カカババーー
取取りり付付けけ前前
取取りり付付けけ後後
-10 -
6) 臍カバーを胎児モデルに取り付けます。
※※ググリリセセリリンンななどどのの潤潤滑滑剤剤ががつついいてていいるる状状態態でで取取りり付付けけ作作業業をを行行ううとと、、臍臍カカババーーがが滑滑っってて取取れれややすすくく
ななるるののでで、、潤潤滑滑剤剤ななどどががつついいてていいなないい状状態態でで取取りり付付けけ作作業業をを行行っっててくくだだささいい。。
※胎児モデルと臍カバー接続部の内部構造
胎児モデルの臍部分の内部には下図の様に溝があります。臍カバーのフランジ部分と溝
がはまる様に取り付けてください。
7) 以上で取り付けは終了です。臍帯結紮切断パーツ用臍帯を切断してから再度、取り付ける場合は、
4)からの手順で取り付けを行ってください。
※※娩娩出出ささせせるる時時はは、、胎胎児児モモデデルルとと胎胎盤盤モモデデルル、、及及びび外外陰陰部部のの内内側側にに十十分分ググリリセセリリンンをを塗塗っっててかからら
ごご使使用用くくだだささいい。。
胎胎児児臍臍側側
臍
臍
カ
カ
バ
バ
ー
ー
取取りり付付けけ前前
取取りり付付けけ後後
After attachingBefore attaching
Umbilical side of
the fetal model
Umbilical cover
-10 -
6) 臍カバーを胎児モデルに取り付けます。
※※ググリリセセリリンンななどどのの潤潤滑滑剤剤ががつついいてていいるる状状態態でで取取りり付付けけ作作業業をを行行ううとと、、臍臍カカババーーがが滑滑っってて取取れれややすすくく
ななるるののでで、、潤潤滑滑剤剤ななどどががつついいてていいなないい状状態態でで取取りり付付けけ作作業業をを行行っっててくくだだささいい。。
※胎児モデルと臍カバー接続部の内部構造
胎児モデルの臍部分の内部には下図の様に溝があります。臍カバーのフランジ部分と溝
がはまる様に取り付けてください。
7) 以上で取り付けは終了です。臍帯結紮切断パーツ用臍帯を切断してから再度、取り付ける場合は、
4)からの手順で取り付けを行ってください。
※※娩娩出出ささせせるる時時はは、、胎胎児児モモデデルルとと胎胎盤盤モモデデルル、、及及びび外外陰陰部部のの内内側側にに十十分分ググリリセセリリンンをを塗塗っっててかからら
ごご使使用用くくだだささいい。。
胎胎児児臍臍側側
臍臍カカババーー
取取りり付付けけ前前
取取りり付付けけ後後

11
3-3 Attaching the fetal model (LM-114A) and placenta model (LM-0634)
1) Take the umbilical cord contained in this Umbilical Cord Kit and roll back the end that has a
hole in it until a string loop appears.
2) Roll back the end of the umbilical cord attached to the placenta model until a hook appears
on the end.
3) Hook the placenta model's hook onto the string loop of the umbilical cord contained in this
Umbilical Cord Kit. Unroll the edge of the end that was rolled back so it covers the end of the
umbilical cord contained in this kit.
* If the end of the umbilical cord contained in this Umbilical Cord Kit is not covered by the end
of the placenta model's umbilical cord, they may come apart during delivery.
* Make sure the parts are not lubricated when attaching them together. It will be diffi cult to
slide the placenta model's umbilical cord over the umbilical cord contained in this Umbilical
Cord kit if they are lubricated with glycerin, etc. during this step.
-11 -
33--33胎胎児児モモデデルル((LLMM--111144AA))とと胎胎盤盤モモデデルル((LLMM--00663344))にに取取りり付付けけるる場場合合
1) 臍帯結紮切断パーツ用臍帯の穴が開いている端を捲ってください。紐輪が出てきます。
2) 胎盤モデルの臍帯先端部を捲って先端のフックを出してください。
3) 臍帯結紮切断パーツ用臍帯の紐輪に胎盤モデルのフックを引っかけてください。その後、捲った
部分を元に戻し、胎盤モデル臍帯を臍帯結紮切断パーツ用臍帯に被せてください。
※※臍臍帯帯結結紮紮切切断断パパーーツツ用用臍臍帯帯がが胎胎盤盤モモデデルルのの臍臍帯帯にに覆覆わわれれてていいなないいとと娩娩出出時時にに外外れれるる場場合合ががあありり
まますす。。
※※ググリリセセリリンンななどどのの潤潤滑滑剤剤ががつついいてていいるる状状態態でで取取りり付付けけ作作業業をを行行ううとと、、胎胎盤盤モモデデルルのの臍臍帯帯がが、、臍臍帯帯結結
紮紮切切断断パパーーツツ用用臍臍帯帯にに被被せせににくくいいののでで、、潤潤滑滑剤剤ななどどががつついいてていいなないい状状態態でで取取りり付付けけ作作業業をを行行っってて
くくだだささいい。。
紐輪
String loop
-11 -
33--33胎胎児児モモデデルル((LLMM--111144AA))とと胎胎盤盤モモデデルル((LLMM--00663344))にに取取りり付付けけるる場場合合
1) 臍帯結紮切断パーツ用臍帯の穴が開いている端を捲ってください。紐輪が出てきます。
2) 胎盤モデルの臍帯先端部を捲って先端のフックを出してください。
3) 臍帯結紮切断パーツ用臍帯の紐輪に胎盤モデルのフックを引っかけてください。その後、捲った
部分を元に戻し、胎盤モデル臍帯を臍帯結紮切断パーツ用臍帯に被せてください。
※※臍臍帯帯結結紮紮切切断断パパーーツツ用用臍臍帯帯がが胎胎盤盤モモデデルルのの臍臍帯帯にに覆覆わわれれてていいなないいとと娩娩出出時時にに外外れれるる場場合合ががあありり
まますす。。
※※ググリリセセリリンンななどどのの潤潤滑滑剤剤ががつついいてていいるる状状態態でで取取りり付付けけ作作業業をを行行ううとと、、胎胎盤盤モモデデルルのの臍臍帯帯がが、、臍臍帯帯結結
紮紮切切断断パパーーツツ用用臍臍帯帯にに被被せせににくくいいののでで、、潤潤滑滑剤剤ななどどががつついいてていいなないい状状態態でで取取りり付付けけ作作業業をを行行っってて
くくだだささいい。。
紐輪

12
4) Remove the umbilical cover from the fetal model, and then thread the outer part of the
umbilical cord contained in this Umbilical Cord Kit through it.
5) Clamp the umbilical cord contained in this Umbilical Cord Kit in place using the clip attached
to the fetal model.
* Make sure the parts are not lubricated when attaching them together. If the parts are
lubricated with glycerin, etc. during this step, the umbilical cord contained in this Umbilical
Cord Kit will become slippery and come o .
6) Attach the umbilical cover to the fetal model.
* Make sure the parts are not lubricated when attaching them together. If the parts are
lubricated with glycerin, etc. during this step, the umbilical cover will become slippery and
come o .
-12 -
4) 胎児モデルから臍カバーを外し、臍帯結紮切断パーツ用臍帯に通します。
5) 胎児モデルのクリップで臍帯結紮切断パーツ用臍帯を挟みます。
※※ググリリセセリリンンななどどのの潤潤滑滑剤剤ががつついいてていいるる状状態態でで取取りり付付けけ作作業業をを行行ううとと、、臍臍帯帯結結紮紮切切断断パパーーツツ用用臍臍帯帯
がが滑滑っってて取取れれややすすくくななるるののでで、、潤潤滑滑剤剤ななどどががつついいてていいなないい状状態態でで取取りり付付けけ作作業業をを行行っっててくくだだささいい。。
6) 臍カバーを胎児モデルに取り付けます。
※※ググリリセセリリンンななどどのの潤潤滑滑剤剤ががつついいてていいるる状状態態でで取取りり付付けけ作作業業をを行行ううとと、、臍臍カカババーーがが滑滑っってて取取れれややすすくく
ななるるののでで、、潤潤滑滑剤剤ななどどががつついいてていいなないい状状態態でで取取りり付付けけ作作業業をを行行っっててくくだだささいい。。

13
* Internal structure of the fetal model and the umbilical cover's connector.
* There is a grove in the fetal model's umbilicus as shown in the fi gure below. Make sure to fi t
the umbilical cover's fl ange into the groove.
7) Assembly is now complete. To re-attach the umbilical cord contained in this Umbilical Cord
Kit after it has been cut, restart the procedure from step 4.
* Apply adequate glycerin to the fetal model and placenta model as well as to the inside of
the vulva when practicing delivery.
-10 -
6) 臍カバーを胎児モデルに取り付けます。
※※ググリリセセリリンンななどどのの潤潤滑滑剤剤ががつついいてていいるる状状態態でで取取りり付付けけ作作業業をを行行ううとと、、臍臍カカババーーがが滑滑っってて取取れれややすすくく
ななるるののでで、、潤潤滑滑剤剤ななどどががつついいてていいなないい状状態態でで取取りり付付けけ作作業業をを行行っっててくくだだささいい。。
※胎児モデルと臍カバー接続部の内部構造
胎児モデルの臍部分の内部には下図の様に溝があります。臍カバーのフランジ部分と溝
がはまる様に取り付けてください。
7) 以上で取り付けは終了です。臍帯結紮切断パーツ用臍帯を切断してから再度、取り付ける場合は、
4)からの手順で取り付けを行ってください。
※※娩娩出出ささせせるる時時はは、、胎胎児児モモデデルルとと胎胎盤盤モモデデルル、、及及びび外外陰陰部部のの内内側側にに十十分分ググリリセセリリンンをを塗塗っっててかからら
ごご使使用用くくだだささいい。。
胎胎児児臍臍側側
臍
臍
カ
カ
バ
バ
ー
ー
取取りり付付けけ前前
取取りり付付けけ後後
After attachingBefore attaching
Umbilical side of
the fetal model
Umbilical cover
- 13 -
※胎児モデルと臍カバー接続部の内部構造
胎児モデルの臍部分の内部には下図の様に溝があります。臍カバーのフランジ部分と溝
がはまる様に取り付けてください。
7) 以上で取り付けは終了です。臍帯結紮切断パーツ用臍帯を切断してから再度、取り付ける場合は、
4)からの手順で取り付けを行ってください。
※※娩娩出出ささせせるる時時はは、、胎胎児児モモデデルルとと胎胎盤盤モモデデルル、、及及びび外外陰陰部部のの内内側側にに十十分分ググリリセセリリンンをを塗塗っっててかからら
ごご使使用用くくだだささいい。。
胎胎児児臍臍側側
臍臍カカババーー
取取りり付付けけ前前
取取りり付付けけ後後

14
3-4 Attaching the fetal model (LM-0633) and placenta model (LM-114B)
* Two umbilical cord connectors are needed.
1) Take the umbilical cord contained in this Umbilical Cord Kit and roll back the end that has a
hole in it until a string loop appears.
2) Roll back the end of the umbilical cord connector with a hook attached until the hook is
visible, and then attach the hook to the umbilical ring of the umbilical cord contained in this
Umbilical Cord Kit. After attaching the hook, unroll the edge of the end that was rolled back
so it covers the end of the umbilical cord contained in this kit.
-14 -
33--44胎胎児児モモデデルル((LLMM--00663333))とと胎胎盤盤モモデデルル((LLMM--111144BB))にに取取りり付付けけるる場場合合
※※臍臍帯帯接接続続部部品品がが22個個必必要要
1) 臍帯結紮切断パーツ用臍帯の穴が開いている端を捲ってください。紐輪が出てきます。
2) 臍帯接続部品のフック側を捲り、フックが見える状態にしてから、臍帯結紮切断パーツ用臍帯の
紐輪にフックを取り付けてください。その後、捲った部分を元に戻して臍帯結紮切断パーツ用臍帯
に被せてください。
紐輪
String loop
-14 -
33--44胎胎児児モモデデルル((LLMM--00663333))とと胎胎盤盤モモデデルル((LLMM--111144BB))にに取取りり付付けけるる場場合合
※※臍臍帯帯接接続続部部品品がが22個個必必要要
1) 臍帯結紮切断パーツ用臍帯の穴が開いている端を捲ってください。紐輪が出てきます。
2) 臍帯接続部品のフック側を捲り、フックが見える状態にしてから、臍帯結紮切断パーツ用臍帯の
紐輪にフックを取り付けてください。その後、捲った部分を元に戻して臍帯結紮切断パーツ用臍帯
に被せてください。
紐輪

15
3) Roll back the end of the umbilical cord connector with a clip until the clip is visible, then
clamp it onto the French knot on the placenta model's umbilical cord. After clamping them
together, unroll the end of the umbilical cord connector that was rolled back so it covers the
end of the umbilical cord.
4) Roll back the end of another umbilical cord connector with a hook until the hook is visible,
then attach the hook to the umbilical ring on the fetal model. After attaching the hook, unroll
the end.
-15 -
3) 臍帯接続部品のクリップ側を捲り、クリップが見える状態にしてから胎盤モデルの臍帯玉留め
部分を挟んでください。その後、臍帯に臍帯接続部品の捲った部分を被せてください。
4) もう1個の臍帯接続部品のフック側を捲り、フックが見える状態にしてから、胎児モデルの臍リン
グに取り付けてください。取り付け後に捲った部分を元に戻してください。
フック
臍リング
-15 -
3) 臍帯接続部品のクリップ側を捲り、クリップが見える状態にしてから胎盤モデルの臍帯玉留め
部分を挟んでください。その後、臍帯に臍帯接続部品の捲った部分を被せてください。
4) もう1個の臍帯接続部品のフック側を捲り、フックが見える状態にしてから、胎児モデルの臍リン
グに取り付けてください。取り付け後に捲った部分を元に戻してください。
フック
臍リング
Hook
Umbilical ring

16
5) Roll back the end of the umbilical cord connector with a clip until the clip is visible, then
clamp it onto the umbilical cord contained in this Umbilical Cord Kit. After clamping them
together, unroll the end of the connector that was rolled back so it covers the end of the
umbilical cord contained in this kit.
* If the umbilical cord connector does not cover the end of the umbilical cord contained in
this Umbilical Cord Kit, the parts may separate.
6) Assembly is now complete. To re-attach the umbilical cord contained in this Umbilical Cord
Kit after it has been cut, restart the procedure from step 5.
* Apply adequate glycerin to the fetal model and placenta model as well as to the inside of
the vulva when practicing delivery.
-16 -
5) 臍帯接続部品のクリップ側を捲り、クリップが見える状態にしてから臍帯結紮切断パーツ用臍帯
を挟んでください。挟んだ後、臍帯結紮切断パーツ用臍帯に臍帯接続部品の捲った部分を被せて
ください。
※※臍臍帯帯結結紮紮切切断断パパーーツツ用用臍臍帯帯はは、、臍臍帯帯接接続続部部品品をを被被せせなないいとと外外れれるる場場合合ががあありりまますす。。
6) 以上で取り付けは終了です。臍帯結紮切断パーツ用臍帯を切断してから再度、取り付ける場合は、
5)からの手順で取り付けを行ってください。
※※娩娩出出ささせせるる時時はは、、胎胎児児モモデデルルとと胎胎盤盤モモデデルル、、及及びび外外陰陰部部のの内内側側にに十十分分ググリリセセリリンンをを塗塗っっててかからら
ごご使使用用くくだだささいい。。
クリップ
Clip
-16 -
5) 臍帯接続部品のクリップ側を捲り、クリップが見える状態にしてから臍帯結紮切断パーツ用臍帯
を挟んでください。挟んだ後、臍帯結紮切断パーツ用臍帯に臍帯接続部品の捲った部分を被せて
ください。
※※臍臍帯帯結結紮紮切切断断パパーーツツ用用臍臍帯帯はは、、臍臍帯帯接接続続部部品品をを被被せせなないいとと外外れれるる場場合合ががあありりまますす。。
6) 以上で取り付けは終了です。臍帯結紮切断パーツ用臍帯を切断してから再度、取り付ける場合は、
5)からの手順で取り付けを行ってください。
※※娩娩出出ささせせるる時時はは、、胎胎児児モモデデルルとと胎胎盤盤モモデデルル、、及及びび外外陰陰部部のの内内側側にに十十分分ググリリセセリリンンをを塗塗っっててかからら
ごご使使用用くくだだささいい。。
クリップ

17
4. Model Conguration Chart
Umbilical Cord Kit (LM-101D)
Optional item Umbilical cord for replacement (10 pcs) (LM-101E)
5. Specications
Product name Total length Diameter Weight
Umbilical cord Approx. 12 cm Approx. 1.4 cm Approx. 16 g
Umbilical cord connector Approx. 4 cm Approx. 1.6 cm Approx. 7 g
Quantity
1
1
1
Quantity
01
1
Quantity
1
1
1
Quantity
01
1
Quantity
1
1
1
Quantity
01
1
Umbilical cord
Umbilical cord connector
Instruction Manual (this document)
Umbilical cord
Handling Precautions
Table of contents
Other KOKEN Science Education Product manuals

KOKEN
KOKEN LM-055 User manual

KOKEN
KOKEN LM-017 User manual

KOKEN
KOKEN Maternity Model Type II User manual

KOKEN
KOKEN LM-078 User manual

KOKEN
KOKEN LM-103 User manual

KOKEN
KOKEN LM-114H-CE User manual

KOKEN
KOKEN LM-107A User manual

KOKEN
KOKEN LM-109FA User manual

KOKEN
KOKEN LM-101K User manual

KOKEN
KOKEN LM-025 User manual