KOKEN LM-095N User manual

9999
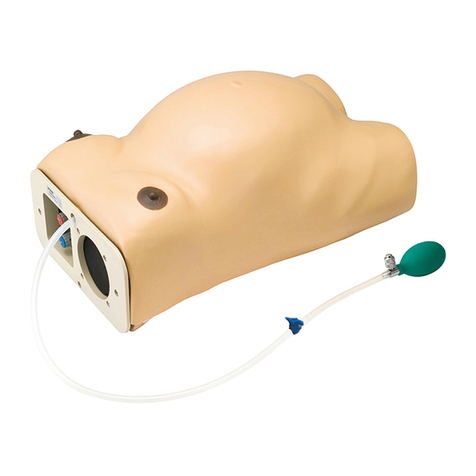
Virtual Reality
Vaginal Exam
Model II
LM-095N
Instruction Manual
Thank you for purchasing the Virtual Reality Vaginal Exam Model II.
Please read this instruction manual carefully to ensure correct use of the product,
and store it in a safe place for easy access.
KOKEN CO., LTD.
1-4-14 Koraku, Bunkyo-ku, Tokyo 112-0004 JAPAN
URL:http://www.kokenmpc.co.jp
E-mail:[email protected]
©2015-2021 KOKEN CO.,LTD. C-1-1018-1-01-04


1
Handling and Safety Precautions
These precautions should be strictly observed in order to ensure safe, long-term
use of the product.
The following precautions should be observed particularly strictly:
1. This model is made of a special material with a feel similar to that of the human body. Please
handle it with the same care that you would exercise when working with a human body. Pulling
it with excessive force or su bjecting it to a strong impact, for example if dropped, could cause
damage to the model.
2. The material of the vulva for vaginal exam II has a distinct odor. This odor is not harmful to the
human body and does not indicate poor quality. The distinct odor fades with time. There may
also be a smell of baby powder remaining on the product, as baby powder is applied during
fabrication.
3. Use glycerin to lubricate. Be sure to apply a sucient amount of lubricant (glycerin) to the model
before practicing. Koken is not responsible for deterioration or damage to the model occurring
from use of lubricants other than glycerin. When the glycerin provided runs out, use commercially
available glycerin.
4. Placing objects directly on top of the model or placing the model on uneven surfaces may cause
deformation.
5. Do not use rubbing alcohol, thinners, or benzin or other organic solvents on the model, as doing
so may cause damage.
6. Do not use oil-based inks, pencil, chalk, or paints on the model, as they will soak into the model
and cannot be removed.
7. If the surface becomes increasingly sticky or after washing the model with water after practicing,
apply baby powder all over the vulva for vaginal exam II to reduce friction
8. The vulva for vaginal exam II may become deformed due to aging. Check the shape of the model
about 3 years after purchase. If it is deformed to the extent that function is aected, consider
replacing the vulva for vaginal exam II.
9. Air bubbles or impressions in the vulva for vaginal exam II that may remain from during
fabrication do not aect the strength of the material, as the material used is tear-resistant.

2
10. Dropping the model or trakSTAR, or subjecting them to strong impact, could cause damage.
11. Be careful not to excessively bend or twist the nger sensor cables, and avoid stepping on them.
Such actions could cause the cables to break. Cables cannot be repaired once they have broken.
12. When connecting the nger sensors to the trakSTAR, and when disconnecting them, be sure to
hold the main body of the connector. Attaching or removing the connector by pulling on the
cables themselves could cause the cables to break.
13. Attaching the nger sensors with long ngernails could damage the nger sacks.
14. Be sure to apply baby powder to the inside of the gloves before attaching the nger sensors and
putting on the gloves.
15. Wear disposable gloves when practicing.
16. The gloves provided are made of natural rubber. In rare cases, natural rubber may cause allergic
reactions. Please read the cautions printed on the glove packaging before use.
17. The model itself is not lubricated, so before practicing vaginal examinations, be sure to apply a
sucient amount of glycerine to both the model and to the trainee’s gloved ngers.
18. The Virtual Reality Vaginal Exam Model may react to magnetic fields, causing the model to
malfunction. When using the Virtual Reality Vaginal Exam Model, keep computers and objects
that generate magnetic elds at least 1 m away from the base that secures the main body.
19. Persons within a 1-meter radius of the model, including the trainee, should remove any metallic
objects (rings, necklaces, cellular telephones, etc.) about their person before starting to practice.
Metallic objects may cause malfunction.
20. To prevent malfunction of the Virtual Reality Vaginal Exam Model, be sure to place the base that
secures the main body on the upper level of the plastic wagon provided as an accessory, and
place the trakSTAR on the lower level.
21. Before practicing, check to make sure that the stoppers on the casters of the plastic wagon have
been set in the ON (locked) position.
22. The model and images displayed on the computer do not match perfectly. The images simply
allow an instructor to recognize the general area being palpated by the trainee during the
Vaginal examination being practiced on the model.
23. When not in use, the model should be stored in a location where it is not exposed to direct
sunlight or ultraviolet rays. Using the model in a high-temperature environment can cause
deformation, discoloration, and breakdowns.

3
Handling and Safety Precautions
These precautions should be strictly observed in order to ensure safe, long-term
use of the product.
Caring for the model after use
1. The vulva for vaginal exam II can be removed from the main body by unscrewing the exclusive
screws. Wipe off dirt using a material such as a moist cloth or gauze with water or a neutral
solvent diluted with water. Suciently wipe o the water to prevent the metal parts from rusting.
If the metal parts become rusted to the extent that function is aected, consider replacing them.
After wiping o the dirt, apply baby powder all over the model. (Do not clean the model with
rubbing alcohol, thinners, or benzin or other organic solvents.)
2. Oil may leak from the vulva for vaginal exam II. Wipe o oil using a material such as a moist cloth
or gauze with water or a neutral solvent diluted with water.
3. The dilated uterus models and fetal head model can simply be washed with water. After washing
with water, suciently wipe o the water with a soft cloth, such as dry gauze.
4. To clean the main body, wash the interior with water, leaving the exclusive screws installed to
keep water from getting inside the main body. (If the exclusive screws are not installed, water
may get inside the main body through the screw holes.)
5. To clean the finger sensors, disconnect them from the trakSTAR and use a neutral detergent
diluted with water to remove any dirt. Wipe off stubborn dirt with a material such as gauze
dipped in disinfecting ethanol. Do not use solvents such as thinners or benzin. Clean only the
nger sack part of the nger sensor.
6. Storing the models for an extended time in high- or low-temperature environments may
cause deformation. Exposure to direct sunlight or ultraviolet rays may also cause the material
to deteriorate, deform, or discolor. Store the model in an environment at 0-50 °C, in a location
where it will not be exposed to direct sunlight or ultraviolet rays.
1. The contents of this instruction manual are subject to change without notice.
2. This instruction manual may not be reproduced in part or in its entirety without permission.
3. Please contact the manufacturer in the event that any errors or omissions are found in the contents of
this instruction manual.
4. This product should be used only as described in this instruction manual. In particular, the product
should not be used in any way that contravenes the precautions noted in the instruction manual.

4
Table of Contents
Before Use
1. Outline and Features
2. Names of Parts and Conguration Diagram
3. Installing and Uninstalling the Application on the Computer
1) System Requirements
2) Setting up the Virtual Reality Vaginal Exam Model
3) Installing the Application
4) Installing the Application (other methods)
5) Uninstalling the Application
How to Use
4. Setting Up and Exiting the Virtual Reality Vaginal Exam Model
1) Setting up the Virtual Reality Vaginal Exam Model
2) Launching the Application Menu
3) Launching Applications
4) Exit
5. Fetal Head Rotation 3D Graphics Operation
1) Launching the Fetal Head Rotation 3D Graphics Application
2) Animation Operation
3) Viewpoint Operation
6. Setting Up the Virtual Vaginal Exam
7. Handling of the Virtual Reality Vaginal Exam Model
1) Applying Lubricant
2) Setting the Uterus dilation model in Place
8. Basic Operation of the Virtual Vaginal Exam
1) Launching the Virtual Vaginal Exam
2) Explanation of Menus
3) Operation of Functions
(1) Adjusting the displayed image
(2) Changing the viewpoint
(3) Measurement
9. Detailed Conguration of the Virtual Vaginal Exam
1) Operation Environment Setup
2) Adjusting the Position of the Model
Other
10. Model Conguration Chart
11. Specications

5
1. Outline and Features
Outline
The Virtual Reality Vaginal Exam Model makes it possible to see images of the actual movements
of the ngers inside the vagina when practicing vaginal examinations, something that has not
previously been possible. Instructors can now show trainees specifically how the two fingers
should be moved when performing an examination, and can check that the trainee is moving
their ngers properly.
Features
1. Sensors attached to the ngers make it possible to measurement and display distances between
the two ngers and the distance moved by the ngers.
2. A line connecting the ischial spines (zero station) can be displayed.
3. The material used for the model closely approximates that of real tissue. The cervix and other
structures can be checked under highly realistic conditions.
4. The images are three-dimensional and can be freely moved on the computer, enabling checking
from any direction.
5. Bishop scores from the late stage of pregnancy to the beginning of labor (cervical dilation,
eacement, consistency and position) can be conrmed.
6. Three models with varying degrees of uterus opening dilation are provided, along with models
of the fetal head. These can be interchanged and the degree of engagement can be adjusted,
making it possible to gauge the progression of labor by means of vaginal examination.
7. The fetal head models can be used to gauge rotation of the fetal head by varying positions of the
sagittal sutures and posterior fontanel.
8. Rotation of the fetus at the time of delivery can be checked by means of three-dimensional
animation.

6
2. Names of Parts and Conguration Diagram
Main body Vulva for vaginal exam II Exclusive screws
Base for securing main body Finger sensors trakSTAR
(for index nger and second nger)
USB cable Power cable 1~2 cm uterus dilation model
3~4 cm uterus dilation model 8~9 cm uterus dilation model Fetal head model
Base for uterus dilation model Baby powder Glycerine

7
Gloves Product key Product CD
Plastic wagon Cloth cover
*Finger sensors are available in three nger sizes: S, M and L. The S, M and L nger sack sizes are equivalent to surgical
glove sizes 6, 7 and 8.
* trakSTAR is a trademark of Ascension Technology Corporation.

8
3. Installing and Uninstalling the Application on the Computer
1) System Requirements
Please ensure that the computer to be used meets the following requirements.
■ Computer speci cations
・ Operating system: Windows 8 (32/64-bit version)/Windows 8.1 (32/64-bit version)/Windows 10
(64-bit version)
* Also runs on Windows XP (Service Pack 2 or newer version), Vista (32-bit version), 7 (32/64-bit
version), but please note that operating system support has ended.
・ CPU: Pentium 4 (at least 1 GHz recommended) or newer processer
・ Memory: 512 MB (at least 1 GB recommended)
・ Graphics card: Desktop: GeForce 4 or higher recommended
Note: GMA X3100 (Intel GL960, GM965, etc.) or higher recommended
・ USB ports: 2 ports (these are used to connect the trakSTAR and product key when operating
the model)
*Three USB ports are required if the computer does not have an internal CD drive and an
external CD drive is connected via USB.
*The .NET Framework 3.5 program (or newer version) is required when using this software.
The.NET Framework 3.5 can be installed during installation of this software. (In this case, an
Internet connection will be required. See note on p. 12 (4)*)
2) Setting up the Virtual Reality Vaginal Exam Model
*Dropping the model or trakSTAR, or subjecting them to strong impact, could cause damage. Handle
these items with caution.
*Before installing the software, be sure to connect the model as shown below.
(1) Referring to the instruction manual that comes packaged with the product, assemble the plastic
wagon.

9
(2) Place the base for securing the main body on the upper level of the plastic wagon, and secure
the main body in place. Set the sides of the main body against the reference positions for attaching
to the base, and turn the knob to x it in place.
(3) Set the trakSTAR on the lower level of the plastic wagon, and insert the cable coming from the
main body base into the terminal labeled "Transmitter” on the trakSTAR.
(4) Connect the nger sensors to “Sensors” 1 and 2 on the trakSTAR.
*Be careful not to excessively bend or twist the nger sensor cables, and avoid stepping on them. Such
actions could cause the cables to break.
*Connect the finger sensor for the index finger to terminal 1, and the finger sensor for the second
nger to terminal 2.
Position for attachment

10
*Follow the outlines below when connecting and disconnecting the nger sensors.
< Connecting >
Hold the part of the connector circled in blue in the gure below, and connect it to the trakSTAR.
< Disconnecting >
Hold the part of the connector circled in blue in the figure below, and disconnect it from the
trakSTAR.
*When connecting the nger sensors to the trakSTAR, and when disconnecting them, be sure to
hold the main body of the connector. Attaching or removing the connector by pulling on the cable
could cause the cable to break.
㻝㻜㻌
*Follow the outlines below when connecting and disconnecting the finger sensors.
<Connecting >
Hold the part of the connector circled in blue in the figure below, and connect it to the trakSTAR.
<Disconnecting >
Hold the part of the connector circled in blue in the figure below, and disconnect it from the trakSTAR.
*When connecting the finger sensors to the trakSTAR, and when disconnecting them, be sure to hold the
main body of the connector. Attaching or removing the connector by pulling on the cable could cause the
cable to break.

11
(5) Connect the USB cable to the computer. The USB cable connects to the terminal labeled “USB”
at the back of the trakSTAR.
*The Virtual Reality Vaginal Exam Model will not function if the USB cable is inserted into any location
other than the USB port on the computer to which the cable was connected at the time of installation.
Decide in advance, which USB port is to be used for connecting the USB cable before starting
installation.
(6) Connect the power cable to the back of the trakSTAR, and plug the cable into an electrical
outlet. Do not turn on the power at this point.

12
3) Installing the application
(1) After connecting the model, turn the computer on and insert the product CD into the computer.
(2) When the product CD is opened, the screen shown in the gure below is displayed. Double-click
on [940041 _ RevE].
(3) Double-click on [Setup.exe] to run.
(4) The following screen appears. Click [Accept]. (Depending on your computer Setup, the gure
below may be skipped and Screen (5) may appear, in which case, proceed with installation from
Step (5) below.)
*If .NET Framework is not installed, click [Accept] while connected to the Internet to have it install
automatically. If the computer is not connected to the Internet, the message shown below will
appear on the screen. In this case, connect the computer to the Internet and click [Retry].
Click here

13
(5) The following screen appears. Click [Next].
(6) Select “Just me” and click [Next].
Click here
Click here
Click here
Select “Just me”

14
(7) The following screen appears. Click [Next].
(8) The Installation screen appears, and installation commences.
(9) When message appears on the screen whether you wish to install or not, please click [Install].
Click here

15
(10) The following screen appears. Click [Next].
(11) The following screen appears. Click [Close].
(12) Turn on the power to the trakSTAR.
(13) Please insert the product key to USB port on the computer.
Click here
Click here
Power switch

16
(14) When the product CD folder is opened, the folders shown in the gure below will appear on
the screen. Double-click on [English] or [Japanese] to select the language to be displayed when
operating the Virtual Reality Vaginal Exam Model.
(15) When the language is selected, the following screen appears. Double-click on [Setup.msi] to
run.
(16) When Setup.msi is run, the Virtual Reality Vaginal Exam Model installer launches. Click on [Next].
(17) The folder selection screen will appear.
Click here

17
○ [Folder] edit box
Specify the installation destination. Write a new installation destination to change the installation
folder.
○ Change user radio button
Select whether to allow only the user performing the installation or all users who uses the
computer to use the Virtual Reality Vaginal Exam launch shortcut created during installation.
(18) Click [Next] to move to the Conrm Installation screen. Click on [Next].
(19) The Installation screen appears, and installation commences.
(20) A User Account Control conrmation dialog box will appear during installation (immediately
after installation starts). Click [Yes] to return to the Installation screen and restart installation.
Click here

18
(21) After completing installation, the Installation Complete screen appears. Click the [Close] button
to close the screen and complete installation.
(22) When installation ends, shortcuts are created on the Start Menu and on the Desktop.
Click here
Click here
Table of contents
Other KOKEN Science Education Product manuals

KOKEN
KOKEN LM-017 User manual

KOKEN
KOKEN LM-074 User manual

KOKEN
KOKEN LM-055 User manual

KOKEN
KOKEN LM-109FA User manual

KOKEN
KOKEN LM-089 User manual

KOKEN
KOKEN Western Features Baby User manual

KOKEN
KOKEN LM-078 User manual

KOKEN
KOKEN LM-060 User manual

KOKEN
KOKEN LM-114H-CE User manual

KOKEN
KOKEN LM-101D User manual

KOKEN
KOKEN LM-109M User manual

KOKEN
KOKEN LM-110 User manual

KOKEN
KOKEN LM-094B User manual

KOKEN
KOKEN LM-026M User manual

KOKEN
KOKEN LM-113A User manual

KOKEN
KOKEN LM-068 User manual

KOKEN
KOKEN LM-025 User manual

KOKEN
KOKEN LM-101K User manual

KOKEN
KOKEN LM-101B User manual

KOKEN
KOKEN Colonoscopy Lower GI Endoscopy Simulator Type... User manual