Step 3: Install the FC-174
Install FC-174 using one of the following methods:
Attach the rubber feet and place the unit on a flat surface.
Fasten a bracket (included) on each side of the unit and attach it to a flat surface.
For more information go to www.kramerav.com/downloads/FC-174.
Mount the unit in a rack using an optional RK-T2B rack adapter.
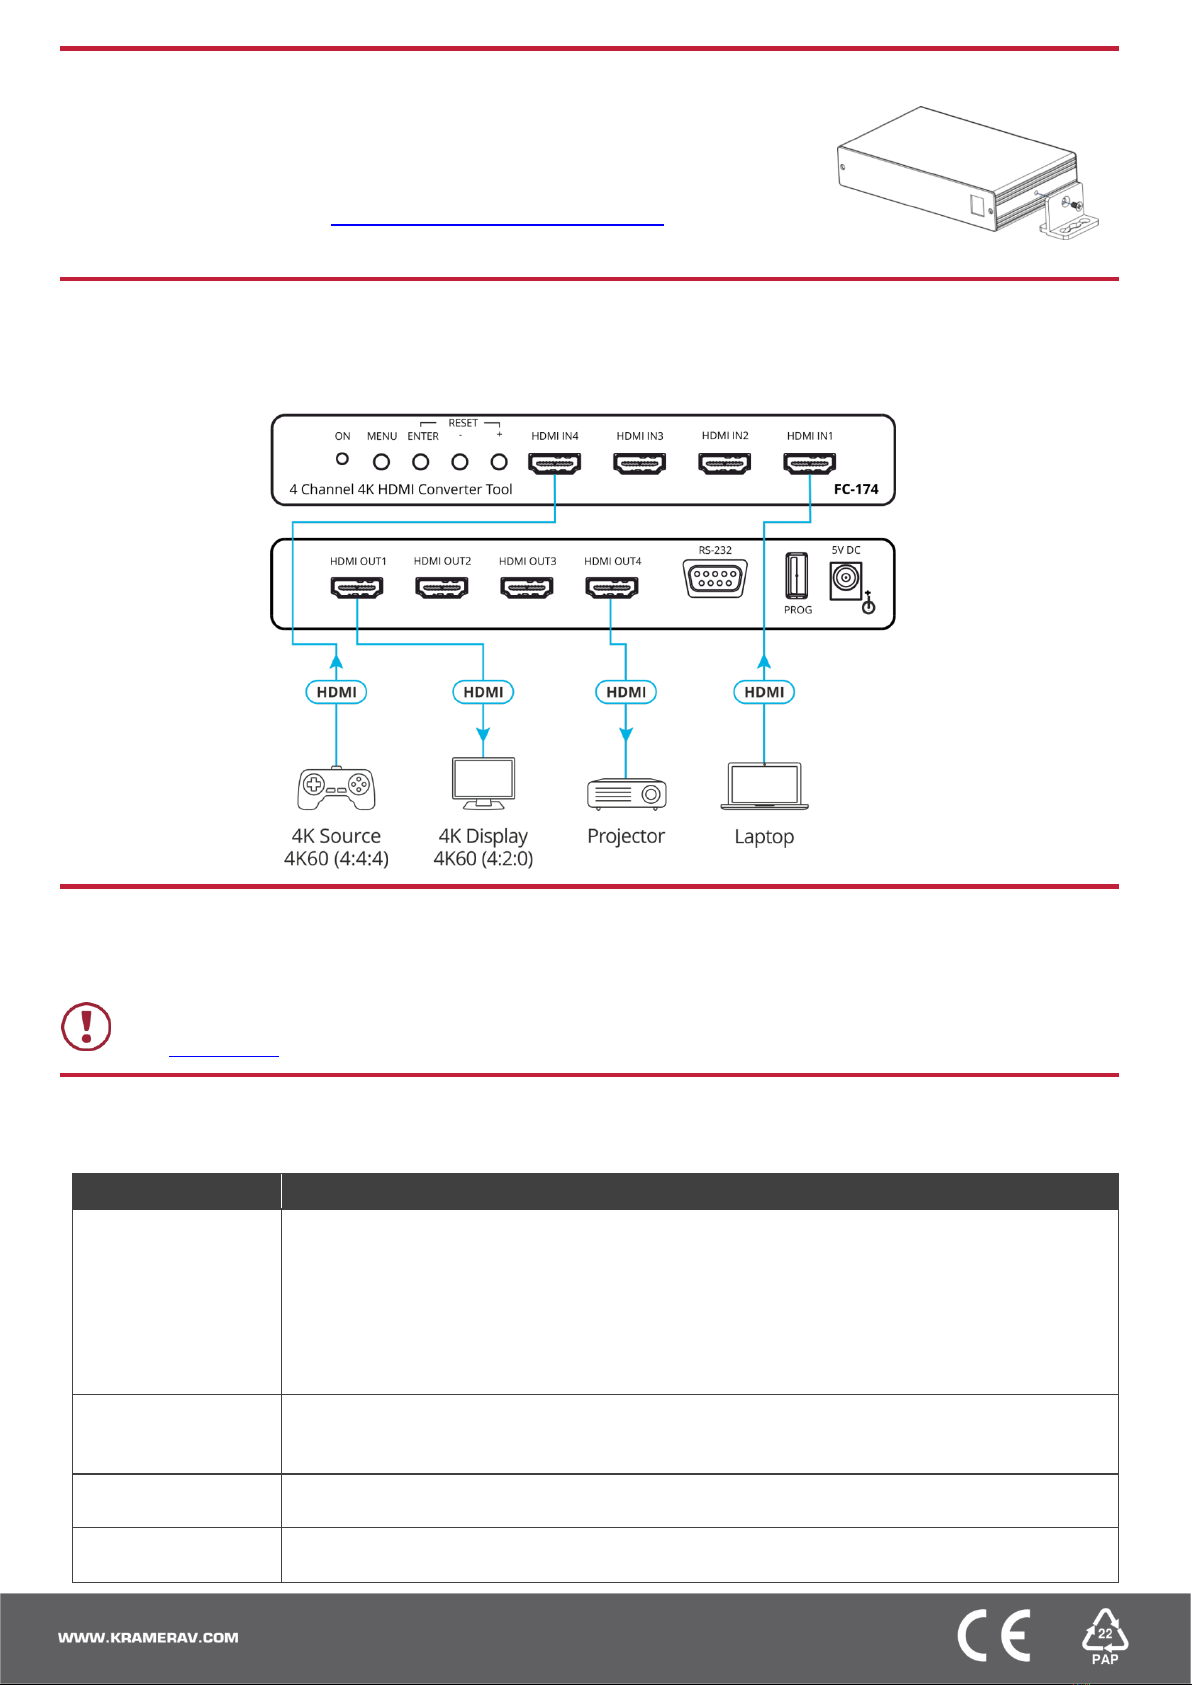
Step 4: Connect the inputs and outputs
Always switch OFF the power on each device before connecting it to your FC-174. For best results, we recommend that you always
use Kramer high-performance cables to connect AV equipment to the FC-174.
Step 5: Connect the power
Connect the 5V DC power adapter to the power socket and then connect the adapter to the mains electricity.
Safety Instructions
There are no operator serviceable parts inside the unit.
Use only the Kramer Electronics power supply that is provided with the unit.
Disconnect the power and unplug the unit from the wall before installing.
See www.KramerAV.com for updated safety information.
Step 6: Operate the FC-174
Use the OSD menu to set the parameters:
Input EDID Select: Sink User or Internal
4K2K 50/60 RGB: 4:2:0 Downsampling, 4:2:2 Downsampling or Passthrough.
4K2K 50/60 YUV4:4:4: 4:2:0 Downsampling, 4:2:2 Downsampling or Passthrough.
4K2K 50/60 YUV4:2:2: 4:2:0 Downsampling, 4:2:2 Downsampling or Passthrough.
Auto Sync Off: Disable, Slow or Fast.
Output Pattern: Mode (On/Off), Timing and Pattern Type.
OSD: Display Information (Yes/No) and Display Timeout.
Display Select: All Channels or one Channel (set Main OSD to appear on all channels or on one of
the four channels).
Display Timeout: 5 to 40 sec, Off
Channel 1 to 4: Resolution, Input Colorspace, Output Colorspace, Input HDCP, Output HDCP
Firmware Version
Firmware Update.
Factory Reset.


